Step Motor Control Module STP-340 User Manual - Becker & Hickl
Step Motor Control Module STP-340 User Manual - Becker & Hickl
Step Motor Control Module STP-340 User Manual - Becker & Hickl

You also want an ePaper? Increase the reach of your titles
YUMPU automatically turns print PDFs into web optimized ePapers that Google loves.
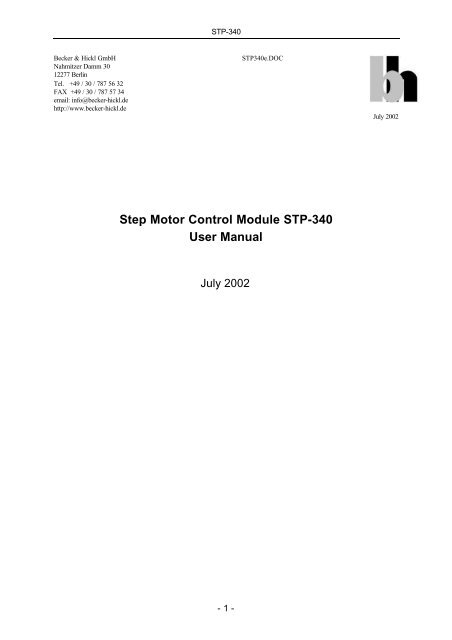
<strong>STP</strong>-<strong>340</strong><strong>Becker</strong> & <strong>Hickl</strong> GmbHNahmitzer Damm 3012277 BerlinTel. +49 / 30 / 787 56 32FAX +49 / 30 / 787 57 34email: info@becker-hickl.dehttp://www.becker-hickl.de<strong>STP</strong><strong>340</strong>e.DOCJuly 2002<strong>Step</strong> <strong>Motor</strong> <strong>Control</strong> <strong>Module</strong> <strong>STP</strong>-<strong>340</strong><strong>User</strong> <strong>Manual</strong>July 2002- 1 -
<strong>STP</strong>-<strong>340</strong><strong>Step</strong>ping <strong>Motor</strong> <strong>Control</strong>ler <strong>STP</strong>-<strong>340</strong>General InformationUp to two unipolar stepping motors with up to 8 phases in total can be connected tothe <strong>Step</strong>ping <strong>Motor</strong> <strong>Control</strong>ler <strong>STP</strong>-<strong>340</strong>. The <strong>STP</strong>-<strong>340</strong> has been designed to be usedin combination with very sensitive measurement equipment as the Time CorrelatedSingle Photon Counting <strong>Module</strong> SPC-300. To reduce the noise of the steppingdevice(s) to the lowest possible level the current flow through the motor coils is notcontrolled by Pulse Width Modulation (PWM). The current flow is "formed" by applyingan initial high voltage peak at the beginning of each step, followed by a normal voltagefor the remaining time of this step. The default high voltage is +12 V, the defaultnormal voltage is +5 V. Other values can be achieved by applying external powerthrough the external power connector. The maximum current per phase is 1 A.Unipolar motors with 3-8 phases can be connected to the <strong>STP</strong>-<strong>340</strong>. If two motors areused following combinations of phase numbers are valid: 4-4, 3-5, 5-3. All motor coilsmust be connected to the <strong>STP</strong>-<strong>340</strong> on one side (+) and to GND on the other side (-).All timing parameters of the motors are defined in a configuration file "stp.cfg". Thestructure of this file is described in the chapter "Configuration file stp.cfg".Two limit switch inputs are provided for each motor to prevent movements beyondspecified limits. Either a TTL-compatible source or a simple switch can be connectedto these inputs. The open input is pulled to +5 V (10kΩ). Therefore a switch shouldconnect to GND when closed. The presence and the polarity of the limit switches mustbe defined in the configuration file "stp.cfg".ConnectorsThere are three connectors at the <strong>STP</strong>-<strong>340</strong> (from top to bottom):• External Supply: Sub-D, 9-pin male• <strong>Motor</strong> 1: Sub-D, 9-pin female• <strong>Motor</strong> 2: Sub-D, 9-pin female- 2 -
<strong>STP</strong>-<strong>340</strong>Connection Scheme:Pin <strong>Motor</strong> 1 <strong>Motor</strong> 2 External Supply1 Phase 1 + Phase 1 + high voltage (max. +20 V)2 Phase 2 + Phase 2 + high voltage (same as pin 1)3 Phase 3 + Phase 3 + normal voltage (max. +15 V)4 Phase 4 + Phase 4 + normal voltage (same as pin 3)5 Phase 5 +(if <strong>Motor</strong> 2 has 3phases)6 lower limit input(connected to+5 V via 10 kΩ)Phase 5 +(if <strong>Motor</strong> 1 has 3phases)lower limit input(connected to+5 V via 10 kΩ)OpenConnect to GND (pin 7) to switch toexternal supply.7 GND GND GND8 GND GND GND9 upper limit input(connected to+5 V via 10 kΩ)upper limit input(connected to+5 V via 10 kΩ)+5 V from computerInstallationTo install the device, switch off the computer and disconnect the power cord. Theninsert the <strong>STP</strong>-<strong>340</strong> module into a free PCI slot. To avoid damage due to electrostaticdischarge we recommend to touch the module at the metallic back shield. Then toucha metallic part of the computer with the other hand. Then insert the module into a freeslot of the computer.During the next start of the computer Windows will detect the new hardware and,dependent on the Windows version may ask for drivers. Then insert the “BH driverdisk” (Version 1.3 or higher required) into the floppy drive and be sure to present thecorrect directory (“WIN2K_NT” for Windows 2000 or Windows NT or “WIN_9X” forWindows 95 or Windows 98). Windows will load then the appropriate driver.If the <strong>STP</strong>-<strong>340</strong> should be controlled from SPC, PMS, PMM or MSA software no moreactions are required if you have the latest updates installed. Following revisions (orhigher) are required: SPC 7.6, PMS 2.5, PMM 1.5, MSA 2.3). To install the <strong>STP</strong>-DLLand Labview Instrument (LabView 6.0 or higher required) insert the disk “<strong>STP</strong>Software” to the floppy drive and execute “setup.exe” from there.- 3 -
<strong>STP</strong>-<strong>340</strong>Configuration file "stp.cfg"Configuration and timing are defined in the configuration file "stp.cfg". During theinitialisation of the <strong>STP</strong>-<strong>340</strong> by the library function "<strong>STP</strong>_init" these parameters aretransferred to the module.The structure of "stp.cfg" is similar to ".ini" files for Windows applications. Commentsstart with a ";" and end at the end of the line. The mentioned default values are used ifthe respective parameter is not defined in "stp.cfg"."stp.cfg" has the following structure:The first section contains general parameters:[base]baseadr = 0x3A0 ; base I/O address of the <strong>STP</strong>-240 <strong>Module</strong>, ignored for; <strong>STP</strong>-<strong>340</strong>, default = 0x3A0use_mot = 1 ; motors in use:; 0 - none (default); 1 - <strong>Motor</strong> 1; 2 - <strong>Motor</strong> 2; 3 - both motors; only motors in use are initialised!use_dev =1 ; device in use (for simulation only, if no motor is in use; 0 - none (default); 1 - device 1; 2 - device 2; this parameter is used only if use_mot = 0.The next two sections contain motor specific parameters:[motor1]; All times are multiples of 2 µs.tpeak = 1000 ; high voltage active, 1-65535, default = 150tmin = 1500 ; min. time per step, tpeak-65535 (>= 50), default = 250tmax = 10000 ; max. time per step, tmin-65535, default = 1500tdelta = 250 ; initial acceleration, 1-65535, default = 250; if a big number of steps should be executed the first; step will take the time tmax. The next step will take the; time (tmax-tdelta). The time per step for subsequent; steps will be further reduced by the factor; (tmax-tdelta)/tmax until half the steps are executed or; tmin is reached.; The deceleration works in the reversed order.overlap = 0 ; full step mode (0 = default) oder half step mode (1)phases = 4 ; number of phases: 3-8, default = 3min_lim = -1 ; lower limit switch:; 0 - not present (default),; -1 - present and used for stepping,; logical 0 (2,4 V) when limit is reachedmax_lim = -1 ; upper limit switch:- 4 -
<strong>STP</strong>-<strong>340</strong>; use the same values as for lower limit switch; default = 0device = 1 ; device, which is connected to this motor:; 0 - none (default); 1 - device 1; 2 - device 2steps = 100 ; number of steps per one whole motor turn; default = 200[motor2]; as motor 1The last two sections define the parameters of the devices which are connected to themotors:[device1]scale = Wavelength[nm] ; Parameter of the experiment which is altered; by the device. This text (max. 16 characters); will be used to name an axis in the display; (SPC-300).unit = nm ; unit of the above Parameter (max. 3 chars.).min = 300. ; min limit (units)max = 800. ; max limit (units)turn_incr = 10.[device2] ; as device 1; Alteration of the Parameter per motor turn; (units)- 5 -