Flamco
Flamco
Flamco

You also want an ePaper? Increase the reach of your titles
YUMPU automatically turns print PDFs into web optimized ePapers that Google loves.
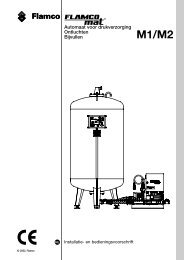
SPECIAL PRESSURISATION EQUIPMENT<strong>Flamco</strong><strong>Flamco</strong><strong>Flamco</strong>mat ®Installation and operating instructionsBalanced PressureActive de-aerationTop Up© <strong>Flamco</strong>18502309 Edition 2006 / UK
FLAMCOMAT INSTALLATION AND OPERATING INSTRUCTIONS<strong>Flamco</strong>Installation andoperating instructions3. Product descriptionAccessoriesBall cock buttPressure limiterBall cock buttBall cock butt with thread and seal; the user may complement it with a relief valveor screw plug (left or right handed). For use in installations with an intermediate vesseland at the system connection (installation diagram, example, appendix 1).Pressure limiterPressure limiter. For use with hot-leg temperatures in excess of 100 °C. Its purposeis extra pressure monitoring to hinder the build-up of steam (installation diagram,example, appendix 1 and terminal plan, additions, appendix 2).System dividerSystem divider with particle filter. For use when installing the feed line to/from thewater mains. (installation diagram, example, appendix 1).System dividerPulse water meterPulse water meter (Not Standard in the UK)Water meter with pulse outlet. For use when the feed quantity has to be displayedin litres, rather than hours and minutes (drive display, interface data, RS485).A conversion in line with diagram 4, page 21 is not necessary in that case(terminal plan, additions, appendix 2).Vessel connectorsPair of J-bend connectors to the vessel. For use in installations with an intermediatevessel.Vessel connectorsSDS module 31SDS module 31Slow start-up motor(s). Enables reduction of the dynamic pressure ratio when thepumps start up. It is possible to have it retro-fitted by a specialist.SDS module 32SDS module 32Timer, operation chronometer. For use in performance after periods of inertia in theaeration function. Fault diagnosis with date, time and operating time per drive(motor 1, 2; valve 1, 2, 3). It is possible to have it retro-fitted by a specialist.SDS module 33SDS module 34SDS module 33Signaller for capacity, analogue pressure. For use in performance signalling analoguereadings pertaining to vessel capacity and system pressure (0 – 10 V). It is possibleto have it retro-fitted by a specialist. Evaluation and visualisation is on the constructionside. (terminal plan, additions, appendix 2).SDS module 34Diaphragm rupture sensor, special version. For use with original equipment only.It is not possible to have it retro-fitted by a specialist (terminal plan, additions,appendix 2).Working methodAs the system fluid heats up it expands, during expansion the system pressure rises.The <strong>Flamco</strong>mat control equipment senses the pressure rise and opens the connection valve to the expansion vessel.The expanding fluid flows into the vessel, through an orifice (to restrict flow rates) and a system pressure riseis prevented.As the system cools down, the system fluid contracts, during contraction the system pressuredrops. The <strong>Flamco</strong>mat control equipment senses the pressure drop and energises the pumps. The fluid is activelypumped into the system from the vessel, and a system pressure drop is prevented.18502309 Edition 2006 / UK6
FLAMCOMAT INSTALLATION AND OPERATING INSTRUCTIONS<strong>Flamco</strong>Installation andoperating instructions6. CommissioningThe final configuration (pp. 8-10) must enable commissioning at the flick of the power switch. Please notethat the closed valves of the system connections of the pump module and the feed line must only be openedon completion of the commissioning. Switch the power ON. The display will show the pre-configurationprocess screen.SystemFigure 22Example. Duo system (2 pumps/valves) with feed line, including pulse watermeter (total feed in litres, accessories). Shows check valve, pressure andcapacity sensor, aeration mode OFF. In start mode the parameters are 0.Cursor and system (highlighted) can be toggled.Fault menuAlarm thresholdConfirm▼Fault1/1SystemFigure 23Example (as fig. 22, but with aeration mode ON showing cursor andfault, flashing). Rotating the rotary switch controls the cursor; system(highlighted) will flash. Touching the rotary switch during a fault gives thefault menu, fig. 24; doing the same while the system is highlighted givesthe selection menu, fig. 26.Figure 24Example. Shows fault no. 3, alarm threshold min. The vessel fill level hasreached the pre-set parameter. Press confirm and back. See also menu1; 2 data, param. menu F 2, level (appendix 2). This sub-menu (F2a,rows 1-10) shows the pre-sets.Figure 25Example. Mono system (1 pump/valve) with feed line, standard (total offeed in 0.00 hours, 0.01 h = 0.6 mins = 36 secs) and aeration mode ON.‘Full’ icon, (highlighted), showing that the power outlets for the respectivedrive are on (active).18502309 Edition 2006 / UKScreendisplaysEnterBackSaveMode▼B 1CodeDataServiceBackD ▼1ID-numberLanguageAdjust capacityAdjust valveOperating modeG ▼1Factory adjustmentOperating adjustmentBackG3a ▼1Operating adjustment163163 kg147→→000000StartBackG3b 1▼BackFigure 26If you touch the rotary switch during processing (figs. 22 and 25) you willaccess menu B, row 1. The row highlighted with the cursor is a selection,which can be moved with the rotary switch to other rows. Select Enter(row 2) and press enter.Figure 27Enter 000001 in the code menu. Turning the rotary switch moves thecursor from columns 1 to 6 and in the second row to Save and Back.Select column 6 (last 0), press enter, move the rotary switch to figure 1.Press enter, choose Save and press enter.Figure 28By entering the right code, you can enter Edit mode, menu D. Choosingrow 1, Mode, enables you to configure the unit. Row 2, Data lets youchange the parameters (values, numbers). Row 3, service, is for enteringdata for classification. Select Mode and press enter.Figure 29Menu G contains rows 1 – 14 (see also appendix 2, overview). SelectLanguage to change the language. Select adjust capacity if the level inthe process display is > 0%. Select column 6, aeration (fig. 32, p. 12), ifother pre-sets are necessary.Figure 30Example: Adjust capacity. In menu G, sub-menu a, select row 3 (G3a),adjust operation (G3a2) and press Enter.Figure 31Example: Menu G3b 1 shows the permissible limits for a configured vessel(ID no.), min. and max. The actual parameter comprises the kg. unit.Apart from the limits, adjustment is not possible. Make sure the vesselcomplies with the limits avoiding additional loads and press start. If youpress Back in G3b and G3a, you will be taken to the main G menu withthe cursor on row 3, adjust capacity (fig. 29, fig. 32).
FLAMCOMAT INSTALLATION AND OPERATING INSTRUCTIONS<strong>Flamco</strong>Installation andoperating instructionsCommissioningOperating modeAerationFeedSensorMotor protectionG ▼▲ 7AerationOff✔NormalTurboBackG6a ▼1FeedSensorMotor protectionMinimum pressure limiterRelieve valveG 9▼▲Minimum pressure limiterONBackG10a ▼1Minimum pressure limiterRelieve valveAdjustment modeWeek programmeBackG ▼▲ 12SundayMondayTuesdayWednesdayThursdayW ▼101:00 - 05:00--:-- - --:--BackW 1▼01:00 - 05:00SaveDeleteBackFigure 32The aeration mode is selected from row 6 in the G main menu. In theexample, the rotary switch moves in the direction of the arrow to selectthe row number. Select Aeration and press Enter.Figure 33The example shows aeration mode Off. The factory setting is Turbo. Thechoice of one of the rows (here e.g. 2,3) combined with enter will select therelevant function and deselect the previously-selected function. Then selectBack and press Enter.Figure 34Use with hot-leg temperatures in excess of 100 °C requires you to set theminimum-pressure limiter (opener opens when the temperature dropsbelow the pre-set minimum temperature and stops the pressure fromdropping during installation on terminals 39 and 40 (appendix 2)). After this,select row 10 and press Enter.Figure 35Press Enter in menu row 1, On. This activates the entrance (terminals 39and 40) for this opening function. Note: Activating these entrances whenthe minimum-pressure limiter is not installed means that the overflow valvewill not be energised when the system pressure rises. Select Back, thenpress Enter.Figure 36Accessories: timer, operation chronometer. The installed module enablesyou to set two aeration rests per day. Select row 13, Week programmeand press Enter.Figure 37Use the cursor to select the day of the week and press enter. The downarrow in the appropriate row indicates that a cursor movement in thisdirection opens further rows. In this case, row 6 is Friday and row 7 isSaturday. Row 8 is Back.Figure 38Example: row 1 already contains a rest period from 01.00 to 05.00 (24hour mode with adjustment for summer time). Select row 2 to enter thesecond rest period or row 1 to change the current time and press Enter.Figure 39Example: changing the rest period. Move the rotary switch to the columnto be altered (1 and 2, hours and minutes for start time, 3 and 4, hoursand minutes for end time). Press Enter to exit the relevant column, movethe rotary switch to the required figure and press enter. End the process bysaving and press Enter.The adjustable menus under G, Mode are not accessible. Choose per submenu Back and press Enter till menu D,fig. 40.ModeDataServiceBackD ▼ 1System pressureLevelAerationFeedTime, dateF ▼ 1Figure 40Select Data in menu D, row 2 and press Enter. The following menucontains all parameters and pre-sets. This brings you to the code entry,as before in the Edit mode and you can now change the followingparameters or make amendments to the system.Figure 41The F menu has seven rows. Choose the row to be altered (in this case 1,system pressure, after installing the module). Row 5 timer, operatingchronometer, time, date; row 6 Miscellaneous including switching offsummer time.18502309 Edition 2006 / UK12
FLAMCOMAT INSTALLATION AND OPERATING INSTRUCTIONS<strong>Flamco</strong>Installation andoperating instructions6. CommissioningSystem pressure2,8 barF1a ▼1System pressure5,42,8 bar0,5→→SaveBackBackF1a ▲ 24AerationFeedTime, dateMiscellaneousBackF ▼▲ 5Figure 42Example. The pre-set reads 2.8 bars. To alter, press Enter. Move the rotaryswitch in the direction of the arrow (downwards). This gives further menurows up to F1a24 (main F menu, row 1, sub-menu a, row 1…24).Figure 43Example. This menu contains the minimum and maximum permissibleoperating parameters for a configured pump module (ID no.). The setdesired parameter contains the unit in bars. Other than the limits, settingscannot be saved. Select column 1 and press Enter. Move the rotary switchto the relevant figure and press Enter. Select column 2 and repeat theprocedure. Select Save and press Enter. After saving, the programme willreturn automatically to menu row F1a (fig. 42).Figure 44Move the rotary switch downwards with the arrow, from menu F1a, row 1,desired system pressure, to menu F1a, row 24, Back. Press Enter. You arenow back at the main F menu, row 1, system pressure (fig. 41).Figure 45Move the cursor by moving the rotary switch downwards with the arrow fromthe top of menu F, system pressure (row 1). Select time and date, row 5,to activate the installed timer/operating chronometer (accessories) ormiscellaneous (row 6) and sub-menu F6a 1 (chronometer on), F6a 2(chronometer off). Should a pre-set have to be changed, (pre-set tochronometer on, 03/March; chronometer off 10/October). Summer-timeadjustment cuts in on the last Sunday, from 02.00 to 03.00/on and from03.00 to 02.00/off. The adjustment can be deactivated by replacing the03 or 10 with 0. If necessary, select Back (row 7) and press Enter to switchto the main D menu.ModeDataServiceBackD ▼1StartSystemSystemFigure 46Example. The cursor is on Mode. Recommendation: if you toggle from thesub-menu to the main menu, the cursor position does not change, as it doesif you select the main menu otherwise. The cursor position in this examplewould otherwise be row two, (data). Select row three, Service and pressEnter. Then select row three, commissioning, press Enter and select row one,commissioning and press Enter. This is the procedure for commissioningunder normal circumstances using code K1, date and time (plus operationchronometer, if the timer is installed). Press Back, until the procedure display(e.g. figure 22) is visible. Recommendation: If an operation adjustment hasbeen carried out (fig. 31), the menu can be engaged by releasing start (fig. 47).Figure 47The cursor is on start. Check the configuration for readiness. If you have tocheck the settings in the subsequent menus once more, move the rotaryswitch (system is highlighted) and press enter. Pressing Start leads todisplay and activation of a system which is ready for operation (fig. 48).Figure 48Example. Mono system (1 pump/valve) with feed line, standard (total feedin 0.00 h), aeration mode on and feed valve on. Error messages such asalarm limit level min., pressure min. are negated automatically in normaloperating conditions.The actions carried out in advance relating to configuration and data settings/changes match those of normalcommissioning. Other settings may be considered. Use the overview menu in appendix 2 for quick orientation.Note that in display mode each setting can be displayed and in entry mode (code) it is possible to change it(stated scope, appendix 2). Check in particular the setting of desired system pressure (F1a 1).A code, once entered, will be active after each signal emitted in a period of …5 mins. By moving or touching therotary switch for another 5 mins. If this time is exceeded, the code must be re-entered. If nothing is received bythe drive for a period of 10 mins, the default menu will automatically be shown along with the default cursorposition on the start menu (e.g. fig. 48). Repeated touching of the rotary switch (until there is a change) in thedefault cursor position will also default to the start menu (from the top, 1st example).18502309 Edition 2006 / UK13
FLAMCOMAT INSTALLATION AND OPERATING INSTRUCTIONS<strong>Flamco</strong>Installation andoperating instructions6. CommissioningIcons and symbols in the menusFigure 49No ID number availableFigure 50Work adjustmentnot carried outFigure 51Operation adjustmentnot carried outFigure 52Outside the min./max.limitsFigure 53AcceptedFigure 54Access denied(due to lack of ID number)Figure 55Rejected, not installedFigure 56Small oscillationFigure 57Deleted(not even saved)Figure 58Please waitFigure 59Code requiredFigure 60Manual operationError messages- Minimum pressure alarm threshold Returns automatically under normal operating conditions- Maximum pressure alarm threshold Returns automatically under normal operating conditions- Minimum capacity alarm threshold Returns automatically under normal operating conditions- Maximum capacity alarm threshold Return manually- Feed amount Returns automatically under normal operating conditions- Safety relay Return manually- Motor 1 relay Return manually- Motor 2 relay Return manually- Motor 1 fuse Return manually- Motor 2 fuse Return manually- Motor 1 external TK Return manually- Motor 2 external TK Return manually- Motor 1 internal TK Return manually- Motor 2 internal TK Return manually- Motor 1 supra TK (Accessories) Return manually- Motor 2 supra TK (Accessories) Return manually- Minimum-pressure limiter (Accessories) Returns automatically under normal operating conditions- Dry-running safeguard (special version) Returns automatically under normal operating conditions- Diaphragm rupture (special version) Return manually- Motor 1 run time Return manually- Motor 2 run time Return manually- Supra timer (Accessories) Return manually- Supra I-0 ignition (Accessories) Return manually- Supra I-1 ignition (Accessories) Return manually- Supra U ignition (Accessories) Return manually- Supra Communication (Accessories) Return manually- Voltage Returns automatically under normal operating conditions- RTC voltage (timer) (Accessories) Return manually- Pressure short circuit Returns automatically under normal operating conditions- Capacity short circuit Returns automatically under normal operating conditions- Pressure interruption Returns automatically under normal operating conditions- Capacity interruption Returns automatically under normal operating conditions- Wrong sensor type Returns automatically under normal operating conditions- EEPROM Return manually- RAM error Return manually- Supra blocked (Accessories) Returns automatically under normal operating conditions- Commissioning Returns automatically under normal operating conditions- Start-up error Returns automatically under normal operating conditions18502309 Edition 2006 / UK14
FLAMCOMAT INSTALLATION AND OPERATING INSTRUCTIONS<strong>Flamco</strong>Installation andoperating instructions6. CommissioningThe final configuration (p. 8) and the drive settings entered (p.11) form the basis of hydraulic commissioning.Please review the following procedures.Figure 61Note:Check the setting of the minimum-pressure limiter on the drive (menu G 10). If required by an installation(see terminal plan, addendum, appendix 2), this function can be engaged. Set the limiter’s cut-in parameteraccording to the needs of the project. The control module has the factory pre-set OFF (operation withoutminimum-pressure limiter).Primer valveFigure 62KFE-valve with open cap, M 0 version.Figure 63Pump aeration, M 0 version.Figure 64Pump aeration, showing D 2;M 1, M 2 and D 2 versions.Figure 65• Turn the power OFF.• Prior to configuring, check the readiness of the heating or climate-control system (e.g. is the system full withheating water, heat medium), the cold-leg connection and suitability before shutting the cap valve to thesystem feed/pump-pressure line and system discharge/valve-discharge line (construction diagram, exampleinstallation, appendix 1).• Adjust the primer valve (fig. 61) on pump modules M 1, M 2, M 3, D 1, D 2 and D 3 (M 0 not necessary, asstandard). Use diagrams 2 - 4, governor, pre-set as in appendix 1 and bung the valve(s) once set. The factorysetting for the relevant control module is the appropriate maximum setting (bunged). Please refer to theappropriate appendices if the system has been added to or modified in comparison to the standard or specialedition (E.g. app. He, hydr. added or app. Hm, hydr. Modified).• Fill the system (heating or climate-control).• Test the readiness after feeding. Open the check valve at the feed opening of the <strong>Flamco</strong>mat equipment (andother valves in the same line where appropriate).Recommendation:If another capacity than the automatic minimum level is required (topping-up, dry-running safeguard), theamount necessary according to the appendix must be filled via the KFE-valve (figure 62, Item 3.15, p. 4,5).Where required, the cap valves at the system feed and discharge and the check valve on the feed line must bekept closed; the cap valve on the connection assembly opened and the power switched on.Note: the closed valve on the vessel feed (connection assembly) may open the safety valve.The gradually increasing capacity can be observed when the power is on (%, level in the display). Note thecondition and limits (display system, enter … > menu B1/display, enter …> menu D2/data, enter …> menuF2/capacity, enter) open the valve on the feed line after filling (close KFE-valve).• Turn the power ON. After a short pause, valve 3 Feed will be energised. If a capacity of approx. …7…% isreached, switch off the power and bleed the pump (..pumps, fig. 63 and 64). Control modules M 3 and D 3 areequipped with automatic vents. The red cap on these components can be opened by twisting (fig. 65).• If the pre-set feed amount is exceeded (in one day/period of 24 hours, feed error message) the amounts canonce again be made available by switching the power off and then on again (system - check seals, continuousoperation of the pressurisation equipment will automatically bleed the reduced volume of the heat source;feed amounts, pre-sets: menu F4a row 4 without pulse water meter, row 5, with pulse water meter).• Open the cap valve on the cold-leg entrainment (system feed and discharge).• Seal the cap valve (open position).The completion of all the tasks to be carried out, the review of technical data, recommendations and explanationsin this manual pertain to pressurisation equipment, readiness for operation.• Switch on the power.Depending on the condition, the equipment will then either be in aeration mode or pressurised (… feed). Theaeration mode is preset to quick (menu G6a, row 3). If this pre-set is not changed, it will automatically revert tonormal. The time this change takes is contained in menu F3a, row 5.Initial settings or significant hydraulic changes to the cold-leg entrainment may lead to the pump or overflowvalve being energised several times in quick succession. In this short situation, the hydraulic ratios will governthe switching value.Automatic vent with ventrestrictor showing M 3;M 3 and D 3 versions.18502309 Edition 2006 / UK15
FLAMCOMAT INSTALLATION AND OPERATING INSTRUCTIONS<strong>Flamco</strong>Installation andoperating instructions6. CommissioningRestarting• If the system has been idle for some time.We recommend you carry out maintenance before restarting. Bleed the water area of the pressurisationequipment (fig. 62 and 66) and ensure that all conditions for installation and commissioning are observed.Use the commissioning protocol for restarting and be sure to check any alterations to the system which couldlead to different operating conditions in the pressurisation equipment (e.g. desired system pressure).• If the mains electricity has failed.The desired parameters and pre-sets pertaining to pressure, aeration and feed connected to power will beunaltered, i.e. automatic operation will resume automatically when power is restored (power on). Extraordinarysystem operating conditions (e.g. cooling to below the preset parameter) may exceed or fall below the permittedoperating parameters of the pressurisation equipment.Note: please ensure that when the system cools down or warms up, the minimum or maximum systempressure does not exceed or fall below the permitted operating pressure.Under and over pressure valves for operation of heating or climate-control systems are not supplied with the<strong>Flamco</strong>mat.Check the operation of the unit once the mains electricity has been restored and if the SDS module 32 (timer,operation chronometer) is fitted, set the actual values for date and time (menu F5).Figure 667. MaintenancePerform maintenance activities when the system is down and ensure that no part of the system is under pressure.Do not touch the cap valves on the pressurisation equipment or expansion line while the power is on - do soonly when components such as the pump and valve are down, i.e. when the power is off.Please observe all directions pertaining to operation, safety for the entire project. We additionally recommendyou adhere to the maintenance periods below.Aeration valve, connection assembly,protective cap open.Maintenance interval Component Maintenance activities/measures(standard version)6 months Particle filter 3.8* Clean filter insert and housing.Particle filter, system divider On system divider when installing accessories only.Vent restrictor, vent valve 1.2*, Clean, check function. Unscrew the red cap andautomatic vent 3.18*remove the inner spring and ball-bearing for cleaning.Put together in the reverse order, screw on the red capand open one turn.Primer valve 3.11, 3.12* Check and reset the pre-sets as in diagrams 2-4,appendix 1 (see diagram, app. …).Pump 3.3, 3.4*Check function.Valve 1, 2, 3.13, 3.14*Valve 3, water meter 3.15*Power 3.20*, parameterHave certified trained personnel carry this out manually.Other checks can be carried out while the <strong>Flamco</strong>matequipment is running (observation). Bleed the pump(M 0, M 1, M 2, D 1, D 2).Check and restore the required settings(overview menu appendix 2).Annual Vessel 1* Check and reset the seal of all hydraulic connections toControl module 3*the water areas. Check the threaded connections fortightness, the external condition for damage, deformationor corrosion and return to stand-by state.Safety valve 3.17*Check function. Have certified trained personnel carrythis out manually. This requires the cap valve 2.1*on the connection assembly.* see pp. 4 and 518502309 Edition 2006 / UK16
FLAMCOMAT INSTALLATION AND OPERATING INSTRUCTIONS<strong>Flamco</strong>Installation andoperating instructions7. MaintenanceWhen carrying out maintenance, please observe the relevant instructions. Instructions needed for maintenanceof extra equipment or accessories are available from the supplier.Further checks (e.g. of the inside of the vessel) should be carried out according to the prevailing local rules andregulations by the user.Bleeding of the vesselIf it is necessary to drain the expansion water in the basic vessel or in the intermediate vessels, consult thefollowing directions.• Make a note of the current capacity (%), shown in the display (e.g. fig. 22 p. 11).• Switch OFF the power.• Close the cap valve on the expansion line (system feed and discharge) and on the connection assembly(vessel feed and discharge).• Close the check valve on the feed opening.• Carry out the required actions on the vessel (bleeding).• Switch ON the power.• Check the capacity reading (%) in the display. If the reading is > 0%, carry out a new system adjustment(basic vessel). The method for this adjustment is shown on p.11, fig. 26 f. See also fig. 31 (hold down Back(fig. 31) to return to the display, e.g. fig. 25).• Fill the basic vessel and, if necessary, the intermediate vessels.The new capacity can be monitored in the display and the filling process can be interrupted once the desiredreading as noted before has been reached.Recommendation: The vessel is best filled via the opening on the vessel, the valve (marked). If both thebasic and intermediate vessels must be filled, open the cap valve on each vessel (feed and discharge).Be aware that the capacity can be checked via the capacity sensor in the basic vessel. Filling via the feed openingmust be carried out by certified trained personnel.• Switch OFF the power (remove the filling equipment).• Open all previously-closed valves (seals) and bleed the pump (pumps).• Switch ON the power (operational).Restoring operational safety• Use replacement or accessory components issued by <strong>Flamco</strong>.• Do not convert or alter the system yourself.• The supplier’s General Terms and Conditions apply at all times.• Please consult <strong>Flamco</strong> Customer Services in matters of maintenance, repair or replacement parts relating tothe components supplied with the <strong>Flamco</strong>mat.18502309 Edition 2006 / UK17
<strong>Flamco</strong> STAG GmbH39307 GenthinGERMANYAnnée de fabricationYear of manufactureHerstellungsjahrlitreslitreLiterbaba˚CTypTypTyN˚ de sérieSerial-Serien-Capacité nominaleNominalNenninhaltSurpression de service admissiblePermissible working overpressureZulässiger BetriebsüberdruckSurpression d`essaiTestPrüfüberdruckTempérature de service mini. / maxi. admissiblePermissible working temperature min. / max.Zulässige Betriebstemperatur min. / max.TypTypTyN˚ de sérieSerial-Serien-Capacité nominaleNominalNenninhaltSurpression d`essaiTestPrüfüberdruck<strong>Flamco</strong> STAG GmbH39307 GenthinGERMANYAnnée de fabricationYear of manufactureHerstellungsjahrlitreslitreLiterSurpression de service admissiblePermissible working overpressurebaZulässiger BetriebsüberdruckbaTempérature de service mini. / maxi. admissiblePermissible working temperature min. / max.˚Zulässige Betriebstemperatur min. / max.FLAMCOMAT INSTALLATION AND OPERATING INSTRUCTIONS<strong>Flamco</strong>Installation andoperating instructionsAppendix 1: Technical data, figures, hydraulic equipment.Vessel, weights and measures.Nominal volume(litres)Vessel Highest Vessel Condensation Vessel Netdiameter point connection discharge flange weightfeed(asdischargesuppliedwithout(D) (H) (G) (G1) (F) packaging(mm) (mm) (G; inches) (G; inches) (DN) (kg)150 550 1350 1 1 /2200 550 1530 1 1 /2300 550 2030 1 1 /2400 750 1535 1 1 /2600 750 1955 1 1 /2800 750 2355 1 1 /21000 750 2855 1 1 /21000 1000 1915 1 1 /21200 1000 2210 1 1 /21600 1000 2710 1 1 /22000 1200 2440 1 1 /22800 1200 3040 1 1 /23500 1200 3840 1 1 /25000 1500 3570 1 1 /26500 1800 3500 1 1 /28000 1900 3650 1 1 /210000 2000 4050 1 1 /21/2 561/2 711/2 911/2 1311/2 1611/2 1961/2 2271/2 2611/2 2911/2 3461/2 4311/2 5161/2 6261/2 12411/2 500 17111/2 500 18311/2 500 2026ØDBottom evelationGGG1FBottom evelationØDGGBottom evelationGGØDG1FG1F150 - 1000 litres1200 - 5000 litres 6500 - 10000 litres18502309 Edition 2006 / UK18
<strong>Flamco</strong> STAGGmbH39307 Genthin<strong>Flamco</strong> STAGGmbH39307 GenthinTypTypTyN˚ de sérieAnnée de fabricationSerial-Year of manufactureSerien-HerstellungsjahrCapacité nominalelitresNominallitreNenninhaltLiterSurpression de service admissiblePermissible working overpressurebaZulässiger BetriebsüberdruckSurpression d`essaiTestbaPrüfüberdruckTempérature de service mini. / maxi. admissiblePermissible working temperature min. / max.˚Zulässige Betriebstemperatur min. / max.TypTypTyN˚ de sérieAnnée de fabricationSerial-Year of manufactureSerien-HerstellungsjahrCapacité nominalelitresNominallitreNenninhaltLiterSurpression de service admissiblePermissible working overpressurebaZulässiger BetriebsüberdruckSurpression d`essaiTestbaPrüfüberdruckTempérature de service mini. / maxi. admissiblePermissible working temperature min. / max.˚Zulässige Betriebstemperatur min. / max.FLAMCOMAT INSTALLATION AND OPERATING INSTRUCTIONS<strong>Flamco</strong>Installation andoperating instructionsAppendix 1: Technical data, figures, hydraulic equipment.Vessel, operational data.Nominal volumePermitted Test Permitted Permitted Permittedexcess excess operating operating long-termpressure pressure temperature temperature diaphragm(min). (max). temperatureexposure(litres)(bars) (bars) (ºC) (ºC) (ºC)150 - 3500 0 8,6 0 70 705000 - 10000 0 4,3 0 70 70Minimum distancesMembraneOperationmin. 500min. 500min. 500min. 650 150 - 1600 litres, min. 650 mm2000 - 10000 litres, min. 1000 mmOperationmin. 800Pump module, weight and measures.Type Height Length Width Vessel System Feed Netconnection connection opening weight(as suppliedwithoutpackaging)(mm) (mm) (mm) (G, inches) Rp, inches) Rp, inches) (kg)M 0 890 440 330 1 1 /4 1 1/2 15M 1 890 460 380 1 1 /4 1 1/2 20M 2 890 460 380 1 1 /4 1 1/2 23M 3 915 410 410 1 1 /2 1 1 /41/2 40D 1 890 590 500 1 1 /2 1 1 /41/2 34D 2 890 590 500 1 1 /2 1 1 /41/2 40D 3 915 560 410 1 1 /2 1 1 /41/2 7518502309 Edition 2006 / UK19
FLAMCOMAT INSTALLATION AND OPERATING INSTRUCTIONS<strong>Flamco</strong>Installation andoperating instructionsAppendix 1: Technical data, figures, hydraulic equipment.Pump module, operational data.Type Permitted Rated Permitted operating Permitted operatingoperating excess capacity temperature temperaturepressure range (min.) (max.)(bars) (kW) (ºC) (ºC)M 0 10 300 - 1300 5 70M 1 10 1000 - 4000 5 70M 2 10 2000 - 8000 5 70M 3 10 1200 - 4000 5 70D 1 10 2000 - 8000 5 70D 2 10 4000 - 10000 5 70D 3 10 2200 - 8000 5 70Pump module, operating range9M3D3Diagram 187654D2System pressure [bars]321M0M1M2D10 1 2 3 4 5 6 7 8 9 10Boiler output [MW] Cooling capacity [MW] = Boiler output [MW] x 2,42 ≤ MWDiagram 2Governor valve, M 1 – valve 1 pre-sets; D 1 valves 1 and 2.0,30,40,50,70,91,01,11,21,251,351,41,51,61,71,81,955System pressure [bars]432Primer governor valveDiagram 3Governor valve, M 2 – valve 1 pre-sets; D 2 valves 1 and 2.0,751,01,21,31,451,61,751,92,02,22,42,73,24,0Example:system pressureset to 3.0 bars2,4System pressure [bars]54322418502309 Edition 2006 / UK20
TFLAMCOMAT INSTALLATION AND OPERATING INSTRUCTIONS<strong>Flamco</strong>Installation andoperating instructionsAppendix 1: Technical data, figures, hydraulic equipment.Governor valve, M 3 – valve 1 pre-sets; D 3 valves 1 and 2.0,30,350,40,50,60,70,80,91,01,11,151,21,31,41,451,55987System pressure bars654Primer governor valveDiagram 5Feed, volume stream.165150135120Withoutsystem divider105Volume stream in l/mm90756045Withsystem divider2 3 4 5 6 7 8Hot-leg prerssure in barsInstallation diagram, example installation.Showing M 0 (M 1, M 2, M 3), basic vessel.Hot-leg temperature < = 100 ºCHeat generatorCold-leg temperature < = 70 ºCTPPBasic vesselControl modulePASystem feedSystem dischargeDistance between system feed anddischarge on the cold-leg entrainmentin the area of …1…2…m.If the cold leg is horizontal, theconnection must be from above(not from below) to prevent extra dirtgetting into the system.MFAm 3Connection assemblyNon-mains water(not potable)18502309 Edition 2006 / UK21
TTTFLAMCOMAT INSTALLATION AND OPERATING INSTRUCTIONS<strong>Flamco</strong>Installation andoperating instructionsAppendix 1: Technical data, figures, hydraulic equipment.Installation diagram, example installation.Showing D 1 (D 2, D 3), basic and intermediate vessel.<strong>Flamco</strong> reminds you that always an intermediate vessel has to be installed when the expansion legs are connectedwithin the boiler circuit.Heat generator 1 Heat generator 2Hot-leg temperature > 100 ºC < = 120 ºCTPTPPPCold-leg temperature < = 70 ºCInrermediate vesselBasic vesselControl modulePAControl moduleValveSystem feedValveSystem dischargeMinimumpressurelimiter1)MMFAConnection vesselValve)***Intermediate vesselreturnIntermediate vesselfeedConnectionassemblyMains waterpotable (in)m 3Reflux valve with filter***accessories, sealable ball cocksInstallation diagram, example installationModel shown M 0 (M 1, M 2, M 3), basic vessel and intermediate vessel.Hot-leg temperature > 100 ºC 70 ºCTPPValveSystem feedSystem dischargeMinimumpressurelimiterBasic vesselControl modulePAValveIntermediate vessel(accessories,<strong>Flamco</strong> typesVSV or V-B)MValveFAm 3ConnectionassemblyNon-mains water(not potable)* Supplied as standard.18502309 Edition 2006 / UK** Accessories.1) Can be extended by several linked vessels.22
FLAMCOMAT INSTALLATION AND OPERATING INSTRUCTIONS<strong>Flamco</strong>Installation andoperating instructionsAppendix 2: Technical data, figures, electrical equipment.Power, standard terminal plan.R-VC-VR-valveC-valvePressure sensor IWZ Min.-PL TK-M2Pressuresensor PWM Min.-PL TP-M2Valve 3Valve 3Motor 1Motor 2COM 1 aU10-10VGNDA+24VSignalAGND0V10V10V1PENLPENLPE N L313233343536373839404142101112131415161718COM 1 bbbge/gnbbge/gnbbge/gnbbswsw2F ext. 16A (K)ge/gnbbge/gnbbge/gnbb30292827262524232221201998765432 1U20-10VGNDA+24VSignalAGND0V 1DR / D / G0V112PENLPENLPE N L1Mains supplyC-VR-VC-Motor Level sensor MB / T / G TP-M1 FaultR-Motor Level sensor Sensor TK-M1 FaultValve 1Valve 1Valve 2Valve 2Mains supply230V 50HzLevel sensorPressure sensorModel 1Pressure sensorModel 2Motor 1 Motor 2TK internTK internConnector x1Connector x1Connector x144ge/gnge/gnPEPEBush x24 Signal swBushx2+24 VswBush4x2Valve 3+24 VbValve 2Signal sw2Valve 1Signal+24 VbbConnector x1Connector x1Connector x11 NBushx2bge/gn1 NBushx2bge/gn1 NBushx2bge/gn2 Lb2 Lb2 LbTK-M2TP-M2Motor 1Motor 20V 1 PE N L PE N L41 42 13 14 15 16 1718swswge/gnbbge/gnbbbbbswbswbswNote:available single-line marking: 230V,alternativeN black 1L black 2Motor 1TK externMotor 2TK extern22 210V 1TP-M1TK-M1ge/gnPEbbswswge/gnPEbbswsw18502309 Edition 2006 / UK23
pressenterelectronic control unitstandard pressure controlDFLAMCOMAT INSTALLATION AND OPERATING INSTRUCTIONS<strong>Flamco</strong>Installation andoperating instructionsAppendix 2: Technical data, figures, electrical equipment.Power, additional terminal plan.R-valveC-valveIWZPWMMin.-PLMin.-PLCOM 1 a0-10VGNDA0V10V 13233373839 40gusw2swgurswsw2sw2swrsw2sw2928242320 190-10VGNDA0V 1DR / D / G1 2C-MotorR-MotorMB / T / GSensorFaultStoringGBSRS485MembraanbreuksensorInhoudanaloogDrukanaloogImpulswatermeterMinimumdruk-begrenzer4PDataprotocolMenuG8a 1Verzamelstoringsmelding12 Omax.< 5 kOhmSDSmodule 33Potentiaalvrij contactMax. 240 V AC; 1 A;NC - Openend bij storing.max.< 5 kOhmSDSmodule 33MenuG7a 3Contact1; 2geopend:IN.MenuG10a 11 2 3 4 5 67 8 9 1011<strong>Flamco</strong>SDS1 2 3 4 5 6InternalfusesMotor 2Motor 1PowerPower, electrical dataObjectPowerInternal fusesData200 – 240V, 45 – 60Hz (motoroperation frequency, valve coils50Hz, motor operation power,valve coils 230V) L, N, PE (CEE)external fuse: 16A bearing (K)Motor 2: fine tuning:T 16A 250VMotor 1: fine tuning:T 16A 250V power: fine tuning:T400 L 250VMode of protection IP 54, IP 65capacity sensorConnection output M0 0.4kWM1 0.85kWM2 1.2kWM3 1.2kWD1 1.6kWD2 2.3kWD3 2.4kWPower, cablesNr. Component Line diameter(min. - max.)1 (Pulse water meter,accessories) 3 - 52 Pressure sensor 5 - 93 Valve 3 5 - 94 Motor 1 5 - 95 Motor 2 5 - 96 Mains power line 8 - 127 Capacity sensor(analogue signal,accessories) 5 - 98 Accumulatederror message 5 - 99 Mimimum-pressuresensor 5 - 910 Valve 1 5 - 911 Valve 2 5 - 918502309 Edition 2006 / UK24
FLAMCOMAT INSTALLATION AND OPERATING INSTRUCTIONS<strong>Flamco</strong>Installation andoperating instructionsAppendix 2: Technical data, figures, electrical equipment.Power, menu overview.PROCESS DISPLAYSystem /ErrorsManual operationActual pressureActual capacityFeed time /Amount*Process displayError list activeConfirmMENUB DisplayEnterBackCodeCodeK 1Edit123Normal commissioningK 1MENU78Notification ofcommissioning.Notification ofmaintenance.1Mode2Data3Service4BackSERVICE MENUE Project number (<strong>Flamco</strong>)Software versionCommissioningMaintenanceError listReading statisticsRun timeBack*D12345678System classificationDisplay E1a 1-4Display E2 1Display E3 1-2Display E4a 1-2DisplayDisplayDisplayE6aE7a1-251-151-7ChangeChangeCode-nr.: K1 = 0000011-21-2123Setting the desiredsystem pressure.Setting and activatingtime and date.Summertimecompensation ON, OFF.PARAMETER MENUF System pressureLevelAerationFeedTime, dateMiscellaneousBack*1234567DisplayDisplayDisplayDisplayDisplayDisplaySystem dataF1a 1-24F2a 1-10F3a 1-7F4a 1-7F6a 1-24ChangeChangeChange11/2456Operationadjustment(empty vessel).Hot-leg temperaturesin excess of 100 ºC.Activate entrances forminimum-pressurelimiter to be added.Limitation ofaeration times.EQUIPMENT MENUG ID numberLanguageAdjust capacityAdjust valveMode of operationAerationFeedSensorMotor protectionMininum-pressure valveLoad-relief valveControl valveWeek programmeBack*****1234567891011121314AccessoriesDisplayDisplayDisplayDisplayDisplayDisplayDisplayDisplayDisplayDisplayDisplayDisplayDisplaySystem classificationID 1-2G2a 1-5G3a 1-3G4a 1-3G5a 1-6G6a 1-4G7a 1-4G8a 1-4G9a 1-3G10a 1-2G11a 1-2G12a 1-4W 1-8ChangeChangeChangeChangeChange****1-421-311-718502309 Edition 2006 / UK25