Mig-17 Operational Manual
Mig-17 Operational Manual
Mig-17 Operational Manual

You also want an ePaper? Increase the reach of your titles
YUMPU automatically turns print PDFs into web optimized ePapers that Google loves.
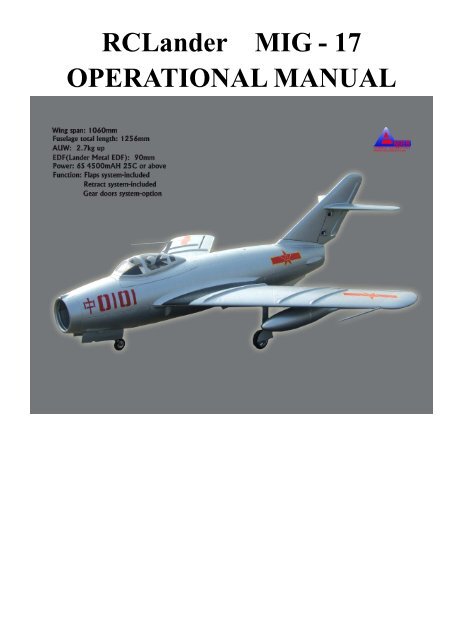
RCLander MIG - <strong>17</strong>OPERATIONAL MANUAL
Please read before operating this system!Wewould like thank you for purchasing our new product <strong>Mig</strong>-<strong>17</strong>,designed for the hobby enthusiast. Based on its full - scalecounterpart, this Russian Jet can undertake loops, inverted flight,rolls and other aerobatics easily. It is a highly maneuverable modelaimed at the intermediate to expert pilot. With the <strong>Mig</strong>-<strong>17</strong> modelwhich includes EDF set*, speed controller, electric servo, flaps,retractable landing gear with front steering and full scale functionalgear doors system (optional requirement). You will have joyful timein model flying.Remarks:* We have metal EDF set for your selection.1) EDF90-1A16 is a higher grade EDF set which is an aluminumalloy material EDF offering a powerful output withoutcompromising efficiency and durability.2) Please be aware that although all servos have been pre-set to thecenter point at our factory there may be discrepancies due todifferent radio manufacturers . Please make sure that you checkthe centre (please pre-set the travel of gear servo to +-130 %. Ifyou have ordered the gear doors system with special modifiedtravel throw servos. You are needed to pre-set the travel ofgear servo to +-110-120%) with your own radio before installinginto the model.4) Centre of Gravity for this model is measured 205mm (+-5mm)from main wing leading edge.5) Please make sure to use a little piece of attached velco to secureyour LiPo battery before flying.- 2 -
Specifications:Wing Span : 1060mmLength: 1256mmAUW: 2.7kg upEDF(Lander Metal EDF): 90mmPower: 6S 4500mAh 25C or aboveThrust: Up to 3kgFunction: Flaps system-includedRetract system-includedGear doors system-optionESC: 100A or aboveEDF SYSTEMEDF9090-1A1A1616Material: Aluminum Alloy, Metal specialWeight: Ca. 168g(Motor not included)Rotor: 90mm dia, 5-bladed.Max rpm 40,000 rpmApplication: 1950WStaic Thrust: 2.75 - 3.0kg- 3 -
Main AccessoriesMain Fuselage Main Wing Vertical StabilizerHorizontal Stabilizer Front Lower Fuselage Main Intake SetRear Lower Exhaust Cover EDF Cover Set Middle lower Fuselage coverCanopy Set Fuel Tanks Plastic Parts of Nose cone & WheelsHosuingRemarks: 1) <strong>Operational</strong> <strong>Manual</strong> (included)2) 5 Min. epoxy set (included)3) Extension cord x 4pcs & Y cord x 5pcs (6pcs for gear doors system (included except ARF version)4) Push rods for Elevator, Rudder, Aileron, and Retract Gear & Steering (included)- 4 -
5) One plastic bag includes screws, Control Horns, Linkage Stoppers, Retract Landing Gear & NoseGear base/ battery compartment.Assembling the aircraft. For color images please go to www.rclander.com011. Prepare to install the nose retract landinggear and battery compartment.2. The Nose Gear Bay / Bay compartmentare completed by factory..021) Take some epoxy to glue up the nosegear bay / battery compartment on the noselower fuselage where is having a mark asthe indicator.031) Glue up the main intake parts on thenose lower fuselage as shown..- 5 -
041) Install the gear & steering servos on thehard wood base (right side is gear servo leftside is steering servo).051) Prepare to install the main retractlanding gear on the main wing.061) Using the provided 2.6 X 12mm pascrew to tight up the main gear on themain wing gear bay then put on theplastic wheel housing and use somestrong clear tape to fix.- 6 -
101) Before glue up both size main wing,recommend to check up the joinerposition is correct or not.111) Take some epoxy to glue up bothsize main wing.121) Prepare to install the horizontalstabilizer on the vertical stabilizer- 8 -
131) Take out the rubber first and usesome epoxy to glue up the horizontalstabilizer on the vertical stabilizer141) take some epoxy to glue up therubber on the vertical stabilizer151) Install the elevator and rudderservos on vertical stabilizer bay.2) Recommend to take one servo isreversed direction for elevatorfunction better.- 9 -
161) Prepare to install the whole set tailstabilizers on the main fuselage<strong>17</strong>1) Make sure all servos cable of wholeset tail stabilizers to be able passedthrough into the main fuselage beforeglue up action.181) Use the enough volume epoxy toglue up the whole set tail stabilizers onthe main fuselage and make sure theangel is correct.- 10 -
192) Use the extension and Y cord tolink the elevator and rudder servosand put on the slot as shown.201) Use the provided clear PVC sheetto cover the slot.211) Prepare to install the EDF set andESC.- 11 -
221) Use the provided 4 pcs 3 x 10mmPA screws to lock up the EDF set onthe square wood mount and make atest run to check up the ESC & EDFwith well operation.231) Take some epoxy to glue up therear lower exhaust part on the mainfuselage after installation of EDF set.241) prepare to install the nose lowerfuselage on the main fuselage- 12 -
281) Install the control horns on theaileron / flaps then link up the pushrobs with the servos.2) Take the provided pre-paintedplastic sheets to cover the servos291) Install the control horns on theelevator and rudder then link upthe push robs with the servos.2) Take the provided pre-paintedplastic sheets to cover the servos.301) Do the same thing for the other sideof elevator.- 14 -
311) Pre set all cables of aileron / flaps/retract servos as shown and glue upthe provided velco to secure servoscables.321) Using the provided 3 X 40mmscrews to lock up the EDF cover seton the main fuselage.331) Prepare to install the main wing butneed to check up all linkage push robsservos cable are correct or not.- 15 -
341) Use the provided 4 pcs 4 X 25mmwith both of metal and wood washersto lock up the main wing on the mainfuselage.351) Glue up the lower intake cover onthe middle lower main fuselage.361) Prepare to install the middle lowermain fuselage on the main fuselage.- 16 -
401) Plug in the canopy set on the mainfuselage then <strong>Mig</strong> <strong>17</strong> is completed.- 18 -
Flight attentionDo not fly at any place where another same-frequency model is being operated.Taking off:Always take off toward the wind.When launch MIG-<strong>17</strong> by hands, maximize the power (include the micro-adjuster) and run severalmeters, then throw the MIG-<strong>17</strong> horizontally. When launch MIG-<strong>17</strong> on the ground, maximize the powerand let MIG-<strong>17</strong> accelerate in direction of the wind and keep it running straightly, after it run morethan 60 feet, then pull the elevator joy stick, and it will take off.Flight:To keep MIG-<strong>17</strong> flying only need 50% of the maximum power, it is a good idea to fly with power for awhile and glide for a while. In this way you can prolong the maximum flight time and familiarizeyourself with landing approaches.Landing:Before landing, switch off the power, fly along with the wind, and when MIG-<strong>17</strong> flies near to theground, then pull the elevator joystick and MIG-<strong>17</strong> will landing gently. With more practice, then youcould control the model easily.Phenomenon Problem How to solveMotor does not run ★ Battery is not fully charged.★ The battery in the transmitter is not at full power.★ The circuit in MIG-<strong>17</strong> has been damaged due tocrash.★ Charge the battery.★ Install new dry cells.★ Contact the distributor.Can not fly straightly★ The rudder is not on the center position.★ Adjust the rudder on the center position.★Adjust the micro-adjuster on thetransmitter for the rudder on the suitposition.Can not climbControl distance is verynear★ The battery is not fully charged.★ The elevator declines downward.★ The battery of transmitter is not at full power.★ The antenna of transmitter has not beencompletely pulled out★ Charge the battery.★ Adjust the micro-adjuster on thetransmitter.★ Install new dry cells.★ Completely pull out the antenna oftransmitter.- 19 -
- 20 -