3D with OpenGL - 안드로이드 기술 커뮤니티 : Korea Android
3D with OpenGL - 안드로이드 기술 커뮤니티 : Korea Android
3D with OpenGL - 안드로이드 기술 커뮤니티 : Korea Android

You also want an ePaper? Increase the reach of your titles
YUMPU automatically turns print PDFs into web optimized ePapers that Google loves.
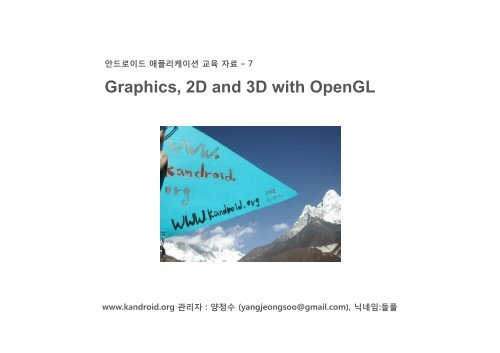
<strong>안드로이드</strong> 애플리케이션 교육 자료 – 7<br />
Graphics, 2D and <strong>3D</strong> <strong>with</strong> <strong>OpenGL</strong><br />
www.kandroid.org 관리자 : 양정수 (yangjeongsoo@gmail.com), 닉네임:들풀
public class MyView extends Activity {<br />
@Override<br />
public void onCreate(Bundle savedInstanceState) {<br />
super.onCreate(savedInstanceState);<br />
setContentView(R.layout.main);<br />
}<br />
}<br />
public class CustomView extends View {<br />
}<br />
public CustomView(Context context, AttributeSet attrs, int defStyle) {<br />
super(context, attrs, defStyle);<br />
}<br />
public CustomView(Context context, AttributeSet attrs) {<br />
super(context, attrs);<br />
}<br />
public CustomView(Context context) {<br />
super(context);<br />
}<br />
<strong>Korea</strong> <strong>Android</strong> Community- www.kandroid.org<br />
3
<strong>Korea</strong> <strong>Android</strong> Community- www.kandroid.org<br />
4
@Override<br />
protected void onMeasure(int widthMeasureSpec, int heightMeasureSpec) {<br />
setMeasuredDimension(measureWidth(widthMeasureSpec),<br />
measureHeight(heightMeasureSpec));<br />
}<br />
private int measureHeight(int measureSpec) {<br />
int result = 0;<br />
int specMode = MeasureSpec MeasureSpec.getMode(measureSpec);<br />
getMode(measureSpec);<br />
int specSize = MeasureSpec.getSize(measureSpec);<br />
mAscent = (int) mTextPaint.ascent();<br />
if (specMode == MeasureSpec.EXACTLY) {<br />
result = specSize;<br />
} else {<br />
result = (int) (-mAscent + mTextPaint.descent()) + getPaddingTop() + getPaddingBottom();<br />
if (specMode == MeasureSpec.AT_MOST) {<br />
result = Math Math.min(result, min(result specSize);<br />
}<br />
}<br />
return result;<br />
}<br />
@Override<br />
protected void onDraw(Canvas canvas) {<br />
super.onDraw(canvas);<br />
canvas canvas.drawText(mText, drawText(mText getPaddingLeft() getPaddingLeft(), getPaddingTop() - mAscent mAscent, mTextPaint);<br />
}<br />
<strong>Korea</strong> <strong>Android</strong> Community- www.kandroid.org<br />
5
<strong>Korea</strong> <strong>Android</strong> Community- www.kandroid.org<br />
6
<br />
<br />
<br />
< <br />
t t lO l "f l "/><br />
<br />
<br />
"false"><br />
<br />
<br />
<br />
<br />
<br />
<br />
<br />
<br />
<br />
<br />
<br />
<strong>Korea</strong> <strong>Android</strong> Community- www.kandroid.org<br />
7
<strong>Korea</strong> <strong>Android</strong> Community- www.kandroid.org<br />
External Library 사용<br />
8
<strong>Korea</strong> <strong>Android</strong> Community- www.kandroid.org<br />
9
1. Graphics<br />
2. 2D Graphics p<br />
3. <strong>3D</strong> <strong>with</strong> <strong>OpenGL</strong>
Graphics<br />
Overview<br />
<strong>Android</strong> graphics are powered by a custom 2D graphics library and <strong>OpenGL</strong> ES 1.0 for high<br />
performance <strong>3D</strong> graphics. The most common 2D graphics APIs can be found in the drawable<br />
package. <strong>OpenGL</strong> APIs are available from the Khronos <strong>OpenGL</strong> ES package, plus some <strong>Android</strong><br />
O<strong>OpenGL</strong> GL utilities. tiliti<br />
When starting a project, it's important to consider exactly what your graphical demands will be.<br />
Varying graphical tasks are best accomplished <strong>with</strong> varying techniques. For example, graphics<br />
and d animations i ti ffor a rather th static t ti application li ti should h ld bbe iimplemented l t d much h diff differently tl th than<br />
graphics and animations for an interactive game or <strong>3D</strong> rendering.<br />
Here, we'll discuss a few of the options you have for drawing graphics on <strong>Android</strong>, and which<br />
tasks the they're 're best ssuited ited for for.<br />
If you're specifically looking for information on drawing <strong>3D</strong> graphics, this page won't help a lot.<br />
However, the information below, on Drawing <strong>with</strong> a Canvas (and the section on SurfaceView),<br />
will give you a quick idea of how you should draw to the View hierarchy hierarchy. For more information on<br />
<strong>Android</strong>'s <strong>3D</strong> graphic utilities (provided by the <strong>OpenGL</strong> ES API), read <strong>3D</strong> <strong>with</strong> <strong>OpenGL</strong> and refer<br />
to other <strong>OpenGL</strong> documentation.<br />
<strong>Korea</strong> <strong>Android</strong> Community- www.kandroid.org<br />
11
Graphics<br />
Consider your options<br />
When drawing 2D graphics, you'll typically do so in one of two ways:<br />
a. Draw your graphics or animations into a View object from your layout. In this manner, the<br />
drawing (and any animation) of your graphics is handled by the system's normal View hierarchy<br />
drawing process - you simply define the graphics to go inside the View.<br />
b. Draw your graphics directly to a Canvas. This way, you personally call the appropriate class's<br />
draw() method (passing it your Canvas), or one of the Canvas draw...() methods (like<br />
drawPicture()). In doing so, you are also in control of any animation.<br />
Option "a," drawing to a View, is your best choice when you want to draw simple graphics that do<br />
not need to change dynamically and are not part of a performance-intensive game. For example,<br />
you should draw your graphics into a View when you want to display a static graphic or predefined<br />
animation, <strong>with</strong>in an otherwise static application. Read Simple Graphics Inside a View.<br />
Option "b," drawing to a Canvas, is better when you're application needs to regularly re-draw itself.<br />
Basically, any video game should be drawing to the Canvas on its own. However, there's more than<br />
one way to do this:<br />
• In the same thread as your UI Activity, wherein you create a custom View component in your layout,<br />
call invalidate() and then handle the onDraw() callback..<br />
• Or, in a separate thread, wherein you manage a SurfaceView and perform draws to the Canvas as<br />
fast as your thread is capable (you do not need to request invalidate()).<br />
<strong>Korea</strong> <strong>Android</strong> Community- www.kandroid.org<br />
12
Graphics<br />
Simple Graphics Inside a View<br />
If you'll be drawing some simple graphics (images, shapes, colors, pre-defined animations, etc.),<br />
then you should probably just draw to the background of a View or to the content of an ImageView in<br />
your layout.<br />
In this case, you can skip the rest of this document and learn how to draw graphics and animations in<br />
the 2D Graphics document.<br />
<strong>Korea</strong> <strong>Android</strong> Community- www.kandroid.org<br />
13
Graphics<br />
Draw <strong>with</strong> a Canvas<br />
When you're writing an application in which you would like to perform specialized drawing and/or<br />
control the animation of graphics, you should do so by drawing through a Canvas.<br />
A Canvas works for you as a pretense, or interface, to the actual surface upon which your<br />
graphics will be drawn - it holds all of your "draw" calls. Via the Canvas, your drawing is actually<br />
performed upon an underlying Bitmap, which is placed into the window.<br />
In the event that you're drawing <strong>with</strong>in the onDraw() callback method, the Canvas is provided for you<br />
and you need only place your drawing calls upon it. You can also acquire a Canvas from<br />
SurfaceHolder.lockCanvas(), when dealing <strong>with</strong> a SurfaceView object. (Both of these scenarios are<br />
discussed in the following sections.)<br />
However, if you need to create a new Canvas, then you must define the Bitmap upon which drawing<br />
will actually be performed. The Bitmap is always required for a Canvas. You can set up a new Canvas<br />
like this:<br />
Bitmap b = Bitmap.createBitmap(100, 100, Bitmap.Config.ARGB_8888);<br />
Canvas c = new Canvas(b);<br />
<strong>Korea</strong> <strong>Android</strong> Community- www.kandroid.org<br />
14
Graphics<br />
Draw <strong>with</strong> a Canvas<br />
Now your Canvas will draw onto the defined Bitmap. After drawing upon it <strong>with</strong> the Canvas, you can<br />
then carry your Bitmap to another Canvas <strong>with</strong> one of the Canvas.drawBitmap(Bitmap,...) methods.<br />
It's recommended that you ultimately draw your final graphics through a Canvas offered to you by<br />
View.onDraw() or SurfaceHolder.lockCanvas() (see the following sections).<br />
The Canvas class has its own set of drawing methods that you can use, like drawBitmap(...),<br />
drawRect(...), drawText(...), and many more. Other classes that you might use also have draw()<br />
methods. For example, you'll probably have some Drawable objects that you want to put on the<br />
Canvas. Drawable has its own draw() method that takes your Canvas as an arguement.<br />
<strong>Korea</strong> <strong>Android</strong> Community- www.kandroid.org<br />
15
Graphics<br />
Draw <strong>with</strong> a Canvas / On a View<br />
If you're application does not require a significant amount of processing or frame-rate speed (perhaps<br />
for a chess game, a snake game, or another slowly-animated application), then you should consider<br />
creating a custom View component and drawing <strong>with</strong> a Canvas in View.onDraw().<br />
The most convenient aspect of doing so is that the <strong>Android</strong> framework will provide you <strong>with</strong> a predefined<br />
Canvas to which you will place your drawing calls.<br />
To start, extend the View class (or descendent thereof) and define the onDraw() callback method. This<br />
method will be called by the <strong>Android</strong> framework to request that your View draw itself. This is where<br />
you will perform all your calls to draw through the Canvas, which is passed to you through the<br />
onDraw() callback.<br />
<strong>Korea</strong> <strong>Android</strong> Community- www.kandroid.org<br />
16
Graphics<br />
Draw <strong>with</strong> a Canvas / On a View (cont.)<br />
The <strong>Android</strong> framework will only call onDraw() as necessary. Each time that your application is<br />
prepared to be drawn, you must request your View be invalidated by calling invalidate(). This indicates<br />
that you'd like your View to be drawn and <strong>Android</strong> will then call your onDraw() method (though is not<br />
guaranteed that the callback will be instantaneous).<br />
Inside your View component's onDraw(), use the Canvas given to you for all your drawing, using<br />
various Canvas.draw...() methods, or other class draw() methods that take your Canvas as an<br />
argument. Once your onDraw() is complete, the <strong>Android</strong> framework will use your Canvas to draw a<br />
Bitmap handled by the system.<br />
Note: In order to request an invalidate from a thread other than your main Activity's thread, you must<br />
call postInvalidate().<br />
Also read Building Custom Components for a guide to extending a View class, and 2D Graphics:<br />
Drawables for information on using Drawable objects like images from your resources and other<br />
primitive shapes.<br />
For a sample application, see the Snake game, in the SDK samples folder: /samples/Snake/.<br />
<strong>Korea</strong> <strong>Android</strong> Community- www.kandroid.org<br />
17
Graphics<br />
Draw <strong>with</strong> a Canvas / On a SurfaceView<br />
The SurfaceView is a special subclass of View that offers a dedicated drawing surface <strong>with</strong>in the<br />
View hierarchy.<br />
The aim is to offer this drawing surface to an application's secondary thread, so that the application<br />
isn't required to wait until the system's View hierarchy is ready to draw.<br />
Instead, a secondary thread that has reference to a SurfaceView can draw to its own Canvas at its<br />
own pace.<br />
To begin, you need to create a new class that extends SurfaceView.<br />
The class should also implement SurfaceHolder.Callback.<br />
This subclass is an interface that will notify you <strong>with</strong> information about the underlying Surface, such as<br />
when it is created, changed, or destroyed.<br />
These events are important so that you know when you can start drawing, whether you need to make<br />
adjustments based on new surface properties, and when to stop drawing and potentially kill some<br />
tasks.<br />
Inside your SurfaceView class is also a good place to define your secondary Thread class, which will<br />
perform all the drawing procedures to your Canvas.<br />
<strong>Korea</strong> <strong>Android</strong> Community- www.kandroid.org<br />
18
Graphics<br />
Draw <strong>with</strong> a Canvas / On a SurfaceView (cont.)<br />
Instead of handling the Surface object directly, you should handle it via a SurfaceHolder.<br />
So, when your SurfaceView is initialized, get the SurfaceHolder by calling getHolder(). You should<br />
then notify the SurfaceHolder that you'd like to receive SurfaceHolder callbacks (from<br />
SurfaceHolder.Callback) by calling addCallback() (pass it this). Then override each of the<br />
SurfaceHolder.Callback methods inside your SurfaceView class.<br />
In order to draw to the Surface Canvas from <strong>with</strong>in your second thread, you must pass the thread your<br />
SurfaceHandler and retrieve the Canvas <strong>with</strong> lockCanvas(). You can now take the Canvas given to<br />
you by the SurfaceHolder and do your necessary drawing upon it. Once you're done drawing <strong>with</strong> the<br />
Canvas, call unlockCanvasAndPost(), passing it your Canvas object. The Surface will now draw the<br />
Canvas as you left it.<br />
Perform this sequence of locking and unlocking the canvas each time you want to redraw.<br />
Note: On each pass you retrieve the Canvas from the SurfaceHolder, the previous state of the Canvas<br />
will be retained. In order to properly animate your graphics, you must re-paint the entire surface. For<br />
example, you can clear the previous state of the Canvas by filling in a color <strong>with</strong> drawColor() or setting<br />
a background image <strong>with</strong> drawBitmap(). Otherwise, you will see traces of the drawings you previously<br />
performed.<br />
For a sample application, see the Lunar Landar game, in the SDK samples folder: /samples/LunarLander/.<br />
Or, browse the source in the Sample Code section.<br />
<strong>Korea</strong> <strong>Android</strong> Community- www.kandroid.org<br />
19
1. Graphics<br />
2. 2D Graphics p<br />
3. <strong>3D</strong> <strong>with</strong> <strong>OpenGL</strong>
2D Graphics<br />
Overview<br />
<strong>Android</strong> offers a custom 2D graphics library for drawing and animating shapes and images. The<br />
android.graphics.drawable and android.view.animation packages are where you'll find the common<br />
classes used for drawing and animating in two-dimensions.<br />
This document offers an introduction to drawing graphics in your <strong>Android</strong> application. We'll discuss the<br />
basics of using Drawable objects to draw graphics, how to use a couple subclasses of the Drawable<br />
class, and how to create animations that either tween (move, stretch, rotate) a single graphic or<br />
animate a series of graphics (like a roll of film).<br />
<strong>Korea</strong> <strong>Android</strong> Community- www.kandroid.org<br />
21
2D Graphics<br />
Drawables<br />
A Drawable is a general abstraction for "something that can be drawn." You'll discover that the<br />
Drawable class extends to define a variety of specific kinds of drawable graphics, including<br />
BitmapDrawable, ShapeDrawable, PictureDrawable, LayerDrawable, and several more. Of course,<br />
you can also extend these to define your own custom Drawable objects that behave in unique ways.<br />
There are three ways to define and instantiate a Drawable:<br />
1. using an image saved in your project resouces;<br />
2. using an XML file that defines the Drawable properties; or<br />
3. using the normal class constructors.<br />
Below, we'll discuss each the first two techniques (using constructors is nothing new for an<br />
experienced developer).<br />
<strong>Korea</strong> <strong>Android</strong> Community- www.kandroid.org<br />
22
2D Graphics<br />
Drawables / Creating from resource images<br />
A simple way to add graphics to your application is by referencing an image file from your project<br />
resources. Supported file types are PNG (preferred), JPG (acceptable) and GIF (discouraged). This<br />
technique would obviously be preferred for application icons, logos, or other graphics such as those<br />
used in a game.<br />
To use an image resource, just add your file to the res/drawable/ directory of your project. From there,<br />
you can reference it from your code or your XML layout. Either way, it is referred using a resource ID,<br />
which is the file name <strong>with</strong>out the file type extension (E.g., my_image.png is referenced as my_image).<br />
Example code<br />
The following code snippet demonstrates how to build an ImageView that uses an image from<br />
drawable resources and add it to the layout.<br />
<strong>Korea</strong> <strong>Android</strong> Community- www.kandroid.org<br />
23
2D Graphics<br />
LinearLayout mLinearLayout;<br />
protected void onCreate(Bundle savedInstanceState) {<br />
}<br />
super.onCreate(savedInstanceState);<br />
// Create a LinearLayout in which to add the ImageView<br />
mLinearLayout = new LinearLayout(this);<br />
// Instantiate an ImageView and define its properties<br />
ImageView i = new ImageView(this);<br />
i.setImageResource(R.drawable.my_image);<br />
i.setAdjustViewBounds(true); // set the ImageView bounds to match the Drawable's dimensions<br />
i.setLayoutParams(new Gallery.LayoutParams(LayoutParams.WRAP_CONTENT,<br />
LayoutParams.WRAP_CONTENT));<br />
// Add the ImageView to the layout and set the layout as the content view<br />
mLinearLayout.addView(i);<br />
setContentView(mLinearLayout);<br />
<strong>Korea</strong> <strong>Android</strong> Community- www.kandroid.org<br />
24
2D Graphics<br />
<strong>Korea</strong> <strong>Android</strong> Community- www.kandroid.org<br />
25
2D Graphics<br />
In other cases, you may want to handle your image resource as a Drawable object. To do so, create a<br />
Drawable from the resource like so:<br />
Drawable myImage = Resources.getDrawable(R.drawable.my_image);<br />
ImageView i= i new ImageView(this);<br />
Drawable myImage = getResources().getDrawable(R.drawable.android);<br />
// i.setImageResource(R.drawable.android);<br />
i.setImageDrawable(myImage);<br />
Example XML<br />
The XML snippet below shows how to add a resource Drawable to an ImageView in the XML layout<br />
(<strong>with</strong> ( some red tint just j for fun). )<br />
<br />
For more information on using gpproject j resources, ,<br />
read about Resources and Assets.<br />
<strong>Korea</strong> <strong>Android</strong> Community- www.kandroid.org<br />
26
2D Graphics<br />
<strong>Korea</strong> <strong>Android</strong> Community- www.kandroid.org<br />
27
2D Graphics<br />
Drawables / Creating from resource XML<br />
By now, you should be familiar <strong>with</strong> <strong>Android</strong>'s principles of developing a User Interface. Hence, you<br />
understand the power and flexibility inherent in defining objects in XML. This philosophy caries over<br />
from Views to Drawables. If there is a Drawable object that you'd like to create, which is not initially<br />
dependent on variables defined by your applicaton code or user interaction, then defining the<br />
Drawable in XML is a good option.<br />
Even if you expect your Drawable to change its properties during the user's experience <strong>with</strong><br />
your application, you should consider defining the object in XML, as you can always modify<br />
properties once it is instantiated.<br />
Once you've defined your Drawable in XML, save the file in the res/drawable/ directory of your project.<br />
Then, retrieve and instantiate the object by calling Resources.getDrawable(), passing it the resource<br />
ID of your XML file. (See the example below.)<br />
Any Drawable subclass that supports the inflate() method can be defined in XML and instantiated by<br />
your application. Each Drawable that supports XML inflation utilizes specific XML attributes that help<br />
define the object properties (see the class reference to see what these are). See the class<br />
documentation for each Drawable subclass for information on how to define it in XML.<br />
<strong>Korea</strong> <strong>Android</strong> Community- www.kandroid.org<br />
28
2D Graphics<br />
Example<br />
Here's Here s some XML that defines a TransitionDrawable:<br />
<br />
<br />
<br />
With this XML saved in the file res/drawable/expand_collapse.xml, the following code will instantiate<br />
the TransitionDrawable and set it as the content of an ImageView:<br />
Resources res = mContext.getResources();<br />
TransitionDrawable transition<br />
=(TransitionDrawable) = (TransitionDrawable) res res.getDrawable(R.drawable.expand_collapse);<br />
getDrawable(R drawable expand collapse);<br />
ImageView image = (ImageView) findViewById(R.id.toggle_image);<br />
image.setImageDrawable(transition);<br />
Then this transition can be run forward (for 1 second) <strong>with</strong>:<br />
transition.startTransition(1000);<br />
Refer to the Drawable classes listed above for more information on the XML attributes supported by<br />
each.<br />
<strong>Korea</strong> <strong>Android</strong> Community- www.kandroid.org<br />
29
2D Graphics<br />
<strong>Korea</strong> <strong>Android</strong> Community- www.kandroid.org<br />
30
2D Graphics<br />
ShapeDrawable<br />
When you want to dynamically draw some two-dimensional graphics, a ShapeDrawable object<br />
will probably suit your needs. With a ShapeDrawable, you can programmatically draw primitive shapes<br />
and style them in any way imaginable.<br />
A ShapeDrawable is an extension of Drawable, so you can use one where ever a Drawable is<br />
expected - perhaps for the background of a View, set <strong>with</strong> setBackgroundDrawable(). Of course, you<br />
can also draw your shape as its own custom View, to be added to your layout however you please.<br />
Because the ShapeDrawable has its own draw() method, you can create a subclass of View that<br />
draws the ShapeDrawable during the View.onDraw() method.<br />
Here's a basic extension of the View class that does just this, to draw a ShapeDrawable as a View:<br />
<strong>Korea</strong> <strong>Android</strong> Community- www.kandroid.org<br />
31
2D Graphics<br />
public class CustomDrawableView extends View {<br />
}<br />
private ShapeDrawable mDrawable;<br />
public CustomDrawableView(Context context) {<br />
super(context);<br />
}<br />
int x = 10;<br />
int y = 10;<br />
int width = 300;<br />
int height = 50;<br />
mDrawable = new ShapeDrawable(new OvalShape());<br />
mDrawable.getPaint().setColor(0xff74AC23);<br />
mDrawable.setBounds(x, y, x + width, y + height);<br />
protected void onDraw(Canvas canvas) {<br />
mDrawable.draw(canvas);<br />
}<br />
<strong>Korea</strong> <strong>Android</strong> Community- www.kandroid.org<br />
32
2D Graphics<br />
In the constructor, a ShapeDrawable is defines as an OvalShape. It's then given a color and the<br />
bounds of the shape are set. If you do not set the bounds, then the shape will not be drawn, whereas if<br />
you don't set the color, it will default to black.<br />
With the custom View defined, it can be drawn any way you like. With the sample above, we can draw<br />
the shape progammatically in an Activity:<br />
CustomDrawableView mCustomDrawableView;<br />
protected void onCreate(Bundle savedInstanceState) {<br />
super.onCreate(savedInstanceState);<br />
View mCustomDrawableView = new CustomDrawableView(this);<br />
}<br />
setContentView(mCustomDrawableView);<br />
<strong>Korea</strong> <strong>Android</strong> Community- www.kandroid.org<br />
33
2D Graphics<br />
<strong>Korea</strong> <strong>Android</strong> Community- www.kandroid.org<br />
34
2D Graphics<br />
If you'd like to draw this custom drawable from the XML layout instead of from the Activity, then the<br />
CustomDrawable class must override the View(Context, AttributeSet) constructor, which is called<br />
when instantiating a View via inflation from XML. Then add a CustomDrawable element to the XML,<br />
like so:<br />
<br />
The ShapeDrawable class (like many other Drawable types in the android.graphics.drawable package)<br />
allows you to define various properties of the drawable <strong>with</strong> public methods. Some properties you<br />
might want to adjust include alpha transparency, color filter, dither, opacity and color.<br />
<strong>Korea</strong> <strong>Android</strong> Community- www.kandroid.org<br />
35
2D Graphics<br />
NinePatchDrawable<br />
A NinePatchDrawable graphic is a stretchable bitmap image, which <strong>Android</strong> will automatically<br />
resize to accomodate the contents of the View in which you have placed it as the background. An<br />
example use of a NinePatch is the backgrounds used by standard <strong>Android</strong> buttons - buttons must<br />
stretch to accommodate strings of various lengths. A NinePatch drawable is a standard PNG image<br />
that includes an extra 1-pixel-wide border. It must be saved <strong>with</strong> the extension .9.png, and saved<br />
into the res/drawable/ directory of your project.<br />
The border is used to define the stretchable and static areas of the image. You indicate a stretchable<br />
section by drawing one (or more) 1-pixel-wide black line(s) in the left and top part of the border. (You<br />
can have as many stretchable sections as you want.) The relative size of the stretchable sections<br />
stays the same, so the largest sections always remain the largest.<br />
You can also define an optional drawable section of the image (effectively, the padding lines) by<br />
drawing a line on the right and bottom lines. If a View object sets the NinePatch as its background<br />
and then specifies the View's text, it will stretch itself so that all the text fits inside only the area<br />
designated by the right and bottom lines (if included). If the padding lines are not included,<br />
<strong>Android</strong> uses the left and top lines to define this drawable area.<br />
To clarify the difference between the different lines, the left and top lines define which pixels of the<br />
image are allowed to be replicated in order to strech the image. The bottom and right lines define the<br />
relative area <strong>with</strong>in the image that the contents of f the View are allowed to lie <strong>with</strong>in.<br />
<strong>Korea</strong> <strong>Android</strong> Community- www.kandroid.org<br />
36
2D Graphics<br />
Here is a sample NinePatch file used to define a button:<br />
This NinePatch defines one stretchable area <strong>with</strong> the left and top lines and the drawable area <strong>with</strong> the<br />
bottom and right lines. In the top image, the dotted grey lines identify the regions of the image that will<br />
be replicated in order to strech the image. The pink rectangle in the bottom image identifies the region<br />
in which the contents of the View are allowed. If the contents don't fit in this region, then the image will<br />
be stretched so that they do.<br />
The Draw 9-patch tool offers an extremely handy way to create your NinePatch images, using a<br />
WYSIWYG graphics editor. It even raises warnings if the region you've defined for the stretchable area<br />
is at risk of producing drawing artifacts as a result of the pixel replication.<br />
<strong>Korea</strong> <strong>Android</strong> Community- www.kandroid.org<br />
37
2D Graphics<br />
NinePatchDrawable / Example XML<br />
Here's some sample layout XML that demonstrates how to add a NinePatch image to a couple of<br />
buttons. (The NinePatch image is saved as res/drawable/my_button_background.9.png<br />
<br />
<br />
Note that the width and height are set to "wrap_content" to make the button fit neatly around the text.<br />
<strong>Korea</strong> <strong>Android</strong> Community- www.kandroid.org<br />
38
2D Graphics<br />
Tween Animation<br />
A tween animation can perform a series of simple transformations (position, size, rotation, and<br />
transparency) on the contents of a View object. So, if you have a TextView object, you can move,<br />
rotate, grow, or shrink the text. If it has a background image, the background image will be<br />
transformed along g <strong>with</strong> the text. The animation ppackage g pprovides<br />
all the classes used in a tween<br />
animation.<br />
A sequence of animation instructions defines the tween animation, defined by either XML or<br />
<strong>Android</strong> code. Like defining g a layout, y an XML file is recommended because it's more readable,<br />
reusable, and swappable than hard-coding the animation. In the example below, we use XML. (To<br />
learn more about defining an animation in your application code, instead of XML, refer to the<br />
AnimationSet class and other Animation subclasses.)<br />
The animation instructions define the transformations that you want to occur, when they will occur, and<br />
how long they should take to apply. Transformations can be sequential or simultaneous - for example,<br />
you can have the contents of a TextView move from left to right, and then rotate 180 degrees, or you<br />
can have the text move and rotate simultaneously. Each transformation takes a set of parameters<br />
specific for that transformation (starting size and ending size for size change, starting angle and<br />
ending angle for rotation, and so on), and also a set of common parameters (for instance, start time<br />
and duration). To make several transformations happen simultaneously, give them the same start<br />
time; to make them sequential, calculate the start time plus the duration of the preceding<br />
transformation.<br />
<strong>Korea</strong> <strong>Android</strong> Community- www.kandroid.org<br />
39
2D Graphics<br />
Tween Animation (cont.)<br />
The animation XML file belongs in the res/anim/ directory of your <strong>Android</strong> project.<br />
The file must have a single root element: this will be either a single , , ,<br />
, interpolator p element, or element that holds groups g p of these elements ( (which may y<br />
include another ).<br />
By default, all animation instructions are applied simultaneously.<br />
To make them occur sequentially, q y you y must specify p y the startOffset attribute, as shown in the<br />
example below.<br />
The following XML from one of the ApiDemos is used to stretch, then simultaneously spin and rotate a<br />
View object.<br />
<strong>Korea</strong> <strong>Android</strong> Community- www.kandroid.org<br />
40
2D Graphics<br />
<br />
<br />
<br />
<br />
<br />
<br />
<strong>Korea</strong> <strong>Android</strong> Community- www.kandroid.org<br />
41
2D Graphics<br />
Screen coordinates (not used in this example) are (0,0) at the upper left hand corner, and increase as<br />
you go down and to the right.<br />
Some values, such as pivotX, can be specified relative to the object itself or relative to the parent. Be<br />
sure to use the proper format for what you want ("50" for 50% relative to the parent, or "50%" for 50%<br />
relative to itself).<br />
You can determine how a transformation is applied over time by assigning an Interpolator.<br />
<strong>Android</strong> includes several Interpolator subclasses that specify various speed curves: for instance,<br />
AccelerateInterpolator p tells a transformation to start slow and speed p up. p Each one has an attribute<br />
value that can be applied in the XML.<br />
With this XML saved as hyperspace_jump.xml in the res/anim/ directory of the project, the following<br />
Java code will reference it and apply pp y it to an ImageView g object j from the layout. y<br />
ImageView spaceshipImage = (ImageView) findViewById(R.id.spaceshipImage);<br />
Animation hyperspaceJumpAnimation<br />
= AnimationUtils.loadAnimation(this, ( , R.anim.hyperspace yp p _jjump); p);<br />
spaceshipImage.startAnimation(hyperspaceJumpAnimation);<br />
As an alternative to startAnimation(), you can define a starting time for the animation <strong>with</strong><br />
Animation.setStartTime(), (), then assign g the animation to the View <strong>with</strong> View.setAnimation(). ()<br />
<strong>Korea</strong> <strong>Android</strong> Community- www.kandroid.org<br />
42
2D Graphics<br />
<strong>Korea</strong> <strong>Android</strong> Community- www.kandroid.org<br />
43
2D Graphics<br />
Frame Animation<br />
This is a traditional animation in the sense that it is created <strong>with</strong> a sequence of different<br />
images, played in order, like a roll of film. The AnimationDrawable class is the basis for frame<br />
animations. While you can define the frames of an animation in your code, using the<br />
AnimationDrawable class API, it's more simply pyaccomplished p <strong>with</strong> a single g XML file that lists the<br />
frames that compose the animation. Like the tween animation above, the XML file for this kind of<br />
animation belongs in the res/anim/ directory of your <strong>Android</strong> project. In this case, the instructions are<br />
the order and duration for each frame of the animation.<br />
The XML file consists of an element as the root node and a series of child <br />
nodes that each define a frame: a drawable resource for the frame and the frame duration. Here's an<br />
example XML file for a frame-by-frame animation:<br />
<br />
<br />
<br />
<br />
<br />
This animation runs for just three frames. By setting the android:oneshot attribute of the list to true, it<br />
will cycle just once then stop and hold on the last frame. If it is set false then the animation will loop.<br />
<strong>Korea</strong> <strong>Android</strong> Community- www.kandroid.org<br />
44
2D Graphics<br />
With this XML saved as rocket_thrust.xml in the res/anim/ directory of the project, it can be added as<br />
the background image to a View and then called to play.<br />
Here's an example Activity, in which the animation is added to an ImageView and then animated when<br />
the screen is touched:<br />
AnimationDrawable at o a ab e rocketAnimation;<br />
oc et at o ;<br />
public void onCreate(Bundle savedInstanceState) {<br />
super.onCreate(savedInstanceState);<br />
setContentView(R.layout.main);<br />
( y );<br />
}<br />
ImageView rocketImage = (ImageView) findViewById(R.id.rocket_image);<br />
rocketImage.setBackgroundResource(R.anim.rocket_thrust);<br />
rocketAnimation = (AnimationDrawable) ( ) rocketImage.getBackground();<br />
g g g ();<br />
public boolean onTouchEvent(MotionEvent event) {<br />
if (event.getAction() ( g () == MotionEvent.ACTION_ DOWN) ){ {<br />
rocketAnimation.start();<br />
return true;<br />
}<br />
return super.onTouchEvent(event);<br />
p ( );<br />
}<br />
<strong>Korea</strong> <strong>Android</strong> Community- www.kandroid.org<br />
45
2D Graphics<br />
It's It s important to note that the start() method called on the AnimationDrawable cannot be called<br />
during the onCreate() method of your Activity, because the AnimationDrawable is not yet fully<br />
attached to the window.<br />
If you want to play the animation immediately immediately, <strong>with</strong>out requiring interaction interaction, then you might want to call<br />
it from the onWindowFocusChanged() method in your Activity, which will get called when <strong>Android</strong><br />
brings your window into focus.<br />
<strong>Korea</strong> <strong>Android</strong> Community- www.kandroid.org<br />
46
2D Graphics<br />
<strong>Korea</strong> <strong>Android</strong> Community- www.kandroid.org<br />
47
1. Graphics<br />
2. 2D Graphics p<br />
3. <strong>3D</strong> <strong>with</strong> <strong>OpenGL</strong>
<strong>3D</strong> <strong>with</strong> <strong>OpenGL</strong><br />
Overview<br />
<strong>Android</strong> includes support for high performance <strong>3D</strong> graphics via the <strong>OpenGL</strong> API - specifically, the<br />
<strong>OpenGL</strong> ES API.<br />
<strong>OpenGL</strong> p ES is a flavor of the <strong>OpenGL</strong> p specification p intended for embedded devices.<br />
Versions of <strong>OpenGL</strong> ES are loosely peered to versions of the primary <strong>OpenGL</strong> standard.<br />
<strong>Android</strong> currently supports <strong>OpenGL</strong> ES 1.0, which corresponds to <strong>OpenGL</strong> 1.3.<br />
So, if the application you have in mind is possible <strong>with</strong> <strong>OpenGL</strong> 1.3 on a desktop system, it should be<br />
possible p on <strong>Android</strong>.<br />
The specific API provided by <strong>Android</strong> is similar to the J2ME JSR239 <strong>OpenGL</strong> ES API.<br />
However, it may not be identical, so watch out for deviations.<br />
<strong>Korea</strong> <strong>Android</strong> Community- www.kandroid.org<br />
49
<strong>3D</strong> <strong>with</strong> <strong>OpenGL</strong><br />
Using the API<br />
Here's how to use the API at an extremely high level:<br />
1. Write a custom View subclass.<br />
2. Obtain a handle to an <strong>OpenGL</strong>Context, p which provides p access to the <strong>OpenGL</strong> p functionality. y<br />
3. In your View's onDraw() method, get a handle to a GL object, and use its methods to<br />
perform GL operations.<br />
For an example p of this usage g model ( (based on the classic GL ColorCube), )<br />
see com.android.samples.graphics.GLSurfaceView.java in the ApiDemos sample code project.<br />
A slightly more sophisticated version showing how to use it <strong>with</strong> threads can be found in<br />
com.android.samples.graphics.GLSurfaceViewActivity.java.<br />
Writing a summary of how to actually write <strong>3D</strong> applications using <strong>OpenGL</strong> is beyond the scope of this<br />
text and is left as an exercise for the reader.<br />
<strong>Korea</strong> <strong>Android</strong> Community- www.kandroid.org<br />
50
<strong>3D</strong> <strong>with</strong> <strong>OpenGL</strong><br />
Links to Additional Information<br />
Information about <strong>OpenGL</strong> ES can be found at http://www.khronos.org/opengles/.<br />
Information specifically about <strong>OpenGL</strong> ES 1.0 (including a detailed specification) can be found at<br />
http://www.khronos.org/opengles/1_X/.<br />
p g p g _<br />
The documentation for the <strong>Android</strong> <strong>OpenGL</strong> ES implementations are also available.<br />
Finally, y note that though g <strong>Android</strong> does include some basic support pp for <strong>OpenGL</strong> p ES 1.1,<br />
the support is not complete, and should not be relied upon at this time.<br />
<strong>Korea</strong> <strong>Android</strong> Community- www.kandroid.org<br />
51
<strong>3D</strong> <strong>with</strong> <strong>OpenGL</strong><br />
Understanding <strong>3D</strong> graphics<br />
<strong>Android</strong> provides a three three-dimensional dimensional graphics library based on the <strong>OpenGL</strong> ES standard<br />
<strong>Korea</strong> <strong>Android</strong> Community- www.kandroid.org<br />
52
<strong>3D</strong> <strong>with</strong> <strong>OpenGL</strong><br />
Introducing <strong>OpenGL</strong><br />
<strong>OpenGL</strong>1 was developed by Silicon Graphics Inc. in 1992. It provides a unified interface for<br />
programmers to take advantage of hardware from any manufacturer. At its core, <strong>OpenGL</strong> implements<br />
familiar concepts like viewports and lighting, and tries to hide most of the hardware layer from the<br />
developer developer.<br />
Because it was designed for workstations, <strong>OpenGL</strong> is too large to fit on a mobile device. So, <strong>Android</strong><br />
implements a subset of <strong>OpenGL</strong> called <strong>OpenGL</strong> ES (<strong>OpenGL</strong> for Embedded Systems).2 This<br />
standard was created by the Khronos Group Group, an industry consortium of companies like Intel Intel, AMD AMD,<br />
Nvidia, Nokia, Samsung, and Sony. The same library (<strong>with</strong> minor differences) is now available on<br />
major mobile platforms including <strong>Android</strong>, Symbian, and iPhone.<br />
Every language has its own language bindings for <strong>OpenGL</strong> ES ES, and Java is no exception exception. Java’s Java s<br />
language binding was defined by a Java Specification Request (JSR239).3 <strong>Android</strong> implements this<br />
standard as closely as possible, so you can refer to a variety of books and documentation on JSR239<br />
and <strong>OpenGL</strong> ES for a full description of all its classes and methods.<br />
- “hello, android” 중에서.<br />
<strong>Korea</strong> <strong>Android</strong> Community- www.kandroid.org<br />
53
<strong>3D</strong> <strong>with</strong> <strong>OpenGL</strong><br />
Introducing <strong>OpenGL</strong> (cont.)<br />
What is <strong>OpenGL</strong> ES?<br />
• Royalty-free, cross-platform API for full-function 2D and <strong>3D</strong> graphics on embedded system<br />
• <strong>3D</strong> API for Symbian, <strong>Android</strong>, iPhone, etc<br />
• Stripped down version of <strong>OpenGL</strong><br />
– Standard specification for cross-language, cross-platform API for 2D & <strong>3D</strong> graphics<br />
– About 150 commands specifying objects and operations<br />
<strong>Korea</strong> <strong>Android</strong> Community- www.kandroid.org<br />
54
<strong>3D</strong> <strong>with</strong> <strong>OpenGL</strong><br />
Building an <strong>OpenGL</strong> Application<br />
package org.kandroid.example.opengl;<br />
import android.app.Activity;<br />
import android.os.Bundle;<br />
public class <strong>OpenGL</strong> extends Activity {<br />
}<br />
private GLSurfaceView mGLSurfaceView;<br />
@Override<br />
protected p void onCreate(Bundle ( savedInstanceState) ){ {<br />
}<br />
super.onCreate(savedInstanceState);<br />
mGLSurfaceView = new GLSurfaceView(this); ( );<br />
setContentView(mGLSurfaceView);<br />
<strong>Korea</strong> <strong>Android</strong> Community- www.kandroid.org<br />
55
<strong>3D</strong> <strong>with</strong> <strong>OpenGL</strong><br />
public class GLSurfaceView extends SurfaceView implements SurfaceHolder.Callback {<br />
//<br />
}<br />
private GLThread mGLThread;<br />
public GLSurfaceView(Context context) {<br />
super(context);<br />
getHolder() getHolder().addCallback(this);<br />
addCallback(this);<br />
getHolder().setType(SurfaceHolder.SURFACE_TYPE_GPU);<br />
}<br />
public void surfaceCreated(SurfaceHolder holder) {<br />
mGLThread = new GLThread(this);<br />
mGLThread.start();<br />
}<br />
public void surfaceDestroyed(SurfaceHolder holder) {<br />
mGLThread.requestExitAndWait();<br />
mGLThread = null;<br />
}<br />
public void surfaceChanged(SurfaceHolder holder, int format, int w, int h) {<br />
}<br />
<strong>Korea</strong> <strong>Android</strong> Community- www.kandroid.org<br />
56
<strong>3D</strong> <strong>with</strong> <strong>OpenGL</strong><br />
1. SurfaceView - a special kind of view that is used for <strong>3D</strong> graphics. Extend this for any view that<br />
uses <strong>OpenGL</strong>.<br />
2. Surface - a place for drawing, like a Canvas, except it is implemented by the <strong>3D</strong> hardware (if<br />
any). The Surface will be created when your <strong>OpenGL</strong> activity is running in the foreground, and<br />
destroyed when the activity exits or some other activity comes to the foreground.<br />
3. SurfaceHolder - an instance of this class is always there even if the Surface that it holds goes<br />
away.<br />
44. SurfaceHolder SurfaceHolder.Callback Callback - a SurfaceView implements this interface so <strong>OpenGL</strong> will notify it<br />
when the view’s Surface is created, destroyed, or resized.<br />
- Hello <strong>Android</strong> 중에서 중에서.<br />
<strong>Korea</strong> <strong>Android</strong> Community- www.kandroid.org<br />
57
<strong>3D</strong> <strong>with</strong> <strong>OpenGL</strong><br />
Managing the threads<br />
}<br />
class GLThread extends Thread {<br />
private final GLSurfaceView view;<br />
GLThread(GLSurfaceView ( view) ){ {<br />
this.view = view;<br />
}<br />
@Override<br />
public void run() {<br />
// Loop until asked to quit<br />
while (!done) {<br />
// Draw a single frame here...<br />
}<br />
}<br />
public void requestExitAndWait() {<br />
try {<br />
join();<br />
} catch (InterruptedException ex) {<br />
Thread.currentThread().interrupt();<br />
}<br />
}<br />
<strong>Korea</strong> <strong>Android</strong> Community- www.kandroid.org<br />
58
<strong>3D</strong> <strong>with</strong> <strong>OpenGL</strong><br />
// Initialize <strong>OpenGL</strong>...<br />
EGL10 egl = (EGL10) EGLContext EGLContext.getEGL(); getEGL();<br />
EGLDisplay display = egl.eglGetDisplay(EGL10.EGL_DEFAULT_DISPLAY);<br />
int[] version = new int[2];<br />
egl egl.eglInitialize(display, eglInitialize(display version);<br />
int[] configSpec = { EGL10.EGL_RED_SIZE, 5,<br />
EGL10.EGL_GREEN_SIZE, 6, EGL10.EGL_BLUE_SIZE, 5,<br />
EGL10 EGL10.EGL_DEPTH_SIZE, EGL DEPTH SIZE 16, 16 EGL10.EGL_NONE EGL10 EGL NONE };<br />
EGLConfig[] configs = new EGLConfig[1];<br />
int[] numConfig = new int[1];<br />
egl egl.eglChooseConfig(display, eglChooseConfig(display configSpec configSpec, configs configs, 11, numConfig);<br />
EGLConfig config = configs[0];<br />
EGLContext glc = egl.eglCreateContext(display, config, EGL10.EGL_NO_CONTEXT, null);<br />
EGLSurface surface = egl.eglCreateWindowSurface(display, config, view.getHolder(), null);<br />
egl.eglMakeCurrent(display, surface, surface, glc);<br />
GL10 gl = (GL10) (glc.getGL());<br />
(glc getGL());<br />
<strong>Korea</strong> <strong>Android</strong> Community- www.kandroid.org<br />
59
<strong>3D</strong> <strong>with</strong> <strong>OpenGL</strong><br />
init(gl);<br />
// Loop until asked to quit<br />
while (!done) {<br />
// Draw a single frame here...<br />
drawFrame(gl);<br />
egl egl.eglSwapBuffers(display, eglSwapBuffers(display surface);<br />
}<br />
// Error handling<br />
if (egl.eglGetError() == EGL11.EGL_CONTEXT_LOST) {<br />
Context c = view view.getContext();<br />
getContext();<br />
if (c instanceof Activity) {<br />
((Activity) c).finish();<br />
}<br />
}<br />
// Free <strong>OpenGL</strong> resources<br />
egl egl.eglMakeCurrent(display, eglMakeCurrent(display EGL10.EGL_NO_SURFACE,<br />
EGL10 EGL NO SURFACE<br />
EGL10.EGL_NO_SURFACE, EGL10.EGL_NO_CONTEXT);<br />
egl.eglDestroySurface(display, surface);<br />
egl.eglDestroyContext(display, glc);<br />
egl egl.eglTerminate(display);<br />
eglTerminate(display);<br />
<strong>Korea</strong> <strong>Android</strong> Community- www.kandroid.org<br />
60
<strong>3D</strong> <strong>with</strong> <strong>OpenGL</strong><br />
private void init(GL10 gl) {<br />
}<br />
// Define the view frustrum<br />
gl.glViewport(0, 0, view.getWidth(), view.getHeight());<br />
gl.glMatrixMode(GL10.GL_PROJECTION);<br />
gl gl.glLoadIdentity();<br />
glLoadIdentity();<br />
float ratio = (float) view.getWidth() / view.getHeight();<br />
GLU.gluPerspective(gl, 45.0f, ratio, 1, 100f);<br />
// Set up any other options we need<br />
gl.glEnable(GL10.GL_DEPTH_TEST);<br />
gl.glDepthFunc(GL10.GL_LEQUAL);<br />
gl.glEnableClientState(GL10.GL_VERTEX_ARRAY);<br />
private void drawFrame(GL10 gl) {<br />
// Clear the screen to black<br />
gl.glClear(GL10.GL_COLOR_BUFFER_BIT<br />
| GL10.GL_DEPTH_BUFFER_BIT);<br />
}<br />
<strong>Korea</strong> <strong>Android</strong> Community- www.kandroid.org<br />
61
<strong>3D</strong> <strong>with</strong> <strong>OpenGL</strong><br />
glEnable()<br />
GL_BLEND<br />
Blend the incoming color values <strong>with</strong> the values already in the color buffer.<br />
GL_CULL_FACE<br />
Ignore polygons based on their winding (clockwise or counter-clockwise) counter clockwise) in window coordinates.<br />
This is a cheap way to eliminate back faces.<br />
GL_DEPTH_TEST<br />
Do depth comparisons and update the depth buffer. Pixels further away than those already<br />
drawn will be ignored. g<br />
GL_LIGHT<br />
Include light number i when figuring out an object’s brightness and color.<br />
GL_LIGHTING<br />
Turn on lighting g g and material calculations.<br />
GL_LINE_SMOOTH<br />
Draw anti-aliased lines (lines <strong>with</strong>out jaggies).<br />
GL_MULTISAMPLE<br />
Perform multi-sampling p g for anti-aliasing g and other effects.<br />
GL_POINT_SMOOTH<br />
Draw anti-aliased points.<br />
GL_TEXTURE_2D<br />
Use textures to draw surfaces.<br />
<strong>Korea</strong> <strong>Android</strong> Community- www.kandroid.org<br />
62
<strong>3D</strong> <strong>with</strong> <strong>OpenGL</strong><br />
<strong>Korea</strong> <strong>Android</strong> Community- www.kandroid.org<br />
63
<strong>3D</strong> <strong>with</strong> <strong>OpenGL</strong><br />
Building a model<br />
class Cube<br />
{<br />
private final IntBuffer mVertexBuffer;<br />
public Cube() {<br />
}<br />
int one = 65536;<br />
int half = one / 2;<br />
int vertices[] = {<br />
-half, half -half, half half half, half half, -half, half half half, -half, half half half, half half, half half, half half, half half, // FRONT<br />
-half, -half, -half, -half, half, -half, half, -half, -half, half, half, -half, // BACK<br />
-half, -half, half, -half, half, half, -half, -half, -half, -half, half, -half, // LEFT<br />
half, -half, -half, half, half, -half, half, -half, half, half, half, half, // RIGHT<br />
-half, half half half, half half, half half, half half, half half, -half, half half half, -half, half half half, half half, -half, half // TOP<br />
-half, -half, half, -half, -half, -half, half, -half, half, half, -half, -half, // BOTTOM};<br />
ByteBuffer vbb = ByteBuffer.allocateDirect(vertices.length * 4);<br />
vbb vbb.order(ByteOrder.nativeOrder());<br />
order(ByteOrder nativeOrder());<br />
mVertexBuffer = vbb.asIntBuffer();<br />
mVertexBuffer.put(vertices);<br />
mVertexBuffer.position(0);<br />
<strong>Korea</strong> <strong>Android</strong> Community- www.kandroid.org<br />
64
<strong>3D</strong> <strong>with</strong> <strong>OpenGL</strong><br />
}<br />
public void draw(GL10 gl) {<br />
gl gl.glVertexPointer(3, glVertexPointer(3 GL10.GL_FIXED, GL10 GL FIXED 00, mVertexBuffer);<br />
}<br />
gl.glColor4f(1, 1, 1, 1);<br />
gl.glNormal3f(0, 0, 1);<br />
gl gl.glDrawArrays(GL10.GL_TRIANGLE_STRIP, glDrawArrays(GL10 GL TRIANGLE STRIP 0, 0 4);<br />
gl.glNormal3f(0, 0, -1);<br />
gl.glDrawArrays(GL10.GL_TRIANGLE_STRIP, 4, 4);<br />
gl gl.glColor4f(1, glColor4f(1 1, 1 1, 1 1);<br />
gl.glNormal3f(-1, 0, 0);<br />
gl.glDrawArrays(GL10.GL_TRIANGLE_STRIP, 8, 4);<br />
gl.glNormal3f(1, 0, 0);<br />
gl gl.glDrawArrays(GL10.GL_TRIANGLE_STRIP, glDrawArrays(GL10 GL TRIANGLE STRIP 12, 12 4);<br />
gl.glColor4f(1, 1, 1, 1);<br />
gl.glNormal3f(0, 1, 0);<br />
gl gl.glDrawArrays(GL10.GL_TRIANGLE_STRIP, glDrawArrays(GL10 GL TRIANGLE STRIP 16, 16 4);<br />
gl.glNormal3f(0, -1, 0);<br />
gl.glDrawArrays(GL10.GL_TRIANGLE_STRIP, 20, 4);<br />
<strong>Korea</strong> <strong>Android</strong> Community- www.kandroid.org<br />
65
<strong>3D</strong> <strong>with</strong> <strong>OpenGL</strong><br />
private void drawFrame(GL10 gl) {<br />
// Clear the screen to black<br />
gl.glClear(GL10.GL_COLOR_BUFFER_BIT<br />
| GL10.GL_DEPTH_BUFFER_BIT);<br />
}<br />
// Position model so we can see it<br />
gl.glMatrixMode(GL10.GL_MODELVIEW);<br />
gl.glLoadIdentity();<br />
gl.glTranslatef(0, 0, -3.0f);<br />
// Other drawing commands go here...<br />
cube.draw(gl);<br />
<strong>Korea</strong> <strong>Android</strong> Community- www.kandroid.org<br />
66
<strong>3D</strong> <strong>with</strong> <strong>OpenGL</strong><br />
<strong>Korea</strong> <strong>Android</strong> Community- www.kandroid.org<br />
67
<strong>3D</strong> <strong>with</strong> <strong>OpenGL</strong><br />
Lights, Camera, …<br />
// Define the lighting<br />
float lightAmbient[] = new float[] { 0.2f, 0 2f 00.2f, 2f 00.2f, 2f 1 };<br />
float lightDiffuse[] = new float[] { 1, 1, 1, 1 };<br />
float[] lightPos = new float[] { 1, 1, 1, 1 };<br />
gl gl.glEnable(GL10.GL_LIGHTING);<br />
glEnable(GL10 GL LIGHTING);<br />
gl.glEnable(GL10.GL_LIGHT0);<br />
gl.glLightfv(GL10.GL_LIGHT0, GL10.GL_AMBIENT, lightAmbient, 0);<br />
gl.glLightfv(GL10.GL_LIGHT0, GL10.GL_DIFFUSE, lightDiffuse, 0);<br />
gl gl.glLightfv(GL10.GL_LIGHT0, glLightfv(GL10 GL LIGHT0 GL10.GL_POSITION, GL10 GL POSITION lightPos lightPos, 0);<br />
// What is the cube made of?<br />
float matAmbient[] = new float[] { 1, 1, 1, 1 };<br />
float matDiffuse[] = new float[] { 11, 11, 11, 1 };<br />
gl.glMaterialfv(GL10.GL_FRONT_AND_BACK, GL10.GL_AMBIENT,matAmbient, 0);<br />
gl.glMaterialfv(GL10.GL_FRONT_AND_BACK, GL10.GL_DIFFUSE,matDiffuse, 0);<br />
<strong>Korea</strong> <strong>Android</strong> Community- www.kandroid.org<br />
68
<strong>3D</strong> <strong>with</strong> <strong>OpenGL</strong><br />
All <strong>3D</strong> graphics libraries support three types of lighting:<br />
• ambient —a general glow that the light contributes to the entire scene, even to objects facing away<br />
from the light. It’s important to have a little ambient light so you can pick out details even in the<br />
shadows.<br />
• diffuse —soft directional lighting, as you might get from a flourescent panel. Most of the light<br />
contributed to your scene will typically come from diffuse sources.<br />
• specular p —shiny y light, g , usually y from bright g ppoint sources. Combined <strong>with</strong> shiny y materials this ggives<br />
you highlights (glints) that add realism.<br />
- Hello <strong>Android</strong> 중에서<br />
<strong>Korea</strong> <strong>Android</strong> Community- www.kandroid.org<br />
69
<strong>3D</strong> <strong>with</strong> <strong>OpenGL</strong><br />
<strong>Korea</strong> <strong>Android</strong> Community- www.kandroid.org<br />
70
<strong>3D</strong> <strong>with</strong> <strong>OpenGL</strong><br />
Action<br />
private long startTime;<br />
private void init(GL10 gl) {<br />
startTime = System.currentTimeMillis();<br />
}<br />
private void drawFrame(GL10 gl) {<br />
// ... Set rotation angle based on the time<br />
long elapsed = System.currentTimeMillis() - startTime;<br />
gl gl.glRotatef(elapsed glRotatef(elapsed * (30f / 1000f) 1000f), 00, 11, 0);<br />
gl.glRotatef(elapsed * (15f / 1000f), 1, 0, 0);<br />
}<br />
<strong>Korea</strong> <strong>Android</strong> Community- www.kandroid.org<br />
71
<strong>3D</strong> <strong>with</strong> <strong>OpenGL</strong><br />
<strong>Korea</strong> <strong>Android</strong> Community- www.kandroid.org<br />
72
<strong>3D</strong> <strong>with</strong> <strong>OpenGL</strong><br />
Applying texture<br />
private final IntBuffer mTextureBuffer;<br />
public Cube() {<br />
int texCoords[] = {<br />
0, one, one, one, 0, 0, one, 0, // FRONT<br />
one one, one one, one one, 00, 00, one one, 00, 0 0, // BACK<br />
one, one, one, 0, 0, one, 0, 0, // LEFT<br />
one, one, one, 0, 0, one, 0, 0, // RIGHT<br />
one, 0, 0, 0, one, one, 0, one, // TOP<br />
00, 00, 00, one one, one one, 00, one one, one one, // BOTTOM };<br />
ByteBuffer tbb = ByteBuffer.allocateDirect(texCoords.length * 4);<br />
tbb.order(ByteOrder.nativeOrder());<br />
mTextureBuffer = tbb tbb.asIntBuffer();<br />
asIntBuffer();<br />
mTextureBuffer.put(texCoords);<br />
mTextureBuffer.position(0);<br />
}<br />
static void loadTexture(GL10 gl gl, Context context context, int resource) {<br />
Bitmap bmp = BitmapFactory.decodeResource(<br />
context.getResources(), resource);<br />
ByteBuffer bb = extract(bmp);<br />
load(gl load(gl, bb bb, bmp bmp.getWidth(), getWidth() bmp bmp.getHeight());<br />
getHeight());<br />
}<br />
<strong>Korea</strong> <strong>Android</strong> Community- www.kandroid.org<br />
73
<strong>3D</strong> <strong>with</strong> <strong>OpenGL</strong><br />
private static ByteBuffer extract(Bitmap bmp) {<br />
ByteBuffer bb = ByteBuffer.allocateDirect(bmp.getHeight() * bmp.getWidth() * 4);<br />
bb bb.order(ByteOrder.BIG_ENDIAN);<br />
order(ByteOrder BIG ENDIAN);<br />
IntBuffer ib = bb.asIntBuffer();<br />
}<br />
// Convert ARGB -> RGBA<br />
for (int y=bmp y = bmp.getHeight() getHeight() - 1; y > -1; 1; y y--) )<br />
for (int x = 0; x < bmp.getWidth(); x++) {<br />
int pix = bmp.getPixel(x, bmp.getHeight() - y - 1);<br />
// int alpha = ((pix >> 24) & 0xFF);<br />
int red = ((pix >> 16) & 0xFF);<br />
int green = ((pix >> 8) & 0xFF);<br />
int blue = ((pix) & 0xFF);<br />
// Make up alpha for interesting effect<br />
ib.put(red
<strong>3D</strong> <strong>with</strong> <strong>OpenGL</strong><br />
private static void load(GL10 gl, ByteBuffer bb, int width, int height) {<br />
// Get a new texture name<br />
int[] tmp tmp_tex tex = new int[1];<br />
gl.glGenTextures(1, tmp_tex, 0);<br />
int tex = tmp_tex[0];<br />
}<br />
// Load it up<br />
gl.glBindTexture(GL10.GL_TEXTURE_2D, tex);<br />
gl.glTexImage2D(GL10.GL_TEXTURE_2D, 0, GL10.GL_RGBA,<br />
width width, height height, 00, GL10 GL10.GL_RGBA,<br />
GL RGBA<br />
GL10.GL_UNSIGNED_BYTE, bb);<br />
gl.glTexParameterx(GL10.GL_TEXTURE_2D,<br />
GL10 GL10.GL_TEXTURE_MIN_FILTER, GL TEXTURE MIN FILTER GL10.GL_LINEAR);<br />
GL10 GL LINEAR);<br />
gl.glTexParameterx(GL10.GL_TEXTURE_2D,<br />
GL10.GL_TEXTURE_MAG_FILTER, GL10.GL_LINEAR);<br />
<strong>Korea</strong> <strong>Android</strong> Community- www.kandroid.org<br />
75
<strong>3D</strong> <strong>with</strong> <strong>OpenGL</strong><br />
public void draw(GL10 gl) {<br />
gl gl.glTexCoordPointer(2, glTexCoordPointer(2 GL10.GL_FIXED, GL10 GL FIXED 00, mTextureBuffer);<br />
}<br />
private void init(GL10 gl) {<br />
}<br />
gl.glEnableClientState(GL10.GL_TEXTURE_COORD_ARRAY);<br />
gl.glEnable(GL10.GL_TEXTURE_2D);<br />
cube.loadTexture(gl, view.getContext(), R.drawable.android);<br />
<strong>Korea</strong> <strong>Android</strong> Community- www.kandroid.org<br />
76
<strong>3D</strong> <strong>with</strong> <strong>OpenGL</strong><br />
<strong>Korea</strong> <strong>Android</strong> Community- www.kandroid.org<br />
77
<strong>3D</strong> <strong>with</strong> <strong>OpenGL</strong><br />
Peekaboo<br />
boolean SEE_THRU = true;<br />
// ...<br />
if (SEE_THRU) {<br />
gl gl.glDisable(GL10.GL_DEPTH_TEST);<br />
glDisable(GL10 GL DEPTH TEST);<br />
gl.glEnable(GL10.GL_BLEND);<br />
gl.glBlendFunc(GL10.GL_SRC_ALPHA, GL10.GL_ONE);<br />
}<br />
<strong>Korea</strong> <strong>Android</strong> Community- www.kandroid.org<br />
78
<strong>3D</strong> <strong>with</strong> <strong>OpenGL</strong><br />
<strong>Korea</strong> <strong>Android</strong> Community- www.kandroid.org<br />
79
질의및응답<br />
<strong>Korea</strong> <strong>Android</strong> Community- www.kandroid.org<br />
80
<strong>안드로이드</strong> 애플리케이션 교육 자료 – 8<br />
Audio & Video, Location, Dev. Tools<br />
www.kandroid.org 관리자 : 양정수 (yangjeongsoo@gmail.com), 닉네임:들풀
11. Audio and Video<br />
22. Location<br />
33. DDevelopment l TTools l<br />
<strong>Korea</strong> <strong>Android</strong> Community- www.kandroid.org<br />
82
Audio and Video<br />
Overview<br />
The <strong>Android</strong> platform offers built-in encoding/decoding for a variety of common media types, so<br />
that you can easily integrate audio, video, and images into your applications. Accessing the<br />
platform's media capabilities is fairly straightforward ? you do so using the same intents and<br />
activities ti iti mechanism h i th that t th the rest t of f <strong>Android</strong> A d id uses.<br />
<strong>Android</strong> lets you play audio and video from several types of data sources. You can play audio or<br />
video from media files stored in the application's resources (raw resources), from standalone<br />
fil files in i th the fil filesystem, t or from f a data d t stream t arriving i i over a network t k connection. ti To T play l audio di or<br />
video from your application, use the MediaPlayer class.<br />
The platform also lets you record audio, where supported by the mobile device hardware.<br />
Recording of video ideo is not ccurrently rrentl ssupported, pported but b t is planned for a ffuture t re release release. To record aaudio, dio<br />
use the MediaRecorder class. Note that the emulator doesn't have hardware to capture audio,<br />
but actual mobile devices are likely to provide these capabilities that you can access through<br />
MediaRecorder.<br />
For a list of the media formats for which <strong>Android</strong> offers built-in support, see the <strong>Android</strong> Media<br />
Formats appendix.<br />
<strong>Korea</strong> <strong>Android</strong> Community- www.kandroid.org<br />
83
Audio and Video<br />
<strong>Android</strong> Supported Media Formats (Core Media Formats)<br />
TType FFormat E D DDetails il Fil File Type(s) T ( ) SSupported d<br />
Audio AAC LC/LTP<br />
HE-AACv1(AAC+)<br />
X<br />
Mono/Stereo content in any combinatio<br />
X n of standard bit rates up to 160 kbps a<br />
3GPP (.3gp) and MPEG-4<br />
(.mp4, .m4a). No support<br />
HE-AACv2 (enhanced AAC+) X nd sampling rates from 8 to 48kHz for raw AAC (.aac)<br />
AMR-NB X X 4.75 to 12.2 kbps sampled @ 8kHz 3GPP (.3gp)<br />
AMR-WB X<br />
9 rates from 6.60 kbit/s to 23.85 kbit/s s<br />
ampled @ 16kHz<br />
3GPP (.3gp)<br />
MP3 X Mono/Stereo 8-320Kbps constant (CBR MP3 X MP3 ( (.mp3) mp3)<br />
)or variable bit-rate (VBR)<br />
MIDI Type 0 and 1. DLS Version 1 and<br />
2. XMF and Mobile XMF. Support for rin<br />
gtone formats RTTTL/RTX, OTA, and i<br />
Melody<br />
<strong>Korea</strong> <strong>Android</strong> Community- www.kandroid.org<br />
Type 0 and 1 (.mid, .xmf, .<br />
mxmf). Also RTTTL/RTX (<br />
MIDI X<br />
.rtttl, .rtx), OTA (.ota), and<br />
Melody iMelody (.imy)<br />
Ogg Vorbis X Ogg (.ogg)<br />
PCM/WAVE<br />
8- and 16-bit linear PCM (rates up to lim<br />
X<br />
it of hardware)<br />
WAVE (.wav)<br />
Image JPEG X X base+progressive JPEG (.jpg)<br />
GIF X GIF ( (.gif) if)<br />
PNG X PNG (.png)<br />
BMP X BMP (.bmp)<br />
Video H.263 X X 3GPP (.3gp)<br />
HH.264 264 X X<br />
3GPP (.3gp) and MPEG-4<br />
(.mp4)<br />
MPEG4 SP 3GPP (.3gp)<br />
84
Audio and Video<br />
<strong>Android</strong> Supported Media Formats (T-Mobile G1 Media Formats)<br />
Type Format E D Details File Type(s) Supported<br />
Audio WMA X<br />
Audio Supports WMA standard L1-L3:<br />
L1: 64 kbps - 161 kbps @ 44.1kHz<br />
L2:
Audio and Video<br />
Audio and Video Playback<br />
Media can be played from anywhere: from a raw resource, from a file from the system, or from<br />
an available network (URL).<br />
YYou can play l bback k th the audio di ddata t only l tto th the standard t d d output t t ddevice; i currently, tl th that t iis th the mobile bil<br />
device speaker or Bluetooth headset. You cannot play sound files in the conversation audio.<br />
<strong>Korea</strong> <strong>Android</strong> Community- www.kandroid.org<br />
86
Audio and Video<br />
Audio and Video Playback / Playing from a Raw Resource<br />
Perhaps the most common thing to want to do is play back media (notably sound) <strong>with</strong>in your<br />
own applications. Doing this is easy:<br />
11. PPut t the th sound d (or ( other th media di resource) ) fil file iinto t th the res/raw / ffolder ld of f your project, j t where h th the<br />
Eclipse plugin (or aapt) will find it and make it into a resource that can be referenced from<br />
your R class<br />
22. CCreate t an instance i t of f MMediaPlayer, di Pl referencing f i that th t resource using i MMediaPlayer.create, di Pl t and d<br />
then call start() on the instance:<br />
MediaPlayer mp = MediaPlayer.create(context, R.raw.sound_file_1);<br />
mp mp.start(); start()<br />
To stop playback, call stop(). If you wish to later replay the media, then you must reset() and<br />
prepare() the MediaPlayer object before calling start() again. (create() calls prepare() the first<br />
time time.) )<br />
To pause playback, call pause(). Resume playback from where you paused <strong>with</strong> start().<br />
<strong>Korea</strong> <strong>Android</strong> Community- www.kandroid.org<br />
87
Audio and Video<br />
Audio and Video Playback / Playing from a File or Stream<br />
You can play back media files from the filesystem or a web URL:<br />
1. Create an instance of the MediaPlayer using new<br />
22. CCall ll setDataSource() tD t S () <strong>with</strong> ith a St String i containing t i i th the path th (l (local l fil filesystem t or URL) to t the th file fil<br />
you want to play<br />
3. First prepare() then start() on the instance:<br />
MMediaPlayer di Pl mp = new MMediaPlayer(); di Pl ()<br />
mp.setDataSource(PATH_TO_FILE);<br />
mp.prepare();<br />
mp.start();<br />
stop() and pause() work the same as discussed above.<br />
Note: It is possible that mp could be null, so good code should null check after the new. Also,<br />
IllegalArgumentException and IOException either need to be caught or passed on when using<br />
setDataSource(), since the file you are referencing may not exist.<br />
Note: If you're passing a URL to an online media file, the file must be capable of progressive<br />
download download.<br />
<strong>Korea</strong> <strong>Android</strong> Community- www.kandroid.org<br />
88
Audio and Video<br />
Audio Capture<br />
Audio capture from the device is a bit more complicated than audio/video playback, but still fairly<br />
simple:<br />
1. Create a new instance of android.media.MediaRecorder using new<br />
2. Create a new instance of android.content.ContentValues and put in some standard<br />
properties like TITLE, TIMESTAMP, and the all important MIME_TYPE<br />
33. Create a file path for the data to go to (you can use android android.content.ContentResolver content ContentResolver to<br />
create an entry in the Content database and get it to assign a path automatically which you<br />
can then use)<br />
4. Set the audio source using MediaRecorder.setAudioSource(). You will probably want to use<br />
MediaRecorder.AudioSource.MIC<br />
5. Set output file format using MediaRecorder.setOutputFormat()<br />
6. Set the audio encoder using MediaRecorder.setAudioEncoder()<br />
77. Call prepare() on the MediaRecorder instance instance.<br />
8. To start audio capture, call start().<br />
9. To stop audio capture, call stop().<br />
10. When you are done <strong>with</strong> the MediaRecorder instance, call release() on it.<br />
<strong>Korea</strong> <strong>Android</strong> Community- www.kandroid.org<br />
89
Audio and Video<br />
Audio Capture / Example: Audio Capture Setup and Start<br />
recorder = new MediaRecorder();<br />
ContentValues values = new ContentValues(3);<br />
values.put(MediaStore.MediaColumns.TITLE, SOME_NAME_HERE);<br />
values.put(MediaStore.MediaColumns.TIMESTAMP, System.currentTimeMillis());<br />
values.put(MediaStore.MediaColumns.MIME_TYPE, recorder.getMimeContentType());<br />
ContentResolver contentResolver = new ContentResolver();<br />
Uri base = MediaStore.Audio.INTERNAL_CONTENT_URI;<br />
Uri newUri = contentResolver contentResolver.insert(base, insert(base values);<br />
<strong>Korea</strong> <strong>Android</strong> Community- www.kandroid.org<br />
90
Audio and Video<br />
Audio Capture / Example: Audio Capture Setup and Start (cont.)<br />
if (newUri == null) {<br />
// need to handle exception here - we were not able to create a new<br />
// content entry<br />
}<br />
String path = contentResolver.getDataFilePath(newUri);<br />
// could use setPreviewDisplay() to display a preview to suitable View here<br />
recorder.setAudioSource(MediaRecorder.AudioSource.MIC);<br />
recorder.setOutputFormat(MediaRecorder.OutputFormat.THREE_GPP);<br />
recorder.setAudioEncoder(MediaRecorder.AudioEncoder.AMR_NB);<br />
recorder.setOutputFile(path);<br />
recorder.prepare();<br />
recorder.start();<br />
<strong>Korea</strong> <strong>Android</strong> Community- www.kandroid.org<br />
91
Audio and Video<br />
Audio Capture / Stop Recording<br />
recorder.stop();<br />
recorder.release();<br />
<strong>Korea</strong> <strong>Android</strong> Community- www.kandroid.org<br />
92
Audio and Video<br />
Playback<br />
Audio / Video<br />
Record<br />
android android.media.MediaPlayer media MediaPlayer android android.media.MediaRecorder<br />
media MediaRecorder<br />
<strong>Korea</strong> <strong>Android</strong> Community- www.kandroid.org<br />
93
Audio and Video<br />
• Play y Media From:<br />
– Resource Folder<br />
– File System Path<br />
– URL<br />
• Basically<br />
– Create Ceaenew e instance sa ceoof MediaPlayer ed a aye<br />
– Call prepare()<br />
– Call start()<br />
<strong>Korea</strong> <strong>Android</strong> Community- www.kandroid.org<br />
94
Audio and Video<br />
Playback: MediaPlayer Class<br />
• Create Using:<br />
• Get:<br />
� Set:<br />
– URI<br />
– Position<br />
� Audio Stream<br />
– Resource ID<br />
– Duration<br />
�� Output Display<br />
– URI + Surface<br />
– FrameAt<br />
� Looping<br />
� Data Source<br />
• Others: O e s<br />
– Start<br />
�� Wake Mode<br />
–<br />
–<br />
Prepare<br />
Pause<br />
� Listeners:<br />
–<br />
–<br />
Release<br />
Reset<br />
Inherits from<br />
java.lang.Object<br />
�� �<br />
Buffering Update<br />
Completion<br />
– SeekTo<br />
� Error<br />
– Stop � Wh When Prepared P d<br />
<strong>Korea</strong> <strong>Android</strong> Community- www.kandroid.org<br />
95
Audio and Video<br />
Recording: MediaRecorder<br />
• Create new instance of MediaRecorder<br />
• Create new instance of ContentValues<br />
• Create an output file<br />
• Set Preview Display<br />
• Set Video and Audio Source (Camera and Mic)<br />
• Set Properties (File Size, Video Size, Frame Rate)<br />
• Set Audio and Video Encoders<br />
• Call Prepare() and Start()<br />
• CCall ll St Stop() () and d RRelease() l ()<br />
<strong>Korea</strong> <strong>Android</strong> Community- www.kandroid.org<br />
96
Audio and Video<br />
Uses of Media API<br />
• Call:<br />
– Receiving – Start mp3 background service<br />
– Automatically record conversation or 3G videos<br />
• Playing Games:<br />
– Sound mp3’s in background, render video in foreground<br />
– Clicking buttons sound small ticks (mp3’s)<br />
• Conference:<br />
– RRecording di and d Pl Playback b k of f MMobile bil CConference f<br />
– Synchronising Playback via Bluetooth on Projector<br />
• Record Sounds or Movements, Transform into Actions<br />
<strong>Korea</strong> <strong>Android</strong> Community- www.kandroid.org<br />
97
Location<br />
Overview<br />
The <strong>Android</strong> SDK includes two packages that provide <strong>Android</strong>'s primary support for building<br />
location-based services: android.location and com.google.android.maps. Please read on below<br />
for a brief introduction to each package.<br />
<strong>Korea</strong> <strong>Android</strong> Community- www.kandroid.org<br />
98
Location<br />
android.location<br />
This package contains several classes related to location services in the <strong>Android</strong> platform. Most<br />
importantly, it introduces the LocationManager service, which provides an API to determine location and<br />
bearing if the underlying device (if it supports the service). The LocationManager should not be<br />
iinstantiated t ti t d directly; di tl rather, th a handle h dl tto it should h ld bbe retrieved t i d via i<br />
getSystemService(Context.LOCATION_SERVICE).<br />
Once your application has a handle to the LocationManager, your application will be able to do three<br />
thi things:<br />
• Query for the list of all LocationProviders known to the LocationManager for its last known location.<br />
• Register/unregister for periodic updates of current location from a LocationProvider (specified either by<br />
Criteria or name). name)<br />
• Register/unregister for a given Intent to be fired if the device comes <strong>with</strong>in a given proximity (specified<br />
by radius in meters) of a given lat/long.<br />
However However, during initial development development, you may not have access to real data from a real location provider<br />
(Network or GPS). So it may be necessary to spoof some data for your application, <strong>with</strong> some mock<br />
location data.<br />
<strong>Korea</strong> <strong>Android</strong> Community- www.kandroid.org<br />
99
Location<br />
Providing Mock Location Data<br />
When testing your application on the <strong>Android</strong> emulator, there are a couple different ways to send it some<br />
spoof location data: <strong>with</strong> the DDMS tool or the "geo" command.<br />
UUsing i DDMS<br />
With the DDMS tool, you can simulate location data a few different ways:<br />
• MManually ll send d iindividual di id l llongitude/latitude it d /l tit d coordinates di t tto th the ddevice. i<br />
• Use a GPX file describing a route for playback to the device.<br />
• Use a KML file describing individual placemarks for sequenced playback to the device.<br />
For more information on using sing DDMS to spoof location data data, see the Using DDMS gguide. ide<br />
<strong>Korea</strong> <strong>Android</strong> Community- www.kandroid.org<br />
100
Location<br />
Providing Mock Location Data<br />
Using the "geo" command<br />
Launch your application in the <strong>Android</strong> emulator and open a terminal/console in your SDK's /tools<br />
di directory. t NNow<br />
you can use:<br />
• geo fix to send a fixed geo-location.<br />
Thi This command d accepts t a longitude l it d and d latitude l tit d in i decimal d i l ddegrees, and d an optional ti l altitude ltit d iin<br />
meters.<br />
For example:<br />
geo fi fix -121.45356 121 45356 46.51119 46 51119 4392<br />
geo nmea to send an NMEA 0183 sentence.<br />
This command accepts a single NMEA sentence of type '$GPGGA' (fix data) or '$GPRMC' (transit<br />
data).<br />
For example:<br />
geo nmea $GPRMC $GPRMC,081836,A,3751.65,S,14507.36,E,000.0,360.0,130998,011.3,E*62<br />
081836 A 3751 65 S 14507 36 E 000 0 360 0 130998 011 3 E*62<br />
<strong>Korea</strong> <strong>Android</strong> Community- www.kandroid.org<br />
101
Location<br />
com.google.android.maps<br />
This package introduces a number of classes related to rendering, controlling, and overlaying<br />
customized information on your own Google Mapified Activity. The most important of which is the<br />
MapView class, which automagically draws you a basic Google Map when you add a MapView to your<br />
llayout. t Note N t that, th t if you want t to t do d so, then th your Activity A ti it that th t handles h dl the th MMapView Vi must t extend t d<br />
MapActivity.<br />
Also note that you must obtain a MapView API Key from the Google Maps service, before your MapView<br />
can lload d maps ddata. t FFor more iinformation, f ti see Obt Obtaining i i a MMapView Vi API Key. K<br />
Once you've created a MapView, you'll probably want to use getController() to retrieve a MapController,<br />
for controlling and animating the map, and ItemizedOverlay to draw Overlays and other information on<br />
the Map. Map<br />
This is not a standard package in the <strong>Android</strong> library. In order to use it, you must add the following node<br />
to your <strong>Android</strong> Manifest file, as a child of the element:<br />
<br />
<strong>Korea</strong> <strong>Android</strong> Community- www.kandroid.org<br />
102
Sensor<br />
Sensor<br />
The <strong>Android</strong> SDK supports many different types of sensor devices, including:<br />
• SENSOR_ACCELEROMETER - measures acceleration in the X, Y, and Z axis.<br />
• SENSOR_LIGHT - tells you how bright your surrounding area is.<br />
• SENSOR_MAGNETIC_FIELD - returns magnetic attraction in the X, Y,and Z axis.<br />
• SENSOR_ORIENTATION - measures the yaw, pitch, and roll of the device.<br />
• SENSOR_ORIENTATION_RAW - same thing <strong>with</strong>out filtering.<br />
• SENSOR_PROXIMITY - provides the distance between the sensor and some object.<br />
• SENSOR_TEMPERATURE - measures the temperature of the surrounding area.<br />
• SENSOR_TRICORDER - turns your device into a fully functional Star Trek Tricorder.<br />
<strong>Korea</strong> <strong>Android</strong> Community- www.kandroid.org<br />
103
질의및응답<br />
<strong>Korea</strong> <strong>Android</strong> Community- www.kandroid.org<br />
104