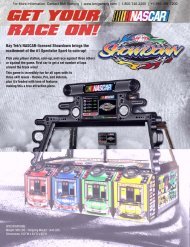
CRANK IT REVOLUTION 4-11-12.pub - BMI Gaming
CRANK IT REVOLUTION 4-11-12.pub - BMI Gaming
CRANK IT REVOLUTION 4-11-12.pub - BMI Gaming
Create successful ePaper yourself
Turn your PDF publications into a flip-book with our unique Google optimized e-Paper software.
To Purchase This Item, Visit <strong>BMI</strong> <strong>Gaming</strong> | www.bmigaming.com | (800) 746-2255 | +1.561.391.7200SPECIFICATIONSWEIGHTWEIGHT800 lbs.POWER REQUIREMENTSSHIP WEIGHT900 lbs.INPUT VOLTAGE RANGE 100 to 120 VAC or 220 to 240 VACDIMENSIONSWIDTH 57.5INPUT FREQUENCY RANGE 50 HZ to 60 HZDEPTH 39”HEIGHT 83”OPERATING TEMPERATURE80 - 100 Degrees Fahrenheit26.7 - 37.8 Degrees CelsiusMAX START UPCURRENT2.5 AMPS @ <strong>11</strong>5 VAC1.25 AMPS @ 230 VACOPERATINGCURRENT2 AMPS @ <strong>11</strong>5 VAC1 AMP @ 230 VACSAFETY PRECAUTIONSDANGERDO NOT perform repairs or maintenance on this game with the power ON. Unplug the unit from the wall outlet or shutoff the power at the power strip located inside the game cabinet.WARNINGUse of flammable substances can cause severe burns or serious injury.Always use NON-FLAMMABLE solvents for cleaning. DO NOT use gasoline, kerosene, or thinners.CAUTIONLifting heavy objects can cause back, neck, or other injuries. Be sure adequate lifting and moving devices are availablewhen unloading, unpacking, and moving this game.ATTENTIONBe sure the electrical power matches the game requirements. See the serial number decal located on the back of thegame cabinet. Always plug game into a grounded circuit. If the supply cord is damaged, it must be replaced by a specialcord or assembly available from the manufacturer or its service agent.IN CASE OF EMERGENCY:Unplug the power cord.The power cord must be accessible at all times in case of emergency.6
To Purchase This Item, Visit <strong>BMI</strong> <strong>Gaming</strong> | www.bmigaming.com | (800) 746-2255 | +1.561.391.7200DIP SW<strong>IT</strong>CH SETTINGSThe dip switch bank is located on the main board,inside the front door of the game.*factory default settings are highlighted in blueSW<strong>IT</strong>CH ON OFF1 Double-value tickets ON Double-value tickets OFF2* Standard arrow position Lower “kiddie” arrow position3 Jersey Shore settings ON Jersey Shore settings OFF4 Brake Test ON Brake Test OFF* See page 25 to change arrow position7
To Purchase This Item, Visit <strong>BMI</strong> <strong>Gaming</strong> | www.bmigaming.com | (800) 746-2255 | +1.561.391.7200DETAILED OPERATIONSMENUS1. Press and hold the “MENU” buttonsinside the front door of the player stationsfor 3 seconds2. Tap the “MENU” button to scrollthrough the menu options3. To choose an option, press the“SELECT” button4. Scroll through the menu settings withthe “SELECT” button5. To make your selection, press the“MENU” button to scroll through theremaining menus past 8 to exitMENUSELECTMENUDESCRIPTION1 CRED<strong>IT</strong>S PER PLAY2 TICKET PATTERNS3 CHANGE JACKPOT VALUE4 GAME VOLUME5 ATTRACT MODE VOLUME6 PRINTER SETTINGS7 WHEEL POS<strong>IT</strong>ION DIAGNOSTICS8 TICKET VALUE DIAGNOSTICS8
To Purchase This Item, Visit <strong>BMI</strong> <strong>Gaming</strong> | www.bmigaming.com | (800) 746-2255 | +1.561.391.7200MENU 1– CRED<strong>IT</strong>S PER PLAYScroll through the n1 menu with the “menu select” button.Make your selection by pressing the “menu button” and scrollingthrough the remaining menus past n8 to exit the menu.*Factory default settings are highlighted in BLUE.1 2 3 4 5 6 7 8MENU 2– TICKET PATTERNSScroll through the n2 menu with the “menu select” button.Make your selection by pressing the “menu button” and scrollingthrough the remaining menus past n8 to exit the menu.*Factory default settings are highlighted in BLUE.These settings should not be changed unless the decals on the game’s wheel arealso changed.We encourage you to try the thoroughly tested standard factory ticket pattern for atleast a month before deciding to change it.Please contact our Service Department to order replacement decals if you do decideto change the ticket pattern on your game.QUICK REFERENCE CHARTTicket pattern:1 2 3 4 5 10 <strong>11</strong> 1213Credits / Priceper play:2 /$.502 /$.502 /$.504 /$1.004 /$1.001Euro30Pence40Pence2/$.50Bonus Value250 250 1000 500 1000 1000 250 250500Jackpot Value 1000 2500 2500 5000 2500 5000 1000 1000 10009
To Purchase This Item, Visit <strong>BMI</strong> <strong>Gaming</strong> | www.bmigaming.com | (800) 746-2255 | +1.561.391.7200MENU 2– TICKET PATTERNS, cont.15-18Avg Tix/ Game17-19Avg Tix/ Game17-20Avg Tix/ Game33-36Avg Tix/ Game33-35Avg Tix/ Game10
To Purchase This Item, Visit <strong>BMI</strong> <strong>Gaming</strong> | www.bmigaming.com | (800) 746-2255 | +1.561.391.7200MENU 2– TICKET PATTERNS, cont.*PATTERNS 7-9 INTENTIONALLY LEFT BLANK60-66Avg Tix/ Game8-12Avg Tix/ Game10-13Avg Tix/ Game<strong>11</strong>-13Avg Tix/ Game<strong>11</strong>
To Purchase This Item, Visit <strong>BMI</strong> <strong>Gaming</strong> | www.bmigaming.com | (800) 746-2255 | +1.561.391.7200MENU 3– SET JACKPOT VALUEScroll through menu 3 with the “menu select” button.Make your selection by pressing the “menu button” and scrollingthrough the remaining menus past n8 to exit the menu.*Factory default settings are highlighted in BLUE.8001000 2500 5000PLEASE CONTACT BAY TEK GAMES SERVICE DEPARTMENT FOR REPLACEMENTBACKL<strong>IT</strong> DECALS IF YOU DECIDE TO CHANGE THEJACKPOT VALUEMENU 4– GAME VOLUMEScroll through menu 4 with the “menu select” button.Make your selection by pressing the “menu button” and scrollingthrough the remaining menus past n8 to exit the menu.*Factory default settings are highlighted in BLUE.0 1 2 3 4 5 6 7(OFF)This control is for the volume of the game while it is being played,or after a coin has been inserted.A sample noise will play an example volume while scrolling throughthe volume levels.MENU 5– ATTRACT VOLUMEScroll through menu 5 with the “menu select” button.Make your selection by pressing the “menu button” and scrollingthrough the remaining menus past n8 to exit the menu.*Factory default settings are highlighted in BLUE.0 1 2 3 4 5 6 7(OFF)This control is for the volume of the gamewhile it is NOT being played.This game plays fun sounds to lure customers to play.A sample noise will play an example volume while scrolling throughthe volume levels.12
To Purchase This Item, Visit <strong>BMI</strong> <strong>Gaming</strong> | www.bmigaming.com | (800) 746-2255 | +1.561.391.7200MENU 6– PRINTER SETTINGS*Scroll through menu 6 with the “menu select” button.Make your selection by pressing the “menu button” and scrollingthrough the remaining menus past n8 to exit the menu.*Factory default settings are highlighted in BLUE.0 PRINTER DISABLED1 PRINTS FOR JACKPOT VALUES ONLY, TICKETS DISPENSE FOR ALL OTHER VALUES2 PRINTS FOR VALUES OF 250 AND ABOVE, TICKETS DISPENSE FOR ALL OTHER VALUES3 PRINTS FOR VALUES OF 100 AND ABOVE, TICKETS DISPENSE FOR ALL OTHER VALUES*Printers for Crank It Revolution are a factory option.If you choose to add printers to your game, call our service department to order a printer kit -Part # AAPR-CIRSee “How to Install Printer” section on pages 35-36.13
To Purchase This Item, Visit <strong>BMI</strong> <strong>Gaming</strong> | www.bmigaming.com | (800) 746-2255 | +1.561.391.7200MENU 7– WHEEL POS<strong>IT</strong>ION DIAGNOSTICSWhile in wheel position diagnostics, turn the wheel down towardsyou to view the position of each space on the wheel.The count should start at 0 on the decal seam, and count up to 24.2348910141516567<strong>11</strong>12131718192021222324 / 0<strong>11</strong>4
To Purchase This Item, Visit <strong>BMI</strong> <strong>Gaming</strong> | www.bmigaming.com | (800) 746-2255 | +1.561.391.7200MENU 8– TICKET VALUE DIAGNOSTICSWhile in ticket value diagnostics, the dot-matrix display should show thesame number as the wheel as you turn it towards you.15
To Purchase This Item, Visit <strong>BMI</strong> <strong>Gaming</strong> | www.bmigaming.com | (800) 746-2255 | +1.561.391.7200CIRCU<strong>IT</strong> BOARD WIRINGAANEWGEN1 - MAIN BOARDAACE8850 Colored Wheel Lights,Counters & Wheel SolenoidAACE8853 LowTicket Jumper toticket trayJ25AACE886612 Volt DCPower In CableJ18J22J8AACE8862 BillAcceptor CableAACE8859Matrix ComCableAACE8850Coin DoorJ6J16Chase 3Chase 2Chase 1AACE8860 Orange AttractCable to MarqueeAACE8860 Silver AttractCable to MarqueeAACE8860 Gold AttractCable to MarqueeAACE8858Cable toSpeakers inMarqueeJ19J24J21AACE8851 FrontIllumination LightsJ9AACE8853 TicketDispenser CableJ5AACE8851 EncoderSensor, Home Sensor &Menu ButtonsAACB8854– MARQUEECONTROLLER BOARDAACB8856– DUAL PRINTERCONTROL BOARD (OPTIONAL)Power to RightSide DisplayAACE89<strong>11</strong>Power to LeftSide DisplayAACE89<strong>11</strong>Display 1 Display 2AACB8854DC Power InAACE8906Chase 4Chase 3Chase 2Top Flashing LightsAACE8919Attract LightsAACE8915Attract LightsAACE8915J1AACE8925 - Comfrom Blue socketon Main BoardJ6Printer 1J2AACE8912 - 12 VoltPower from J24 J7Printer 2AACE8923 - PrinterCom to Right SideAACE8909 - Com toMarquee JackpotAACE8924 - PrinterCom to Left SideCom In Display 1 Display 2Chase 1Attract LightsAACE8915Com fromMain BoardAACE8909Left SideDisplayAACE8908Right SideDisplayAACE891016
To Purchase This Item, Visit <strong>BMI</strong> <strong>Gaming</strong> | www.bmigaming.com | (800) 746-2255 | +1.561.391.7200AACE8912– J24, J19, J18 CONNECTORSAC POWER, DC POWER, SPEAKERS, LIGHTINGLED lightstrip on leftside of leftwheelLED lightstrip onright side ofleft wheelLED lightstrip on leftside of rightwheelLED lightstrip onright side ofright wheelAACE8856 AACE8856 AACE8856 AACE8856MARQUEE– TOP OF GAMELeft SpeakerAACE88<strong>11</strong>Right SpeakerAACE88<strong>11</strong>AC BulbAC Bulb+-+-+-+-AACE8912Power toprinter board(AACB8856)for PrinteroptionAACE8921AACE892<strong>11</strong>2 Volt power toController BoardAACE8918AACE8918To J24 Connectoron Main BoardTo AACE8900Lights onwheelTo J19“Speakers” onMain BoardSpeaker Cable to topof game AACE89054 3 2 <strong>11</strong>2 Volt Powerto top of gameAACE8906To J18“POWER IN”Connector onMain BoardRight Side Power To PrinterAACE8926AACE89134 3 2 14 3 2 14 3 2 1Note: Power Supply has Green andBlack Wire tied together to enablepower on at power up.AC Power toMarqueeAACE8917Left Side Power To PrinterAACE89264 3 2 1Power SupplyAAPS1008Line FilterA5FI9010Left Side Bill AcceptorPower Cable - AACE8916Right Side Bill AcceptorPower Cable - AACE8916Power In CordFrom WallA5CORD5AC Power In cableAACE8922Outlet StripA5OU100017
To Purchase This Item, Visit <strong>BMI</strong> <strong>Gaming</strong> | www.bmigaming.com | (800) 746-2255 | +1.561.391.7200AACE8904/AACE8901– J5, J9, J25 CONNECTORSTICKET DISPENSERS, LOW TICKET SW<strong>IT</strong>CH, WHEEL SOLENOIDLEFT SIDE WHEELRIGHT SIDE WHEELWheel SolenoidAASO4010Wheel SolenoidAASO4010Ticket Tray CableAACE8852To Ticket DispenserPart # A5TD<strong>11</strong>2 Volt PowerEnable SignalCom GroundNotch SignalTicket Tray CableAACE8852To Ticket DispenserPart # A5TD<strong>11</strong>2 Volt PowerEnable SignalCom GroundNotch SignalAACE8901GameGroundAACE8901GameGroundAACE8904FromAACE8902cable toLeftSolenoidLow Ticket SwitchWired Normally OpenA5SW2001/4” Spacer A5SENY020FromAACE8902cable toRightSolenoidAACE8901Low Ticket SwitchWired Normally OpenA5SW2001/4” Spacer A5SENY020To J5 ConnectorTo J9 ConnectorAACE8904AACE8901AACE890418
To Purchase This Item, Visit <strong>BMI</strong> <strong>Gaming</strong> | www.bmigaming.com | (800) 746-2255 | +1.561.391.7200AACE8902/AACE8900– J22 CONNECTORSENSORS, MENU BUTTONS, WHEEL SOLENOIDLEFT SIDE WHEELRIGHT SIDE WHEELFromAACE8916cable - J21on boardHome ReflectorSensorAACB4403FromAACE8912cable - J24on boardFromAACE8916cable - J21on boardHome ReflectorSensorAACB4403AACE8900AACE8902AACE8854AACE8854BlueRedGreenWhiteBlueRedGreenWhiteTo Lights on sidesof wheelsAACE8854To Lights on sidesof wheelsAACE8854BlueRedGreenWhiteAACE8900BlueRedGreenWhiteTo J22 Connectoron Main BoardAACE8902To AACE8904 cableto Left SolenoidTo AACE8901 cableto Right SolenoidAACE8902AACE8902GameCounterTicketCounterTicket and Game CountersAACO100019
To Purchase This Item, Visit <strong>BMI</strong> <strong>Gaming</strong> | www.bmigaming.com | (800) 746-2255 | +1.561.391.7200AACE8916– J21 CONNECTORCOIN MECHS, DBAS, MENU BUTTONS, WHEEL SENSORSLEFT SIDE WHEELRIGHT SIDE WHEELEncoder Sensor inFront ArrowAACB8852Encoder Sensor inFront ArrowAACB8852AACE8903AAPB2700Menu ButtonAACE8916AACE8916AAPB2700Menu SelectButtonTo J21on MainBoardToAACE8900cable toRightSide HomeSensorAACE8916ToAACE8902cable toLeftSide HomeSensorTo Bill Acceptoron Left SideTo Bill Acceptoron Right SideTo J6on MainBoardAACE8916AACE8916AACE8916To J8 onMainBoardAACE8916LEFT DBACABLERIGHT DBACABLEAACBL4A-DOORAACBL4A-DOORLEFT COINDOORRIGHTCOIN DOOR20
To Purchase This Item, Visit <strong>BMI</strong> <strong>Gaming</strong> | www.bmigaming.com | (800) 746-2255 | +1.561.391.7200MARQUEE WIRINGAACB8855AACE8920AACB8855AACE8920AACB8855AACE8919AACE8914Small Circle LightBoard AACB8850Small Circle LightBoard AACB8850AACE8914AACE8914AACE8914AACE8915Speaker Light BoardAACB8853AACE8914Speaker Light BoardAACB8853AACE891912 Volts DCto MarqueeAACE8906AACB8854AACE8915AACE8915AACE8907AACE8915AACE8908AACE8910AACE89<strong>11</strong>Left MatrixDisplay 1AACB8851-1MarqueeFront of GameRight MatrixDisplay 2AACB8851-1AACE8909Main Board in bottom ofgame - A5NEWGEN1AACE8909To J18 onMain Board21
To Purchase This Item, Visit <strong>BMI</strong> <strong>Gaming</strong> | www.bmigaming.com | (800) 746-2255 | +1.561.391.7200AACE8909– J18 CONNECTORPRINTER WIRING OPTIONSAACB8854J18 WIRING–NO PRINTERSTo Marquee in Top of GameAACE8909Cable goes nowhere.Main Board in bottom ofgame - A5NEWGEN1AACE8909To J18 onMain BoardAACB8854J18 WIRING-W<strong>IT</strong>H PRINTERSTo Marquee in Top of GameAACE8909 - Com toMarquee JackpotJ1J6Printer 1AACE8925 - Comfrom Blue socketon Main BoardAACE8909J2AACE8912 - 12 VoltPower from J24 J7Printer 2AACB8856 - Dual PrinterControl BoardAACE8909To J18 onMain BoardMain Board in bottom ofgame - A5NEWGEN122
To Purchase This Item, Visit <strong>BMI</strong> <strong>Gaming</strong> | www.bmigaming.com | (800) 746-2255 | +1.561.391.7200TROUBLE SHOOTING GUIDETroubleshooting StrategyUse common sense and a systematic method of troubleshooting to determine the exact problem, probable cause andremedy. Use the process of elimination to find the faulty component. Always check for the simple and obvious causesfirst such as unplugged, loose or broken wires and bad sensors, bent, pinched, stuck or jammed components.Troubleshooting ChartProblem Probable Cause RemedyNo power to the game.No lights on at all.AC Light and Bill Acceptoron; everything else off.(Power Supply not ON)Dollar Bill Acceptor notfunctioning.Ensure Bill Acceptor is set to“Always Enable”Game not coining up.Unplugged.Circuit breaker tripped.Power strip faulty.Faulty cable/power supply.Power supply unplugged.Rocker Switch turned off.Power supply shutting downbecause of 12 V overload.Faulty power supply.Check for power to BillAcceptor.Dirt or debris in acceptorslot.Pinched, broken, ordisconnected wiring.Bill acceptor problem.Ensure game makes soundwhen coin switch is triggered.Game set to large amount ofcredits per game.Check wall outlet.Reset power strip breaker switch or buildingcircuit breaker.Change plug position, replace if needed.See Power Supply diagnostic below.Ensure unit is pluggedinto power strip.Make sure rocker switch isset to ON.See power supply diagnostics to isolate badcomponent. A bad motor or 12 volt shortwould cause this.See Power Supply Diagnostic below.Acceptor should cycle stacker at gamepower up. If not, check cable connections.Refer to “How to Clean Bill Acceptor”Or clean with bill reader cleaning card.(A5CC9000)Check wiring from bill acceptorto Main Board. (AACE8862)Repair or replace wiring harness.Check J8 connector on Main BoardMake sure wires are secure in connectors.Refer to troubleshooting section of dollar billacceptor manual included with this game orthe diagnostics label on the back of the unit.Check coin switches—both should be wirednormally open. If one switch is “closed” theother will not work either.Check wiring to main board.Cable AACBL4A-DOOR, AACE8850Jackpot display will show credits inserted.Enter N1 mode in menu to set credits pergame.23
To Purchase This Item, Visit <strong>BMI</strong> <strong>Gaming</strong> | www.bmigaming.com | (800) 746-2255 | +1.561.391.7200TROUBLE SHOOTING GUIDEProblem Probable Cause RemedyGame shows“Spin now”and “Hurry up”Encoder sensor dirty orfaulty.Sensor is being interferedwith.Clean sensor and replace if needed.(AACB8852)Remove game from direct sunlight,move game to area away from neonlights or bright fluorescent lights.ScoringIssuesEncoder sensornot seeingwheel spin.Game says you woneven though wheel isstill spinning.Pinched, broken, or disconnectedwiring.Faulty Main BoardBrake Assembly tension set toloose.Inspect wiring and replace cable ifneeded. AACB8852, AACE8851Refer to Encoder Sensor Test below.Refer to“How to Set Brake Tension”Wheel values, arrowpointer and payout areoff slightly.There is an adjustment on thewheel encoder sensor to calibratethe monitor change towhere the arrow is pointing.Refer to“How to adjust wheel sensor”Game is giving wrongtickets values.Enter Diagnostic Menu onMENU 6and watch dot matrix displayas you spin the wheeldownward.*Remove game from directsunlight, move game to areaaway from neon lights orbright fluorescent lights.Display shows“LOW TKTS”Wheel Position does notchange as you spin the wheeldown.Wheel Position does changeas you spin the wheel down.Ticket tray is empty.Disconnected, loose or brokenwires.Faulty low ticket switches.Faulty Main Board.Encoder sensor unplugged, dirty or faulty.Clean and replace if needed. (AACB8852)Inspect wiring, refer to Encoder Sensor Testbelow.If Wheel Position goes to 24, then resets to 0and continues up again.Encoder sensor out of adjustment.Refer to“How to adjust wheel sensor”If Wheel Position increments constantly upwardsup past 100.Home Position sensorunplugged, dirty or faulty.Clean and replace if needed. (AACB4403)Inspect wiring.Cable #’s AACE8854, AACE8850Wrong ticket pattern selected. Enter menu andgo to MENU 2. Verify correct ticket pattern.Refill tray with tickets, check low ticket switch.Check connections and reseat J25 on mainboard. Cable #’s AACE8852, AACE8853Switches wired normally open. Replace switches.A5SW200Replace main board. Part # AANEWGEN124
To Purchase This Item, Visit <strong>BMI</strong> <strong>Gaming</strong> | www.bmigaming.com | (800) 746-2255 | +1.561.391.7200TROUBLE SHOOTING GUIDEProblem Probable Cause RemedyWheel not spinningwhen player moveshandle.Check for 12 Volts DC atcoin up on connector.Solenoid always stayson.Players can continue tospin wheel after “good spin”,allowing them to nudge it tothe bonus space.Players will win a lot!No 12 Volts on connector atcoin up.12 Volts present at connector,but solenoid still doesn’t engage.Jammed Solenoid or SpringsPinched Cable.Check for 12 Volts DC on cableto solenoid when game on, butnot coined up in game play.Inspect cable from Solenoid to main board.(J22) Cable part #’s: AACE8869, AACE8850Replace main board. (AANEWGEN1)Inspect cable as far into wheel as possible.Look for broken or stretched wires.Repair if possible.Wheel will have to be removed to further inspector replace.Refer to “How to Remove Wheel”Inspect solenoid. Ensure it operatessmoothly.Press in on silver bar. It is spring loaded andwill spring back after release.Inspect cable for smashed wire. May alsohave to replace main board.If 12 Volts present, Replace main board.(AANEWGEN1)If no 12 Volts and solenoid is still engaged –Wheel will have to be removed to further inspector replace.Refer to “How to Remove Wheel”26
To Purchase This Item, Visit <strong>BMI</strong> <strong>Gaming</strong> | www.bmigaming.com | (800) 746-2255 | +1.561.391.7200POWER SUPPLY DIAGNOSTICSCheck power cable into back of game.Check AC cord from power strip in game.Verify power strip rocker switch is ON.(Switch cord into different socket in power strip)Check AC connection to power supply.Ensure Power Supply switch is set to <strong>11</strong>5V(Some power supplies may not have this)Ensure Power switch is on.Check if Power Supply Fan is turning:If Fan is turning:Power supply is working. If game still has no 12 Volts DC, then Power Supply is faulty.Replace Power Supply. AAPS1008If Fan is not turning:Turn power OFF. Disconnect all 12 voltoutput wires from power supply only. Turnpower ON.Fan turns.Fan does not turnTurn power OFF. Unplug all outputs from the large PCB. Reconnectthe 12 volt output wires from Power Supply to PCB mainboard. Turn power ON.Replace PowerSupply.(AAPS1008)Fan turns.Fan does not turn.Short in PCB - Replace.Turn power OFF. Reconnectthe outputs at thePCB one at a time. Wait60 seconds betweentests to turn power ON.Fan does not turn.That cable or related component isshorted out or causing an overload. SeeJumper Cable Pin-Outs to see whichcomponent might be at fault.Fan turns.That cable is OK.27
To Purchase This Item, Visit <strong>BMI</strong> <strong>Gaming</strong> | www.bmigaming.com | (800) 746-2255 | +1.561.391.7200BILL ACCEPTOR DIAGNOSTICSNote: There are many different models and brands of Bill Acceptors that are used onredemption games. Your Bill Acceptor may differ from the unit shown.First determine if Bill Acceptor has power:Turn game ON—The bill acceptor should make noise as stacker cycles andgreen lights on outside bezel should flash.If NO power:Due to the different models and brands of Bill Acceptors that are used:Examine Bill Acceptor and determine if acceptor is 12 Volt DC or <strong>11</strong>0 VACUse meter to measure voltage at cable going into Bill Acceptor.If power is OK:Clean Bill Acceptor path to make sure there is nothing jamming unit.Enter DBA Diagnostics Mode -Important—Do not hold button down too long or Bill Acceptor will enterprogramming mode.If accidentally entered programming mode by mistake—Unplug game and plug back in.To enter Diagnostic Mode, press and hold theDiagnostic Button on the back left corner of the DBA for1-3 seconds.The lights above the bill slot will flash the code.ERROR CODESCount the number of flashes on front bezel of Bill Acceptor andfollow chart for repair.FLASHINGCODEDESCRIPTIONCORRECTIVEACTIONLEDs off Power off Turn on powerLEDs onAcceptor is OK1 flash Bill path blockage Un-jam bill path2 flashes Stacker jam Un-jam stacker3 flashes Cassette is full of bills Empty the cassette4 flashes Cassette is removed Replace the cassette5 flashes Acceptor is defective Replace the acceptor6 flashes Acceptor not enabled See service manual10 flashes Configuration Mode Power down to exitRapid flashingduring operationStringing attempt detected;or sensors dirtyClean the sensors28
To Purchase This Item, Visit <strong>BMI</strong> <strong>Gaming</strong> | www.bmigaming.com | (800) 746-2255 | +1.561.391.7200HOW TO: Change Arrow Position1. Slide open the cabinet window2. Remove the nuts and washers from the3 bolts shown and set asideX3. Move the entire arrow assembly downto the second set of boltsX4. Re-secure the lock nuts, adding awasher to the now-empty boltWASHER5. Close the window6. Open the front door of the cabinet toaccess the main board7. Turn dip switch 2 to the correct position(see page 7)29
To Purchase This Item, Visit <strong>BMI</strong> <strong>Gaming</strong> | www.bmigaming.com | (800) 746-2255 | +1.561.391.7200HOW TO: Adjust Wheel SensorWheel sensor is located behind the arrow on wheel.It “reads” the notch in the side of the wheel to tell thegame when the panel has changed.To Test:Enter menu and go to MENU 8.Spin Wheel slowly downward, and watch display’s wheelposition readout.The wheel position value should change as soon as nextpanel crosses arrow point.To Adjust:Turn Phillips head screw to move sensor.Continue spinning wheel slowly downward,and watch display’s wheel positionreadout; adjusting screw until panelchanges at arrow.Part #’s:Pointer Assy. AAPO8800Sensor alone - AACB8852HOW TO: Clean GameUse a mild soap solution and a clean lint free cloth to wipe down game.Do NOT use any cleaning solvents on the game’s graphics!Front Plexi will slide up. (Like a roll top desk)How to:Open front door and unclip2 latches holding windowbracket.Push up on bracket, and roll plexi upwards.Clean inside of plexi with lint free cloth or “swiffer”duster.30
To Purchase This Item, Visit <strong>BMI</strong> <strong>Gaming</strong> | www.bmigaming.com | (800) 746-2255 | +1.561.391.7200HOW TO: Set Brake TensionTo Test:Turn off game and flip dipswitch #4 ON.Turn game on.Dip 4The display will show “TEST BRAKE”Use plunger handle to give the wheel agood spin, Let the wheel coast to a stop likea normal game play.If brake is set correctly, screen will show anumber between 50 - 70.If less than 50: Loosen BrakeIf greater than 70: Tighten BrakeTo Adjust:To loosen brake:Loosen top nut and move 1/4 inch up. Thethreaded rod will drop as top nut moves up.Spin bottom nut up tight to bracket. Tightenboth nuts.To tighten brake:Loosen bottom nut and move 1/4 inchdown. Lift up the threaded rod and spin nutdown tight to bracket.Tighten both nuts.Re-test to verify.Top NutBottom Nut31
To Purchase This Item, Visit <strong>BMI</strong> <strong>Gaming</strong> | www.bmigaming.com | (800) 746-2255 | +1.561.391.7200HOW TO: Change Ticket PatternSlide up front plexi to access wheel by opening front doorand unclipping 2 latches holding window bracket.Push up on bracket, and roll plexi upwards.Press Menu Button and go to MENU 8 Mode.Slowly spin the wheel down while watching display.This number will match the number on the wheel.MENU 8Determine which ticket pattern to purchase:Reference ticket patterns below—Note the approximate tickets per game for each pattern.Purchase cover up decals.*PATTERNS 6-9 INTENTIONALLY LEFT BLANK15-18Avg Tix/Game17-19Avg Tix/Game17-20Avg Tix/Game33-36Avg Tix/Game33-35Avg Tix/GameInstall cover up decals:Press Menu Button and go to MENU 2 Mode.Change number to desired Ticket Pattern as it shows on display.Press Menu Button and go to MENU 6 Mode.Spin wheel downward slowly one complete revolutionThis number will show the new ticket value on the wheel.60-66Avg Tix/Game8-12Avg Tix/Game10-13Avg Tix/GameMENU 8<strong>11</strong>-13Avg Tix/GamePlace new decal carefully over value on wheel.Note: Be careful to not rock wheel backwards over a notch, or the position will be off.If it does rock backward, spin wheel downward one complete revolution to allow wheel to calibrate.Continue applying new decals carefully until wheel is complete.32
To Purchase This Item, Visit <strong>BMI</strong> <strong>Gaming</strong> | www.bmigaming.com | (800) 746-2255 | +1.561.391.7200HOW TO: Remove WheelThe wheel will have to be removed to access engaging solenoid to repair/replace.Step 1:Remove the back door fromthe game using a 644 key.Step 2:Remove the top backfrom the game.There are 4 screws ontop of the game to remove.Inside the game thereare 2 screws on theLEFT and 2 screws onthe RIGHT to remove.(RIGHT side screwsshown below)Step 3:Unplug the 8850-1 and the 8850-3 cables.Remove the 3 cable clamps from the board on theRIGHT side.Step 4:Remove the screws from the upper and lower side boards from theLEFT and RIGHT side of the game.Remove the boards.Step 5:Remove the pin from the linkage below the wheel on the RIGHT side.Separate the linkage after removing the pin.REMOVEStep 6:Remove the upper and lower bolts from the sides of the wheel cradle.33
To Purchase This Item, Visit <strong>BMI</strong> <strong>Gaming</strong> | www.bmigaming.com | (800) 746-2255 | +1.561.391.7200HOW TO: Remove WheelStep 7:Move around to the front of the game and open the front door. Reach inside the game and unlatch both front windowlocks. Raise the window so you can easily access the arrow.LEFT SideRIGHT SideStep 8:Unplug the arrow sensor cable.Remove the 2 nuts from the arrow bracket.Step 9:Remove the arrow assembly from the game. Be carefulnot to damage the sensor when removing the arrow.Step 10:Close the front window.Step <strong>11</strong>:Move around to the back of the game.Begin to slide the wheel assembly straight back.When it gets about half way out, lean it back and lift it out of the game to remove.34
To Purchase This Item, Visit <strong>BMI</strong> <strong>Gaming</strong> | www.bmigaming.com | (800) 746-2255 | +1.561.391.7200HOW TO: Install Printer*Printers for Crank It Revolution are a factory option.Parts included in Kit:2 of A5PRTH003 - PrintersIf you choose to add printers to your game, call our service2 of A5PYTH010 - Rolls of Paperdepartment to order a printer kit -2 of A5HLPR001 - Paper HoldersPart # AAPR-CIR2 of A5PL8902 - Metal Mounting Plates1 of AACB8856 - Printer Controller Board1 of AACE8923 - Cable from Controller Board toRight Side Printer1 of AACE8924 - Cable from Controller Board toLeft Side Printer1 of AACE8925 - Jumper from Blue Socket onMain Board to Controller Board2 of AACE8926 - Power Cable from Power Supply to Printers1.) Remove the printer parts from the box and assemble both printers.Attach the core holder to the arm using the large screw provided.Attach the arm to the printer body using the 3smaller screws. BE SURE TO INSTALL <strong>IT</strong> ONTHE CORRECT SIDE, as shown.Use a zip tie to manage the cable, as shown.Place a side piece onto the core holder.Place the paper roll onto the core and then snapthe final side piece onto the holder.Note: Paper mustfeed under holderand into printer35
To Purchase This Item, Visit <strong>BMI</strong> <strong>Gaming</strong> | www.bmigaming.com | (800) 746-2255 | +1.561.391.7200HOW TO: Install Printer, cont.2.) Install Printers on both doors.Open front doors and remove blanking plate (Part # A5PL8901)Install new printer plate on cabinet. (Part # A5PL8902)Install printers on doors.3.) Install Dual Printer Control Board and wiring.Control Board is mounted above power supply in front of game.Standoff’s are included in kit.Plug both AACE8926 cables into spare power supply cables.AACE8925 - Comfrom Blue socketon Main BoardJ1Printer 1J6AACE8923 - PrinterCom to Right SideAACB8856 - Dual PrinterControl BoardJ2AACE8909 - Com toMarquee JackpotAACE8912 -12 Volt Powerfrom J24Printer 2J7AACE8924 - PrinterCom to Left Side3.) Route Wiring to both Printers. Route both the phone cable and the power cable to bothprinters, making sure that the cables will not get pinchedby doors and mechanisms.Left DoorAACE8924 & AACE8926Right DoorAACE8923 & AACE892636
To Purchase This Item, Visit <strong>BMI</strong> <strong>Gaming</strong> | www.bmigaming.com | (800) 746-2255 | +1.561.391.7200PARTS LISTPART # DESCRIPTION PART # DESCRIPTIONA5BURU075 Rubber BumperA5CB1499 Cash BoxA5CO4400 Handle GripsA5CORD5 Computer CordW5TM4002 Blue T-Molding 13/16"A5FI9010 Inline FilterA5LI0001 120 Volt Fluorescent LightAAGU4401 Wire GuardA5LK2000 Lock, 631A5LK5001 Lock, 6449654K191 SpringA5ME4167 Metal Solenoid LinkA5ME4180 Metal Right Ticket TrayA5ME4414-BLKMetal Handle GuideAAME4415 Metal T-HandleA5ME4417 Metal Pivot LinkA5ME4420 Metal Pivot Link BracketA5ME4422 Metal Wheel Mounting BracketA5ME4429 Metal Solenoid BracketA5ME4430 Metal Slip Clutch BracketA5ME8800 Metal Wheel ShaftA5ME8802 Metal Curved Glass RailA5ME8806 Metal Sliding Window HandleA5ME8807 Metal Sliding Window BracketA5ME8812 Metal Handle RodA5ME8814 Metal Side GuardA5ME8816 Metal Rocker ArmA5PL9097 Plate Replaces Bill AcceptorA5SW200 SwitchA5TT4102 Ticket TrayA5TT4103 Left Long Ticket TrayA5TU4400 Clear TubingAACP8901 Metal Control Panel With DecalAADO8905 Cash Box Door With DecalAADO8906 Left Ticket Door With DecalAADO8907 Right Ticket Door With DecalAADO8908 Left Coin Mech Door With DecalAADO8909 Right Coin Mech Door With DecalAAPO8800 Pointer Assy.A5DE8801-1 Pointer DecalA5DE8802-1 Right Side Wheel DecalA5DE8803-1 Left Side Wheel DecalA5DE8804-1 Right Side Top DecalA5DE8805-1 Left Side Top DecalA5DE8806-1 Right Side Middle DecalA5DE8807-1 Left Side Middle DecalA5DE8814-1 Right Side Marquee DecalA5DE8815-1 Left Side Marquee DecalA5DE8817-1 Small Marquee Gear DecalA5DE8818 Large Left Marquee Gear DecalA5DE8819 Large Right Marquee Gear DecalA5DE8900 Left Marquee Gear DecalA5DE8902 Wheel Seam DecalA5DE8903 Control Panel DecalA5DE8904 Main Front Cabinet DecalA5DE8905 Coin Door DecalA5DE8906 Left Ticket Door DecalA5DE8907 Right Ticket Door DecalA5DE8908 Left Coin Mech Door DecalA5DE8909 Right Coin Mech Door DecalA5DE8910 Bottom Right Side Cabinet DecalA5DE89<strong>11</strong> Bottom Left Side Cabinet DecalA5DE8912 Jackpot Marquee DecalA5DE8913-2500 Jackpot Value Marquee DecalA5DE8914 Backlit Logo DecalA5DE8915 Option Menu DecalA5DE8919 Right Marquee Gear DecalA5DE8901 Default Big Wheel DecalAADE8923 Ticket Cover Up Pattern #1AADE8924 Ticket Cover Up Pattern #3AADE8921 Ticket Cover Up Pattern #4AADE8925 Ticket Cover Up Pattern #5AADE8922 Ticket Cover Up Pattern #10AADE8926 Ticket Cover Up Pattern #<strong>11</strong>AADE8927 Ticket Cover Up Pattern #12AADE8928 Ticket Cover Up Pattern #1337
To Purchase This Item, Visit <strong>BMI</strong> <strong>Gaming</strong> | www.bmigaming.com | (800) 746-2255 | +1.561.391.7200PARTS LISTPART #DESCRIPTIONAACB4403 Reflective SensorAACB8850 Circle LightAACB8851-1 Display BoardAACB8852 Encoder SensorAACB8853 Speaker Light BoardAACB8854 Marquee Controller BoardAACB8855 Chaselight Board (3 Per)AANEW-GEN1Mini Gen 1 (main board)PART #AAPB2700AACBL4A-DOORAACE1710AACE1715AACE88<strong>11</strong>AACE8852AACE8853AACE8856AACE8861AACE8865AACE8900AACE8901AACE8902AACE8903AACE8904AACE8905AACE8906AACE8907AACE8908AACE8909AACE8910AACE89<strong>11</strong>AACE8912AACE8913AACE8914AACE8915AACE8916AACE8917AACE8918AACE8919AACE8921AACE8922AACO1000A5TD1AABK8800AASO8800AAPS1008DESCRIPTIONPush Button with CableCoin Door CableDoor Ground CableGround Strap CableSpeaker with CableTicket Tray CableMini Gen 1 to Ticket Jumper CableWheel Lights CablesGround to Front Door CableCoin Door Ground CableRight Wheel CableLeft Ticket Dispenser CableLeft Wheel CableLight Jumper CableTicket Tray CableVolume CableAux Board Power Cable12 Volt Power CableDisplay Jumper CableMain Board to Aux Board CableDisplay Jumper CableBonus Light CableLED Light CableCounter CableGear Driver CableMarquee Controller BoardCoin Door CableMarquee Light CableCeramic Light CableChaselight to Aux Board CableSpeaker CableLine Filter Jumper CableCounter AssemblyTicket DispensorBrake Assy.Solenoid Assembly With CablePower Supply38
To Purchase This Item, Visit <strong>BMI</strong> <strong>Gaming</strong> | www.bmigaming.com | (800) 746-2255 | +1.561.391.7200PARTS PICTURESAACB8852 AACB4403 AACB8851-1 AACB8853 AACB8850AACB8854 A5TD1 A5NEWGEN1 AAPS1008 AACB8855A5ME8806 A5ME8807 A5ME8802 A5ME8800 A5TU4400A5ME8816 A5ME8814 A5PL9097 A5ME8812 AACP8901AADO8906 AADO8908 AADO8909 AADO8907 AADO8905A5CO4400 A5CB1499 A5BURU075 AACO1000 AASO4010A5LK2000 A5LK5001 A5FI9010 A5SW200 A5CORD539
To Purchase This Item, Visit <strong>BMI</strong> <strong>Gaming</strong> | www.bmigaming.com | (800) 746-2255 | +1.561.391.7200PARTS PICTURESAACBL4A-DOOR AACE1715 AACE88<strong>11</strong> AACE8852 AACE8854AACE8856 AACE8861 AACE8868 A5OU1000 AACE8926AACE8905 AACE8906 AACE8907 AACE8908 AACE8909AACE8900 AACE8901 ` AACE8902 AACE8903 AACE8904AACE8910 AACE89<strong>11</strong> AACE8912 AACE8913 AACE8914AACE8915 AACE8916 AACE8917 AACE8918 AACE8919AACE8920 AACE8921 AACE8922 AAPB270040
To Purchase This Item, Visit <strong>BMI</strong> <strong>Gaming</strong> | www.bmigaming.com | (800) 746-2255 | +1.561.391.7200DECAL PLACEMENT41
To Purchase This Item, Visit <strong>BMI</strong> <strong>Gaming</strong> | www.bmigaming.com | (800) 746-2255 | +1.561.391.7200MAINBOARD PINOUTSPI Out - Display - (J10) Chase Lights (J<strong>11</strong>,J12,J13,J14)Ground Pin 1 & Pin 3 - +12V Pin 1 - Chase Output+12V Pin 2 - SCLK_BUS2 Pin 2 - Chase OutputLow Side Driver Pin 4 - SMOSI_BUS2 Pin 3 - +12VHigh Side Driver Pin 5 & Pin 7 - Ground Pin 4 - Chase Output+3.3V TTL Logic Pin 6 - SCS2_BUS2 Pin 5 - Chase Output+3.3V Pin 8 - SMISO_BUS2 Pin 6 - +12V42
To Purchase This Item, Visit <strong>BMI</strong> <strong>Gaming</strong> | www.bmigaming.com | (800) 746-2255 | +1.561.391.7200MAINBOARD PINOUT GUIDEBayTek Crank It Revolution! NEWGEN1 Hardware REV D Pinout - Version 1Pin Type Purpose Ref Pin # =Low Side DriverLOWSIDE #1,w diode Solenoid Game #1 J22 1 =High Side DriverLOWSIDE #2, w diode Solenoid Game #2 J22 2 = TTL Input/OutputLOWSIDE #3 RED RGB Game #1 J22 3 = LED Constant Current DriveLOWSIDE #4 BLUE RGB Game #1 J22 4 = 12 VoltsLOWSIDE #5 GREEN RGB Game #1 J22 5 = GroundLOWSIDE #6 RED RGB Game #2 J22 6LOWSIDE #7 BLUE RGB Game #2 J22 7 Pin Type Purpose Ref Pin #LOWSIDE #8 Mechanical Counter (games) J22 8 Ground J24 1LOWSIDE #9 Mechanical Counter (tickets) J22 9 Ground J24 2+12 Volts J22 <strong>11</strong> +12 Volts J24 3+12 Volts J22 12 +12 Volts J24 4+12 Volts J22 13 PB7 J24 5+12 Volts J22 14 LOWSIDE #12 GREEN RGB Game #2 J24 6+12 Volts J22 15 PX29 J24 7+12 Volts J22 16 HIGHSIDE #10 Ambient White Lights Game #1 J24 8+12 Volts J22 17 HIGHSIDE #<strong>11</strong> Ambient White Lights Game #2 J24 9+12 Volts J22 18 3.3V J24 10+12 Volts J22 19+12 Volts J22 20 PX37 Ticket Notch Game #1 J5 1Ground Ground for Ticket Dispensor J5 2HIGHSIDE #13 J25 1 PB18 Ticket Motor Game #1 J5 3HIGHSIDE #14 J25 2 +12 Volts Power for Ticket Dispensor J5 4PX10 Low Ticket Input GAME #1 J25 3PX<strong>11</strong> Low Ticket Input GAME #2 J25 4 PB16 Ticket Notch Game #2 J9 1Ground J25 5 Ground Ground for Ticket Dispensor J9 2Ground J25 6 PB17 Ticket Motor Game #2 J9 3+12 Volts Coin Door Power J6 1+12 Volts Power for Ticket Dispensor J9 4PA05 Coin Input GAME #1 J6 2 PA06 Coin Input GAME #2 J8 1Ground Coin Ground J6 3 +12 Volts J8 2Ground J8 3Ground J8 443
To Purchase This Item, Visit <strong>BMI</strong> <strong>Gaming</strong> | www.bmigaming.com | (800) 746-2255 | +1.561.391.7200MAINBOARD PINOUT GUIDEPB19 Service Button #1 J21 1 Driver 1 J12 1PX39 J21 2 Driver 2 J12 2PX00 Service Button #2 J21 3 +12 Volts J12 3PX01 Wheel Sensor Encoder #2 GAME #2 J21 4 Driver 3 J12 4PB20 Wheel Sensor Encoder #1 GAME #2 J21 5 Driver 4 J12 5PX02 Wheel Sensor HOME Input GAME #2 J21 6 +12 Volts J12 6PB21 Wheel Sensor Encoder #2 GAME #1 J21 7PB22 Wheel Sensor Encoder #1 GAME #1 J21 8 Driver 5 J<strong>11</strong> 1PB23 Wheel Sensor HOME Input GAME #1 J21 9 Driver 6 J<strong>11</strong> 2PB24 J21 10 +12 Volts J<strong>11</strong> 3Ground J21 <strong>11</strong> Driver 7 J<strong>11</strong> 4Ground J21 12 Driver 8 J<strong>11</strong> 5Ground J21 13 +12 Volts J<strong>11</strong> 6Ground J21 14+12 Volts J21 15 Driver 9 J13 1+12 Volts J21 16 Driver 10 J13 2+12 Volts J21 17 +12 Volts J13 3+12 Volts J21 18 Driver <strong>11</strong> J13 4PB25 DBA Input Game #1 J21 19 Driver 12 J13 5PB26 DBA Input Game #2 J21 20 +12 Volts J13 6Driver 13 J14 1Driver 14 J14 2+12 Volts J14 3Driver 15 J14 4Driver 16 J14 5+12 Volts J14 644
To Purchase This Item, Visit <strong>BMI</strong> <strong>Gaming</strong> | www.bmigaming.com | (800) 746-2255 | +1.561.391.7200MAINTENANCE LOGIf you need to make repairs or order replacement parts, it is a good idea to keep a log.Below is a chart you can use to track repairs and maintenance.DATE MAINTENANCE PERFORMED PARTS ORDERED IN<strong>IT</strong>IALS45
To Purchase This Item, Visit <strong>BMI</strong> <strong>Gaming</strong> | www.bmigaming.com | (800) 746-2255 | +1.561.391.7200TECHNICAL SUPPORTExcellent customer service is very important to Bay Tek Games! We know that keeping your gamesin great operating condition is important to your business. When you need us, we are here to help.You can call us for free technical assistance, and you can count on us to have parts on-hand tosupport your game. When you do need us, it’s important that you know what to expect. We offeroptions that fit your needs.Electronics / Circuit Boards - Repair OptionsRepair & Return – If you have Circuit Board issues with your Bay Tek game, you can send theboard to us and we’ll repair it right away. Most items sent to us are repaired and returned to youwithin two days. This option is your best value as we offer this fast turn-around service at the mostreasonable price.Advance Replacement – If you have Circuit Board issues with your Bay Tek game, but you don’thave time to send in your board in for repair, give us a call and ask for an Advance Replacement.We’ll send you a replacement board that same day (pending availability). When you get your newboard, just repackage the defective board in the same box and send it back to us. We make it easyby including a UPS Return Shipping label for you to put on the box (not available for internationalshipments). This is your best option when you need to get you game up and running as quickly aspossible!Spare Parts – Take matters into your own hands and purchase new spare Circuit Boards for yourBay Tek games. Many of our games share the same main-board electronics. This means you canbuy one set of spare electronics to support many of your Bay Tek games. Spare boards allow youto get your game up and running the quickest and provide you a valuable troubleshooting option.Call our technicians to get recommendations for what you should keep on hand for spare parts!Technical Support:“You” are the best tool for troubleshooting! Your abilities to understand the game and your skills torepair the game are invaluable to us! If you need help, you know you can call us. It’s not easy todiagnose a game remotely by phone, but our technicians do a great job. They’ll need your help toperform some troubleshooting steps and convey to them exactly what’s happening with your game.Returns, Credits, & Fees:NOTICE! ALL <strong>IT</strong>EMS being sent to Bay Tek Games for repair or return, etc. require prior ReturnAuthorization! Bay Tek Games will provide a Product Return Form with an authorizing Ticket Numberfor each item to be returned. Please be certain to include this document with all shipments!Late Fees and Non-Return Fees - Advance Replacement and Warranty Replacement items requirethe defective items to be returned by Bay Tek games promptly to avoid Late Fees. We would expectitems to be returned with 10 working days. Late fees are invoiced monthly. Late fees are nonrefundableunder any circumstance! Any item not returned within 90 days will be invoiced in full as areplacement part!Bench Fees - Bench fees will apply for each electronic item returned to Bay Tek Games (this includesunused Advance Replacement items). This charge covers our cost to inspect, evaluate andretest each item. Please note that returned items that do not pas our tests will be charged accordinglyas replacement items or advance replacements.Restocking Fees - Unused items returned for credit will be credited minus a restocking fee. Itemsmust be returned with in 30 days of purchase in order to qualify for any credit amount. No shippingcharges will be credited.46
To Purchase This Item, Visit <strong>BMI</strong> <strong>Gaming</strong> | www.bmigaming.com | (800) 746-2255 | +1.561.391.7200WARRANTYBay Tek Games warrants to the original purchaser that all game components will befree of defects in workmanship and materials for a period of 6 months from the dateof purchase. If you fill out the registration card in the cashbox of the game, Bay Tekwill add another 3 months to your warranty, free of charge.Bay Tek Games will, without charge, repair or replace defective component partsupon notification to the parts/service department while the game is under warranty.Warranty replacement parts will be shipped immediately, via ground service, alongwith a Product Return Form for the return of defective parts.Defective parts must be shipped back to Bay Tek Games unless otherwiseinstructed. Items not returned to Bay Tek Games will be invoiced as replacementparts.This warranty does not apply in the event of any misuse or abuse to the product, oras a result of any unauthorized repairs or alterations. The warranty does notapply if any serial number decal is altered, defaced, or removed from its originalposition.ATTENTIONIn order to maintain the safety & other compliance certifications ofthe game, ONLY approved parts may be used. For approved parts,refer to the parts list in this manual.Should you need your game serviced, determine the serial number from the decalplaced on the front of this manual, or locate it on the back of the game. Thencontact our Service Department at: 920.822.3951 ore-mail: service@baytekgames.comNON-WARRANTYOptions and estimated charges will be provided to you for your approval.Please remember that any items being sent to Bay Tek Games must include priorreturn authorization from our Parts & Service Department. This approval will includea Product Return Form which is required to be included with any incomingshipments. Repaired parts will be shipped back using the same method in whichthey were received. Repairs are warranted for 30 days from the date of returnshipment.47
To Purchase This Item, Visit <strong>BMI</strong> <strong>Gaming</strong> | www.bmigaming.com | (800) 746-2255 | +1.561.391.720048
To Purchase This Item, Visit <strong>BMI</strong> <strong>Gaming</strong> | www.bmigaming.com | (800) 746-2255 | +1.561.391.720049


