Operating Instructions JL-G/L Gold balances - Mettler Toledo
Operating Instructions JL-G/L Gold balances - Mettler Toledo
Operating Instructions JL-G/L Gold balances - Mettler Toledo
Create successful ePaper yourself
Turn your PDF publications into a flip-book with our unique Google optimized e-Paper software.
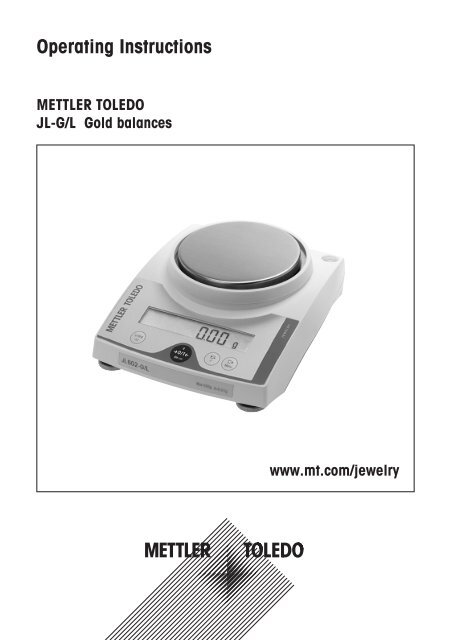
<strong>Operating</strong> <strong>Instructions</strong>METTLER TOLEDO<strong>JL</strong>-G/L <strong>Gold</strong> <strong>balances</strong>www.mt.com/jewelry
<strong>Operating</strong> instructions in a nutshellPress key briefly▼Press and hold key down until the desired display appearsautomatic sequence* These functions must be activatedin the menu (section 4.3.2)Switching onOnPiece counting*Free factor / selectabledisplay increment*8888888817.89 g▼0.00 g#0.00 gF#F FAC ŸÖSwitching off12.07 g#1.0000OffOFF▼FSEt 10 PCS1/10d#0.9999…Simple weighing“SEt 20 PCS1/10d#0.95000.00 g• 1182.03 g1250.00 g±20 PCS±##StEPá▼0.01Adjusting (calibration)244 PCS“#0.02CalCAL▼Cal500.00“147.25 g“#…0.05Cal------▼Cal0.00Percent weighing*±#17.00Cal------▼CalCAL donE▼F0.00 g12.07 g%SEt100Taring0.00 g121.01 g0.00 g#0.00 gUnit switching*±22.00 g0.78 oz±%100.00%101.6095.97 g-121.01 g
ContentsContents1 Getting to know <strong>JL</strong>-G/L <strong>Gold</strong> <strong>balances</strong> .........41.1 General ............................................................... 41.2 Layout of <strong>balances</strong>................................................ 41.3 Overview of key functions...................................... 52 Startup.......................................................62.1 Unpacking / standard equipment............................ 62.2 Cautionary notes .................................................. 62.3 Setting up, leveling, preparations for weighing belowthe balance.......................................................... 62.4 Adjusting (calibration)........................................... 83 Weighing...................................................93.1 On/Off switching................................................... 93.2 Simple weighing................................................... 93.3 Faster weighing with reduced readability.................. 93.4 Taring.................................................................. 94 Menu.......................................................104.1 Overview............................................................ 104.2 Menu operation.................................................. 114.3 Description of menu options................................. 115 Functions.................................................155.1 Piece counting.................................................... 155.2 Percent weighing................................................ 165.3 Switching weight units......................................... 165.4 Weighing with free factor and/or selectabledisplay increments.............................................. 176 Technical data, options,optional equipment...................................186.1 Technical data.................................................... 186.2 RS232C interface................................................ 196.3 MT-SICS Interface commands and functions........... 196.4 Optional equipment............................................. 216.5 Dimensional drawing (in mm)............................. 227 Appendix..................................................237.1 Typical printouts from METTLER TOLEDORS-P26 and LC-P45 printers................................ 237.2 What if ...?......................................................... 247.3 Maintenance and cleaning................................... 257.4 Declaration of conformity..................................... 26
Getting to know <strong>JL</strong>-G/L <strong>Gold</strong> <strong>balances</strong>1 Getting to know <strong>JL</strong>-G/L <strong>Gold</strong> <strong>balances</strong>1.1 GeneralBalance features• Readability 0.01g, max. load 610 g.• In addition to basic operations such as weighing, taring and adjusting (calibration)miscellaneous functions such as “Piece counting weighing”, “Percentweighing” or “Free factor” can be activated.1.2 Layout of <strong>balances</strong>53211641104769 12856111 Keys2 Display3 Model plate with the following data:“Max”: maximum capacity“d”: readability“Min”: minimum capacity (recommended minimum load, only relevant forcertified <strong>balances</strong>)“e”: verification scale interval (smallest display increment tested duringcertification, only relevant for certified <strong>balances</strong>)4 Weighing pan5 Draft shield element6 Leveling feet7 Hanger opening for weighing below the balance (underside of balance)8 AC adapter socket9 RS232C interface (optional)10 Lug for optional antitheft device11 Leveling control12 Compartment for batteries
1.3 Overview of key functionsKey functions in weighing modeGetting to know <strong>JL</strong>-G/L <strong>Gold</strong> <strong>balances</strong>The <strong>balances</strong> have two operator control levels: the weighing mode and the menu. The function of each individual key dependson the operator control level and how long the key is pressed.Weighing mode0.00 g▼Press brieflyPress and hold down1/10d • Reduce readability Cal • Adjust (calibrate)On • Switch on Off • Switch off# • Zero/tareC • Cancel function“ • Switch F • Call function;• Change settingsA function must beactivated in the menu,otherwise “F nonE”appears in the display± • Transfer weighing data via Menu • Show menu (hold keyinterface with activateddown until MENUprinterappears)• Confirm settingsKey functions in menu modeMenuPress brieflyPress and hold down1/10d • Change settings 1/10d • Reduce value• Reduce value by 1 steprapidlyŸÖENVC • Close menu (without –saving changes)“ • Change settings “ • Increase value rapidly• Increase value by 1 step± • Select next menu item Menu • Save changes and closemenu
Startup2 Startup2.1 Unpacking / standard equipment1)The standard equipment for every balance comprises:• AC adapter, to national standard• Weighing pan, Weighing pan support, draft shield element• <strong>Operating</strong> <strong>Instructions</strong>• Protective cover (placed on the balance over the weighing cell cone) with instructionsheet. This protective cover must not mislaid. It will be needed againlater to protect the cone when changing batteries (underside of balance).1) In-use covers are available as optional extras (Section 6.4).2.2 Cautionary notes• <strong>JL</strong>-G/L <strong>balances</strong> must not be operated in hazardous areas with the standardsupplyAC adapter.• Before connecting the AC adapter, verify that the voltage printed on it correspondsto the local AC power supply voltage. If this is not the case, please contact yourlocal METTLER TOLEDO dealer.• <strong>JL</strong>-G/L <strong>balances</strong> may only be used indoors in a dry environment.• For use with CSA Certified (or equivalent approved) power source, which musthave a limited and SELV circuit output.2.3 Setting up, leveling, preparations for weighing below the balanceThe optimum locationThe correct location makes an important contribution to the accuracy of the weighingresults of high-resolution analytical and precision <strong>balances</strong>.• Stable, vibration-free position as horizontal as possible• No direct sunlight• No excessive temperature fluctuations• No draftsThe best location is on a stable bench in a corner protected against drafts, as faraway as possible from doors, windows, radiators or the louvers of air conditioners.LevelingSome models are equipped with a level glass and two or four leveling feet to compensatefor minor irregularities in the surface on which the balance stands. The balanceis exactly horizontal when the air bubble is in the middle of the level glass.Note: The balance should be leveled each time it is moved to a new location.Preparations for weighing below the balanceTo carry out weighing operations below the balance, get rid of the special cover onthe underside of the balance. (Note: never put the balance without the protectivecover over its cone down on its head, only on its side!). This exposes the openingfor the hanger, making weighing below the balance possible.
StartupAntitheft deviceAll models are provided with a lug for attaching an antitheft device (see optionalequipment in Section 6.4).Power supply➞ Plug the AC adapter into the AC adapter socket on the balance, and connect tothe power supply.➞ The balance performs a self-test. This test is finished when “OFF” appears.➞ Press the «On» key briefly: the balance is in operational readiness. Before anywork is performed with the balance, it must be adjusted (Section 2.4).Battery operationModels in the PL-L line of <strong>balances</strong> can also be operated independently of the ACpower supply by using their batteries. To do this, always fit the protective coverover the weighing cell cone first, then open the cover of the battery compartmenton the underside of the balance and insert the batteries.Caution: ensure correct polarity (as specified inside the battery compartment).Close battery compartment again.When the balance is operating on its batteries, the border around the battery symbolin the display lights up. The number of segments that are lit is an indicator of batterycondition (3 = fully charged, 0 = discharged). When the batteries are almostcompletely discharged, the last segment flashes.Recommended battery type: AA (LR6) 1.5 V alkali-manganese.NiMH (nickel-metal hydride) rechargeable batteries, which are recharged in anexternal battery charger, can be also be used. The intervals between recharging arenot as long as the service life of a nonrechargeable battery.Notes• Batteries are not included in the standard supply.• Battery operation is automatically overridden when the AC adapter is connectedto the AC power supply.• To prolong battery (disposable or rechargeable) life, it is advisable to activate«Auto shut» in the menu (see Section 4.3.7).• All discharged batteries must be disposed of in an environmentally responsiblemanner. No attempt must be made to incinerate or disassemble them.
Startup2.4 Adjusting (calibration)To obtain accurate weighing results, the balance must be adjusted to match thegravitational acceleration at its location.Adjusting is necessary• before the balance is used for the first time• at regular intervals during weighing service• after a change of locationTo obtain accurate results, the balance must be left switched on for 30 minutes toreach operating temperature before starting the adjustment procedure.CalCAL▼Cal500.00Cal------▼Cal0.00Cal------▼CalCAL donE▼0.00 gAdjusting with external weight➞ Have required adjusting weight ready.➞ Unload weighing pan.➞ Press and hold the «Cal» key down until “CAL” appears in the display. Releasekey.The required adjustment weight value flashes in the display.➞ Place adjustment weight in centre of pan. The balance adjusts itself auto-matically.➞ When “0.00 g” flashes, remove adjustment weight.The adjusting is finished when the message “CAL done” appears briefly in thedisplay, followed by “0.00 g”. The balance is again in weighing mode and readyfor operation.Notes• Certified models cannot be adjusted by the user, because of weights andmeasures legislation.• This adjustment procedure can be terminated at any time with the «C» (“Cancel”)key. The balance reverts to weighing mode.
Weighing3 Weighing3.1 On/Off switchingOn88888888▼Switching on➞ Remove any load from weighing pan and press «On» key briefly.The balance performs a display test (all segments in the display light upbriefly).When zero is displayed, the balance is ready for operation.0.00 gOffOFF▼Switching off➞ Press and hold the «Off» key down until “OFF” appears in the display. Releasethe key.3.2 Simple weighing➞ Place weighing sample on the weighing pan.0.00 g• 1182.03 g1250.00 g➞ Wait until the stability detector “•” disappears.➞ Read the result.3.3 Faster weighing with reduced readabilityThe balance has the facility for speeding up the weighing operation by reducing its readablity (number of decimal places):1/10d1.24 g1.2 g➞ The balance is operating with its normal readability and speed.➞ Press the «1/10d» key and …➞ … the balance operates with reduced readability (one decimal place less), butdisplays the weighing result quicker. Pressing the «1/10d» key briefly againtoggles the balance back to its full readability.3.4 Taring#0.00 g121.01 g0.00 g➞ Place empty container on the balance.➞ The weight is displayed.➞ Press the «#» key briefly.95.97 g➞ Add weighing sample to container. The net weight is now displayed.-121.01 gIf the container is removed from the balance, the tare weight will be shown as anegative value.The tare weight remains stored until the «#» key is pressed again or thebalance is switched off.
ESEtF nonEStdUnit 1gUnit 2gA.ZEro A.Off 10'#PCSLiST F FAC d F countF FAC ÑÖ#F100%robustdoskgb tb t kgUnit 1 Unit 1 Unit 2 Unit 2t oUnit 1Unit 1 mgt oUnit 2Unit 2 mgno A.ZEro A.Off 5' A.Off -A.Off 2'A.Off 30”clUnit 1Unit 1 ctUnit 2Unit 2 ctt tllbUnit 1 Unit 1mUnit 2lbUnit 2S tlUnit 1ozUnit 1moUnit 2ozUnit 2H tlUnit 1 Unit 1 oztdwtUnit 2 Unit 2 oztmUnit 1Unit GN1 Unit GN2moUnit 1dwtUnit 1HS OFF 7b-E bd 2400PrintErHS HArdHS SoFt7b-odd8b-no7b-nobd 1200bd 600bd 19200bd 4800bd 9600S. SICSS. ALLS. AutoS. StbS. ContHoStZDISPLAYS. PÑÖtiMenu104 Menu4.1 OverviewIn the menu you can change the weighing unit, select additional functions and carry out various settings. A description of theindividual menu options is given in Section 4.3.Overview of menu1 Reset 2 Function3 Weighingmode4 Weighing5 Weighingunit 1 1) unit 2 2)6 Autozero 1) 7 Auto shut off13 Handshake5) 6)12 Bit/Parity5) 6)11 Baud rate5) 6)8 Peripheralunit 6)9 Send3) 6)modeS. oFF10 Sendformat 4) 6)Notes1)With certified <strong>balances</strong>, this menu option has a fixed setting and cannot be changed.2)With certified <strong>balances</strong>, only those weighing units allowed by the appropriate nationalweights and measures legislation may be selected.3)This menu option is only shown if “Host” has been selected in menu option 8 (Peripheral unit).4)This menu option is only shown if “S.oFF” has not been selected in menu option 9 (Send mode).5)These menu options are only shown if “Host” or “Printer” has been selected in menu option 8 (Peripheral unit).6)Only displayed if an interface has been installed.Menu optionFactory setting
Menu114.2 Menu operationMenu0.01 gŸÖENU▼Opening the menuIn weighing mode, press and hold down the «Menu» key until “Menu” appears inthe display. Release the key: the 1st menu option is displayed.rESEt±rESEt*F rEcALLSelect menu optionsThe «±» key is used to select individual menu options with their current settingsone after the other.“* F rEcALL%F 100Change settingsPressing the «“» key displays the next setting; pressing the «1/10d» key displaysthe previous one. Once the desired setting appears in the display, the next menuoption can be selected («±») or you can close the menu (see following Section).MenuStorEd0.01 gSaving settings and closing the menuHold the «Menu» key down until “StorEd” appears in the display. Release the key andthe balance reverts to weighing mode. All changes are saved.C0.01 gAbortPress the «C» key briefly. The balance reverts to weighing mode. Changes are notsaved.NoteIf no entry is made within 45 seconds, the balance reverts to weighing mode.Changes are not saved.4.3 Description of menu options4.3.1 Reset or recording of balance settings (1st menu option “RESET”)MenurESEtr donE0.00 gReset balance settings➞ Select “Reset”, press and hold down the «Menu» key until the message “r donE”confirms that all menu settings have been reset. The balance then reverts toweighing mode and works with the factory settings (Section 4.1).“MenurESEtLIStStorEd0.00 gRecording balance settings➞ Select “List” and hold down the «Menu» key until the message “StorEd” is displayed.The current balance settings are transmitted to the peripheral device connectedto the optional RS232C interface. To do this the setting “Printer” must always beselected at the 8th menu option (Peripheral unit). The current balance settingsare saved at the same time.
Menu124.3.2 Functions (2nd menu option / see Section 5 for their use)In addition to simple weighing, the following functions can be selected with the «“» key:“F nonEPCSF countF 100#F FAC ŸÖ#F FAC d%F nonEF countF 100 %F FAC MF FAC dNo function, simple weighingPiece countingPercent weighingMultiply free factor value by weight,change size of display incrementDivide free factor value by weight,change size of display increment4.3.3 Weighing mode (3rd menu option)“ÖÜStddoSÑrobuStThis setting allows you to adapt the balance to the weighing mode. Select “Std”(standard) for all normal weighing processes. With “doS” (dosing) - for dispensingsubstances in liquid or powder form - the balance reacts very rapidly to the slightestchanges of weight. With “robuSt” (absolute weighing) the balance only reacts tomore significant changes in weight, so that the weighing result is very stable.4.3.4 Weighing unit 1 (4th menu option “UNIT 1”)Depending on requirements, the balance can operate with the following units (possible with certified <strong>balances</strong> only if permittedby national weights and measures legislation):“““Unit 1 gUnit 1 kg…Unit 1 oz…Unit 1 dwtUnit Conversion factor Commentsg gram factory settingkg kilogram 1 kg = 1000 gmg milligram 1 mg = 0,001 gct carat 1 ct = 0,2 glb pound 1 lb = 453,59237 goz ounce 1 oz = 28,349523125 gozt troy ounce 1 ozt = 31,1034768 gGN grain 1 GN = 0,06479891 gdwt pennyweight 1 dwt = 1,55517384 gmo momme 1 mom = 3,75 gm Mesghal 1 msg ≈ 4,6083 gH tl Hong Kong tael 1 tlh = 37,429 gS tl Singapore tael 1 tls ≈ 37,7993641666667 g The Malaysian tael hasthe same valuet tl Taiwan tael 1 t tl = 37,5 gcl Tical 1 tical ≈ 16,3293 gt o tola1 tola = 11,6638038 gb t baht 1 baht = 15,16 g4.3.5 Weighing unit 2 (5th menu option “UNIT 2”)If it is required to show the weighing result in weighing mode in an additional unit by pressing the «“» key, the desired secondweighing unit can be selected in this menu option. The same weighing units are available as under “UNIT 1”, with the exceptionof the tael units (“H tl”, “S tl” and “t tl”).
Menu134.3.6 Autozero (6th menu option / see overview and notes in Section 4.1)This menu option allows you to switch the automatic zero correction on or off.“ÅZErono ÅZEroAutozero switched onThe zero point is automatically corrected (e.g. if drift occurs or the weighing panbecomes dirty).Autozero switched offThe zero point is not automatically corrected. This setting is advantageous for specialapplications (e.g. evaporation measurements).4.3.7 Auto shut off (7th menu option)If the automatic shut off function is activated, the balance automatically switches itself off after a selected period of inactivity (i.e.with no key being pressed or changes of weight occurring):“A.OFF 10éA.OFF -A.OFF 10‘A.OFF -A.OFF 30“A.OFF 2‘Automatic shutoff after 10 minutes inactivityAutomatic shutoff not activatedAutomatic shutoff after 30 seconds inactivityAutomatic shutoff after 2 minutes inactivityA.OFF 30”A.OFF 5‘Automatic shutoff after 5 minutes inactivityA.OFF 2éA.OFF 5é4.3.8 Peripheral unit (8th menu option / see overview and notes in Section 4.1)Peripheral devices can only be connected if the balance has been equipped with an RS232C interface. The balance automaticallysaves the appropriate settings (Sections 4.3.9 – 4.3.13) for every peripheral device.“PrintErHostz.dISPLAYPrinterHostAux. displayConnected to a printer.Connection to any desired peripheral device.Connection of an optional auxiliary display unit (communicationsparameters cannot be selected).4.3.9 Send mode (9th menu option / see overview and notes in Section 4.1)Note: This menu option is only available if the “Host” setting was selected in the 7th menu option (Peripheral unit)!It specifies how a value is transferred to a peripheral device.“S. oFFS. StbS. ContS. AutoS. oFF Send mode switched off.S. Stb The next possible stable value will be transferred after the «±» keyhas been pressed.S. Cont All values are transferred automatically.S. Auto Only stable values are transferred automatically.S. All The current value is transferred after the «±» key has beenpressed.S. ALL
Menu144.3.10 Send format (10th menu option / see overview and notes in Section 4.1)Note: This menu option is only available if the “S. oFF” setting was not selected in the 9th menu option (“Send mode”)!It sets the data transfer format.“S. SICSS. PŸÖ“S. SICS”: The MT-SICS data transfer formats are used. Please refer to the“Reference Manual MT-SICS B-S/L/L-S <strong>balances</strong> 11780447”,available from your METTLER TOLEDO dealer or downloaded fromthe Internet (www.mt.com/sics-classic).More Information please find in the Section 6.3.“S. PM”*:The following PM balance data transfer formats are used:S. Stb: /////1.67890/gS. Cont: S////1.67890/g SD///1.39110/gS. Auto: S////1.67890/gS. All: /////1.67890/g/D///1.39110/g* unidirectional, no MT-SICS commands are accepted.4.3.11 Baud rate (11th menu option / see overview and notes in Section 4.1)““bd 2400bd 4800…bd 19200Note: This menu option is only available if the “Printer” or “Host” setting was selectedin the 8th menu option (Peripheral unit)!The baud rate (data transfer rate) determines the speed of transmission via the serialinterface. The unit is the baud (bd) = 1 bit/second.The following settings are available: 600 bd, 1200 bd, 2400 bd, 4800 bd, 9600bd and 19200 bd.For problem-free data transmission the sending and receiving devices must be setat the same value.4.3.12 Bit/Parity (12th menu option / see overview and notes in Section 4.1)Note: This menu option is only available if the “Printer” or “Host” setting was selected in the 8th menu option (Peripheral unit)!It sets the character format for the peripheral device connected to the balance.7b–E 7 data bits/even parity“7b-E7b–no 7 data bits/no parity8b–no 8 data bits/no parity7b-no7b–odd 7 data bits/odd parity8b-no7b-odd4.3.13 Handshake (13th menu option / see overview and notes in Section 4.1)Note: This menu option is only available if the “Printer” or “Host” setting was selected in the 8th menu option (Peripheral unit)!This function is used to select the data transfer mode to suit different serial devices.HS oFF No handshake“ HS oFFHS SoFtHS HArdSoftware handshake (XON/XOFF)Hardware handshake (RTS/CTS)HS SoFtHS HArd
Functions155 FunctionsSettings and values saved under a given function are retained until they are replaced or another function is selected. The «C» keycan be used to cancel the procedure currently in progress.5.1 Piece countingRequirementThe function “F count” must be activated in the menu (Section 4).#F0.00 gSEt 10 PCS➞ Place empty container on the balance and tare by briefly pressing the«#» key.Setting the reference: a reference weight must first be entered for piece counting:➞ Add a number of reference pieces to container. Possible numbers are 5, 10,20, 50, 100 and “no” (piece counting deactivates).Note that the minimum weight = 10d (d: display increment), and theminimum unit weight = 1d!➞ Hold the «F» key down until “SEt ... PCS” is displayed.➞ Repeatedly press the «“» key until the display equals the number ofreference pieces entered.“±SEt 20 PCS20 PCS➞ Confirm the number of reference pieces with the «±» key or automaticacceptance after 7 seconds. The current number of pieces (PCS = pieces) isdisplayed.“240 PCS144.81 gSwitching between piece count and weight display➞ Place the items to be counted in the container. The number of pieces isdisplayed.➞ Press the «“» key. The weight is displayed (in unit 1, and if the key ispressed again, in unit 2, provided this function is activated).➞ Return to the piece count display by pressing the «“» key again.
Functions165.2 Percent weighing0.00 gRequirementThe function “F 100 %” must be activated in the menu (Section 4).F148.50 g%SEt100Set target weight➞ Target weight (Reference weight, which corresponds to 100 %) in centre ofpan.Note that the minimum weight = 10d (d: display increment).➞ Hold the «F» key down until “SEt 100 %” is displayed.±%100.00➞ Press the «“» key to select “SEt 100 %” or “SEt no %” (Percent weighingdeactivated).➞ The «±» key can be used briefly to confirm or automatic acceptance after 7seconds.101.60%Switching between percent weighing and weight display➞ Place weighing sample in centre of pan.The weight of the sample is displayed as a percentage of the target weight.“150.88 g➞ Press the «“» key. The weight is displayed.“%101.60➞ Return to display in percent: pressing the «“» key again.5.3 Switching weight units“ 22.00 g0.78 ozRequirementDifferent weight units must be activated in the menu for unit 1 and unit 2 (Section 4).➞ The «“» key can be used at any time to toggle between the two weighingunits selected in the menu (“UNIT 1” and “UNIT 2”).Note• Switching between weight units may be blocked with certified <strong>balances</strong>,depending on national weights and measures legislation.
5.4 Weighing with free factor and/or selectable display incrementsIn this menu option a custom “free factor” can be defined at will.FunctionsThis value is then either multiplied (“F FAC M”) by the weighing result (in grams), i.e. reading = factor * weight, or it is divided(“F FAC d”) by the weight, i.e. reading = factor / weight. The range over which this factor can be selected depends on the weighingrange and the readability of the model concerned.The “free factor” (FAC M) function can, for example, be used to calculate the price of the material weighed directly or to calculatethe weight per defined unit of surface area. It can also be used to convert the weight into any desired alternative unit. The abilityto select the display increments makes it possible to specify how the weighing result is to be presented, the choice of displayincrements being limited by the set factor and the resolution of the balance model itself.17RequirementThe function “F FAC M” or “F FAC d” must be activated in the menu (Section 4).F1/10d1/10d±““±17.89 g#F FAC ŸÖ#1.0000#0.9999…#0.9500#StEPá▼#0.01#0.02…#0.05#17.00Entering the free factor and/or the display increments➞ Hold the «F» key down until “F FAC M” or “F FAC d” appears in the display.➞ Press the «“» key to select “FAC M” / “FAC d” or “noFAC M” / “noFAC d”(Function deactivated).➞ Release the key. Either the factor 1 appears as default value or the factor thatwas saved most recently.This value can now be changed:➞ Pressing the «“» key increases the factor.Pressing the «1/10d» key reduces the factor.Pressing the key once changes the value by one increment. If the key is held down,the value changes increasingly rapidly.➞ Confirm the selected factor with the «±» key (it will not be saved automatically).“StEP=” appears in the display, and the program changesautomatically to allow the display increments to be entered. The smallestpossible display increment appears as default value, or the last value that wassaved.➞ This value can be changed in the same way as for the free factor (see above).Confirm the selected display increment with the «±» key (it will not be savedautomatically).The appropriate calculation is then made using the weight on the pan in grams andthe selected factor, the result being displayed with the selected display increment.No units are displayed, the symbol “#” being displayed instead. The calculation isalways based on the weight in grams.Note• If you only want to change the display increments, set the free factorat exactly 1.Toggling between displaying the calculated value and the measured weight➞ Place the sample on the weighing pan. The appropriate calculation is thenmade using the weight of the sample and the selected factor, the result beingdisplayed with the selected display increment.➞ Press the «“» key. The weight is displayed (in unit 1, and if the key ispressed again in unit 2, provided that this option is activated).➞ Press the «“» key again to return to the calculated value.
Technical data, options, optional equipment186 Technical data, options, optional equipment6.1 Technical dataStandard equipment• AC adapter to national codes.100–240 VAC/50–60 Hz, 0.3 A12 VDC, 0.84 ABalance power input 6-14,5VAC, 50/60Hz, 4VA or7-20VDC, 4W• Can weigh below balanceMaterials• Housing: plastic (ABS/PC)• Weighing pan: 18/10 chromium-nickel steelBatteries• 4 x AA (LR6) 1.5 V alkali-manganese,typical 20 h (with 2.9 Ah capacity)Protection• Protected against dust and water• Pollution degree: 2• Installation category: class II• EMC: see declaration of conformityAmbient conditionsThe technical data are valid under the following ambientconditions:• Ambient temperature 10 °C … 30 °C• Relative humidity 10 % to 80 % at 31 °C,linear decreasingto 50 % at 40 °CnoncondensingOperability is assured at ambient temperatures between5 and 40 ºC.Max. capacityReadabilityRepeatability (sd)LinearitySensitivity temperature drift (10 °C … 30 °C)Settling time, typicalAdjustment weight external (optional)Interface RS232CExternal dimensions of balance (W/D/H)External dimensions of packaging (W/D/H)Weighing panNet weight (with packaging)Level indicatorNumber of leveling screws 2Certified balance available<strong>JL</strong>602-G/L610 g0.01 g0.01 g0.03 g±10 ppm/°C3 s500 goptional194x225x67 mm350x275x140 mm(0.0127 m 3 )ø 120 mm1.0 (2.1) kgyesyes
Technical data, options, optional equipment196.2 RS232C interfaceGND5RxDTxD1DATAINOUTEvery balance can be equipped with an optional RS232C interface for connection toa peripheral device (e.g. printer, auxiliary display or PC with a 9-pin male connector,see Section 6.4). The balance must then configured to suit the peripheral device ina menu dialog (Sections 4.3.8 – 4.3.13).A detailed description of the available interface commands is given in the “ReferenceManual MT-SICS B-S/L/L-S <strong>balances</strong> 11780447”. This can be downloaded from theInternet (www.mt.com/sics-classic) and is only available in English.9 6CTSRTSHANDSHAKEINOUTThe wide range of features of the <strong>JL</strong>-G/L <strong>balances</strong> regarding documentation of theresults can be utilized by connecting to a printer, e.g. the RS-P26 or LC-P45 fromMETTLER TOLEDO. Printed results then make a decisive contribution to simplifyingGLP/GMP-compliant work.6.3 MT-SICS Interface commands and functionsMany of the <strong>balances</strong> used have to be capable of integration in a complex computer or data acquisition system.To enable you to integrate <strong>balances</strong> in your system in a simple manner and utilize their capabilities to the full, most balancefunctions are also available as appropriate commands via the data interface.All new METTLER TOLEDO <strong>balances</strong> launched on the market support the standardized command set “METTLER TOLEDO StandardInterface Command Set” (MT-SICS). The commands available depend on the functionality of the balance.Basic information on data interchange with the balanceThe balance receives commands from the system and acknowledges the command with an appropriate response.Command formatsCommands sent to the balance comprise one or more characters of the ASCII character set. Here, the following must be noted:• Enter commands only in uppercase.• The possible parameters of the command must be separated from one another and from the command name by a space(ASCII 32 dec., in this description represented as /).• The possible input for “text” is a sequence of characters of the 8-bit ASCII character set from 32 dec to 255 dec.• Each command must be closed by C RL F(ASCII 13 dec., 10 dec.).The characters C RL F, which can be inputted using the Enter or Return key of most entry keypads, are not listed in this description,but it is essential they be included for communication with the balance.ExampleS – Send stable weight valueCommand S Send the current stable net weight value.ResponseS/S/WeightValue/UnitS/IS/+S/-Current stable weight value in unit actually set under unit 1.Command not executable (balance is currently executing another command, e.g.taring, or timeout as stability was not reached).Balance in overload range.Balance in underload range.ExampleCommand S Send a stable weight value.ResponseS/S/////100.00/gThe current, stable weight value is 100.00 g.
Technical data, options, optional equipment20The MT-SICS commands listed below is a selected list of available commands. For additional commands and further informationplease refer to the Reference Manual “MT-SICS for B-S/L/L-S <strong>balances</strong> 11780447” downloadable from the Internet underwww.mt.com/sics-classic.S – Send stable weight valueCommand S Send the current stable net weight value.SI – Send value immediatelyCommand SI Send the current net weight value, irrespective of balance stability.SIR – Send weight value immediately and repeatCommand SIR Send the net weight values repeatedly, irrespective of balance stability.Z – ZeroCommand Z Zero the balance.@ – ResetCommand @ Resets the balance to the condition found after switching on, but without a zero settingbeing performed.SR – Send weight value on weight change (Send and Repeat)Command SR Send the current stable weight value and then send continuously the stable weightvalue after every weight change.The weight change must be at least 12.5 % of the last stable weight value,minimum = 30d.ST – Send stable weight after pressing ± (transfer) keyCommand ST Inquiry of actual status of the ST function.SU – Send stable weight value with currently displayed unitCommand SU As the “S” command, but with the currently displayed unit.
Technical data, options, optional equipment216.4 Optional equipmentAC adapterAC adapter universal (EU, USA, AU, UK) 11120270100–240 VAC/50–60 Hz, 0.3 A12 VDC, 0.84 AAccuPac B-SRechargeable external power source for18 hours weighing operation independentof AC power supply 21254691Adjustment weightsAvailable as OIML weights (E1, E2, F1, 11795461with calibration certificate); for further details seeMETTLER TOLEDO Weights brochureor see www.mt.com/weightsAntitheft deviceCable with lock 00590101Auxiliary display 1)• Auxiliary display RS-AD-L7, with backlit 72213564• Auxiliary display RS-AD-7 72213565Draft shieldGlass cylinder 12102988Interface cable 1)• RS9–RS25: (m/f), length 2 m 11101052• RS9–RS9: (m/f), length 1 m 11101051• RS9–RS9: (m/m), length 1 m 21250066• RS232–USB converter cable 11103691In-use cover 12102980Printer, Application printer (LC-P45) 1) 00229119Plain-paper printer, 24 characters, withadditional functions (time, date, statistic,multiplier etc.)Printer, Report printer (RS-P26) 1) 12120788Plain-paper printer, 24 characters, withadditional functions (date and time).Software 1)LabX direct balance 11120340(software for easy data transfer to PC)Transport caseFor all models (without 12102982draftshield); accomodates balance,AC adapter, batteries and weightsInterface RS232CThe interface must be fitted in the factory. Retrofitting is onlypossible if carried out by a METTLER TOLEDO sevice facility.1)RS232 interface necessary
Technical data, options, optional equipment226.5 Dimensional drawing (in mm)19467225
Appendix237 Appendix7.1 Typical printouts from METTLER TOLEDO RS-P26 and LC-P45 printersFunction: Adjusting-BALANCE CALIBRATION-04.07.2007 09:50:12METTLER TOLEDOType:<strong>JL</strong>602-G/LSNR: 1120053108SW:1.0Weight ID: ............Weight: 500.00 gExternal Cal. doneSignature:........................--------- END ---------Function: Percentweighing----- % - WEIGHING -----Ref. 10.008 g100.00 %60.01 g599.59 %Function: Piece countingPrintout with referenceweight---- PIECE COUNTING ----APW:0.99 gOut of: 10 PCS27.00 g27 PCSFunction: ListPrintout of the current <strong>balances</strong>ettings--- LIST OF SETTINGS ---04.07.2007 09:55:12METTLER TOLEDOType:<strong>JL</strong>602-G/LSNR: 1120053108SW: 1.0TDNR: 7.17.1.286.108------------------------Weighing Parameters:Weighing Mode StandardUnit 1gA.ZeroOn------------------------System Parameters:Auto off10 min------------------------Peripheral Devices:P.DevicePrinterBaud 2400Bit/Parity 7b-evenHandshakeOffP.DeviceHostSendmodeOffBaud 9600Bit/Parity 8b-noHandshakeSoft--------- END ----------Function: MultiplierOnly possible with LC-P45.Function is triggered via theprinter.04.07.2007 08:23:22ID 242SNR: 1118015657Factor 1.65588.43 g* 970.9095Function: Verification of thecalibration (adjustment)with external weight.Only possible with LC-P45.Function is triggered via theprinter.----- BALANCE TEST -----04.07.2007 09:52:12METTLER TOLEDOType:<strong>JL</strong>602-G/LSNR: 1120053108SW:1.0Weight ID: .............Target : ...............Actual : .......199.98 gDiff : ...............External test doneSignature:........................--------- END ----------Function: StatisticsOnly possible with LC-P45.Function is triggered via theprinter.04.07.2007 10:44:07ID 666SNR: 11180156571 1100.15 g2 1600.10 g3 1699.95 gn 3x 1466.733 gs321.372 gsrel 21.91 %min. 1100.15 gmax. 1699.95 gdif. 599.80 g--------- END ----------NotesThe operating instructionsfor the LC-P45 include adescription of the functionsthat are triggered via thatprinter.The RS-P26 prints all reportsin English. This applies alsoto the LC-P45 reports thatoriginate in the balance. Inthe case of reports triggeredby the LC-P45, the followinglanguages may be selected:German, English, French,Spanish or Italian.
Appendix247.2 What if ...?Error/Error message Cause Rectificationíååååìî____ïError 1Error 2Error 3Error 40.000 gAbortOverloadUnderloadNo stability• in taring or adjusting (calibration)• when reference weight for piece countingis placed on panWrong adjustment weight on pan or none at allReference weight (Piece counting,Percent weighing) too smallInternal faultWrong weighing pan or pan missing ornot emptyAdjustment aborted with the «C» key➞ Remove sample from weighing pan,zero again (tare).➞ Check whether weighing pan ispositioned properly.➞ Wait for stability before pressing key.➞ Ensure more stable ambient conditions.➞ Remove weighing pan and clean ifnecessary➞ Place required adjustment weight incentre of pan.➞ Increase reference weight.➞ Contact METTLER TOLEDO customerservice.➞ Place correct pan or empty pan onbalance.No display• AC adapter not plugged in• Batteries discharged➞ Check AC power supply.Plug AC adapter into power supply.➞ Replace batteries
Appendix257.3 Maintenance and cleaningServiceRegular servicing of your balance by a service technician prolongs its working life. Ask your METTLERTOLEDO dealer for details of servicing options.CleaningEvery now and then, clean the weighing pan, draftshield element, draftshield (depending on themodel) and housing of your balance using a damp cloth. Your balance is made of high-quality,durable materials and can therefore be cleaned with a standard, mild cleaning agent.Please observe the following notes• On no account use cleaning agents, which contain solvents or abrasive ingredients, as this canresult in damage to the terminal overlay.• After working with chemicals, it is advisable to wash or clean the weighing pan and the bottomplate (if draft shield fitted).• Although all materials are of high quality, corrosion may occur if corrosive substances are depositedon chrome steel for an extended period of time (and if air is excluded, for example by acoating of grease).• Ensure that no liquid comes into contact with the balance or the AC adapter!• Never open the balance or AC adapter – they contain no components, which can be cleaned,repaired or replaced by the user.• Soiled protective covers can be replaced on all balance types (see Optional equipment).DisposalIn conformance with the European Directive 2002/96/EC on Waste Electrical and Electronic Equipment(WEEE) this device may not be disposed of in domestic waste. This also applies to countriesoutside the EU, per their specific requirements. Please dispose of this product in accordance withlocal regulations at the collecting point specified for electrical and electronic equipment.If you have any questions, please contact the responsible authority or the distributor from which youpurchased this device.Should this device be passed on to other parties (for private or professional use), the content of thisregulation must also be related.Thank you for your contribution to environmental protection.
Appendix267.4 Declaration of conformityThe undersigned declare on behalf of<strong>Mettler</strong>-<strong>Toledo</strong> AGIm LangacherCH-8606 Greifenseethat the <strong>balances</strong> METTLER TOLEDO <strong>JL</strong>-G/L to which this declaration relates (serial numberspecified on the product) are in compliance with the below mentioned EEC Directives (including all amendments)73/23/EEC89/336/EECLow Voltage DirectiveElectromagnetic compatibilityand that following standards have been appliedIEC/EN61010-1:2001,EN61326:1997+ A1:98+A2:01+A3:03 (class B)EN61326:1997+ A1:98+A2:01+A3:03 (Minimal requirements)for Canada, USA and AustraliaCAN/CSA-C22.2 No.61010-1-04, UL Std. No.61010A-1, FCC, Part 15, class A,AS/NZS CISPR 22, AS/NZS 61000.4.3Balances in certified version additionally compliy with 90/384/EEC Non-automatic weighing instrumentsand standard EN45501.Greifensee, 03.10.2007<strong>Mettler</strong>-<strong>Toledo</strong> AGLaboratory & Weighing TechnologiesRené LenggenhagerGeneral ManagerMarcel StrotzManager SBU LAB Basic Weighing
To protect your METTLER TOLEDO product’s future:METTLER TOLEDO Service assures the quality, measuring accuracyand preservation of value of all METTLER TOLEDO products for years tocome.Please send for full details about our attractive terms of service.Thank you.*11781164*Subject to technical changes and to the availabilityof the accessories supplied with the instruments.© <strong>Mettler</strong>-<strong>Toledo</strong> AG 2007 11781164 Printed in Switzerland 0710/2.12<strong>Mettler</strong>-<strong>Toledo</strong> AG, Laboratory & Weighing Technologies, CH-8606 Greifensee, SwitzerlandPhone +41-44-944 22 11, Fax +41-44-944 30 60, Internet: http://www.mt.com


