

SCUBAPRO Balanced Power Inflator - Pmp6.fr
SCUBAPRO Balanced Power Inflator - Pmp6.fr
SCUBAPRO Balanced Power Inflator - Pmp6.fr

You also want an ePaper? Increase the reach of your titles
YUMPU automatically turns print PDFs into web optimized ePapers that Google loves.
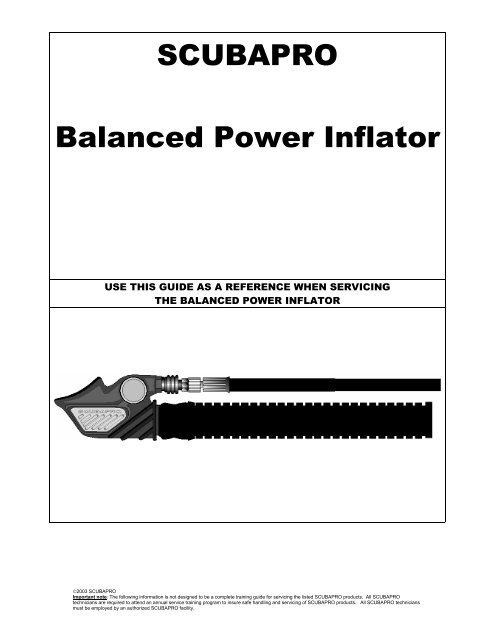
<strong>SCUBAPRO</strong><strong>Balanced</strong> <strong>Power</strong> <strong>Inflator</strong>USE THIS GUIDE AS A REFERENCE WHEN SERVICINGTHE BALANCED POWER INFLATOR©2003 <strong>SCUBAPRO</strong>Important note: The following information is not designed to be a complete training guide for servicing the listed <strong>SCUBAPRO</strong> products. All <strong>SCUBAPRO</strong>technicians are required to attend an annual service training program to insure safe handling and servicing of <strong>SCUBAPRO</strong> products. All <strong>SCUBAPRO</strong> techniciansmust be employed by an authorized <strong>SCUBAPRO</strong> facility.
P/N 41-047-000<strong>SCUBAPRO</strong> <strong>Balanced</strong> <strong>Power</strong> <strong>Inflator</strong>TOOLS NEEDED FOR REPAIR OFBALANCED POWER INFLATORQuantity Part Number Description1 set 10.102.100Brass o’ring picks(Peter Built)P/N 43040000TOOLSNEEDED1 tube 41.047.000 Christo-LubeChristo-LubeOXYGEN COMPATIBLE LUBRICANT1 47.010.000 Counter Mat1 41.496.101 Lubricant syringeMonoject2 Adjustable wrench1 Small screwdriver (5mm)43.300.221Schrader valve tool(<strong>SCUBAPRO</strong>)20.125.200 Seat Slider(Peter Built)1 18.300.500(Peter Built)Blow Gun/Air Nozzle1 7/32” Nut Driver1 43.040.000 Universal Tool1 Torque Wrench - 100 in-lb rangeICON LEGENDMonojectInspect carefully, replace if neededLubricate properlyReplace annuallyP/N 43040000TOOLSNEEDEDNo tools needed for this step©2003 <strong>SCUBAPRO</strong>2Important note: The following information is not designed to be a complete training guide for servicing the listed <strong>SCUBAPRO</strong> regulators. All <strong>SCUBAPRO</strong>technicians are required to attend an annual service training program to insure safe handling and servicing of <strong>SCUBAPRO</strong> products. All <strong>SCUBAPRO</strong> techniciansmust be employed by an authorized <strong>SCUBAPRO</strong> facility.
<strong>SCUBAPRO</strong> <strong>Balanced</strong> <strong>Power</strong> <strong>Inflator</strong>P/N 43040000TOOLSNEEDEDNo tools neededthis stepRemove hoses from unit.Remove the male quick disconnectfitting using an adjustable wrench.Use the Seat Slider to loosen theexhaust and inflation mechanismcovers as shown.P/N 43040000TOOLSNEEDEDNo tools neededthis stepRemove the covers.©2003 <strong>SCUBAPRO</strong>3Important note: The following information is not designed to be a complete training guide for servicing the listed <strong>SCUBAPRO</strong> regulators. All <strong>SCUBAPRO</strong>technicians are required to attend an annual service training program to insure safe handling and servicing of <strong>SCUBAPRO</strong> products. All <strong>SCUBAPRO</strong> techniciansmust be employed by an authorized <strong>SCUBAPRO</strong> facility.
<strong>SCUBAPRO</strong> <strong>Balanced</strong> <strong>Power</strong> <strong>Inflator</strong>7/32”Carefully loosen the 7/32” nut from theexhaust mechanism. The exhaust seatwill be inspected and re-used except ifit is worn.CAUTION: Hold pressure on theexhaust button while loosening toprevent the assembly from loss due tospring tension.Carefully loosen the inflator seat usinga small standard screwdriver (5mmblade).CAUTION: Hold pressure on theinflator button while loosening toprevent the assembly from loss due tospring tension.Disassemble the quick disconnect hosefitting from the low-pressure hose usingthe Universal Tool and adjustablewrench.©2003 <strong>SCUBAPRO</strong>4Important note: The following information is not designed to be a complete training guide for servicing the listed <strong>SCUBAPRO</strong> regulators. All <strong>SCUBAPRO</strong>technicians are required to attend an annual service training program to insure safe handling and servicing of <strong>SCUBAPRO</strong> products. All <strong>SCUBAPRO</strong> techniciansmust be employed by an authorized <strong>SCUBAPRO</strong> facility.
<strong>SCUBAPRO</strong> <strong>Balanced</strong> <strong>Power</strong> <strong>Inflator</strong>Push the quick disconnect sleeve downto reveal the retainer ring. Use a brasso’ring pick or similar tool to carefullyremove the retainer ring.CAUTION: Release spring tension onthe quick disconnect mechanism slowlyto prevent loss of importantcomponents.Carefully remove the sleeve. Lift offthe spring being cautious not to loosethe bearings.Loosen the Schrader valve using aSchrader valve tool.Remove the rubber insert from insidethe coupling barrel.MonojectInspect the Schrader valve seatingsurfaces for corrosion and wear.Lubricate.Inspect and lubricate the rubbercoupling barrel insert and hose fittingo’ring.Replace the bearings by placing asmall amount of lubricant in eachbearing hole. Carefully place eachbearing and reassemble.©2003 <strong>SCUBAPRO</strong>5Important note: The following information is not designed to be a complete training guide for servicing the listed <strong>SCUBAPRO</strong> regulators. All <strong>SCUBAPRO</strong>technicians are required to attend an annual service training program to insure safe handling and servicing of <strong>SCUBAPRO</strong> products. All <strong>SCUBAPRO</strong> techniciansmust be employed by an authorized <strong>SCUBAPRO</strong> facility.
<strong>SCUBAPRO</strong> <strong>Balanced</strong> <strong>Power</strong> <strong>Inflator</strong>Reassemble the quick disconnectmechanism on to the low-pressurehose fitting.MonojectReplace and lubricate the dynamicstem o’ring (annual replacement).Replace the inflator seat (annualreplacement).Reassemble the inflator mechanisminto the inflator body. Note thealignment “ribs” on the underside of theinflator button. These should align withslots on the inflator body.Apply torque of 4.5 in-lbs/ 0.5 Newton-Meters©2003 <strong>SCUBAPRO</strong>6Important note: The following information is not designed to be a complete training guide for servicing the listed <strong>SCUBAPRO</strong> regulators. All <strong>SCUBAPRO</strong>technicians are required to attend an annual service training program to insure safe handling and servicing of <strong>SCUBAPRO</strong> products. All <strong>SCUBAPRO</strong> techniciansmust be employed by an authorized <strong>SCUBAPRO</strong> facility.
<strong>SCUBAPRO</strong> <strong>Balanced</strong> <strong>Power</strong> <strong>Inflator</strong>MonojectReplace and lubricate the dynamicstem o’ring (annual replacement).Inspect the exhaust seat for signs ofwear. Replace if needed.Reassemble the exhaust mechanisminto the inflator body.Tighten with 7/32” driver. Apply torqueof 4.5 in-lbs/ 0.5 Newton-MetersP/N 43040000TOOLSNEEDEDNo tools neededthis stepInspect the seal on the inflator cover.Lubricate lightly if needed.Replace the exhaust and inflatorcovers.Tighten the covers using the SeatSlider tool.CAUTION: Do not over-tighten thecovers. Applying too much torque cancause the covers to break.©2003 <strong>SCUBAPRO</strong>7Important note: The following information is not designed to be a complete training guide for servicing the listed <strong>SCUBAPRO</strong> regulators. All <strong>SCUBAPRO</strong>technicians are required to attend an annual service training program to insure safe handling and servicing of <strong>SCUBAPRO</strong> products. All <strong>SCUBAPRO</strong> techniciansmust be employed by an authorized <strong>SCUBAPRO</strong> facility.
<strong>SCUBAPRO</strong> <strong>Balanced</strong> <strong>Power</strong> <strong>Inflator</strong>MonojectInspect and lubricate the static (male)quick disconnect o’ring.Reassemble the fitting into the inflatorbody. Apply torque of 35 in-lbs/ 5Newton-MetersP/N 43040000TOOLSNEEDEDNo tools neededthis stepReassemble the <strong>Balanced</strong> <strong>Power</strong> <strong>Inflator</strong>on to the BC hose. Use tie-wraps or aspecial retainer to ensure that the inflator isleakproof and to ensure that the inflatorcannot come off during use.If BC uses a pull dump cable, be certain toassemble the inflator pin through the cableloop at this time.CAUTION: The inflator MUST be securein the inflator hose. Failure to ensuresecurity can result in a dangerouscondition causing the BC to deflateunexpectedly.P/N 43040000TOOLSNEEDEDNo tools neededthis stepLeak test the BC with the inflator firmlyattached to the BC. A simplepreliminary leak test can be performedby tightly inflating the BC and allowingit to stand for one hour. Inspect the BCand ensure that no air has been lostprior to using the unit in water.©2003 <strong>SCUBAPRO</strong>8Important note: The following information is not designed to be a complete training guide for servicing the listed <strong>SCUBAPRO</strong> regulators. All <strong>SCUBAPRO</strong>technicians are required to attend an annual service training program to insure safe handling and servicing of <strong>SCUBAPRO</strong> products. All <strong>SCUBAPRO</strong> techniciansmust be employed by an authorized <strong>SCUBAPRO</strong> facility.


