(Mach 2), EL2-EL2001-YCAH - Balboa Direct
(Mach 2), EL2-EL2001-YCAH - Balboa Direct
(Mach 2), EL2-EL2001-YCAH - Balboa Direct

Create successful ePaper yourself
Turn your PDF publications into a flip-book with our unique Google optimized e-Paper software.
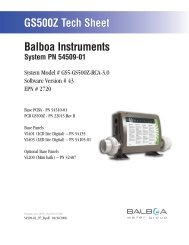
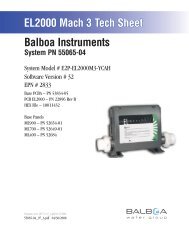
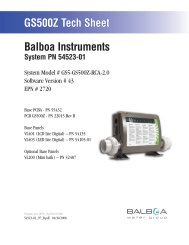
<strong>EL2</strong>001 Hot Sheet_http://www.balboawatergroup.com
Circuit Board Configuration240 Volt AC Connections120 Volt AC Connections12 Volt AC Connection
J1 & W1 . . Pump 1J2 & W7 . . Circ PumpF ELFEFF EJ6 & W12 . BlowerJ4 & W8 . . A.V.J5 & W12 . Pump 2J9 & W13 . OzoneJ12 & W9 . LightLTTFFF EFF ETLETFE TEETTlTlTT T F F E ELl T E T lELl TE lEOptional Aux Relay Board 120V (W12 - J50)J3 to Black AC on Main Board (J11)FJ to J60 on Main Board (EXT - near Swtichbank A)
DIP Switches andJumµersS Itchbank AS Itchbank BJ371,1A tseT edסM FFOA2, HIgh Amp,3A retIIF b nסItaruDA4, 12 Hr TImeA5, Degrees F,6A trסhS stuסemITA7, Ieanup cIe OFFA8, 1Hr O 3 DIsabIe OFFA9 A10,סN crI pmuPסI ,11A 3 O 1P,21A rסmeM NOB1, Pump 2 1 SpeedB2, Pump 2 EnabIed,3B re IBס deIbanE,4B סN IeehW rebIFB5, N AB6, PaneI ScrunchIng OFF21 ٧LIght23DIP Switch KeyA 1 . . . . . . . . . . . . . Test Mode (normally Off)A 2 . . . . . . . . . . . . . In “ON” position, all high-speed pumps/blower can run with Heater. . . . . . . . . . . . . In “OFF” position, no high-speed pumps or blower can run with HeaterA 3 . . . . . . . . . . . . . In “ON” position, filter cycles are programmed by duration as opposed to start and end timesA 4 . . . . . . . . . . . . . Displays time in 24 hours (military time) – in ON position.Displays 12 hour time when OFFA 5 . . . . . . . . . . . . . Celsius (ON) or Fahrenheit (OFF) Temperature DisplayA 6 . . . . . . . . . . . . . Pump timeout settings (15 minutes / 2 hr for P1 low (Off) or30 minutes / 4 hr for P1 low (On)A 7 . . . . . . . . . . . . . Cleanup Cycle – 30 min after spa use/timeout,P1-low & Ozone run for 1 hour.A 8 . . . . . . . . . . . . . Ozone Suppression for one hour after pump/blower button pressA9 and A 10 . . . . . . . . See Figure 2 for Circ Pump Behavior settingsA 11 . . . . . . . . . . . . . Ozone in Filter Cycle only (non-circ mode)One-Speed Pump 1 (in any circ mode)Circ Pump(Refer to Figure 2)A9 A10 BehaviorA 12 . . . . . . . . . . . . . Persistent memory reset(used when spa is powering up)BBBBBBOFF OFFON OFFOFF ON1 . . . . . . . . . . . . . Single-speed Pump 22 . . . . . . . . . . . . . Pump 2 Enable3 . . . . . . . . . . . . . Blower Enable with pump 2 low relay4 . . . . . . . . . . . . . fiber and Wheel instead of Spa Light (non-circ only)5 . . . . . . . . . . . . . Pump 3 enable (Jets 3 replaces blower on Aux panel)ON ON6 . . . . . . . . . . . . . ML 900 scrunching - ML550 / 700 Jets 3 replaces BlowerNo Circ Pump24 Hr24 Hr w/3° Shut-OffActs like P1 low(Filter Cycles, Polls)Figure 2J37Jumper on Pin 1 and 2 will power one leg of J9 (Spa Light) at 120 Volts AC.Jumper on Pin 2 and 3 will power one leg of J9 (Spa Light) at 12 Volts AC.Note: W9 controls voltage on the other leg of J9 and must be set for the same voltage.
Ozone ConnectionsFirst, configure the EL Circuit Board to deliver the desired voltage to theon-board connector (J9). Connect the W-13 wire to either White AC (120V) or Red AC(240V) to set the voltage.The pin next to ground determines voltage on these connectors. Ground is typically thebottom pin of the white connector (if the flat sides of the top and bottom holes are to theleft and the heater connections are on the bottom edge of the board).The pin next to the bottom (ground) pin of J9 is fed by W-13 and sets the voltage in theconnector.If the board is set up to operate a 120V ozone generator, the connector on the ozonegenerator is likely to be configured correctly, but should be compared to theillustration below.If a 240V ozone generator is required, be sure the red wire in the ozone cord ispositioned in the connector next to the green ground wire as described below.Note: A special tool is required to remove the pins from the connector body once theyare snapped in place. Check with your <strong>Balboa</strong> Account Manager for information on purchasinga pin-removal tool.Ozone connector configuration for 120V 60HzBlack conductorUse this slot for the leftover Red conductorInstall the White conductor here for 120V ozoneGreen conductorOzone connector configuration for 240V 60HzBlack conductorUse this slot for the leftover White conductorInstall the Red conductor here for 240V ozoneGreen conductorBBGG
Panel ConfigurationO 3SET TEMP PANEL LOCKSTANDARDML 700PN 53649ML 400PN 52684lML 200 ML 900PN 52958 PN 52654Auxiliary panels are available in Panel “Scrunching” on the ML 900the following configurations:(requires custom panel overlays)Infrared Remote (Dolphin) which With DIP switch B6, unused Note: Some button positionshas a separate connector on buttons on an ML 900 can be MUST be used in order tothe board. “scrunched” in a custom con- perform certain functions. Forfiguration or the unused posi- instance, the Jets 2 button and4-Button tions can be left blank. the Blower button are used in2-Buttoncertain button press combinations,1-Button Scrunching moves the buttons and need to be available to ain a counter-clockwise direction user, even if they are labeled withConfiguration of the 4-Button and 2- from the bottom row to the top a different name.Button Aux Panels can be done forrow, on the right side of the discustomapplications. play. The result is that all miss- See reference cards for details.ing buttons or gaps appear on1-button Aux panels are available in the bottom row, just to the right4 different versions. of the display.There are two Aux Panelconnectors on the board.