Faculty of Electrical Engineering - Universiti Teknologi Malaysia
Faculty of Electrical Engineering - Universiti Teknologi Malaysia
Faculty of Electrical Engineering - Universiti Teknologi Malaysia

Create successful ePaper yourself
Turn your PDF publications into a flip-book with our unique Google optimized e-Paper software.
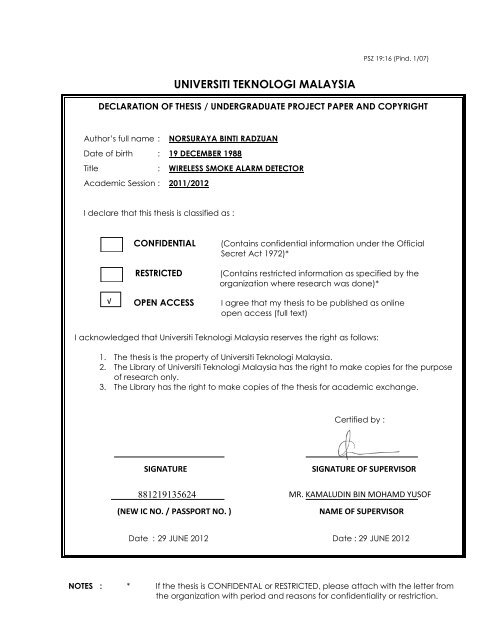
PSZ 19:16 (Pind. 1/07)UNIVERSITI TEKNOLOGI MALAYSIADECLARATION OF THESIS / UNDERGRADUATE PROJECT PAPER AND COPYRIGHTAuthor’s full name : NORSURAYA BINTI RADZUANDate <strong>of</strong> birth : 19 DECEMBER 1988Title : WIRELESS SMOKE ALARM DETECTORAcademic Session : 2011/2012I declare that this thesis is classified as :√CONFIDENTIALRESTRICTEDOPEN ACCESS(Contains confidential information under the OfficialSecret Act 1972)*(Contains restricted information as specified by theorganization where research was done)*I agree that my thesis to be published as onlineopen access (full text)I acknowledged that <strong>Universiti</strong> <strong>Teknologi</strong> <strong>Malaysia</strong> reserves the right as follows:1. The thesis is the property <strong>of</strong> <strong>Universiti</strong> <strong>Teknologi</strong> <strong>Malaysia</strong>.2. The Library <strong>of</strong> <strong>Universiti</strong> <strong>Teknologi</strong> <strong>Malaysia</strong> has the right to make copies for the purpose<strong>of</strong> research only.3. The Library has the right to make copies <strong>of</strong> the thesis for academic exchange.Certified by :SIGNATURESIGNATURE OF SUPERVISORSIGNATURE 881219135624 MR. KAMALUDIN SIGNATURE BIN OF MOHAMD SUPERVISOR YUSOF(NEW IC NO. / PASSPORT NO. )NAME OF SUPERVISORDate : 29 JUNE 2012 Date : 29 JUNE 2012NOTES : * If the thesis is CONFIDENTAL or RESTRICTED, please attach with the letter fromthe organization with period and reasons for confidentiality or restriction.
“I hereby declare that I have read this report and in myopinion this thesis is sufficient in terms <strong>of</strong> scope and quality for theaward <strong>of</strong> the degree <strong>of</strong> Bachelor <strong>of</strong> <strong>Engineering</strong> (<strong>Electrical</strong> – Telecommunication)”Signature: ...................................................Name <strong>of</strong> Supervisor: MR KAMALUDIN MOHAMAD YUSOFDate: 29 JUNE 2012
WIRELESS SMOKE ALARM DETECTORNORSURAYA BINTI RADZUANA report submitted in partial fulfillment <strong>of</strong> therequirements for the award <strong>of</strong> degree <strong>of</strong>Bachelor <strong>of</strong> <strong>Engineering</strong> (<strong>Electrical</strong>-Telecommunication)<strong>Faculty</strong> <strong>of</strong> <strong>Electrical</strong> <strong>Engineering</strong><strong>Universiti</strong> <strong>Teknologi</strong> <strong>Malaysia</strong>JUNE 2012
iiI declare that this report entitle “Wireless Smoke Alarm Detector” is the result <strong>of</strong> myown research except as cited in the references. The report has not been accepted for anydegree and is not concurrently submitted in candidature <strong>of</strong> any other degree.Signature: ..........................................................Name: NORSURAYA BINTI RADZUANDate: 29 JUNE 2012
iiiDEDICATIONSpecial dedication to my beloved parent:-RADZUAN B JON and LATIFAH BT MARJUKIFor their support and concernSpecial thanks to my supervisor:-MR KAMALUDIN MOHAMAD YUSOFFor the advice and guidanceThank you to all my friends for their support
ivACKNOWLEDGEMENTAlhamdulillah all praise and gratitude to Allah S.W.T for giving me health andstrength to complete my final year project for these last two semesters. I would like toexpress my deepest appreciation to my supervisor, Mr. Kamaludin Mohamad Yus<strong>of</strong> forthe guidance and encouragement to complete this project. A special thanks goes to myparent that always be my side giving me their full support in completing my project.Last but not least, a further appreciation goes to all my friends especially to mycolleague from batch SET0809 for the helping hand and also their support during myhard time in completing this project.
vABSTRACTNowadays there are an increasing numbers <strong>of</strong> incidents that occur due to fires inthe building. Most <strong>of</strong> the fire incident will cause damage and the owner will have to facea loss. Unfortunately some <strong>of</strong> the fires incident will also cause injuries and fatalities tothe resident. In order to reduce and prevent such accident occur, the smoke detector wascreated to alert the user upon the smoke detection. Current smoke detector systeminstalled in the building mostly connected via wires to the monitor panel. For the largebuilding it will cause a complicated wiring and very costly. Therefore a completewireless smoke alarm detection system was implemented using an ArduinoDuemilanove board which is an open-source physical computing platform and Xbeemodule for the wireless communication. The C language is used to program themicrocontroller in the Arduino Duemilanove board. The monitoring system for thissmoke detector was design using Micros<strong>of</strong>t Visual Basic that will be used to monitor thetriggered alarm location. With this wireless smoke detector, it will give an early warningto the people in that area with the alarm sound upon the smoke detection. The exactlocation <strong>of</strong> the smoke detection also can be known by the person in charge by looking atmonitoring system. Therefore, early response can be deployed to the affected area andcan help in reducing the possibility <strong>of</strong> fatalities and injuries when the fires happen.
viiTABLE OF CONTENTCHAPTER TITLE PAGEDECLARATIONDEDICATIONACKNOWLEDGEMENTSABSTRACTABSTRAKTABLE OF CONTENTLIST OF TABLESLIST OF FIGURELIST OF APPENDICESLIST OF ABBREVIATIONSiiiiiivvviviixixiixivxv1 INTRODUCTION1.1 Chapter Overview 11.2 Research Background 21.3 Problem Statement 31.4 Objective <strong>of</strong> Study 31.5 Scope <strong>of</strong> Study 31.6 Expected Outcome 41.7 Thesis Outline 4
viii2 LITERITURE REVIEW2.1 Chapter Overview 52.2 Wireless Sensor Network 62.3 Smoke Alarm Detector 72.4 Types <strong>of</strong> Smoke Detector 82.4.1 Photoelectric/Optical Smoke Detector 82.4.2 Ionization Smoke Detector 92.4.3 Air Sampling Smoke Detector 92.5 Related Work 102.5.1 Wireless Smoke Detector Systemby Fatimah Khairiah (UTM undergraduatethesis) 102.5.2 Optical Smoke Detector by AhmadNor Bin Mupagat (UTM undergraduate thesis) 102.5.3 Wireless Smoke Detection System byOthman O. Khalifa, A. Albagul, Sheroz Khan,Mohd Rafiqul Islam, Noruzaihan Mod Usman,<strong>Electrical</strong> and Computer <strong>Engineering</strong>,International Islamic University <strong>Malaysia</strong>. 112.5.4 Wireless security control system &sensor network for smoke & fire detection byLipu M.S.H., Karim T.F, Rahman M.L, andSultana.F, <strong>Electrical</strong> & Electronic <strong>Engineering</strong>Department, IP Network, ImplementationDepartment, and Technical Department. 113 METHODOLOGY3.1 Chapter Overview 123.2 Project Flow 13
ix3.2.1 The work detail for each step<strong>of</strong> project flow 143.3 Gantt Chart 164 HARDWARE DEVELOPMENT4.1 Chapter Overview 174.2 Arduino Duemilanove(main board) 184.2.1 Arduino Duemilanove BoardSpecification 194.2.1.1 Power 204.2.1.2 Memory 204.2.1.3 Input and Output 214.2.1.4 Communication 224.2.1.5 Programming 234.3 RF module (XBee) 234.3.1 XBee Specification 244.3.2 XBee Pin Signal 254.4 XBee Shield 264.5 Smoke Detector 264.5.1 Smoke Detector Specifications 275 SOFTWARE DEVELOPMENT5.1 Chapter Overview 285.2 X-CTU S<strong>of</strong>tware 295.2.1 XBee Configuration 295.3 Arduino S<strong>of</strong>tware 325.3.1 Upload Sketch into ArduinoBoard 325.3.2 Transmitter Coding 335.3.3 Receiver Coding 35
x5.4 Visual Basic 365.4.1 Visual Basic Coding 366 RESULT6.1 Chapter Overview 396.2 Transmitter Part 406.3 Receiver part 416.4 Overall Project Design 426.5 Testing 436.6 Working Principle <strong>of</strong> the projectDesign 447 CONCLUSION7.1 Chapter Overview 457.2 Conclusion 467.3 Future Recommendation 46REFERENCES 47APPENDICES A-B 49-59
xiLIST OF TABLESTABLE NO. TITLE PAGE4.1 Specifications <strong>of</strong> Arduino Duemilanove 194.2 Power Pin Function 204.3 Specialized Digital Pin Function 214.4 Specialized Analog Pin Function 224.5 XBee Specification 244.6 Pin Assignment for XBee Module 254.7 Smoke Detector Specification 27
xiiLIST OF FIGURESFIGURE NO. TITLE PAGE2.1 Piezoelectric Diaphragm 73.1 Project Flow 134.1 Arduino Duemilanove (main board) 184.2 XBee Module 234.3 XBee Shield 264.4 Photoelectric Smoke Detector 265.1 X-CTU S<strong>of</strong>tware 295.2 X-CTU Test/Query 305.3 XBee Configuration 315.4 X-CTU Terminal 315.5 Arduino S<strong>of</strong>tware 325.6 Transmitters Coding to Initialize the SerialCommunication 335.7 Transmitters Coding to read and send data 345.8 Receiver Coding 355.9 Visual Basic 365.10 Visual Basis Coding for serial port 375.11 Visual Basic Coding for button action 375.12 Visual Basic Coding to read and display result 38
xiii5.13 Monitoring System Layout in Visual Basic 386.1 Transmitter Part 406.2 Receiver Part 416.3 Overall Project Design 426.4 Smoke Monitoring System 436.5 Working Principle 44
xivLIST OF APPENDICESAPPENDIX TITLE PAGEA Photoelectric Smoke Detector IC Datasheet 49B XBee / XBee Pro OEM RF Module Product Manual 51
xvLIST OF ABBREVIATIONSPIC - Peripheral Interface ControllerRF - Radio FrequencyWSN - Wireless Sensor NetworkOFM - Optical Frequency MeasurementsLED - Light Emitting DiodeLCD - Liquid Crystal DisplayGPS - Global Positioning SystemUSB - Universal Serial BusDH - Destination HighDL - Destination LowDC - Direct CurrentAC - Alternating CurrentI/O - Input/Output
CHAPTER 1INTRODUCTION1.1 Chapter OverviewThis chapter will discuss on the research background, problem statementobjective and scope <strong>of</strong> the project. Problem statement states the reason why this projectwas carried out. Then the objective <strong>of</strong> this project was based on what the problemstatement is stated. The scope <strong>of</strong> this project was based on the objective <strong>of</strong> this project.
21.2 Research BackgroundToday, wireless communication has been used in many applications <strong>of</strong>electronic devices such as cellular phones, global positioning system control (GPS),remote and in the smoke detector system. Radio frequency (RF) technology has beenimplemented to transfer information without the use <strong>of</strong> wires. RF is basically thefrequency <strong>of</strong> radio wave and alternating current that carry a radio signal. The basicprinciple <strong>of</strong> how it works is energy in RF current conductor can radiate <strong>of</strong>f into space asradio waves.RF technology is currently implemented in the smoke detector system to reducewiring and create a communications transmitter and receiver via RF signals to transmitdata. This technology also can reduce wiring costs because it can be installed by usersthemselves without a technician. The smoke detectors may be one way to create aneffective tool in providing early warning <strong>of</strong> smoke detection.Smoke detectors are <strong>of</strong>ten used in confined spaces such as inside a building,houses, airplanes, and factories. It basically work on the principle <strong>of</strong> when smoke isdetected, an alarm will be activated to warn the people around the area.
31.3 Problem statementNowadays, there are lot <strong>of</strong> fatalities and damages caused by fire. In order to givean early warning to the people, the smoke detector was used to give an alert on thesmoke detected. The current industrial smoke alarm system used by the user usuallyinvolves a network that requires wider space and wires, therefore make installationprocess more complicated and costly. When the alarm triggered, it requires user to gothe building itself and find the monitoring panel in order to find the exact location <strong>of</strong> thesmoke detected. This process makes the early response to be delayed.1.4 Objective <strong>of</strong> StudyThe main objective <strong>of</strong> this project is to design a wireless smoke detection systemthat can give alert to user upon any detection <strong>of</strong> smoke and to monitor using computerupon location <strong>of</strong> any detection <strong>of</strong> smoke in a building.1.5 Scope <strong>of</strong> studyIn order to achieve the objective <strong>of</strong> this project, the scope <strong>of</strong> this wireless smokealarm detector is basically focusing on the implementation <strong>of</strong> wireless smoke alarmdetector using Arduino board. Design a monitoring system for wireless smoke alarmdetector using Visual Basic programming. Finally integrate the hardware and s<strong>of</strong>twareinto a complete wireless smoke alarm detection system.
41.6 Expected OutcomeThe expected outcome <strong>of</strong> this project is the system can perform when detects anysmoke where it will give an alarm to the users and the computer can show the locationupon the place <strong>of</strong> the detection.1.7 Thesis OutlineThis report consists <strong>of</strong> five chapters. Chapter 1 is an introduction to the projectthat consists <strong>of</strong> research background, objective, scope <strong>of</strong> project and also problemstatement. Chapter 2 covers on the literature reviews on the project that include therelated work or study on the previous project. Meanwhile, Chapter 3 covers themethodology <strong>of</strong> the project that consists <strong>of</strong> the project flow, hardware selection and alsothe Gantt chart for the project. As for Chapter 4, it will cover hardware development <strong>of</strong>the project that will include the specification <strong>of</strong> the hardware itself. In Chapter 5, it willdiscuss on the s<strong>of</strong>tware development <strong>of</strong> this project which are the Arduino s<strong>of</strong>tware andvisual basic. Chapter 6 will discuss about result <strong>of</strong> this project and lastly Chapter 7 willexplain overall conclusion and recommendation.
CHAPTER 2LITERITURE REVIEW2.1 Chapter OverviewIn this chapter, the literature review on wireless sensor network and smoke alarmdetector will be discuss and also the related work on the previous project design will alsobe explain and the type <strong>of</strong> smoke detector that currently used today.
62.2 Wireless Sensor Network (WSN)Wireless Sensor Network is a collection <strong>of</strong> node distribution that capable onoperating with the presence <strong>of</strong> minimal user whereby one user can monitor severalnodes. WSN was built from some number <strong>of</strong> hundreds or even thousands, in which eachnode is connected to one or several sensor. For example, one node is attached to severalsensors such as temperature sensor, pressure sensor and gas sensor [1].Wireless Sensor Network can be the most useful way to collect variousparameters and all the information needed by environments such as in industrial,shipboard, home, building, utilities and transportation system automation. But the sensoris resources constrained which include the battery life, communication bandwidth, CPUstorage and capacity.The main function <strong>of</strong> wireless sensor network is to determine the environmentalconditions that are monitored by sensing some physical event. Sensor network consistsbasically <strong>of</strong> a large number <strong>of</strong> sensor nodes deployed in a large physical area to monitorand track the activities <strong>of</strong> real-time environment. This sensor nodes works together tocollect data such as temperature, humidity, and acceleration from the environment.In each <strong>of</strong> sensor network node consist <strong>of</strong> several parts which are the radiotransceiver with an internal or external connection to an antenna, a microcontrollerwhich are the electronic circuit for interfacing with the sensors and energy source,usually a battery or an embedded form <strong>of</strong> energy harvesting.
72.3 Smoke Alarm DetectorThe contribution in development <strong>of</strong> smoke detector was from research made byWalter Jaeger in 1930 [14]. In the early 1940’s, the first smoke detector was developedby Meili and Jaeger that required high voltage power input [14]. Then in 1965, Duane D.Persall created the first affordable home smoke detector that using individual batterypowered that can be replace and install easily by the users [17]. Francis Robbins Uptonthen invented the first automatic fire alarm in 1890 that give great contribution to todaysmoke alarm detector [17].Smoke alarm, both ionization and photoelectric type using a piezoelectric horn,as shown in Figure 2.1, to inform the consumer that the smoke alarm has been activated.Piezoelectric horn sound source is a piezoelectric diaphragm. Diaphragm consists <strong>of</strong> apiezoelectric ceramic plate, which has electrodes on both sides, and metal plates areusually made <strong>of</strong> brass or stainless steel [11].Figure 2.1 Piezoelectric DiaphragmsWhen voltage DC is used for piezoelectric diaphragm electrode, it causes amechanical distortion <strong>of</strong> the piezoelectric element. A piezoelectric element eitherexpands or contracts depending on the polarity <strong>of</strong> the applied voltage to the piezoelectric
8elements. Metal plate that was attached to a piezoelectric element do not expanding. Itwills alternately repeated expansion and contraction when the voltage AC is used forelectrodes producing sound waves in air.The unit that most commonly used to measure the sound intensity is in decibel(dB). Decibel scale is a logarithmic scale, an increase <strong>of</strong> 10 dB in sound intensityrepresents 10-fold increase in sound power and 100-fold increase in sound pressuresince the noise power is directly proportional to the square <strong>of</strong> sound pressure. Wherebythe sound pressure is measured with a meter sound-stage..2.4 Types <strong>of</strong> Smoke DetectorGenerally there are three types <strong>of</strong> smoke detector that was currently used andavailable in the market which are photoelectric smoke detector, ionization smokedetector and air sampling smoke detector. Each smoke detector has their own way ondetecting the smoke.2.4.1 Photoelectric/Optical Smoke DetectorThe photoelectric smoke detector is actually a light sensor. When used as asmoke detector, it includes a light source which is from LED, lens will adjust the line <strong>of</strong>sight <strong>of</strong> the light into the beam, and the photodiode or other photoelectric sensor at an
9angle to the beam as the light detector. In the absence <strong>of</strong> smoke, the light passes in front<strong>of</strong> the detector in a straight line. When smoke enters the optical chamber across the line<strong>of</strong> the light beam, some light will scattered by the smoke particles, leads to the sensorand thus triggering the alarm.2.4.2 Ionization Smoke DetectorIt consists <strong>of</strong> ionization chamber and a source <strong>of</strong> ionizing radiation. Anionization type smoke detector is generally cheaper to compare an optical smokedetector. However, it is sometimes rejected because likely to sound a false alarms due tothe sensitivity <strong>of</strong> smoke particles whereby it can detect smoke particles that are too smallto be seen. When the smoke entering the ionization chamber, the smoke particles attachto the ions and neutralize them, so they do not reach the plate. The drop in currentbetween the plates would trigger the alarm.2.4.3 Air Sampling Smoke DetectorThe air sampling smoke detector was capable <strong>of</strong> detecting smoke microscopicparticles. Most air-sampling detectors work by actively drawing air through a network <strong>of</strong>small bore pipe lay on or under the ceiling running parallel covering an area protected.Small holes drilled into the pipe every matrix form holes <strong>of</strong> sampling points, providingeven distribution throughout the pipe network. Air samples work over a sensitive opticaldevice, <strong>of</strong>ten a solid-state laser, is tuned to detect very small particles <strong>of</strong> combustion.
102.5 Related work2.5.1 Wireless Smoke Detector System by Fatimah Khairiah (UTMundergraduate thesis)The project that has been done by Fatimah Khairiah was involving fabricationand programming process <strong>of</strong> wireless smoke detector system. Therefore, this projectconsists two part which is hardware and s<strong>of</strong>tware part. For the hardware part, it consists<strong>of</strong> PIC microcontroller, LED, LCD, air contaminant sensor and RF module. For thes<strong>of</strong>tware part, MPLAB IDE and PICkit2 were used to create and load the program. Theway <strong>of</strong> this system work is when a smoke detected by air contaminant sensor, it willtransmit RF signal to the receiver part. Then, the buzzer will activated while the LEDand LCD will display the condition <strong>of</strong> the detected smoke. [4]2.5.2 Optical Smoke Detector by Ahmad Nor Bin Mupagat (UTM undergraduatethesis)This optical smoke detector was design to detect the intensity <strong>of</strong> smoke and givea warning to people inside the building. The design <strong>of</strong> circuit was using Proteus wherethen it will converted into printed circuit board. For the programming and simulation <strong>of</strong>the microcontroller, MPLAB IDE s<strong>of</strong>tware was used. This smoke detector work whenthe smoke is detected, the alarm and LED will activate. [5]
112.5.3 Wireless Smoke Detection System by Othman O. Khalifa, A. Albagul,Sheroz Khan, Mohd Rafiqul Islam, Noruzaihan Mod Usman from <strong>Electrical</strong> andComputer <strong>Engineering</strong>, International Islamic University <strong>Malaysia</strong>.This wireless smoke detection system is basically using a photoelectric smokedetector whereby when it sense smoke, the alarm will activate and send signal to othersmoke detector in the vicinity. Signal will activates the individual relays in the othersmoke detectors causing them to activate the alarm. There are battery operated andtherefore no external connections are required. It can be installed by homeowner just asthey would a normal smoke detector. This design basically aiming to have cost efficientsystem, compact design, easily expandable, simple to install and replaceablecomponents. [3]2.5.4 Wireless security control system & sensor network for smoke & firedetection by Lipu M.S.H., Karim T.F, Rahman M.L, and Sultana.F from <strong>Electrical</strong>& Electronic <strong>Engineering</strong> Department, IP Network, Implementation Department,and Technical Department.This project was designing a smoke detector that will raise alarm signal thatactivate relay. Whereby this relay is connected to computer via parallel port that willallow reading on alarm signal from smoke detector circuit. When it receives the alarm, itwill send message to specified mobile station. The hardware used is including PICmicrocontroller, temperature sensor, smoke sensor, low battery sensor, transmitter andreceiver. For the s<strong>of</strong>tware component, the program and code is implemented using PICmicrocontroller.[6]
CHAPTER 3METHODOLOGY3.1 Chapter OverviewIn this chapter, the methodology <strong>of</strong> this project will be discuss in detail theapproach and method that will be used in this project which include the project flow andthe Gantt chart for both semester 1 and semester 2.
133.2 Project FlowFigure 3.1 below shows the project flow <strong>of</strong> the designing process.Literature review / ResearchSelection and Analysis <strong>of</strong> devicesMicrocontroller CodingCommunicate between XbeeMonitoring system designSmoke detector testingRun and test whole systemFigure 3.1 Project Flow
143.2.1 The work detail for each step <strong>of</strong> project flowi. Literature Review / ResearchIn this step, the information about developing this RF technologywas being search. Especially in wireless sensor network and wirelesssmoke detector system. The source <strong>of</strong> this information are gathered frombooks, journal, article, internet and also thesis from previousundergraduate students that relate to this project in order to make surethere was a different approach in designing this project. The suitablehardware is also being search in this step.ii.Selection and Analysis <strong>of</strong> devicesAfter some research that has been done in selecting the suitabledevices to use in this project. The analysis <strong>of</strong> the devices was done inthese steps that include the architecture and specification <strong>of</strong> the devices.
15iii.Communicate between XbeeTo make the xbee communicate with each other, configuration onthis RF module was made using XCTU s<strong>of</strong>tware. As for this project weneed the xbee to be a transmitter and receiver.iv.Microcontroller CodingIn this step, the coding for microcontroller was created using theArduino s<strong>of</strong>tware and uploads the program into the Arduino board. Thisprogram was created based on the working principle <strong>of</strong> the projectdesign.v. Monitoring system designTo design the monitoring system, visual basic was used to createthe graphical user interface. The layout for the monitoring system wasdesign to see the location upon any detection <strong>of</strong> the smoke.
16vi.Smoke detector testingAfter done with the programming in arduino and visual basic, thesmoke detector was test using the smoke to see where the constant outputcurrent flow after the smoke was detected then the smoke detector wasattached to the transmitter part.vii.Run and test whole systemIn this step, the smoke detector was triggered when the smoke was placeto the smoke detector and as a result the visual basic will display the detectionupon the smoke.
CHAPTER 4HARDWARE DEVELOPMENT4.1 Chapter overviewThe hardware development for this project will be explain in this chapter thatconsist <strong>of</strong> three main component which are the Arduino Duemilanove board that consist<strong>of</strong> microcontroller, RF module (XBee) for wireless data transmission and a photoelectricsmoke sensor which are a standalone smoke detector.
184.2 Arduino Duemilanove (main board)The Arduino Duemilanove main board is an open-source physical computingplatform based on a simple I/O board and a development environment that implementsthe processing. Arduino can be used to develop stand-alone interactive objects or it canbe connected to s<strong>of</strong>tware on the computer. It was automatically select the power supplyeither from USB or external power. This board is exposed the microcontrollerinput/output pin to enable connection between this pin to other circuit or sensor. Figure4.1 show the component on the Arduino Duemilanove board.Figure 4.1 Arduino Duemilanove (main board)
194.2.1 Arduino Duemilanove Board SpecificationTable 4.1 below shows the specification <strong>of</strong> the Arduino Duemilanove BoardTable 4.1 Specification <strong>of</strong> Arduino Duemilanove boardSpecificationArduino Duemilanove BoardMicrocontrollerATmega328Operating Voltage5VInput Voltage (recommended) 7-12VInput Voltage (limits) 6-20VEEPROM1 KB (ATmega328)SRAM2 KB (ATmega328)Clock Speed16 MHzDC Current for 3.3V Pin50 mADC Current per I/O Pin40 mAAnalog Input Pins 6Digital I/O Pins 14 ( provide 6 PWM output )Flash Memory32 KB <strong>of</strong> which 2 KB used bybootloaderBefore using Arduino Duemilanove board, we must know the specification <strong>of</strong> theboard that we are using to avoid any damage on the board itself. The arduino board areusing ATmega328 microcontroller with operating voltage <strong>of</strong> 5V. For this project, thedigital I/O pin will be used and the current per I/O pin should not be more than 40mA.
204.2.1.1 PowerThe Arduino Duemilanove board can be powered via USB or external powersupply. The power source is automatically selected. External power can come eitherfrom an adapter or battery. The adapter can be connected by plug it into the power jack<strong>of</strong> the board. The board is able to operate on an external supply <strong>of</strong> 6 to 20 volts. Ifsupplied with less than 7V, however, the 5V pin may supply less than five volts and theboard may be unstable. If using more than 12V, the voltage regulator may overheat anddamage the board. The recommended range is 7 to 12 volts. The power pins are asshown in Table 4.2Table 4.2 Power pins functionsPower Pins FunctionsVIN The input voltage when using an external power source.5V Regulated power supply to power up the microcontroller and othercomponents on the board.3V3 A 3.3 volt supply generated by the on-board FTDI chip.GND Ground pins.4.2.1.2 MemoryThis board is using the ATmega328 that has 32 KB with 2 KB are used for theboot loader. This ATmega328 has 2 KB <strong>of</strong> SRAM and 1 KB <strong>of</strong> EEPROM.
214.2.1.3 Input and OutputEach <strong>of</strong> the 14 digital pins on the board can be used as an input or output,using pinMode(), digitalWrite(), and digitalRead() functions. They operate at 5 volts.Whereby each pin can provide or receive a maximum <strong>of</strong> 40 mA and has an internal pullupresistor <strong>of</strong> 20-50 kOhms. In addition, some pins have specialized functions as shownin Table 4.3.Digital pinsFunctionSerial: 0 (RX) and 1 (TX) Used to receive (RX) and transmit (TX) TTL serial data.PWM: 3, 5, 6, 9, 10, and Provide 8-bit PWM output with the analogWrite() function11External Interrupts: 2 and 3 These pins can be configured to trigger an interrupt.LED: 13A built-in LED connected to digital pin 13. LED is onwhen it receive HIGH value and LED is <strong>of</strong>f when itreceive LOW value.SPI: 10 (SS), 11 (MOSI), Support SPI communication by using the SPI library12 (MISO), 13 (SCK).Table 4.3 Specialized Digital pins functionThe board also has six analog inputs, provides ten bits <strong>of</strong> resolution each. Bydefault they measure from ground to 5 volts, thus is it possible to change the upper end<strong>of</strong> their range by using the AREF pin and the analogReference() function. In addition,some analog pins have specialized functionality as shown in Table 4.4.
22Table 4.4 Specialized Analog pins functionAnalog PinsResetI 2 CAREFFunctionLOW value to reset the microcontroller.Support I 2 C (TWI) communication by using the Wire libraryThe analog input reference voltage that used withanalogReference().4.2.1.4 CommunicationIn order to communicate with a computer, another Arduino, or othermicrocontrollers the Arduino Duemilanove board has a number <strong>of</strong> facilities. Whereby,the ATmega328 provide UART TTL (5V) serial communication, which is available ondigital pins 0 (RX) and 1 (TX). An FTDI FT232RL on the board channels this serialcommunication over USB and the FTDI drivers provide a virtual com port to s<strong>of</strong>twareon the computer. Arduino s<strong>of</strong>tware includes a series <strong>of</strong> monitors that allow the collection<strong>of</strong> data in the form <strong>of</strong> simple text to be sent to and from the Arduino board. The RX andTX LEDs on the board will flash when data is transmitted via the FTDI chip and USBconnection to the computer. A serial communication library allows S<strong>of</strong>tware Serial onany digital pin on the board.
234.2.1.5 ProgrammingThe Arduino Duemilanove board can be programmed with the Arduino s<strong>of</strong>tware.Without the use <strong>of</strong> an external hardware programmer, ATmega328 on the ArduinoDuemilanove comes preburned with a bootloader that allows new code uploading into it.The original STK500 protocol was used to communicate.4.3 RF module (XBee)For this project, XBee Series 1 which are point to point communication wereused in this project. This type <strong>of</strong> RF module was selected because it can provide reliabledelivery <strong>of</strong> data and only require minimal power to transmit the data between thedevices. Since the communications network up 100 meters with low power (1mW). ThisXBee RF module was design to meet the IEEE 802.15.4 standard and it was a low-costand low power wireless sensor network. It can transmit data wirelessly without anyadditional configuration. No configuration necessary for out <strong>of</strong> the box RFcommunications. XBee modules are equipped with application s<strong>of</strong>tware to facilitateusers to edit the configuration and also to test the function.Figure 4.2 XBee module
244.3.1 XBee SpecificationThe specification <strong>of</strong> XBee module is shown in Table 4.5 below.Table 4.5 XBee SpecificationSpecificationRF Module (XBee)Operating frequencyISM 2.4 GHzPower output1 mW (0 dBm)Command setAT or APIIndoor/Urban range up to 100 ft (30 m)Power-down sleep current
254.3.2 XBee Pin SignalThis XBee need minimum connection <strong>of</strong> VCC, GND, DOUT and DIN. Thismodule includes a 50kohms pull-up resistor attached to RESET and several input pullupcan be configured using PR command. Table 4.4 shows the pin assignment for theXBee.Table 4.6 Pin Assignment for XBee module
264.4 XBee shieldThis XBee Shield is an XBee expansion board that design for Arduino board andit was used to make the connection between RF module and the Arduino board. Figure4.3 below shows the XBee Shield.Figure 4.3 XBee Shield4.5 Smoke DetectorFor a smoke detector part, it will consist <strong>of</strong> photoelectric sensor, a 9V DC batteryand a buzzer. This smoke detector will be connected to the transmitter part <strong>of</strong> the sensornode. Figure 4.4 below shows the photoelectric smoke alarm detector.Figure 4.4 Photoelectric Smoke Detector
274.5.1 Smoke Detector SpecificationsTable 4.7 shows the specification <strong>of</strong> the smoke detector.Table 4.7 Smoke Detector SpecificationSpecificationSmoke DetectorSensor typePhotoelectric sensorPower supplyDC9V batteryOption current20uaAlarm current10maAlarm sonority≥85dbWorking temperature -10-45℃Relative humidity
28CHAPTER 5SOFTWARE DEVELOPMENT5.1 Chapter overviewThis chapter will explain the details on the s<strong>of</strong>tware development in this project.In the s<strong>of</strong>tware part, the Arduino s<strong>of</strong>tware will be used and C programming languagewas used to create the program in the Arduino board. To program the XBee, X-CTU wasused to create the communication program. To create a GUI program for monitoringpurpose, Micros<strong>of</strong>t visual basic will be used to create the program.
295.2 X-CTU S<strong>of</strong>twareIn order to configure the RF module, the X-CTU s<strong>of</strong>tware was used to createcommunication between the XBee that will act as transmitter and receiver. Figure 5.1below show the X-CTU s<strong>of</strong>tware.Figure 5.1 X-CTU s<strong>of</strong>tware [10]5.2.1 XBee ConfigurationTo configure this RF module, X-CTU s<strong>of</strong>tware was used. First place the jumperin USB connection on the Arduino board. When the program is launched, select the “PCSetting” tab. In this PC setting tab, select the COM port and the COM port wasconfigured to these setting:Baud Rate: 9600Flow Control: NoneData bits: 8Parity: NoneStop bit: 1
30Then the Test/Query button is select and it wills response as Figure 5.2.Figure 5.2 X-CTU Test/QueryThen select the modem configuration. First read the XBee module to get thecurrent configuration and XBee was configured to these setting:COM 20 (Transmitter)PAN ID: 2223DH: 0DL: 0Baud rate: 9600COM 21 (Receiver)PAN ID: 2223DH: 0DL: FFFFBaud rate: 9600The configuration was shown in Figure 5.3. Then select the write button and waituntil the program complete process on configuring the RF module. But the XBeemodule can be both transmitter and receiver. To create that function, configure the value<strong>of</strong> DH and DL to 0. To see whether the XBee can communicate with each other, selectthe terminal tab and type any word on transmitter <strong>of</strong> the COM port than it will appear tothe receiver COM port as shown in Figure 5.4.
31Figure 5.3 XBee ConfigurationFigure 5.4 X-CTU Terminal
325.3 Arduino S<strong>of</strong>twareTo create program in Arduino duemilanove board, Arduino s<strong>of</strong>tware was used toupload the program into the microcontroller. This Arduino s<strong>of</strong>tware was using Clanguage. First the Arduino s<strong>of</strong>tware and board need to be installed in the computer.Then identified what are the COM port for the Arduino board since there is two Arduinoboard are used in this project. As for this project the COM 21 and COM 20 was used.Figure 5.5 shows the Arduino s<strong>of</strong>tware.Figure 5.5 Arduino S<strong>of</strong>tware5.3.1 Upload Sketch into Arduino BoardTo upload a sketch into the microcontroller inside the Arduino board, make surethe jumper in the USB setting on Arduino board then select the tool tab and select theboards which are Arduino Duemilanove w/ ATmega328. Then select serial port which isCOM20 and COM21. Then select upload button to upload the sketch. To test thecommunication between XBee change the jumper to XBee setting.
335.3.2 Transmitter CodingFigure 5.6 below show the coding to transmit the data from transmitter board tothe receiver board. First the pin that will be used will be declared. Then initialized theserial communication using Serial.begin(9600). Value <strong>of</strong> 9600 refers to the baud rateused in sending the serial data. Then defined the pin as an input which refers to pin thatwill receive input from smoke detector.To declare the pinthat will be usedTo initialize theserial communicationand pin as inputFigure 5.6 Transmitters Coding to Initialize the Serial Communication
34Figure 5.7 below show the coding to read add send the data. Void loop was usedto make it always run. First the state <strong>of</strong> pin was read. The if statement was used to checkthe pins that detect input from smoke detector. LOW will identified no detection whileHIGH identified the detection. Then Serial.print used to display the data then transmit itto the receiver board. Delay was used to provide the delay time before next detection.Read the state <strong>of</strong> pinin the boardCheck if the pindetects any input anddisplay the result thensend it to the receiverFigure 5.7 Transmitters Coding To Read and Send the Data
355.3.3 Receiver CodingFigure 5.8 below shows the receiver coding in Arduino s<strong>of</strong>tware. First the pinand the incomingByte was declared. Then initialize the serial communication and definepin as an output. Serial.available was used to check any incoming serial data and read itusing Serial.read. Then when the data detected it will display it then send it to the visualbasic.To declare the pin andthe incomingByteTo initialize theserial communicationand pin as outputCheck if there is incomingserial data and read theoldest byte in the serialbuffer.If incomingByte = 0,turn <strong>of</strong>f the LED. Elsetrun ON the LEDFigure 5.8 Receiver Coding
365.4 Visual BasicVisual Basic was used to create the GUI <strong>of</strong> the monitoring system <strong>of</strong> thiswireless smoke alarm detector. Figure 5.6 shows the visual basic s<strong>of</strong>tware and Figure5.7 shows the layout for the monitoring system.Figure 5.9 Visual Basic [9]5.4.1 Visual Basic CodingFigure 5.10, Figure 5.11 and Figure 12 shows the coding in the visual basic. FirstImport was used to define the scope element in the visual basic programming. Then thecoding to detect the serial port was created and also the button function and actions.There are four button was used, which are connect, disconnect, refresh and logout buttonand all the function and action was created. In order to read data from Arduino board,delegates and invoke statement was used. Then when receive the data from Arduinoboard, it will display the result in the monitoring system layout as in Figure 5.13.
37Scope <strong>of</strong> the elementTo get the serial portdetected and alsolist the baud ratethat will be used.Button state wasdeclared.Figure 5.10 Visual Basic Coding for Serial port detectionDefine the button connectaction when serial portdetected and connected.Define the disconnect button actionwhen serial port disconnected.Figure 5.11 Visual Basic Coding for button action
38Read the buffer from theserial port.Button Logout actionRead the incoming data and displaythe result.Figure 5.12 Visual Basic Coding to read and display the resultFigure 5.13 Monitoring System Layout in Visual Basic
39CHAPTER 6RESULT6.1 Chapter OverviewIn this chapter, the overall design <strong>of</strong> this wireless smoke alarm detector was testand will be analyze. The monitoring system was also being test to get the input fromsmoke detector when the smoke detector was triggered. The overall working principle <strong>of</strong>this project design will also be discussed.
406.2 Transmitter partIn the transmitter part, it consist <strong>of</strong> XBee (TX) with shield, ArduinoDuemilanove board, smoke detector and a simple circuit in order to make connectionbetween smoke detector and Arduino board. Figure 6.1 shows the circuit in thetransmitter part.Figure 6.1 Transmitter partThere are 6 digital pin are used to receive the input from smoke detector. A dipswitch was used as a replacement for the smoke detector to make sure the connectionwas correct before connected to the smoke detector. First before testing make sure thecurrent supply to the pin is less than 40mA or else it will damage the board. Since theArduino board has 5V pin, it can be used to supply voltage to the circuit. Then 10KOhmresistor was used to reduce the current. When done testing using dip switch, connect thesmoke detector to the circuit and a LED was added to the circuit to see whether aconstant current flow in the circuit when smoke was detected.
416.3 Receiver partIn the receiver part, it consists <strong>of</strong> XBee (RX) with shield, Arduino Duemilanoveboard and computer. Figure 6.2 shows the receiver part <strong>of</strong> project design.Figure 6.2 Receiver PartFor this receiver part the connection was made using USB cable plug in to thecomputer and Arduino board and make sure the jumper in XBee setting so it can receivedata from the transmitter.
426.4 Overall Project DesignFigure 6.3 below shows the complete project design.Smoke detectorTransmitterWIRELESSMonitoring PanelReceiverFigure 6.3 Overall Project DesignThe Figure 6.3 shows the overall project design when the smoke detector detectthe smoke the alarm will triggered then it will produce output current that will activatethe pin in the transmitter Arduino board. Then through XBee it will send data wirelesslyto the receiver node and from the receiver node, it will send the data through the USBcable to the computer.
436.5 TestingThe testing for this project was done by applied a smoke at the smoke detectoruntil the smoke detector was triggered. At the same time, the monitoring system willgive warning upon the detection <strong>of</strong> the smoke. Figure 6.4 shows the monitoring systemwhen the smoke detector was triggered.Figure 6.4 Smoke Monitoring System
446.6 Working Principle <strong>of</strong> the project designFigure 6.5 below shows the working principle <strong>of</strong> the project design.Figure 6.5 Working PrincipleWhen the smoke detector does not detect any smoke, it will send data to thetransmitter to indicate that there is no smoke detected. But when smoke is detected, thebuzzer will activate and send data to transmitter part to indicate that there is smokedetected. Then from the transmitter, the data will be send wirelessly via the RF moduleto the receiver part. At the receiver part, data will send to the computer to indicatewhether there is any detection <strong>of</strong> smoke and the monitoring system in visual basic willdisplay the result <strong>of</strong> the indication.
CHAPTER 7CONCLUSION7.1 Chapter OverviewIn this chapter, the conclusion and future recommendation will be discuss. Inconclusion, the objective <strong>of</strong> this project will be analyzed to see whether it was beingachieved or not. The future recommendation for this project will be suggest toimproving the quality and also the performance <strong>of</strong> the project design.
467.2 ConclusionBased on the result <strong>of</strong> this project design, the objective <strong>of</strong> this project wassuccessfully being achieved whereby the design a wireless smoke detection system thatcan give alert to user upon any detection <strong>of</strong> smoke was able to function. The monitoringsystem using computer upon location <strong>of</strong> any detection <strong>of</strong> smoke was done using thevisual basic. But this prototype design has some limitation in term <strong>of</strong> the datatransmission distance since it only can be up to 100m and this design only point to pintcommunication.7.3 RecommendationIn order to improve the design limitation, some future recommendation is beingsuggested to overcome this weakness. First is to use RF module that has high power inorder to transmit the data for long distance but also to improve the transmission qualitysince in real situation there will be some blocking occur that will reduce the transmissionsignal. Secondly is to use point to multipoint RF module so it can transmit data morethan one sensor node and the signal hopping can be done to transmit the data from onepoint to another point to create a wireless sensor network.
47REFERENCES1. Mitta, R. Bhatia, M.P.S. Wireless sensor networks for monitoring theenvironmental activities. Computational Intelligence and Computing Research(ICCIC), 2010 IEEE International Conference .1-5, 28-29 Dec. 20102. Anu Jyothy (2011). Secure and Efficient Data Transfer in WSN ME ( AppliedElectronics ), IJECT Vol. 2, Issue 3.3. Khalifa, O.O. Albagul, A. Khan, S. Islam, M.R. Usman, N.M., Wireless smokedetection system. Computer and Communication <strong>Engineering</strong>, 2008. ICCCE2008. International Conference .409-413, 13-15 May 20084. Fatimah Khairiah binti ABD Hamid (2011). Wireless Smoke Detector SystemBachelor Degree Thesis. <strong>Universiti</strong> <strong>Teknologi</strong> <strong>Malaysia</strong>:5. Ahmad Nor bin Mupagat (2011). Optical Smoke Detector. Bachelor DegreeThesis, <strong>Universiti</strong> <strong>Teknologi</strong> <strong>Malaysia</strong>6. Lipu M.S.H, Karim T.F , Rahman M.L, Sultana, F. , Wireless security controlsystem & sensor network for smoke & fire detection. Advanced ManagementScience (ICAMS), 2010 IEEE International Conference , vol.3, 153-157, 9-11July 20107. Deitel and Paul J (2010). C: How to Program (6 th ed) Upper Saddle River,NJ.:Pearson/Prentice Hall.8. M.R.McRoberts (2009) Arduino Starter Kit Manual, Earthshine Design9. visual-basic-net-simple-web-browser, http://www.itechsociety.com/2010/11
4810. http://www.matlog.com/accessoires/accessoires-radio/digi-x-ctu.html11. Lee .A, Midgett .J, White .S, (2004). Sound Effectiveness <strong>of</strong> Residential SmokeAlarms U.S Consumer product Safety Commission.12. B.C. Taber, J.Z. Su, N. Bénichou. et , “ Smoke Detection In Full-Scale HouseExperiments”, Fire Research Program, National Research CouncilCanada13. Micros<strong>of</strong>t Developer Network, http://msdn.micros<strong>of</strong>t.com/en-us/default.aspx14. Jim Milke, (2011) “The History <strong>of</strong> Smoke Detection: A Pr<strong>of</strong>ile <strong>of</strong> HowTechnology and Role <strong>of</strong> smoke Detection Has Change”, Department <strong>of</strong> FireProtection <strong>Engineering</strong>, University <strong>of</strong> Maryland.15. Photoelectric Smoke Detector IC, Datasheet16. XBee / XBee Pro OEM RF Module, Product Manual17. Smoke Detector, http://en.wikipedia.org/wiki/Smoke_detector
APPENDIX A49
APPENDIX B51