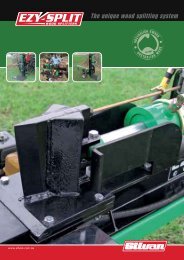
Generator 6.5Hp Selecta Power - Silvan
Generator 6.5Hp Selecta Power - Silvan
Generator 6.5Hp Selecta Power - Silvan

Create successful ePaper yourself
Turn your PDF publications into a flip-book with our unique Google optimized e-Paper software.
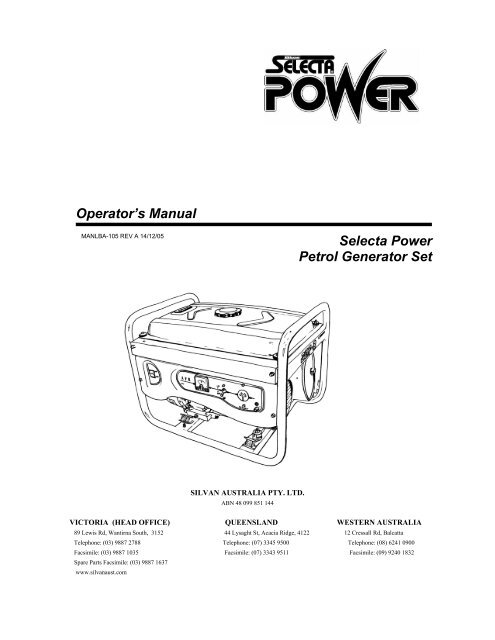
Operator’s ManualMANLBA-105 REV A 14/12/05<strong>Selecta</strong> <strong>Power</strong>Petrol <strong>Generator</strong> SetSILVAN AUSTRALIA PTY. LTD.ABN 48 099 851 144VICTORIA (HEAD OFFICE) QUEENSLAND WESTERN AUSTRALIA89 Lewis Rd, Wantirna South, 3152 44 Lysaght St, Acacia Ridge, 4122 12 Cressall Rd, BalcattaTelephone: (03) 9887 2788 Telephone: (07) 3345 9500 Telephone: (08) 6241 0900Facsimile: (03) 9887 1035 Facsimile: (07) 3343 9511 Facsimile: (09) 9240 1832Spare Parts Facsimile: (03) 9887 1637www.silvanaust.com1
New Product WarrantyWARRANTY POLICY<strong>Silvan</strong> Australia Pty. Ltd. Warrants to its authorised dealer, who in turn warrants to theoriginal purchaser (owner) of each new <strong>Silvan</strong> product, that it will repair or replace,without charge for labour or parts, any defective or malfunctioning parts in accordancewith the warranty limitations and adjustments schedule below.PRODUCT – ALLPRIVATE DOMESTIC USE – 12 MONTHSPRIVATE and COMMERCIAL AGRICULTURAL USE – 12 MONTHSAGRICULTURAL CONTRACTORS – 6 MONTHSGOVERNMENT and MUNICIPAL DEPARTMENTS – 6 MONTHSALL OTHER NON-AGRICULTURAL APPLICATIONS – 3 MONTHSHIRE COMPANIES – 3 MONTHSThe warranty period will begin on the date the product is delivered to the first retailpurchaser.THIS WARRANTY COVERS:• Claims resulting from defects in workmanship or material under normal use and service.THIS WARRANTY DOES NOT COVER:• Conditions resulting from misuse, negligence, alteration, accidental damage or failure toperform normal maintenance services;• Any product which has been repaired by other than an authorised <strong>Silvan</strong> Australia Pty.Ltd. Service outlet so as, in any way in the sole and absolute judgement of <strong>Silvan</strong>Australia Pty. Ltd., to affect adversely its performance and reliability;• The replacement of wear and tear items such as diaphragms, V belts and groundengaging components;• Loss of time, inconvenience, loss of use of the product or any other consequentialdamages.The repair of defective products qualifying under this warranty will be performed by anauthorised <strong>Silvan</strong> Australia Pty. Ltd. Service outlet within a reasonable time following thedelivery of the product, at the cost of the owner, to the service outlet’s place of business.The product will be repaired or replaced, using new parts sold by <strong>Silvan</strong> Australia Pty.Ltd.The owner is responsible for the performance of regular maintenance services asspecified in the Operator’s Manual applicable to the product.• THIS WARRANTY IS THE ONLY WARRANTY APPLICABLE TO SILVANAUSTRALIA PTY. LTD. NEW PRODUCTS AND, TO THE MAXIMUM EXTENTPERMITTED BY LAW, IS EXPRESSLY IN LIEU OF ANY OTHER WARRANTIESEXPRESSED OR IMPLIED, INCLUDING ANY IMPLIED WARRANTY OFMERCHANTABILITY OR FITNESS FOR A PARTICULAR PURPOSE.• SILVAN AUSTRALIA PTY. LTD. DOES NOT AUTHORISE ANY PERSON TOCREATE FOR IT ANY OTHER OBLIGATION OR LIABILITY IN CONNECTION WITHTHESE PRODUCTS.• SUBJECT ONLY TO LEGISLATIVE OBLIGATIONS TO THE CONTRARY, SILVANAUSTRALIA PTY. LTD. SHALL NOT BE LIABLE FOR INCIDENTAL ORCONSEQUENTIAL DAMAGES RESULTING FROM A PRODUCT PERFORMING INBREACH OF THIS WRITTEN WARRANTY.2
Lubrication and MaintenanceMaintenance ScheduleRegular maintenance is necessary to ensure optimum performance and extend the service life of the unit.The table below shows the items that require regular maintenance and the frequency at which eachshould be serviced.Ensure that the engine is stopped before you begin any maintenance or repairs. This will avoid thepossibility of carbon monoxide poisoning from the exhaust fumes. Be sure that there is adequateventilation whenever you operate the engine.To avoid burns from hot parts let the engine cool before touching it.Engine oilItemFrequencyEachtimeusedOFirst monthor20 hoursEach 3 monthsor50 hoursEach 6 monthsor100 hoursCheck levelChange O OEach yearor300 hoursCheckOAir cleaner element CleanO(1)Replace O (2)Sediment cup Clean OSpark plugClean AdjustOReplaceOIdle speed Adjust OValve clearance Adjust O(3)Combustion chamber Clean After every 500 hours (3)Fuel tank & strainer Clean O(3)Fuel supply pipe Check Every 2 years (replace if necessary) (3)(1) Service more frequently in dusty areas.(2) Replace only the paper element.(3) Should be done by a <strong>Silvan</strong> dealer, unless you have the proper tools and are mechanically proficient.Engine Oil ChangeDrain the oil when the engine is warm to ensurequick and complete draining.Place a suitable container beneath the drain plug.Remove the dipstick and drain plug and allow theoil to drain completely in to the container.Reinstall the drain plug and tighten securely.With the engine level, fill the sump through thedipstick opening with premium quality SAE 10W-30engine oil, until it reaches the upper level mark onthe dipstick. Oil capacity is 0.6 litres.Reinstall the dipstick and tighten.Dispose of the used oil in a manner consistent withprotecting the environment. Take it to a servicestation or recycling depot for proper disposal.Drain Plugand gasketOil LevelDipstickCHANGING THE ENGINE OIL6
Lubrication and MaintenanceAir Cleaner ServiceA dirty filter will restrict air flow to the carburettorand reduce engine power. Operating without theair cleaner fitted or with a damaged filter will allowdirt to enter the engine causing rapid wear, whichwill not be covered under warranty.Air FilterBaseCoverSpark Plug ServiceDisconnect the spark plug lead and remove anydirt from around the plug. Remove the plug with a13/16 inch spark plug wrench.Inspect the spark plug and clean any carbon fromthe electrodes with a wire brush. Replace if theelectrodes are worn or the insulator is damaged.Measure the electrode gap with a spark pluggauge or feelers and adjust as necessary bycarefully bending the side electrode - refer diagrambelow for gap dimension.Install the plug carefully by hand to avoid crossthreading.Then after it is seated tighten with thespark plug wrench to compress the gasket. Ifrefitting a used plug tighten 1/8 to 1/4 turn afterseating or if a new plug 1/2 turn. Refit the sparkplug lead.The recommended plug is NHSP LD F6RTCU.Air Filters0.28 – 0.31 in(0.70 – 0.80 mm)Unclip and remove the air cleaner cover. Unscrewthe lower wing nut and remove the filter assembly.Remove the outer foam element from the paperelement.Inspect both elements and replace if damaged.Always replace the paper element at thescheduled service interval. Clean both elements ifthey are suitable for reuse.Tap the paper element several times on a hardsurface to remove dirt, or blow compressed air notexceeding 200kPa (30 psi) through the elementfrom the inside. Never brush dirt off as this willforce dirt into the fibres.Rinse the foam element in warm soapy water orclean in non-flammable solvent (not petrol) andallow to dry. When dry, dip the element in cleanengine oil then squeeze out all excess. The enginewill smoke if too much oil is left in the foam.Clean the interior of the air cleaner cover and basewith a moist cloth. Take care to avoid dirt enteringthe air duct.Re-install the filter assembly on the air cleanerbase, then install the air cleaner cover and lock theclips back into position.SPARK PLUG GAP7
Lubrication and MaintenanceIDLE SPEED ADJUSTMENTThrottle StopScrewIdle Speed AdjustmentStart the engine outdoors and allow it to warm upto normal operating temperature.Move the throttle lever to the slowest runningposition. Then turn the throttle stop screw with across head screwdriver to obtain the correct idlingspeed which is 1400 rpm, +200/-150 rpm.Preparation for StorageIf storing with petrol in the fuel tank it is importantto choose a well ventilated area to reduce thehazard of petrol vaporisation. Avoid areas with anaked flame, such a gas pilot light, or sparkproducingelectric motors.Petrol will oxidise and deteriorate in storage, whichcan leave gum deposits and cause hard starting.The length of time it can be left in the fuel tankbefore causing problems varies depending uponthe petrol blend and storage temperature. The airin a partially filled tank promotes fuel deteriorationand this is accelerated by high temperature. Forlengthy storage it is best to drain the fuel tank intoa suitable container by setting the fuel valve to ‘on‘and removing the sediment cup and the drain plugfrom the carburettor. Reinstall the sediment cupand drain plug after draining.Store the unit in a dry location and cover to protectfrom dust, etc. Avoid areas of high humidity whichpromotes corrosion.Trouble ShootingEngine will not start• Check if enough fuel in tank.• Check if fuel tap is on.• Check if fuel enters carburettor.Remove drain plug at bottom of fuel bowl.• Check that oil level is not too low.The low oil level protection system may beactivated - refer page 5.• Check that the engine switch is on.• Check if spark available at spark plug.• Remove spark plug, reconnect lead, earth plugagainst engine block, turn engine switch on,pull starter cord and see if spark jumps at pluggap.• If all above checks are OK and engine will stillnot start contact your <strong>Silvan</strong> dealer<strong>Generator</strong> fails to generate electricity• Check to see if the AC breaker is in the onPosition• If all above checks are OK and generator willstill not generate electricity contact your <strong>Silvan</strong>dealer.8
Wiring DiagramWiring Diagram9
SILVAN AUSTRALIA PTY. LTD.ABN 48 099 851 144www.silvanagcess.comVICTORIA (HEAD OFFICE)89 Lewis Rd.Wantirna South 3152Telephone: (03) 9887 2788Facsimile: (03) 9887 1035Spare Parts Facsimile: (03) 9887 1637QUEENSLAND44 Lysaght St.Acacia Ridge 4110Telephone: (07) 3345 9500Facsimile: (07) 3345 9511WESTERN AUSTRALIA12 Cressall RdBalcatta 6021Telephone: (08) 6241 0900Facsimile: (09) 9240 1832