Belles 21A Manual - bSpace
Belles 21A Manual - bSpace
Belles 21A Manual - bSpace
You also want an ePaper? Increase the reach of your titles
YUMPU automatically turns print PDFs into web optimized ePapers that Google loves.
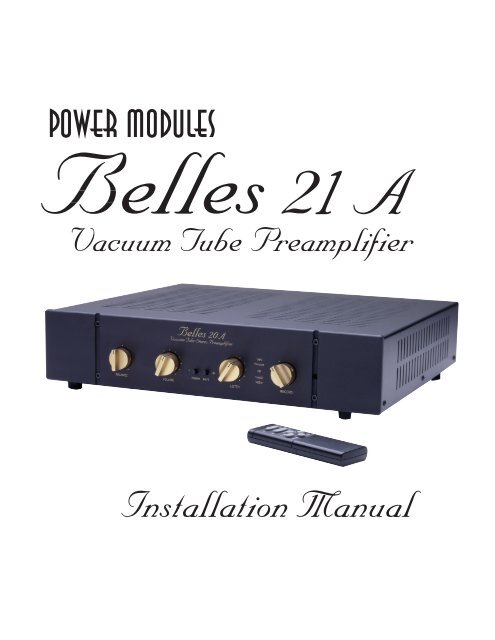
Power Modules1Vacuum Tube PreamplifierInstallation <strong>Manual</strong>
IntroductionCongratulations. You have purchased a preamplifier that is the culmination of 25 years ofaudio research experience. David <strong>Belles</strong> has designed the <strong>Belles</strong> <strong>21A</strong> to exceed in performanceany vacuum tube preamplifier in its class.The <strong>Belles</strong> <strong>21A</strong> has been designed to be a reliable part of your precision sound system,assuming it is handled and installed properly. We have provided these operating instructionsfor you, which, if followed, will insure you years of listening enjoyment.CareThe most important thing you can do for your preamplifier is clean it properly. There may beoccasions when dust or dirt my build up on your unit. Polishes, cleaners, solvent or anyammonia based cleaners will damage the aluminum anodize finish of your unit. Use aclean cloth and wipe the dirt from the unit. Use greater pressure to clean more persistentdirt. With proper care, the appearance of the <strong>Belles</strong> <strong>21A</strong> will be preserved for years.PurposeThe purpose of this instruction manual is to provide guidance to:• unpack the unit• install the unit• operate the unit• care and maintain the unitUnpacking the UnitWhen you receive your unit, carefully inspect the carton for any damage. Any obvious dentsor scuff marks should alert you to the possibility of damage to the contents. If any externaldamage to the carton is found, note the location in relation to the orientation of the preamplifieras it is removed from the carton.Open the top flaps of the carton and carefully remove the unit, lifting it straight out of thecarton. Inspect the unit for damage, paying particular attention to those areas that correspondto any damaged areas on the outer carton.If your unit was damaged (1) Contact your dealer if the unit was purchased locally. (2)Contact your common carrier (eg- UPS) if your unit was shipped to you. Do not send theunit back to the shipper until instructed to do so by the carrier. To do so may void any damageclaim you may have.Do not discard your packing materials or cartons. Should it be necessary to return the unit,it must arrive undamaged. Using the original packing materials will ensure your unit arrivessafely. Sending your unit back in improper packing could lead to the unit being damaged,with no possibility of a successful claim against the carrier1
Rear Panel Inputs and OutputsThe <strong>21A</strong> rear panel inputs and outputs include:• AC Power Cord Input: used to connect the AC power cord.• Main Output: balanced and unbalanced outputs used to connect the preamplifieroutput to your power amplifier input.• Various Inputs: used to connect your various source components. The <strong>21A</strong> hasinputs for CD, Tape, Video, Tuner, and (2) Auxiliary components. Use the Inputselection control on the front panel to listen to a particular source component.Installing the <strong>21A</strong>Perform the following steps to install the <strong>Belles</strong> <strong>21A</strong> Preamplifier:1. Select a location for the preamplifier. Make sure the selected location is stableenough to support the preamplifier.2. Before you make any connections, make sure your power amplifier and source(s)are turned off and unplugged.3. Connect the preamplifier outputs to the inputs of your power amplifier.4. Connect the outputs of your source(s) to the appropriate inputs of the preamplifier.5. Plug in the power cords for your amplifier and source(s).6. Plug in the power cord for the preamplifier.7. Switch on the power for your amplifier and source(s). You may use the remotecontrol by pressing the power button on the remote controlYou are now ready to operate the preamplifier.Replacing the Vacuum TubesTo replace the Vacuum Tubes, perform the following steps:1. Disconnect the preamplifier power cord from the AC outlet.2. Remove the (2) top screws in the front panel, and the (3) screws in the rear lip ofthe top cover.2. Remove the (3) screws on the left and right sides of the top cover, and remove thetop cover.3 Replace the (4) vacuum tubes with 5814A or 12AU7 tubes. Do not mix tubes ofdifferent types.4. Replace the top cover and re-install the side, rear and front panel screws. Avoidcross-treading the screws.2
Operating the UnitFront Panel ControlsTo operate the <strong>Belles</strong> <strong>21A</strong> preamplifier, a familiarity with the units controls and inputs andoutputs is necessary. The following sections provide locations and descriptions of the <strong>21A</strong>front panel controls, rear panel input/output jacks, and remote control button functions.The <strong>21A</strong> front panel controls include:• Inputs Selector: the Listen and Record selectors are used to select the appropriatesource input to listen to and record.• Balance Control: used to control the sound balance between the left and rightchannel.• Volume Control: used to control the volume of the audio signal. This control can bechanged using the Remote Control unit.• Power Button: turns on and off the preamplifier power.• Mute Button: enages the mute when de-pressed.Remote ControlThe <strong>21A</strong> remote control includes:• Power Button: used to enable and disable power to the remote control logiccircuitry. The preamplifier can be operated with the logic circuitry disabled.• Mute Button: used to mute the audio signal to the power amplifier.• Volume Up and Down Buttons: used to control the motorized volume pot of the<strong>21A</strong> preamplifier.See the figure below for the remote control button locations.PowerPMIONPOWEROFFMuteONVOLUMEMUTEUPOFFVolume UpVOLUMEDOWNVolume Down3
Home Theater BypassTheHome Theater Bypass feature of the <strong>Belles</strong> <strong>21A</strong> Stereo Preamplifier allows the unit toplay direct 2-channel music or to be bypassed in a multi-channel home theater system.The standard method to use this feature is to connect the <strong>Belles</strong> <strong>21A</strong> to the power amp andmusic sources such as CD player, tuner, etc. The audio output of the home theater processoris then connected to the video inputs of the <strong>Belles</strong> <strong>21A</strong>.When the Listen Selector (Front Panel of <strong>21A</strong>) is turned to the HT position, the videoinputs are connected directly to the unbalanced Main Outputs, bypassing the <strong>Belles</strong> <strong>21A</strong>.The <strong>Belles</strong> <strong>21A</strong>'s power is turned off when the HT position is selected; however, it must stillbe plugged into an active power line.SpecificationsThe specifications for the <strong>Belles</strong> <strong>21A</strong> preamplifier are as follows:Noise . . . . . . . . . . . . . . . . . . . . . . . . . . . . .90 dB A weightedDistortion . . . . . . . . . . . . . . . . . . . . . . . . . .THD and IM less than 0.05%Power Requirements . . . . . . . . . . . . . . . . .115-120 VAC or 220-240 AC @ 50/60HzVacuum Tubes . . . . . . . . . . . . . . . . . . . . . .(4) 5814A or 12AU7Inputs . . . . . . . . . . . . . . . . . . . . . . . . . . . .(5 pair) unbalanced stereo inputsOutputs . . . . . . . . . . . . . . . . . . . . . . . . . . .(1 pair) unbalanced stereo main output. . . . . . . . . . . . . . . . . . . . . . . . . . . . . . . . .(1 pair) balanced stereo main output. . . . . . . . . . . . . . . . . . . . . . . . . . . . . . . . .(1 pair) unbalanced stereo tape outputInput Impedance . . . . . . . . . . . . . . . . . . . .50,000 ohmsControls . . . . . . . . . . . . . . . . . . . . . . . . . . .Listen, Record, Volume and BalanceRemote Controls . . . . . . . . . . . . . . . . . . . .Power On/Off, Mute, VolumeFrequency Response . . . . . . . . . . . . . . . . .0.5 to 200,000 Hz within 3dBDimensions . . . . . . . . . . . . . . . . . . . . . . . .17" W x 3.5" H x 14" D (excluding jacks, knobs,. . . . . . . . . . . . . . . . . . . . . . . . . . . . . . . . .feet)Shipping Weight . . . . . . . . . . . . . . . . . . . . .17 poundsPower Rating . . . . . . . . . . . . . . . . . . . . . . .120 VAC 5 A Fuse (240 VAC available on. . . . . . . . . . . . . . . . . . . . . . . . . . . . . . . . .request)Warranty . . . . . . . . . . . . . . . . . . . . . . . . . .5 years (Vacuum tubes 30 days)4
Limited WarrantyPower Modules Inc., herein referred to as the “manufacturer”, guarantees this productto be free from defect in both material and workmanship, and agrees to remedy any such defector replace any defective component at no charge for a period of five years from the date of saleto the first end user. This warranty is void if the product has been found to be subjected to misuse,abuse, lightning strike, unauthorized service, damaged in transit, or has been altered orrepaired in such a way so as to detract from its performance, reliability, or its safe operation.Should such a defect be discovered and it falls within the terms of this guarantee, themanufacturer will correct the defect in workmanship and/or replace any defective component witha new one of similar capability and value. This warranty does not apply to the cabinet orappearance items such as the faceplate, control knobs, or meter lenses, nor does it cover anyexpenses incurred in shipping the unit to the appropriate service depot.The foregoing is in lieu of any other warranties expressed, implied, or statutory and themanufacturer neither assumes nor authorizes any person to assume for it any other obligation orliability in connection with the sale of this product. This warranty is not transferable except by writtenauthorization from the manufacturer.In order to qualify under the terms of the above warranty, all items must be returned to theappropriate factory service depot with all shipping charges prepaid. In lieu of having previouslyregistered the purchase of the unit by completing and returning the attached PurchaseRegistration Card, the unit must be accompanied by proof of purchase (bill of sale) from anauthorized Power Modules dealer.Power Modules Inc.Please Note: Defective units must be returned to the selling dealer or to Power Modules attheir service depot within the country of sale.The shipping address is: Power Modules Inc. 479 East St. Pittsford, N.Y. 14534Phone Number: (716) 586-0740WarningTO PREVENT SHOCK OR HAZARD, DO NOT EXPOSE THIS APPLIANCE TO RAIN OR MOIS-TURE. TO REDUCE THE RISK OF ELECTRICAL SHOCK, DO NOT REMOVE COVER ORFACEPLATE. NO USER SERVICEABLE PARTS INSIDE. REFER SERVICING TO QUALIFIEDSERVICE PERSONNEL.Model No. __________________________ Ser No._________________________________Purchased From ___________________________________ On ___________________(Name of Dealer)(Date)


