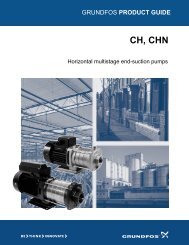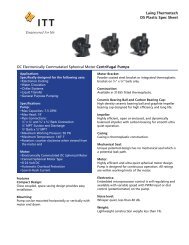
submersible pump with hazardous location motor end - Pump Express
submersible pump with hazardous location motor end - Pump Express
submersible pump with hazardous location motor end - Pump Express

Create successful ePaper yourself
Turn your PDF publications into a flip-book with our unique Google optimized e-Paper software.
Single phase <strong>pump</strong>s <strong>with</strong> capacitorstart have a run and a start windingeach drawing a different current.To adequately protect thesewindings <strong>with</strong> the appropriateheaters, consult the factory.NOTE: red lead is alwaysstart wind ing of <strong>pump</strong> usingsingle phase.<strong>Pump</strong>Installationinstalling Sump Level ControlFloat Controls:In either simplex, duplex ortriplex systems the lower orturn-off control is to be set tomaintain a minimum level in thesump. This level shall be no morethan 3 1 ⁄4" from the top of the<strong>motor</strong> housing down to thesurface of the sewage.The second or turn-on control isset above the lower turn-offcontrol. The exact distancebetween the two floats must be acompromise between a fre quent<strong>pump</strong>ing cycle (10 starts per hourmax.) to control septicity, solidsand a slower cycle for energyecon o my. This distance shouldbe de ter mined by the engineer orcon sult ing engineer de p<strong>end</strong> ing onthe con di tions of the application.For installation of Hydromaticsupplied level con trols refer toyour sys tem’s installation andservice manual.installing <strong>Pump</strong> in Sump:Before installing <strong>pump</strong> in sumplay it on side and rotate impeller.Impeller may be slightly stuckdue to factory test water so it mustbe broken loose <strong>with</strong> small bar orscrewdriver in edge of vanes. Theimpeller should turn freely. Donot connect the power until afterthis test.Clean all trash and sticks fromsump and connect <strong>pump</strong> to piping.A check valve must be installedon each <strong>pump</strong>. A gate or plugvalve in each <strong>pump</strong> dischargeis highly rec om m<strong>end</strong> ed. Thisvalve should be installed on thedischarge side of the check valveso if necessary to service thecheck valve the line pressure canbe cut off. Sin gle <strong>pump</strong> systemsare sometimes installed <strong>with</strong>out acheck valve where it is de sir ableto self-drain the dis charge line toprevent freezing. This can be doneonly <strong>with</strong> short discharge lines;oth er wise water will return to thesump and cause short cycling ofthe <strong>pump</strong>.Making Electrical Connections:All electrical wiring must be inac cor dance <strong>with</strong> local code, andonly qual i fied electricians shouldmake the in stal la tions. Completewiring di a grams are included foruse in making the installation. Allwires should be checked for shortsto ground <strong>with</strong> an ohmmeter orMegger after the con nec tionsare made. This is important, asone grounded wire can causecon sid er able trouble.iMPOrTANT: if equipmentis not properly wired andprotected as recomm<strong>end</strong>ed,Hydromatic war ran ty is void.See Page 4.Heat Sensor and SealFailure Connections:If a Hydromatic control panel isused, terminal blocks are providedfor heat sensor, seal failureconnections (See Panel Schematic).If a control panel is supplied byothers, it must allow heat sensorand seal failure ter mi na tions.<strong>Pump</strong>OperationsStarting System:1. Double check all wireconnections.2. Turn <strong>pump</strong>s to Off position onH-O-A switch es.3. Turn on breakers.4A.When using single phase<strong>pump</strong>s, make sure red <strong>pump</strong>lead is con nect ed to capacitorcircuit, con nect amprobe to<strong>pump</strong> power cord and turn<strong>pump</strong> on. <strong>Pump</strong> will show highamp draw mo men tari ly, thenas <strong>pump</strong> comes off startwiring, amps will drop tonormal nameplate amps.4B.When using three phase<strong>pump</strong>s (230/460/575), turnH-O-A switch to Handpo si tion on one <strong>pump</strong> andnotice op er a tion. If <strong>pump</strong> isnoisy and vi brates, rotation iswrong. To change rotation,interchange any two line leadsto <strong>pump</strong>. Do not in ter changemain incoming lines. Checkrotation of all <strong>pump</strong>s in thissame manner.5. Now set both H-O-A switchesto Auto po si tion and allowwater to rise in sump until one<strong>pump</strong> starts. Allow <strong>pump</strong> tooperate until the level dropsto turn-off point.6. Allow sump level to rise tostart other <strong>pump</strong>(s). Notice runlights to panel. <strong>Pump</strong>s shouldalternate on each successivecycle of op er a tion.7. Turn both H-O-A switches toOff position and allow sump tofill to the override control level(s).8. Turn switches to Auto position,and <strong>pump</strong>s should start andop er ate together until leveldrops to turn-off point.3