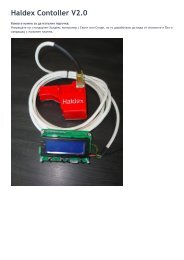
ABS MK II - VWClub.BG
ABS MK II - VWClub.BG
ABS MK II - VWClub.BG

You also want an ePaper? Increase the reach of your titles
YUMPU automatically turns print PDFs into web optimized ePapers that Google loves.
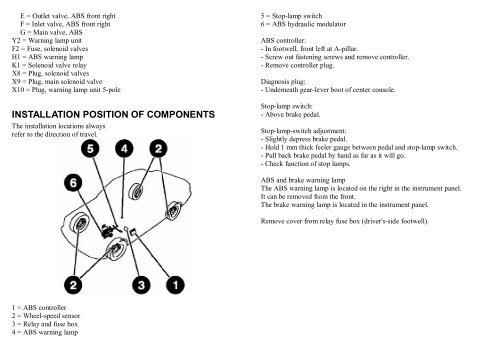
E = Outlet valve, <strong>ABS</strong> front rightF = Inlet valve, <strong>ABS</strong> front rightG = Main valve, <strong>ABS</strong>Y2 = Warning lamp unitF2 = Fuse, solenoid valvesH1 = <strong>ABS</strong> warning lampK1 = Solenoid valve relayX8 = Plug, solenoid valvesX9 = Plug, main solenoid valveX10 = Plug, warning lamp unit 5-poleINSTALLATION POSITION OF COMPONENTSThe installation locations alwaysrefer to the direction of travel.5 = Stop-lamp switch6 = <strong>ABS</strong> hydraulic modulator<strong>ABS</strong> controller:- In footwell, front left at A-pillar.- Screw out fastening screws and remove controller.- Remove controller plug.Diagnosis plug:- Underneath gear-lever boot of center console.Stop-lamp switch:- Above brake pedal.Stop-lamp-switch adjustment:- Slightly depress brake pedal.- Hold 1 mm thick feeler gauge between pedal and stop-lamp switch.- Pull back brake pedal by hand as far as it will go.- Check function of stop lamps.<strong>ABS</strong> and brake warning lampThe <strong>ABS</strong> warning lamp is located on the right in the instrument panel.It can be removed from the front.The brake warning lamp is located in the instrument panel.Remove cover from relay fuse box (driver's-side footwell).1 = <strong>ABS</strong> controller2 = Wheel-speed sensor3 = Relay and fuse box4 = <strong>ABS</strong> warning lamp