Lawn Genie Richdel 54048-49 Valve Owner's ... - Irrigation Direct
Lawn Genie Richdel 54048-49 Valve Owner's ... - Irrigation Direct
Lawn Genie Richdel 54048-49 Valve Owner's ... - Irrigation Direct

Create successful ePaper yourself
Turn your PDF publications into a flip-book with our unique Google optimized e-Paper software.
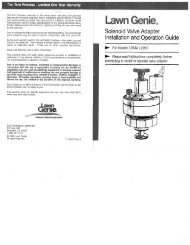
• Installation Method A (Figure 1)Step 1- Apply three complete wraps of Teflon ® tape to the slip/thread adapters.Caution: Use only Teflon tape on threaded connections. Pipe dope and othertypes of pipe thread sealants can damage plastic threads.Step 2- Install a slip/thread adapter into each end of the valve and tighten securely.Step 3- Cut a 4" length of 1" schedule 40 PVC pipe for each valve.Step 4- Using PVC primer and cement, assemble the valve and PVC components asshown, aligning the tee fitting perpendicular to the valve. Repeat this procedure foreach valve in the manifold.Note: The last valve in the manifold can be connected with a 90° elbow instead ofa tee. However, if future expansion of the sprinkler system is expected, use the teefitting and a 4" section of 1" schedule 40 PVC pipe capped on the end. This enablesthe main line to be easily connected to additional downstream valves.Step 5- Using 4" sections of 1" schedule 40 PVC pipe, connect the valve assembliestogether to create the manifold, making sure the valves are aligned during assembly.Step 6- Ensure the end of the supply line is dry and free of burrs. Cement themanifold to the main line.Step 7- Allow the cemented connections to cure for a minimum of one hour (orper the cement manufacturer’s directions) before applying water pressure. If noleaks occur after pressurization, begin connecting the sprinkle zone piping using1" class 200 PVC pipe.• Installation Method B (Figure 2)Step 1- Apply three complete wraps of Teflon tape to both ends of a 4" long 1" PVCthreaded pipe nipple and the slip/thread adapter.Caution: Use only Teflon tape on threaded connections. Pipe dope and othertypes of pipe thread sealants can damage plastic threads.Step 2-Install the pipe nipple to the valve inlet and tee fitting and tighten securely,aligning the tee perpendicular to the valve. Install the slip/thread adapter into thevalve outlet and tighten securely. Repeat this procedure for each valve in the manifold.Note: The last valve in the manifold can be connected with a 90° elbow instead ofa tee. However, if future expansion of the sprinkler system is expected, use the teefitting and a 4" section of 1" schedule 40 PVC pipe capped on the end. This enablesthe main line to be easily connected to additional downstream valves.Step 3- Using 4" sections of 1" schedule 40 PVC pipe, connect the valve assembliestogether to create the manifold, making sure the valves are aligned during assembly.Step 4- Ensure the end of the supply line is dry and free of burrs. Cement the manifoldto the main line.Step 5- Allow the cemented connections to cure for a minimum of one hour (orper the cement manufacturer’s directions) before applying water pressure. If noleaks occur after pressurization, begin connecting the sprinkle zone piping using1" class 200 PVC pipe.Figure 1 -Installation Method A3/4" Slip x Slip xSlip PVC Tee3/4" Slip x Slip xThread PVC Tee<strong>Valve</strong> InletFigure 2 -Installation Method B3/4" Sch 40 PVC4" Long<strong>Valve</strong> Inlet3/4" Slip x Thread Adapter(Teflon-Taped threads)<strong>Valve</strong> Manifold Assembly3/4" Sch 40 PVCWater Supply Pipe90° Elbow or Tee and Cap Plug1" Slip x Thread Adapter(Teflon-taped Threads)3/4" PVC Threaded Pipe Nipple 4" Long(Teflon-taped Threads)3/4" Schedule 40 PVC 4" Long3/4" Class 200 PVCPipe To Sprinklers