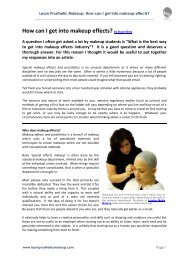
A basic makeup effects kit by Stuart Bray - Learn Prosthetic Makeup
A basic makeup effects kit by Stuart Bray - Learn Prosthetic Makeup
A basic makeup effects kit by Stuart Bray - Learn Prosthetic Makeup

You also want an ePaper? Increase the reach of your titles
YUMPU automatically turns print PDFs into web optimized ePapers that Google loves.
<strong>Learn</strong> <strong>Prosthetic</strong> <strong>Makeup</strong>: A <strong>basic</strong> <strong>makeup</strong> <strong>effects</strong> <strong>kit</strong><br />
________________________________________________________________<br />
A <strong>basic</strong> <strong>makeup</strong> <strong>effects</strong> <strong>kit</strong> <strong>by</strong> <strong>Stuart</strong> <strong>Bray</strong><br />
How much should you spend?<br />
What can you do without?<br />
What are professional <strong>makeup</strong> artists using?<br />
Nothing dampens the enthusiasm of budding <strong>makeup</strong> <strong>effects</strong> artists more than looking through<br />
catalogues of <strong>makeup</strong> products and totting up the cost. Starting out, you don’t want to waste a load<br />
of money on expensive <strong>kit</strong> that perhaps you won’t need. Maybe you don’t have a job yet, but you<br />
need to get familiar with the <strong>kit</strong>, and start to create work that you can photograph and put in a<br />
portfolio or website. This article hopes to help clarify what is essential <strong>kit</strong>, and more importantly what<br />
isn’t.<br />
This article is not concerned with making prosthetic appliances, but the <strong>kit</strong> you will need to create<br />
simple <strong>makeup</strong> <strong>effects</strong>. Whether you are making up plain skin or building up some kind three<br />
dimensional form (using an appropriate material or premade appliance), essentially, the practice of<br />
colouring remains the same. All that is different is the surface onto which the colour is applied.<br />
<strong>Makeup</strong><br />
There is <strong>makeup</strong> and then there is <strong>makeup</strong>. The kind you will be using is<br />
known as professional <strong>makeup</strong>, usually bought from professional <strong>makeup</strong><br />
suppliers, and even then it breaks down into several distinct types. Be aware<br />
there are many manufacturers (Kryolan, Grimas, Mehron, Fardel, RCMA etc)<br />
who make their own versions of these, so be sure to compare prices.<br />
Often <strong>makeup</strong> is available as both individual colours or as mixed palettes.<br />
� Water based such as aquacolour, body paints and children’s face-painting <strong>makeup</strong> are easy to<br />
clean up, and usually very skin friendly. They tend not to be so durable, but unless you have a<br />
day’s filming ahead, that’s probably not a big problem.<br />
� Oil or Crème based what was known as ‘greasepaint’ from the theatre tradition is still widely<br />
used today. There are different kinds of crème <strong>makeup</strong> including concealer <strong>makeup</strong> which<br />
contains a pigment ratio for maximum coverage.<br />
� Alcohol activated a relatively new kind of <strong>makeup</strong> which started out as a temporary tattoo and<br />
hair tinting <strong>makeup</strong>. Now, there are several brands boasting a variety of palette choices as well<br />
as liquid forms which can also be airbrushed. Skin Illustrator, Stacolor and Reel Creations are<br />
well known alcohol activated <strong>makeup</strong> brands.<br />
� Rubber Mask Grease Paint (aka RMGP) has a high pigment ratio, and was used extensively with<br />
foam latex prosthetics, as it has a castor oil base which did not affect the rubber.<br />
� PAX paint is combination of Pros Aide and LiquiteX acrylic brand paints led to the name PAX, a<br />
durable and flexible paint which can be used on both skin and foam latex. Invented <strong>by</strong> Dick<br />
Smith, it has become an industry standard for painting foam appliances. It is useful for creating<br />
an opaque base, and thinned washes can be built up to create excellent paint finishes. There<br />
are off the shelf versions, but most artists tend to mix their own.<br />
www.learnprosthetic<strong>makeup</strong>.com Page 1
<strong>Learn</strong> <strong>Prosthetic</strong> <strong>Makeup</strong>: A <strong>basic</strong> <strong>makeup</strong> <strong>effects</strong> <strong>kit</strong><br />
________________________________________________________________<br />
Brushes<br />
Brushes are important,<br />
but they need not be<br />
expensive. Art and craft<br />
supply stores sell sets of<br />
brushes made with sable<br />
and synthetic fibres.<br />
Get a variety of sizes-<br />
some small (size 2 to 4),<br />
medium (6 to 8) and large<br />
(12 to 14). Sable brushes<br />
can cost a lot, and frankly<br />
are not necessary in this<br />
kind of work. Nylon or acrylic fibres will work just as well. I also use large laminating or chip brushes,<br />
cut down with scissors to create a spatter brush for flicking colours from hardware stores-<strong>basic</strong>ally<br />
cheap bristle paintbrushes. One or two larger brushes can be flared out to create much more realistic<br />
application of colour.<br />
Sponges<br />
Colour application in <strong>effects</strong> is usually all about breaking colour up, and avoiding flat, single colours. A<br />
big car washing sponge can be torn or cut up into many pieces. This is great for applying initial basecolours,<br />
as well materials such as latex.<br />
A couple of red-rubber and black stipple-sponges are great too. These<br />
are good for applying colour break-up in a much more convincing way<br />
than plain sponge.<br />
Three Dimensional Materials<br />
Directly applied materials used to create a three dimensional form are great for one-off <strong>effects</strong> such as<br />
portfolio pieces or test <strong>makeup</strong>s.<br />
� Waxes such as ‘morticians’, ‘nose and ‘scar’ wax are quick to apply and colour. They are not<br />
very durable, however, and can be easily damaged <strong>by</strong> touch.<br />
� Latex can be built up in layers <strong>by</strong> itself or with tissue paper or cotton wool to create skin peeling<br />
<strong>effects</strong>. Latex is very flexible and durable. Avoid using crème <strong>makeup</strong>, as it often looks patchy<br />
on latex. Also, check for latex allergies before you start using it on a subject’s skin. Eyelash<br />
adhesive is often made from latex.<br />
� Gelatine and gelatine based products (such as Gelefects) are quick ways of building up very<br />
realistic skin, especially burns. You can make your own or buy pre made blocks. Gelatine is used<br />
as a liquid and requires heating to get it to this state. Molten gelatine can burn skin. Always be<br />
careful to avoid injury and check the temperature before applying it to skin!<br />
� Silicone based modelling materials such as SculptGel and Third Degree are easy to use, flexible<br />
and durable. They usually come as a two-part material mixed in equal quantities and applied<br />
directly to skin. Unlike wax, they are not easily damaged <strong>by</strong> touch and hypoallergenic. It may<br />
have a third component added to soften the mixture.<br />
www.learnprosthetic<strong>makeup</strong>.com Page 2
<strong>Learn</strong> <strong>Prosthetic</strong> <strong>Makeup</strong>: A <strong>basic</strong> <strong>makeup</strong> <strong>effects</strong> <strong>kit</strong><br />
________________________________________________________________<br />
Blood<br />
Couldn’t really go through a <strong>kit</strong> without getting to some gore, could we?<br />
Most blood (but not all) is syrup based, coloured with food dyes and thinned<br />
with water. Always check that the blood is suitable for use it the mouth, and<br />
do a patch test to check staining on fabrics. If you find it beads up on oily<br />
surfaces like make up, put a little dishwashing detergent such as fairy into the<br />
blood. Keep this separate from any blood to be used in the mouth.<br />
There are also various kinds of blood-type products such as ‘congealed’, ‘scab’ and ‘wound filler’. These<br />
are often thickened fake blood. You may wish to try making your own blood, but it may actually work<br />
out cheaper to simply buy a small bottle from a store. A little goes a long way<br />
Other Effects Materials<br />
Glycerine is great for sweat, tears and general moisture <strong>effects</strong>. KY Jelly is better for shiny areas such as<br />
fresh burns or for drool. Non-flexible collodion is a good stand<strong>by</strong> for incised scars and a scar plastic such<br />
as Tuplast <strong>by</strong> Kryolan is good for raised scars. In both cases, do a patch test and check for allergies as<br />
sometimes the solvents can aggravate sensitive skin.<br />
Tools<br />
You don’t need a ton of tools, but a few good ones will help. A<br />
good pair of small, curved nail scissors and a pair of straight<br />
scissors are essential. Fine tweezers will be useful too. Small<br />
dental tools can be bought from chemist’s stores, sculpture<br />
supplies or art shops. Wooden spatulas or cuticle sticks will do<br />
instead to start you off.<br />
A hairdryer will speed up the drying of various materials, so keep<br />
one in your <strong>kit</strong>. Also, a cape or towel to cover your subjects<br />
clothing will avoid unwanted spills, and a few hair clips, grips or a<br />
hair band will help keep unwanted hair from getting in the way<br />
whilst you work.<br />
Adhesives & Removers<br />
If you are going to be using prosthetics or bald caps, you’ll probably need some kind of adhesive. Often,<br />
these are available in different quantities, so get a small bottle to start with.<br />
� Pros-Aide® is a very good, water based acrylic adhesive which can be used to apply prosthetics,<br />
bald caps and hair to skin. Pros-Aide® II is easier to remove from the skin.<br />
� Medical Adhesive is usually silicone and solvent based. These glues grab very well, and are not<br />
usually water soluble making them very durable<br />
� Spirit gum is the traditional adhesive for applying hairpieces. It is not usually very flexible, but<br />
applied correctly it works well. Try to get matte versions which shine less.<br />
Pros-Aide® Remover, Pro Clean, EZ Off, Bond Off and Super Solv are all oil-based removers which break<br />
down the adhesive and allow removal from the skin. Spirit gum usually uses an alcohol-based remover.<br />
� Make sure you have a suitable remover before you start using glue.<br />
� Do a patch test to check for allergies.<br />
www.learnprosthetic<strong>makeup</strong>.com Page 3
<strong>Learn</strong> <strong>Prosthetic</strong> <strong>Makeup</strong>: A <strong>basic</strong> <strong>makeup</strong> <strong>effects</strong> <strong>kit</strong><br />
________________________________________________________________<br />
Kit Bags<br />
What to store and carry your <strong>kit</strong> in can work out very expensive, and the choice of what type to use can<br />
be confusing. If you are just making stuff for fun at home, a simple, cheap tool box with a carry handle<br />
will work fine. If you are planning on travelling about with your <strong>kit</strong>, or perhaps going on set, you’ll<br />
probably need a bag rather than a case. <strong>Makeup</strong> bags can be very flash and pricey-probably not what<br />
you want to spend your money on at this stage. One solution is to look in fishing and tool shops - you’ll<br />
be surprised what you can find.<br />
Both <strong>makeup</strong> artists and people who go fishing and are often presented with similar problems with<br />
regards to <strong>kit</strong>. Lots of bits and bobs needing compartments and unusual shaped containers, often used<br />
outside in harsh weather and carried over difficult terrain. As a result, there is much to be said for<br />
equipment found in fishing shops.<br />
I have a great little fishing bag which was £20, and is enough for most on-set<br />
situations. For bigger boxes which maybe get left at a base or trailer, try<br />
mobile tool chests and ‘rolling’ workshops with wheels and retractable<br />
handles. Often, these are waterproof, hard bodied boxes which also double as<br />
convenient seats if you find yourself without a chair, usually from £20-£50<br />
max.<br />
Also, open tool boxes which have large carry handles and a rigid base are good<br />
for items you need to grab in a hurry. Fishing bait bags and organisers have<br />
reflective foil inners which act like cool bags keeping <strong>kit</strong> safe from heat.<br />
You won’t need a workshop or a lot of expensive equipment to start out-just some <strong>basic</strong> <strong>kit</strong>, a clean<br />
space, some time and a camera.<br />
Happy sticking!<br />
<strong>Stuart</strong><br />
Questions or comments about this article?<br />
Get in touch at www.learnprosthetic<strong>makeup</strong>.com<br />
©Copyright <strong>Stuart</strong> <strong>Bray</strong> 2009<br />
Take care whenever working with <strong>makeup</strong> materials.<br />
Familiarise yourself with the products and take appropriate<br />
health and safety measures. We suggest you obtain and<br />
consult the relevant MSDS (Material Safety Data Sheets) from<br />
your supplier whenever possible. This article is for your<br />
information only. We cannot accept any responsibility for<br />
your actions.<br />
www.learnprosthetic<strong>makeup</strong>.com Page 4