

PDF Download - Character Creation Series
PDF Download - Character Creation Series
PDF Download - Character Creation Series

You also want an ePaper? Increase the reach of your titles
YUMPU automatically turns print PDFs into web optimized ePapers that Google loves.
Table ofContentsForward 4Basic introduction to Part TwoThe Interface Overview 5A general overview of Zbrush’s interfaceImporting the Base Mesh 6Bringing in the OBJ to Zbrush from Part OneBeginning the Sculpting Process 7The basics of Zbrush sculpting explainedThe Brush Palette 9The Zbrush Brush Palette explainedBrushes Overview 10A brief overview of some of the brushes we will be usingMatCaps Overview 11An explanation of Zbrush MatCaps2
Table ofContentsSculpting the <strong>Character</strong> 12Techniques for sculpting a character in ZbrushSculpt Detailing 16Techniques for detailing a character in ZbrushAdding SubTools 18An overview of SubTools, benefits and uses.Video Companion 20A hyperlink to a video companion for Part TwoIndex 223
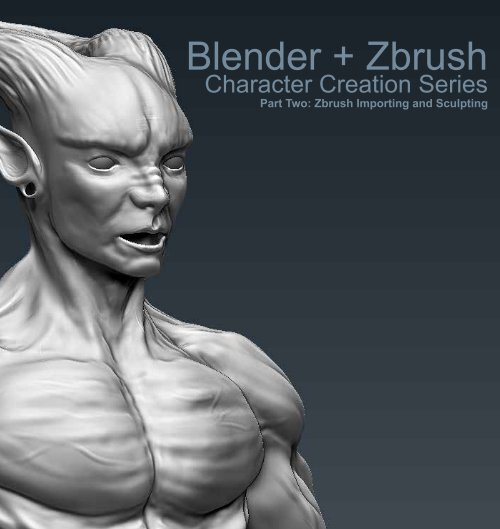
Forward4Part Two Zbrush Importing and SculptingIn the second part of this tutorial series you will learn how to import the basemesh you created in part one to Zbrush. The basics of the Zbrush interfacewill be discussed, and the basics of sculpting your character will be presentedthrough text, pictures and video format.Keep in mind that sculpting is more about practice and technique than basicknowledge that can be taught in a tutorial. A lot of your progress will be theresult of practice. This guide can only give you the idea behind the process.
The Interface123456Overview7 8 9 101. Brush Selection Tool: A variety of brushesto sculpt with can be selected here.2. Stroke Tool Selection: Tools can be selectedhere that change the stroke of your brush.3. The Alpha Palette: Alpha maps can beselected and loaded in here that change theway your brush strokes look.4. Texture Palette: Textures can be selectedhere to be painted with.5. MatCap Selection: A selection of premadeshaders for your model can be selected here.6. Color Palette: This controls the color ofyour brush.7. Color Intensity: This controls how strongcolor is applied.8. Brush Intensity: This controls how strongyour brush is.9. Brush Size: This controls the size of yourselected brush.10. Tool Panel: Various options for saving andloading models in Zbrush are here.5
Importing theBase MeshSince Zbrush cannot read Blender3D’s native file format, .BLENDER,we exported it as an .OBJ file type.1. Click Import on the Tool Panel.2. Browse to the OBJ File, open it.Zbrush has successfully importedthe OBJ file, meaning you havetransferred the base mesh fromBlender to Zbrush and you are nowready to sculpt.3. Drag anywhere on the Zbrush’smain document area to place thebasemesh.You can place multiple instances of amodel on the document, or canvas, butyou can only work on one. For thisreason you only need one instanceof the base mesh on the canvas. Ifyou accidentally put more than one,press CTRL + N to clear the canvas.4. To actually start to sculpt the base mesh, click the EDIT button(or press “T”) to make it editable.6
Beginning theSculpting ProcessThe first thing that must be done when sculpting in Zbrush is increasingthe level of detail, or polycount of the base mesh. Currently, the basemesh is very blocky because it is made up of very few faces, or polys.Zbrush details by moving individual polys, so if we increase the polys tonumbers in the millions, we can achieve high levels of detail.1. On the right hand side of thescreen, locate and click the GeometryTab.2. Click “Divide”Divide literally divides the polygons,what was once one poly, is now four.So automatically the polycount is muchhigher. Notice the “Smt” button is highlightedautomatically, this stands for smooth.Each time you click Divide, it will smooththe mesh.One thing to keep in mind, while higherpolycounts allow for more detail, it isalso easier to make a mess. It is betterto slowly increase your polycount as youneed too. High polycounts also decreasethe performance of your system.7
SculptingContinuedAbove Image: On the left, the normal basemesh in Zbrush. On the right, the same basemesh with 3 divisions and smoothing. Theone on the right has more polys, so more detailcan be sculpted in.Right Images: Top right: A sphere with 1division level. Bottom right: The same spherewith 4 division levels. As you can see, themore divisions the better the result.8
The BrushPaletteZbrush comes equipped with many brushes for your use. When you click the BrushPalette a box appears with many options. It would be wise to experiment with many ofthese brushes, as they are all useful and do a variety of different things. The results inthis tutorial series were made with the use of only a few brushes.The above brushes are the ones used mostly for the creation of this character. Clay,ClayBuildup, ClayTubes, MaskPen, Morph, Smooth, Standard, and Trim Dynamic.9
BrushesOverviewClay: This brush is useful for adding mass to model. This brush acts justlike sculpting in physical clay would.Clay Buildup: This is a more extreme version of the Clay Brush. Thisbrush simulates slabbing huge amounts of a clay onto a model.Clay Tubes: This is the brush I use mostly for adding controlled amounts of“clay” to a model. It’s great for blocking out muscular shapes.MaskPen: You can mask out certain portions of a model so you don’taccidentally sculpt on it.Morph: This is a great brush used in detailing. This brush allows you tomorph parts of a model back to previous states.Smooth: This brush smooths over parts of a model.Standard: This is sort of like a pen brush. It is good for sculpting controlleddetails.Trim Dynamic: This is a good brush to trim down a section of a model andflatten it out.10
MatCapsOverviewIf you click the MatCaps palette you will see several MatCaps appear. MatCaps affectthe appearance of a model while sculpting, but will not change the final result of themodel. Find a MatCap you like, and use it. Different MatCaps will allow to see your sculptfrom different color and light perspectives which can be useful in creating a good sculpt.Two different MatCaps. On the left MatCap Red Wax, on the right MatCap White Cavity.11
Sculpting The<strong>Character</strong>When sculpting the character it’s always good to have anatomy references close by.You will produce better results when referring to images of muscles and whateverobjects you are sculpting.1. Add a few division levels byclicking “Divide” under theGeometry tab, or just pressCTRL+D.Like in Blender, when usingthe Mirror Modifier, it is bestto model with symmetry alongthe X-Axis, so both sides arethe same with minimal effort.Press the “X” key to activatethis feature.2.Select the “ClayTubes” brushand change the Brush Size tosomething smaller. Start blockingin the chest.By applying the brush with theleft mouse button, or a tablet youadd clay. Hold down the ALT key to subtract or dig into the model for the middle chest.It is best to slowly add to the model, rather than rush and build up too much mass onthe model.It’s also important to work on the entire model at the same time, moving from body partto body part, sort of jumping around. This ensures that the model stays in properproportion, both in terms of size and detail.12
SculptingContinued4. Use the “Smooth” brush onthe abs. Remember to cut intothem as well as build up theshapes of the muscles.In the image below you cansee blocked in leg muscles andsmoothed abs muscles.3. Use the “Smooth” brush tosmooth out the rough ClayTubesblocky shapes.If need be, continue to refine.When sculpting you will probablyneed to continue to work andrework the details of the model. Inthe above image the abdominalmuscles are being blocked in withClayTubes.13
SculptingContinuedIn the above images you can see thenumber of divisions increase with thedetail level of the model. These imagesshow the model move from a blocky basemesh to a model with some basicmuscular forms. No great details aresculpted into the model as of yet. Theseresults can be achieved using only theClay, ClayBuildup, ClayTubes andSmooth brushes.14
SculptingContinuedAs you can see here the model is gaininga lot more detail. The process is gradual,and equal all over. The division levelsslowly rise as needed. You will notice asyou raise division levels the brushes feelmore precise, and the detail level is greater.The Standard brush is good for makingmuscles pop out and cutting in and makingcreases between the muscles. The smoothbrush will smooth out small details.15
SculptDetailingTrim DynamicThe Trim Dynamic brush can be usedto flatten areas like the upper lip andedges of the eye lids. Trim Dynamic isgood for really defining areas like thecheek bones. The brush is primarilyused for hard surface modeling, suchas cars or machines, but it’s not excludedfrom organic modeling either.AlphasWhen you select an Alpha Map fromthe Alpha Palette you can change theway a brush works. To make pores onthe skin select an Alpha with tiny circlesand use it with the Standard Brush. Putthe Standard Brush on a low intensitysetting like 10-12. Start to drag thebrush along the face to create pores.The standard brush will detail using the alpha, in this case tiny circles.16
Sculpting DetailingContinuedMorph Targets1. On the far right click the Morph TargetPanel. Select “StoreMT.”Zbrush has stored the current look of themodel in memory.2. Edit the model in anyway, for example,a large line drawn on the chest depictedon the bottom left image.3. Use the morph brush to selectivelymorph the model to it’s previous state,creating a vein in the model’s chest.As you can see, Morph Targets are a great way to control the amount ofdetail. This is great for details such as veins, scars, and other uses.17
AddingSubToolsSubTools are great for adding multiple meshes together inZbrush, but still keeping them separate for editing. For example,I blocked out a base mesh for clothes for the character inBlender. I exported the clothes as OBJ files, just like the character.To get them into Zbrush:1.Import the OBJs2. Select your main character from the Tool Palette3. Click SubTool on the far right4. Click Append5. Select the clothesYou can toggle SubTools on and off with the “eye” icon underSubTools. You can also highlight the one you want to edit aswell. No other models will be edited except the highlightsubtool. This is useful for editing clothing that needs to bepushed and pulled to fit well on a model.Morph Targets also work well with the Standard Brush to createwrinkles in clothing as well, during the detailing process.Alphas can be used to add a cloth texture look to clothing as well.18
SubToolsContinuedThe clothing base mesh in Blender is depicted on the left, while the clothing base mesh is imported as aseperate subtool in Zbrush on the right.19
VideoCompanionWhen it comes to art, some things are better off being visual rather than being writtenabout in a guide. If you are having trouble with some of these techniques I havesupplied a video to re-irritate the focus of this tutorial. Check it out right here:https://www.youtube.com/watch?v=GO0M4Cilmik20
To beContinued...That’s all for part two! By now you should have the knowledge toimport your base mesh into Zbrush and sculpt it. In Part Three ofthis series we will look at how texture the model in Zbrush usingPolyPaint, create UV Maps for the model, and export the mapsfrom Zbrush.21
IndexAAlpha Palette 5Alphas 16BBrushesBrush Intensity 5Brush Palette 9Brush Size 5Clay Brush 10Clay Buildup 10ClayTubes 10, 12, 13MaskPen 10Morph Brush 10, 17Morph Targets 17Smooth 10, 13Standard 10Trim Dynamic 10, 16CColor Intensity 5DDivision Levels 7, 8EEdit Button 6IImport 6Interface 5MMatCaps 11PPalettesBrush Palette 9Color Palette 5MatCap Selection 5, 11Texture Palette 5The Alpha Palette 5SSubTools 17TToolsBrush Selection Tool 5Geometry Tab 7Stroke Tool Selection 5Tool Panel 5, 6XX-Axis 12GGeometry Tab 722