Operating Instructions GEORG FISCHER +GF+ ... - Orbitechnik.com
Operating Instructions GEORG FISCHER +GF+ ... - Orbitechnik.com
Operating Instructions GEORG FISCHER +GF+ ... - Orbitechnik.com

Create successful ePaper yourself
Turn your PDF publications into a flip-book with our unique Google optimized e-Paper software.
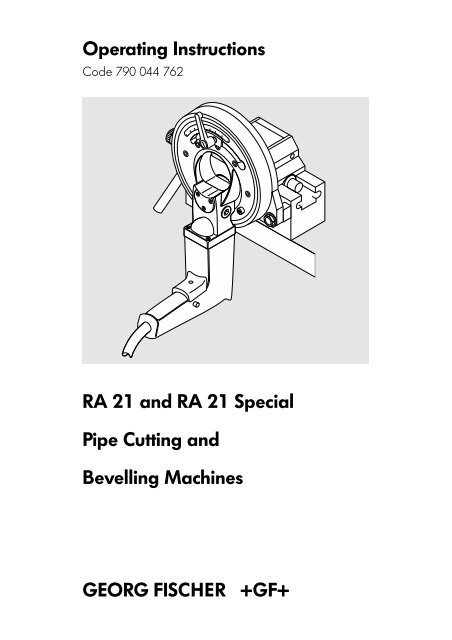
<strong>Operating</strong> <strong>Instructions</strong><br />
Code 790 044 762<br />
RA 21 and RA 21 Special<br />
Pipe Cutting and<br />
Bevelling Machines<br />
<strong>GEORG</strong> <strong>FISCHER</strong> <strong>+GF+</strong>
These operating instructions are part<br />
of machine no.: .........................<br />
All rights retained, in particular the rights to reproduction, dissemination and<br />
translation.<br />
Copying or reproduction in any form (print, photocopy, microfilm or data<br />
acquisition) require written permission from Georg Fischer Rohrverbindungstechnik<br />
GmbH.
Table of Contents<br />
<strong>GEORG</strong> <strong>FISCHER</strong> <strong>+GF+</strong><br />
Page<br />
0 About these operating instructions 1<br />
1 Notes on safety 2<br />
2 Description of the pipe cutter 4<br />
3 Features and scope of application<br />
of the pipe cutter 5<br />
4 Technical specifications 7<br />
5 Commissioning 8<br />
5.1 Checking the scope of delivery 8<br />
5.2 Transporting and assembling<br />
the pipe cutter 9<br />
6 Operation 10<br />
6.1 Fitting the saw blade /<br />
additional cutter 10<br />
6.2 Adjusting the pipe diameter 12<br />
6.3 Adjusting the additional cutter 13<br />
6.4 Using stops 14<br />
6.5 Cutting the pipe 16<br />
6.6 Cutting and bevelling the pipe 18<br />
7 Maintenance 20<br />
8 What to do if ...? 22<br />
I
II <strong>GEORG</strong> <strong>FISCHER</strong> <strong>+GF+</strong>
0 About these operating<br />
instructions<br />
The symbols used in this manual are explained<br />
here to help you quickly understand the<br />
operating instructions and use them effectively.<br />
Symbols<br />
Note on safety<br />
This general hazard symbol ac<strong>com</strong>panies<br />
passages of text which you should<br />
read and understand under all circumstances.<br />
By failing to do so you could<br />
endanger yourself and others.<br />
Important information<br />
Passages of text which convey important<br />
information are ac<strong>com</strong>panied by this<br />
symbol. Failing to observe them can<br />
cause machine malfunctions or damage.<br />
� Action<br />
This arrow indicates an action you must<br />
perform.<br />
<strong>GEORG</strong> <strong>FISCHER</strong> <strong>+GF+</strong><br />
1
1 Notes on safety<br />
The RA 21/RA 21 Special Pipe Cutting and<br />
Bevelling Machine (referred to as a pipe cutter<br />
in the following) is a state-of-the-art machine.<br />
Using it for purposes other than those described<br />
in this manual may cause injury to the user or to<br />
others. It may also damage the machine or<br />
other equipment.<br />
Therefore:<br />
º Always ensure that the machine is in good<br />
working order and always <strong>com</strong>ply with<br />
these notes on safety.<br />
Proper use<br />
º Only use the materials and types of pipe<br />
specified in this manual (see chapter 3).<br />
Always consult Georg Fischer after-sales<br />
service personnel before using other<br />
materials.<br />
º Only use the pipe cutter for cutting and<br />
bevelling operations as described in<br />
chapter 6.<br />
º Only use original Georg Fischer spare parts<br />
and auxiliaries.<br />
º Inspect the pipe cutter every day for visible<br />
signs of damage or defects. Any damage or<br />
defects must be repaired immediately.<br />
Work on the electrical installations may only<br />
be performed by a qualified electrician.<br />
º Do not use the pipe cutter unless all safety<br />
devises<br />
- restart inhibitor<br />
- overload protection<br />
- saw blade guard<br />
are working properly and the fixtures on the<br />
vise and baseplate are fitted securely.<br />
2 <strong>GEORG</strong> <strong>FISCHER</strong> <strong>+GF+</strong>¹
Working with safety in mind<br />
"Make your contribution to safety at the workplace."<br />
Report any unusual behaviour on the part of the<br />
machine to the person in charge immediately.<br />
Always work with safety in mind.<br />
º Wear safety goggles during<br />
cutting and bevelling operations.<br />
º Switch the RA 21 (S) off after<br />
<strong>com</strong>pleting each stage of work and<br />
allow the machine to run a stop.<br />
º Disconnect from the mains before<br />
cleaning the pipe cutter.<br />
<strong>GEORG</strong> <strong>FISCHER</strong> <strong>+GF+</strong><br />
The cutter and saw blade may cause<br />
injury.<br />
Therefore:<br />
º Keep your hands away from the<br />
tools during cutting and bevelling<br />
operations.<br />
Keep the pipe cutter dry, do not use<br />
in the rain.<br />
Do not use the pipe cutter in areas<br />
subject to explosion hazards.<br />
Disposal<br />
Please make sure that material chips and used<br />
gear oil are disposed of properly.<br />
Further safety rules<br />
Comply with the regulations, standards and<br />
guidelines that apply in your country.<br />
3
1 pipe diameter adjusting<br />
facility<br />
2 locking screw<br />
3 worm gear<br />
4 nameplate<br />
5 motor<br />
6 on/off switch<br />
7 locking knob for on/off<br />
switch<br />
8 power cable with slipring<br />
contact<br />
9 vise<br />
2 Description of the<br />
pipe cutter<br />
The pipe cutter is a robust, user-friendly,<br />
service-friendly and safety-oriented design.<br />
Vise and saw<br />
All mechanically stressed parts are metal.<br />
The rounded, smooth edges help to avoid<br />
accidents.<br />
The saw blade and jaws are close togethers<br />
which reduces vibrations during cutting.<br />
Motor and power cable<br />
The motor can be easily removed. The motor<br />
housing and switches are made from lightweight,<br />
impact-resistant plastic.<br />
Integrated into the power cable is a slipring<br />
contact which prevents the cable from twisting<br />
during cutting.<br />
1<br />
2<br />
3<br />
4<br />
5<br />
6<br />
7<br />
4 <strong>GEORG</strong> <strong>FISCHER</strong> <strong>+GF+</strong>¹<br />
8<br />
9
3 Features and scope of<br />
application of the pipe<br />
cutter<br />
The pipe cutter<br />
º is a fully configured working machine suitable<br />
for workshop and building site operation;<br />
º is part of the <strong>com</strong>bined KM 2 and GTM 2<br />
pipe cutting and threading machines;<br />
º works using the safety-enhancing principle:<br />
stationary pipe, rotating tool.<br />
The pipe cutter is suitable for<br />
º cutting and<br />
º bevelling<br />
pipes.<br />
The cut pipes are free from burr, so no<br />
deburring (in- or outside) is required.<br />
This reduces the risk of corrosion.<br />
Scope of application RA 21 RA 21<br />
Special<br />
º pipe Ø 1/4" to 2"<br />
or 10 mm to 63 mm X X<br />
º up to 5.5 mm wall<br />
thickness<br />
Chrome and stainless<br />
steel pipes up to 1.5 mm X<br />
wall thickness<br />
Solid material<br />
Ø 6 mm to 16 mm X<br />
<strong>GEORG</strong> <strong>FISCHER</strong> <strong>+GF+</strong><br />
5
The following materials can be used:<br />
º steel, black or galvanised<br />
º chrome and stainless steel<br />
(up to 2.5 mm wall thickness)<br />
º aluminium<br />
º non-ferrous metals (e.g. copper, brass)<br />
º plastics (PE, PP, PVDE, PVC)<br />
Other materials on request.<br />
Do not use cast pipes with glass-hard<br />
surfaces (GG).<br />
6 <strong>GEORG</strong> <strong>FISCHER</strong> <strong>+GF+</strong>¹
4 Technical specifications<br />
Manufacturer Georg Fischer<br />
Rohrverbindungstechnik GmbH<br />
D-78224 Singen<br />
Dimensions 300 x 450 x 300 mm<br />
Weight<br />
(incl. vise) 34 kg<br />
Power 550 W<br />
Protection class Totally insulated in accordance<br />
with Class II DIN VDE 0740<br />
Speed 180 rpm<br />
Versions 1-phase AC<br />
110 ... 120 V, 50/60 Hz<br />
230 ... 240 V, 50/60 Hz<br />
Sound pressure<br />
level at the<br />
workplace at idle: approx. 82 dB (A)<br />
under load: approx. 84 dB (A)<br />
As the noise level may also exceed 84 dB (A)<br />
under unfavourable operating conditions, we<br />
re<strong>com</strong>mend the use of suitable ear protection<br />
when the machine is used for extended periods.<br />
The sound pressure level was measured under<br />
normal operating conditions in accordance with<br />
EN 23741.<br />
Vibration level<br />
in accordance<br />
with EN 28662,<br />
Part 1 < 2.5 m/s 2<br />
<strong>GEORG</strong> <strong>FISCHER</strong> <strong>+GF+</strong><br />
7
5 Commissioning<br />
5.1 Checking the scope of delivery<br />
Check all parts of the delivery for <strong>com</strong>pleteness<br />
and transport damage. Please report missing<br />
parts or transport damage to the support<br />
immediately.<br />
Normal accessories<br />
(subject to change without notice)<br />
º 1 saw blade<br />
º 1 ring spanner, 22 mm<br />
º 1 brush<br />
º 2 hexagon Allen keys<br />
º 1 tube of saw blade lubricant<br />
º 1 quick mounting base plate<br />
º 1 tube of special gear oil<br />
8 <strong>GEORG</strong> <strong>FISCHER</strong> <strong>+GF+</strong>¹
5.2 Transporting and assembling the pipe cutter<br />
Transport<br />
Disconnect from the power supply<br />
before transporting, mounting or<br />
dismounting and allow the machine to<br />
run a stop.<br />
Mounting the quick mounting base plate<br />
The pipe cutter with the vise is mounted either<br />
º on the quick mounting base plate, or<br />
º on the quick mounting base plate<br />
(special accessory) with clamps.<br />
<strong>GEORG</strong> <strong>FISCHER</strong> <strong>+GF+</strong><br />
1<br />
�Mark and punch<br />
the bolt holes on<br />
the work bench.<br />
Use the quickmounting<br />
baseplate<br />
as a template.<br />
�Drill 13 mm Ø holes.<br />
�Bolt down the<br />
quick-mounting<br />
baseplate.<br />
�Place the vise with<br />
flanged-on pipe<br />
cutter on the base<br />
plate. Tighten the<br />
hexagon nut (1).<br />
9
�Loosen the locking<br />
screw (1).<br />
�Turn the pipe cutter<br />
upwards 180°<br />
clockwise.<br />
�Tighten the locking<br />
screw (1).<br />
�Clean the saw blade<br />
shaft (2) and vicinity.<br />
6 Operation<br />
6.1 Fitting the saw blade /<br />
additional cutter<br />
1<br />
Disconnect the mains plug before fitting<br />
or changing the tool.<br />
The saw blade/additional cutter must be free<br />
from chips and dirt.<br />
Use only original Georg Fischer saw blades<br />
and cutters.<br />
The inscription on the saw blade (1) must<br />
always face the pipe cutter. Observe sign for<br />
saw blade guard.<br />
Preparatory work<br />
2<br />
10 <strong>GEORG</strong> <strong>FISCHER</strong> <strong>+GF+</strong>¹<br />
1
Fitting the saw blade<br />
5<br />
Fitting the saw blade and additional cutter<br />
6<br />
4<br />
5<br />
3<br />
4<br />
3<br />
<strong>GEORG</strong> <strong>FISCHER</strong> <strong>+GF+</strong><br />
1<br />
2<br />
1<br />
2<br />
�Mount the following<br />
on the shaft (1):<br />
º saw blade (3)<br />
º clamping disk (4)<br />
code RA 21:<br />
790 041 188<br />
code RA 21 S:<br />
790 044 192<br />
�Tighten the nut (5)<br />
by turning counterclockwise.<br />
Left-hand<br />
thread.<br />
�Loosen the locking<br />
screw (2).<br />
�Turn the pipe cutter<br />
clockwise back<br />
down into its home<br />
position.<br />
�Mount the following<br />
on the shaft (1):<br />
RA 21:<br />
º saw blade (3)<br />
º additional cutter (4)<br />
º clamping disk (5)<br />
RA 21 S:<br />
º saw blade (3)<br />
º additional cutter (4)<br />
�Tighten the nut (6)<br />
by turning counterclockwise.<br />
Left-hand<br />
thread.<br />
�Loosen the locking<br />
screw (2).<br />
�Turn the pipe cutter<br />
clockwise back into<br />
its home position.<br />
11
�Release the lever<br />
(1).<br />
�Select pipe diameter<br />
on the scale (3).<br />
�Set the red mark on<br />
the left side of the<br />
stop (2) to the corresponding<br />
number.<br />
�Tighten the lever (1).<br />
�Insert the pipe in the<br />
vise.<br />
�Move the pipe<br />
almost up to the<br />
saw blade.<br />
�Tighten the pipe in<br />
the vise.<br />
�Release the lever (1)<br />
and set the stop (2)<br />
to position 2".<br />
Do not tighten.<br />
�Raise the motor of<br />
the pipe cutter as if<br />
to start cutting, until<br />
the points of the<br />
saw blade teeth<br />
project about 1.5<br />
mm into the pipe.<br />
�Tighten the lever (1).<br />
6.2 Adjusting the pipe diameter<br />
Threaded pipes to DIN 2440<br />
3<br />
2<br />
2<br />
12 <strong>GEORG</strong> <strong>FISCHER</strong> <strong>+GF+</strong>¹<br />
11/2<br />
11/4<br />
1<br />
3/4<br />
1/2<br />
open<br />
All other types of pipe<br />
1<br />
2<br />
2<br />
11/2<br />
11/4<br />
1<br />
3/8<br />
1/4<br />
3/4<br />
1/2<br />
3/8<br />
1/4<br />
1
6.3 Adjusting the additional cutter<br />
Simultaneous cutting and bevelling of steel pipes<br />
up to a wall thickness of 4.5 mm is possible.<br />
1<br />
2<br />
Bevel OK<br />
2<br />
11/2<br />
11/4<br />
<strong>GEORG</strong> <strong>FISCHER</strong> <strong>+GF+</strong><br />
1<br />
3/4<br />
1/2<br />
3/8<br />
1/4<br />
Move the<br />
stop (2) a<br />
little to the<br />
right<br />
Move the<br />
stop (2) a<br />
little to the<br />
left<br />
�Insert the pipe in the<br />
vise.<br />
�Move the pipe<br />
almost up to the<br />
additional cutter.<br />
�Clamp the pipe in<br />
the vise.<br />
�Release the lever (1)<br />
and set the stop (2)<br />
to position 2".<br />
Do not tighten.<br />
�Raise the motor of<br />
the pipe cutter as if<br />
to start cutting, until<br />
the cutter covers the<br />
wall of the pipe.<br />
�Tighten the lever (1).<br />
�Do a test bevel and<br />
check the result (see<br />
section 6.6).<br />
13
�Mount the length<br />
gauge (1).<br />
�Swing the stop (2) in<br />
to the middle of the<br />
pipe and engage.<br />
�Release the cross<br />
knob (3).<br />
�Set to the desired<br />
length. Use the scale.<br />
�Tighten the cross<br />
knob.<br />
�Push the pipe forwards<br />
up to the<br />
stop and clamp.<br />
�Swing the stop clear.<br />
�Cut the pipe.<br />
�Mount the length<br />
gauge (1).<br />
�Swing the stop in to<br />
the middle of the<br />
pipe.<br />
�Use a yardstick to<br />
extend the stop to<br />
the desired length.<br />
�Push the clamp (2)<br />
up against the<br />
housing and turn it<br />
so that it is in<br />
contact with the<br />
work bench.<br />
6.4 Using stops<br />
Length gauge up to 250 mm<br />
Length gauge over 250 mm<br />
2<br />
14 <strong>GEORG</strong> <strong>FISCHER</strong> <strong>+GF+</strong>¹<br />
2<br />
1<br />
1<br />
3
<strong>GEORG</strong> <strong>FISCHER</strong> <strong>+GF+</strong><br />
�Tighten the clamp.<br />
�Push the pipe up<br />
against the stop<br />
and clamp.<br />
�Swing the stop out<br />
and push all the<br />
way back.<br />
�Cut the pipe.<br />
�For the next cut,<br />
extend the stop and<br />
swing into place<br />
clockwise.<br />
15
�Connect the pipe<br />
cutter to the mains.<br />
�Apply saw blade<br />
lubricant to the saw<br />
blade teeth.<br />
�Mark the cutting<br />
location on the<br />
pipe.<br />
�Insert the pipe in the<br />
vise.<br />
�Push the marked<br />
cutting location over<br />
the saw blade.<br />
�Clamp the pipe in<br />
the vise.<br />
6.5 Cutting the pipe<br />
Cut thin-walled chrome and stainless steel<br />
pipe up to 1.5 mm wall thickness only with<br />
RA 21 Special.<br />
Put on safety goggles before cutting.<br />
Repeat the lubrication every three cuts.<br />
If in contact with drinking water or<br />
foodstuffs, use only Georg Fischer<br />
lubricating gel.<br />
³ 1 m ³ 1 m<br />
Use a pipe support for pipes that are over<br />
1 m long.<br />
16 <strong>GEORG</strong> <strong>FISCHER</strong> <strong>+GF+</strong>¹
1<br />
2<br />
11/2<br />
11/4<br />
2<br />
For non-stop operation: After cutting, loosen<br />
the hexagon nut on the saw blade to avoid<br />
damage caused by tension.<br />
<strong>GEORG</strong> <strong>FISCHER</strong> <strong>+GF+</strong><br />
1<br />
3/4<br />
1/2<br />
3/8<br />
1/4<br />
1<br />
3<br />
�Switch on the saw<br />
motor. Press the on/<br />
off switch (1) and<br />
the locking button<br />
(2).<br />
�Carefully turn the<br />
pipe cutter clockwise<br />
until the wall of<br />
the pipe has been<br />
pierced through.<br />
�Continue to turn<br />
rapidly until the pipe<br />
has been cut off and<br />
the marks (3) on the<br />
slide housing and<br />
vise housing are<br />
aligned.<br />
�Turn the pipe cutter<br />
back into its home<br />
position.<br />
�Switch off the saw<br />
motor. Press the on/<br />
off switch (1) again.<br />
17
�Connect the pipe<br />
cutter to the mains.<br />
�Apply saw blade lubricant<br />
to the saw<br />
blade teeth/cutting<br />
surface.<br />
�Mark the cutting<br />
location on the<br />
pipe.<br />
�Insert the pipe in the<br />
vise.<br />
�Push the marked<br />
cutting location over<br />
the saw blade.<br />
�Clamp the pipe in<br />
the vise.<br />
6.6 Cutting and bevelling the pipe<br />
This procedure <strong>com</strong>bines cutting and bevelling<br />
of the pipe. When cutting and bevelling simultaneously,<br />
turn the pipe cutter more slowly<br />
around the pipe that you would for cutting<br />
alone, as two tools are used at the same time.<br />
Put on safety goggles before cutting.<br />
Repeat the lubrication every three cuts.<br />
If in contact with drinking water or<br />
foodstuffs, use only Georg Fischer<br />
lubricating gel.<br />
³ 1 m ³ 1 m<br />
Use a pipe support for pipes that are more<br />
than 1 m long.<br />
18 <strong>GEORG</strong> <strong>FISCHER</strong> <strong>+GF+</strong>¹
1<br />
2<br />
11/2<br />
11/4<br />
For non-stop operation: After cutting, loosen<br />
the hexagon nut on the saw blade to avoid<br />
damage caused by tension.<br />
<strong>GEORG</strong> <strong>FISCHER</strong> <strong>+GF+</strong><br />
1<br />
3/4<br />
1/2<br />
2<br />
3/8<br />
1/4<br />
1<br />
3<br />
�Switch on the saw<br />
motor. Press the on/<br />
off switch (1) and<br />
the locking button<br />
(2).<br />
�Carefully turn the<br />
pipe cutter clockwise<br />
until the wall of<br />
the pipe has been<br />
pierced through.<br />
�Continue turning<br />
rapidly until the pipe<br />
has been cut off and<br />
the marks (3) on the<br />
slide housing and<br />
vise housing are<br />
aligned.<br />
�Turn the pipe cutter<br />
back into its home<br />
position.<br />
�Switch off the saw<br />
motor. Press the on/<br />
off switch (1) again.<br />
19
Interval<br />
every week<br />
º every time the cutter is<br />
cleaned<br />
º every tool change<br />
7 Maintenance<br />
Activity<br />
Disconnect the mains plug before<br />
doing maintenance work.<br />
Remove the saw blade and brush off chips.<br />
Oil the four locations marked by the arrows.<br />
Check the oil level of the gear and top up if<br />
necessary.<br />
Do not use <strong>com</strong>pressed air to clean the area at the<br />
end of the shaft marked with an arrow as the rotary<br />
shaft seal may otherwise be damaged by chips.<br />
Use a cloth or brush to clean the end of the shaft.<br />
20 <strong>GEORG</strong> <strong>FISCHER</strong> <strong>+GF+</strong>¹
Interval<br />
after the first 150 hours<br />
of operation<br />
(or after 3 months,<br />
whichever is sooner),<br />
then every 1000 hours of<br />
operation (or every year)<br />
<strong>GEORG</strong> <strong>FISCHER</strong> <strong>+GF+</strong><br />
Activity<br />
Fill with gear oil up to the threaded hole.<br />
21
Problem<br />
Pipe cutter will not turn.<br />
Saw blade is not cutting<br />
and is slipping.<br />
Saw blade is not cutting.<br />
Pipe is not being cut<br />
concentrically.<br />
Pipe is not being cut.<br />
Motor not running.<br />
8 What to do if ...?<br />
Cause<br />
Locking screw tightened.<br />
Wrong pipe diameter<br />
set.<br />
Nut on saw blade shaft<br />
not tight enough.<br />
Saw blade wrong way<br />
round.<br />
Pipe cutter not flanged<br />
on. Flange surfaces are<br />
dirty.<br />
Pipe diameter wrongly<br />
set.<br />
Clamping lever not tight.<br />
The restart inhibitor has<br />
tripped.<br />
Remedy<br />
Loosen locking screw.<br />
Set pipe diameter<br />
correctly.<br />
Tighten nut.<br />
Fit saw blade correctly.<br />
Inscription on saw blade<br />
must face the pipe cutting<br />
machine (see chapter 6).<br />
Remove pipe cutter,<br />
clean mounting parts<br />
and flange surfaces, bolt<br />
pipe cutter back on.<br />
Adjust pipe diameter<br />
(see chapter 6).<br />
Tighten clamping lever.<br />
Turn switch to "0", then<br />
switch the pipe cutter on.<br />
22 <strong>GEORG</strong> <strong>FISCHER</strong> <strong>+GF+</strong>¹
Service / after-sales service<br />
Spare parts: see separate spare parts list.<br />
Separate service instructions are available for<br />
the elimination of faults.<br />
Alternatively, contact your local Georg Fischer<br />
agent.<br />
A list of addresses is provided on the back<br />
cover of this manual.<br />
Please quote the following data:<br />
º Cutter type: RA 21/RA 21 Special<br />
º Machine number: see nameplate.<br />
The technical data are not binding.<br />
They are not warranted characteristics and<br />
are subject to change.<br />
Please consult our General Conditions of<br />
Supply.<br />
<strong>GEORG</strong> <strong>FISCHER</strong> <strong>+GF+</strong><br />
23
<strong>GEORG</strong> <strong>FISCHER</strong> <strong>+GF+</strong><br />
A Georg Fischer Rohrleitungssysteme GmbH, Sandgasse 16, 3130 Herzogenburg,<br />
Tel. +43(0)2782/8 56 43-0, Fax +43(0)2782/8 56 64, office@georgfischer.at, www.georgfischer.at<br />
AUS George Fischer Pty Ltd, 186-190 Kingsgrove Road, Kingsgrove NSW 2008,<br />
Tel. +61(0)2/95 54 39 77, Fax +61(0)2/95 02 25 61, sales@georgefischer.<strong>com</strong>.au,<br />
www.georgefischer.<strong>com</strong>.au<br />
B/L Georg Fischer NV/SA, Digue du Canal 109-111 – Vaartdijk 109-111, 1070 Bruxelles/Brüssel,<br />
Tél. +32(0)2/556 40 20, Fax +32(0)2/524 34 26, info.be@be.piping.georgfischer.<strong>com</strong>,<br />
www.georgfischer.be<br />
CH Georg Fischer Rohrleitungssysteme (Schweiz) AG, Ebnatstrasse 101, Postfach,<br />
8201 Schaffhausen, Tel. +41(0)52/631 30 26, Fax +41(0)52/631 28 97,<br />
info@rohrleitungssysteme.georgfischer.ch, www.piping.georgfischer.ch<br />
D Georg Fischer Rohrverbindungstechnik GmbH, Freibühlstrasse 18/19, 78224 Singen (Htwl.),<br />
Tel. +49(0)7731/79 25 21–23, Fax +49(0)7731/79 25 24, info@rvt.georgfischer.<strong>com</strong>,<br />
www.rvt.georgfischer.<strong>com</strong><br />
DK/IS Georg Fischer A/S, Rugvænget 30, 2630 Taastrup, Tel. +45 70 22 19 75,<br />
Fax +45 70 22 19 76, info@dk.piping.georgfischer.<strong>com</strong>, www.georgfischer.dk<br />
F George Fischer S.A.S., 105–113, rue Charles Michels, 93208 Saint-Denis Cedex 1,<br />
Tél. +33(0)1/492 21 34 1, Fax +33(0)1/492 21 30 0, info@georgefischer.fr, www.georgefischer.fr<br />
GB George Fischer Sales Limited, Paradise Way, Coventry, CV2 2ST, Tel. +44(0)2476/535 535,<br />
Fax +44(0)2476/530 450, info@georgefischer.co.uk, www.georgefischer.co.uk<br />
I Georg Fischer S.p.A., Via Sondrio 1, 20063 Cernusco S/N (MI), Tel. +3902/921 861,<br />
Fax +3902/921 407 85-6, office@piping.georgfischer.it, www.georgfischer.it<br />
N Georg Fischer AS, Rudsletta 97, 1351 Rud, Tel. +47(0)67/18 29 00, Fax +47(0)67/13 92 92,<br />
info@no.piping.georgfischer.<strong>com</strong>, www.georgfischer.no<br />
NL Georg Fischer N.V., Postbus 35-8160, 816 PA Epe, Tel. +31(0)578/67 82 22,<br />
Fax +31(0)578/62 17 68, info.vgnl@nl.piping.georgfischer.<strong>com</strong>, www.georgfischer.nl<br />
Georg Fischer WAGA N.V., Lange Veenteweg 19, Postbus 290, 8160 AG Epe,<br />
Tel. +31(0)578/67 83 78, Fax +31(0)578/62 08 48, info@waga.georgfischer.<strong>com</strong>,<br />
www.waga.georgfischer.<strong>com</strong><br />
S/FIN Georg Fischer AB, Box 113, 12523 Älvsjö-Stockholm, Tel. +46(0)8/506 77 500,<br />
Fax +46(0)8/749 23 70, info@georgfischer.se, www.georgfischer.se<br />
USA George Fischer Inc., 2882 Dow Avenue, Tustin, CA 92780-7258, Tel. +1(714) 731-88 00,<br />
Toll Free 800/854 40 90, Fax +1(714) 731 62 01, info@us.piping.georgefischer.<strong>com</strong>,<br />
www.us.piping.georgefischer.<strong>com</strong><br />
Export Georg Fischer Rohrverbindungstechnik GmbH, Freibühlstrasse 18/19, 78224 Singen (Htwl.),<br />
Tel. +49(0)7731/792-0, Fax +49(0)7731/792 524, info@rvt.georgfischer.<strong>com</strong>,<br />
www.rvt.georgfischer.<strong>com</strong><br />
790 044 762_01/4 (09.03) © Georg Fischer Rohrverbindungstechnik GmbH, D-78224 Singen 2003