AV13 Air Vent for Steam Systems - Spirax Sarco
AV13 Air Vent for Steam Systems - Spirax Sarco
AV13 Air Vent for Steam Systems - Spirax Sarco

Create successful ePaper yourself
Turn your PDF publications into a flip-book with our unique Google optimized e-Paper software.
8<br />
6. Maintenance<br />
Note: Be<strong>for</strong>e actioning any maintenance programme observe<br />
the 'Safety in<strong>for</strong>mation' in Section 1.<br />
6.1 General in<strong>for</strong>mation<br />
Be<strong>for</strong>e undertaking any maintenance on the <strong>AV13</strong> it must be isolated from the supply<br />
line and return line and any pressure allowed to safely normalise to atmosphere. The <strong>AV13</strong><br />
should then be allowed to cool. When reassembling, ensure that all joint faces are clean.<br />
Maintenance can be completed with the <strong>AV13</strong> in the pipeline, once the safety procedures<br />
have been observed. It is recommended that new gaskets and spares are used whenever<br />
maintenance is undertaken. Ensure that the correct tools and necessary protective<br />
equipment are used at all times. When maintenance is complete open the isolation valves<br />
slowly and check <strong>for</strong> leaks.<br />
6.2 How to fit a new capsule and seat:<br />
- Remove the cap (2) using a spanner.<br />
- Lift out the spring (5), capsule (4) and spacer plate (6).<br />
- Unscrew the valve seat (7).<br />
- Remove the seat gasket (8).<br />
- Fit a new seat gasket (8).<br />
- Screw in a new valve seat (7). Use a small amount of anti-seize compound on the threads<br />
and tighten to the recommended torque (see Table 1).<br />
- Drop in the new spacer plate (6) ensuring it is located centrally on the valve seat (7).<br />
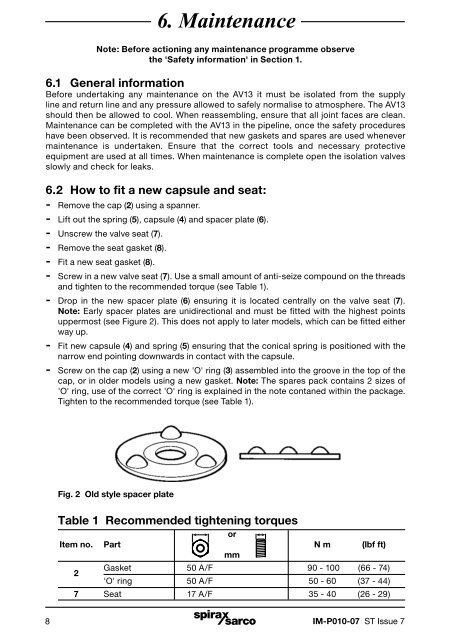
Note: Early spacer plates are unidirectional and must be fitted with the highest points<br />
uppermost (see Figure 2). This does not apply to later models, which can be fitted either<br />
way up.<br />
- Fit new capsule (4) and spring (5) ensuring that the conical spring is positioned with the<br />
narrow end pointing downwards in contact with the capsule.<br />
- Screw on the cap (2) using a new 'O' ring (3) assembled into the groove in the top of the<br />
cap, or in older models using a new gasket. Note: The spares pack contains 2 sizes of<br />
'O' ring, use of the correct 'O' ring is explained in the note contaned within the package.<br />
Tighten to the recommended torque (see Table 1).<br />
Fig. 2 Old style spacer plate<br />
Table 1 Recommended tightening torques<br />
or<br />
Item no. Part N m (lbf ft)<br />
mm<br />
2<br />
Gasket 50 A/F 90 - 100 (66 - 74)<br />
'O' ring 50 A/F 50 - 60 (37 - 44)<br />
7 Seat 17 A/F 35 - 40 (26 - 29)<br />
IM-P010-07 ST Issue 7