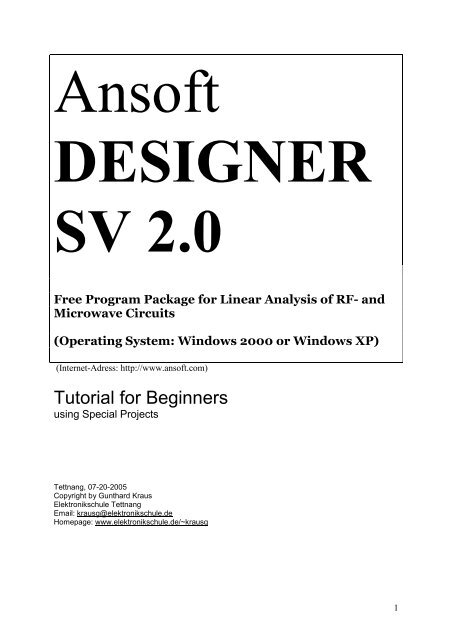
Ansoft DESIGNER SV 2 - von Gunthard Kraus
Ansoft DESIGNER SV 2 - von Gunthard Kraus
Ansoft DESIGNER SV 2 - von Gunthard Kraus

You also want an ePaper? Increase the reach of your titles
YUMPU automatically turns print PDFs into web optimized ePapers that Google loves.
<strong>Ansoft</strong><br />
<strong>DESIGNER</strong><br />
<strong>SV</strong> 2.0<br />
Free Program Package for Linear Analysis of RF- and<br />
Microwave Circuits<br />
(Operating System: Windows 2000 or Windows XP)<br />
(Internet-Adress: http://www.ansoft.com)<br />
Tutorial for Beginners<br />
using Special Projects<br />
Tettnang, 07-20-2005<br />
Copyright by <strong>Gunthard</strong> <strong>Kraus</strong><br />
Elektronikschule Tettnang<br />
Email: krausg@elektronikschule.de<br />
Homepage: www.elektronikschule.de/~krausg<br />
1
Remarks<br />
For a long time you have been able to get very good and useful, but high priced simulation tools for different tasks<br />
from <strong>Ansoft</strong>. But <strong>Ansoft</strong> has always provided free, but limited versions for radio amateurs, students etc.<br />
So the “Designer “ follows this line in his unlimited licensed version. It is not only a simple RF- and Microwave<br />
CAD Program, but also a Filter or Transmission Line Calculator, an S-Parameter Simulator, a linear or non-liner<br />
simulator in the Time Domain, an EM-Machine (for simulating antennas, microstrip lines, waves) and so on...<br />
As a user you don’t miss anything and you ‘ll find every part needed. And You can also compare the simulation of<br />
different simulation principles.<br />
As soon as you start the package on the PC and work on the first project, you learn at once that You<br />
have to cooperate with a “very complicated Lady“ who does not forgive any errors or mistakes.<br />
For the “Little Man” as a user of the free student version this means:<br />
a) Some tools like Nonlinear- or EM-Simulation are completely missing<br />
b) Even for the simplest task you have to fight against the complicated desktop of a program<br />
priced at the regions of a new Mercedes or BMW car...<br />
So this Tutorial is using a concept as follows:<br />
As many different tasks and projects as possible are tackled, solved and described. So the<br />
user gets more and more knowledge of the program functions, buttons and menus.<br />
For this purpose You find a list of “education goals” for every project.<br />
So – as an <strong>Ansoft</strong> <strong>SV</strong> beginner -- you should not ignore anything and work through every project to<br />
get more and more experience.<br />
<strong>Gunthard</strong> <strong>Kraus</strong><br />
2
Contents<br />
Page 4 Project 1 Design of a 100 MHz Chebyshev Lowpass Filter (series inductor<br />
and parallel capacitor version)<br />
Education goal: opening of and working with a project. Successfully working with the Filter<br />
Designer Tool.<br />
Page 7 Project 2 Impedance Matching using a λ / 4 –Microstrip-Line (on a FR4board)<br />
Education goals: a) Working with Circuit Design Projects<br />
b) Usage of Microstrip Lines, Microwave Ports and lumped<br />
components<br />
c) Correct Working with the Microstrip Calculator<br />
d) Preparation and Execution of Simulations<br />
e) Showing the results in the Smithchart or as a Rectangular Plot<br />
f) Using Data Markers in the result plot<br />
Page 17 Project 3: Impedance Matching using a λ / 4 –Microstrip-Line (with a<br />
not in the proposal window listed substrate)<br />
Education goal: Using any substrate for the board<br />
Page 21 Project 4: Impedance Matching using a λ / 4 – Line (= Grounded Coplanar<br />
Waveguide)<br />
Education goal: Usage of other Line Types and other substrates<br />
Page 24 Project 5: Travelling around sharp corners and afterwards turning in the<br />
air<br />
Education goal: a) Using “Bends“<br />
b) 2D- and 3D-Layouts<br />
Page 28 Project 6: Working with S-Parameter-Files (of the GaAs-FET ATF34143)<br />
and N-Ports<br />
Education goals: a) Working with N-ports<br />
b) Simulating with S-Parameter-Files<br />
c) First Meeting with the Noise Figure “NF“ and the Stability Factor<br />
“K“<br />
Page 32 Project 7: Improving the Stability of the ATF34143-Amplifier (Project 6)<br />
Education goals: a) Using N-Ports with reference points<br />
b) More stability for Transistor Amplifiers<br />
Page 35 Project 8: Creating and saving the S-Parameter-File for a selfmade circuit<br />
(SnP-formate)<br />
Page 37 Project 9: Analysing a 1 GHz – Microstrip-LPF<br />
Education goal: Microstrip Lines and Steps in combinations<br />
Page 43 Project 10: Optimising the LPF of Project 9<br />
Education goals: a) Using Local Variables<br />
b) Working with the „Accumulate“- Function<br />
Page 49 Project 11: Complete Design of a 1575 MHz – Microstrip edge coupled<br />
Bandpass Filter<br />
Education goals: a) Design of such a filter type with the integrated Filter Designer<br />
b) Successfully using coupled lines<br />
Page 57 Project 12: Optimizing the 1575 MHz – BPF (Project 11) using the<br />
Network – Analyser Measurements of the manufactured Prototype<br />
3
Project 1: Design of a 100 MHz Chebyshev Lowpass Filter (series inductor<br />
and parallel capacitor version)<br />
Education goal: opening of and working with a project. Successfully working with the Filter Designer Tool.<br />
Step 1:<br />
Start the program, open the menu “View” and activate the different managers<br />
(a tip: for little notebook screens, only “Project Manager” and “Message Manager” will be sufficient)<br />
Step 3:<br />
Step 2:<br />
Click the “New”-Button to start the job. Afterwards choose “Insert Filter<br />
Design” in the Project Menu.<br />
Please examine: the “lumped component button” (marked by a coil and a capacitor) should be active.<br />
Then mark the following items in the columns:<br />
Lowpass Ideal lumped Chebyshev Default Ideal<br />
and press “Next”.<br />
4
Then continue with „Next“<br />
Step 5:<br />
Step 4:<br />
Choose<br />
filter order = 5<br />
passband ripple = 0.1 dB<br />
cutoff frequency fp1 = 0.1 GHz<br />
Source and load resistance =<br />
50Ω<br />
and press “Analyse”.<br />
Afterwards you can have a look<br />
at the S11- and S21- filter curves<br />
either as “Narrowband” or as<br />
“Wideband” version.<br />
With “settings“ the presentation<br />
mode can be modified.<br />
This looks already very nice and if you are contented, press<br />
“Finish”.<br />
Step 6:<br />
So you get the<br />
complete results (=<br />
curves + parts) on your<br />
screen for the “series<br />
inductor version“.<br />
If you prefer the<br />
“parallel capacitor<br />
version”, please press<br />
the marked button......<br />
5
….and have a new look at your screen.<br />
Now you can still save or print this project.<br />
6
Project 2: Impedance Matching using a λ / 4 –Microstrip-Line (on a FR4-Board)<br />
Education goals: a) Working with Circuit Design Projects<br />
b) Usage of Microstrip Lines, Microwave Ports and lumped components<br />
c) Correct Working with the Microstrip Calculator<br />
d) Preparation and Execution of Simulations<br />
e) Showing the results in the Smithchart or as a Rectangular Plot<br />
f) Using Data Markers in the result plot<br />
Task: Match the radiating resistance (136 Ω) of a Patch Antenna to the 50 Ω – feeder at the GPS – frequency<br />
of 1575 MHz using a Quarterwave Transmission Line on a FR4-Board.<br />
FR4-board-properties::<br />
Thickness = 60 MIL = 0.06 inch = 1.52 mm<br />
er = 4.4<br />
loss tangent = 0.02<br />
copper cladding = 0.675 mil = 17µm = 0.5 oz copper (up and down)<br />
Step 1:<br />
Start a new project , click on “Project“<br />
and choose “Insert Circuit Design”.<br />
At once you come to a menu for the<br />
board substrate.<br />
Mark<br />
MS – FR4 (ER =4.4)<br />
0.06 inch,<br />
0.5 oz copper<br />
and click “Open“.<br />
Step 2:<br />
The Circuit Editor and<br />
the Simulation Tool Box<br />
with all necessary<br />
buttons appear.<br />
Important:<br />
Please open at once all<br />
circuit folders and<br />
directories in the Project<br />
Management to get the<br />
necessary overview.<br />
Examine the “Data“ –<br />
Folder to be sure, that<br />
“FR4“-substrate was<br />
accepted by the<br />
software.<br />
Now save the entire<br />
project under a name<br />
an in a folder of your<br />
personal choice.<br />
7
First change to “Microwave Port“.<br />
Then close this menu.<br />
Step 4:<br />
Step 3:<br />
Press the “Interface Port“-Button (or open the pulldown menu<br />
„DRAW“ and click there). At once your cursor is equipped with<br />
the symbol. Place two such ports and press “ESC“ to terminate<br />
this action.<br />
Now do a Double – Click on the port symbol to open it’s<br />
property menu.<br />
Now you should see the modified port.<br />
Please change now to the “Components”<br />
Open the folders<br />
“Lumped“ and<br />
“Resistors“.<br />
Choose the simple<br />
resistor and use<br />
“Drag and Drop” to<br />
move it into our<br />
Editor screen.<br />
Rotate the part (if<br />
necessary) with the<br />
“R“-key, but if a<br />
part was already<br />
placed, You must at<br />
first mark it.<br />
Afterwards rotating<br />
can be done with<br />
+ .<br />
Finish any placing<br />
action with “ESC“).<br />
Now a “Ground“<br />
symbol is still<br />
needed and it can be<br />
found at the marked<br />
place in the Toolbox.<br />
Please connect it to the lower end of the resistor and change the resistors value (after a double click on it’s<br />
symbol) to 136 Ohms.<br />
8
Step 5:<br />
To get the Microstrip<br />
Transmission Line,<br />
close the folder<br />
“Lumped“ and open<br />
“Microstrip“. At the end<br />
of the contents list you<br />
find “Transmission<br />
Lines” and in it<br />
„MS Transmission<br />
Line, physical length“.<br />
Use Drag and Drop to<br />
place it on the editor<br />
screen and connect it to<br />
the Microwave Port and<br />
the resistor.<br />
For this connecting<br />
procedure You have<br />
two possibilites:<br />
a) Either You use<br />
the “Wires“-Function to<br />
do the connection<br />
b) Or you move, with Drag and Drop, the line connection in contact with the Microwave Port connection.<br />
Afterwards you drag the line to get a contact at he other side of the resistor’s end. In this case the wiring is<br />
done automatically.<br />
Step 6:<br />
Open the Property Menu with a double click on the Microstrip symbol.<br />
If you wish to read a short description of this Line Type, please use “Info / MSTRL”.<br />
Clicking on “TRL“ opens the Microstrip-Calculator.<br />
9
Step 7:<br />
At first we calculate the necessary impedance Zo for the Quarterwave Transmission Line:<br />
Z = 50Ω<br />
•136Ω<br />
= 82,<br />
46Ω<br />
This Impedance Zo, the electric length of 90 degrees and the operating frequency of 1575 MHz should now be<br />
entered to our calculator windows (right hand side) - then press “Synthesis“ and find on the left hand side the<br />
necessary line width w = 1.072 mm and the physical length P = 27.0653 mm<br />
Please compare and<br />
examine everything<br />
and then press “OK“.<br />
At once the<br />
calculated length and<br />
width are transferred<br />
to the Property<br />
Window of the used<br />
Microstrip Line and<br />
are visible beside the<br />
Line Symbol on the<br />
Editor screen.<br />
Now it is time to<br />
return to the Project<br />
Management and to<br />
prepare the<br />
simulation.<br />
10
Step 8:<br />
Step 9:<br />
11
Step 10:<br />
And now<br />
1) Set the desired sweep (here: linear from 0 to 5 GHz with steps of 50 MHz)<br />
2) Then press “Add”.<br />
3) Check the values in the window<br />
4) Then press “OK”<br />
5) And “Finish” this action<br />
Step 11:<br />
12
Step 12:<br />
Please<br />
1) mark “S-<br />
Parameters” in the<br />
list<br />
2) choose “S11”<br />
3) press “Add<br />
Trace” and<br />
4) press “Done”<br />
This should be the<br />
result and the goal.<br />
Very often (when optimising a circuit) we want to know how a parameter at a special frequency changes it’s value.<br />
In this case you should use a “Tag” and we’ll demonstrate that for our example.<br />
13
Do a right mouse click on your report screen and choose “Data Marker” from the menu. At once the curve<br />
changes it’s colour. Additionally you see a little marker if you move the cursor to the curve (...you can also use<br />
the cursor arrow buttons!). Move the marker exactly to the best matching point ( - minimum value of S11) at the<br />
frequency 1575 MHz and press “T” (for “TAG”).Repeat the procedure for the other matching point at 4.7 GHz.<br />
It is very nice to see, that for<br />
every tag the value of<br />
frequency and S11 is<br />
presented in a separate<br />
window.<br />
But pay attention:<br />
The Data marker mode is<br />
still active. If you want to<br />
leave it, do a right mouse<br />
click on the screen and<br />
choose “Exit Marker<br />
Mode”.<br />
And if you want to clean the<br />
screen from this additional<br />
action, choose “Delete all<br />
Tags” in the right-handclick-menu.<br />
=====================================================================================<br />
And now we demonstrate how to create a Smith Chart report:<br />
Do a right mouseclick on “Results” in the Project Management<br />
and create a new report.<br />
Attention:<br />
Now you have to change the Display Type to<br />
“Smith Chart”<br />
14
now repeat the already<br />
known game....<br />
....and the job is well<br />
done!<br />
Please examine:<br />
In the Project<br />
Management you find<br />
under “Results”<br />
these two reports.<br />
you can change<br />
between them with a<br />
simple mouseclick.<br />
15
Please test all the possibilities that are offered by the right mouseclick (markers, tags etc.)!<br />
And so the screen looks like<br />
this if you use “Zoom In” after<br />
a right mouseclick on the<br />
report screen. So you can<br />
examine every detail of the<br />
curve.<br />
(Back to first screen: a right<br />
mouseclick and “Zoom Out”)<br />
16
Project 3: Impedance Matching using a λ / 4 – Microstrip-Line (with a<br />
substrate not listed in the proposal window)<br />
Education goal: Using any substrate for the board<br />
Now we repeat the design of project 2 but use another -- not listed! -- substrate.<br />
Task:<br />
Match the radiating resistance (136 Ohms) of a Patch Antenna at the GPS-Frequency (1575 MHz) to 50 Ohms,<br />
using a Quarterwave-Microstrip-Transmission Line on a Rogers R04003 – Substrate.<br />
Properties of the R04003-board:<br />
Thickness = 32 mil = 0.813 mm<br />
Er = 3.38<br />
Loss tangent = 0.0027<br />
Copper cladding = 1.35 mil = 35µm = 1 oz<br />
Roughness = 0.1 mil = 2.5 µm<br />
Step 1:<br />
Start a new project, choose “Insert Circuit Design” and use any substrate in the list (like “FR4, 60 mil, er =4.4”<br />
from project 2). Then store your new project under a convenient name (here: “lamda_02”) and open all folders<br />
and directories in the Project Management.<br />
Step 2:<br />
Open the Property Menu for<br />
the FR4-substrate by doubleclicking<br />
on its symbol in the<br />
Project Management and then<br />
“Edit” to modify the copper<br />
data.<br />
At once we get a message that<br />
the reference to the “stackup<br />
layer” will be lost and therefore<br />
the “specification by material or<br />
resistivity” is valid. Please<br />
confirm it with “Yes”.<br />
Step 3:<br />
Now you can enter the new properties of the<br />
copper cladding. Thickness is “1.35mil”,<br />
“Roughness” is (by experience) 0.1mil (=2.5µm).<br />
Please terminate with “OK’”.<br />
17
Step 4:<br />
Now you should modify the substrate. Here you can choose between two ways:<br />
First Method:<br />
Double-click on the FR4symbol<br />
in the Project<br />
Management.<br />
Then choose “Edit” to<br />
open the menu and do<br />
the following entries:<br />
Substrate Name =<br />
R04003<br />
Height H = 32 mil<br />
Er = 3.38<br />
TAND = 0.0027<br />
Be sure that “Microstrip”<br />
is chosen as Substrate<br />
Type.<br />
Please always remember to enter a value for the upper cover height HU (distance between board surface and<br />
metallic grounded cover), even if there is no cover. In this case enter “500 mm”, which will not give any influence<br />
to the simulation result . But so you will never forget this item, especially if a cover is really used...<br />
Second Method:<br />
Double-click on the FR4-Symbol in the Project Management. But now press “Select” and once more “Select” to<br />
see the listing of the substrate library. Search for “Rogers R04003(tm)” in the list, mark this item, then click<br />
“OK” and once more “OK”. Now you see again the property menu with the already fixed two entries for Er and<br />
tand.<br />
So enter the rest<br />
Substrate Name =<br />
R04003<br />
Height H = 32 mil<br />
HU = 500 mm<br />
and check the correct<br />
Substrate Type<br />
“Microstrip”.<br />
Close with “OK”.<br />
18
Step 5:<br />
This step is not an absolute “must”, because we have changed the substrate reference from “stackup layer” to<br />
“specification by material or resistivity” (See Step 1 of this chapter) and this works well. But for any rate and any<br />
case it is better to use the chosen substrate entries also in the stackup layer property menu. Then you can modify<br />
a project and change the reference without troubles.....<br />
Now modify the entries “by hand”<br />
So please press the Layout stackup Button and open the<br />
menu.<br />
====================================================================================<br />
Now all preparations are finished and we start to draw the circuit diagram.<br />
As in project 2 we need a Microwave Port, a terminating resistance of 136 Ohms and a “Microstrip Transmission<br />
Line, physical length”. After the wiring procedure we double-click on the Transmission Line Symbol and check,<br />
whether “R04003” is already entered as Substrate type.<br />
Then open the Microstrip Calculator (= Line “TRL”)<br />
19
Step 6:<br />
Please check at first the<br />
properties of the substrate and<br />
the metalisation.<br />
Then enter the line impedance<br />
of 82.46 Ohms, the electrical<br />
length of 90 degrees and the<br />
operating frequency of 1575<br />
MHz.<br />
With “Synthesis” we get at<br />
once the necessary line width<br />
W = 0.71171 mm and the<br />
physical length<br />
P = 30.3145 mm.<br />
After two “Oks” we see again our circuit diagram, but now<br />
with the calculated line properties beside the symbol.<br />
So please (See project 2...) prepare an Analysis Setup for<br />
the frequency range from 0 to 5 GHz (with steps of 50 MHz),<br />
then start the simulation and afterwards create a rectangular<br />
plot for S11<br />
You should know this<br />
screen from<br />
project 2.<br />
If you want, please<br />
add Data markers,<br />
Tags......<br />
20
Project 4: Impedance Matching using a λ / 4 – Line (Grounded Coplanar<br />
Waveguide)<br />
Education goal: Usage of other Line Types and other substrates<br />
Here you can see such a CPW (...this illustration comes from<br />
the very good Designer’s Online Help....).<br />
The central signal line is “embedded” into ground planes at<br />
the left, the right and the under side. This gives less crosstalk<br />
from other signal lines and better “shielding” -- and less<br />
influence of the metal cover HU.<br />
And so comes here the new task:<br />
Match the radiating resistance (136 Ohms) of a Patch<br />
Antenna at the GPS-Frequency (1575 MHz) to 50 Ohms,<br />
using a Quarterwave-CPW-Transmission Line on a<br />
Rogers R04003 – Substrate.<br />
Step 1:<br />
Start a new project, choose “Insert Circuit Design” and “FR4-Material, 60 mil”. Save the project under a new name<br />
(here: “lambda_03”) and open every directory and folder in the Project Management.<br />
Step 2:<br />
Open the Property<br />
Menu for the<br />
substrate by<br />
double-clicking on<br />
“FR4” in the<br />
“Data”-folder of the<br />
Project<br />
Management. At<br />
first change now<br />
the metalisation -so<br />
click “Enter” in<br />
the lower right<br />
corner and enter<br />
the new data<br />
Thickness = 1.35<br />
mil<br />
Roughness = 0.1<br />
mil.<br />
Confirm with OK.<br />
Now repeat the<br />
opening<br />
procedure, but<br />
change at once the Line Type from “Microstrip” to “Grounded Coplanar Waveguide”. Then alter the<br />
substrate properties (see last project!) to<br />
R04003 / Er = 3.38 / TAND = 0.0027 / H = 32mil / HU = 500 mm<br />
21
Step 4:<br />
Now let us continue with the circuit diagram. Our Microwave Port and the Terminating Resistor of 136 Ohms are<br />
already well-known, but the CPW is still missing.<br />
So change from the project to the<br />
Components and look for the “Grounded<br />
Coplanar Waveguide” – Menu.<br />
Use Drag and Drop to get the<br />
GCPW Transmission Line, Physical<br />
Length<br />
on your editor screen (click “Merge Layers” on<br />
the appearing menu...).<br />
Now do the necessary wiring and open the<br />
Property Menu of the CPW with a double-click<br />
on the symbol.<br />
Step 5:<br />
Important notice: when using a CPW, you have (as usual) to enter the Line Impedance, the Electrical Length and<br />
the Operating Frequency.<br />
But You must also tell the program either the “Gap G” or the “Line Width W” -- the other value will then<br />
be calculated by the program!<br />
So we use a gap of 0.5 mm (a good value for the PCB-production) , an impedance of 82.46 Ohms, an electrical<br />
length of 90 degrees and an operating frequency of 1575 MHz:<br />
22
Do You remember.....?<br />
By the “OK”-click the calculated line parameters were<br />
automatically transfered to the CPW property menu<br />
and to the symbol on the editor screen.<br />
So please repeat the necessary procedure:<br />
Prepare an analysis from 0 to 5 GHz with 50 MHz –<br />
steps, simulate and create a S11-report in a<br />
Rectangular Plot.<br />
23
Project 5: Travelling around sharp corners and afterwards turning in the air<br />
Education goal: a) Using “Bends“<br />
b) 2D- and 3D-Layouts<br />
It isn’t always possible to “go straight forward” with the microstrip<br />
lines on a board. But every “bend” produces errors that must be<br />
compensated by inserting such a model in our circuit.<br />
In general we try to use a “right angle bend” because this case is<br />
very well analyzed and You find a model for it in the <strong>Ansoft</strong><br />
Designer’s library.<br />
When “bending” such a transmission line you get an additional<br />
capacitance from this corner. So a piece of the edge is cut away to<br />
reduce the unnecessary capacitor. This procedure is called “mitring”.<br />
So we bend the CPW of the last project an divide the 90<br />
degree-Quarterwave-Line into two pieces of 45 degrees,<br />
connected by a “Grounded Coplanar Waveguide mitred<br />
Bend” from the Components Library. Now we get this circuit<br />
diagram for the simulation (please choose the same line width<br />
and the same gap for the bend as for the CPWs).<br />
After the simulation you should examine<br />
the S11-curve:<br />
Caused by the inserted bend model we<br />
get a lower “optimum matching<br />
frequency”, and this is why we now<br />
must shorten the two line pieces!<br />
24
The correction is quickly done:<br />
Reduce the length of the two CPWs by the factor<br />
1500 MHz / 1575 MHz = 0.95238<br />
and you get this new circuit.<br />
Now you repeat the simulation with improved<br />
frequency resolution and you can at once admire<br />
the result of the operation:<br />
25
Now it looks much better.<br />
But now we want to<br />
have a look at the<br />
PCB-Layout.<br />
1) Click the button<br />
“Edit Layout” and<br />
you will get a “ratsnest”,<br />
built from our<br />
lines and parts.<br />
2) So mark the<br />
complete circuit on<br />
your screen with<br />
the mouse.<br />
3) Finally open the<br />
“Draw” Menu and<br />
press “Align MW<br />
Ports”.<br />
26
To see this View, simply click<br />
on the 3D-Button in the menu.<br />
If you like to turn this view in<br />
every direction, do a right<br />
mouse-click on your screen.<br />
Under “View” you find a lot of<br />
games to play.<br />
Let’s hope that your PC has<br />
a lot of RAM and a high clock<br />
frequency. Otherwise it will<br />
test your patience.<br />
27
Project 6: Working with S-Parameter-Files (of the GaAs-FET ATF34143)<br />
and N-Ports<br />
Education goals: a) Working with N-ports<br />
b) Simulating with S-Parameter-Files<br />
c) First Meeting with the Noise Figure “NF“ and the Stability Factor<br />
“K“<br />
S-Parameters are normally used to describe the linear RF- and Microwave properties of circuits and components.<br />
That is why the GaAs-Fet “ATF34143” is our next toy. The S-Parameter-File comes from the Agilent Homepage<br />
and you should save it on your harddisk in a “Datasheet Folder”. But you can also find it as an additional gift to<br />
this tutorial.<br />
Step 1:<br />
Start a new project and choose “Insert Circuit Design”. Save it at once under a special name (here, “atf” was<br />
chosen) and copy the S-parameter-file of the ATF34143 into this project folder. Then make visible every folder<br />
and directory in the Project Management. Use any substrate material of your choice (e.g. “FR4, 60 mil”).<br />
Step 2:<br />
Start the circuit drawing with two Microwave Ports.<br />
Step 3:<br />
Click on “Add N-Port”........<br />
......then<br />
a) enter “atf34143” as name,<br />
b) check “Interpolation =<br />
Linear”<br />
c) check “Data Source =<br />
Import data”<br />
d) check “File = Use path”<br />
and at last enter the correct<br />
path to your used Sparameter-File.<br />
(don’t be anxious, if you some day need more but 2 ports: simply change to the network data menu and<br />
search....)<br />
If this work is done, click “OK” and place the Symbol on the screen. But on the screen, the name of your used file<br />
is still missing and not indicated!<br />
28
Double-click on the N-<br />
Port-Symbol and change<br />
to the “Property<br />
Display”-Menu” (1).<br />
With “Add” (2) the Nport<br />
Data-Value (3) is<br />
accepted and by clicking<br />
“OK” (4) visible on your<br />
screen.<br />
So the screen should now look like.<br />
Step 3:<br />
Now prepare a<br />
simulation from 0<br />
to 10 GHz (steps:<br />
100 MHz), simulate<br />
and indicate all S-<br />
Parameters S11,<br />
S21, S12, S22.<br />
29
Step 4:<br />
After this success let us have a look at the Noise Figure NF in dB. Therefore click right on the “Report” – Symbol<br />
in the Project Management for the order “Create Report”<br />
That means:<br />
Never forget to examine the stability properties of your circuit to avoid any self-oscillating!<br />
Please choose<br />
now<br />
“Noise” under<br />
“Category”<br />
“NF” under<br />
“Quantity”<br />
“dB” under<br />
“Function”.<br />
Then add the<br />
trace, check the<br />
correct function<br />
“dB(NF)” and<br />
press “Done”.<br />
Please ignore the<br />
“ripple” in the NFcurve,<br />
because a<br />
result can never be<br />
better than the<br />
accuracy and the<br />
stepping of the<br />
values, given by<br />
the noise<br />
parameters in the<br />
Agilent ATF34143-<br />
File.....<br />
But if you now<br />
(when regarding<br />
the good gain- and<br />
NF-values of our<br />
circuit!) believe,<br />
that your amplifier<br />
development is<br />
already finished,<br />
then your<br />
experience<br />
potential has not<br />
reached his<br />
maximum.....<br />
30
To avoid these instabilities,<br />
check the Stability Factor<br />
“K” by an additional report.<br />
If<br />
K>1<br />
in the complete frequency<br />
range, then your circuit<br />
works stable.<br />
So create your report and<br />
choose<br />
“Stability” under<br />
“Category”<br />
“K” under “Quantity”<br />
“abs” under “Function”<br />
Then add the trace and<br />
press “Done”:<br />
On this screen You see -- nothing!<br />
So double-click on the vertical axis<br />
and activate “Rescale” in the menu.<br />
Switch “Autoscale” off and set the<br />
scaling of the vertical axis to<br />
0.....+2<br />
Now you see that still some work is waiting<br />
for you to bring K in the complete frequency<br />
range to values greater than 1.<br />
31
Project 7: Improving the Stability of the ATF34143-Amplifier<br />
(from Project 6)<br />
Education goals: a) Using N-Ports with reference points<br />
b) More stability for Transistor Amplifiers<br />
We need a direct connection to a Transistor’s Emitter or a FET’s Source to insert a little inductor. By this manner<br />
the stability can be improved without much degeneration of the Noise Properties.<br />
Step 1:<br />
We start a new project, choose “Insert Circuit Design” (with the FR4-Substrate...) and save it under a new name<br />
(here: “atf_02”). Now we need two Microwave Ports and the N-Port. When placing the N-port, you get the familiar<br />
menu.<br />
Name, Interpolation and File<br />
Path are the same as in<br />
Project 6.<br />
But now we have to activate:<br />
Show common<br />
reference node.<br />
With OK you suddenly see he<br />
desired “Two-Port with<br />
Reference” hanging on your<br />
cursor. So please place it in<br />
your circuit.<br />
Now insert the inductor (a very small and short<br />
Microstrip Transmission Line, Physical Length)<br />
between the reference connector of the N-Port and<br />
Ground.<br />
This Transmission Line now serves as “Negative<br />
Current Feedback” and improves the stability. Give the<br />
length L = 3mm and the Width W = 0.3 mm.<br />
Finally click on the N-Port-Symbol, go to “Property<br />
Display”, press “Add” and OK – now the name<br />
“ATF34143” should be visible beside the Symbol.<br />
Now prepare the Analysis Setup for 0......10 GHz (with steps on 0.1 GHz) and create three different reports:<br />
a) for the S-Parameters S11, S21, S12, S22<br />
b) for the Noise Figure NF in dB<br />
c) for the Stability Factor K (absolute value)<br />
So you can immediately recognise the results of any circuit modification.<br />
32
Now examine the results of our circuit modification.<br />
In the Project Management You now find under “Data” the chosen FR4-<br />
Substrate and the S-Parameter-File for the ATF34143.<br />
The three different reports house under “Results”. With mouse clicks you can<br />
change between them.<br />
The gain (represented by S21)<br />
decreases more rapidly than before,<br />
but at high frequencies you now get a<br />
“peak”.<br />
And this peak is dangerous: S11 AND<br />
S22 are greater than 0 dB. So the<br />
absolute values are greater than “1”<br />
and that means<br />
Negative Resistance<br />
Values of Zin and Zout!!!<br />
Not very good for an amplifier....<br />
The Stability is improved in the<br />
frequency range from 1 to 2 GHz.<br />
33
And the Noise Properties have not<br />
changed.<br />
You see that this would be a good starting position for the development of a 1.5....2 GHz-Amplifier, but some<br />
development work is still waiting for you.<br />
Important information:<br />
Download the Agilent Application Notes 1190, 1195 and 1288, where the development work of these kind of<br />
amplifiers is described in a good and informative manner.<br />
34
Project 8: Creating and saving the S-Parameter-File for a selfmade<br />
circuit (SnP-formate)<br />
With an S-Parameter-File you can describe the linear properties of any part or circuit at high frequencies. So, if<br />
you have finished the developement of such a circuit, create such a file and you can then use it as a module<br />
(called N-Port) which can be inserted in another circuit or be connected with other N-Ports to a chain or a<br />
complete system. Let us take the circuit of Project 7 and demonstrate the S-Parameter-File-Creation for it.<br />
Attention:<br />
Some strict rules exist for SnP-Files, which must never be ignored:<br />
a) Do not merge the 4 Parameter-Columns in the Data Table<br />
b) The Frequency must always be given in “GHz”<br />
Click right on “results” in the<br />
Project Management to activate<br />
“Create Reports”.<br />
But now select “Date Table” as Display Type.<br />
Now create your report for the<br />
four S-Parameters as columns<br />
S11 S21 S12 S22<br />
and press “Done.<br />
35
Under “Report 2D” you find the necessary ......so save the Data Table as a simple text file<br />
tool “Copy to File”..... (here: named “LNA_01.txt”)<br />
Now you can save the new file as “LNA_01.s2p”.<br />
Now load this text file<br />
into your text editor,<br />
erase all remarks and<br />
comments (produced by<br />
the <strong>Ansoft</strong> Designer <strong>SV</strong>)<br />
and replace them by<br />
the necessary SnP-<br />
Syntax<br />
But you should test the success and use this new file in project 6 with a N-Port-Simulation. If You get the same<br />
results as with the complete circuit of project 7 -- congratulations!<br />
36
Project 9: Analyzing a 1 GHz – Microstrip-LPF<br />
Education goal: Microstrip Lines and Steps in combinations<br />
Remarks<br />
If Low Pass Filters for cutoff frequencies higher than 1 GHz are needed, Microstrip versions are preferable. Here<br />
a double-sided- copper-plated board is used. On the upper side you find the filter structure and the lower side is<br />
the ground plane. This gives advantages in production costs, no alignment is necessary, there is nearly no<br />
variation in the filter values and so on.<br />
But you should only use the best substrate material as possible. The Teflon versions produced by Rogers (“RT-<br />
Duroid....”) are well known, but when handling they are like chewing gum. So you should prefer their new<br />
materials from the “R4000”-series that can be drilled or milled without any problems. They are cheaper than the<br />
Teflon versions and have a loss tangent of half the Teflon versions at 10 GHz (there LT = 0.027 and if you reduce<br />
the operating frequency, the Quality Factor Q increases with the root of the frequency).<br />
.<br />
If possible, do not use the FR4-Epoxy-substrate versions. These are very cheap, but already at 1.5 GHz you have<br />
to calculate with a LT of 0.02 (= miminum 10.....20 worse than R4003-Material!) and the Loss Tangent is rapidly<br />
increasing from this point while the Dielectric constant decreases....<br />
Analysed Circuit:<br />
To demonstrate the Designers capabilities for these circuits, a circuit already analysed in the author’s article serie<br />
“Praxisprojekt: Streifenleitungs-Tiefpässe für verschiedene Frequenzbereiche” in the “UKW-Berichte”-Journal<br />
(VHF Communications Magazine, “Microstrip-Lowpass-Filters for different frequency regions”) is used. There you<br />
can read all the background for the design of this filter type, the measuring techniques etc.<br />
In part 3 of this article you find the following filter specifications:<br />
Filter Degree: N = 5<br />
Filter Type: Chebychev, parallel capacitor version<br />
Maximum Ripple in the Passband: 0.1 dB<br />
Ripple Corner Frequency: 1 GHz<br />
System Impedance: 50 Ohms<br />
Substrate Data for the used Rogers R04003-material:<br />
Thickness: 32 mil (= 0.813 mm)<br />
Copper Cladding: 1 oz (copper thickness = 1.35 mil = 35µm)<br />
Dielectric Constant ER = 3.38<br />
Loss Tangent 0.0027 at 10 GHz (gives ca. 0.001 at 1 GHz)<br />
The Board Size is 30 mm x 50 mm and the housing is milled from an compact aluminium block. Cover height is<br />
HU = 14 mm.<br />
Now let us find out the properties of this circuit.<br />
Now let us have a look at the board layout.<br />
At the left and the right you find two short 50 Ohm –<br />
Microstrip-Transmission Lines (width = 1.83 mm) as a feed<br />
and for the transition between the SMA-connector in the<br />
housing wall and the board.<br />
They are followed by two pieces with a width of 17 mm and a<br />
length of 4 mm. Like the centre piece (width = 22 mm / length<br />
= 5.08 mm) they serve as capacitors. Between them you find<br />
the “inductors” as very small lines (width = 0.25 mm / length =<br />
15.9 mm).<br />
So you get the Standard LPF of the “parallel capacitor type”.<br />
Step 1:<br />
We start a new project, choose “Insert Circuit Design” (with the familiar FR4-Substrate...) and save it under a new<br />
name (here: “lpf1000”). Then make visible every folder and directory in the Project Management. Use any<br />
substrate material of your choice (like “FR4, 60 mil”).<br />
37
Step 2:<br />
Open the Property Menu for the substrate by double-clicking on “FR4” in the “Data”-folder of the Project<br />
Management. At first change now the metalisation -- so click “Enter” in the lower right corner and enter the new<br />
data<br />
Thickness = 1.35 mil<br />
Roughness = 0.1 mil.<br />
Confirm with OK.<br />
Now repeat the opening procedure and alter the substrate properties to<br />
R04003 / Er = 3.38 / TAND = 0.0027 / H = 32mil / HU = 14 mm<br />
To check your success, here you have the result:<br />
Step 3:<br />
Now place two Microwave Ports, two Ground Symbols and seven “Microstrip Lines, physical length” for the circuit<br />
drawing. Additionally we need 7 “Microstrip Steps” (path: “Components / Microstrip / Microstrip_General<br />
Components / Mstep”). But pay attention: every step has a broad and a small side -- insert them in the correct<br />
direction in the circuit....<br />
On the next side you see the complete circuit with all details, but you need still some additional information for the<br />
steps.<br />
38
As you can see in the picture (from the Online Help!), the<br />
Designer wants also to know the Offset “D” between the<br />
two lines.<br />
D can easily be calculated by the formula<br />
D =<br />
( W1−<br />
W2)<br />
2<br />
and the result must be noted in the property menu of every<br />
step. (W1 is always the smaller line).<br />
Because you find several different steps in the circuits, here<br />
comes a nice little table with the complete list of property<br />
values:<br />
a) Step from 1.83 mm to 17 mm: W1 = 1.83 mm / W2 = 17 mm / D = 7.585 mm<br />
b) Step form 17 mm to 0.25 mm: W1 = 0.25 mm / W2 = 17 mm / D = 8.375 mm<br />
c) Step from 0.25 mm to 22 mm: W1 = 0.25 mm / W2 = 22 mm / D = 10.875 mm<br />
For “Step a” as an example you get the following property menu:<br />
Step 4:<br />
Now prepare an analysis for the<br />
frequency range from 0 to 4 GHz<br />
(with steps of 10 MHz), start the<br />
simulation and create and S11 +<br />
S21- report as a rectangular plot.<br />
This looks very nice, but in the<br />
marked region You find something<br />
which does not exist in the real world<br />
-- produced by a bug in the<br />
software. There seems to be a<br />
“resonance Fips” and this irregularity<br />
cannot be found when simulating<br />
with other programs (APLAC,<br />
EAGLEWARE-Genesys, PUFF).<br />
<strong>Ansoft</strong> knows this bug and promises<br />
debugging for the next release.<br />
OK, let us accept that for this time....<br />
40
Here still some important relations for the analysis:<br />
But now you should zoom the<br />
amplitude range to 0...-1 dB and so<br />
make the “Chebychev-Ripple” visible<br />
in the passband. Therefore click right<br />
with the mouse on the diagram,<br />
choose “zoom in” and then rescale<br />
the vertical axis by hand.<br />
It is not very difficult to imagine the<br />
correct curve without the “Fips” and it<br />
will be very interesting to see the<br />
measured network analyser results of<br />
the prototype board.<br />
For a Chebychev filter you get to following relations between the reflection coefficient and the passband ripple in<br />
dB:<br />
⎛ 1<br />
10 •log⎜<br />
⎝ 1−<br />
r<br />
= 2<br />
Ripple in dB<br />
If you measure the ripple and want then to know the actual value of the reflection coefficient, calculate<br />
r = 1−<br />
1<br />
Ripple<br />
10 10<br />
Nearly all Simulation Programs present the S11-value in dB. To compare the results with the above calculations,<br />
use<br />
S11 = 20 •log<br />
⎞<br />
⎟<br />
⎠<br />
⎡<br />
( r)<br />
= 20 •log⎢<br />
1−<br />
⎥(dB)<br />
⎢<br />
⎢⎣<br />
10<br />
1<br />
Ripple<br />
10<br />
Our LPF was designed for a maximum ripple of 0.1 dB. If we use the above formula, we should get an S11maximum<br />
of<br />
S11 = -16.4 dB<br />
in the measured curves.<br />
If you measure a greater ripple value, don’t be sad but enjoy the advantage: in this case the transition from the<br />
passband to the stop band is less flat....<br />
So let us have a look at the measuring results and compare them with the <strong>Ansoft</strong> Designer <strong>SV</strong> prediction.<br />
⎤<br />
⎥<br />
⎥⎦<br />
41
In the passband the<br />
difference between S21<br />
of simulation and<br />
prototype is only max.<br />
0.12 dB.<br />
A little “cutoff frequency<br />
shift” from approx. 1050<br />
MHz (simulated) to<br />
1075 MHz (measured)<br />
can be found.<br />
If you set the vertical<br />
axis calibration to<br />
0....-40 dB,<br />
You get convenient<br />
values for S11 in the<br />
passband and identical<br />
S21-curves for<br />
Simulation and<br />
Measurement in the<br />
stop band.<br />
Very good results and a<br />
good starting position if<br />
you intend to optimise<br />
the prototype.<br />
42
Project 10: Optimizing the LPF of Project 9<br />
Education goals: a) Using Local Variables<br />
b) Working with the “Accumulate“- Function<br />
In the full licensed version of the <strong>Ansoft</strong> Designer there is a “Tuning” tool, but this is missing in the Student<br />
Version. So let us do the optimising procedure by hand.<br />
Optimisation Target:<br />
After the optimisation procedure the manufactured prototype should have<br />
a) a cutoff frequency of 1 GHz and<br />
b) a maximum ripple of 0.1 dB in the passband resp. S11-Maxima of –16.4 dB.<br />
The problem is solved in three steps:<br />
1) Modify the Microstrip Line data in your simulation so, that you get exactly the measured values of<br />
the Prototype.<br />
2) Now modify these data to fulfil the desired specifications<br />
3) Now calculate the differences between a) and b) and modify the “Line start values” by these<br />
differences.<br />
Part 1: Prototype Simulation<br />
Step 1:<br />
Press “Add”, call the three Line Lengths “L1”, L2”, “L3” and enter the three line values.<br />
L1 = 4 mm (width = 17 mm)<br />
L2 = 15.9 mm (width = 0.25 mm)<br />
L3 = 5.08 mm (width = 22 mm).<br />
Open the last<br />
project 9 with the 1<br />
GHz- LPF, but<br />
save it under<br />
another name (a<br />
simple precaution<br />
if something<br />
undesired happens<br />
during your<br />
work.....)<br />
Now go to the<br />
“Circuit”-menu,<br />
search “Design<br />
properties” and<br />
“Local Variables”.<br />
43
Step 2:<br />
In the circuit<br />
diagram<br />
EVERY line<br />
length in the<br />
filter structure is<br />
now replaced by<br />
its Variable.<br />
(The 50 Ohm<br />
feeder need no<br />
optimisation....)<br />
44
Step 3:<br />
If you now press the ‘”Analyse”-Button. you should get exactly the same simulation results as in Project 9.<br />
Step 4:<br />
Now we’ll modify the Variables L1 / L2 / L3 to get exactly the<br />
measured curves. We start with the correction of S11<br />
(measured: one maximum with -17 dB, the other with -15 dB).<br />
So please press at first the “Accumulate Reports”-Button to<br />
watch the curve variations.<br />
Now open “Circuit / Design properties /<br />
Local Variables” and enter a new L1value<br />
of 4.15 mm.<br />
After the simulation and with “Zoom in”<br />
You see, that “both hills” are growing.<br />
So repeat the procedure, but now reduce<br />
the Variable L2 to 15.5 mm. This reduces<br />
the height of the “right hill” and holds the<br />
height of the left hill.<br />
(to “empty the bucket with the<br />
accumulated curves”, press the<br />
“Accumulate Reports”-Button twice).<br />
Finally you can do the “Fine Tuning” by<br />
additionally varying L3.<br />
L1 = 4.15mm<br />
L2 = 15.5 mm<br />
L3 = 5.18 mm<br />
give the desired result.<br />
45
Now we have to examine the ripple cutoff<br />
frequency. As discussed at the end<br />
of Project 9, the prototype has a<br />
measured fcorner = 1075 MHz. As you<br />
see in the left diagram, our simulation<br />
gives only 1050 MHZ.<br />
So we shorten the three values L1, L2<br />
and L3 by the same factor<br />
1050 / 1075 = 0.9767441<br />
and use the new values<br />
L1 = 4.05 mm<br />
L2 = 15.14 mm<br />
L3 = 5.06 mm<br />
for the next simulation.<br />
The red curve in the left diagram shows that by using shorter line lengths the cut-off frequency (as desired) has<br />
moved to 1075 MHz.<br />
The right diagram proves, that the values of -17 dB and -15 dB for the S11- maximum values have not been<br />
influenced by the frequency shift operation.<br />
So the first part is done: we have now a simulation circuit that describes exactly the properties of the prototype.<br />
================================================================================<br />
46
Part 2: Optimising the Prototype to fulfil the specifications<br />
At first we bring the “Height” of the two S11-“peaks” to the same value of –16.4 dB. Then the circuit must be<br />
modified to get a corner frequency of 1000 MHz.<br />
Step 1:<br />
After several trials and using the Accumulate Function you find the<br />
new Line Length Values for the left diagram:<br />
L1 = 4.06 mm<br />
L2 = 15 mm<br />
L3 = 5.25 mm<br />
Now the two S11-peaks have the same height of -16,4 dB.<br />
Step 2:<br />
The Ripple Cutoff Frequency is at 1050 MHz. So we increase L1,<br />
L2 and L3 by the factor<br />
1050 / 1000 = 1.05<br />
and get the new values<br />
L1 = 4.26 mm<br />
L2 = 15.75 mm<br />
L3 = 5.51 mm.<br />
for our simulation.<br />
After the simulation you can see that now everything is nearly OK -- only the ripple cut-off frequency still has a<br />
value of 1010 MHz. This equates a difference of 1%, so you only have to enlarge the three values L1, L2 and L3<br />
by 1%. The result is shown below.<br />
================================================================================<br />
47
Part 3: Calculating the final values for L1, L2 and L3 for use in the new PCB-<br />
Layout.<br />
This is really an easy exercise.<br />
From Part 1 You got the values for simulating the Prototype properties: 4.05 mm 15.14 mm 5.06 mm<br />
From Part 2 You got the values to fulfil the desired specifications: 4.30 mm 15.91 mm 5.57 mm<br />
This gives the following length differences for the Layout:<br />
Enlarge L1 by 0.25 mm<br />
Enlarge L2 by 0.77 mm<br />
Enlarge L3 by 0.51 mm<br />
With the length listing for the manufactured and measured prototype ( 4 mm / 15,9 mm / 5,08 mm) You get the<br />
new Layout Values:<br />
L1: width = 17 mm / length = ( 4 mm + 0.25 mm) = 4.25 mm<br />
L2: width = 0,25 mm / length = ( 15,9 mm + 0.77 mm) = 16.67 mm<br />
L3: width = 22 mm / length = ( 5,08 mm + 0.51 mm) = 5.59 mm<br />
Finished!<br />
48
Project 11: Complete Design of a 1575 MHz – Microstrip edge coupled<br />
Bandpass Filter<br />
Education goals: a) Design of such a filter type with the integrated Filter Designer<br />
b) Successfully using coupled lines<br />
This filter type is often used in the frequency range above 1000 MHz because of it’s reliable reproduction, cheap<br />
and simple production and high accuracy. An additional advantage: the mechanical dimensions decrease linearly<br />
with frequency.<br />
Specifications:<br />
Input and Output Impedance: Z = 50 Ohms<br />
Passband ripple of S21: 0.1 dB ( gives S11-maximum of –16.4 dB)<br />
Filter Order: n = 3<br />
Passband Centre Frequency: 1575 MHz ( = GPS-reception)<br />
Ripple Bandwidth: 200 MHz<br />
Board and Substrate Properties:<br />
Substrate: Rogers R04003<br />
Thickness: 32 mil (= 0.813 mm)<br />
Dielectric Constant: 3.38<br />
Loss Tangent: 0.0027 at 10 GHz (gives ca. 0.001 at 1 GHz)<br />
Copper cladding (up and down): 1 oz (thickness = 1.35 mil = 0.035 mm)<br />
Cover Height: 14 mm<br />
Part 1: Working with the Filter Design Tool<br />
We start a new project<br />
and choose “Insert<br />
Filter Design” in the<br />
“Project Menu” of the<br />
programs task line.<br />
Then mark<br />
Bandpass<br />
Edge Coupled<br />
Chebychev<br />
Default<br />
Microstrip<br />
on the screen.<br />
Finally press the button<br />
“with the coil and the<br />
capacitor” and click<br />
“Next”.<br />
49
Now continue in the left list and<br />
choose<br />
Filter Order = 3<br />
Ripple = 0.1 dB<br />
Centre Frequency fo =<br />
1.575 GHz<br />
Bandwidth BW = 0.2 GHz.<br />
If you now do a click on “fp1” or<br />
“fp2”, the software<br />
automatically calculates these<br />
two values for the cut-off<br />
frequencies.<br />
Please try it out!<br />
Continue with clicks on “Analyse”<br />
and then “Narrow Band” to get<br />
the characteristic filter curves.<br />
Now the Filter Designer<br />
likes to know the<br />
Substrate Properties.<br />
So please enter<br />
Er = 3.38<br />
Substrate Height =<br />
0.813 mm<br />
Conductive<br />
Thickness = 0.035mm<br />
Cover Height = 14 mm<br />
Centre Frequency =<br />
1.575 GHz<br />
If you now press the upper button in the left column (signed with a inductor and a capacitor), you see at once the<br />
circuit diagram.<br />
And with the buttons in the right column you can vary the part descriptions from “nothing to be seen” to “complete<br />
part list. Please test this yourself and then click “Next”.<br />
50
At first you still see the BPF-circuitdiagram.<br />
But if you click the marked<br />
button, you get a nice little table with<br />
the mechanical line data.<br />
Attention:<br />
Please print out this table at<br />
once, because with the next<br />
step there is a bug in the<br />
program and these are still<br />
the correct values for the<br />
Layout work.........<br />
So click “Finish”....<br />
This looks like very<br />
nice, but somewhere<br />
there is a little rat<br />
trap....<br />
To find out the errors<br />
caused by the bug, do<br />
a double-click on the<br />
first coupled line pair to<br />
open its Property Menu<br />
with Even- and Odd-<br />
Impedance and Line<br />
Length.....<br />
51
...and only bad experience teaches you, that<br />
this calculated Line Length is only valid for<br />
1000 MHz, but not for our centre frequency<br />
of 1575 MHz!<br />
Please compare this value with the value in the<br />
printed-out table and you see what I mean.<br />
(A test with the full licensed Designer Software<br />
shows that the bug also exists in this big<br />
version and you get this wrong calculation for<br />
all line pairs of the filter).<br />
Part 2: Circuit Design<br />
We start a new project, choose “Insert Circuit Design” (with the now familiar FR4-substrate...) and save it under a<br />
new name (here: “bpf1575_02”). Then make visible every folder and directory in the Project Management, doubleclick<br />
on “FR4” under “Data” and set the properties of the metalisation to “Copper / Thickness = 1.35 mil /<br />
Roughness = 0.1 mil”. After OK repeat this procedure to modify the substrate entries to<br />
Substrate Name = Rogers R04003<br />
Thickness = 32 mil<br />
Dielectric Constant ER = 3.38<br />
Loss Tangent TAND = 0.0027<br />
Cover Height HU = 14 mm<br />
Now search in the Task Line for “Circuit”, open “Design Properties” and then “Local Variables”. Press “Add”<br />
to enter the following list of Variables for the different length, width and gap values:<br />
WCL1 = 0.64 mm<br />
S1 = 0.29 mm<br />
L1 = 30.6mm<br />
WCL2 = 0.82 mm<br />
S2 = 0.67 mm<br />
L2 = 30.22 mm<br />
If you now click “Add”, you get this window. Enter under<br />
“Name” the first variable name (WCL1).<br />
In the “Value” – line the program needs an initial value for<br />
this variable. So please read the recommendations and then<br />
enter<br />
0.64mm,$WCL1<br />
52
Repeat this procedure for all the six variables and you get this table.<br />
Then activate “Hidden” in each line and “Show hidden”.<br />
Close with OK.<br />
And now let us draw the complete circuit.<br />
Start with two Microwave Ports and the microstrip-feeder (Z = 50 Ohms, Width = 1.83 mm, Length = 10 mm) at<br />
every port connection.<br />
The filter circuit consists of 4 coupled lines (path: “Components / Microstrip / Coupled Lines / MS Coupled<br />
Lines with Open Ends, symmetric”). And at every connection between lines with different widths you need a<br />
Step (path: “Components / Microstrip / _General Components / MS Step”).<br />
See the complete circuit for your own work on the next page.<br />
53
Now prepare every part in the circuit.<br />
A) There are no problems with the two feeders. Double-click on the symbol and enter in the Property Menu<br />
a width of 1.83 mm and a length of 10 mm.<br />
B) Use the defined<br />
Variable Names in<br />
every coupled line<br />
pair as values for<br />
width “W” , gap<br />
(Separation “S”)<br />
and physical<br />
length “P”.<br />
B) Pay attention when entering the properties for the steps. At every step you should define Width W1 and W2<br />
and the Offset between the two lines. And for the Offset you must use a formula to say...”take half the<br />
difference between the two line widths”....<br />
...So that looks like for the step<br />
between the 50 Ohm-feeder and the<br />
first coupled line pair...<br />
....and so for the step between two<br />
different coupled line pairs.<br />
Attention:<br />
Did you recognise that the two<br />
steps in the right hand side of the<br />
schematic diagram are flipped?...<br />
55
these sort of filters:<br />
Now speed is increasing<br />
RAPIDLY.<br />
Prepare a sweep from<br />
0......4 GHz (with steps of<br />
10 MHz), start the Analysis<br />
and afterwards create a<br />
S11- and S22-Rectangular<br />
Plot.<br />
This is what you get on<br />
Your screen....not so bad<br />
for the first trial!<br />
So use “Zoom in” (after a<br />
right mouseclick on the<br />
diagram) to examine the<br />
result in the passband<br />
region:<br />
As you can see, there are<br />
still two effects:<br />
a) the maximum S11values<br />
in the passband are<br />
not equal and not at the<br />
desired values and<br />
b) the centre<br />
frequency is still differing<br />
from the desired value of<br />
1575 MHz.<br />
Here come the tricks for the<br />
correction procedure for<br />
1) Increase (or decrease) the length L1 of the two outer line pairs in little steps as long as you get exactly<br />
the same “height on the two S11-peaks”.<br />
2) Now vary the Separation S1 of this two line pairs as long as you get the correct value of S11 = -16.4 dB<br />
on both S11-peaks.<br />
3) Now extract the correct actual value for the centre frequency (middle “hole” in the above S11-curve<br />
(please use a “Tag” for this procedure!), take your pocket calculator and modify both Line Lengths L1<br />
and L2 by the same factor<br />
(actually watched centre frequency) / 1575 MHz<br />
56
...and the following Analysis Result:<br />
The work is done......<br />
If you play this game to the end,<br />
you will get this table:<br />
57
Project 12: Optimising the 1575 MHz – BPF (Project 11) using the Network –<br />
Analyser Measurements of the manufactured Prototype<br />
Some remarks before<br />
This part of work cannot be avoided when realising and manufacturing a prototype after the simulation. The<br />
measured results differ “a little bit” from the desired specifications and if you want errors less than 0,5%, you<br />
sometimes have to repeat this work. But always remember the “fundamental natural law for PCB-developement”:<br />
You never get a PCB ready for serious production until having produced and<br />
tested 3 Protoypes!<br />
This does not depend on your personal knowledge or any property, but depends on the fight against physical<br />
problems and other things. In most cases, after PCB number 2 (which already seems to run well!) somebody<br />
comes and wants to change the circuit or some specifications or wants to offer a “property, desired by an<br />
important customer” or the total system concept is modified.... or.....or.....or.<br />
But now let us compare the measured results and the simulation. Please remember:<br />
Tackling the Job<br />
Please have at first a look at the prototype in its selfmilled<br />
aluminium case. Very good can be seen the<br />
transition from the SNA-Connector to the 50 Ohmcentre-feeder.<br />
The filter structure itself is produced with<br />
high accuracy (and a big compliment goes to the<br />
colleague who does this job). The R04003-substrate is<br />
not delivered with any light-sensitive coating for<br />
production. So he does this work by hand with a little<br />
spray pot -- and very good results!.<br />
Always watch the S11-curves (reflection curves) when reducing too big ripple values in the passband.<br />
These curves are much more sensitive instruments than S21-Transmission-Curves. S11-Variations of (let<br />
us says) 10 dB often produce only ripple variations less than 0.1 dB….<br />
Let us now talk about the “Insertion Loss”. Caused by the components or the substrate, this only gives an amount<br />
of additional loss and the typical ripple of the choosen filter type is added to this “constant value”. A reduction can<br />
be achieved by using better components or better substrate material or (sometimes!) another filter type.<br />
This fundamental relation can be<br />
seen in the left curve.<br />
But if you have a very sharp look at<br />
these two curves, you see at once<br />
that three tasks must be done to<br />
fulfil the specifications.<br />
58
a) The insertion loss is better than expected and predicted. So let us have a close look at the substrate’s<br />
properties.<br />
b) The ripple is not as good as expected -- it’s greater and not equal on different frequency ranges in the<br />
passband.<br />
c) There is a shift of the centre frequency to lower values.<br />
Part a) Correction of the Insertion Loss<br />
The Rogers Datasheet gives us a tand-value of 0.0027 for the R04003-substrate. But this is valid for 10 GHz and<br />
if you reduce the operating frequency, the loss tangent decreases with the root of the frequency ratio. So please<br />
calculate<br />
1600MHz<br />
tan d =<br />
• =<br />
10000MHz<br />
For 1.6 GHz. 0,<br />
0027 0,<br />
00108<br />
Now we open the “R04003” –<br />
Property-Menu in the “Data”-Folder<br />
of our project and use tand = 0.0011<br />
instead of 0.0027.<br />
Then we repeat the simulation and<br />
examine the improvements: not so<br />
bad!<br />
But it seems that a value of tand =<br />
0.0015 would do the job a little<br />
better.<br />
====================================================================================<br />
Part b) Correcting the Ripple and the Reflection<br />
We talked about the problem a little<br />
earlier:<br />
S21-Ripple-corrections shall only be<br />
done and tested by watching the<br />
sensible curve of the reflection<br />
property S11.<br />
So we see that the increased ripple in the<br />
passband is caused by the two “S11peaks”<br />
of -13 dB and -15 dB instead of –<br />
16.4 dB.<br />
59
Now we modify our circuit diagram to<br />
simulate exactly the measured reflection<br />
curves. This is done by changing the values<br />
of the length, gap or width of the coupled<br />
line pairs.<br />
5 minutes of playing this game gives an<br />
S11-curve which coincides perfectly with the<br />
measured S11.<br />
Only one little difference must be eliminated:<br />
The centre frequency lies at 1580 MHz<br />
instead of 1575 MHz.......<br />
Here you can see the necessary<br />
modifications in the list of Local Variables<br />
for the above result -- no terrible efforts.<br />
To shift the centre frequency, simply<br />
increase the lengthes L1 and L2 by the<br />
factor<br />
1580 MHz / 1575 MHz = 1.0031746<br />
and you’ll get<br />
L1 = 29.89 mm<br />
L2 = 29.89 mm.<br />
Now You should have a simulation result that is similar to the measured curves and <strong>Ansoft</strong> Designer tells You,<br />
that the following table of physical line properties produces exactly the Network Analyser Data Output:<br />
WCL1 = 0.68 mm<br />
S1 = 0.31 mm<br />
L1 = 29.89mm<br />
WCL2 = 0.82 mm<br />
S2 = 0.68 mm<br />
L2 = 29.89 mm<br />
This means:<br />
WCL1 must be increased by 0.68mm – 0.64 mm = 0.04 mm,<br />
L1 must be shortened by 29.89 mm – 30.02 mm = -0.13 mm,<br />
L1 must be increased by 29.89 mm – 29.8 mm = 0.09 mm,<br />
to simulate exactly the measured prototype.<br />
====================================================================================<br />
60
Part c) Creating the modified Layout<br />
Here comes the final result in form of physical dimensions for the next prototype PCB<br />
WCL1 = 0.64 mm – 0.04 mm = 0.60 mm<br />
S1 = 0.31 mm<br />
L1 = 30.02 mm + 0.13 mm = 30.15 mm<br />
WCL2 = 0.82 mm<br />
S2 = 0.68 mm<br />
L2 = 29.8 mm – 0.09 mm = 29.71 mm<br />
Therefore we need at first the Local<br />
Variable Table of Chapter 11 – Project<br />
(manufactured prototype).<br />
And now let us modify WCL1, L1 and<br />
L2 as simulated,<br />
but in the opposite<br />
direction!<br />
Then we come from the measured<br />
prototype and its simulation to the ideal<br />
circuit with the demanded<br />
specifications!<br />
Personally I use the free “Target“ test version (download from www.ibfriedrich.com) for this Layout Work -- it is<br />
simple, effective and intuitive to use.<br />
It is sad to say that <strong>Ansoft</strong> has not included the Gerber Plot etc. for the quick and effective PCB-production -- but<br />
they are right, because lot of people and companies would prefer to use the free Designer version for their daily<br />
work. Not so good for the <strong>Ansoft</strong> Sales Department...<br />
But anyway: our <strong>Ansoft</strong> toy has demonstrated its power and the second PCB-Prototype now shows differences in<br />
the 0.1%-region between properties and specifications (…. But 0.2% mean a difference of 4 MHz at 2 GHz, and<br />
that is why in such a case one can hear you say:.....”the same procedure as before...”)<br />
61