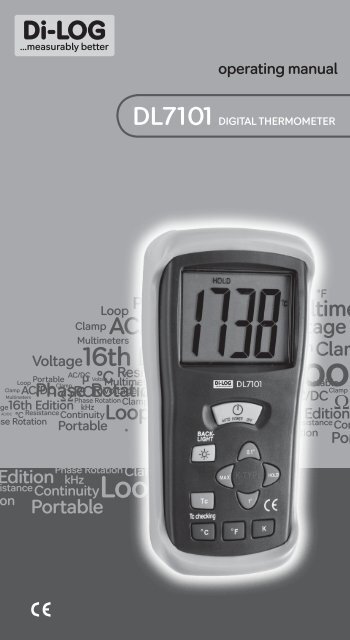
DL7101
Download Instruction Manual - Di-Log
Download Instruction Manual - Di-Log

You also want an ePaper? Increase the reach of your titles
YUMPU automatically turns print PDFs into web optimized ePapers that Google loves.
operating manual<strong>DL7101</strong> DIGITAL THERMOMETER
Safety InformationThis instrument is a portable 3½ digit.,compact-sized digital thermometer designed to useexternal K-type thermocouple as temperature sensor.Temperature indication follows National Bureau ofStandards and IEC584 temperature/voltage tablesfor K-type thermocouples. Two K-type thermocouplesare supplied with the thermometer.
Safety InformationIt is recommended that you read the safety andoperation instructions before using the thermometer.Warning:TO AVOID ELECTRICAL SHOCK. DO NOT USE THISINSTRUMENT WHEN VOLTAGES AT THE MEASUREMENTSURFACE EXCEED 24V AC OR 60V DC.Warning:TO AVOID DAMAGE OR BURNS. DO NOT MAKETEMPERATURE MEASUREMENTS IN MICROWAVEOVENS.Caution:REPEATED SHARP FLEXING CAN BREAK THETHERMOCOUPLE LEADS. TO PROLONG LEAD LIFE,AVOID SHARP BENDS IN THE LEADS, ESPECIALLYNEAR THE CONNECTOR.THESYMBOL ON THE INSTRUMENT INDICATESTHAT THE OPERATOR MUST REFER TO ANEXPLANATION IN THIS MANUAL.
Specifications ElectricalTemperature Scale:Celsius (°C), Fahrenheit (°F) user-selectableMeasurement Range:-50°C to 1300°C, -58°F to 2000°FResolution:1°C or 1°F, 0.1°C or 0.1°FAccuracy:Accuracy is specified for operating temperaturesover the range of 18°C to 28°C (64°F to 82°F), for oneyear, not including thermocouple error.±2°C ---------------------- -50°C to 0°C±4°F ---------------------- -58°F to 32°F±(0.5% rdg+1°C) -------- 0°C to 1000°C±(0.8% rdg+1°C) -------- 1000°C to 1300°C±(0.5% rdg+2°F) -------- 32°F to 2000°FTemperature Coefficient:0.1 times the applicable accuracy specification per °Cfrom 0°C to 18°C and 28°F to 50°F (32°F to 64°F and82°F to 122°F).Input protection:60V de or 24V rms ac maximum input voltage on anycombination of input pins.
Specifications ElectricalReading Rate:2.5 times per second.Input Connector:Accepts standard miniature thermocoupleconnectors (flat blades spaced 7.9mm, centreto centre). ‘K’ type.EnvironmentalAmbient Operating Range:0°C to 50°C (32°F to 122°F)Storage Temperature-20°C to 60°C (-4°F to 140°F)Relative Humidity:0% to 80% (0°C to 35°C) (32°F to 95 °F)0% to 70% (35°C to 50°C) (95°F to 122°F)
GeneralDisplay:3½ digit liquid crystal display (LCD) with maximumreading of 1999.Battery:Standard 9V battery (NEDA 1604, IEC 6F22)Dimensions:162mm (H)×76mm(W)×38.5mm(D)Weight:210gSupplied Probe:1.2m type ”K” thermocouple bead probe (Teflon tapeinsulated).Maximum insulation temperature 260°C (500°F)Probe accuracy ±2.2°C or ±0.75% of reading(Whichever is greater) from 0°C to 800°C.
Operating InstructionsSelecting the Temperature ScaleReadings are displayed in either degrees Celsius (°C),degrees Fahrenheit (°F). When the thermometer isturned on, it is set to the temperature scale that wasin use when the thermometer was last turned off. Tochange the temperature scale, press the °C or °F key.Single-Thermocouple Temperature MeasurementThe thermometer displays the temperature of thethermocouple that is connected to the selected input.Press the T2 key to display the temperature of thethermocouple connected to the T2 input. Press the T1key to display the temperature of the thermocoupleconnected to the T1 input. The input selection cursorindicates which input is selected.Differential Temperature MeasurementDifferential temperature measurement is selectedby pressing the T1-T2 key. This causes thethermometer to display the temperature differencebetween the two thermocouples (the temperatureof thermocouple T1 minus the temperature ofthermocouple T2). The selection is indicated by theinput selection cursor.Selecting the Display ResolutionThe thermometer allows two choices of resolution:High resolution: 0.1°C or 0.1 °FLow resolution: 1°C or 1°F
Overload Display (1)The digital display will indicate 1 when the inputexceeds the measurement range selected.If measuring above 199.9ºF, change the resolution to1ºF. Be certain to seat the thermocouple connectorproperly and check that the leads are not broken.Hold ModePressing the HOLD key to enter the Data Hold mode,the “HOLD” annunciator is displayed. When HOLDmode is selected, the thermometer holds the presentreading and stops all further measurements.Pressing the HOLD key again cancels HOLD mode,causing the thermometer to resume takingmeasurements.
Max ModePress the MAX key to enter the MAX mode.The thermometer then records and updates themaximum values and the MAX annunciator appearson the display. Press the MAX key again to exit theMAX recording mode. In the MAX mode, pressHOLD key to stop the recording, press HOLD againto resume recording.Backlight ModePress the Backlight key to turn on the LCDbacklight function. Press the Backlight key againto turn off the LCD backlight function.
Operator MaintenanceWarning:TO AVOID POSSIBLE ELECTRICAL SHOCK, DISCONNECTTHE THERMOCOUPLE CONNECTORS FROM THETHERMOMETER BEFORE REMOVING THE COVER.
Battery ReplacementThe battery symbol appears on the lower right ofthe LCD when the 9V battery needs to be replaced.Replace the 9V battery as follows:1. Turn the meter off and disconnect thetemperature probe.2. Remove the rubber holster that surroundsthe entire meter by pulling it over the top ofthe meter.3. Remove the small Phillips head screw on the rearof the meter.4. Open the battery compartment and replace the9V battery.Re-assemble the meter before operating.
Warranty & Maintenance24 Month WarrantyDi-Log instruments are subject to stringent quality controls.If in the course of normal daily use a fault occurs we willprovide a 24 month warranty (only valid with invoice).Faults in manufacture and materials defect will be rectifiedby us free of charge, provided the instrument has not beentampered with and returned to us unopened.Damage due to dropping abuse or misuse is not covered bythe warranty.Outside the warranty period we offer a full repair andre-calibration service.MaintenanceWARNING Do not attempt to repair or service your meterunless you are qualified to do so and have the relevantcalibration, performance test and service information.To avoid electrical shock or damage to the meter do notget water inside the case.Periodically wipe the case with a damp cloth and milddetergent. Do not use chemical solvent.Clean the input terminals with cotton bud, as dirt or moisturein the terminals can affect readings.Di-Log Test Equipment28 Wheel Forge Way,Trafford Park,ManchesterM17 1EH, UKtel: + 44 161 87 7 0322 fax: + 44 161 87 7 1614email: sales@dilog.co.ukwebsite: www.dilog.co.uk