SH-FW-01 FlexWire Seat Heater - Donmar
SH-FW-01 FlexWire Seat Heater - Donmar
SH-FW-01 FlexWire Seat Heater - Donmar
- No tags were found...

You also want an ePaper? Increase the reach of your titles
YUMPU automatically turns print PDFs into web optimized ePapers that Google loves.
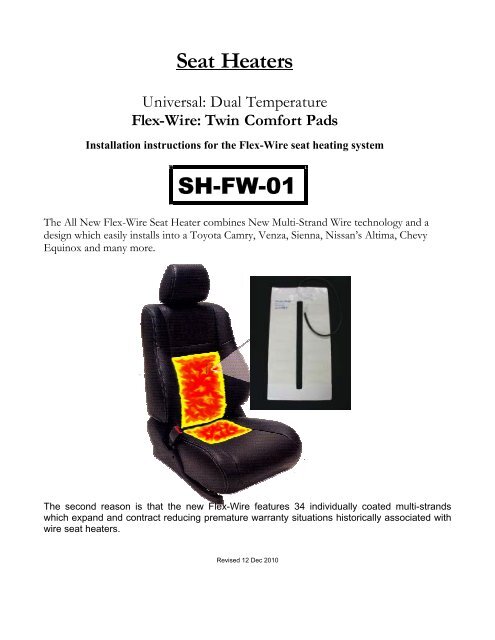
Flexwire Highlights1. A Solution to Center Listings and <strong>Seat</strong> <strong>Heater</strong> Installations.The Toyota Camry, Venza, Sienna, Nissan Altima and Chevy Equinox are some of themore popular models with this listing style.You can now cut out the center section of the heating pads to allow the whole listing areato be reattached back to the foam without sacrificing any heated surface area.2. Flex-Wire: Toyota Factory Switch Series.Flex-Wire heaters are available with the latest Switch Technology.The New Factory Switch Series is designed to fit into Toyota truck chassis OEM switchslots. They are OEM-like in appearance and Illuminated in 2-Colors. This DualTemperature High/Low Rocker Style Switch was developed to add value to theautomotive aftermarket.*Ask for more details regarding this special program.3.The Flex-Wire system is a simple Universal style design wire layout. This design featuresboth vertical & horizontal spacing allowing for either Wire or Velcro listings withoutcompromising performance in any way.4. Modified Backrest & <strong>Seat</strong> Bottom Heating PadsBack = 9.5”x18”Bottom = 9.5”x18”These pads have been modified to these dimensions in anticipation of some of thechanges in seating styles / listing locations on new seats through 2<strong>01</strong>3 models.5. Quick Connect / Disconnect Flexible SystemPacific Flex-Wire heaters provide you with the flexibility to install for the front and rearseats. Our seat heaters are equipped with “Quick-Release” Lock-Tite connectors whichprovide a stable connection throughout our modular system.6. Quick Heat Up TimeYou should start to notice the effect of heat within the first few minutes of starting thesystem in the High temperature setting.
1. Ensure that the vehicle is on a level surface in “Park” & with the hand brakeengaged.2. Disconnect the car’s battery or ensure that the work area is well grounded.3. Unplug any wires which may be attached / harnessed to the underside of thevehicle’s seat. Proceed to unbolt the seat from the vehicle’s floor.4. Carefully remove the seat out of the vehicle to allow for easier access to the vehicle’sseat & seat cover trim “J” clips.5. Carefully remove the seat covers off of the seat by detaching the sewn “J” clipswhich bind the Backrest Cover together. Then, detach the “J” clips which secure theseat bottom seat cover. These clips secure the cover at the base / perimeter of thebottom of the seat.6. Place the backrest pad & the seat bottom heating pad against the respective backrest& seat bottom. Align the heating pads against the seat & “Mark” the listingattachment area to be cut to allow for the re-installation of the backrest & Cushioncovers.7. Carefully cut away material within the Flex-Wire system to facilitate the reattachmentof the covers back to the foam core. **(See Note)**Note: The Flex-Wire seat heater system is in Series.Do not cut any wires within the seat heating pads or it will void the warranty. You maytrim away some of the fabric between the wires to allow for the attachment of theoriginal covers back to the seat. The pads were designed to accommodate a wide varietyof seating styles & listing locations.Example – 2007+ Toyota Camry - The installer can cut a ¾ “wide channel running fromthe back of the heating pad all the way up to the front. This makes it really easy to attachthe Velcro from the cover to the glued Velcro on the seat bottom.8. Remove the protective backing from the back side of the seat heating pad andcarefully adhere the pad to the seat at the desired location.9. At this point the holes cut in the pad should align with your identified key listingattachment locations.Note: Older style listings = wire rod and listing sleeve (requires hogrings for the installation. However, Small Zip-Ties are becoming morepopular among restylers). Newer style listings incorporate velcroattachments. For older styles listings secure one of the provided strips ofadhesive tape around the wire listing rod to insulate it.General Installation Instructions Continued
10. Locate an onboard power source that is able to deliver a continuous 10 Amp current.This source may be located at your accessory panel, accessory outlet, etc. Consultwith the Owner’s Vehicle Manual to ensure a location of an appropriate powersource. Another way to obtain power is by way of a Relay connected to the batteryand the switch to the accessory panel.11. Once the power source is located extend the wiring harness underneath the carpetingto be able to access this power source.12. For the Factory style switches simply insert them into the factory slots. For theuniversal switches, find a suitable location for your seat heater switches either at theside of the seat, front dash or floor mounted center console in between the driverand passenger seats.13. For the Universal switches drill a 13/16” or 21mm hole and pull the main wiringconnector to be attached to the seat heater switch harness connector through thehole. Attach the switch connector with the main wiring connector and pusheverything back through the hole and make sure to push the switch snuggly into thehole until you hear a “click”.14. Re-install the vehicle’s seats and attach the connector which you secured underneaththe seat with the connector pulled up through the carpeting. Make sure to securelyre-bolt the vehicle’s seats to the vehicle’s floor.15. At this point connect the seat heater lead wires to the previously identified safepower source and secure a good ground base.16. Make sure to connect your battery terminals and start your ignition and if the air bagwires were disconnected at the time of installation – Please reconnect them Prior rostarting the ignition..17. Press the seat heater switch to the upward position for a desired high setting. Themiddle setting is the Neutral or Off position. Press the switch down to the lowerposition to engage the Low temperature setting.Caution: If at any time you feel that the seat heaters are too hot or causing dizziness dueto overheating please turn off the seat heater and / or take your vehicle to the side of theroad and carefully exit the vehicle and wait to regain composure. If you feel that the seatheaters are continuing to malfunction either unplug the power lead connector or removethe cube shaped black 5pin automotive relay plugged in the main seat heater harness.Please consult with your Professional Installer for a full evaluation of the situation.