1 Scripting
1 Scripting - Digital Cinema Arts
1 Scripting - Digital Cinema Arts
- No tags were found...

You also want an ePaper? Increase the reach of your titles
YUMPU automatically turns print PDFs into web optimized ePapers that Google loves.
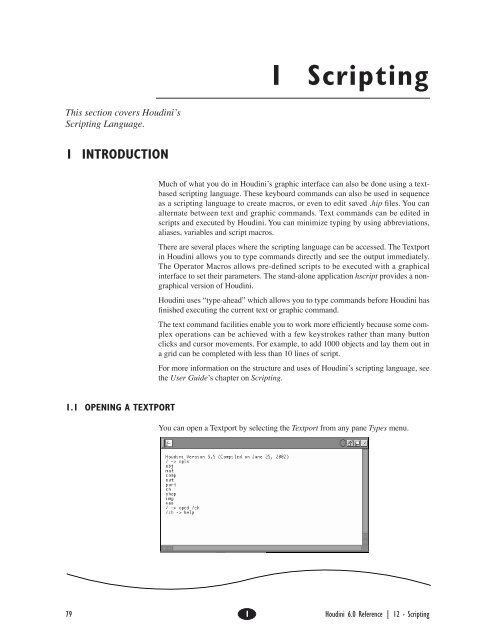
1 <strong>Scripting</strong>This section covers Houdini’s<strong>Scripting</strong> Language.1 INTRODUCTIONMuch of what you do in Houdini’s graphic interface can also be done using a textbasedscripting language. These keyboard commands can also be used in sequenceas a scripting language to create macros, or even to edit saved .hip Þles. You canalternate between text and graphic commands. Text commands can be edited inscripts and executed by Houdini. You can minimize typing by using abbreviations,aliases, variables and script macros.There are several places where the scripting language can be accessed. The Textportin Houdini allows you to type commands directly and see the output immediately.The Operator Macros allows pre-deÞned scripts to be executed with a graphicalinterface to set their parameters. The stand-alone application hscript provides a nongraphicalversion of Houdini.Houdini uses “type-ahead” which allows you to type commands before Houdini hasÞnished executing the current text or graphic command.The text command facilities enable you to work more efÞciently because some complexoperations can be achieved with a few keystrokes rather than many buttonclicks and cursor movements. For example, to add 1000 objects and lay them out ina grid can be completed with less than 10 lines of script.For more information on the structure and uses of Houdini’s scripting language, seethe User Guide’s chapter on <strong>Scripting</strong>.1.1 OPENING A TEXTPORTYou can open a Textport by selecting the Textport from any pane Types menu.79 1 Houdini 6.0 Reference | 12 - <strong>Scripting</strong>
Introduction1.2 NAVIGATING WITHIN THE TEXTPORTKEYBOARD SHORTCUTS[ Select text. Selected text becomes red. You can onlyselect a single line of text at a time.] Paste text.\ Scroll Textport. Mouse pointer changes into a handcursor which allows you to pan the text area in muchthe same way as you can pan the Layout area.U / VQ / ZScroll text up / down, one page at a time.Returns you to the beginning / end of the Textportentries (maximum of 2000 lines).COPYING AND PASTINGcopyingSelect text within the Textport by dragging across the text with the left mouse ( [ ).The text becomes highlighted in red and is copied to the clipboard as soon as yourelease the mouse button. You can copy only one line of text at a time.pastingText from the clipboard (i.e. the last text that was higlighted) can be pasted by clickingwithin the Textport with the middle mouse ( ] ).80 1 Houdini 6.0 Reference
The <strong>Scripting</strong> Language2 THE SCRIPTING LANGUAGE2.1 ORDER OF EXPANSIONExpansion of a Houdini command follows the C shell expansion standards veryclosely. There are some subtle differences.LIMITATIONS• The maximum line length for a Houdini command is 8 Kb (expanded)• The maximum number of arguments on a command line is 1024• The maximum number of number of nested if statements in a single source Þle is128• The maximum number of source Þles is limited by the system limit on open Þles• There is no limit for nested loopsLEXICAL STRUCTUREHoudini splits input lines into words at space characters, except as noted below. Thecharacters ; < > ( ) = form separate words and Houdini will insert spaces aroundthese characters except as noted below. By preceding a special character by a backslash(\), its special meaning can be suppressed.evaluation of quotesStrings enclosed in a matched pair of quotes forms a partial word. Within doublequotes (“), expansion will occur. Within single quotes (‘) expansion will not bedone. Within back-quotes (`) the enclosed string will be evaluated as a Houdiniexpression and the result will be considered to be a partial word. Unlike csh, inside amatched pair of quotes, the quote character may be protected by preceding the slashwith a back-slash.Back-quotes are evalutated with a higher priority than double quotes. This meansthat if a double-quoted argument encloses a back-quoted string, the back-quotedstring may contain double quotes without terminating the initial double quote delimiter.For example, the string:"foo‘ch("/obj/geo1/tx")‘"will be parsed as a single argument.Note: As a general rule, do not include spaces between your “back” quotation marksand what lies between them. Houdini may not evaluate them if there are extraspaces.commentsThe character # introduces a comment which continues to the end of the line. Thischaracter can be protected by a back-slash (\) or by enclosing the character inquotes.12 - <strong>Scripting</strong> 1 81
The <strong>Scripting</strong> LanguageCOMMAND STRUCTUREThe output of a Houdini command can be redirected to a UNIX Þle by using themeta-character >. The output can be appended to a UNIX Þle by using >>. To redirectthe error output and the standard output of a command to a UNIX Þle, the charactersequence >& can be used.Multiple commands can be speciÞed on the same line by separating them with semicolons(;).EXPANSIONExpansion is done in the following order: History substitution, Alias expansion,Variable & Expression expansion.History substitution is not as sophisticated as the csh history mechanism. The supportedsubstitutions are:!! Repeat last command!str!numRepeat last command matching strRepeat command “num” from the history list!-5 Repeat the command run Þve commands previousWith the !! substitution, characters following the !! are appended to the command.The resulting command is displayed in the Textport before the command is run.Alias expansion is also not as sophisticated as csh. For example, one current limitationis that there is no recursive alias expansion. For example, the followingsequence of commands will not produce the expected result:houdini -> alias opcd opcfhoudini -> alias cd opcdThe cd alias will result in an unknown command “opcd” since the alias expansionterminates after the Þrst expansion. As well, alias expansion does not include thehistory meta-character substitution that csh supports.Variable and expression evaluation are done at the same time and have equal precedence.Variables are delimited by a dollar sign ($) followed by the variable name. Avariable name must begin with letter or an underscore (_) followed by any numberof letters, numbers or underscores. As well, the variable name may be delimited bycurly braces ({}) in which case the contents of the curly braces is expanded beforethe variable name is resolved. This allows for pseudo array operations on variables.For example:houdini -> set foo1 = bobhoudini -> set foo2 = suehoudini -> for i = 1 to 2> echo ${foo${i}}> endbobsue82 1 Houdini 6.0 Reference
The <strong>Scripting</strong> LanguageExpression evaluation is done on the string contained within matching back-quotes( ‘ ). Inside the back-quotes, expression expansion is performed as opposed to commandline expansion. The expression is evaluated, and the resulting string is usedto replace the expression on the command line. If the expression evaluates to a typeother than a string, the result is cast to a string and this is the value used.COMMAND EXPRESSIONSThese differ from general Houdini expressions, though Houdini expressions can beused inside of command expressions. The command expressions are used in the“while” and “if” commands. The order of operations in a command expression is asfollows:( ) Parentheses== != < > = Equal, Not Equal, Less Than, Greater Than, Less Thanor Equal, Greater Than or Equal&& ||Logical And and Logical OrExpressions can be enclosed in parentheses for clarity, but this is not necessary.2.2 VARIABLESThere are two types of variables in Houdini, local variables and system or globalvariables. Local variables are local to Houdini (or the script being executed). Whenthe script terminates, these variables will automatically be unset. Global variableswill remain in the scope of all scripts and also to any UNIX programs started byHoudini. The “set” command will create local variables, while the setenv commandwill create global variables. For example:houdini -> setenv agent = 99houdini -> set local_agent = 45houdini -> echo Agent $agent, this is agent $local_agent\nAgent 99, this is agent 45houdini -> unix echo ’Agent $agent, this is agent $local_agent’local_agent - Undefined variableNote, the single quotes prevent Houdini from expanding the contents of the command(see order of expansion).All variables created by loops are considered local variables (i.e. the “for” loop willuse local variables).12 - <strong>Scripting</strong> 1 83
The <strong>Scripting</strong> Language2.3 PATTERN MATCHINGMany of the op and ch commands allow patterns to specify multiple objects or channels.These patterns allow wildcards which will match all or parts of strings.* Match any sequence of characters? Match any single character[set]@ [group name]Match any characters enclosed in the square brackets.In Houdini, the [a-g] format is not currently supported,the characters must be listed.Expands all the items in the group. Since each groupbelongs to a network, you can specify a path before the@group identiÞer.EXAMPLESopcf /obj ; opls -d @geoThis example lists all the objects in the group named “geo”opcf /obj/geo1; chadd @xform_sops tx ty tzThis example adds channels (tx, ty, and tz) to all the SOPs contained in thexform_sops group.opcf /mat ; opls /obj/@lightsThis example shows how to reference groups outside of the current folder.See also: Expression Language > Pattern Matching p. 38.2.4 COMMAND LOOPSfor loopforeach loopwhile loopThere are three different looping constructs in the Houdini scripting language:for variable = start to end [step increment]...endforeach variable (element_list)...endwhile (expression)...endThe for loop will loop from the start, up to and including the end. foreach will cyclethrough every element in the element_list assigning the variable value to be a differentelement each iteration through the loop.All variables in the for and foreach loops are local variables. To export the variableto other scripts (or to UNIX commands), simply set a global variable using setenvinside the loop. See for p. 112, foreach p. 112, and while p. 120.84 1 Houdini 6.0 Reference
The <strong>Scripting</strong> LanguageEXAMPLEYou can use a loop to perform repetitive tasks for you. For example, if you wantedto wanted to merge 255 SOPs, it would be faster to write a short script than to do allthat wiring manually. For example, if you named your SOPs consistently, like:model-0, model-1, model-2... model-255then you could execute the following script in a Textport:for i = 0 to 255opwire model-$i -$i merge1endIf you haven’t been consistent with naming, you could also do it with a foreach .2.5 CONDITIONAL STATEMENTSThe “if” command provides the ability for a script to check a condition and thenexecute one set of commands if the condition is true or an alternate set of commandsif the condition is false. It should have an endif to signify the end. See if p. 114.if ( expr ) [then]...else if (expr2) [then]...else...endif2.6 ALIASES AND MULTIPLE COMMANDSSome frequently used commands can be represented with a single word, an alias.For example:houdini-> alias greet echo hello worldhoudini-> greethello worldhoudini-> alias mine “opset -d off * ; opset -d on geo1”houdini-> mineThis will execute the string attached to the alias “mine” and turn off the display ofall the objects then turn on object geo1.The next two commands list, then undeÞne, an alias:houdini-> aliasgreet hello worldmine opset -d off * ; opset -d on geo1houdini-> alias -u greetHoudini accepts several commands on the same command line separated by a semicolon.This does not apply to semicolons embedded in quotes. Aliases can containcommands embedded in quotes.Note: Alias expansion is not performed if the local variable noalias is set.12 - <strong>Scripting</strong> 1 85
The <strong>Scripting</strong> Language2.7 USING ARGUMENTS IN SCRIPTSThe source command, when entered at the c-shell prompt, can have arguments afterthe .cmd Þle name. These arguments are set to Houdini variables so that they can beused by the script. For example:houdini-> source repeat.cmd 1 10 2 blockheadwhere repeat.cmd contains the Houdini script,echo Hello, my name is $arg4for i = $arg1 to $arg2 step $arg3echo I said, my name is $arg4endNote that there are four variables in the script: arg1, arg2, arg3 and arg4. These areset to the source arguments 1, 10, 2 and blockhead respectively. This mechanismworks well with the -g options of the rcwrite and opdump commands, which causeobject names to be written out generically, as $arg1, $arg2 and so on. In this way,names of objects can be changed when reading them as scripts.$ARG0 – NAME OF THE SCRIPTYou can get the name of the script being run from $arg0. For example:source myscript.cmd 1 4.5 7 balloonwill come into the script with$argc = 5$arg0 = myscript.cmd$arg1 = 1$arg2 = 4.5$arg3 = 7$arg4 = balloonThis allows usages such as:if $argc != 5 thenecho USAGE: source $arg0 numclowns clownsize numtoys toytypeexitendif$ARGC – NUMBER OF ARGUMENTS PASSED TO SCRIPTThe number of arguments passed to the script can be retrieved with the variable$argc, for example, from the lookat.cmd script:# USAGE: lookat.cmd eyeobject focusobjectif $argc!= 2 thenecho USAGE: source lookat.cmd eyeobject focusobjectexitendif86 1 Houdini 6.0 Reference
The <strong>Scripting</strong> LanguageSHIFT COMMANDIn addition to using arguments, scripts can do very simple parsing of the commandline using the shift command. Shift will shift the argument index one argument tothe right. For example, the script for lattices sets the number of lattices (NL) todefault to 3, however, if the Þrst argument passed to it is -n then the NL will be set tothat argument; and the arguments shifted:# lattice.cmd - builds a lattice deformation box around an objectset NL = 3if “$arg1” == “-n” thenshiftset NL = $arg1shiftendif...Note that parsing occurs by shifting; this implies that the arguments must be passedin a speciÞc order.2.8 EXECUTING SCRIPTSYou can execute a list of commands located in a UNIX text Þle by running the sourcecommand. The following is fetched from the standard Houdini directory containingscripts, $HH/scriptshoudini-> source sixcreate.cmdNormally, Houdini executes all the commands in any command Þle before redrawingthe screen.2.9 EXAMPLE SCRIPTTEXTPORT EXAMPLE – WIRING OPSYou can use a loop to perform repetitive tasks for you. For example, if you wantedto wanted to merge 255 SOPs, it would be faster to write a short script than to do allthat wiring manually. For example, if you named your SOPs consistently, like:model-0, model-1, model-2... model-255then you could execute the following script in a Textport:for i = 0 to 255opwire model-$i -$i merge1endIf you haven’t been consistent with naming, you could also do it with a foreach .12 - <strong>Scripting</strong> 1 87
The <strong>Scripting</strong> LanguageGUESSING GAMEThe following is a simple script which illustrates the use of loops, conditional execution,and variables. For more examples, see the <strong>Scripting</strong> section of the UserGuide.# Houdini command script for the guessing game (guess.cmd)# First, let’s get a random seedset foo = `system(date)`set seed = `substr($foo, 14, 2)``substr($foo, 17, 2)`# Then, pick a random numberset num = `int(rand($seed)*100)+1`set guess = -1echo Guess a random number between 1 and 100.while ( “$guess” != “$num” )echo -n Enter guess (q to quit): “read guessif ( “$guess” == q || “$guess” == ““) thenbreak;endif# Ensure they entered a number - i.e. convert to a numberset iguess = `atof($guess)`if ( $iguess < $num ) thenecho Too lowelse if ( $iguess > $num ) thenecho Too highelseecho Spot on!endifend# Come here if they selected “q” to quit:echo The number to guess was $num88 1 Houdini 6.0 Reference
3 SCRIPTING WITH HSCRIPT AND THE C-SHELLIn many cases an animator or Technical director will not want to use the full graphicalversion of Houdini, but simply deal with the text version - hscript and use the Cshell. The main advantage to this is the animator can write automated scripts torender sequences of frames without the need for an attendant animator.Houdini's hscript allows you to accomplish virtually everything that you could withthe full GUI interface, but with text-based commands. hscript also makes the transitionfrom the GUI to the text version relatively easy with the opscript command.This section assumes that you're relatively familiar with hscript and Houdini's textportcommands and provides you with an explanation of how to incorporate hscriptand C shell commands. The following discussion centers around writing renderscripts, though much of this information can be used to write other kinds of scripts(such as adding in composite operations or Þle operations).3.1 THE BASICS OF INCORPORATING C SHELL AND HSCRIPTIf you’ve used hscript within the conÞnes of Houdini’s textport, then you’ll realizethat hscript expects keyboard input. The trick to incorporating hscript and C shell isto redirect commands coming from the C shell so they appear to be keyboard input.Once this is done, commands can be sent to hscript as if you were typing the commandsfrom the textport.Following, is the basic form a script to do this takes:#! /bin/csh -f#add any standard C shell commands here.hscript
<strong>Scripting</strong> With Hscript and the c-shellDo not incorporate extra spaces or comments on the line that contains the ENDCATterminator. If you do, you'll get an unknown variable error.Alternatively, you might see (and use) the line hscript& means any error messages that normally would appear on screen are insteadwritten to a Þle. In this case the Þle is called renlog. You should note that renlogcan be any Þle name.3.3 EXAMPLES – RENDERING SCRIPTSEXAMPLE 1 – BASIC RENDERLooking at a very simple example, the following script works with two parameters–the .hip Þle to render and the Þle name to send the rendered image to. The script isnamed simple_ren and would be invoked as follows:basic_render test.hip /usr/tmp/test_image.picsource#! /bin/csh -f#check to see if user suppled the correct number of arguments#- exit if notif ($#argv < 2) thenecho “USEAGE: ren_script ”exitendif# set up user supplied argumentsset HIP_FILE = $1set OUT_FILE = $2# start up hscript and allow commands to be sent from C shellhscript & renlogmread $HIP_FILEopcd \/out# set the ouput file name for the render output driveropparm mantra1 picture ( $OUT_FILE )#start the renderrender mantra1#signal an end to commands sent to hscriptENDCAT90 1 Houdini 6.0 Reference
<strong>Scripting</strong> With Hscript and the c-shellexplanation#! /bin/csh -fThis line is required to be at the beginning of each C shell script to denote that itcontains commands that can be executed as a C shell script.if (#$argv < 2) thenecho “USEAGE: ren_script ”exitendifThese lines check to see if you entered the correct number of arguments. The variable#$argv contains the number of parameters passed to the C shell script from thecommand line. For example, if you typed basic_render test.hip, the variable #$argvwould be set to 1, and an error message would be generated because you omitted adestination image Þle as part of the command string.set HIP_FILE = $1set OUT_FILE = $2These lines set the variables $HIP_FILE and $OUT_FILE to the parameters sent tothe C shell from the command line. For instance, if you typed basic_render test.hip/usr/tmp/test.pic, $1 and $2 and, consequently, $HIP_FILE and $OUT_FILE, wouldbe set to test.hip and /usr/tmp/test.pic respectively.hscript & renlogCommands following this line will be interpreted as hscript commands up until itencounters the word ENDCAT. Also any error messages encountered in hscript will besent to a Þle called renlog.mread $HIP_FILEReads the .hip Þle speciÞed by this variable.opparm mantra1 picture ( $OUT_FILE )Changes the default output paramter so the rendered image is sent to the Þle speci-Þed by $OUT_FILE (the default setting is ip).render mantra1Render the image using the mantra1 output driver. Note that this case assumes thatthe output driver mantra1 exists in the saved .hip Þle.ENDCATThis signals the C shell to stop redirecting commands to hscript. Don't insert extraspaces or comments or you will get the following error:ENDCAT -
<strong>Scripting</strong> With Hscript and the c-shellif ($#argv < 4) thenecho "USEAGE: ren_script "exitendif# set up user-supplied argumentsset HIP_FILE = $1set OUT_FILE = $2set START = $3set END = $4# start up hscript and allow commands to be sent from C shellhscript
<strong>Scripting</strong> With Hscript and the c-shell# start up hscript and allow commands to be sent from C shellhscript
<strong>Scripting</strong> With Hscript and the c-shellRunning this script would give you the error: frame - Undefined variable Inorder to correct this you prepend a "\" to any variables you are manipulating (allthose variable names that you would put a '$' in front of). The above example wouldbe corrected as follows:hscript
<strong>Scripting</strong> With Hscript and the c-shell4. Type opscript > . If the driver name is calledmantra1 and the Þlename you want to save to is called /usr/tmp/driver.cmd thentype: opscript mantra1 > /usr/tmp/friver.cmdSAMPLE OUTPUTS FROM OPSCRIPTThe following output was generated with the opscript command:opscript mantra1 > /usr/tmp/driver.cmd :1: # Node mantra12: opadd -n mantra mantra13: oplocate -x 0 -y 0 mantra14: opparm mantra1 execute ( 0 ) trange ( on ) f ( 1 150 1 ) \5: renderer ( Mantra2 ) camera ( cam1 ) visible ( * ) tscript ( off ) \6: script ( /usr/tmp/test.cmd ) binary ( off ) picture ( ‘$HIP/$F.pic’ ) \7: dof ( on ) jitter ( 1 ) dither ( 0.004 ) gamma ( 1 ) sample ( 3 3 ) \8: field ( frame ) blur ( deform ) tres ( on ) res ( 320 243) \9: resmenu ( “640 486 1.0” ) aspect ( 1 ) command ( ‘mantra3’ )10: opset -d off -r off -t off -l off -s off -u off -c off -C off -p off mantra111: opcf /outLines 4-9 specify parameters for the ouput driver mantra1. Normally they wouldappear as one line but have been formatted on multiple lines here for the sake of legiblity.To use this information in a script, you would remove lines 3, 10, and 11, (these arenot necessary unless you are importing it into the graphical version of Houdini)leaving you with:1: # Node mantra12: opadd -n mantra mantra14: opparm mantra1 execute ( 0 ) trange ( on ) f ( 1 150 1 ) \5: renderer ( Mantra2 ) camera ( cam1 ) visible ( * ) tscript ( off ) \6: script ( /usr/tmp/test.cmd ) binary ( off ) picture ( ‘$HIP/$F.pic’ ) \7: dof ( on ) jitter ( 1 ) dither ( 0.004 ) gamma ( 1 ) sample ( 3 3 ) \8: field ( frame ) blur ( deform ) tres ( on ) res ( 320 243) \9: resmenu ( “640 486 1.0” ) aspect ( 1 ) command ( ‘mantra3’ )This fragment adds an output driver called mantra1 which tells hscript to renderusing mantra. It then uses the opparm parameter to set the requisite parameters.At Þrst glance, the number of parameters used with the opparm command seemscumbersome. In many cases, you might want to use default settings and just tweakone or two parameters. For example, assume that the only thing you want to changefrom the defaults is the size of the output image. To accomplish this, your scriptfragment might look like the following:opadd -n mantra mantra1opparm tres ( on ) res (640 480 )In this case you are overriding the default resolution with tres ( on ) and specifyingthe custom resolution with res (640 480 ). To use this in a Þle you could do twothings:1. Copy these lines into your C shell script (the approach used thus far), or;2. Reference this Þle in the C shell using the source command.12 - <strong>Scripting</strong> 1 95
<strong>Scripting</strong> With Hscript and the c-shell3.7 USE OF THE SOURCE COMMANDThough it hardly seems a chore to simply copy these lines into your shell script inthese simple cases, imagine that you have many script fragments that are changedrepeatedly during a production by your Technical Director and these are stored in acentral repository. Instead of having the Technical Director or the animator makethese changes in the C shell script, all that is necessary is to change the .cmd Þleitself and the changes are automatically reßected. The use of the source commandcan make a Þle cleaner and easier to maintain, but it depends on the individual andthe overall complexity of the script.The two examples below outline render scripts that are functionally equivalent,except the Þrst example uses the source command to reference a Þle created byopscript, while the second reproduces the code “inline”.USING SOURCE#! /bin/csh -fset HIP_FILE = “/usr/temp/test.hip”hscript
<strong>Scripting</strong> With Hscript and the c-shell3.8 DEFAULT PARAMETERS FOR OUTPUT DRIVERSThe following are the default parameters set for each output driver when using theopadd command or when adding a new driver in the graphical interface.It is not necessary to include all parameters available when executing an opscriptcommand–just the ones you want changed from the defaults. Also note that someparameters remain consistent for each driver and should not be changed. Theseinclude:• execute (0)• renderer ( Mantra2 )• resmenu ( “640 486 1.0” )PARAMETER MEANINGStrange (on/off)f (start end inc)camera (cam)when rendering, this parameter determines whether ornot to use the frame range speciÞed by f ( ). When off,only the current frame will be rendered.speciÞes the frame range that is rendered.speciÞes which camera is used for the render.visible ( scope) speciÞes which objects are rendered. The wildcard *means all objects are made visible in the render.tscript (on/off)script (script_name)binary (on/off)picture (Þle_name)dof (on/off)jitter (value)dither (value)gamma (value)sample (xval yval)speciÞes whether or not to generate the .ifd (instantaneousframe description for mantra) or a .rib (Render-Man interface bytestream for Renderman) instead of arendered picture. This option will override that set withthe picture ( ) parameter.speciÞes the name of the script generated when thetscript ( ) option is on.speciÞes whether the output Þle will be saved in ASCIIor binary format.the name of the output Þle when generating images.speciÞes whether to use depth of Þeld.speciÞes the jitter value used in conjuction with antialiasingtechniques.sets the dither level.sets the gamma value for the frame.sets the number of supersamples in the horizontal andvertcal directions on a per pixel basis.12 - <strong>Scripting</strong> 1 97
<strong>Scripting</strong> With Hscript and the c-shellÞeld (frame/even/odd)allows you to specify full frame, even Þeld or odd Þelddominance.blur (off/deformation/transformation )speciÞes what type of motion blur to use for Mantraand Renderman.tres (on/off)res (x y )aspect (value)speciÞes whether to override the default camera resolution.speciÞes resolution of frame in pixels when tres() is on.speciÞes the aspect ratio.3.9 OUTPUT DRIVER SAMPLESMANTRAopparm mantra1 execute ( 0 ) trange ( off ) f ( 1 150 1 )renderer ( Mantra2 ) camera ( cam1 ) visible ( * ) tscript ( off )script ( ““ ) binary ( on ) picture ( ip ) dof ( off ) jitter ( 1 )dither ( 0.004 ) gamma ( 1 ) sample ( 3 3 ) field ( frame )blur ( none ) tres ( off ) res ( 320 243 ) resmenu ( “640 486 1.0” )aspect ( 1 ) command ( ‘mantra3 -v 0.015’ )RENDERMANopparm rman1 execute ( 0 ) trange ( off ) f ( 1 150 1 )renderer ( Mantra2 ) camera ( cam1 ) visible ( * ) tscript ( off )script ( ““ ) binary ( on ) picture ( ip ) dof ( off ) jitter ( 1 )dither ( 0.004 ) gamma ( 1 ) sample ( 3 3 ) field ( frame )blur ( none ) tres ( off ) res ( 320 243 ) resmenu ( “640 486 1.0” )aspect ( 1 ) command ( render ) device ( framebuffer )COPopparm cop1 execute ( 0 ) trange ( off ) f ( 1 150 1 )icenetname ( ““ ) copname ( ““ ) copoutput ( ip ) tres ( off )res ( 320 243 ) fraction ( 1 )GEOMETRYopparm geometry1 execute ( 0 ) trange ( off ) f ( 1 150 1 )objectname ( geo1 ) sopname ( font1 ) sopoutput ( ‘$HIP/$F.bgeo’ )SCENEopparm scene1 execute ( 0 ) trange ( off ) f ( 1 150 1 )renderer ( Mantra2 ) camera ( cam1 ) visible ( * ) tscript ( off )script ( ““ ) binary ( on ) picture ( ip ) dof ( off ) jitter ( 1 )dither ( 0.004 ) gamma ( 1 ) sample ( 3 3 ) field ( frame )blur ( none ) tres ( off ) res ( 320 243 ) resmenu ( “640 486 1.0” )aspect ( 1 ) command ( mantra )98 1 Houdini 6.0 Reference
<strong>Scripting</strong> With Hscript and the c-shell3.10 A FINAL EXAMPLE (RENDERING AND COMPOSITING)This example is slightly contrived, but it is a good example of things you can dowith scripting. Let’s say you have two animators who are working on the samescene and at the end of the day, you want to render their contributions and make aside by side comparison to see which one is better.We’ll assume that we have two different .hip Þles – one from each animator. Wethen want to render a sequence of frames from each .hip Þle and then use the compositorin Houdini to place them side by side and then write the resulting “comparisionframes” out to disk. You want to be able to do this automatically at night andthen come in the next morning to see the results.This involves two steps:• Render the two sequences of frames, using a variation of the Þrst render scriptexample.• Compositing the images together, and then writing them out to disk.We'll build our COP network interactively in Houdini and save it out as a .hip Þle.We'll then change the parameters of the composite from the C shell based on therender parameters we give it. This makes life much easier while still giving you allthe ßexibility you need. You could build the entire compositing section with hscript.This is included as listing 5 for comparision purposes.BUILDING THE COP NETWORKThe idea will be to take a neutral background colour (like black) which is double thesize of the two input images, then use the Over COP to position and overlay theimages correctly over the background.1. Start Houdini and create a new COP network. Call it compare.2. In the compositor place down a constant COP. Set alpha to zero, so it is completelytransparent and make sure its name is "color1".3. Place two File COPs making sure their names are Þle1 and Þle2.4. Append an Over COP to each of the Þle COPs and in the Spatial Shift tab selectthe no scale checkbox, making sure they are named over1 and over2.5. Attach the output from the Constant COP (color1) into the second inputs of eachof the Over COPs.6. Put down another Over COP and run the outputs from the Þrst two Over COPsinto the inputs of the third Over.7. Go to the Output Editor, and place a Composite output driver, making sure it iscalled cop1.8. Save this Þle and call it compare.hip. (Don’t worry about other parameters, suchas the resolution of the images, since we’ll be setting those in the C shell.)12 - <strong>Scripting</strong> 1 99
<strong>Scripting</strong> With Hscript and the c-shellWRITING THE RENDER SCRIPTCreate a render script called compare and save it in the same directory as compare.hip.The full script is below and makes several assumptions. First, the .hip Þlesthat are the animator-supplied .hip Þles, must both have an output driver calledmantra1. Second, the render script is called compare and is located in the samedirectory as the compare.hip Þle.usagecompare examplecompare animator1.hip animator2.hip 1 50 640 480This will render out frames 1 to 1 50 from each of the Þles called animator1.hip andanimator2.hip at 640 × 480 resolution and the composite the images together usingthe compare.hip Þle created above.CODE FOR COMPARE RENDER SCRIPT#! /bin/csh -f#check to see if the user supplied the correct number of arguments#- exit if notif ($#argv < 6) thenecho "USEAGE: ren_script "exitendifset HIP_FILE1 = $1 # set up user supplied argumentsset HIP_FILE2 = $2set START = $3set END = $4set XRES = $5set YRES = $6set OUT_FILE1 = sequence1_\$F.picset OUT_FILE2 = sequence2_\$F.picset COMP_OUTPUT = comp_\$F.pic#Render out the first sequence of images#hscript
<strong>Scripting</strong> With Hscript and the c-shellopcd \/comp\/compareopparm file1 source ( '$OUT_FILE1' )opparm file2 source ( '$OUT_FILE2' )opparm color1 size ( \`$XRES*2\` $YRES )opparm over2 offoffpixel ( $XRES 0 )opcd \/outopparm cop1 icenetname ( compare ) copname ( over3 )opparm cop1 trange ( on ) f ( $START $END 1 )opparm cop1 copoutput ( '$COMP_OUTPUT' )render cop1ENDCATNOTES ON THE RENDER SCRIPTThe Þrst half of the script is nothing new. It merely sets up our user-supplied parameters,and then renders a sequence of images from the two .hip Þles supplied as commandline paramters. The third section which does the actual composite is a littledifferent, but if you understand the rendering sections, you should have little troubleunderstanÞng how the compositing section works.The trickiest part in this whole script is the line:opparm color1 size ( \`$XRES\*2\` $YRES )Note the backslashes here. These are necessary because we are dealing with the Cshell. In hscript we could just type in something like echo `1+1` and get 2. If wetry this through the C shell we get an error. So the general rule is if you're trying todo arithmetic in hscript via the C shell, put a \ in front of the backquote `.The compositing section works by setting up all of the compositing parameters onthe ßy. It Þrst tells the File COPs where to Þnd the Þles. It then tells the Color COP toresize itself so it is double the X reolution of the two rendered images (so we canplace them side by side). Finally it tells the two Over COPs where to put the two renderedimages in relation to the background (in this case image one is shifted up tothe halfway mark and image two is shifted over to the right and up half way).The Þnal step is to tell the composite output driver the frame range and Þle namesfor output.THINGS TO WATCH OUT FORThis is a small list of things to watch out for when using hscript within the C shell.Readng this will probably save you a lot of aggravation and time if you Þnd yourscripts don't work as they should. Many errors can be attributed to the C shellexpanding strings and variables when in fact, you don't want them to.One other thing to keep in mind is that hscript and C shell are not syntactically thesame–though it may appear to be at Þrst glance. Entries that you make in Houdini'stextport may need some editing when you use them as input from the C shell.Read the compare script above to see some of following items put into practice.• Passing in strings to hscriptPassing variable strings to hscript should be encapsulated by single forwardquotes. So if you set a variable string such as set OUT = image_$F.pic then makesure when you use it with hscript you type in '$OUT'.If you want to pass in a string with spaces in it (like "hello there"), make sure toput it in double quotes.12 - <strong>Scripting</strong> 1 101
<strong>Scripting</strong> With Hscript and the c-shell• Variables passed in as numericsAny variable passed into hscript as a numeric can be left as is (unless you are performingarithmetic with it).• Specifying Directories and using '/'If you change directories in hscript (e.g. opcd /out) then make sure that any forwardslashes are protected by a backslash ( opcd \/out ).• ArithmeticIf you want to do some arithmetic via hscript from within C shell, make sure thatany arithmetic is surrounded by a \` to prevent C shell from doing any expansionwith the backquote. For instance in hscript you might type: echo `1+2`. If you aredoing this within C shell you would use: echo \`1+2\`.• Watch the ENDCATWhen you have the hscript
<strong>Scripting</strong> With Hscript and the c-shell3.11 BUILDING COMPLEX FILENAMESThere are many times when you want to build complex Þlenames, based on framenumbers or based on a Þlename referenced by the user. For example, passing in a.hip Þle to your script, then converting this Þlename to a .pic Þle (i.e. convert“input.hip” to “output.pic”). Below are C shell example fragments.EXTRACTING THE BASE FILENAME, PATH AND EXTENSIONset HIP_FILE = \/usr\/tmp\/myfile.hipset HIP_PATH = $HIP_FILE:h #keep the path/drop filenameset FILE_NAME = $HIP_FILE:t #keep the filename/drop pathset BASE = $FILE_NAME:r #drop the extensionset EXT = $FILE_NAME:e #just keep the extensionThe variables would have the following values:$HIP_FILE = /usr/tmp/myfile.hip$HIP_PATH = /usr/tmp$FILE_NAME = myfile.hip$BASE = myfile$EXT = hipBUILDING A FILE NAME WITH A NEW EXTENSIONContinuing from above we will build a new Þlename with a new extension. We haveall of the individual components and now we want to put them back together again.set NEW_EXT = .picset NEW_FILE = $HIP_PATH\/$BASE${NEW_EXT}Notice the braces. This allows you to put togther two variables as one string. Notethat you could say $BASE$NEW_EXT, but it’s good to get in the habit of using thebraces, as it might save you trouble later on. Also notice that we put in a \/. If youlook closely at the results of $HIP_PATH, it doesn’t include the trailing forwardslash, so we have to include it ourselves.Now we end up with the following results:$HIP_FILE = /usr/tmp/myfile.hip$HIP_PATH = /usr/tmp$FILE_NAME = myfile.hip$BASE = myfile$EXT = .hip$NEW_EXT = .pic$NEW_FILE = /usr/tmp/myfile.picWe could have accomplished the same thing much more quickly. All we reallywanted to do was change the extension. The following would be equivalent:set $HIP_FILE = \/usr\/tmp\/myfile.hipset FILE_NAME = $HIP_FILE:r#keep all but extensionset NEW_EXT = .picset $NEW_FILE = $FILE_NAME${NEW_EXT}The reason for breaking up the full path into its individual components is so that youcan change the individual components and put them back together again.12 - <strong>Scripting</strong> 1 103
<strong>Scripting</strong> With Hscript and the c-shellMEANING OF :H, :R, :E, :TMore information on the following, can be found by doing a man csh and searchingfor History Substitution.:h Remove a trailing pathname component, leaving the head.:r Remove a trailing suffix of the form `.xxx', leaving thebasename.:e Remove all but the suffix.:t Remove all leading pathname components, leaving the tail.104 1 Houdini 6.0 Reference
<strong>Scripting</strong> Tricks4 SCRIPTING TRICKS4.1 GROUP NAMES IN SCRIPTING COMMANDSYou specify a group within scripting commands by using the @ character before thegroup name. For exampe, if you wanted to turn on/off the display of all objects in agroup, you would use the opset command (e.g. opset -d on/off geo* ). In the command,we can specify an OP name (e.g. geo1), a pattern for an OP name (e.g. geo*),or OP Groups (e.g. @myGroup).To test this, use the Object Editor’s Edit > Edit OP Groups... menu command to createan object group called “myGroup”. It should contain geo1, geo2, and ambient1.You can list the objects included in myGroup with the opgls command:/obj -> opset -d on @myGroupTurns on the display ßags for all the objects listed in myGroup .Using the @ character to expand a group name can also be applied to any otherHoudini scripting command that normally accepts only object names.Tip: Try assigning this to a Function Key using the Edit > Edit Aliases... dialog.4.2 EMBEDDING COMMANDSWithout the Group expransion using the @ character, we would have to turn on/offdisplay of all the objects in a group by using the opgls command delimited with singlequotes. For example, if you didn’t have the @ character, you would need to usesomething like:-> opcf /obj/obj -> opgls -l myGroupmyGroupgeo1geo2ambient1/obj -> opset -d on `run("opgls -l myGroup")`This works, because where it expects an object name (or pattern), you’re telling it toevaluate what is within the single quotes as the name(s). The opgls command simplylists all the objects contained in the speciÞed group. So, in effect, what you’re doingis listing the names of all the objects within your group by having the opgls commandlist them out for you. You’ll get a single error (this doesn’t affect correct operationhowever), because the actual group name (i.e. “myGroup”) is listed along withall the object names in that group, and hscript won’t Þnd it as a valid object.12 - <strong>Scripting</strong> 1 105
<strong>Scripting</strong> Tricks4.3 SETTING ACCORDING TO THE DISPLAY FLAGIf you want to set all the objects within a group (say “bugs”) but only if their Displayßag is set (Object Editor), you can use a foreach loop to check and set the statusof objects in the group which have their Display ßag on. For example:opcf /obj#Loop through all the objects in the groupforeach obj ( ‘run("opglob @bugs")‘ )opset -l on $obj/‘opflag($obj, "d")‘4.4 TRAVERSING AN OBJECT HIERARCHYThe following script can be used to traverse an object hierarchy. This script simplyprints out the hierarchy (with appropriate indenting), however, it can easily be modiÞedto do other things.# hscript command file to traverse a hierarchy of nodesif ( $argc != 2 && $argc != 3 ) thenecho "Invalid usage: $arg0 opname [prefix]exitendifif ( $argc == 2 ) thenset indent = ""set level = 1elseset indent = ""for i = 0 to $arg2set indent = "$indent "endset level = ‘$arg2 + 2‘endifecho "$indent"$arg1set nout = ‘opnoutputs($arg1)-1‘if ( $nout != -1 ) thenfor i = 0 to $nout step 1source $arg0 ‘opoutput($arg1, $i)‘ $levelendendif106 1 Houdini 6.0 Reference
Intrinsic Commands2 <strong>Scripting</strong>CommandsFollowing, is a list of scripting commands available in the Houdini scripting language.Commands can be broken up into different logical groups.For C-shell scripting commands, consult a text on UNIX.1 INTRINSIC COMMANDSThis set of commands provide an intrinsic level of control for scripting. These commandsare most like their csh equivalents.1.1 ALIASSYNTAXalias [name [value]]alias -salias -u name [name2...]EXPLANATIONCreates an alias for a command or sequence of commands. Aliases may containsemi-colon separated statements.-s Display a list of current aliases in “source-able” formatso they can be sourced into other HIP Þles.-u Will undeÞne the aliases listed.EXAMPLEalias ls oplsThis alias command changes the opls (operator list) command to the abbreviatedcharacter string ls.12 - <strong>Scripting</strong> 2 107
Intrinsic CommandsTEMPORARILY DISABLING ALIASINGIn the Houdini shell, if the local variable noalias is set, then alias expansion is notdone on commands in the script. This variable can be used to force scripts to use theoriginal commands instead of user aliases. Since local variables are local per script,once the script exits, alias expansion will continue as before. However, if the variableis set, all subsequent (nested) scripts will have alias expansion turned off. Example:alias echo "This is a bad alias"set noalias = 1echo "foo bar"set -u noaliasIn this script, even though the alias is set, the echo statement will work (since thenoalias variable is set).1.2 BREAKSYNTAXbreak [n]EXPLANATIONBreaks out of a loop without executing any of the remaining statements. The loopwill be terminated without completing its iterations. The integer speciÞed by ndetermines how many loops to break out of. By default, n == 1.EXAMPLEbreak 3This command string would break you out of three levels.1.3 CMDREADSYNTAXcmdread [-q] filenameEXPLANATIONCmdread runs the commands in the Þlename speciÞed. If the -q option is speciÞed,no warnings about missing Þlenames will be displayed. See also: source.108 2 Houdini 6.0 Reference
Intrinsic Commands1.4 CONTINUESYNTAXcontinue [n]EXPLANATIONContinue a loop without executing the statements following the continue statement.The loop will continue iterating. The integer speciÞed by n determines how manyloops to affect.EXAMPLEcontinue 3This command executes the script, omitting the next three loops.1.5 ECHOSYNTAXecho [-n] listEXPLANATIONThe words in list are displayed. The -n option will prevent a trailing line feed frombeing displayed.EXAMPLEecho bafflegabThis command would produce the text bafßegab below the command line.echo `npoints(“/objects/object_name/sop_name”)`echo `npoints(“/objects/gg/s”)`If object is gg and the SOP is s then following expression will display the number ofpoints in the SOP s.1.6 EXCATSYNTAXexcat [pattern]12 - <strong>Scripting</strong> 2 109
Intrinsic CommandsEXPLANATIONThis command displays the source for all expression functions in the current .hipÞle. If a pattern is speciÞed, only those expression functions matching the patternare displayed.EXAMPLEexcat fpsThis will display all expressions in the .hip Þle that contain fps.1.7 EXEDITSYNTAXexedit [pattern]EXPLANATIONThis command allows you to edit expression functions. If no pattern is speciÞed,you can add new functions to the current list. If a pattern is speciÞed, the functionswhich match the pattern will be edited.Warning: If a function is renamed or removed from the edit session, this does notmean that the old function will be removed from the current function list. This mustbe done through the exrm command.EXAMPLEexedit $FAllows you to edit the expression functions containing $F.Tip: You can also edit expression functions using the dialog displayed from the Edit> Edit Aliases/Variables... menu command.1.8 EXHELPSYNTAXexhelp [pattern]EXPLANATIONDisplays help text for all expression functions matching the pattern speciÞed. If nopattern is speciÞed help for all the expressions is shown.EXAMPLEexhelp sin110 2 Houdini 6.0 Reference
Intrinsic CommandsDisplays the online help for the command chadd.1.9 EXLSSYNTAXexlsEXPLANATIONList all the current expression functions.1.10 EXREADSYNTAXexread diskfile [diskfile2...]EXPLANATIONThis command reads external Þles of expression functions.EXAMPLEexread /n/usr/staff/betty/[filename]This command reads the expression functions in the path and Þle(s) speciÞed.1.11 EXRMSYNTAXexrm [pattern]EXPLANATIONAll expression functions matching the pattern will be removed.1.12 EXITSYNTAXexit12 - <strong>Scripting</strong> 2 111
Intrinsic CommandsEXPLANATIONTerminates a source Þle. This will terminate all “if” statements and “for” loops correctly.It is not possible to specify an exit status, except that the setenv command canbe used to return a status in a global variable.1.13 FORSYNTAXfor VARIABLE = START to END [step INC]EXPLANATIONThe “for” loop construct. The loop will set the value of var to start. On each iterationof the loop, the value of var will have inc added to its value. The loop will terminateafter the end is passed. If the end value is achieved exactly, the loop williterate for this value. By default, the step size is 1. The end of the “for” loop isßagged by the end command. For example:houdini -> for i = 1 to 3> echo -n $i,> end1, 2, 3,The variable you specify loops from the beginning to the end according to the incrementyou set.EXAMPLEfor i = 1 to 3for i = 1 to 100 step 3In the examples above, the variable i will loop, in the Þrst instance, from one tothree. In the second instance, the variable will loop from one to one hundred inincrements of three.1.14 FOREACHSYNTAXforeach VAR (list)EXPLANATIONThe foreach loop construct. The loop will set the value of VAR to a different word inthe list for each iteration of the loop. The list is processed in the order speciÞed. Theend of a foreach loop is always signiÞed by the end command. For example:> foreach obj ( `execute(“opls”)` )> echo -n $obj,112 2 Houdini 6.0 Reference
Intrinsic Commands> endcam1, geo1, geo2, light1, light2,1.15 HELPSYNTAXhelp [command_pattern] [-k expression]EXPLANATIONIf no command is speciÞed, a list of available commands is displayed.If a command is speciÞed, help for that command will be displayed.The -k option allows you to search for keywords. All commands which contain thekeyword will be displayed.EXAMPLEhelp echoDisplays the help available for the echo command.help -k expressionchkey excat exedit exhelp exls exread exrm opcopy opfindEach of these commands has the word ’expression’ somewhere in the help for thecommand.1.16 HISTORYSYNTAXhistory [-c]EXPLANATIONDisplays the command history. If you employ the -c option, the command history iscleared.12 - <strong>Scripting</strong> 2 113
Intrinsic Commands1.17 IFSYNTAXif ( expr ) [then]...else if (expr2) [then]...else...endifEXPLANATIONIf expr is true, the commands up to the Þrst else are executed. If expr is false andexpr2 is true, then the commands between the two else statements are executed. Ifexpr2 is false, the commands between the else and the endif are executed. It is notnecessary to specify the two else statements.It is not possible to specify commands following the if statement. Any arguments(except the trailing then) are considered to be parts of the condition.A matching endif statement should always be used after an if statement if the ifstatement is more than one line.1.18 JOBSYNTAXjob [unix_path]EXPLANATIONSets the job variable to the path you specify.EXAMPLEjob /n/usr/caesarThis command line changes the job directory.1.19 MEMORYSYNTAXmemoryEXPLANATIONDisplays the current memory usage of the application that is running.114 2 Houdini 6.0 Reference
Intrinsic Commands1.20 PROMPTSYNTAXprompt [new_prompt]EXPLANATIONChange the current prompt. Before the prompt is displayed, the value of the promptis expanded. Therefore, it is possible to set the prompt to something very meaningful.EXAMPLEhoudini -> prompt ‘$HIPNAME Frame $y -> ‘untitled1.hip Frame 1 ->1.21 PRINTSYNTAXprint label expressionEXPLANATIONDisplays the value of the expression to stdout and returns the same expression value.This can be used to diagnose parameters in OPs or channels.Note: “print” in shell-speak doesn’t actually print to the printer, but displays theresult in the shell in which the command is executed.EXAMPLEprint("wheel:", sin($T))1.22 QUITSYNTAXquitEXPLANATIONTerminates the application. Some applications will not warn of quitting without saving(i.e. hscript), while others will (i.e. Houdini).12 - <strong>Scripting</strong> 2 115
Intrinsic Commands1.23 READSYNTAXread [-g] variable_name [variablename2...]EXPLANATIONWill read the following line into the variable names speciÞed. The Þrst argumentwill be put into the Þrst variable. The last variable speciÞed will contain the remainingarguments of the input line. If the -g option is speciÞed, the variables will be setas global variables instead of local variables. The -g option makes the variables global(see set p. 117).1.24 RKILLSYNTAXrkill [process]EXPLANATIONAny background render which has a process ID matching the process pattern speci-Þed on the command line will be terminated. Since the process argument speciÞedcan be a pattern, it is possible to kill multiple renders at once.EXAMPLErkill 9382rkill *The Þrst example stops the speciÞc background rendering process, while the secondstops all background rendering in progress.1.25 RPSSYNTAXrpsEXPLANATIONThis command lists active background render processes. The command lists theprocess identiÞcation number, the host on which the command is running, and thename of the command being run.116 2 Houdini 6.0 Reference
Intrinsic Commands1.26 SETSYNTAXset [-g] varname = valueset -p name = valueset -u nameset [-s]EXPLANATIONThe set command is used to assign local variables to the value given (use the setenvcommand to set global variables). With no arguments, it will list all current variablesand their current values.The -g (global) option on the set command makes it work like setenv, otherwise thevariable will be Local to the script Þle where the command is executed.If no name is speciÞed and the -s option is given, it will output the list of variables ina form which is useful for sourcing into another .hip Þle. This makes it easier tomove variables from one .hip Þle to another.The -p option will set the variable in the caller (or parent) script. If the currently runningscript is at the topmost level, then this option has no effect. This option lets youreturn values from within sourced scripts. For example, to set a return value into thevariable name passed into our script as the Þrst parameter, you would do somethinglike:set -p $arg1 = $returnValueThe -u option will un-set the speciÞed variable.See also: setenv .EXAMPLEsetenv -l HOUDINI_LOD = 2Temporarily changes the Houdini Level of Detail to 2 within the current script.THE DIFFERENCE BETWEEN SET AND SETENVUsing the setenv command in the scripting language is different than using the setcommand in two ways:1. The set command is local to the script which is currently running. This meansthat when another script is called, or the current script exits, the variable is nolonger visible. Also, this means that you can re-use variables within differentscripts without over-writing their values.2. The setenv command will create a global variable. The setenv command will alsoexport all variables to any processes started from Houdini. For example:hscript-> set foo = 0 ; unix echo '$foo'foo undefined variable12 - <strong>Scripting</strong> 2 117
Intrinsic Commandshscript-> setenv foo = 0 ; unix echo '$foo'01.27 SETENVSYNTAXsetenv [-l] varname = valuesetenv -u namesetenv [-s]EXPLANATIONThe setenv command sets the global variable you specify by name to the value speciÞed.If you do not provide a name, a list of all variables is displayed. When not providinga name, and using the -s option, the command will produce output suitablefor loading as a script.The -l (local) option on setenv makes it work like set – forcing the variable to actlocally, meaning their values are discarded once the current script Þle ends.If no name is speciÞed and the -s option is given, it will output the list of variables ina form which is useful for sourcing into another .hip Þle. This makes it easier tomove variables from one .hip Þle to another.The -u option will un-set the speciÞed variable.See also: set .Note: It is important to note that this command actually sets a real UNIX environmentvariable, its inßuence is therefore both within the Houdini shell, and in yourstandard UNIX shell. You can Þnd a complete list of Houdini-related environmentvariables in: Environment Variables p. 211.1.28 SHIFTSYNTAXshiftEXPLANATIONWhen a script is sourced, the arguments are set to variables $arg0, $arg1 ... Theshift command will shift the arguments so that $arg1 goes into $arg0, $arg2 goesinto $arg1 etc. The $argc variable is decremented to reßect the changes.118 2 Houdini 6.0 Reference
Intrinsic Commands1.29 SOURCESYNTAXsource filename [arg1...]EXPLANATIONSources a command script and executes the commands contained in the script untilthe exit command is reached or the end of Þle is reached. The arguments to thescript are passed in local variables $arg0... $argn. The number of arguments ispassed as $argc. This command is often used to load in Þles generated by opscriptand opwrite.EXAMPLEsource 123.cmdThis command runs the commands in the Þle 123.cmd.1.30 TIMESYNTAXtime [command]EXPLANATIONThe Time command allows you to time other commands (i.e. a render command or asource command). The time displayed shows how much user/system and real timethe command took.EXAMPLE0.0u 0.0s 0.0r% time render mantra10.1u 0.2s 18.7rThis indicates that Houdini took .1 seconds of CPU, .2 seconds of system time andthen had to wait 18.7 seconds of real time for mantra to Þnish rendering.1.31 UNDOCTRLSYNTAXundoctrl [on|off]undoctrl -s12 - <strong>Scripting</strong> 2 119
Intrinsic CommandsEXPLANATIONThis can turn on or off the undo mechanism in Houdini. With no options, the currentstate will be printed out. Please use this command with extreme caution. Turning offthe undo mechanism can cause scripts to execute with greater speed, but the changesmade by the script will not be undo-able. As well, be careful to restore the undostate at the conclusion of the script.The second usage with the -s option queries the memory usage of the undo mechanism.Note: Be careful to restore the undo state at the conclusion of the script! It wouldbe a shame to lose hours of work because a script forgot to turn undo’s back on.1.32 VERSIONSYNTAXversionEXPLANATIONDisplays the current version of the program you are running.1.33 WHILESYNTAXwhile (expression)...endEXPLANATIONThe while loop construct. A while loop will iterate continuously while the expressionevaluates true. When the expression is false, the loop will terminate. Thismeans you will have to manually include a variable within the expression, andincrement that variable somewhere within the body of the loop in order for a whileloop to Þnish its execution.Warning: It is very easy to create endless loops which will not terminate if you arenot careful about incrementing the variable within the expression somewhere withinthe body of your loop. You may want to use the foreach and for loop constructswhich implicitly increment your variable.EXAMPLEset i = 0while ( $i < 10 )set i = `$i+1`120 2 Houdini 6.0 Reference
Intrinsic Commandsecho $iendoutput: 1 2 3 4 5 6 7 8 912 - <strong>Scripting</strong> 2 121
Unix Related Commands2 UNIX RELATED COMMANDSThese commands provide a minimal interface to the UNIX shell.2.1 UCDSYNTAXucd [path]EXPLANATIONChanges the current working directory to the one you specify in the path statement.EXAMPLEucd /n/usr/staff/mulderIn this example the working directory would be altered to mulder.2.2 UPWDSYNTAXupwdEXPLANATIONThis command displays the current UNIX working directory.2.3 UNIXSYNTAXunix command [argument1...]EXPLANATIONRuns the UNIX command you specify. The command will be run in its own csh.EXAMPLEunix csh -f -cIn the example above, the csh will be started.122 2 Houdini 6.0 Reference
Plug-In Commands3 PLUG-IN COMMANDSThese commands are provided through plug-in modules. These plug-ins do not haveto be loaded, but provide extra functionality if they are.For an example of how to create a Tcl/Tk script, see <strong>Scripting</strong> chapter of the UserGuide.3.1 TCLSYNTAXtcl [args]EXPLANATIONThis command allows you to run scripts written in the Tcl language from withinHoudini, and is useful for customising Houdini’s interface and dialog boxes.Tcl starts a tcl shell with the arguments given. There is an additional command in tcl“hscript” which can be used to run any Houdini command. tcl is a public domainscripting language which has many powerful features (see tk).You can run a sample Tcl script by typing tk hbrowser.tk in the Textport. This scriptsimply brings up a Þle requester style browser which shows the Houdini objectsinstead of Þles. By double clicking on an object, you will see the contents of theobject. This is a quick way of seeing what objects are available.Tcl is a scripting language which is in common use around the world. Tk is anextension to Tcl which allows you to create Windows and interface elementsthrough the scripting language. You should be able to Þnd books that discuss Tcl/Tk(commonly pronounced “tickle”) in any computer book store.3.2 TKSYNTAXtk [args]EXPLANATIONTk is a version of Tcl which supports X11 and Motif extensions. This allows you tobuild custom user interfaces in scripts. Again, there are several books whichdescribe the tk language as well as a wealth of information on the world wide web.There are some simple example scripts installed in $HH/scripts/tk .12 - <strong>Scripting</strong> 2 123
Channel and Operator Commands4 CHANNEL AND OPERATOR COMMANDSThese commands deal with channels and operators in general. The commands havebeen written so there is a minimal number to become familiar with, yet powerfulenough to do almost anything that can be done through the graphical interface.4.1 BONECONVERTSYNTAXboneconvert [-r | -m] [-x] [-t]EXPLANATIONThis command is used to update old hip Þles to use the new bones introduced inHoudini 5. The conversions performed are:• All bones which have lock channels in their translate parameters matching:lock(0), lock(0), lock(-ch(strcat("../", strcat(opinput(".", 0), "/length"))))are changed to: lock(0), lock(0), lock(0) .The new bone objects have an output transform that places all child objects at theirend points. To force this conversion, use the -t option.• The Top Cap and Bottom parameters in the CRegion SOP of bone objects have theirmultiplication factor removed and multiplied into the values of the object-level cregionparameters. This will only be performed if the object-level cregion parametershave no channels. To deal with special cases, please see the options described below.• All bone objects have their xray ßag turned on. Use the -x option to avoid doing thisconversion.• Adds the command "boneÞxchops $OPSUBNAME" to the delete script.OPTIONSThe -r option forces the conversion of the CRegion SOP parameters even if theobject-level cregion parameters already have channels. This option is useful if youhave channel references in the object-level parameters that mirror other captureregions. The CRegion SOP parameters are forced to be correct without interpretationof the parameter.The -m option not only forces the conversion of the CRegion SOP parameters like:-r, but it will also attempt to add the multiplication factor if the object-level parametershave channels on them. This option will not have different behaviour if theobject-level cregion parameters do not have channels. It will also fail to add the multiplicationfactor if the cregion SOP parameters do not have an expression of theform * .124 2 Houdini 6.0 Reference
Channel and Operator Commands4.2 BONEFIXCHOPSSYNTAXbonefixchops [-r] bone_objectEXPLANATIONThis command is used to clean up InverseKin CHOPs that may reference the givenbone object before the bone is deleted. For example, if an InverseKin CHOP is usingan Inverse Kinematics solver on a bone chain from bone1 to bone4, and you execute"boneÞxchops bone4", this CHOP will be changed to apply its solver to the chainfrom bone1 to bone3. If you have an InverseKin CHOP that is using an Inverse Kinematicssolver on bone1 only, and you execute "boneÞxchops bone1", the CHOPwill be deleted. This command is used in the default delete script of bone objects.If the -r option is used, then it will recursively destroy all outputs of the foundInverseKin CHOPs as well.4.3 BONEMOVEENDSYNTAXbonemoveend bone_object [-f "world"|"parent"] [-x xpos] [-y ypos][-z zpos]EXPLANATIONThis command adjusts the length and rest angles of the given bone object so that inthe rest chain the bone would end at the speciÞed position.4.4 BOOKMARKSYNTAXbookmark [-a path] [-l] [-r path_pattern]EXPLANATIONThis command is used to add, list and remove path bookmarks.OPTIONS-a path Add path to bookmarks.-r path_pattern Remove path from bookmarks, wildcards such as *, ?and [ ] are valid.-l List current bookmarks.12 - <strong>Scripting</strong> 2 125
Channel and Operator Commands4.5 CHCPSYNTAXchcp source_channel_name destination_channel_nameEXPLANATIONCopies the contents of one channel to another. If the destination channel alreadyexists, its contents are deleted Þrst.EXAMPLESchcp /obj/logo/tx /obj/sky/tx_copyCopies the previously created tx channel of the logo object to be a spare channel ofsky named tx_copy.chcp /obj/logo/tx /obj/logo/tyCopies the previously created tx channel of the logo object to the ty channel, overwritingany existing keyframe information of ty.chcp /obj/logo/tx /obj/skyCopies the previously created tx channel of the logo object to the sky object.The new channel is named /obj/sky/tx.4.6 CHADDSYNTAXchadd [-f fstart fend] [-t tstart tend] object’s name1 [name2...][-f fstart fend][-t tstart tend]object’s nameRepresents the frame range you want to add the channelto.Represents the time range you want to add the channelto.Represents name of the object you wish to add a channelto.EXPLANATIONAdds channels to the speciÞed objects. You can specify objects using pattern matchingi.e. geo*. By default, the channels have a segment stretching from the beginningto the end of the animation. Specifying a frame, or time, range causes the segment toadopt that range.EXAMPLEchadd geo* tx ty tz spare1126 2 Houdini 6.0 Reference
Channel and Operator CommandsAdds channels tx, ty, tz and spare1 to all objects matching geo*.4.7 CHGADDSYNTAXchgadd -f group_name [second_name...]EXPLANATIONThis command creates a new channel group (or groups). If the group_name speci-Þed already exists, chgadd will not add a new group. The -f option can force chgaddto add a group. If there is already a group by that name, the new group is given aunique name.EXAMPLEchgadd bisonCreates the channel group bison.4.8 CHCOMMITSYNTAXchcommit [-l] [channel_pattern...]EXPLANATIONSimulates adding a keyframe (i.e. clicking the red Key button in the Playbar). The -loption will not modify, but only list pending keyframe changes to the Textport. If nochannel_pattern is speciÞed, all pending keyframes changes are assumed.4.9 CHGLSSYNTAXchgls [-l][-g] [pattern...]EXPLANATIONThis command lists channel groups. The -l option lists the contents of the channelgroup as well. The -g option generates commands which can be used to re-create thechannel group (or groups) speciÞed. If a pattern is speciÞed, then only the groupsmatching the pattern are listed.12 - <strong>Scripting</strong> 2 127
Channel and Operator CommandsEXAMPLEchgls -lLists the contents of all available channel groups4.10 CHGOPSYNTAXchgop group_name operation channel_pattern [second_pattern...]EXPLANATIONThis command performs operations on groups of channels. It allows for the additionor removal of channels from a group. group_name designates the name of the channelgroup to modify. The operation variable permits three actions on the group:setaddremoveSets the contents of the groupAdds channels to a groupRemoves channels from a groupThe channel_patern variable designates the list of channels to work on.EXAMPLEchgop group1 set /o*/g*/r?Sets the group’s contents to the channels.chgop group1 add /o*/g*/t?Adds channels to group one.chgop group1 remove /o*/g*/txRemoves tx channels from group one.4.11 CHGRMSYNTAXchgrm group_patternEXPLANATIONThis command remove a channel group or groups.EXAMPLEchgrm bison128 2 Houdini 6.0 Reference
Channel and Operator CommandsRemoves the channel group bison.4.12 CHHOLDUSAGEchhold [-b | -e] [channel_patterns]Or: chhold [-s] [-l]Allows you to put channels into a ’hold’ (or pending) state at the current time. Thiscan be used in conjunction with the chcommit command to force the creation ofkeys.OPTIONS-b (begin) Turn on the hold status for the given channels so thatthey remain in a pending state even if time changes. Ifno patterns are given, then all currently scoped channelswill be affected.-e (end) Releases the previously held channels. If no patternsare given, then it will release all held channels.-s (status) Queries the current hold status.-l (list) Lists currently held channels.4.13 CHKEYSYNTAXchkey [-f frame] [-t time] [-v value] [-m slope] [-a accel] [-Ffunction] channel_patternEdit or insert a key frame by specifying the following:-v The value at the key frame-m The slope at the key frame-a The acceleration at the key frame-F The expression function for the segment following thekeyframe.EXPLANATIONEdits or creates a key frame with the values you specify. If a key frame alreadyexists the time/frame you specify, the values for that key frame are modiÞed. Thechannel pattern speciÞes which channels are affected by the command.12 - <strong>Scripting</strong> 2 129
Channel and Operator CommandsEXAMPLEchkey -f 1 -v3 -F ’cubic ()’ geo*/t?Will, at frame one, set the value to three and the expression function to cubic () forall channels matching the pattern geo*/t?. The expression function should usuallybe bracketed by ‘ ‘ in order to prevent expansion of its contents. In this example, the() would be expanded, producing a syntax error.4.14 CHLSSYNTAXchls [-1] object_nameEXPLANATIONThis command lists the existing channels. If you specify the -1 option, the keyframes for the channel are listed.EXAMPLEchls -1 geo*/*This command string would produce a listing of the keyframes and channels for allgeometry objects (*/*). When you use this command, ensure that you specify theobject name.4.15 CHREADSYNTAX1) chread [-f fstart fend] channel_pattern ...filename.{chan,bchan}2) chread [-f fstart fend | -o fstart] [-r src_pat dest_pat]filename.{chn,bchn}3) chread -i filename.{chn,bchn}EXPLANATIONUsage 1: The speciÞed Þle is assumed to be a raw channel data Þle (.chan or .bchan)and column data from the Þle will be read and matched with the channels listed inthe order speciÞed. Loading will only occur in the frame range speciÞed or will startat the global animation start time if no range is given. The order of channels resultingfrom a pattern match is not well deÞned.Note that only channels with raw segments in the frame range will have valuesassigned to them. You must convert segments to raw before reading values in withchread.130 2 Houdini 6.0 Reference
Channel and Operator CommandsUsage 2: The speciÞed Þle is assumed to be a keyframe data channel Þle and loadedinto the current hip Þle. The Þle extension must be either be .chn (ASCII) or .bchn(binary). The -f option gives the frame range to load the data into. Keys will bescaled into the frame range if the Þle's range does not match. Instead of the -foption, the -o option simply gives the starting frame to load the data into (no scalingwill be done). If the -f and -o options are omitted, then the Þle’s frame range is used.If there are existing channels, then any animation outside the frame range will bepreserved with keyframes set at the beginning and end of the frame range.The -r option allows renaming of channel node paths before the channels are loadedfrom Þle. In the chwrite command, full paths of the nodes are saved out. This optionallows the mapping of animation from one set of nodes into a different set. Thisrenaming function will rename nodes from the data Þle in the same manner as howthe Rename CHOP functions. Here are some examples:old_path src_pat dest_pat result/obj/apple /obj/a*le /obj/b* /obj/bpp/obj/a_to_b /obj/*_to_*/obj/*(1)_to_*(0)/obj/b_to_a/obj/Lleg /obj/L* /obj/R* /obj/RlegFor any nodes that do not match the src_pat (source pattern), then will be loadedinto their original path. Note that if the destination node is not found, then loadingwill stop.Usage 3: The -i option takes speciÞed Þle (.chn or .bchn extension) and gives informationregarding the Þle. This option is similar in output to the command line"chinfo" program.See also: chwrite chadd chkey chls.4.16 CHRENAMESYNTAXchrename channel new_nameEXPLANATIONThe chrename command will rename a speciÞed channel to a new name. When achannel is renamed, references to that channel are not automatically updated (seethe opchange p. 141 command). If a channel which is bound to a parameter isrenamed, that parameter will no longer be animated. If a user deÞned channel isrenamed to a parameter channel, the parameter will become animated.EXAMPLESchrename /obj/geo1/tx translate_xchrename /obj/geo1/spare1 tx12 - <strong>Scripting</strong> 2 131
Channel and Operator Commands4.17 CHREVERSESYNTAXchreverse [-f fstart fend] [-t tstart tend] channel_patternEXPLANATIONThis command reverses selected channels for the frame range you specify. If youspecify neither the frame nor the time range, the entire length of the channel isreversed.EXAMPLEchreverse geo1/r*This command would reverse the rotation channels for the object geo1.4.18 CHRMSYNTAXchrm channel_patternEXPLANATIONThis action removes the channels you specify.EXAMPLEchrm geo*/t?In the example above, the translation channels would be removed from the geometryobject.4.19 CHRMKEYSYNTAXchrmkey [-f frame] [-t time] channel_patternEXPLANATIONRemoves the key frames for the designated channels. You must specify either thetime or the frame to identify the key frame you want to remove.EXAMPLEchrmkey -f 30 geo2/rx132 2 Houdini 6.0 Reference
Channel and Operator CommandsThis command removes the keyframe (thirty) for the x axis rotation channel for theobject geo2.4.20 CHROUNDSYNTAXchround [-v] -achround [-v] channel_patternEXPLANATIONThe chround command moves keyframes to lie on exact frame values. If the -a (all)option is speciÞed, then all channels in the entire session are scanned for keys thatrequire shifting. If a channel pattern is given instead, then only the speciÞed channelsare scanned.The -v (verbose) option causes the command to report all keys that are modiÞed,showing the old an new frame positions.This command is useful after changing the frame rate (FPS) of an animation whichcauses keyframes at the old frame rate to no longer lie on exact frames at the newframe rate.4.21 CHSCOPESYNTAXchscope [-w] [-c|-e @group_name] [channel_pattern ...]EXPLANATIONThe chscope command will set or modify the channel scope according to the patternsspeciÞed. Patterns may be preÞxed by a '+' or ',' character to add channels tothe current scope or by a '-' to remove channels from the scope. No preÞx or an '='character will set the scope to the given pattern. A channel group may be speciÞedas '@group_name'.If the -c (collapse) option is speciÞed, then all channel group name patterns will bescoped into the Dopesheet as a single row. Similarly, the -e (expand) option willscope and expand all channel group name patterns into separate rows in theDopesheet.If the channel editor is open when this command is executed it will load the newchannel scope. Multiple patterns may be speciÞed, in which case an implicit '+'operation is assumed between each argument.Note that the results will not be visible if the channel editor is not currently open.Specify the -w option to open a channel editor if it is closed.12 - <strong>Scripting</strong> 2 133
Channel and Operator CommandsIf no scope patterns are speciÞed this command will list all currently scoped channelsfrom the current folder on down.EXAMPLESThe following three examples are equvalent:chscope tx+ry+szchscope tx,ry,szchscope tx ry szOthere usages:chscope geo1/*-geo1/r?chscope +light1/t?chscope -light1/ty4.22 CHSTRETCHSYNTAXchstretch [-f fstart fend] [-t tstart tend] [-F nframes][-T nseconds] [-v] [-p pivot_frame] [-s] channel_pattern-F nframes speciÞes the number of frames to add or subtract-T nseconds speciÞes the number of seconds to add or subtract-f start end speciÞes the frame range to stretch-t start end speciÞes the time range to stretch-v enables verbose mode for the commandEXPLANATIONThis command stretches the channels speciÞed. Either the -F or -T option must bespeciÞed to indicate how much time to add or subtract (if the value is negative),from the channel.If the -f or -t options are speciÞed, the channel will only be stretched in the speciÞedrange. If neither the -f or -t options are speciÞed, then the whole channel will bestretched. If the -v option is speciÞed, the command will be verbose about whatchannels are stretched.EXAMPLEchstretch -F 10 geo1/txAdds 10 frames to geo1/tx. The frames are added so that each segment between keyframesgrows in proportion to the length of the channel.chstretch -f 30 60 -T 4.1 -v geo1/*Adds 4.1 seconds for all channels of geo1, however, it adds the time by moving keyframesbetween frame 30 and 60.134 2 Houdini 6.0 Reference
Channel and Operator CommandsWarning: If the time/frame range speciÞed does not fall directly on keyframes,then the following segments may also be adjusted slightly to accommodate thestretch.For example, if there are keyframes only at frame 1 and frame 150, and the framerange speciÞed is from frame 40 to 90, the keyframe at frame 150 will be adjusted toallow for a proper stretch.Also, if time is being removed, and more time is speciÞed than exists over the framerange, then some keyframes may not move as expected. i.e. it is not possible toreverse keyframes by removing more seconds than exist in the channel.chstretch -f 30 40 -F -30 geo/txThe command shown above will cause any keyframes between frame 30 and 40 tobe squashed to frame 30 because it is impossible to remove 30 frames from the 10frames speciÞed.4.23 CHWRITESYNTAX1. chwrite [-f fstart fend] channel_pattern...filename.{chan,bchan}2. chwrite channel_pattern ... filename.{chn,bchn}EXPLANATIONUsage 1: This command will write out the speciÞed channels as columns of raw valueswith one sample per frame across the given frame range. If no range is given thecurrent global animation time range will be used. Channels will be output in columnsin the order speciÞed. The output will be saved as ASCII data unless the Þlehas a sufÞx of ".bchan", in which case binary format will be used. The order ofchannels resulting from a pattern match is not well deÞned.Note: Channels need not be raw in order to save them using chwrite. The channelvalues will be sampled at the current frame rate.Usage 2: This command writes out the speciÞed channels along with their full nodepaths into the speciÞed Þle as keyframe data. The extension must be one of .chn(ASCII) or .bchn (binary). The chread command can be used to read these Þles.See also: chread, chadd, chkey, chls .4.24 HIPSYNTAXhip [unix_path]12 - <strong>Scripting</strong> 2 135
Channel and Operator CommandsEXPLANATIONIf no path is speciÞed, this command displays the current setting of the $HIP variable.If a path is speciÞed, it sets the $HIP variable to the path.EXAMPLEhip /usr/people/helene/jobsSets the $HIP environment variable to: /usr/people/helene/jobs .4.25 MREADSYNTAXmread [-m merge_pattern | -M] [-c] [-o] filenameEXPLANATIONReads a hip Þle with the following options:-m The -m option merges the speciÞed Þle into the currentHIP Þle. A pattern is speciÞed to indicate which sectionsof the Þle should be merged in.-M The -M option is a shortcut for -m * which will mergethe entire contents of the speciÞed Þle.-c If the -c option is speciÞed, a merge will not be done,but instead, a list of collisions is reported. Collisionsoccur when an object in the merge Þle has the samename as an existing object in the HIP Þle.-o If the -o option is speciÞed, the merge will attempt tooverwrite the nodes whose names collide with those inthe current session.EXAMPLESmread job3.hip # Replace current HIP file with job3mread -m * job3.hip # Merge in everything from job3mread -m *geo* job3.hip # Merge in all ops which match *geo*See also: mwrite, opread, source.136 2 Houdini 6.0 Reference
Channel and Operator Commands4.26 MWRITESYNTAXUsage1: mwrite [-i] [filename]Usage2: mwrite -c filenameEXPLANATIONWrite out a hip Þle containing the entire active session.-i If the -i option is speciÞed, then the Þlename is automaticallyIncremented.-b If the -b option is speciÞed, a numbered backup is created.That is, if the Þlename already exists, then it isrenamed to a Þlename containing the next number inthe sequence before saving. The -b and -i options areexclusive.-c If the -c option is speciÞed, then the Þlename is mandatoryand a partial hip Þle will be saved containing onlythe animation channels. To load such a channels-onlyhip Þle into a current session use the command:mread -o -M .See also: mread, opwrite, opscript.EXAMPLEmwrite -i example.hipThe command above writes and increments the motion Þle example.hip.4.27 KINCONVERTSYNTAXkinconvertDESCRIPTIONCreate InverseKinematic CHOPs for all bone objects that have a solver type otherthan ’none’. This command easily updates old (i.e. 3.0) .hip Þles to the new structurefor performing IK.12 - <strong>Scripting</strong> 2 137
Channel and Operator Commands4.28 NETEDITORSYNTAXneteditor [-d ] pane1 ...EXPLANATIONAllows different options of the Network Editor to be set. A valid pane name mustbe speciÞed. If no desk name is given, it will assume the current desk.OPTIONS-d Desktops to operate on. If blank, it will default to thecurrent desktop.-x 0|1 Display group dialog.-p 0|1 Display parameters.-c 0|1 Display the color palette.-e 0|1 Display expose ßag in list mode.-n 0|1 Display operator names.-o 0|1 Display the network overview-s 0|1 Toggle connection style (direct or not)-z 0|1 Minimize operator bar.-G The split fraction for groups-P The split fraction for parameters-S order Set the sort order. The order may be one of:user = User deÞned orderalpha = Alphabetictype = Operator typehier = Hierarchical-v path x y scale Changes how the network speciÞed by path should bedisplayed. The x and y refer to panning positions, andthe scale to the zoom level.4.29 NEXTKEYSYNTAXnextkey [-s | -c channel_list | -p]138 2 Houdini 6.0 Reference
Channel and Operator CommandsIf no arguments are speciÞed, nextkey will take you to the next keyframe using thecurrent method of key seeking.-p goes to the Previous key.-s seeks the next key by using the currently Scoped channels(i.e. the Channel List’s selection).-c seeks the next key by using keys from the speciÞedchannels.4.30 OBJPARENTSYNTAXobjparent [on|off|useflag]EXPLANATIONWith no arguments, the command returns the state of the "Keep Position whenParenting" option. With an argument, the command will set the speciÞed option.Objects which are re-parented (using opwire) when the option is turned "on" willalways maintain their world space position. If the option is "off", then it will neverchange the object's position. If the option is "useßag", then positioning of objectswhen re-parented will depend upon the keeppos (Keep position when parenting)parameter of the object.4.31 OPADDSYNTAXopadd [-n] [-v] [type [name] [name2...]-n Suppresses initialization.-v The -v option causes the opadd command to displaythe name of the operator that was created.EXPLANATIONThis command lists all valid operators. If you specify the type, you add an operatorof that type; if you designate a name, the operator is given that name. Before enteringthis command, you Þrst have to go to the folder speciÞc to that OP type.You can specify any number of names after you have speciÞed the type. Forinstance, opadd geo arms legs torso hands feet creates Þve geometry objectswith those names.12 - <strong>Scripting</strong> 2 139
Channel and Operator CommandsWhen any OP (i.e. SOP, COP) is created a script can be run. This can be used to initializecertain parameters or create other OPs. The directories where the scripts arelocated are as follows:OP TypeObjectSOPShadersTexture OPsCOP networksCOPsScript Directoryobjects/sops/materials/tops/comps/cops/The script which is run is determined by the type of the OP being added.For example, when adding a geo object, the script will be found in objects/geo.cmdThere is one argument passed to the script which is the name of the object.These scripts are only run when you add an OP interactively, or add one via theopadd command. The opadd command has an option to prevent the script frombeing run -n.EXAMPLEopadd cam eyeballThe above command adds a camera object (cam) named eyeball to the workingenvironment.If you had a geometry object (geo1) and typed:set test = `run(“opadd -v geo geo1”)` and then typed echo $test , geo2would be displayed.4.32 OPCFSYNTAXopcf op_pathEXPLANATIONChanges the working operations directory to that speciÞed in the path portion of thecommand. See also: ucd.EXAMPLEopcf /n/usr/dougThis command line changes the working directory’s path.140 2 Houdini 6.0 Reference
Channel and Operator Commands4.33 OPCHANGESYNTAXopchange from_pattern to_patternEXPLANATIONThis will search all operators for the from_pattern. If the pattern is found, it will bereplaced with the to_pattern. All parameters of all operators will be searched for thepatternThe -s option causes opchange to operate silently.Normally opchange outputs all the information about the changes being made.EXAMPLEopchange plastic constantChanges the word plastic to the word constant wherever it is found.See also: opÞnd4.34 OPCHANGETYPESYNTAXopchangetype [-n] [-p] [-c] -t operator_type operator_patternThis will change the given operators to the speciÞed type.OPTIONS-n Keep name-p Keep parameters-c Keep network contentsEXAMPLEopchangetype -n -p -t null /obj/logoSee also: opadd, opget, opparm, opset.4.35 OPCOOKSYNTAXopcook [-f frame_range] [-i frame_inc] [-v] object12 - <strong>Scripting</strong> 2 141
Channel and Operator CommandsEXPLANATIONThis command will cook, or process, any OP for a speciÞed range. This may haveuses for particle systems etc. When specifying the object, you either have to be inthe correct directory ( opcd /obj for object cooking) or specify implicitly the objectto be cooked.EXAMPLEopcook -f 1 35 -i 1 -v /obj/geo1/particle1Cooks a speciÞc SOP (particle1) for the indicated frames.4.36 OPCPSYNTAXopcp operator1 [operator2...] destinationEXPLANATIONThis will copy the speciÞed operators. If the destination directory is speciÞed thenthe operator(s) are copied there. If not, the operator will be copied to a new operatorwith the destination name (a new name will be generated if there’s already an objectof that name).EXAMPLEopcp geo*opcp /obj/geo1/* /obj/geo2opcp geo1 fredThe Þrst example copies all operators that start with geo to the current directory. Thesecond example copies all the operators in geo1 to geo2. The third example copiesgeo1 to fred.See also: opname p. 149.4.37 OPDEPENDSYNTAXopdepend [-b] [-i] [-I] [-o] [-u idx] [-e] [-p] [-s] [-l level] nodeor opdepend {-n | -N} [-b] [-l level] nodeEXPLANATIONLists all the operators that are either dependent on this object or that this objectdepends on. The -i (inputs) option lists all OPs that are the inputs to this node (i.ethat this object depends on). The -o (outputs) list all ops that depend on this node.142 2 Houdini 6.0 Reference
Channel and Operator CommandsThe -e option speciÞes “extra” inputs to this object. For example, a Texture TOP thatreferences a COP network for its source image.Note: To get correct results, you must cook the network Þrst.OPTIONS-b the output does not show full paths.-l Which level to descend to in the hierarchy.-i lists all OPs that are inputs to the node.-I lists all OPs that are indirect inputs to the node.-o lists all OPs that are outputs of the node.-O lists all OPs that are extra outputs of the node(i.e. list who depends on the node).-u with the -o option, speciÞes the index of the output tolook at when Þnding outputs of the node.-e lists all extra (reference) inputs to the node (for examplea CHOP that references a COP network for itschannels).-p select the nodes speciÞed.-s silent mode – no output to the textport.-n lists all name references starting from this node.-N lists all name dependents starting from this node.EXAMPLESopdepend -i -e /mat/blue_plasticopdepend -i -o -e /obj/geo1opdepend -i -p -s /obj/logoopdepend -n /obj/light1opdepend -N /obj/logo4.38 OPFINDSYNTAXopfind string12 - <strong>Scripting</strong> 2 143
Channel and Operator CommandsEXPLANATIONThis command will search all nodes in the project to Þnd the string speciÞed. Thestring is case sensitive and also must match a “word”.EXAMPLEopfind WelcomeIn this case, opÞnd will look for the string “Welcome”. The search is case sensitive,and looks for an exact match, therefore “welcome” or “elcome” would not displaywhat you are looking for.4.39 OPGADDSYNTAXopgadd group_name [second_name...]EXPLANATIONOpgadd creates one or more operator groups. Use the opgop command to add andremove operators from each group.See also: opgls, opgop, and opgrm. These commands allow you to perform operationson groups associated with a network. The groups can contain a list of operatorsfrom within the network.Note: Names may contain only alphanumeric characters or underscores. The namemust contain at least one alphaBETIC character or at least one underscore.The following are legal op names: _ _1 1_ 12345a a12345 hello .The following are illegal op names: 1 123 a:b fu-bar ?%!arrgh4.40 OPGETSYNTAXopget [-q] [flag] ... operators ...EXPLANATIONThe opget command queries individual operator ßags and outputs the result as an’opset’ command. The -q (quiet) option supresses messages from being displayedon an unknown ßag or operator.OPTIONS-d Display.144 2 Houdini 6.0 Reference
Channel and Operator Commands-r Render.-t Template.-b Bypass.-l Lock (off, soft, hard (or equivalently ’on’)).-e Expose.-h Highlight.-f Footprint.-s Save data in motion Þle.-u Unload data after cook.-c Compress icon,-C Set to be the ’current’,-p Set the ’picked’ ßag,-x Object pivot axes (Objects only)-y Xray (Objects only).-a Audio (CHOPs only).-o Export (CHOPs only).EXAMPLEopget -d geo*opget -p -r light*opget geo*/*See also: opadd, opchangetype, opparm, opset.4.41 OPGETINPUTSYNTAXopgetinput [-n num | -o outputop [-u outputidx]] inputopEXPLANATIONWith the -n option, this function returns the name of the node that is attached toinput num of the inputop. It returns the empty string if no input is attached to thegiven input. With the -o option, this function returns the input number of the inputopthat is connected to the outputop. If the outputop is not connected to the inputop, -1is returned. If the outputop is connected to more than one input of the inputop, thehighest input number is returned. When the -o option is speciÞed, the -u option can12 - <strong>Scripting</strong> 2 145
Channel and Operator Commandsalso be used to specify which output index of the outputop must be connected to theinputop. The default for this option is -1, which indicates that any output of the outputopshould be considered.4.42 OPGLOBSYNTAXopglob object_patternEXPLANATIONExpands the pattern according to the parameters you specify and then displays theresults of the expansion.EXAMPLEopglob geo...4.43 OPGLSSYNTAXopgls [-l][pattern...][-g] [group_pattern]EXPLANATIONLists operator groups. The -l option will list the names of the operators in eachgroup as well. The -g option generates commands which can be used to recreate thegroup(s) speciÞed. This option can be used to implement scripts for speciÞc groups.If a pattern is speciÞed, then only groups which match the pattern will be listed.4.44 OPGOPSYNTAXopgop group_name [set, add, remove] name_pattern[second_pattern...]EXPLANATIONThis command performs operations on operator groups (i.e. allows addition orremoval of operators from the group). group_name is the name of the operatorgroup to modify. It can be one of:setaddSet the contents of the groupAdd operators to group146 2 Houdini 6.0 Reference
Channel and Operator CommandsremoveRemove operators from groupThe name_pattern speciÞes a list of operators to be added/removed from the group.EXAMPLEopgop group1 set geo* opgop group1 add light1 light2 light3 opgopgroup1 remove geo4The above command sets the contents of group one to all geo objects, adds threelight objects to that group, and then removes geo4 from the group.4.45 OPGRMSYNTAXopgrm group_pattern [second_group...]EXPLANATIONRemoves the speciÞed operator groups from the current network.4.46 OPHELPSYNTAXophelp [operator] [operator type]EXPLANATIONDisplays help for an operator or for an operator type. Operator type is of the form/Available operator classes are:sopobjchmatpoptopcopoutEXAMPLESurface OperatorsObjectsCHOPsShadersParticle OperatorsTexture OperatorsComposite OperatorsDriversophelp sop/addophelp /obj/geo1Displays the help for add SOPs.Displays the help for the geo objects since /obj/geo1 isa geo object.12 - <strong>Scripting</strong> 2 147
Channel and Operator Commands4.47 OPINFOSYNTAXopinfo operator [operator...]EXPLANATIONDisplays information about the operator. This typically displays the informationcontained when clicking on the Info pop-up of an operator tile.4.48 OPLAYOUTSYNTAXoplayout [-p] [width] [height]EXPLANATIONArranges the operators according to your speciÞcations in the options of the commandstring. If the -p option is used, this command will only place the selectedoperators where there is space available in the Layout area.-p lays out only those operators that have been selectedwidthheightspeciÞes the width in inchesspeciÞes the height in inches4.49 OPLOCATESYNTAXoplocate [-d] [-x xval] [-y yval] object_patternEXPLANATIONThis command locates the operators you specify in the worksheet view. The bottomleft-hand corner of the worksheet has the coordinates 0,0 independent of any scrollingyou might have done.-d The -x and -y are the delta values and are added to thecurrent location-x SpeciÞes the X position-y SpeciÞes the Y positionIf neither x nor y are speciÞed, the current position is displayed.148 2 Houdini 6.0 Reference
EXAMPLEoplocate geo2This command provides you with the location of geo2 in the Layout Area, expressedin x,y coordinates.4.50 OPLSSYNTAXopls [options] [object_pattern]EXPLANATIONThis command lists the operators you have speciÞed in the object_pattern.-a Show all Þles (including hidden items).-l List items in long * format.-R Recursively list contents of Operators.For example, list all SOPs contained in the objectsor all operators in sub-networks.* The long format lists eight ßags along with the operator and the number of nodesit contains. The meanings of the ßags are:drtl/Le/hbcsEXAMPLEopls geo*opls /*/*/*Display ßagRender ßagTemplate ßagSoft lock/Hard lockExposed/HiddenBypassedCurrentSelectedThese two examples lists all geo(metry) operators, and all operators, respectively.4.51 OPNAMESYNTAXopname old_name new_nameEXPLANATIONRenames the speciÞed operator.149 2 Houdini 6.0 Reference | 12 - <strong>Scripting</strong>
Channel and Operator CommandsNote: Names may contain only alphanumeric characters or underscores. The namemust contain at least one alphaBETIC character or at least one underscore.The following are legal op names: _ _1 1_ 12345a a12345 hello .The following are illegal op names: 1 123 a:b fu-bar ?%!arrghEXAMPLEopname harv.geo nell.geoThis command gives the harv.geo object the new name nell.geo.4.52 OPORDERSYNTAXoporder operator1 [operator2...] before_operatorEXPLANATIONThe oporder command will reorder the speciÞed operators such that they appearbefore the before_operator. These changes will be reßected in the User DeÞnedsorting option for lists of operators in the user interface.EXAMPLEoporder geo1 cam2This example places the geo1 operator before the cam2 operator in the Object Editor’slist view.4.53 OPPARMSYNTAXopparm [-q] operator_pattern [-v] parametersopparm [-q] -c operator_name parameter [parameter_choice]opparm [-q] -d operator_pattern [-v] parameter_namesEXPLANATIONThe Þrst two instances of opparm will set parameters for the given operator. Thethird instance (-d) displays the contents of the listed parameter names for the givenoperator.The parameters are operator dependent and thus are different for each object type.To get a list of parameters, please try ’opscript’.If the -q (quiet) option is used, no warning or error messages are displayed.150 2 Houdini 6.0 Reference
Channel and Operator CommandsWhen using opparm to set parameter values, the animation channels of the parametersare deleted by default. But if the -v option is speciÞed and the value speciÞedfor the parameter is a number, then the channels aren't deleted. The opparm commandwill behave as if the values had been entered into a parameter dialog at thecurrent time.When using "opparm" to query parameters contents, the animation channels of theparameters will be displayed by default. Use the -v option to evaluate the channelsat the current time and display parameter values.clicking a virtual button (-c)The -c option allows the scripting language to “click” these types of buttons for you.If the parameter is a button which causes initialization or execution, setting the datadoes not invoke the function associated with the button. For these buttons, it is possibleto use the second usage (-c) to invoke the function. Examples of these types ofbuttons are in the Creep SOP (initialize), the Skeleton SOP (clear capture regions),and many render output drivers (the Render button).If the -c option is speciÞed on the wrong type of parameter, a usage message isprinted out. If an invalid parameter choice is speciÞed, a list of valid choices is alsoprinted.EXAMPLESopparm geo1 t ( 1 2 3 )opparm -c /obj/geo1/creep1 Initialize initfillopparm -d geo1 tSee also: opadd, opchangetype, opget, opset.4.54 OPPWFSYNTAXoppwfEXPLANATIONDisplays the current working folder. Similar to the UNIX pwd command.4.55 OPRAMPSYNTAXForm1: opramp operator_name pos r g b aForm2: opramp -r operator_name positionThe Þrst form of this command’s syntax adds a key in the color ramp of the speci-Þed OP (if it contains a color ramp) by specifying the name, position and the red,green, blue, and alpha values at that key.12 - <strong>Scripting</strong> 2 151
Channel and Operator CommandsThe second form removes a key at the speciÞed position (pos ranges from 0-1). Thiscommand is mostly useful for COP Ramps and Two tone shaders. The -r optionremoves a key frame from the ramp. The position of the key should be a valuebetween zero and one. If you set a key within 0.01 units of an existing key, that key’scolor will be altered. You cannot remove the ramp’s Þrst and last keys. For a list ofavailable keys, use the opscript command on the shader you want to modify.The opramp command is a more general implementation of the matramp command,which is actually an alias for opramp. This allows control of COP Ramps fromscripts. See also: matramp.4.56 OPREADSYNTAXopread ÞlenameEXPLANATIONReads the contents of the Þle into the current directory oppw. The Þle you specifyshould have been created using the opwrite command.EXAMPLEopread environment.hipReads the Þle environment.hip to the current directory.4.57 OPRMSYNTAXoprm object_patternEXPLANATIONRemoves the speciÞed objects.EXAMPLEoprm geo*This command removes all objects that adhere to the geo* pattern.4.58 OPSAVESYNTAXopsave [-f start end] [-i inc] object filename152 2 Houdini 6.0 Reference
Channel and Operator CommandsEXPLANATIONOpsave saves the contents of the designated object to the Þlename you specify.Options include the ability to specify a frame range as well as the increments to besaved.EXAMPLEopsave -f 1 10 -i 2 twist1 twist1\$F.ribThis command saves every other frame over the range one through ten for the objecttwist1 to the Þle twist\$F.rib.Note: opsave only saves the geometry belonging to a SOP.4.59 OPSETSYNTAXopset [flags] on|off [node_name]EXPLANATIONSets the options for the speciÞed node’s ßags. The ßags are as follows:-d Display-r Render-t Template-b Bypass-l Lock (off, soft, hard / on )-e Expose-h Highlight-f Footprint-s Save data in motion Þle-u Unload data after cook (CHOPs only)-c Compress icon-C Current-p Picked-S Selectable in Viewport (objects only)-x Object pivot axes (objects only)-y X-Ray (objects only)-a Audio (CHOPs only)-o Export (CHOPs only)12 - <strong>Scripting</strong> 2 153
Channel and Operator CommandsEXAMPLEopset -d on geo*opset -l on -s on geo*/*The Þrst example toggles the display ßags on for all geometry objects. The secondexample toggles both the save data and lock features on for all geometry objects.4.60 OPUNWIRESYNTAXopunwire node input_number [input_number...]EXPLANATIONThis command disconnects inputs from an operator node.EXAMPLEopunwire merge1 0 3 12The above command disconnects inputs 0, 3, and 12 from the merge1 operator.See also: opwire below.4.61 OPUPDATESYNTAXopupdateEXPLANATIONThis command causes all OPs which reference external disk Þles to re-cook if thereferenced disk Þle has been changed. Any cached textures or geometry Þles whichare out of date will be re-loaded.See also: texcache p. 161, geocache p. 159.4.62 OPWIRESYNTAXopwire [-n] object -input_number wire_object [-input_number...]EXPLANATIONThis command ’wires’ or connects the output of one OP node to the input of anothernode. It is recommended that for multiple input OPs like the merge SOP that the154 2 Houdini 6.0 Reference
Channel and Operator Commandsinputs are Þlled up consecutively. Use -input_number to specify which inputnumber to wire.The -n option will ignore the Keep Position when Parenting ßag on objects.EXAMPLEopwire twist1 -0 box1Connects twist1 to the Þrst input of box1.opwire box1 -0 merge1 ; opwire box2 -1 merge1Connects box1 to the Þrst input of merge1, box2 to the second input of merge1.See also: opunwire above.4.63 VARCHANGESYNTAXvarchange [-v] [-V]EXPLANATIONWhen a variable value changes, the OPs which reference that variable are not automaticallycooked. Running the varchange command causes all OPs which use a variablethat has changed to be re-cooked. The -v and -V options represent differentlevels of verbosity. -v will cause all changed variables to be listed. -V will also listall the OPs which get changed due to the variable changes.12 - <strong>Scripting</strong> 2 155
Commands to Manage Time Groups5 COMMANDS TO MANAGE TIME GROUPS5.1 TMGADDSYNTAXtmgadd -t time | -f frame group_name [second_name...]EXPLANATIONCreates one or more time groups.EXAMPLEtmgadd -f 35 group_oneCreates time group group_one at frame 35.5.2 TMGLSSYNTAXtmgls [-l] [-k] [pattern...]EXPLANATIONLists time groups.-l Lists time groups. The -l option will list the full contentsof a time group. If a pattern is speciÞed, then onlygroups which match the pattern are listed.-k The -k option lists only some of the keys belonging tothe time group. If a pattern is speciÞed, then onlygroups which match the pattern are listed.EXAMPLEtmgls -l newt*Lists the contents of groups matching the pattern newt*.156 2 Houdini 6.0 Reference
Commands to Manage Time Groups5.3 TMGNAMESYNTAXtmgname old_name new_nameEXPLANATIONRenames the speciÞed time group to the new name.5.4 TMGOPSYNTAXtmgop -t time_from time_to | -f frame_from frame_to group_nameoperation channel_pattern [second_pattern...]EXPLANATIONThis command performs operations on time groups (i.e. allows addition or removalof keyframes from the group).optionsgroup_nameThe name of the time group to modifyoperationCan be one of:setaddremoveSets the contents of groupAdd keyframes to groupRemove keyframes fromgroupchannel_patternspeciÞes a list of channels to work on.EXAMPLEtmgop -f 1 50 group1 set /o*/g*/r?Sets the contents of time group group1 to the rotate channels (i.e. r?) of all objectsthat start with the letter “g” (i.e. g*).tmgop -f 1 50 group1 add /o*/g*/t?Adds channels to group1.tmgop -f 1 50 group1 remove /o*/g*/txRemoves /tx channels from group1.12 - <strong>Scripting</strong> 2 157
Commands to Manage Time Groups5.5 TMGRMSYNTAXtmgrm group_pattern [second_group...]EXPLANATIONRemoves the speciÞed time groups.5.6 TMSHIFTSYNTAXtmgshift [-a] [-g] [-r] -f numframes | -t time group_nameEXPLANATIONShift the time group by a certain number of frames or by an increment of time.-a Will shift everything absolutely i.e. tmshift -a -f 55 T1will move the time group to frame 55-g Will only shift the time group and not its members-r The shift will only occur if it can within the keyframeboundaries.158 2 Houdini 6.0 Reference
Operator-Specific Commands6 OPERATOR-SPECIFIC COMMANDSThis set of commands deals with speciÞc types of operators. Some operators havespecial features which don’t Þt into the paradigm of the general commands, so speciÞccommands have been created to access these functions.6.1 COMPFREESYNTAXcompfreeEXPLANATIONThis command releases all cached images from all composite networks in the currentHoudini session. Use after working in the composite editor, when current imagecaches are no longer required.6.2 GEOCACHESYNTAXgeocache [-s] [-l] [-c] [-a 0|1] [-m max]EXPLANATIONThis command allows access to the internal geometry cache.The geometry cache is used by VEX geometry functions.query options-s See the current settings-l List the contents of the geometry cachecontrol options-c Clear the cache-n Clear the cache only if newer Þles exist on disk.-a Turn auto-ßushing of geometry Þles on or off. Leavingthe geometry in the cache (i.e. no auto-ßushing)improves performance at the cost of extra memory.-m Specify the cache size (in Kb).This defaults to 8192 (8 Mb).See also:texcache p. 161, texcache p. 161, opupdate p. 154.12 - <strong>Scripting</strong> 2 159
Operator-Specific Commands6.3 MATRMANSYNTAXmatrman material nameEXPLANATIONSaves the material speciÞed in RenderMan Shader Language. This provides a simpleway of generating RenderMan shaders very quickly. The output of this commandmay be re-directed to a Þle.EXAMPLEmatrman phong1 > /tmp/phong1.slThis command saves the material phong1 as a RenderMan shader in the speciÞeddirectory.6.4 MATRAMPSYNTAXForm1: matramp material_name position r g b aForm2: matramp material_name -r positionEXPLANATIONThe Þrst form of this command’s syntax sets a key in a shader’s ramp by specifyingthe name, position and the red, green, blue, and alpha values at that key.The second form removes keys from a shader’s ramp. The -r option removes a keyframe from the ramp. The position of the key should be a value between zero andone. If you set a key within 0.01 units of an existing key, that key’s color will bealtered. You cannot remove the ramp’s Þrst and last keys. For a list of available keys,use the opscript command on the shader you want to modify.EXAMPLEmatramp twotone1 0.5 18 2 6 1This command generates a key on the Two tone shader’s ramp at the halfway mark.Its red, green, blue, and alpha values are listed sequentially, producing a headacheinducingcolor ramp.6.5 RENDERSYNTAXrender [-V] driver_name160 2 Houdini 6.0 Reference
Operator-Specific CommandsEXPLANATIONThis command causes an output driver to render.The -V option causes a line of output as each frame begins rendering.For example: 11:46:06 Rendering frame 1 (1 of 3)EXAMPLE% render mantra1This will cause the output driver named mantra1 to render.6.6 TEXCACHESYNTAXtexcache [-s] [-l] [-c] [-a on|off] [-r xres yres] [-m max]EXPLANATIONThis command allows access to the internal texture map cache used by Houdini. Thetexture map cache is used when displaying texture maps in the Viewports (or alsofor background images when texturing is turned on).query options-s See the current settings.-l List the contents of the texture map cache.control options-c Clear the cache.-a Turn auto-ßushing of maps on or off. Leaving maps inthe cache improves performance at the cost of extramemory.-r Specify the maximum resolution of an image for thecache. This does not include maps stored in COPs.-m Specify the cache size (maximum number of imagesstored in the cache).12 - <strong>Scripting</strong> 2 161
Time Related Commands7 TIME RELATED COMMANDS7.1 FCURSYNTAXfcur [frame]EXPLANATIONSets the current frame to the frame speciÞed.EXAMPLEfcur 15Sets the current frame to frame 15.7.2 FPLAYBACKSYNTAXfplayback [-i on|off] [-r on|off] [-f factor] [-s step_size]EXPLANATIONThese commands are used to save the state of the playbar to motion Þles. Now, theinformation will be retrieved from motion Þles when they are loaded.Options:-i Integer frame values on or off-r Real-time on or off-f Real-time factor-s Non-real time frame step size7.3 FPSSYNTAXfps [frames_per_sec]162 2 Houdini 6.0 Reference
Time Related CommandsEXPLANATIONSets the output rate to the value you specify. If the value isn’t speciÞed, the currentframes per second rate is used. See also: chround.EXAMPLEfps 30The command above sets the output rate at thirty frames per second.7.4 FRANGESYNTAXfrange [start end]EXPLANATIONSpecify the frame range for playing the animation. If the range is not speciÞed, thenthe current range is displayed.EXAMPLEfrange 20 607.5 FSETSYNTAXfset [nframes]EXPLANATIONSets the frame range is set to the number of frames speciÞed. If no frame count isspeciÞed, the current frame range is displayed.EXAMPLEfset 30-100The command above speciÞes that frames thirty to one hundred should be displayed.12 - <strong>Scripting</strong> 2 163
Time Related Commands7.6 FTIMECODESYNTAXftimecode [timecode]EXPLANATIONSets the current frame to the timecode speciÞed. If none is speciÞed, the currentframe is displayed in timecode format.7.7 TCURSYNTAXtcur [time]EXPLANATIONSets the current frame to the time speciÞed. If you don’t set the time, the currenttime is displayed.7.8 TSETSYNTAXtset [time]EXPLANATIONSets the frame range to the time speciÞed. If no time is speciÞed, the current time isdisplayed.164 2 Houdini 6.0 Reference
Interface Related Commands8 INTERFACE RELATED COMMANDSThese commands are speciÞc to Houdini’s user interface. They have no effect whenrunning from the scripting version of Houdini (hscript), but will produce warningsindicating that information may not be saved correctly.8.1 QUAD-VIEW REFERENCING CONVENTIONS (FIND: UPDATE!)The view commands described in this section allow access to the parameters of eachof the individual viewports. If, for example, you wanted to change the level of detailin the perspective viewport in the modeler you could type:viewdisplay -l 3 Build.pane1.world.persp1To get a list of valid Viewport names, use:viewls -vNote: As a convenience, can be any regular expression.Thus, Build* references Build.top, Build.front1, Build.persp1 etc.Currently, cannot be a pattern, nor can the memory name when referencinga view memory with the form :.Note that some commands do not support pattern matching of Viewport names:• viewcopy does not support pattern matching for the source viewport• viewtransform does not support pattern matching at all8.2 ANIMVIEWSYNTAXanimview [-v port|edit|both] [-c graph|table|both][-S ] [-s ]EXPLANATIONSets the Animation Editor screen layout options. This command is primarily used tosave and restore the Animation Editor layout in a .hip Þle. The split fractions set theposition of the screen area split bars, and are ßoating point values between zero andone.OPTIONS-v Set Main View layout.-c Set Channel Editor layout.-S Set main screen split fraction.-s Set channel chooser split fraction.12 - <strong>Scripting</strong> 2 165
Interface Related Commands8.3 AUDIOPANELSYNTAXaudiopanel [options]EXPLANATIONChange the parameters for the audiopanel (in the Options menu).If no options are speciÞed, the current settings are displayed.OPTIONS-s n Set the network menu.-s o Set the CHOP menu.-s r on|off Set the scrub repeat toggle.-s s Set the scrub sustain value.-s f Set the scrub rate value.-t p reverse|stop|playSet the test play direction.-t l on|off Set the test loop toggle.-t r on|off Set the test rewind toggle.-o m on|off Set mono output toggle.-o t on|off Set volume tied toggle.-o u on|off Set meter toggle.-o l Set the left volume.-o r Set the right volume.-o d 0 | 1 | 2 Turn off audio | Timeline mode | Test mode.Note: There can only be one -s, -t or -o option speciÞed per command.8.4 CHLAYOUTSYNTAXchlayout options network_pattern166 2 Houdini 6.0 Reference
Interface Related CommandsEXPLANATIONThe chlayout command is used to customize all aspects of each speciÞc CHOP Network.If no options are speciÞed, the current settings are displayed.OPTIONS-a Set the Notes CHOP index.-b Set the number of graphs (less one).-B Graph type: 0=all, 1=per channel, 2=per CHOP,3=per name.-c Graph scope exclusions of the form:“chop chanel chop channel...” .-d on|off Toggles display of dots at each sample of the CHOPchannel. Useful for debugging sampling errors by visuallyexaming the individual values of the channel.(shortcut: type d in the CHOP Graph).-e on|off Display extend regions toggle.-g low|medium|high Grid density.-h on|off Display handles toggle.-H on|off Horizontal adapt toggle.-i on|off Swap interface toggle.-l on|off Display labels toggle.-L 0|1 List mode (0=network, 1=list)-m Graph height start/end range.-n on|off Graph disable toggle.-o Graph dimensions.-p on|off Scope disable toggle.-r h Graph horizontal start/end range.-r b Bar height start/end range.-s on|off Scroll lock toggle.-S Scroll lock position.-t on|off Time bar toggle.-T 0|1 List order: 0=alphabetic, 1=user deÞned.12 - <strong>Scripting</strong> 2 167
Interface Related Commands-u UnitType: “frames”, “samples”, “seconds”.-v graph|bar Graph viewing mode.-V on|off Vertical adapt toggle.-w on|off Full width toggle.-W Viewport settings script.8.5 CLOSEPORTSYNTAXcloseport port_numberCloses a communication port created by the openport command.See Also: openport; Stand Alone > hCommands p. 428.8.6 CPLANESYNTAXcplane [options] viewersModiÞes or displays current construction plane parameters.OPTIONS-o x y z Sets origin to (x, y, z)-n x y z Sets plane normal to (x, y, z)-x x y z Sets plane horizontal axis to (x, y, z)-u x y z Sets the up-vector to (x, y, z)-l [n|x|y|z] Locks the up-vector to either the plane normal, worldX-axis, world Y-axis or world Z-axis.-s x y Sets the grid spacing to x units along the X-axis and yunits along the Y-axis.-r a b Sets the grid ruler to a units along the X-axis and yunits along the Y-axis.-c a b Sets the # of grid cells to a along X and b along Y.-d [on|off] Turns construction plane display on or offFor details on how to specify viewers, type "help viewerformat"168 2 Houdini 6.0 Reference
Interface Related CommandsEXAMPLEScplane -o 0 0 0 *cplane -o 1 1 1 -n 0 0 1 -r 10 10 Build.pane1.world8.7 DOUBLEBUFFERSYNTAXdoublebuffer [on|off]EXPLANATIONThis command turns double buffering on or off. If no options are passed to the command,the current state is returned.Double buffering improves the quality of moving images on a 24 bit monitor. IfDouble Buffering is not used, everything is drawn directly to the screen without anysynchronization to the monitor’s refresh rate. This causes areas of the screen whichare being frequently redrawn tend to be displayed while only partially redrawn, thisproduces a ’ßickering’ effect.When Double Buffering is on, the new image is drawn in an offscreen buffer invideo RAM and then swapped into the display almost instantaneously, thereby eliminatingthe display of half-drawn images, and the ßicker.Why not have it on all the time? Because some machines do not have sufÞcientvideo RAM to perform double buffering in full (24 bit) colour. The colour resolutionmust be halved and then still-frame image quality is reduced due to dithering.8.8 EDITORWarning: This command is obsolete since 4.0. Similar commands are: desk, pane.8.9 NETEDITORSYNTAXneteditor [-d ] pane1 ...EXPLANATIONAllows different options of the network editor to be set. A valid pane name must bespeciÞed. If no desk name is given then it will assume the current desk.OPTIONS-d Desktops to operate on. If it is blank it will default tothe current desktop.12 - <strong>Scripting</strong> 2 169
Interface Related Commands-x 0|1 Display group dialog.-p 0|1 Display parameters.-c 0|1 Display the color palette.-e 0|1 Display expose ßag in list mode.-n 0|1 Display operator names.-o 0|1 Display the network overview.-s 0|1 Toggle connection style (direct or not).-z 0|1 Minimize operator bar.-G The split fraction for groups-P The split fraction for parameters-S order Set the sort order. The order may be one of:user = User deÞned orderalpha = Alphabetictype = Operator typehier = Hierarchical-v path x y scale Changes how the network speciÞed by path should bedisplayed. The x and y refer to panning positions, andthe scale to the zoom level.8.10 OMBINDSYNTAXombind [-t ] [-d ] EXPLANATIONBinds an operator parameter to the movement of a manipulator.OPTIONS-t Network type. Available types are obj, sop, pop, andtop. The default value is sop if the argument is unspeciÞed.The label to associate with the bind operation. If thelabel exists, the new binding is appended to the groupof bindings with the existing label.String specifying both the operator and the parameter170 2 Houdini 6.0 Reference
to be bound, delimited by a colon.String specifying the manipulator and parameter tobind, delimited by a colon.The default settings for this manipulator type whenbound to this type of operator. The meaning of thesesettingsvaries between types of manipulators. Thisoption only has meaning when the instance of themanipulator does not yet exist (i.e.it only works for theÞrst ombind command in the set of commands for onemanipulator).To turn the manipulator off by default,use a default setting of "i".EXAMPLEombind -t sop "First U" carve:group uisoparm:inputombind -t sop "First U" carve:domainu1 uisoparm:kThe Þrst command binds the group parameter of the carve sop, to the movement ofthe input parameter of the uisoparm handle.The "First U" instance is created assuming it is not already created. The domainu1binding to the manipulator parameter k is appended to the existing "First U"instance.See also: ombindinfo, omls, omunbind, omwhere, omwrite.8.11 OMBINDINFOSYNTAXombindinfo [-t ] Lists the parameters that are bound to a manipulator for the speciÞed operator.OPTIONS-t Network type. Available types are: obj, sop, pop, andtop. The default value is sop if the argument is unspeci-Þed.The operator.OUTPUT FORMATinstance manipulator { op_parm->manipulator_parm ... }EXAMPLEombindinfo carveLists the bound parameters of the carve sop operator.171 2 Houdini 6.0 Reference | 12 - <strong>Scripting</strong>
Interface Related CommandsSee also: ombind, omls, omunbind, omwhere, omwrite.8.12 OMLSSYNTAXomls [-t ] [manipulator]Lists the available manipulators for the given operator type. If the manipulatorparameter is speciÞed, this command lists the bindable parameters of the speciÞedmanipulator.OPTIONS-t Network type. Available types are: obj, sop, pop, andtop. The default value is sop if the argument is unspeci-Þed.manipulatorIf unspeciÞed, omls lists the available manipulators.Otherwise a list of bindable parameters for the speci-Þed manipulator is displayed.EXAMPLEomls domainLists the bindable parameters of the domain manipulator.See also: ombind, ombindinfo, omunbind, omwhere, omwrite.8.13 OMPARMSYNTAXomparm For the given manipulator (handle) and operator node, set the manipulators's settingsto the speciÞed settings string. These settings will be used the next time theuser enters the state for this operator node.The values for the settings are speciÞc to the type of manipulator and are undocumented.This command is used internally to save manipulator settings to the hipÞle.See also: ombind, ombindinfo, omunbind, omwhere, omwrite.172 2 Houdini 6.0 Reference
Interface Related Commands8.14 OMUNBINDSYNTAXomunbind [-t ] [instance]Removes the bindings between an operator and manipulator that match the speciÞedsearch criteria.OPTIONS-t Network type. Available types are: obj, sop, pop, andtop. The default value is sop if the argument is unspeciÞed.SpeciÞes the bindings to remove with respect to thebound operator. Legal formats include: operator_nameoperator_name:parm_name The operator name mustbe speciÞed.SpeciÞes the label of the manipulator that should bedisconnected from the speciÞed operator or parameter.EXAMPLESomunbind xformRemoves all bindings for the xform sop.omunbind xform:txRemoves all bindings to xform's tx parameter.omunbind xform:tx TransformerRemoves all bindings of xform's tx parameter that are bound to the Transformerhandle.See also: ombind, ombindinfo, omls, omwhere, omwrite8.15 OMWHERESYNTAXomwhere [-t ] [manipulator]Lists the operators bound to the speciÞed manipulator.OPTIONS-t Network type. Available types are obj, sop, pop, andtop. The default value is sop if the argument is unspeciÞed.12 - <strong>Scripting</strong> 2 173
Interface Related Commands[manipulator]If unspeciÞed, lists all operators bound to a handle.EXAMPLEomwhere pivotLists those operators bound to the pivot handle.See also: ombind, ombindinfo, omls, omunbind, omwrite.8.16 OMSBINDSYNTAXomsbind [-t ] Binds an operator parameter to a selector.OPTIONS-t Network type. Available types are obj, sop, pop, andtop. The default value is sop if the argument is unspeciÞed.String specifying both the operator and the parameterto be bound, delimited by a colon. The parameter speciÞcationis optional.The name of the selector type. A list of selectors can beobtained using the omsls command.A description of the purpose of the selector. Used withomsunbind.The string that is displayed in the status area when theselector is active.Index of operator input where the result of this selectionshould be fed.SpeciÞes if this input is required.A string representing the types of primitives that can bepicked using this selector. This string can consist ofone or more primitive types, or primitive types precededby a "^" to remove that primitive type from theselectable primitive types. The available primitivetypes are: all, face, poly, nurbcurve, bezcurve, hull,mesh, nurb, bez, quadric, circle, sphere, tube, particle,and meta.174 2 Houdini 6.0 Reference
Interface Related CommandsDetermines if the user is allowed to select and beginmanipulation with a single mouse click. Name of the operator's "Group Type" parameter (or ""if there is none). This lets the selector set this parameterto "Primitive" if the user selected primitives,"Points" if the user selected points, etc.If set to a non-zero value, this indicates that the groupparameter requires a "*" to select all geometry. A zerovalue indicates that the group parameter should be leftblank if the whole geometry is selected.EXAMPLEomsbind -t obj blend objselect "Second Input" "Select the secondblend input" 1 1 all 0 "" 0Binds a simple object selector to the second input of the blend object.See also: omsbindinfo, omsls, omsunbind, omswhere, omwrite.8.17 OMSBINDINFOSYNTAXomsbindinfo [-t ] Lists the selectors that are bound to the speciÞed operator.OPTIONS-t Network type. Available types are obj, sop, pop, andtop. The default value is sop if the argument is unspeciÞed.The operator.OUTPUT FORMATselector "Selector Label" "Selector Prompt"op_parameter op_input_index op_input_required primmask allow_dragmenu_name ast_sel_allEXAMPLEomsbindinfo carveLists the bound selectors of the carve sop operator.See also: omsbind, omsls, omsunbind, omswhere, omwrite.12 - <strong>Scripting</strong> 2 175
Interface Related Commands8.18 OMSLSSYNTAXomsls [-t ]Lists the available selectors for the given operator type.OPTIONS-t Network type. Available types are obj, sop, pop, andtop. The default value is sop if the argument is unspeciÞed.EXAMPLEomsls -t objLists the selectors that can be bound to object parameters.See also: omsbind, omsbindinfo, omsunbind, omswhere, omwrite.8.19 OMSUNBINDSYNTAXomsunbind [-t ] [instance]Removes the bindings between an operator and selector that match the speciÞedsearch criteria.OPTIONS-t Network type. Available types are obj, sop, pop, andtop. The default value is sop if the argument isunspeciÞed.SpeciÞes the operator from which to remove bindings.SpeciÞes the label of the selector that should be disconnectedfrom the speciÞed operator.EXAMPLEomsunbind particleRemoves all selector bindings for the particle SOP.omsunbind particle "Force Geometry"Removes the selector with the label "Force Geometry" from the particle SOP.See also: omsbind, omsbindinfo, omsls, omswhere, omwrite.176 2 Houdini 6.0 Reference
Interface Related Commands8.20 OMSWHERESYNTAXomswhere [-t ] [selector]Lists the operators bound to the speciÞed selector.OPTIONS-t Network type. Available types are obj, sop, pop, andtop. The default value is sop if the argument is unspeciÞed.[selector]If unspeciÞed, lists all operators bound to a selector.EXAMPLEomswhere everythingLists those operators bound to the everything selector.See also: omsbind, omsbindinfo, omsls, omsunbind, omwhere.8.21 OMWRITESYNTAXomwrite [bindings_file]This command writes out all manipulator and selector bindings to the speciÞed Þle.If no Þle name is speciÞed, this argument defaults to $HOME/houdini5/OPbindings.The format of this Þle is such that it can replace the default bindings Þle found in$HH/OPbindings.See also: ombind, ombindinfo, omls, omunbind, omwhere, omsbind, omsbindinfo,omsls, omsunbind, omswhere.8.22 OPENPORTSYNTAXopenport port_numberOpens a communication port to Houdini. This allows the hcommand program to runTextport commands from a remote process.See Also: closeport; Stand Alone > hCommands p. 428.12 - <strong>Scripting</strong> 2 177
Interface Related Commands8.23 PANESYNTAXpane [-d desk_name] pane_nameEXPLANATIONAllows different options of the pane to be set. A valid pane name must be speciÞed.If no desk name is given then it will assume the current desk.Also if no options are speciÞed then all panes of that desktop will be listed.OPTIONS-c 0|1 Follow the parent's current node selection.-f 0|1 Toggle fullscreen mode.-l 0-5 Set the link value on the current pane.A zero turns linking off.-m type Valid types are:neteditorchaneditorgeosheetlistchansparmeditortextportuicustomviewermaniplist-h path Set the operator path.-T type Set the operator type. This is used to determine whattype of network (SOP, CHOP, POP, etc.) the desktopreferred to if the -h path doesn’t exist.-o Open a new copy of the pane.-p Move the playbar to this pane.-s 0|1 Split the pane in two:0 – left/right, 1 – top/bottom.-t 0|1 Tear off the window (1), or put it back (0).-z Close the pane.178 2 Houdini 6.0 Reference
Interface Related CommandsEXAMPLESpane -f 1 pane2pane -h /obj pane2pane -l 0 -p pane2Turn fullscreen mode on for pane2.Set the path to objects for pane2.Turns linking off and moves the playbar to pane2.8.24 PERFORMANCESYNTAXperformance [options]EXPLANATIONChange the parameters for the Performance Monitor (noramlly to be found in theOptions > Performance Monitor.options-l off|window|stdout Set the Output Log mode.-c on|off Set Monitor OP Cook toggle.-o on|off Set Monitor Object Display toggle.-v on|off Set Monitor Viewport Display toggle.-f on|off Set Monitor Frame Length toggle.-i on|off Set Tile Statistics in OP Info toggle.-h on|off Set Tile Hilight when Cooking toggle.-s on|off Set Single Frame Capture toggle.-p on|off Set Pause toggle.-e on|off Set Enable Output toggle.When no options are speciÞed, the current settings are displayed.8.25 PLAYSYNTAXplay options12 - <strong>Scripting</strong> 2 179
Interface Related CommandsEXPLANATIONThe play command controls the Playbar. If neither the -r or -s options are not speci-Þed, the playbar will start playing forwards.options-1 The -1 (number ’1’) causes playback to occur one timeonly, and will stop when it reaches the last frame.-l The -l (letter “l”) causes play in loop mode, repeatingover and over again until explicity stopped.-z Play in zigzag mode – alternately playing backwardsand then forwards.-s Stops playback.-r Play in reverse.Tip: To set the Playbar to a speciÞc frame number, use the fcur command.8.26 VIEWBACKGROUNDSYNTAXviewbackground [options] viewnameEXPLANATIONThis command sets background/rotoscoping parameters for a Viewport. When nooptions are speciÞed, the current settings of the speciÞed Viewports and view-memoriesare displayed.OPTIONS-b on|off Turn background image on or off.-t on|off Turn texture mapped backgrounds on or off.-a on|off Turn automatically placing background image on oroff. To use Þxed background image offset and scale,this option must be off and texture mapped backgroundsmust be on.-o x y Offsets the image by x and y.-s x y Scales the image by x and y.-q quality Quality of the background image.-S file|cop The source of the background image.180 2 Houdini 6.0 Reference
Interface Related CommandsFor Files only:-F The Þlename of the disk Þle.-O on|off Toggles manual override of the Þle res.-r Manually sets the Þle res.For COPs only:-c icename copname Specify the COP to use as a background image.-f frame The frame of the image to display-p Sets the Color and Alpha planes to use.EXAMPLEviewbackground -b off Build*Entering this command in the Textport turns off the display of background images inall of the Build desk’s Viewports.8.27 VIEWCAMERASYNTAXviewcamera [-c camera_name] viewname [viewname2...]EXPLANATIONThis command sets the camera to view through for the Viewport(s) speciÞed. If theViewport does not support viewing through a camera (i.e. Geometry Editor Viewports),or if the object speciÞed is not a valid type (i.e. Geometry), an error isreported. It is not possible to specify a camera per memory.Without any options, the cameras for the viewports speciÞed are displayed.See also: viewls, viewdisplay, viewbackground, viewprojection.8.28 VIEWCOPYSYNTAXviewcopy fromview toview [toview...]EXPLANATIONThis command copies the settings of one viewport or view-memory to another. Forexample, you can set up memory buttons based on the current state of a viewport,12 - <strong>Scripting</strong> 2 181
Interface Related Commandscopy the state stored in the memory buttons back to a viewport, or copy settingsbetween different viewports.If the destination is a view-memory that doesn't exist, it will be created.You can specify more than one destination at the same time.For details on how to specify viewports and memories, type: help viewportformatEXAMPLESviewcopy Build.pane1.world.persp1 Build.pane1.world.persp1:1Copy the perspective view to memory location 1 of pane1 of the Build desk.viewcopy Build.pane1.world.persp1:1 Build.pane1.world.persp1Build.pane1Copy memory location 1 to the perspective view and also to a named memory locationin the perspective view of the Build desktop’s viewer in pane1.8.29 VIEWDISPLAYSYNTAXviewdisplay [options] viewnameEXPLANATIONThis command changes the Display options of a Viewport for either the view occupyinga Viewport, or for one of the memory settings associated with it.Tip: You need to supply a viewname. You can get this with the viewls command.Note: All viewing information (including memories) set using viewdisplay are lostwhen saving from non-graphical appliactions such as hscript.OPTIONSgeo_type is one of:allselunseltempltargetApply to All elements.Apply to Selected elements.Apply to Un-selected elements.Apply to TemplatesApply to target output (i.e. the display SOP inthe ’View Current’ mode).-M geo_type mode Change the display mode, where mode is one of:182 2 Houdini 6.0 Reference
Interface Related Commandswirehidden_invishidden_ghostflatflat_wireshadeshade_wirevexvex_wireWireframeHidden Line InvisibleHidden Line GhostFlat ShadedFlat Wire ShadedSmooth ShadedSmooth Wire ShadedVEX ShadedVEX Wire Shaded-N geo_type m on|off Set display of points.-N geo_type n on|off Set display of point numbers.-N geo_type l on|off Set display of point normals.-N geo_type t on|off Set display of point texture coordinates.-N geo_type p on|off Set display of point positions.-E geo_type n on|off Set display of vertex numbers.-E geo_type t on|off Set display of vertex texture.-E geo_type g on|off Set display of vertex texture.-I n on|off Set display of primitive numbers.-I l on|off Set display of primitive normals.-I h on|off Set display of primitive hulls.-I t on|off Set display of primitive proÞles.-I p on|off Set display of primitive proÞle numbers.-I b on|off Set display of primitive breakpoints.-B bw|wb Set the colour scheme: light or dark.-a on|off Set ’match selected with nonselected’ on or off.-A templ|target on|offTurn faded look on or off for template or target outputgeometry.-b on|off Turn backface removal on or off.-C Set constant sensitivity level.-D on|off Turn display geometry on or off12 - <strong>Scripting</strong> 2 183
Interface Related Commands-e value Set line width-f on|off Turn Þeld guide on or off.-F on|off Turn Þlled selections on or off.-g on|off Turn guide geometry on or off.-h on|off Turn ’hulls only’ display on or off. If on, only the hullswill be drawn.-i on|off Turn footprint geometry on or off.-l Adjust Level of Detail (for meta and quadrics).Default 1.0)-L on|off Turn multi-texturing on or off.-n Option for scaling the display normal (default 0.2)-o on|off Turn object origin axes on or off.-O on|off Turn ßoating origin axes on or of (the one in the bottom-leftcorner of the Viewport).-q on|off Turn transparency on or off.-r on|off Turn projected textured and spotlights on or off.-R on|off Turn target output geometry on or off.-s on|off Turn safe area on or off.-S on| off Turn specular on or off in Shaded mode.-t on|off Turn texturing on or off in Shaded mode.-T on|off Turn template geometry on or off.-V Set variable sensitivity level.-w on|off Turn wireframe move on or off.-x on|off Turn on grid in YZ plane (normal is X).-y on|off Turn on grid in XZ plane.-z on|off Turn on grid in XY plane.EXAMPLESviewdisplay -O off Build*Turns off the Origin Axes display in all Viewports in the Build desktop.viewdisplay -M all wire Build*Sets all objects in the Build desk’s Viewports to wireframe mode.184 2 Houdini 6.0 Reference
Interface Related Commandsviewdisplay -l 3 Build.pane1.world.persp1Sets the display resolution in the Build desk’s persp1 Viewport for NURBS surfacesand metaballs to 3.Tip: You could also set this in: i) Viewport Display Options (Viewport page),or ii) by setting the environment variable HOUDINI_LOD.8.30 VIEWLAYOUTSYNTAXviewlayout -q -d [h | v] -s 1-4EXPLANATIONThe viewlayout command allows you to change how the view’s viewports arearranged on screen. Currently, you can switch to a quad view with the -q option,switch to a double view with the -d option and switch to a single view with the -soption:viewlayout -q modelmainviewlayout -d h 1 3 modelmainviewlayout -d v 2 4 modelmainviewlayout -s 4 modelmainthe h and v after the -d option specify whether you want the two viewports arrangedvertically or horizontally.The numbers after the -d and -s options refer to the quadrants of the standard quadview:1 Top Left2 Top Right3 Bottom Left4 Bottom Right8.31 VIEWLSSYNTAXviewls [-n] [-t type] [-l] [-v [-T viewport-type]] [pattern]EXPLANATIONLists all the available viewers using the following format:viewername typetype will be either ’world’, ’texture’, or ’particle’viewername will be of the form Desk.pane.type12 - <strong>Scripting</strong> 2 185
Interface Related CommandsOPTIONS-n Outputs a terse list with the names only.-t Restricts output to viewers of the speciÞed type.-l Includes currently used view-memories, using the followingformat: viewername:memname view-type-v Lists the the Viewports that are associated with eachviewer as well. It uses the format: viewername.viewportnameviewport-type-T Restricts output to Viewports of the given type. Theviewport-type can be one of:perspectiveortho_frontortho_rightortho_topuvFor help on related commands type: help viewIf any patterns are speciÞed, then output is also limitedto viewers whose names match the given patterns.8.32 VIEWPROJECTIONSYNTAXviewprojection [-o on|off] viewnameEXPLANATIONThis command sets the projection type for a viewport.options-o on|off Turn ortho viewing on or offWhen no options are speciÞed, the current settings are displayed.EXAMPLEviewprojection -o off objmainThis command disables orthographic projection in the Object Editor’s main Viewport.186 2 Houdini 6.0 Reference
Interface Related Commands8.33 VIEWTRANSFORMSYNTAXviewtransform [-p] [data] viewnameEXPLANATIONThis command is not intended for use by humans. This sets the transform for a view(as well as some options). The command is really only used for saving to .hip Þles.Options:-p Will display the viewtransform command.A possible use for this (the -p option) is to save one transform and load it intoanother view. For example, you might want to save the current settings into a memorybutton, or move a memory button’s settings into the current view.All Viewport settings are saved to the .hip Þle using these commands.8.34 VIEWTYPESYNTAXviewtype [-t type] [name]EXPLANATIONThis command allows you to change the type of the given viewport(s) and or viewmemories. This type can be one of:ortho_top / bottom / right / left / front / backperspectiveuvFor details on how to specify viewports and view-memories,type: help viewportformatEXAMPLEviewtype -t ortho_top Build.pane1.world.persp1will change the viewport called persp1 in the Þrst pane of the Build desktop to be anortho_top Viewport.12 - <strong>Scripting</strong> 2 187
8.35 VIEWUPDATESYNTAXviewupdate [-c] [-u update_mode]When changes are made in an interactive Houdini session the viewports will updatein one of three possible ways depending on the state of the global update mode. Thismode can be set to one of the following values:off | neveron | changescontinuous | alwaysViews update only on demand.Views update after changes.Views update continuously.The special update mode of “now” will force a single Viewport update if the currentupdate mode is “never”.With no options speciÞed the viewupdate command will show the current status ofthe view update mode.If the -c option is speciÞed then this output will be in the form of a valid "viewupdate"command.The -u option allows the current update mode to be modiÞed.This command correspond to the control offered by the global Update buttons at thetop of each appropriate Editor.EXAMPLEviewupdate -u neverviewupdate -u nowviewupdate -cNote: Currently the update mode applies only to 3D Viewports.188 2 Houdini 6.0 Reference | 12 - <strong>Scripting</strong>
Creating a Script from Houdini3 Uses of the<strong>Scripting</strong> Language1 CREATING A SCRIPT FROM HOUDINI1.1 OPSCRIPT / OPSAVE / OPWRITE COMPAREDThere are three ways of writing out scripts from Houdini. It is important to know thedifferences and limitations of each method.opscriptopsaveopwriteSaves text commands to build operators. This doesn’thandle saving of locked data (i.e. a Model SOP). However,it does save the animation information etc.Saves what ever the data is for the operator. This isonly implemented for SOPs. This saves the data of theOP.Saves a CPIO archive snippet which is useful for copyingoperators (in their entirety) from one HIP Þle toanother. This is the internal mechanism used for copy/pasting within Houdini. This method saves both thelocked data and the animation information for the OP.1.2 OPSCRIPTSYNTAXopscript [-r] [-g] [-b] [-v|-c] [-s] [-G] operator_patternEXPLANATIONThis command will generate a series of commands which will re-create the objectsspeciÞed. This command is very useful when the output needs to be modiÞed, sincethe output is quite straightforward. All channel information as well as operatorinformation is saved. It is also possible to create general scripts which take argumentsfor the objects to be created. In the general form, care is taken to check for thenumber of arguments passed to the script.12 - <strong>Scripting</strong> 3 189
Creating a Script from Houdinioptions-r This tells the command to work recursively through theentire operator hierarchy-G Operator groups in the objects will be saved with theobjects.-g SpeciÞes that the top-level arguments are in generalform and that names must be used when sourcing thescript Þle-b The brief option speciÞes that parameters at theirdefault values are not displayed-v This tells the command to evaluate but not to displaychannel information-c Causes only the channels for the speciÞed operator tobe saved. The node creation, parms, ßags and inputswill not be output when this option is speciÞed. This isuseful for saving animation data only.-s Output channel and keyframe times in samples(i.e. not in seconds).Limitations: Some parts of operators have no script equivalent commands. Forexample, there is no way to load geometry into a SOP, so a modelled SOP will not bere-created correctly from the output of an opscript command.The opscript command can be re-directed to a Þle, or displayed in the Textport.To reconstruct the objects, the source command is used to read the script generated.See source p. 119 for details.Opscript echos, or displays, the commands necessary to re-create the speciÞedobject. If you specify -r, the command covers the entire operator hierarchy. If youspecify -g, the top-level arguments are general in form. The names of the objectsmust be speciÞed using this option.EXAMPLEopscript -r /obj/geo*opscript -r /comp/* > /tmp/mycompfiles.cmdThe Þrst example above will provide you with the commands necessary to recreateall geometry objects in the operator hierarchy. The second example provides youwith the commands necessary to recreate all operators in the hierarchy located in thedirectory speciÞed.See also: opwrite, opsave190 3 Houdini 6.0 Reference
Creating a Script from Houdini1.3 MWRITEEXPLANATIONThis command saves the whole motion Þle into one CPIO archive. There are twoshell scripts provided in the bin directory to take the CPIO archive apart and toreconstruct it (hexpand and hcollapse). Once the .hip Þle is expanded, each componentcan be edited by hand. Care must be taken to reconstruct the CPIO archive inthe same order that it was originally. The hexpand and hcollapse commands takecare of this automatically.Limitations: Since this creates a CPIO archive, the contents are not easily editable.Also, it is not easy to generalize the Þle so that it performs like a macro.The mread command can be used to load or merge a .hip Þle into an existing .hipÞle. If you specify the -i option, the Þlename is incremented, that is has a numberappended to it to signify its position in a sequence of saved versions.1.4 OPWRITESYNTAXopwrite object ÞlenameSaves the object’s contents to the Þle you specify.EXPLANATIONLike the mwrite command, this command saves into a CPIO archive. However, theopwrite command will save a partial .hip Þle. For example, it is possible to saveonly SOPs from a .hip Þle, or only objects, or only materials. This can be used toextract some information from one .hip Þle and move it into another .hip Þle.Limitations: Unlike the opscript command, opwrite saves modelled data and allinformation required to reconstruct an operator (or operators). Unlike the mwritecommand, this allows for partial save/load of motion data. However, like mwrite theoutput is in CPIO archive format, and is less ßexible than the opscript command.Internally, this command is used for copy/paste operations.The opread command is used to load the Þles created by the opwrite command.EXAMPLEopwrite light2 myfile.hipThis causes the contents of object light2 to be saved to a Þle named myÞle.hip.1.5 FURTHER EXAMPLESIf geo1 is made with a Circle SOP, a smaller Circle SOP, followed by a Sweep SOP,followed by a Skin SOP (which is set for display and render), you have created a par-12 - <strong>Scripting</strong> 3 191
Creating a Script from Houdinitial torus. Frequently, you want to use the Sweep SOP followed by the Skin SOP. So,in the Houdini Textport, you could type the following script:houdini-> opcf /obj/geo1houdini-> opscript * > skinner.cmd# Automatic generated scriptset saved_path = `execute(“oppwf”)`opadd circle circle1oplocate -x 2.1 -y 3.26667 circle1opparm circle1 type ( nurbs ) orient ( xy ) rad ( 1 1 )t ( 0 0 0 ) order ( 4 ) divs ( 10 )arc ( openarc ) angle ( -90 90 ) impefect( on )opset -d off -r off -t off -l off -s off -u off-c off -C off -p off circle1opadd circle circle2oplocate -x 0.644444 -y 3.24444 circle2opparm circle2 type ( nurbs ) orient ( xy ) rad ( 0.2 0.2)t ( 0 0 0 ) order ( 4 ) divs ( 10 )arc ( closed ) angle ( 0 360 ) imperfect ( on )opset -d off -r off -t off -l off -s off -u off-c off -C off -p off circle2opadd sweep sweep1oplocate -x 1.6 -y 2.05556 sweep1opparm sweep1 xgrp ( ““ ) pathgrp ( ““ ) cycle ( all )angle ( off ) noflip ( off ) skipcoin ( on )usevtx ( off ) vertex ( 0 ) scale ( 1 )twist ( 0 ) roll ( 0 ) newg ( off )sweepgrp ( sweepGroup )opset -d off -r off -t off -l off -s off -u off-c off -C off -p off sweep1opwire circle2 -0 sweep1opwire circle1 -1 sweep1opadd skin skin1oplocate -x 1.61111 -y 1.17778 skin1opparm skin1 uprims ( ““ ) vprims ( ““ ) surftype ( quads )keepshape ( off ) closev ( nonewv ) force ( off )orderv ( 4 ) skinops ( all ) inc ( 2 )prim ( off ) polys ( off )opset -d on -r on -t off -l off -s off -u off-c off -C on -p on skin1opwire sweep1 -0 skin1opcf $saved_pathThis may look like a lot of noise. However, there are really only twenty commandsbeing executed. Starting with this as a script setup, you would remove the commandsrelating to the Circle SOPs, and re-work the script slightly as follows:# Script to append a skin and a sweep to the current object.# The first argument = backbone; second = the # cross-section.if ( “$argc” != 3 ) thenecho Usage: $arg0 backbone_sop cross_section_sopexitendif# Here is a neat trick to find out the name of the SOP# which was just addedset sweep_sop = `execute(“opadd -v sweep”)`oplocate -x 1.6 -y 2.05556 $sweep_sopopparm $sweep_sop xgrp ( ““ ) pathgrp ( ““ ) cycle ( all )angle ( off ) noflip ( off ) skipcoin ( on )usevtx ( off ) vertex ( 0 ) scale ( 1 )twist ( 0 ) roll ( 0 ) newg ( off )sweepgrp ( sweepGroup )opset -d off -r off -t off -l off -s off -u off-c off -C off -p off $sweep_sop# Here, we change our connectionsopwire $arg2 -0 $sweep_sopopwire $arg1 -1 $sweep_sopset skin_sop = `execute(“opadd -v skin”)`oplocate -x 1.61111 -y 1.17778 $skin_sopopparm $skin_sop uprims ( ““ ) vprims ( ““ ) surftype ( quads )keepshape ( off ) closev ( nonewv ) force ( off )orderv ( 4 ) skinops ( all ) inc ( 2 )prim ( off ) polys ( off )opset -d on -r on -t off -l off -s off -u off-c off -C on -p on $skin_sopopwire sweep1 -0 $skin_sopopcf $saved_path192 3 Houdini 6.0 Reference
Environments2 ENVIRONMENTS2.1 THE DEFAULT ENVIRONMENT FILE (123.CMD)When Houdini is run without any arguments, a default Þle called 123.cmd is loaded.This is the Þrst Þle found in the Houdini search path, so it can be overridden creatinga Þle $HOME/houdini/scripts/123.cmd. If you want the default start-up environmentto contain nothing, leave an empty Þle there.2.2 EDITING THE STARTUP SCRIPTWhen you start Houdini, a default script is automatically read in called 123.cmd.This script sets up the scene with a world object, two cameras, three lights and twogeometry objects. A portion of this 123.cmd looks like this:# This is the startup script.oadd -t world worldoadd -t camera cam1 cam2oadd -t geometry geo1 geo2oadd -t light light1 light2 light3editodisplay -d on -s geo1,geo2,light*odisplay -s geo2 -c 23sgrid -s geo2:first -R 11 -C 11 -z 20 20 -P 0 -.8 0 -p xz -t quad -c rcsopdisplay -s geo2:first -d -rchadd -s light*/t?,r?,light?...This Þle can be modiÞed to customize your default start-up environment. For example,you may want Double Buffering to default to off; so you could add the line:doublebuffer offAny line which starts with a # will not be executed: use them to add comments toyour cripts.2.3 SAVING AN ENVIRONMENT1. Setup your environment (lights, cameras, default geometries, etc.).2. Open a Textport with the Dialogs > Textport menu.3. Save your environment by typing in:opscript -r /obj/* > myEnvironment.cmdThis saves your environment into the Þle myEnvironment.cmd. Although it isn’t necessaryto know all the details at this point, it will help to know why this works lateron. The -r option recursively writes all objects to the Þle. The /obj/* means that you12 - <strong>Scripting</strong> 3 193
Environmentswill be writing out all objects (hence the *) the UNIX redirection character ( > )sends the result to the Þle myEnvironment.cmd.2.4 LOADING AN ENVIRONMENT1. Open a Textport with the Dialogs > Textport menu.2. Type:source myEnvironment.cmdThis merges the elements from your myEnvironment.cmd Þle with those whichalready exist. If you want to start from scratch, you must enter the Objects anddelete all the objects Þrst.2.5 SAMPLE CUSTOM 123.CMD FOR UNIX SCRIPTERSHere is a 123.cmd Þle that provides some UNIX type aliases for common commandslike ls and cd. If you put a 123.cmd Þle in $HOME/houdini/scripts, it will be pickedup before $HH/scripts/123.cmd .If you’re in a large shop where the system administrator has already set up a123.cmd Þle in /usr/local/houdini/scripts (or somewhere else), you should probablysource this in instead of $HH/scripts/123.cmd .# Here, we source in the installed version of 123.cmd so# that we’ll pick up any changes in the distribution.#source $HH/scripts/123.cmd# Now, make some sane aliases#alias cd opcfalias ls oplsalias pwd oppwfalias add opaddalias rm oprmalias date ‘echo Frame $F: `system(date)`’alias unsetenv setenv -ualias unset set -uYou can always change the setup of Houdini so that it’s got whatever objects/materialsyou want by default. Simply use the opscript command as mentioned above, tosee what the commands are needed to generate an operator.Once the 123.cmd is read into a HIP Þle, the aliases are saved along with the Þle, sounless someone removes them, these aliases will be retained.194 3 Houdini 6.0 Reference
Environments2.6 EDITING HIP SCRIPTSBecause Houdini .hip Þles are UNIX CPIO archives, you can use cpio to unpack, andedit them – the commands are the same commands listed here in the scripting commands.Once you are done, you can reassemble them with cpio again. To facilitatethis, there are two scripts: hexpand and hcollapse .HEXPANDThe script hexpand will expand a cpio Þle such as a .hip Þle into a directory structurethat can then be edited using a text editor, and then collapsed back into a regularÞle using hcollapse .Usage:hexpand HCOLLAPSEUsage:hcollapse [-r] -r removes the contents Þle and the expanded directoryThe script hcollapse will collapse a directory that was previously extracted from acpio Þle using hexpand .EXAMPLESelect your .hip Þle in spy, and type:!hexpand myHIPfile.hipto expand the Houdini Þle into editable directories and Þles.12 - <strong>Scripting</strong> 3 195
Creation Scripts3 CREATION SCRIPTSEvery OP node in Houdini can have a “creation script” run when it is created. Thesescripts must appear somewhere in the Houdini search path (below), and shouldappear in a directory according to the type of the node being created.$HOME/houdini/scripts3.1 NAMES OF CREATION SCRIPT DIRECTORIESThe names for the creation script directories are:scripts/objObjectsscripts/matMaterialsscripts/compCOPs (Composite) Networksscripts/outOutput OPsscripts/outPOP (Particle) Networksscripts/chCHOP (Channel) Operatorsscripts/shopSHOP (Shader) Operators3.2 EXAMPLESADDING A TOP TO A SHADER UPON CREATIONFor example, if, every time you added a new Phong shader, you want to automaticallycreate a Color TOP inside it, you can do it by creating a script:% cd ~/houdini% mkdir scripts% cd scripts% mkdir mat% echo 'opcf $arg1 ; opadd texture' > mat/phong.cmdThe Þle phong.cmd should contain:set save_dir = ’run("oppwf")’opcf $arg1opadd textureopcf $save_dirImportant information about the script:1. The script name must be the operator name with a .cmd Þle extension (to Þnd outwhat the operator names are, you can do an opadd command with no arguments).2. The script must exist in the correct directory3. When the script is run, the name of the created object as the Þrst argument.4. The current working directory will be set to the owner of the node just created(i.e. when the script is run for a SOP, the current working directory will be theobject containing the SOP). The current working directory is restored on completionof the creation script.196 3 Houdini 6.0 Reference
Creation ScriptsCREATION OF AN OBJECTAs an example, in terms of the Houdini scripting language, the creation of an objectgoes something like this:# First, add a geometry object and get the name of the object# into a variablehscript-> set save_cwd = `execute("oppwf")`hscript-> opcf /objhscript-> set added_name = `execute("opadd -v geo")`hscript-> cmdread -q obj/geo $added_namehscript-> opcf $save_cwdThis is just an example, in reality, none of the variables in the above example areactually used or set. The example is simply to illustrate the steps taken every time anobject is added.3.3 EXAMPLE SCRIPTSYou can Þnd examples of creation scripts in: $HH/scripts/obj/ .12 - <strong>Scripting</strong> 3 197
Dialog Scripts4 DIALOG SCRIPTS4.1 INTRODUCTIONDialog scripts provide a simple way of creating a graphical interface for building acommand string (this is usually a set of parameters and options for a scripting commandor shader). They do this by deÞning a series of buttons, menus and edit Þeldsto generate the parameters for a command line option.When available, it is possible to access a Dialog script by clicking on the M buttonbeside a parameter in Houdini. Some places they are used are: the Shaders M buttonin the Light object, and the Operator Scripts... option in the OP Layout > C \pop-up menu.EXAMPLEClickingthis buttonadds this option (-f) to the command line,and this value (0) with it.In the example above, the dialog script in $HH/conÞg/scripts/MANlight.ds is used togenerate the command line options for a Z-depth Shadow (zShadow) with Blur enabled(-b) and Depth outside Field of View (-f 0) at a setting of zero.4.2 SUPPLIED DIALOG SCRIPTSDialog scripts are supplied in $HH/conÞg/Scripts. Each editor (i.e. SOP, COP,Object) has its own set of dialog scripts, so you can add your function to any of theeditors. If you want to edit these, make a copy in your $HOME/houdini/conÞg/Scripts/ directory.198 3 Houdini 6.0 Reference
Dialog ScriptsWhen Houdini reads a dialog script, it will automatically create a UI Þle and providea graphical interface for editing a string. Houdini has “hooks” for a dialogscript interface in several parts of the application. These are:• OBJmacro.ds• SOPmacro.ds• COPmacro.ds• MATmacro.ds• MANfog.ds• MANlight.ds• MANlightfog.dsObject MacrosMacros for SOPsMacros for COPsMaterial MacrosShader strings for Mantra Fog shadersShader strings for Mantra Light shadersShader strings for Mantra Atmospheric Light shaders• RMshader.ds• RMdisplace.ds• RMlight.ds• RMinterior.ds• RMatmosphere.dsRenderMan Surface Shader EditorRenderMan Displacement Shader EditorRenderMan Light Shader EditorRenderMan Interior Shader EditorRenderMan Atmosphere Shader Editor• Renderers.dsAn interface to common Renderer Commands.This shows up in the Output Drivers when thereis a command for a speciÞc renderer.When adding a macro/shader to a dialog script, do not replace the scripts installed in$HH/conÞg/Scripts . Because all scripts found in the Houdini search path aremerged, it is preferable to install these scripts in any of the path directories (i.e. /usr/local/conÞg/Scripts ).4.3 SYNTAX OF A DIALOG SCRIPTThe syntax of a dialog script is quite simple. The script describes a nested set ofparameters. Each parameter may be one of many types (i.e. a toggle button, a ßoator a string). Internally, each parameter is represented as either a string, ßoat, or aninteger vectored value. However, there are different ways of representing this valuein the user interface. For example, a string might be a string that the user enters, or aÞle name, or a string chosen from a menu. The list of possible parameter types maybe updated to include new types not listed here.There are also special controls in a script for special features. For example, if thescript is supposed to parse a RenderMan shader, there is a special keyword to usethe RenderMan syntax. Other special features are the ability to group parametersonto individual pages.GENERAL FORMThe general form of a dialog script is:command {headerparameter_list}12 - <strong>Scripting</strong> 3 199
Dialog ScriptsHEADER DEFINITIONThe header deÞnition is basically used to deÞne what the command is at a globallevel. There are certain Þelds which can be speciÞed at this point:namehelplabeldefaultrmanSpeciÞes the actual command name or shader name.SpeciÞes help for the command or shader.SpeciÞes a more descriptive name which is used by theuser interface.SpeciÞes a default command/string which is used atstartup.SpeciÞes that this command should be interpretedusing RenderMan syntax.Only the rman keyword doesn’t take any options after it. All of the other keywordsexpect a string to follow. The help keyword expects a series of strings enclosed by aset of braces ( { and } ). See below for an example.Note: When specifying strings, the script requires that the string be enclosed in doublequotes ( " ) if and only if there are spaces in the string. However, it doesn’t hurtto put the double quotes for all strings.Note: The name usually speciÞes the name of the command. Theoretically, it shouldnot contain any blanks. However, this is not a limitation though presets may notwork correctly.PARAMETER TYPESThe form of a parameter deÞnition is as follows:parm {field value}Mandatory Þelds for each parameter are:namelabeltyperequired | optionThe internal name for the Þeld. This is used when savingand loading presets for the dialog script.The “visible name”. This is what appears in the graphicalinterface. It should be more descriptive than theinternal name.This determines the type of the parameter. See the listbelow for available types.Needed to specify whether this parameter is a requiredÞeld or an optional Þeld.200 3 Houdini 6.0 Reference
Dialog ScriptstypesThe type may be deÞned as one of the following:• toggle• string• object• render• Þle• ßoat• integer• direction• colorA toggle button.An editable string.An editable string. A menu of all objectscan be used to stuff the string.An editable string. A menu of all outputdrivers can be used to stuff the string.A string which has a Þle browser button beside it.A single or vector of ßoating point values.A single or vector of integer values.Three ßoating point values.The size Þeld must be set to 3 for this type of value.Three ßoating point values.Like direction, the size Þeld must be set to 3.The user interface for this parameter type includesa set of color sliders.OPTIONAL PARAMETER KEYWORDSmenumenuSpeciÞes a list of strings that the parameter may contain.The syntax for menus is:menu {value labelvalue labelvalue label}where the label will show up in the UI, while the value is what is actually used forthe Þeld.sizedefaultSpeciÞes the vector size of the parameter. By default,this is 1.SpeciÞes the default value(s) for the parameter.The syntax is:default { value1 [value2...] }Where each value speciÞed is for a different component of a vector. For example, ifthe Size of the parameter was 3, you would probably want to specify three defaultvalues. If no default is speciÞed in the parameter declaration, the parameter willdefault to 0 (or an empty string).callbackThe keyword callback speciÞes an hscript command Þle to execute when the parameter’svalue changes. Please see also: Ref > Shaders > VEX Compiler Pragmas >callback .12 - <strong>Scripting</strong> 3 201
Dialog Scripts4.4 EXAMPLES OF PARAMETER DEFINITIONSEXAMPLE 1parm {name rollofflabel "Spot Light Rolloff"type floatoption -rsize 1default { 1 }}This example shows an optional parameter which is a single ßoat value.It defaults to 1.EXAMPLE 2parm {name scolorlabel "Specular Color"type colorrequiredsize 3default { 1 1 1 }}This example shows a required parameter which is a color. When the UI is built forthis parameter, it will contain a set of RGB sliders for editing the colour value.EXAMPLE 3parm {name nproclabel "Number of Processes"type stringoption -nmenu {1 "1 Process"2 "2 Processes"4 "4 Processes"}}This example shows how you can use a menu to cheat and specify an integer as astring. The menu will simply use the value (i.e. 1, 2, or 4) but present the user with alist of choices.202 3 Houdini 6.0 Reference
Dialog Scripts4.5 SPECIFYING GROUPS (“PAGES”)The dialog script language allows you to group parameters together in pages (with apage tab for each page). The syntax of the group speciÞcation is:group {# First group of parameters/folder tabname string # Name in the tablabel stringparameter_list}group {# Second group of parameters/folder tabname string # Name in the tablabel stringparameter_list}...It is possible to Þt as many levels of pages as you want in the dialog script. However,there may be formatting problems when the UI is displayed if you make too many ofthem due to the horizontal size constrainsts of the screen. It is also possible to nestgroups, though in general, this is bad UI design since it hides parameters from theuser.4.6 MIXING PARAMETERSIt is also possible to mix parameters so that some are always displayed, then thepage tab is a separate entity. For example:command {name pagetablabel "Paged Tab Example"help {"A simple dialog script to show that the always parameter""is always visible even when the groups get switched.""The groups appear below the 'always' parameter."}parm {namelabel}group {namelabelalways"Always visible"page1page1parm {name opt1label "Option 1"}}group {name page2label page212 - <strong>Scripting</strong> 3 203
Dialog Scripts}parm {name opt2label "Option 2"}}parm {namelabel}always2"Shows up after the folder"4.7 EXAMPLES OF DIALOG SCRIPTSMany examples can be found by looking in: $HH/conÞg/Scripts .4.8 TESTING DIALOG SCRIPTSThere is an application shipped with the HDK (Houdini Development Toolkit)called dsparse. This will parse a dialog script and allow you to experiment with thelayout and adding parameters. It is necessary to purchase the HDK in order to getthis utility.4.9 COMMON PROBLEMSWhen each dialog script Þrst gets parsed, it creates a .ui Þle.This Þle is created in:/usr/tmp/Dialogs/...This speciÞes the UI layout for the dialog script. When this Þle is created, the UI islocked for the script. Therefore, even if parameters change, the UI displayed will bethe same. Therefore, when testing, it is mandatory that this created UI Þle isremoved between each test.204 3 Houdini 6.0 Reference
mands5 RMANDSSYNTAXrmands [options] file1.via [file2.vma ...] [file1.slo...]EXPLANATIONThis shell command (not Houdini Textport) accepts for input .via and .vma Þles, andgenerates the Dialog Script for a SHOP .slo Þle.Tip: Once you’ve created or edited a dialog script, you will typically want to clickthe Reload button (at the top of the Dialog Script Window) to ensure that they’reproperly updated. Please see: Interface > Dialog Scripts p. 219.Warning: This program will remove existing .ds Þles!OPTIONS-d Destination directory.-D Destination directory (puts script in this directoryrather than a sub-directory as with the -d option).-i Run using soinfo (for RenderDotC).-e Run using sletell (for Entropy).-p Run using sloinfo (for prman).-oldGenerate old style dialog scripts (pre-shop).-g Specify maximum size per parameter page. The shaderparameters will be split into multiple pages if there aretoo many parameters in the shader.-l file Create an operator type deÞnition Þle for the operator.-L file SpeciÞes an operator type library Þle that the operatordeÞnition should be added to. If not speciÞed, the typedeÞnition Þle is also used as the library Þle.-b Create a backup of the operator type library Þle.-C icon With the -l option, the icon for the operator.-n name With the -l option, the name of the operator.-N label With the -l option, the label of the operator.EXAMPLErmands -g 8 -d $HOME/houdini/shop *.slo12 - <strong>Scripting</strong> 3 205
mandsSHADER HELPWhen rmands is generating the script for a .slo Þle, it will look for a Þle $shader.hlp(where $shader is the name of the shader) and include this Þle as help for the shader.rmands will look in the standard Houdini path (under the ri_shaders sub-directory)for the help Þles.For example:% vi ~/houdini/ri_shaders/myshader.sl% vi ~/houdini/ri_shaders/myshader.hlpSEE ALSO• Stand Alone Tools > dsparse – Dialog Script Parse p. 431.206 3 Houdini 6.0 Reference
Tcl / Tk <strong>Scripting</strong>6 TCL / TK SCRIPTING6.1 INTRODUCTIONHoudini comes with an embedded Tcl (Tool Command Language) / Tk (Toolkit)interpreter, which reads Tcl commands in much the same way csh commands areinterpreted in UNIX. Tcl is pronounced “tickle”, and was developed by J.K. Ousterhout(University of California at Berkeley). Tcl and its extension, Tk, provide ameans of creating your own interface tools like buttons, scrollbars, and menus. Thelanguage can be used in conjunction with hscript, the non-graphical version ofHoudini, to generate simple, custom tools that integrate with the standard user interface.To Þnd out more about the language’s rules and syntax, a good place to start is at:http://www.tcl.tk/ .6.2 USING TCL AND HSCRIPTTo access at Tcl shell from within hscript, enter the tcl command. This starts a Tclinterpreter. If you plan to use the Tk extension, type the tk command. We will beusing the Tcl/Tk shell in this example. You can start the Tcl/Tk interpreter fromHoudini’s Textport, but it is easier to write, test and debug Tcl/Tk scripts throughhscript.The Tcl/Tk interpreter takes over hscript until you type the exit command (see thesection on Limitations below). Houdini adds a command to Tcl/Tk:hscript command ?hscript_command_args?hscript runs its Þrst argument as an hscript command. It takes the remaining arguments(which are optional, as indicated by the question marks) and passes them onas arguments to the given hscript command.For example, from the Tcl/Tk shell: hscript opls /obj lists all of the object operatorsin your current Houdini session.6.3 EXAMPLEThe code that follows builds a graphical representation of the frame-ranges of COPsin a COP network.12 - <strong>Scripting</strong> 3 207
Tcl / Tk <strong>Scripting</strong>CODE## A little script that will show your COP frame ranges as barsproc get_start_range { copname } {hscript set tmp=$copnameset start [ hscript echo {`ch("$tmp/start")`} ]return $start}proc get_end_range { copname } {hscript set tmp=$copnameset end [ hscript echo {`ch("$tmp/start")+ch("$tmp/length")-1`} ]return $end}proc draw_ruler {} {global left_margin pixels_per_frame}set i 1set x1 $left_marginset x2 $x1.canvas create line $x2 5 $x2 15 -width 2while { $i
Tcl / Tk <strong>Scripting</strong>## mainlineset pixels_per_frame 5set left_margin 10build_COPlistbind .copList {set copnet [.copList get [.copList curselection]]build_tbars $copnet}6.4 EXPLANATIONIt is important to remember to use proper quoting in Tcl. The characters “ and $have special meaning in Tcl, and they are expanded by the interpreter before theyare processed by hscript. For example, the following will not work from Tcl/Tk:set cop file1hscript echo `ch(“$cop/framerange1”)`Tcl will see the “ characters and expand “$cop/framerange1” to Þle1/framerange1.This is then passed to hscript, which executes echo `ch(Þle1/framerange1)`, whichis incorrect because hscript expects echo `ch(“Þle1/framerange1”)` (a string needsthe double quotes). What we really want to do is pass the double quotes through tohscript from Tcl/Tk.We can accomplish this using the braces (i.e. {} )in Tcl/Tk. Tcl does not performany expansions within braces. So, using the braces, our command becomes:hscript echo {`ch(“$cop/framerange1”)`}But this is still incorrect, since Tcl/Tk will not expand $cop to Þle1. We want Tcl/Tkto not expand the quotes, yet we still want it to expand $cop. This is impossible, sowe must work around it by setting a variable at the hscript level, then reference thatvariable in our hscript command. The correct command ishscript set tmp=$cophscript echo {`ch(“$tmp/framerange1”)`}The Þrst line creates a variable called tmp at within hscript and sets its value to Þle1(since $cop is expanded by Tcl/Tk in this case since we have not used braces). Thesecond hscript command then references this $tmp hscript variable.You’ll notice that there are two separate name spaces involved here: the Tcl/Tkname space and the hscript name space. In the above example, the $tmp variabledoes not exist in the Tcl/Tk shell. That is, the Tcl/Tk command puts $tmp wouldcause an error since $tmp is only deÞned at the hscript level. Similarly, the variable$cop does not exist in the hscript shell, it is a Tcl/Tk variable. So, hscript echo{$cop} would also cause an error: since $cop is not an hscript variable.12 - <strong>Scripting</strong> 3 209
Tcl / Tk <strong>Scripting</strong>LIMITATIONSIf you start a Tcl/Tk shell from Houdini, you will notice that the Tcl/Tk interpretertakes over the application until you have exited your script. That is, Houdini doesnot refresh nor recook while a Tcl/Tk interpreter is active. That does not mean youcannot modify Houdini objects interactively with a Tcl/Tk script. For example, wecould enhance the above script to modify the frame ranges of the COPs by clickingand dragging the time bars. We would modify the COPs using the command hscriptopparm.... When we exited the Tcl/Tk script, the COPs would show their new framevalues.A second limitation involves Tcl/Tk itself. In Tcl/Tk, all variables are treated asstrings or lists of strings. This is Þne for simple applications, but more complicatedprogramming requires the use of more elaborate data types (integers, ßoating pointnumbers) and the ability to group these data types together (such as in C’s conceptof a structure or Python’s concept of a mutable list). Tcl/Tk is great for writingsmall, simple, tools very quickly. More sophisticated programming tasks will naturallyrequire a more sophisticated language.210 3 Houdini 6.0 Reference
Introduction4 EnvironmentVariables1 INTRODUCTIONThere are many environment variables that affect the way Houdini operates. They setpreferences for such things as your display, directory structures for loading and savingfiles, and paths for the licence server’s location.1.1 SETTING AN ENVIRONMENT VARIABLEIN WINDOWSClick with \ on ’My Computer’, and select Properties from the menu that appears.In the dialog, switch to the Environment tab, and set your variable there.FROM A SHELLYou can set these from any Window Shell. You can also set them from within theHoudini Textport with the setenv command. For example:setenv UT_INTERRUPT_THRESH 50sets the delay for the Interrupt Cook dialog so it waits 5 seconds before appearing.ALIASES / VARIABLES DIALOGYou can also set and display some Houdini-speciÞc variables in the Dialogs > EditAliases/Variables... dialog.1.2 OBTAINING A LIST OF VARIABLESHCONFIGTo get a listing of all Global Variables, in a Window Shell (Options menu), type:hconfig -hthis will give you a listing of all current environment variables. The following pagescontain a listing of some of those which are most commonly used.12 - <strong>Scripting</strong> 4 211
Environment Variables2 ENVIRONMENT VARIABLES2.1 DIRECTORY-RELATED VARIABLESHFSHOUDINI_PATHHIPDIRRoot of the Houdini install tree. All Þles related to runningHoudini reside here – binaries, DSOs, etc.The Houdini search path. The Houdini path is userdeÞnable, and is where Houdini will look to load supportÞles. Extending it allows you to include a directoryto be searched for site-wide conÞguration Þles.The directory in which the .hip Þle is located. It alwaysreturns the directory from where the Houdini Þle wasopened.This variable changes automatically if you move the.hip Þle to another directory. This allows you to movethe .hip Þle together with its subdirectories, so long asyou use $HIPDIR throughout to point to your projectÞles. If $HIPDIR is used within Þlename paths, thenyou can be anywhere on a network and access theproject without having to change the $HIP variable.It is a good idea to organise you project so that it usesdirectories like: $HIPDIR/geo $HIPDIR/mat etc.HIPStores the location of the hip Þle when it was Þrst created– the job’s home directory. This variable is staticand won’t change unless explicitly changed by theuser, or if you’ve set the variableHOUDINI_HIP_FROM_PATH . To retrieve the currentlocation of the hip Þle, use $HIPDIR.Note! Use the hip scripting command to set this. Forexample: hip /usr/people/jobs sets $HIP to thenew path speciÞed.HOUDINI_HIP_FROM_PATHCauses the $HIP variable behaviour to change suchthat the HIP variable is set to the .hip Þle directoryname (so it acts like $HIPDIR).HOUDINI_DSO_PATHSearch path for Houdini plug-in modules.HOUDINI_MPLAY_LOCKPATHDetermines where mplay .lockÞles are put. This allowsusers with home directories on NFS to avoid the networkpenalties by setting the lock Þle to a local path(i.e. /tmp or c:/temp ).212 4 Houdini 6.0 Reference
Environment VariablesHOUDINI_BACKUP_DIRThis is the directory used to store the backed-up hipÞles when the Numbered Backup preference is set. Thedefault backup directory is: ./backup and the backed upÞles will have a _bak{num} sufÞx.HOUDINI_BUFFEREDSAVEWhen enabled, .hip Þles are Þrst saved to a memorybuffer and then written to disk. This is useful when savingover the network from Windows 2000 machines, orother places where seeking to the network is expensive.HOUDINI_TEMP_DIRHOUDINI_UNDO_DIRThe directory to which Houdini writes /tmp Þles to.Allows you to override the location for Þles Houdiniuses for undo operations. The default is /tmp. The Þleswill have names like add### model### and del### .2.2 VIEWPORT RELATED VARIABLESHOUDINI_DOUBLEBUFFERDouble buffering improves the quality of movingimages on a 24 bit monitor. If Double Buffering is notused, everything is drawn directly to the screen withoutany synchronization to the monitor’s refresh rate. Thiscauses areas of the screen which are being frequentlyredrawn tend to be displayed while only partiallyredrawn, this produces a “ßickering” effect.When Double Buffering is on, the new image is drawnin an offscreen buffer in video RAM and then swappedinto the display almost instantaneously, thereby eliminatingthe display of half-drawn images, and theßicker.Why not have it on all the time? Because somemachines do not have sufÞcient video RAM to performdouble buffering in 24bit colour – so they halve thecolour resolution, and then still-frame image quality isreduced due to dithering.HOUDINI_LODSets the Level of Detail in displays for NURBS surfacesand metaballs. The default is one. Tip: You can also setthis in the Viewport Display Options > Viewport page,or by using the viewdisplay scripting command.HOUDINI_MDISPLAY_WAIT_TIMESpeciÞes the time, in seconds, that mantra shouldspend looking for an mdisplay window before givingup, and displaying the Abort / Retry / Fail alert.12 - <strong>Scripting</strong> 4 213
Environment VariablesHOUDINI_VIEW_MANTRASpeciÞes the command to use for default View: Mantrarenderer in the Viewport.HOUDINI_VIEW_RMANSpeciÞes the command to use for View: R-Man in thedefault renderer in the Viewport.2.3 RENDERMAN-RELATED VARIABLESRMAN_EYESPLITSRMAN_SHADERPATHRMAN_TEXTUREPATHRMAN_INCLUDE_FIXSESI_SLO_PATHValue for RenderMan eyesplits (setting any of thesethree variables sets the option in the RIB Þle).Search path for RenderMan shaders (sets option).Search path for RenderMan textures (sets option).When generating RIB, the post-include Þle for objectsoccurs inside the transform block if there is motionblur. This allows for correct motion blurring ofReadArchive data. Setting this environment variablecauses the post-include to be included after the transformblock (as it was in H4.1 and prior).Where to build .slo shaders for automatically generatedRenderMan shaders (i.e. when rendering to Render-Man and converting materials on the ßy).2.4 ABEKAS RELATED VARIABLESABEKAS_NTSC_XRESABEKAS_NTSC_YRESABEKAS_PALABEKAS_PAL_XRESABEKAS_PAL_YRESLOGIN_NAME_ENVLOGIN_PASS_ENVVariable to override the Abekas NTSC X resolution.Variable to override the Abekas NTSC Y resolution.Variable to set the Abekas image support to PALinstead of NTSC.Variable to override the Abekas PAL X Resolution.Variable to override the Abekas PAL Y Resolution.A65 login name.A65 login password.RE_OVERRIDE_XRES These four variables allow you to manually set theRE_OVERRIDE_YRES screen resolution that Houdini uses, and the physicalRE_OVERRIDE_WIDTH monitor size (in millimeters).RE_OVERRIDE_HEIGHT214 4 Houdini 6.0 Reference
Environment VariablesSESI_A60_HOSTSSESI_A65_HOSTSList of Abekas A60’s host names.List of Abekas A65’s host names.2.5 CINEON RELATED VARIABLESCINEON_FLIPWhen set (to any value) ßips all Cineon images in Yduring input.CINEON_FILM_GAMMA SpeciÞes the gamma for Cineon Þles(default value 0.6).CINEON_WHITE_POINT The Cineon log scale value that is considered to be fullwhite and will be mapped on input to the maximumchannel value. (default 685) Range 0 to 1023.CINEON_BLACK_POINT The Cineon log scale value that is considered to be fullblack and will be mapped on input to zero. (default 85)Range 0 to 1023.setting the cineon variablesThe CINEON environment variables should be set as follows for Þnal compositesrequiring perfect conversion to/from logarithmic values:setenv CINEON_WHITE_POINT 1023setenv CINEON_BLACK_POINT 0setenv CINEON_FILM_GAMMA 1.0For previewing and test composites the default values that follow produce outputthat is better for viewing on screen:setenv CINEON_WHITE_POINT 685setenv CINEON_BLACK_POINT 85setenv CINEON_FILM_GAMMA 0.6Note: Since Houdini 1.1, the environment variables: CINEON_OVER_EXPOSUREand CINEON_WHITE_VALUE are obsolete. Also, for backwards compatibility thelookup tables used in Houdini 2.0 can be enabled by setting the environment variableCINEON_OLD_LOOKUP.2.6 IMAGE RELATED VARIABLESHOUDINI_TIFF_BOTTOMLEFTOlder versions of Houdini generated TIFF Þles withthe Þrst scanline of data representing the bottom of theimage. This control can be turned on to replicate thebehaviour of older verions of Houdini.12 - <strong>Scripting</strong> 4 215
Environment VariablesHOUDINI_TIFF_SAMPLEFORMATIf set, then a sample format tag is written to TIFF Þles.By default, Houdini does not add the SAMPLEFOR-MAT tag into TIFF Þles (this maintains backward compatibility).If the sample format tag is added to a Þle,older versions of the TIFF library (i.e. 5.x) will not beable to read the image.SESI_RAT_USAGEHolds the number of megabytes of RAM to use for textureswhen using the .rat image Þle format for texturemaps. i.e. setenv SESI_RAT_USAGE 16 will use a maximumof 16 Mb of RAM.SESI_TIFF_COMPRESSIONCompression type used for TIFF Þles.Valid values are: “LZW” or “none”.VERTIGOPICWFGAMMACreate Vertigo style .pic Þles instead of Houdini format.pic by default.Gamma value for the header when writing Wavefront.rla or .rlb Þles.2.7 MISCELLANEOUS VARIABLESCAPTFRAMEThe Capture Geometry state create keys at the captureframe on the capturing hierarchy bone chains. Thisvariable is used by the object-level character states todetermine which capture frame to use when needed.HOUDINI_ENABLE_FPS_SCALESet this variable if you want your keyframes to scale asthey did in Houdini 4 and prior when setting the FPS inthe Global Animation Parameters.HOUDINI_FORCECONSOLIDATELOWWhen set, causes fast point consolidation to behave thesame as the slow consolidate, Þxing some point orderbugs. Because it changes the previous point order, it isnot the default (Houdini 4.2 and higher).HOUDINI_HIPEXTHoudini adds a ".hip" extension to Þlenames that areentered in the Save dialog (if they don't already haveit). This behaviour can be disabled by setting this variable.216 4 Houdini 6.0 Reference
Environment VariablesUT_INTERRUPT_THRESHThe time delay before the interrupt cook dialog willappear. The time is speciÞed in tenths of seconds; thedefault value is 60 (six seconds).HOUDINI_TEXTURE_DEFAULT_COLORSets the default colour for missing texture maps:setenv HOUDINI_TEXTURE_DEFAULT_COLOR "r g b alpha"causes missing texture maps to return the colour speci-Þed when accessed in VEX.HOUDINI_UISCALEAllows you to adjust the size of Houdini's UI (Fonts,Icons, and Menus). At the default value of 100, thingsare rendered at 85 dpi (the previous default on non-Windows platforms). Higher values generate largericons and fonts, smaller values smaller. To revert to theprevious behaviour set it's value to -1.HOUDINI_WORKSHEET_BOXPICKBox selection of operators in the Layout Area is bydefault tied to [ in order to be consistent with the boxselectionoperations in the 3D Viewports and the ChannelEditor. If you prefer to use a different mouse button,set this variable to “middle” or “right”.HOUDINI_NOSPLASHRAY_DCSIZERAY_SCSIZERAY_NO_FOGBOXSESI_COPY_SUFFIXSESI_FILE_VIEWERHOUDINI_DSO_ERRORDisables the Splash Screen on startup.Size of the dice cache for mantra3.Size of the split cache for mantra3.mantra automatically adds a background object thatencompasses the scene in order to make the atmospherevisible. The object is simply a large box locatedat 0.8*far with a matte shader applied to it. You candisable this behaviour by setting this variable.By default the Þlenames are common between all processes,however by setting the environment variable,SESI_COPY_SUFFIX you can make the clipboardÞles unique.Replaces actview as the Þle viewer within Þle dialogs.If this variable is set, then DSO errors will be printedout. This is particularly useful for HDK developers.12 - <strong>Scripting</strong> 4 217
Environment Variables2.8 WINDOWS NT RELATED VARIABLESHOUDINI_ACCESS_METHODThis value can be 0, 1, or 2. It speciÞes what methodHoudini will use to check Þle permissions. 0 uses thedefault method, which does a real check of Þle permissionsusing the proper NT security model. But thismethod can be quite slow on systems which use a loginserver elswhere in their network. Method 1 uses the NTsecurity model again, and is much faster than method0, but doesn't work on Win2k SP2 (Microsoft broke animportant function in that release). Method 2 justchecks the Þle attributes, which is fast and works, butignores all the NT security stuff, so Þles and directorieswhich are read only because of NT security permissionswill report that they can be written to.CD_PATH (spy only)Though spy recognizes the standard csh/tcsh CDPATHvariable, it also recognizes a variable CD_PATH whichis synonymous with the CDPATH variable. On someNT systems, having the environment CDPATH variableset causes incorrect behaviour in shells. The CD_PATHvariable is a work-around for this situation.HOUDINI_TEXT_SPACES_FIXIn some cases, users of the NT version of Houdini mayhave problems with spaces not appearing in the Textportand Info Text displays. If you are having this problem,you should set this environment variable.HOUDINI_DISABLE_XMMXDisabling XMMX disables support for intels XMMXinstructions. These are only present on P3s+. The ßagis present due to the possibility of errors being presentin them. Crashing with an "invalid op code" when runningVEX functions is a sign that this may be at fault.HOUDINI_DISABLE_CPUIDDisabling CPUID is present for older 386 era Intelmachines & clones which lack the CPUID instruction.We’d detect for it directly, but this test is ineffective,and it is highly unlikely anyone will use such amachine.HOUDINI_WINDOW_CONSOLESetting this variable forces the creation of a ßoatingconsole, regradless if its output is redirected. This isonly necessary for broken shells that incorrectly startupHoudini window applications with redirected output.At present, only required for cygwin-compiled shells.218 4 Houdini 6.0 Reference
Environment Variables2.9 BACKWARDS COMPATIBILITYHOUDINI4_COMPATIBILITYWhen enabled, some of the quirks of Houdini 4 areturned on. This is designed to be used to allow old hipÞles to be loaded. Support for these inconsistences isnot guaranteed in future versions of Houdidi. Currently,this will: i) Change the order of points inspheres, tubes, torii and circules under certain orientations;ii) Reverse the direction of the Clip SOP’s Distanceparameter; iii) Revert to the old Capture Regionweighting method.HOUDINI_H4_CREGION_WEIGHTINGHoudini weighs points for Capture Regions in the CaptureSOP using the Elendt model by default. Set this ifyou prefer the older method (i.e. 1-distance_squared)2.10 VARIABLES NOT SPECIFIC TO HOUDINIEDITORPAGERThe editor to use when typing A e in an edit Þeld.Default pager when viewing a text Þle using actview(i.e. the Unix commands: less and more).12 - <strong>Scripting</strong> 4 219
Environment Variables2.11 NOTES ON HOUDINI PATHShoudini_pathDescription: This is the main Houdini path. If other path variables aren’t set, theirvalues are implicitly derived from the HOUDINI_PATH (or its default value).Default:$HIP/$HIP/houdini/$USER$JOB/$HOME/houdini/dso/usr/local/houdini/dso$HFS/houdini/dsohoudini_dso_pathDescription: Where plug-in DSO's are searched for.Default:$HIP/dso$HIP/houdini/$USER/dso$JOB/dso$HOME/houdini/dso/usr/local/houdini/dso$HFS/houdini/dsohoudini_ui_pathDesc: Typically not used. This is the path to Þles found in $HH/conÞg .This path is really used by developers only.CLIP, TEXTURE AND GEO PATHSThe CLIP, VEX, TEXTURE and GEO paths interpret special characters.The special characters searched for are:@Expands to the current HOUDINI_PATHFor example, with the default HOUDINI_PATH,@/geo expands to:$HIP/geo$HIP/$USER/geo$JOB/geo$HOME/houdini/geo/usr/local/houdini/geo$HFS/houdini/geo^Expands to the appropriate sub-path (for VEX). Forexample, with the default HOUDINI_PATH when referencinga surface shader:@/vex/^ expands to:220 4 Houdini 6.0 Reference
Environment Variables$HIP/vex/Surface$HIP/$USER/vex/Surface$JOB/vex/Surface$HOME/houdini/vex/Surface/usr/local/houdini/vex/Surface$HFS/houdini/vex/SurfaceIf the speciÞc path variable isn’t set, the defaultHOUDINI_PATH is used (as is evidenced bythe defaults).&Expands to the existing search path. For example, toadd a single directory to a path, you might use:setenv HOUDINI_GEO_PATH '~/jobs;&'houdini_clip_pathDescription: Place to search for channel clipsDefault: .;@/clipshoudini_texture_pathDescription: Place to search for images (in COPs, SOPs or as texture maps)Default: .;@/pic;@/map;@/mapshoudini_geo_pathDescription: Place to search for geometry Þles:Default: .;@/geohoudini_vex_pathDescription: Place to search for compiled .vex code. This also applies to the defaultinclude path for vcc .Default: .;@/vex/include;@/vex/^The portions are:. Current directory@/vex/include@/vex/^Expands to $HIP/houdini/vex/include;~/houdini/vex/include;/usr/local/houdini/vex/include;$HFS/houdini/vex/includeExpands to $HIP/houdini/vex/^~/houdini/vex/^/usr/local/houdini/vex/^$HFS/houdini/vex/^Where you should substitute ^ for the context whichthe VEX function is being used (i.e. SOP, POP, Surface,Displacement).12 - <strong>Scripting</strong> 4 221
Environment Variables2.12 UI PATH VARIABLESThe following path variables are used for the 4.0 (and greater) UI:HOUDINI_CFG_PATHHOUDINI_TOOLBAR_PATHHOUDINI_CUSTOM_PATHHOUDINI_DESK_PATHNote: There is no variable HOUDINI_SHADER_PATH that corresponds toRMAN_SHADERPATH or RMAN_TEXTUREPATH. These variables are used todeÞne paths for RIB generation (and are obsolete now).Every Þle that is found under $HH can usually be replaced with a Þle which is foundearlier in the search path. However, in some cases, all the Þles found in the path are‘merged’. These Þles are:$HH/FBio$HH/GEOio$HH/CHANio$HH/CHOPio$HH/RGBcolors$HH/FBrender$HH/FBres$HH/help/exprhelp$HH/helpThe other way that Þles can be excluded from the default Houdini Path is if the ÞleÞts into a ’special’ category. For example, .vex Þles can have their search path overriddenby the HOUDINI_VEX_PATH variable. This means that users can choose toignore the default Houdini path. However, all other Þles (i.e. .ds dialog script Þles)are only searched for within the HOUDINI_PATH.222 4 Houdini 6.0 Reference