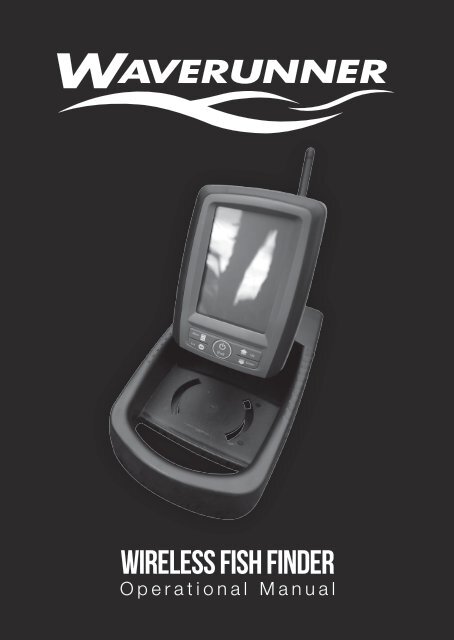
WIRELESS FISH FINDER
WIRELESS FISH FINDER - Waverunner Bait Boats
WIRELESS FISH FINDER - Waverunner Bait Boats
Create successful ePaper yourself
Turn your PDF publications into a flip-book with our unique Google optimized e-Paper software.
<strong>WIRELESS</strong> <strong>FISH</strong> <strong>FINDER</strong>Operational Manual
POWERING THE MONITORThere are 2 ways to power the wff1:1) Use 8 x AA batteryPlease assemble the batteries accordingto the instruction figure curved on theplastic housing.Instruction figure of battery installation3
POWERING THE MONITOR (cont...)Sometimes, you may prefer using a battery forpower supplying.In the package, you can find a separate powercable, which is used to connect the sonar unitto your bait boat batteryPower cableConnect to a batteryNote: in the power cable, there are 2 internal wires:- The red one is for positive electrode.- The black one is for negative electrode.Note: Wff1 can be powered by almost all kindsof battery with voltage of 6~18v.4
POWERING THE MONITOR (cont...)Warning: when use the boat battery forpower supplying; we are not responsiblefor over-voltage or over-current failures.To prevent such possible failures happening,we suggest you using a 3Amp fuse.5
OPERATIONUnderstanding the screenWater DepthWater TempVoltage ReadoutWater SurfaceDepth Range(Up Range)Fish IconGrayline(FC520 only)Bottom ShapeDepth Range(Down Range)This chart shows all the information that your Fishfinder display during the operation. The sonarinformation will firstly appears in the right side,and then scrolls across the screen from right toleft. So, what you see on the screen (Fish symbols,Fish arches, bottom shape, etc) is formed by thesonar history.6
OPERATION (cont...)Keyboard instructionThe Fish finder sound a tone when you press the keywhich means the unit has accepted a command.1. POWER & Exit Key: The POWER & Exit keyis used to turn the Fish Finder on or off. It is alsoused to exit a menu setting.2. Menu Key: The MENU key is used to enter intoa menu setting, and switch between the menus.3. Ent Key: The Ent key is used to confirm a setting.4. Up arrow Key: The Up key is used to selecta certain option on a menu or increase the valueduring some menu setting.5. Down arrow Key: The Down arrow key is usedto select a certain option on a menu or decreasethe value during some menu setting.7
1. SONARSensitiveSensitive determines how echoes will be displayedon the screen.Increasing the sensitivity will make you see moredetails on the screen.In deep water, increasing the sensitivity. Whereas inshallow decreasing the sensitivity. In most situation,just setting sensitivity to “Auto” will work well.To set the Sensitive:1) Press Menu to enter intomenu setting.2) Repeatedly Press Menuto switch to SONAR menu.3) Use the Up/Down Arrowto select Sensitive option.4) Press Ent to enter intosetting.5) Use the Up/Down Arrowto change the value.6) Press Ent to confirm and exit the setting.Note: the menu display will change from figureA to B as soon as entering menu setting.8
1.1 NOISE FILTERNoise Filter is used to filter the noise from the airor water environment to get a clear sonar imageon the screen.In many situations, your Fish finder display will beaffected by undesired signal which may be caused byyour boat engine, turbulence, wiring, or other electricaland mechanical sources. Such undesired signal willproduce unwanted mark on the screen, which maycause a misunderstanding of the underwater condition.In such situations when you see too much clutteron the screen, increasing the Noise Filter will play aneffect. The larger the value is, the more unexpectedSonar returns will not be displayed.If the Noise Filter is increased too high, most sonarreturns (which maybe fish) will not be displayed.In situation while water is clear, try decreasing theNoise Filter, however in situation while water is turbid,try increasing the Noise Filter will be helpful.9
1.2 MAGIC GRAYLINEGrayline is used to let you see both strong and weaksignals on the display.If Grayline is “inversed”, weak returns will be shownwith dark pixels and strong returns with lighter pixels.This is very helpful of ensuring that weak signals willbe clearly visible on the display;If Grayline is “on”, strong returns will be shown withdark pixels and weak returns with lighter pixels. Thisis very helpful of ensuring that strong signals will beclearly visible on the display:To set the Grayline:1) Press Menu to enter intomenu setting.2) Repeatedly Press Menuto switch to SONAR menu.3) Use the Up/Down Arrowto select Grayline option.4) Press Ent to enter intosetting.5) Use the Up/Down Arrowto select the option.6) Press Ent to confirm the setting.7) Press Exit to exit the setting.11
1.3 <strong>FISH</strong> ID SENSORFish ID Sens. is used to adjust the threshold of fishsize detection.If you select a higher setting, then some weakerreturns can be detected and displayed as small fishon screen, which will be very helpful when you areintending to identify small fish species.If you select a lower setting, then only strong returnscan be detected and displayed as big fish on screen,which will be very helpful when you are intending tocatch larger fish species.To set the Fish ID. Sens.:1) Press Menu to enter intomenu setting.2) Repeatedly Press Menuto switch to SONAR menu.3) Use the Up/Down Arrowto select Fish ID. Sens.option.4) Press Ent to enter intosetting.5) Use the Up/Down Arrowto select the option.6) Press Ent to confirm the setting.7) Press Exit to exit the setting.12
2. DISPLAYDepth RangeDepth Range determines in which portion the bottomwill display in the screen. (for example, if the actual depthis 10m, and the current Depth Range is 20m, then thebottom will display on 50% portion of the screen).There are total 10 levels for the depth range setting:a) With feet unit: 10, 15, 25, 35, 50, 70, 85, 100, 131, Autob) With meter unit: 3, 5, 8, 10, 15, 20, 25, 30, 40, AutoAB13
2.1 DEPTH RANGE (cont...)The default setting is Auto, which will keep the bottomalways display in a proper portion on the screen.However in some certain situation, you could alsomanually select a depth range:ABTo set the Depth Range:1) Press Menu to enter into menu setting.2) Repeatedly Press MENU to switch to DISPLAY menu.3) Use the Up/Down Arrow to select Depth Range option.4) Press Ent to enter into setting.5) Use the Up/Down Arrow to change the value.6) Press Ent to confirm and exit the setting.Note: after you enter into the setting by press Ent key,the operation figure will change from A to B, then justpress Down Arrow key to change the levels.14
2.2 ZOOM RANGEZoom Range is used to enlarge some certain depthsegment, which is helpful for you to see small details,fish signals and bottom structure.Your Fish finder has a wonderful performance to seeany depth segment with any scale.For example, if the current Depth Range is 0~40m, bysetting Zoom Range to 20~25m, you can see the sonarimage of the 20~25m depth segment with a 8x scale.And by setting it to 20~30m, you can see the sonarimage of the 20~30m depth segment with a 4x scale.To set the Zoom Range:1) Press Menu to enter intomenu setting.2) Repeatedly Press Menuto switch to DISPLAY menu.3) Use the Up/Down Arrowto select Zoom Range Option.4) Press Ent to enter intosetting.5) Use the Up/Down Arrowto select the option.6) Press Ent to confirm thesetting.7) Press Exit to exit the setting.15
2.2 ZOOM RANGE (cont...)Note: after select “on” option:1) Press Ent to switch to the “Up” or “Low” Range.2) Press Up/Down Arrow to change the value.3) Press Ent to confirm the setting.4) Press Exit to exit the setting.2.3 BACKLIGHTBacklight allows the unit to be used at night.There are 10 levels for you to adjust the brightnessof backlight.To set the Backlight:1) Press Menu to enter intomenu setting.2) Repeatedly Press Menuto switch to DISPLAY menu.3) Use the Up/Down Arrowto select Backlight option.4) Press Ent to enter intosetting.5) Use the Up/Down Arrowto change the value.6) Press Ent to confirm and exit the setting.16
2.4 CONTRASTContrast can let you get a suitable display.To set the Contrast:1) Press Menu to enterinto menu setting.2) Repeatedly Press Menuto switch to DISPLAY menu.3) Use the Up/Down Arrowto select Contrast option.4) Press Ent to enter intosetting.5) Use the Up/Down Arrowto change the value.6) Press Ent to confirm andexit the setting.17
2.5 OVERLAP DATAOn the upper left corner display, there are 3 readout:Water depth, Temperature, Voltage. Overlap Datadetermine which readout will be displayed.To set the Contrast:1) Press Menu to enterinto menu setting.2) Repeatedly Press Menuto switch to DISPLAY menu.3) Use the Up/Down Arrowto select Overlap Data option.4) Press Ent to enter intosetting.5) Use the Up/Down Arrowto change the value.6) Press Ent to confirm andexit the setting.18
3 ALARMDepth AlarmThe Fish finder sound an alarm tone when the bottomgoes shallower or equal than the alarm’s setting.Note: once triggered, an alarm message will appear onthe screen. You can press Menu key to exit the depthalarm mode, however the alarm will trigger again untilyour boat move to an area where the water depth isbeyond the depth alarm range.You also can choose exiting alarm mode by enter intoDepth Alarm menu and artificially increase the currentdepth alarm value to a safe grade.To set the Depth Alarm:1) Press Menu to enter intomenu setting.2) Repeatedly Press Menuto switch to ALARM menu.3) Use the Up/Down Arrowto select Depth Alarm option.4) Press Ent to enter intosetting.5) Use the Up/Down Arrowto change the value.6) Press Ent to confirm and exit the setting.19
3.1 <strong>FISH</strong> ALARMThe Fish finder sound an alarm tone when it detectswhat it determines to be a fish.To set the Fish Alarm:1) Press Menu to enter intomenu setting2) Repeatedly Press Menuto switch to ALARM menu.3) Use the Up/Down Arrowto select Fish Alarm option.4) Press Ent to enter intosetting.5) Use the Up/Down Arrowto change the value.6) Press Ent to confirm and exit the setting.20
3.2 MAIN BATTERYThe Fish finder sounds an alarm tone when the batterystrength of the sonar unit is lower than the setting.To set the Main Battery:1) Press Menu to enter intomenu setting.2) Repeatedly Press Menuto switch to ALARM menu.3) Use the Up/Down Arrowto select Main Batteryoption.4) Press Ent to enter intosetting.5) Use the Up/Down Arrowto change the value.6) Press Ent to confirm and exit the setting.Note: once triggered, an alarm message will appearon the screen. The alarm willrepeatedly appear unless thevoltage of the battery is higherthan the Battery Alarm setting.You can manually choose exiting the alarm mode byentering into Main Battery Alarm menu setting, andjust changing the setting to a safe value will be OK.21
3.3 BOAT BATTERYThe Fish finder sounds an alarm tone when the batterystrength of your bait boat is lower than the setting.To set Boat Battery:1) Press Menu to enter intomenu setting.2) Repeatedly Press Menuto switch to ALARM menu.3) Use the Up/Down Arrowto select Boat Battery option.4) Press Ent to enter intosetting.5) Use the Up /Down Arrowto change the value.6) Press Ent to confirmand exit the setting.Note: only when the RES sensor is powered by thebattery of your bait boat, then the Boat Battery Alarm canbe available. Note: once triggered, an alarm message willappear on the screen. The alarm will repeatedly appearunless the voltage of the boat is higher than the setting.You can manually choose exiting the alarm Mode byentering into Boat Battery Alarm menu setting, and justchanging the setting to a safe value will be OK.22
4. SYSTEMBeeperBeeper is used to determine whether the Fish finderwill sound a tone or not when a key is pressed.To set Beeper1) Press Menu to enter intomenu setting.2) Repeatedly Press Menuto switch to SYSTEM menu.3) Use the Up/Down Arrowto select Beeper option.4) Press Ent to enter intosetting.5) Use the Up/Down Arrowto select the option.6) Press Ent to confirm the setting.7) Press Exit to exit the setting.23
4.1 UNITSUnits is used to choose the depth unit and temp.To set the units:1) Press Menu to enter intomenu setting.2) Repeatedly Press Menuto switch to Units menu.3) Use the Up/Down Arrowto select Units option.4) Press Ent to enter intosetting.5) Use the Up/Down Arrowto select the option.6) Press Ent to confirm thesetting.7) Press Exit to exit the setting.24
4.2 LANGUAGELanguage is used to choose the language ofmenu operation.To set the Language:1) Press Menu to enter intomenu setting.2) Repeatedly Press Menuto switch to SYSTEMmenu.3) Use the Up/Down Arrowto select Language option.4) Press Ent to enter intosetting.5) Use the Up/Down Arrowto select the option.6) Press Ent to confirmthe setting.7) Press Exit to exit the setting.25
4.3 SYSTEM RESETSystem Reset is used to restore original factory setting.To set the System Reset:1) Press Menu to enter intomenu setting.2) Repeatedly Press Menuto switch to SYSTEM menu.3) Use the Up/Down Arrowto select System Resetoption.4) Press Ent to enter intosetting.5) Use the Up/Down Arrowto select the option.6) Press Ent to confirm the setting.7) Press Exit to exit the setting.26
4.4 SIMULATORSimulator is used to let you practicing using theFish finder as if you were on the water.Under the simulating mode, the simulated bottomsignal with fish signals will display and move acrossthe screen, and under the simulating mode, you stillcould change settings to view different sonar imageto have a complete understanding of your Fish finder.To set the Simulator:1) Press Menu to enter intomenu setting.2) Repeatedly Press Menuto switch to SYSTEM menu.3) Use the Up/Down Arrowto select Simulator option.4) Press Ent to enter intosetting.5) Use the Up/Down Arrowto select the option.6) Press Ent to confirm the setting.7) Press Exit to exit the setting.27
TROUBLESHOOTINGYou are not supposed to fix the handheld or the sensor.The product contains no customizable parts. On theother hand, the waterproof performance is enabled byunique techniques, functions of which may be disabledby unauthorised disassembly. On this account, onlyprofessional maintenance personnel properly authorisedby the Company are entitled to any repair necessary.We have been contacted frequently by our customersrequesting repair service. We inspect their productsand find many of them are not in need of repair: theproblems occur because some customers are not veryacquainted with product usage. And we are forced tolabel these products as “inapplicable for maintenance”and return them to the customers.Therefore, in the event of problems during product use,we invite you to read the following troubleshooting partcarefully before you send the product for maintenance.28
1. No signal on screenIf the Fish finder fails to receive signals from the sensor,it will stop updating the screen (which will then remainunchanged).Under any circumstances, if the sonar unit cannotreceive signals transmitted by the RES sensor thescreen will seem the same until signals are restored.1) FC500 is a product depending upon line of sight.Obstacles between the handheld and the sensor cancontribute to signal loss.2) FC500 has a detection depth ranging from 0.6 to 30meters. Incorrect readings may appear in water areaswith depth less than 0.6m. Additionally, consideringthe sonar physical characters, we suggest you avoidusing the product in shallow or small- sized enclosedwater areas.Note: the depth is calculated from the bottom ofsensor, which is fixed on your bait boat.3) The maximum remote-control distance for the sensorreaches 1000 feet (300m). If the sensor with the baitboat moves out of the range, inconsistent signals willhappen or even no signals will be transmitted to thesonar unit.29
TROUBLESHOOTING (cont...)2. Nothing is displayed after the fish finder ispoweredBe sure the battery’s positive and negative poles arecorrectly oriented in the holder. Also, check if the batteryhas enough capacity.3. When using the device in shallow water areas,the screen does not display things normally anddepths are not indicated with consistencyWff1 has a depth capability from 0.6 to 30m, howeverdue to the sonar character; the sensor cannot achievethe best performance in shallow water. Generallyspeaking, please use wff1 in water area not shallowthan 1.0m.4. The picture displayed on the screen vibratesThe picture vibrates because the sea bottom depthbeing scanned is changing. Since the depth range usedby the current test signal and by the previous test signaldiffers, plus the varying height of water bottom, picturesdisplayed on the screen will occupy different heights,causing the vibrating phenomenon.30
5. Nothing appears on the display even you cansee fish under the sensora) Oil, dirt and fuel might cause a film to form on thesensor and reduce its effectiveness. Cleaning thesurface of the transducer might help.b) Electrical noise nearby can interfere with the sonar,which will cause some weaker signals being eliminated.6. The display become so cluttered that you evencould not achieve a clear bottomSuch cluttered display maybe caused because:a) The water is too lowb) The water is too turbidc) There is so much debris in the water,7. The sonar unit cannot reach 300m. There is aabnormal display on the display, and when thebait boat is about 60~70m. Faraway, the sonarunit stops workinga) Please confirm the sensor is mounted at the properlocation on your bait boat. An improper mountinglocation will cause abnormal display.b) The radio performance is easily affected by cloudyor rainy day, which will cause the Remote Controldistance decreasing greatly.31
MAINTENANCEWith a view to making use of your Fish finder,we recommend you follow the steps below andcarry out maintenance.1. for the caseCleaning the sonar unit’s outer case (except for thescreen) with a cloth dipped mild detergent solution,and then wipes it dry.2. for the screenUse a piece of soft cloth or pelt to clean the screen(fresh water or eyeglass cleaner can be used ifneeded). Stubborn dirt or oil stains remaining on thescreen shall not be wiped with force; otherwise itmay scratch the surface.Additionally, give daily attention to ensure the screenis keep away from any chemicals.32
GUARANTEE CONDITIONS1. We assure you this product is free from defects inmaterials and workmanship. The warranty coverageis One Year from the date of purchase, duringwhich if the unit fails to perform as described in theproduct’s written specifications, we will repair orreplace it free of charge. As for products exceedingthe warranty coverage, charges will apply.2. This warranty is void if damage or malfunctionis due to abuse, misuse, accident, failure toreasonably maintain, improper installation or use, orunauthorised alteration or repairs. We retain the finalright to judge or repair the defected products.3. We hold the right to update the products. And itis not obligated for us to update the former productsaccording to the new standard.33
SPECIFICATIONS AND FEATURESDisplayDisplay size: 4.5in, FSTN LCD.Display Resolution: 240 x 128 Pixels.Grayscale: 4 Levels.Adjustable backlight and contrast.Visible under sunlight.Language: English / German / French / Russian.Sonar & RadioDepth Capability: 0.6~30m.Wireless Operating Range: Max 300m.Sonar Frequency: 115KHZ.Sonar Beam Angle: 80deg @-10db.Sonar Alarms: Fish / Shallow / Low Battery.Monitor and Display Real-time Voltageof Bait boat Battery.Technical and casingSensor Cable Length: 1.2m.Sonar unit size: 153 x110 x 44mm.Portable Case Size: 262 x 150 x 98mm.Operational Temperature: -10°C ~ 50°C.Water & Air Temp. Included.IPX7 Level Waterproof Casing Design.34
PowerControl box Power Supply: 6~12V DC or any bait boatbattery of 12~18V.Sonar Unit Power Supply: 8 × AA Alkaline Batteries.Other Features1) Grayline features separates fish and structure fromthe bottom, and defines bottom hardness.2) Zoom Capability to magnify the sonar image.3) Built-in temp sensor in transducer.4) Display target depth reading above each fish symbol.5) Displays fish targets at higher boat speeds.6) Feature memory remembers settings.7) Fresh / salt water environment.8) Rugged portable case gives the full protectionto Fish finder while in storage or transport.9) Full one-year warranty35
NOTES36
NOTES38
www.waverunnerbaitboats.co.ukTel: 01942 258 532 | Fax: 01942 258 796


