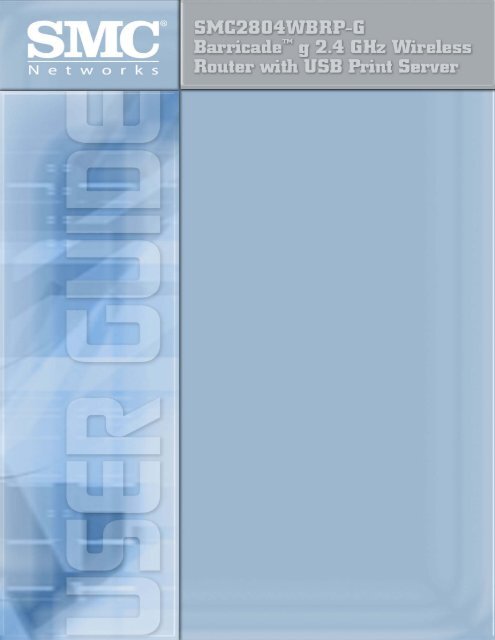
Barricade g Wireless Router with USB Print Server - SMC
Barricade g Wireless Router with USB Print Server - SMC
Barricade g Wireless Router with USB Print Server - SMC

Create successful ePaper yourself
Turn your PDF publications into a flip-book with our unique Google optimized e-Paper software.
<strong>Barricade</strong> g <strong>Wireless</strong> <strong>Router</strong> <strong>with</strong> <strong>USB</strong> <strong>Print</strong> <strong>Server</strong> Manual<br />
Copyright<br />
Information furnished by <strong>SMC</strong> Networks, Inc. (<strong>SMC</strong>) is believed to be accurate and reliable.<br />
However, no responsibility is assumed by <strong>SMC</strong> for its use, nor for any infringements of patents or<br />
other rights of third parties which may result from its use. No license is granted by implication or<br />
otherwise under any patent or patent rights of <strong>SMC</strong>. <strong>SMC</strong> reserves the right to change specifications<br />
at any time <strong>with</strong>out notice.<br />
Copyright © 2003 by<br />
<strong>SMC</strong> Networks, Inc.<br />
38 Tesla<br />
Irvine, CA 92618<br />
All rights reserved.<br />
Trademarks:<br />
<strong>SMC</strong> is a registered trademark; and <strong>Barricade</strong> is a trademark of <strong>SMC</strong> Networks, Inc. Other product<br />
and company names are trademarks or registered trademarks of their respective holders.<br />
2
<strong>Barricade</strong> g <strong>Wireless</strong> <strong>Router</strong> <strong>with</strong> <strong>USB</strong> <strong>Print</strong> <strong>Server</strong> Manual<br />
TABLE OF CONTENTS<br />
CHAPTER 1 | Introduction<br />
Features and Benefits<br />
Package Contents<br />
Minimum Requirements<br />
CHAPTER 2 | Getting to know the <strong>Barricade</strong> g<br />
LED Indicators<br />
Resetting the <strong>Barricade</strong> g<br />
CHAPTER 3 | Getting Connected<br />
Basic Installation Procedure<br />
3-click Installation Wizard<br />
CHAPTER 4 | Configuring your Computer<br />
Configuring Windows 95/98/Me<br />
Configuring Windows 2000<br />
Configuring Windows XP<br />
Configuring a Macintosh Computer<br />
CHAPTER 5 | Configuring the <strong>Barricade</strong> g<br />
Browser Configuration<br />
Disable Proxy Connection<br />
Accessing the <strong>Barricade</strong> Management<br />
CHAPTER 6 | Navigating the Web-based Administration<br />
Making Configuration Changes<br />
CHAPTER 7 | Setup Wizard<br />
CHAPTER 8 | Advanced Setup<br />
CHAPTER 9 | Setting up the <strong>Print</strong> <strong>Server</strong><br />
Install the <strong>SMC</strong> <strong>Print</strong>er Port Monitor<br />
Configure the <strong>Print</strong> <strong>Server</strong> using the <strong>SMC</strong> <strong>Print</strong>er Port Monitor<br />
Configure LPR port on Windows 2000/XP<br />
APPENDIX A | PC Troubleshooting<br />
APPENDIX B | Internet Connection Troubleshooting<br />
APPENDIX C | Frequently Asked Questions<br />
APPENDIX D | Port List – Application / Games<br />
APPENDIX E | Technical Specifications<br />
APPENDIX F | Compliances<br />
APPENDIX G | Technical Support<br />
3
<strong>Barricade</strong> g <strong>Wireless</strong> <strong>Router</strong> <strong>with</strong> <strong>USB</strong> <strong>Print</strong> <strong>Server</strong> Manual<br />
CHAPTER 1 | Introduction<br />
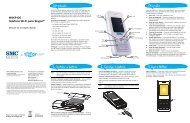
Congratulations on your purchase of a <strong>Barricade</strong> g Broadband <strong>Router</strong> <strong>with</strong> <strong>USB</strong> <strong>Print</strong> <strong>Server</strong><br />
(<strong>SMC</strong>2804WBRP-G). <strong>SMC</strong> is proud to provide you <strong>with</strong> a powerful yet simple communication device<br />
for connecting your local area network (LAN) to the Internet and sharing a <strong>USB</strong> printer on your<br />
network.<br />
1.0 | Features and Benefits<br />
• EZ 3-Click Installation Wizard - A new and improved way to install your <strong>Barricade</strong> in<br />
seconds<br />
• Built-in <strong>USB</strong> print <strong>Server</strong> to share your <strong>USB</strong>-enabled printer<br />
• Internet connection to ethernet broadband modem via a 10/100 Mbps WAN port<br />
• Local network connection via a 4-port auto-sensing 10/100 Mbps Ethernet switch<br />
• DHCP for dynamic IP configuration, and DNS for domain name mapping<br />
• Firewall <strong>with</strong> Stateful Packet Inspection, client privileges, hacker prevention, DoS, and NAT<br />
• NAT also enables multi-user access <strong>with</strong> a single-user account, and virtual server<br />
functionality (providing protected access to Internet services such as web, mail, FTP, and<br />
Telnet)<br />
• Virtual Private Network support using PPTP, L2TP, or IPSec pass-through<br />
• User-definable application sensing tunnel supports applications requiring multiple<br />
connections<br />
• Parental controls allows the user to block access to certain web sites<br />
• Email alerts when the users network is being compromised<br />
• Easy setup through a web browser on any operating system that supports TCP/IP<br />
• Compatible <strong>with</strong> various internet applications, including Peer-to-Peer file sharing, Online<br />
Games, and Instant Message utilities.<br />
1.1 | Package Contents<br />
Before installing the <strong>Barricade</strong> g Broadband <strong>Router</strong> <strong>with</strong> <strong>USB</strong> <strong>Print</strong> <strong>Server</strong>, verify that you have the<br />
items listed under “Package Contents.” Also be sure that you have the necessary cabling. If any of<br />
the items are missing or damaged, contact your local <strong>SMC</strong> distributor.<br />
• <strong>Barricade</strong> g Broadband <strong>Router</strong> <strong>with</strong> <strong>USB</strong> <strong>Print</strong> <strong>Server</strong><br />
• Power adapter (9v/1a)<br />
• One CAT-5 Ethernet cable<br />
• CD <strong>with</strong> User Guide and EZ 3-Click Installation Wizard<br />
• Quick Installation Guide<br />
If possible, retain the carton and original packing materials in case there is a need to return the<br />
product.<br />
1.2 | Minimum Requirements<br />
• Cable or DSL Modem <strong>with</strong> Ethernet connection and Internet access from your local<br />
telephone company or Internet Service Provider (ISP) using a DSL modem or cable modem.<br />
• A computer equipped <strong>with</strong> a 10 Mbps, 100 Mbps, or 10/100 Mbps Fast Ethernet card, or<br />
<strong>USB</strong>-to-Ethernet converter.<br />
• Network adapter <strong>with</strong> Ethernet (UTP CAT 5) cabling and TCP/IP protocol installed per PC<br />
• Internet Explorer 4.0 (or Higher) or Netscape Navigator 4.7 (or Higher) for Web-based<br />
configuration of the <strong>Barricade</strong><br />
4
<strong>Barricade</strong> g <strong>Wireless</strong> <strong>Router</strong> <strong>with</strong> <strong>USB</strong> <strong>Print</strong> <strong>Server</strong> Manual<br />
CHAPTER 2 | Getting to Know the <strong>Barricade</strong><br />
The <strong>SMC</strong>2804WBRP-G <strong>Barricade</strong> Cable/DSL Broadband <strong>Router</strong> is the perfect solution for the<br />
home/office environment. This full-featured router offers:<br />
• 1 - <strong>USB</strong> 1.1 <strong>Print</strong> <strong>Server</strong> port<br />
• 802.11g <strong>Wireless</strong> <strong>with</strong> Performance Enhancing Nitro Technology<br />
• 4 - 10/100 Mbps Auto-Sensing LAN ports <strong>with</strong> Auto-MDI MDIX feature<br />
• 1 - 10/100 Mbps WAN port <strong>with</strong> Auto-MDI MDIX feature<br />
• Comprehensive LEDs for network status and troubleshooting<br />
• Reset Button<br />
2.1 | LED Indicators<br />
The <strong>Barricade</strong> includes LED indicators on the front panel that simplify installation and network<br />
troubleshooting.<br />
LED ON OFF FLASHING<br />
PWR (POWER) Receiving power Not receiving power N/A<br />
SPD (WAN) 100Mbps WAN<br />
10Mbps WAN<br />
N/A<br />
connection detected connection detected<br />
Link/ACT (WAN) Good WAN connection No WAN connection Data transmitting<br />
detected<br />
detected<br />
through the WAN<br />
WLAN <strong>Wireless</strong> function is <strong>Wireless</strong> function is Data transmitting<br />
enabled<br />
disabled<br />
through wireless<br />
Link/ACT (LAN) Good LAN connection No LAN connection Data transmitting<br />
detected<br />
detected<br />
through the LAN<br />
Resetting the <strong>Barricade</strong><br />
The Reset button is located on the rear panel of the <strong>Barricade</strong> Broadband <strong>Router</strong>. Use a paper clip<br />
or a pencil tip to push the Reset button.<br />
Reset<br />
If the <strong>Router</strong> is having problems connecting to the Internet, simply unplug the router for 3 seconds<br />
then plug back in.<br />
Restore Factory Defaults<br />
If resetting the router does not resolve your issue, then you can follow these steps:<br />
1. Leave power plugged into the router<br />
2. Locate the reset button on the back panel, press and hold until WAN LED flashes off.<br />
3. Release reset button.<br />
5
<strong>Barricade</strong> g <strong>Wireless</strong> <strong>Router</strong> <strong>with</strong> <strong>USB</strong> <strong>Print</strong> <strong>Server</strong> Manual<br />
CHAPTER 3 | Getting Connected<br />
The <strong>SMC</strong>2804WBRP-G <strong>Barricade</strong> g <strong>Router</strong> <strong>with</strong> <strong>USB</strong> <strong>Print</strong> <strong>Server</strong> is connected between the Ethernet<br />
Broadband Modem and your computers, either wired or wireless. If you have more then one<br />
computer to connect, simply plug the other computers into the LAN ports on the back of the router<br />
or connect via a wireless signal.<br />
MODEM<br />
connected<br />
t o WAN Port<br />
3.1 | Basic Installation Procedure<br />
COMPUTER<br />
connected to<br />
LAN Port<br />
1. CONNECT the WAN<br />
Connect an Ethernet cable from your cable or DSL modem to the <strong>Barricade</strong> g WAN port on the<br />
back on the router.<br />
2. CONNECT the LAN<br />
Run an Ethernet cable from one of the LAN ports on the back of the <strong>Barricade</strong> g to your<br />
computer’s wired network adapter.<br />
3. POWER on<br />
Connect the power cable to the <strong>Barricade</strong>.<br />
NOTE: It is highly recommended that you do you initial configuration from a wired connection.<br />
Once you have completed connecting all of the hardware, simply insert the <strong>Barricade</strong> g CD-ROM<br />
and the EZ 3-Click Installation Wizard will automatically get you connected you to the Internet.<br />
For manual configuration of the PCs, see Chapter 4.<br />
For advanced configuration of the <strong>Barricade</strong> Broadband <strong>Router</strong>, see Chapter 5.<br />
6
<strong>Barricade</strong> g <strong>Wireless</strong> <strong>Router</strong> <strong>with</strong> <strong>USB</strong> <strong>Print</strong> <strong>Server</strong> Manual<br />
CHAPTER 4 | Configuring your Computer<br />
The information outlined in this chapter will guide you through the configuration for the following<br />
Operating Systems:<br />
• Windows 95/98<br />
• Windows Me<br />
• Windows 2000<br />
• Windows XP<br />
• Apple Macintosh<br />
4.1 | Configuring Windows 95/98/Me<br />
1. Access your Network settings by clicking [Start], choose [Settings], and then select [Control<br />
Panel].<br />
2. In the Control Panel, locate and double-click the [Network] icon.<br />
3. Highlight the TCP/IP line that has been assigned to your network card on the<br />
[Configuration] tab of the [Network] properties window.<br />
4. Next, click the [Properties] button to view that adapter’s TCP/IP settings.<br />
7
<strong>Barricade</strong> g <strong>Wireless</strong> <strong>Router</strong> <strong>with</strong> <strong>USB</strong> <strong>Print</strong> <strong>Server</strong> Manual<br />
5. From the TCP/IP Properties dialog box, click the [Obtain an IP address automatically]<br />
option.<br />
6. Next click on the [Gateway] tab and verify the Gateway field is blank. If there are IP<br />
addresses listed in the Gateway section, highlight each one and click [Remove] until the<br />
section is empty.<br />
7. Click the [OK] button to close the TCP/IP Properties window.<br />
8. On the Network Properties Window, click the [OK] button to save these new changes.<br />
NOTE: Windows may ask you for the original Windows installation disk or additional files.<br />
Check for the files at c:\windows\options\cabs, or insert your Windows CD-ROM into your<br />
CD-ROM drive and check the correct file location, for example, D:\win98, D:\win9x.<br />
(assume “D” is your CD-ROM drive).<br />
9. Windows may prompt you to restart the PC. If so, click the [Yes] button. If Windows does<br />
not prompt you to restart your computer, do so anyways to ensure your settings.<br />
4.2 | Configuring Windows 2000<br />
1. Access your Network settings by clicking [Start], choose [Settings], and then select [Control<br />
Panel]<br />
2. In the Control Panel, locate and double-click the [Network and Dial-up Connections] icon<br />
3. Locate and double-click the [Local Area Connection] icon for the Ethernet adapter that is<br />
connected to the <strong>Barricade</strong>. When the Status dialog box window opens, click the<br />
[Properties] button.<br />
4. On the [Local Area Connection] Properties box, verify the box next to Internet Protocol<br />
(TCP/IP) is checked. Then highlight the Internet Protocol (TCP/IP), and click the Properties<br />
button.<br />
5. Select Obtain an IP address automatically to configure your computer for DHCP. Click the<br />
[OK] button to save this change and close the Properties window.<br />
6. Click the [OK] button again to save these new changes.<br />
7. Reboot your PC.<br />
8
<strong>Barricade</strong> g <strong>Wireless</strong> <strong>Router</strong> <strong>with</strong> <strong>USB</strong> <strong>Print</strong> <strong>Server</strong> Manual<br />
4.3 | Configuring Windows XP<br />
The following instructions assume you are running Windows XP <strong>with</strong> the default interface. If you<br />
are using the Classic interface (where the icons and menus look like previous Windows versions),<br />
please follow the instructions for Windows 2000 outlined above.<br />
1. Access your Network settings by clicking [Start], choose [Control Panel], select [Network<br />
and Internet Connections] and then click on the [Network Connections] icon.<br />
2. Locate and double-click the Local Area Connection icon for the Ethernet adapter that is<br />
connected to the <strong>Barricade</strong> <strong>Router</strong>. Next, click the [Properties] button.<br />
3. On the [Local Area Connection] Properties box, verify the box next to Internet Protocol<br />
(TCP/IP) is checked. Then highlight the Internet Protocol (TCP/IP), and click the Properties<br />
button.<br />
4. Select Obtain an IP address automatically to configure your computer for DHCP. Click the<br />
[OK] button to save this change and close the Properties window.<br />
5. Click the [OK] button again to save these new changes.<br />
6. Reboot your PC.<br />
9
<strong>Barricade</strong> g <strong>Wireless</strong> <strong>Router</strong> <strong>with</strong> <strong>USB</strong> <strong>Print</strong> <strong>Server</strong> Manual<br />
4.4 | Configuring a Macintosh Computer<br />
You may find that the instructions here do not exactly match your screen. This is because these<br />
steps and screenshots were created using Mac OS 8.5. Mac OS 7.x and above are all very similar,<br />
but may not be identical to Mac OS 8.5.<br />
1. Pull down the Apple Menu. Click [Control Panel] and select TCP/IP.<br />
2. In the TCP/IP dialog box, make sure that [Ethernet] is selected in the [Connect Via:] field.<br />
If [Using DHCP <strong>Server</strong>] is already selected in the [Configure] field, your computer is already<br />
configured for DHCP. Close the TCP/IP dialog box, and skip to Step 2 Disable HTTP Proxy<br />
(bottom of this page).<br />
3. All the information that you need to record is on the [TCP/IP] dialog box. Use the space<br />
below to record the information.<br />
4. Select [Using DHCP <strong>Server</strong>] in the [Configure] field and close the window.<br />
5. Another box will appear asking whether you want to save your TCP/IP settings. Click<br />
[Save].<br />
10
<strong>Barricade</strong> g <strong>Wireless</strong> <strong>Router</strong> <strong>with</strong> <strong>USB</strong> <strong>Print</strong> <strong>Server</strong> Manual<br />
CHAPTER 5 | Configuring the <strong>Barricade</strong><br />
After you have configured TCP/IP on a client computer, use a web browser to configure the<br />
<strong>Barricade</strong> Broadband <strong>Router</strong>. The <strong>Barricade</strong> can be configured by any Java-supported browser<br />
including Internet Explorer 4.0 or above, or Netscape Navigator 4.7 or above. Using the web<br />
management interface, you may configure the <strong>Barricade</strong> and view statistics to monitor network<br />
activity.<br />
NOTE: Before you attempt to configure your router, if you have access to the Internet<br />
please visit www.smc.com and download the latest firmware update.<br />
Before you attempt to log into the <strong>Barricade</strong>’s Web-based Administration, please verify the<br />
following:<br />
1. Your browser is configured properly. (see below)<br />
2. Disable any firewall or security software that may be running.<br />
3. Confirm that you have a good “link” LED where your computer is plugged into the<br />
<strong>Barricade</strong>. If you don’t have a “link” light, try another cable until you get a good link.<br />
5.1 | Browser Configuration<br />
Confirm your browser is configured for a direct connection to the Internet using the Ethernet cable<br />
that is installed in the computer. This is configured through the options/preference section of your<br />
browser.<br />
5.2 | Disable Proxy Connection<br />
You will also need to verify that the “HTTP Proxy” feature of your web browser is disabled. This is so<br />
that your web browser will be able to view the <strong>Barricade</strong> configuration pages. The following steps<br />
are for Internet Explorer and for Netscape. Determine which browser you use and follow the<br />
appropriate steps.<br />
Internet Explorer (5 or above)<br />
1. Open Internet Explorer. Click [Tools], and then select [Internet Options].<br />
2. In the [Internet Options] window, click the [Connections] tab.<br />
3. Click the [LAN Settings] button.<br />
4. Clear all the check boxes and click [OK] to save these LAN settings changes.<br />
5. Click [OK] again to close the [Internet Options] window.<br />
Netscape (4 or above)<br />
1. Open Netscape. Click [Edit], and then select [Preferences].<br />
2. In the [Preferences] window, under [Category], double-click [Advanced], then select the<br />
[Proxies] option.<br />
3. Check [Direct connection to the Internet].<br />
4. Click the [OK] button to save the changes.<br />
11
<strong>Barricade</strong> g <strong>Wireless</strong> <strong>Router</strong> <strong>with</strong> <strong>USB</strong> <strong>Print</strong> <strong>Server</strong> Manual<br />
5.3 | Accessing the <strong>Barricade</strong> Management<br />
To access the <strong>Barricade</strong>’s web-based management screens, follow the steps below:<br />
1. Launch your web-browser.<br />
NOTE: Your computer does not have to be ONLINE to configure the <strong>Barricade</strong> <strong>Router</strong>.<br />
2. In the Address Bar, type: http://192.168.2.1<br />
3. When the <strong>Barricade</strong>’s Login screen appears, enter the default password, and click the<br />
[Login] button to access the router.<br />
NOTE: The <strong>Barricade</strong> g default password is “smcadmin”. The password is case sensitive.<br />
4. Once you have logged into the <strong>Barricade</strong> web-based admin screens, you have 2 options<br />
which are outlined in Chapter 6 | Navigating the Web-based Administration<br />
12
<strong>Barricade</strong> g <strong>Wireless</strong> <strong>Router</strong> <strong>with</strong> <strong>USB</strong> <strong>Print</strong> <strong>Server</strong> Manual<br />
CHAPTER 6 | Navigating the Web-based Administration<br />
The <strong>Barricade</strong>’s management interface features a Setup Wizard and an Advanced Setup section.<br />
Use the Setup Wizard if you want to quickly setup the <strong>Barricade</strong> for use <strong>with</strong> a cable modem or DSL<br />
modem. Advanced setup supports more advanced functions like hacker attack detection, IP and<br />
MAC address filtering, intrusion detection, virtual server setup, virtual DMZ hosts, as well as other<br />
advanced functions.<br />
6.1 | Making Configuration Changes<br />
Configurable parameters have a dialog box or a drop-down list. Once a configuration change has<br />
been made on a page, be sure to click the “SAVE SETTINGS” or the appropriate button at the<br />
bottom of the page to save and enable the new settings.<br />
Note: To ensure proper screen refresh after a command entry, be sure that Internet Explorer 5.0 is<br />
configured as follows: Under the menu “Tools/Internet Options/General/Temporary Internet<br />
Files/Settings,” the setting for “Check for newer versions of stored pages” should be “Every visit to<br />
the page.”<br />
This next generation <strong>Barricade</strong> has a new web-based interface that<br />
is easier to use and is faster. Each option is accessible from the<br />
new side navigation section.<br />
If you want to setup the <strong>Router</strong> using the built-in Setup Wizard,<br />
simply click on the SETUP WIZARD option to start the process.<br />
13
<strong>Barricade</strong> g <strong>Wireless</strong> <strong>Router</strong> <strong>with</strong> <strong>USB</strong> <strong>Print</strong> <strong>Server</strong> Manual<br />
CHAPTER 7 | Setup Wizard<br />
Below is an outline of each option available from the Setup Wizard section. This wizard takes 3<br />
steps to complete an ISP configuration.<br />
7.1 | Step One: Time Zone<br />
The first step is to configure the Time Zone you are located in. This setting is used for accurate<br />
timing of client filtering and log events.<br />
7.2 | Step Two: Broadband Type<br />
Select the type of broadband connection you have.<br />
Cable Modem: This is a Dynamic or DHCP Internet connection type – typically used by Cable Modem<br />
Internet connections.<br />
Fixed-IP xDSL: This is a Static IP Internet connection type – choose this option if you ISP has<br />
provided you <strong>with</strong> all the correct static IP info.<br />
14
<strong>Barricade</strong> g <strong>Wireless</strong> <strong>Router</strong> <strong>with</strong> <strong>USB</strong> <strong>Print</strong> <strong>Server</strong> Manual<br />
PPPoE: This Internet connection method requires a username and password - typically used by<br />
xDSL Internet connections.<br />
PPTP: Point-to-Point Tunneling Protocol is a common connection method used for xDSL connections<br />
in Europe.<br />
BigPond®: The BigPond Internet service is used in Australia and uses a Heartbeat client to stay<br />
online.<br />
7.3 | Step Three: Finish Configuration<br />
Once you have configured your type of ISP connection, simply click the [Finish] button and the<br />
<strong>Barricade</strong> g will automatically configure your Internet connection.<br />
15
<strong>Barricade</strong> g <strong>Wireless</strong> <strong>Router</strong> <strong>with</strong> <strong>USB</strong> <strong>Print</strong> <strong>Server</strong> Manual<br />
CHAPTER 8| Advanced Setup<br />
Below is an outline of the Advanced Setup section. This section is used to manually configure your<br />
ISP connection and also define the advanced system parameters, manage and control the <strong>Barricade</strong><br />
and its ports, or monitor network conditions.<br />
8.1 | System<br />
This section is used to configure the local time zone, password for administrator access, and the IP<br />
address of a PC that will be allowed to manage the <strong>Barricade</strong> remotely.<br />
8.1.1 | Time Zone<br />
Use this option to configure the time zone for the <strong>Barricade</strong>. This information is used for log<br />
entries and client access control.<br />
In this section you can enable or disable the Automatic Time <strong>Server</strong> Maintenance feature. This<br />
features uses open-access NTP servers available on the internet to keep your <strong>Router</strong> Time/Date<br />
current.<br />
For the best results, choose a Primary <strong>Server</strong> and Secondary <strong>Server</strong>. If the <strong>Barricade</strong> is unable to<br />
reach the Primary <strong>Server</strong> for any reason (i.e. busy) then it will default to the Secondary <strong>Server</strong>.<br />
16
<strong>Barricade</strong> g <strong>Wireless</strong> <strong>Router</strong> <strong>with</strong> <strong>USB</strong> <strong>Print</strong> <strong>Server</strong> Manual<br />
8.1.2 | Password Settings<br />
Use this menu to restrict access based on a password. By default, the password is “smcadmin”.<br />
NOTE: Passwords can contain up to 9 alphanumeric characters and are case sensitive.<br />
8.1.3 | Remote Management<br />
This feature allows a remote PC to configure, manage, and monitor the <strong>Barricade</strong> using a standard<br />
web browser.<br />
The default port for WAN remote management is port 8080.<br />
To access the <strong>Barricade</strong> remote management from the Internet you can use any web browser. To<br />
access it follow this format for the URL:<br />
http://xxx.xxx.xxx.xxx:8080 (xxx.xxx.xxx.xxx = your WAN IP address)<br />
17
<strong>Barricade</strong> g <strong>Wireless</strong> <strong>Router</strong> <strong>with</strong> <strong>USB</strong> <strong>Print</strong> <strong>Server</strong> Manual<br />
8.1.4 | Syslog <strong>Server</strong><br />
Use this feature to export <strong>Barricade</strong> Log information directly to a PC on your network.<br />
There are several shareware applications that you can use <strong>with</strong> this feature, such as the one<br />
available from www.kiwisoftware.com.<br />
18
<strong>Barricade</strong> g <strong>Wireless</strong> <strong>Router</strong> <strong>with</strong> <strong>USB</strong> <strong>Print</strong> <strong>Server</strong> Manual<br />
8.2 | WAN<br />
In this section you will specify the Internet connection type that you are using, once you choose<br />
Internet option you are using click [More Configuration] button to enter detailed configuration<br />
parameters for the selected connection type.<br />
8.2.1 | Dynamic (DHCP) IP<br />
The Default Internet Connection type is Dynamic or DHCP IP. Most cable modem ISPs use this type<br />
of connection.<br />
Host Name: The Host Name is optional, but it may be required by some ISPs.<br />
MAC Address: A MAC address is a 12-digit code assigned to a unique piece of hardware for<br />
identification. Some ISPs will require you to register a MAC address in order to access the Internet.<br />
If you do not wish to re-register the MAC address <strong>with</strong> your ISP, you may assign the MAC address<br />
you have currently registered <strong>with</strong> your ISP to the <strong>Barricade</strong> by clicking the [Clone MAC Address]<br />
button.<br />
NOTE: If you are unsure of which PC the broadband connection originally set up, contact your ISP<br />
and request they register a new MAC address for your account. Register using the <strong>Barricade</strong>’s MAC<br />
address which can be found on the STATUS page.<br />
Need some more help?<br />
If you are having problems getting online <strong>with</strong> your Dynamic IP connection, please refer to<br />
Appendix B | Troubleshooting Internet Connections.<br />
19
<strong>Barricade</strong> g <strong>Wireless</strong> <strong>Router</strong> <strong>with</strong> <strong>USB</strong> <strong>Print</strong> <strong>Server</strong> Manual<br />
8.2.2 | PPPoE<br />
Some DSL ISPs require a username and password to get online. This type of connection method is<br />
called PPPoE or Point-to-Point Protocol over Ethernet. If you have been assigned a username and<br />
password from your ISP then you will use this Internet connection option.<br />
Username and Password: Enter the PPPoE user name and password assigned by your Internet<br />
Service Provider.<br />
Service Name: The Service Name is normally optional, but may be required by some service<br />
providers.<br />
MTU: The MTU (Maximum Transmission Unit) governs the maximum size of the data packets. Leave<br />
this on the default value (1492) unless you have a particular reason to change it.<br />
Connect on Demand: Enter a Maximum Idle Time (in minutes) to define a maximum period of time<br />
for which the Internet connection is maintained during inactivity. If the connection is inactive for<br />
longer than the Maximum Idle Time, it will be dropped.<br />
When checked, the [Auto-reconnect] option will automatically re-establish the connection when an<br />
application attempts to access the Internet again.<br />
WARNING: If you are using an ISP that charges based on the amount of time that you are online,<br />
disable the Auto-Reconnect option and set your Max Idle Time to 2 minutes.<br />
Need some more help?<br />
If you are having problems getting online <strong>with</strong> your PPPoE connection type, please refer to<br />
Appendix B | Troubleshooting Internet Connections.<br />
20
<strong>Barricade</strong> g <strong>Wireless</strong> <strong>Router</strong> <strong>with</strong> <strong>USB</strong> <strong>Print</strong> <strong>Server</strong> Manual<br />
8.2.3 | PPTP<br />
Point-to-Point Tunneling Protocol (PPTP) allows the secure remote access over the Internet by<br />
simply dialing in a local point provided by an ISP. This Internet connection type is mostly used in<br />
Europe.<br />
IP Address: This is information will be provided by your ISP. If you do not have it please contact<br />
them.<br />
Subnet Mask: This is information will be provided by your ISP.<br />
Default Gateway: This is information will be provided by your ISP.<br />
Username ID and Password: Enter in the username and password information provided by your ISP.<br />
Connect on Demand: Idle Time Out. You can configure the <strong>Barricade</strong> to disconnect the connection<br />
after it has been inactive for a defined amount of time.<br />
Manual-connect: This option will require that you click the [Connect] button on the status page<br />
after the connection has timed out.<br />
Auto-connect: This option will re-connect when you attempt to access the Internet.<br />
Keep session: This option keeps your PPTP online by having the <strong>Barricade</strong> continually check your<br />
internet connection. If you are disconnected – it will automatically reconnect you.<br />
Need some more help?<br />
If you are having problems getting online <strong>with</strong> your PPPoE connection type, please refer to<br />
Appendix B | Troubleshooting Internet Connections.<br />
21
<strong>Barricade</strong> g <strong>Wireless</strong> <strong>Router</strong> <strong>with</strong> <strong>USB</strong> <strong>Print</strong> <strong>Server</strong> Manual<br />
8.2.4 | Static IP Address<br />
If your ISP has provided you <strong>with</strong> permanent IP Information, the you will use this option.<br />
IP Address: This is the IP Address assigned to you from your ISP.<br />
Subnet Mask: This is the Subnet Mask assigned to you from your ISP.<br />
Gateway Address: This is the Gateway IP Address assigned to you from your ISP.<br />
Note: If you don’t have this information, please contact your ISP to obtain it.<br />
CAN’T GET ONLINE?<br />
If you are having problems getting online <strong>with</strong> your Static IP connection type, please refer to<br />
Appendix B | Troubleshooting Internet Connections.<br />
8.2.5 | BigPond®<br />
Use this section to configure the built-in client.<br />
User Name and Password: Enter in the username and password provided by the ISP.<br />
Authentication Service Name: login-server is the default setting for this – unless required by your<br />
ISP this will not need to be changed.<br />
22
<strong>Barricade</strong> g <strong>Wireless</strong> <strong>Router</strong> <strong>with</strong> <strong>USB</strong> <strong>Print</strong> <strong>Server</strong> Manual<br />
8.2.6 | DNS<br />
The Domain Name Services is how the Internet translates domain or website names into<br />
Internet addresses (IP Address).<br />
Primary <strong>Server</strong>: This is the IP Address of the first DNS server will be used first to translate the<br />
website name into an IP Address.<br />
Secondary <strong>Server</strong>: If there is a problem <strong>with</strong> getting the information from the first server, the<br />
<strong>Barricade</strong> will try this alternative server.<br />
This feature provides 2 configuration options, Static IP DNS Settings and Alternative DNS Settings.<br />
Static IP: If you are using the Static IP Internet connection option, you will need to enter in the<br />
DNS <strong>Server</strong> IP Addresses that your ISP provided you.<br />
Alternative DNS: With any of the other Internet connection types, you can setup the <strong>Barricade</strong><br />
g to use a custom DNS server that you want to.<br />
23
<strong>Barricade</strong> g <strong>Wireless</strong> <strong>Router</strong> <strong>with</strong> <strong>USB</strong> <strong>Print</strong> <strong>Server</strong> Manual<br />
8.3 | LAN<br />
From this section, you can configure the <strong>Barricade</strong> g’s LAN interface and DHCP <strong>Server</strong> settings.<br />
LAN IP – IP Address: This is the IP Address of your <strong>Barricade</strong> <strong>Router</strong>.<br />
LAN IP – IP Subnet Mask: Default is 255.255.255.0.<br />
DHCP <strong>Server</strong>: DHCP is enabled by default, if you have another DHCP server on your network or you<br />
don’t want to use DHCP, click the [Disabled] option.<br />
Lease Time: This is the amount of time that a network user will be allowed a connection to the<br />
<strong>Barricade</strong> <strong>with</strong> there current dynamic IP Address settings. For home networks, this may be set to<br />
[Forever], which means there is no time limit on the IP address that is assigned to a client on your<br />
network.<br />
IP Address Pool – Start IP: This is the Starting IP Address of the range of IP Addresses that you want<br />
to be available for DHCP clients. Default is: 192.168.2.100<br />
IP Address Pool – End IP: This is the ending IP Address of the range of IP Addresses that you want<br />
to be available for DHCP clients. Default is: 192.168.2.199<br />
NOTE: Do not include the address of the <strong>Barricade</strong> g in the DHCP client address pool.<br />
Domain Name: This is the Domain name that will be assigned to the DHCP clients.<br />
24
<strong>Barricade</strong> g <strong>Wireless</strong> <strong>Router</strong> <strong>with</strong> <strong>USB</strong> <strong>Print</strong> <strong>Server</strong> Manual<br />
8.4 | WIRELESS<br />
From this section, you can enable or disable the wireless mode, configure wireless settings, and<br />
enable or disable the wireless security features like WEP and WPA.<br />
8.4.1 | <strong>Wireless</strong> Settings (SSID and Channel)<br />
In this section you can configure all the settings for your wireless network.<br />
SSID: This is Name of your wireless network. Default value is [<strong>SMC</strong>]<br />
SSID Broadcast: When enabled your SSID is broadcasted and viewable by other wireless clients.<br />
Default value is [Enabled].<br />
WIRELESS SECURITY: To secure your <strong>Wireless</strong> Network It is recommended that you change the SSID<br />
setting and [Disable] the SSID Broadcast feature to hide your wireless network.<br />
<strong>Wireless</strong> Mode: There are 4 options that you can choose:<br />
• Mixed Mode – in this mode both 802.11b and 802.11g clients can connect to the <strong>Barricade</strong> g.<br />
• Long Range Mixed Mode – this is a special mode that extends the range of your signal and<br />
still allows both 11b and 11g clients to connect.<br />
• 11g Only – in this mode ONLY 802.11g clients can connect to the router.<br />
• 11b Only – in this mode ONLY 802.11b clients can connect to the router.<br />
Transmission Rate: Defines the rate of your wireless signal. It is recommended that you leave this<br />
option to [Fully Automatic]<br />
Channel: Select the channel from the list that you want to broadcast your wireless signal on. All<br />
devices in your wireless network must be broadcast on the same channel in order to function<br />
correctly.<br />
NOTE: If you are experiencing performance issues (i.e wireless distance/throughput) try changing<br />
the wireless channel you are using. Doing so may give you improved performance.<br />
25
<strong>Barricade</strong> g <strong>Wireless</strong> <strong>Router</strong> <strong>with</strong> <strong>USB</strong> <strong>Print</strong> <strong>Server</strong> Manual<br />
g Nitro: Leave this option enabled for improved performance <strong>with</strong> distance and throughput <strong>with</strong><br />
your <strong>SMC</strong> 11g hardware.<br />
8.4.2 | <strong>Wireless</strong> Security<br />
The <strong>Barricade</strong> g supports 3 modes of <strong>Wireless</strong> Security, including WPA, RADIUS, and WEP. These<br />
three modes are outlined in the following sections.<br />
• WEP – <strong>Wireless</strong> Encryption supports 64- and 128-bit and also a pass-phrase feature to auto<br />
generate WEP keys.<br />
• WPA – <strong>Wireless</strong> Protected Access, uses Dynamic keys that can be manually entered or auto<br />
generated <strong>with</strong> a pre-shared key (PSK)<br />
• Radius (802.1x) – supports authentication through a radius server<br />
NOTE: For ultimate flexibility the <strong>Barricade</strong> g router can be configured to support both WEP and<br />
WPA clients.<br />
26
<strong>Barricade</strong> g <strong>Wireless</strong> <strong>Router</strong> <strong>with</strong> <strong>USB</strong> <strong>Print</strong> <strong>Server</strong> Manual<br />
8.4.3 | WEP<br />
WEP is a basic encryption method which is not as secure as WPA. However, for most home users,<br />
WEP is satisfactory.<br />
WEP Mode: The <strong>Barricade</strong> g supports 2 WEP modes, 64-bit and 128-bit.<br />
Passphrase: Use this tool to generate a key from a common phrase.<br />
Static WEP Keys: Choose this option if you want to configure the WEP keys in the <strong>Barricade</strong> g.<br />
Depending on if 802.1X authentication is enabled a Radius server may be required.<br />
Dynamic WEP Keys: If you enable the [Dynamic] key option, the <strong>Barricade</strong> dynamically generates<br />
WEP keys when starting up and provides clients <strong>with</strong> the keys thru EAPOL packets after clients pass<br />
1X authentication. A Radius server is required.<br />
NOTE: When using Dynamic Keys, the 1X authentication should be enabled too, and clients should<br />
choose TLS, TTLS, or PEAP to do 1X authentication.<br />
WPA/WEP: If you configure both WEP and WPA (PSK) security options then you will configure your<br />
wireless WEP clients to use either WEP key 2, 3, or 4. WEP key 1 cannot be used.<br />
27
<strong>Barricade</strong> g <strong>Wireless</strong> <strong>Router</strong> <strong>with</strong> <strong>USB</strong> <strong>Print</strong> <strong>Server</strong> Manual<br />
8.4.4 | WPA<br />
<strong>Wireless</strong> Protected Access or WPA is the latest wireless security enhancement that increases the<br />
level of data protection for communicating over wireless networks. There are 2 modes of WPA, PSK<br />
(pre-shared key) or Radius (803.1.x).<br />
NOTE: To use WPA you must have a <strong>Wireless</strong> Client adapter that supports WPA as well as a WPA<br />
client.<br />
For Windows XP users, you can download and install a WPA update from the Microsoft site.<br />
Cypher Suite: Only TKIP is supported<br />
802.1X Authentication: Requires a Radius server is configured in the 802.1x section.<br />
Pre-shared Key (PSK) Authentication: Uses a pre-shared key to do authentication. No Radius<br />
server is required. The pre-shared key can be generated using <strong>with</strong> passphrase style or manually<br />
defined <strong>with</strong> 64 HEX characters.<br />
Group Key Re-keying: This in the interval time period of renewing broadcast/multicast the<br />
dynamic WPA key to each wireless client on your network.<br />
NOTE: When both WEP and WPA clients are allowed, the Group Key Re-keying function will<br />
automatically be disabled.<br />
28
<strong>Barricade</strong> g <strong>Wireless</strong> <strong>Router</strong> <strong>with</strong> <strong>USB</strong> <strong>Print</strong> <strong>Server</strong> Manual<br />
8.4.5 | Radius (802.1x)<br />
WEP or WPA can be used in coordination <strong>with</strong> a RADIUS server is connected to the <strong>Router</strong> or on the<br />
same Network.<br />
Session Idle Timeout: This is the time (in seconds) that a session will be inactive before<br />
terminating. Set 0 if you do not want the session to timeout.<br />
Re-Authentication Period: The time interval required for the client to re-authenticate again. For<br />
example, if you set this to 30 seconds, the client will have to re-authenticate every 30 seconds.<br />
Quiet Period: This value is the time (in seconds) the <strong>Barricade</strong> will wait between failed<br />
authentications.<br />
<strong>Server</strong> IP: Set the LAN IP address of your Radius <strong>Server</strong>.<br />
<strong>Server</strong> Port: Set the connection port that is configured on the Radius server.<br />
Secret Key: This is the 802.1X secret key shared between the <strong>Barricade</strong> g and the Radius server.<br />
NAS-ID: The NAS ID is an alphanumeric string or an IP address that the RADIUS server uses to<br />
identify packets from the server. The value you enter here will be sent in the NAS-Identifier (32)<br />
attribute in all Access-Request packets sent to this RADIUS server. By default, the NAS ID is the<br />
name of the server.<br />
29
<strong>Barricade</strong> g <strong>Wireless</strong> <strong>Router</strong> <strong>with</strong> <strong>USB</strong> <strong>Print</strong> <strong>Server</strong> Manual<br />
8.5 | NAT<br />
From this section, you can configure the Virtual <strong>Server</strong> and Special Application features that<br />
provide control over the port openings in the router’s firewall. This section can be used to support<br />
several Internet based applications such as online games.<br />
8.5.1 | Virtual <strong>Server</strong><br />
The Virtual <strong>Server</strong> section allows you to set up public services on your network, such as web<br />
servers, ftp servers, e-mail servers, or other specialized Internet applications. (i.e.<br />
videoconferencing or online gaming.)<br />
NOTE: Some Internet applications may not require any forwarding.<br />
To open or forward a port follow the steps outlined below:<br />
1. Enter in the IP Address of the PC on your network that you want all of this data/traffic<br />
directed to.<br />
2. Select the Protocol Type. This can be TCP, UDP, or Both types of data.<br />
3. Enter in the LAN or Private port; this is the internal port that you want this traffic directed<br />
to.<br />
4. Enter in the WAN or Public Port; this is the external port the traffic will be coming in from<br />
the WAN side.<br />
5. Check the Enable option, and click the [Add] button.<br />
NOTE: If you want to temporally disable a virtual server rule, simply uncheck the Enable option<br />
and click the [Add] button. If you want to remove the virtual server rule, then click the [Clean]<br />
button.<br />
Need Port Info?<br />
For a list of the ports required by some of the popular online games and other applications<br />
please refer to Appendix C | <strong>SMC</strong> Port List for Games and Applications.<br />
30
<strong>Barricade</strong> g <strong>Wireless</strong> <strong>Router</strong> <strong>with</strong> <strong>USB</strong> <strong>Print</strong> <strong>Server</strong> Manual<br />
8.5.2 | Special Applications<br />
This section allows you to configure dynamic port forwarding rules by using an outgoing trigger<br />
port.<br />
Trigger Port: Enter in the outgoing port that will be used to open the public ports<br />
Trigger Type: Choose the protocol type, TCP or UDP traffic.<br />
Public Port: Set the Incoming Range of ports that will be opened by the outgoing trigger port data.<br />
The maximum range that you can use for all NAT ports is 0 to 65535.<br />
Public Type: Choose the protocol type, TCP or UDP traffic.<br />
Enabled: You can enable or disable these rules as needed.<br />
NOTE: For security, if you are not using a Special Applications rule, it is recommended that you<br />
disable the rule until needed.<br />
Need Port Info?<br />
For a list of the ports required by some of the popular online games and other applications<br />
please refer to Appendix C | <strong>SMC</strong> Port List for Games and Applications.<br />
31
<strong>Barricade</strong> g <strong>Wireless</strong> <strong>Router</strong> <strong>with</strong> <strong>USB</strong> <strong>Print</strong> <strong>Server</strong> Manual<br />
8.6 | Firewall<br />
The firewall does not significantly affect system performance, so we advise enabling it to protect<br />
your network users.<br />
To enable the Stateful Packet Inspection (SPI) firewall, click on the [FIREWALL] link in the side<br />
navigation bar, select the [Enable] option and click the [SAVE SETTINGS] button.<br />
Once the <strong>Barricade</strong> g Firewall is enabled, you will have be able to access several other features,<br />
including:<br />
• Access Control<br />
• MAC Filter<br />
• URL Blocking<br />
• Schedule Rule<br />
• Intrusion Detection<br />
• DMZ<br />
The following sections outline each of these options.<br />
32
<strong>Barricade</strong> g <strong>Wireless</strong> <strong>Router</strong> <strong>with</strong> <strong>USB</strong> <strong>Print</strong> <strong>Server</strong> Manual<br />
8.6.1 | Access Control<br />
Using this option allows you to specify different privileges for the client PCs. This is an excellent<br />
tool to control a child’s access to specific content and/or general internet access for a specific<br />
time and/or date.<br />
To setup an Access Control Rule: Click on [Click Add PC] link to access the [Access Control Add<br />
PC] configuration page.<br />
Rule Description: Set a Rule Description so you know what this rule applies to. Ex. Jon’s Internet<br />
Access.<br />
Client PC IP Address: Set the IP Address Range of the LAN PCs that you want to apply this rule to.<br />
NOTE: If you only want to apply the rule to one PC, just enter in the IP address twice. For<br />
example, if you want to setup a rule for LAN IP: 192.168.2.100 – your IP range would be 100-100.<br />
33
<strong>Barricade</strong> g <strong>Wireless</strong> <strong>Router</strong> <strong>with</strong> <strong>USB</strong> <strong>Print</strong> <strong>Server</strong> Manual<br />
Client PC Service: This is a section of pre-defined services. To block one of these services simply<br />
check the [Blocking] option next to the service name.<br />
For URL/Website blocking you will need to enter in the Websites and Keywords that you want to<br />
block in the URL Blocking section.<br />
User Define Service: In this section you can define custom services that you want to block. To<br />
configure, select the Protocol you want to block and then select the range of ports.<br />
NOTE: This section is useful for blocking new applications, such as Peer-2-Peer file sharing<br />
applications that don’t use ports defined in the other section.<br />
Scheduling Rule: From this option you can select the schedule that you want this Access Control<br />
Rule to be active. By default it is set to [Always Blocking].<br />
NOTE: If you want to configure a specific time/date for this Rule to be active you will need to<br />
configure the [Schedule Rule] configuration page. When you set-up a custom schedule rule, it will<br />
be listed in the drop-down menu as an option.<br />
34
<strong>Barricade</strong> g <strong>Wireless</strong> <strong>Router</strong> <strong>with</strong> <strong>USB</strong> <strong>Print</strong> <strong>Server</strong> Manual<br />
8.6.2 | MAC Filtering<br />
The MAC Filtering feature of the <strong>Barricade</strong> allows you to control access to your network based on<br />
the MAC (Media Access Control) Address of the client machine. This ID is unique to each network<br />
adapter.<br />
When this option is [ENABLED], each MAC Address listed in the table will be allowed to access the<br />
network and Internet.<br />
NOTE: You must have at least ONE MAC address listed in this table when the feature is enabled.<br />
35
<strong>Barricade</strong> g <strong>Wireless</strong> <strong>Router</strong> <strong>with</strong> <strong>USB</strong> <strong>Print</strong> <strong>Server</strong> Manual<br />
8.6.3 | URL Blocking<br />
The URL Blocking feature of the <strong>Barricade</strong> limits access to website domains (i.e.<br />
www.somesite.com) or by using keywords which will block any websites that have that keyword in<br />
the URL. This feature is an ideal way to protect your family members from questionable content on<br />
the Internet<br />
NOTE: This blocking feature applies to the words and URLs typed in the Address Bar of your<br />
Browser.<br />
36
<strong>Barricade</strong> g <strong>Wireless</strong> <strong>Router</strong> <strong>with</strong> <strong>USB</strong> <strong>Print</strong> <strong>Server</strong> Manual<br />
8.6.4 | Schedule Rule<br />
This section allows you to configure up to 10 schedule rules that can be used <strong>with</strong> the Access<br />
Control Rule feature.<br />
To create a Schedule Rule, click the [Add Schedule Rule] link to access the [Edit Schedule Rule]<br />
configuration page.<br />
Name: The Name of your schedule rule, for example “block kids internet”<br />
Comment: A comment about the schedule rule, for example the time period “7AM – 7PM”<br />
Activate Time Period: This is the span of time that you want the Access Control rule active and<br />
also the day of the week that you want it active.<br />
NOTE: The Start and End Time are set in military time (1705 = 5:05PM)<br />
37
<strong>Barricade</strong> g <strong>Wireless</strong> <strong>Router</strong> <strong>with</strong> <strong>USB</strong> <strong>Print</strong> <strong>Server</strong> Manual<br />
8.6.5 | Intrusion Detection<br />
The <strong>Barricade</strong> g inspects packets at the application layer, and maintains TCP and UDP session<br />
information, including timeouts and the number of active sessions. The <strong>Barricade</strong> g also provides<br />
the ability to detect and prevent certain types of network attacks such as DoS attacks. Network<br />
attacks that deny access to a network device are called denial-of-service (DoS) attacks. Denials of<br />
Service (DoS) attacks are aimed at devices and networks <strong>with</strong> a connection to the Internet. The<br />
goal is not to steal information, but to disable a device or network so users no longer have access<br />
to network resources.<br />
By using inspected information and timeout/threshold criteria, the <strong>Barricade</strong> g provides following<br />
DOS attacks prevention: Ping of Death (Ping flood) attack, SYN flood attack, IP fragment attack<br />
(Teardrop Attact) , Brute-force attack, Land Attack, IP Spoofing attack, IP <strong>with</strong> zero length, TCP<br />
null scan (Port Scan Attach), UDP port loopback, Snork Attack etc.<br />
SPI and Anti-DoS firewall protection: Enable/Disable the SPI functions of firewall.<br />
RIP Defect: Enable/Disable the RIP Defect function of firewall.<br />
Discard Ping to WAN: When this feature is enabled, any host on the WAN cannot ping this product.<br />
This helps avoid unnecessary attacks from the WAN side because your connection is invisible. It is<br />
recommended that you enable this option for security.<br />
Stateful Packet Inspection (SPI): Use this option to define the type of data you want the SPI<br />
firewall to scan.<br />
38
<strong>Barricade</strong> g <strong>Wireless</strong> <strong>Router</strong> <strong>with</strong> <strong>USB</strong> <strong>Print</strong> <strong>Server</strong> Manual<br />
Email Alert: Configure this option if you want the <strong>Barricade</strong> to email when hackers attempt to<br />
attack your network to a specific email address. You will need to configure your email address,<br />
username and password, as well as a SMTP server and POP3 to send the mail through.<br />
NOTE: Some ISPs require that you configure the POP3 server to use there outgoing or SMTP server.<br />
Connection Policy and DoS Detect Criteria: Use both of these sections to tune the <strong>Barricade</strong><br />
Firewall.<br />
Note: For most users the defaults settings will work fine. If you are having throughput slow downs,<br />
then you may want to adjust some of the values under the [DoS Detect Criteria] section:<br />
Change:<br />
• max incomplete sessions from same host from 10 to 30<br />
• incomplete detect sensitive time period from 300 to 600<br />
• flooding cracker block from 300 to 60<br />
39
<strong>Barricade</strong> g <strong>Wireless</strong> <strong>Router</strong> <strong>with</strong> <strong>USB</strong> <strong>Print</strong> <strong>Server</strong> Manual<br />
8.6.6 | DMZ (Demilitarized Zone)<br />
If you have a client PC that cannot run an Internet application properly from behind the firewall,<br />
then you can open the client PC up to unrestricted two-way Internet access. Enter the LAN IP<br />
address of a DMZ host and click “Enable”.<br />
NOTE: Adding a client to the DMZ (Demilitarized Zone) may expose your local network to a variety<br />
of security risks. Only use this option as a last resort.<br />
WAN IP<br />
NOTE: To support the 7 other DMZ hosts the IP Address entered must be in the same range as the<br />
WAN IP Address.<br />
40
<strong>Barricade</strong> g <strong>Wireless</strong> <strong>Router</strong> <strong>with</strong> <strong>USB</strong> <strong>Print</strong> <strong>Server</strong> Manual<br />
8.7 | DDNS (Dynamic DNS)<br />
The <strong>Barricade</strong> has an integrated Dynamic DNS feature that provides users on the Internet a method<br />
to tie their domain name(s) to computers or servers. DDNS allows your domain name to follow your<br />
IP address automatically by having your DNS records changed when your IP address changes.<br />
The section also has a “<strong>Server</strong> Configuration” section that automatically opens the port options<br />
checked in the Virtual <strong>Server</strong> section. Simply enter in the IP Address of your server, such as a web<br />
server, and then click on the port option HTTP Port 80 so users can access your server from the<br />
WAN connection (Internet).<br />
There are 2 DDNS services supported by this built-in client: DynDNS.org and TZO.com.<br />
Provider: Choose DynDNS.org (www.dyndns.org) or TZO.com (www.tzo.com)<br />
Domain Name: This is the DDNS domain name you have setup <strong>with</strong> the Provider.<br />
Account / E-mail: TZO.com uses Account information and DynDNS.org uses an E-mail address for<br />
[username]<br />
Password / Key: TZO.com uses a auto-generated dynamic key for password and DynDNS.org uses a<br />
user-defined password.<br />
<strong>Server</strong> IP: Enter in the LAN IP Address of your Web <strong>Server</strong>. (ex. 192.168.2.50)<br />
NOTE: It is recommended that you configure any server on your Network <strong>with</strong> a static IP<br />
addressed.<br />
<strong>Server</strong> Type: Choose the port traffic that you want routed through the firewall to your server.<br />
41
<strong>Barricade</strong> g <strong>Wireless</strong> <strong>Router</strong> <strong>with</strong> <strong>USB</strong> <strong>Print</strong> <strong>Server</strong> Manual<br />
8.8 | UPnP<br />
The <strong>Barricade</strong> supports UPnP (Universal Plug and Play), a networking architecture that provides<br />
compatibility amongst networking equipment. This feature allows an UPnP based operating system,<br />
like Windows XP to automatically communicate <strong>with</strong> the <strong>Barricade</strong> g and open the required services<br />
when needed.<br />
NOTE: You will also need to enable this option for non-UPnP based operating systems for<br />
Messenger pass-through mode. This will allow Voice, Video, and File Transfer options to work.<br />
8.9 | Tools<br />
Use the “Tools” menu to backup the current configuration, restore a previously saved<br />
configuration, restore factory settings, update firmware, and reset the <strong>Barricade</strong>.<br />
8.9.1 | Configuration Tools<br />
Backup: Backup saves the <strong>Barricade</strong>’s configuration to a file.<br />
Restore: To restore settings from a saved backup configuration file.<br />
Restore to factory defaults: Restores the <strong>Barricade</strong> settings back to the factory default settings.<br />
8.9.2 | Firmware Upgrade<br />
This tool permits easy downloading of the latest Firmware. Download the upgrade file from the<br />
<strong>SMC</strong> website (www.smc.com) and save it to your hard drive. Browse for the file and then the click<br />
[BEGIN UPGRADE] button.<br />
NOTE: When the upgrade process has completed, check the Status page Information section to<br />
confirm that the upgrade process was successful.<br />
8.9.3 | Reboot<br />
Click [REBOOT ROUTER] button to reboot the <strong>Barricade</strong> g. The reset will be complete when the<br />
power LED stops blinking and the login page is displayed.<br />
42
<strong>Barricade</strong> g <strong>Wireless</strong> <strong>Router</strong> <strong>with</strong> <strong>USB</strong> <strong>Print</strong> <strong>Server</strong> Manual<br />
8.10 | Status<br />
The Status screen displays WAN/LAN connection status, firmware, and hardware version numbers,<br />
illegal attempts to access your network, as well as information on DHCP clients connected to your<br />
network.<br />
INTERNET: Displays WAN connection type, status, and if required connection buttons.<br />
GATEWAY: Displays system IP settings, as well as DHCP, UPnP, <strong>Wireless</strong>, Firewall, and <strong>Print</strong>er<br />
status.<br />
INFORMATION: Displays the number of attached clients, the firmware versions, and the MAC<br />
Address for each media interface, as well as the hardware version and serial number.<br />
Security Log: Displays illegal attempts to access your network.<br />
• [Save] Click on this button to save a security log file.<br />
• [Clear] Click on this button to delete the access log.<br />
• [Refresh] Click on this button to refresh the screen.<br />
DHCP Client Log: Displays information on all DHCP clients on your network.<br />
For additional information on the <strong>SMC</strong>2804WBRP-G, please visit www.smc.com.<br />
43
<strong>Barricade</strong> g <strong>Wireless</strong> <strong>Router</strong> <strong>with</strong> <strong>USB</strong> <strong>Print</strong> <strong>Server</strong> Manual<br />
CHAPTER 9| <strong>Print</strong> <strong>Server</strong> Setup<br />
This chapter will outline the steps to configure the built-in <strong>USB</strong> print server on the <strong>Barricade</strong> g<br />
<strong>Router</strong>.<br />
NOTE: This print server will not support multi-function printer devices (ex. <strong>Print</strong>er, Copier, Fax<br />
machine all-in-one)<br />
Windows 98/Me<br />
If you are running Windows 98 or Windows Me then you will need to install the <strong>SMC</strong> <strong>USB</strong> <strong>Print</strong>er Port<br />
utility. This utility will re-direct your print jobs to the <strong>Barricade</strong> g <strong>Router</strong>.<br />
Installation of <strong>SMC</strong> <strong>USB</strong> <strong>Print</strong>er Port Utility<br />
To install, insert the EZ 3-Click Installation Wizard, and click the [Install <strong>Print</strong>er Utility] button.<br />
Once you complete the installation you will need to reboot your PC to complete the installation<br />
process.<br />
After the reboot, you are ready to re-configure an existing printer or install a new printer.<br />
Configure <strong>SMC</strong> <strong>USB</strong> <strong>Print</strong>er Port <strong>with</strong> existing <strong>Print</strong>er<br />
Installing a new <strong>Print</strong>er <strong>with</strong> the <strong>USB</strong> <strong>Print</strong>er Port Utility<br />
44
<strong>Barricade</strong> g <strong>Wireless</strong> <strong>Router</strong> <strong>with</strong> <strong>USB</strong> <strong>Print</strong> <strong>Server</strong> Manual<br />
Windows 2000/XP<br />
If you are running Windows 2000 or Windows XP (Home or Professional) you will need to setup the<br />
LPR port to redirect printer data to the <strong>Barricade</strong> g <strong>Router</strong> built-in <strong>USB</strong> <strong>Print</strong> <strong>Server</strong>.<br />
NOTE: The screen shots shown below were done <strong>with</strong> a Windows 2000 machine, the same steps<br />
apply for a Windows XP machine.<br />
Configure LPR port <strong>with</strong> existing <strong>Print</strong>er<br />
If you already have the <strong>Print</strong>er that is connected to the <strong>USB</strong> <strong>Print</strong> <strong>Server</strong> on the <strong>Barricade</strong> g installed<br />
on the PC then you will simply need to re-configure the driver to use the LPR port.<br />
To do this, follow the steps outlined below:<br />
1. Open the [<strong>Print</strong>ers] window – Click [Start] button, choose [Settings], and then click [<strong>Print</strong>ers]<br />
option.<br />
On Windows XP you will select the [<strong>Print</strong>ers and Faxes] option.<br />
2. In the [<strong>Print</strong>ers] window, locate the icon for your <strong>Print</strong>er and right-mouse click on it. From the<br />
option menu, select the [Properties] options.<br />
45
<strong>Barricade</strong> g <strong>Wireless</strong> <strong>Router</strong> <strong>with</strong> <strong>USB</strong> <strong>Print</strong> <strong>Server</strong> Manual<br />
3. When the <strong>Print</strong>er Properties dialog box opens, click the [Ports] tab at the top. In that section,<br />
click the [Add Port…] button. This will launch the [<strong>Print</strong>er Ports] dialog box.<br />
4. In this dialog box, highlight the [Standard TCP/IP Port] option and click the [New Port…]<br />
button to launch the [Add Standard TCP/IP <strong>Print</strong>er Port Wizard]<br />
5. Click [Next] button to start the installation.<br />
46
<strong>Barricade</strong> g <strong>Wireless</strong> <strong>Router</strong> <strong>with</strong> <strong>USB</strong> <strong>Print</strong> <strong>Server</strong> Manual<br />
6. On the [Add Port] step, fill in the IP address of the <strong>Barricade</strong> g. The default IP is 192.168.2.1.<br />
This will automatically fill in the port name – but you can change this can be changed. Click<br />
the [Next] button to continue.<br />
7. When the [Additional Port Information Required] dialog box opens, select the [Custom] option<br />
and click the [Settings…] button.<br />
47
<strong>Barricade</strong> g <strong>Wireless</strong> <strong>Router</strong> <strong>with</strong> <strong>USB</strong> <strong>Print</strong> <strong>Server</strong> Manual<br />
8. At the [Configure Standard TCP/IP Port Monitor] dialog box, select [LPR] for the protocol and<br />
enter [LPT1] for the Queue name.<br />
Click on the [OK] button to save the settings can close this dialog box.<br />
9. This brings you back to the [Additional Port Information Required] screen. Click the [Next]<br />
button to continue.<br />
10. You have completed the installation of the LPR printer port click the [Finish] button to<br />
complete the process.<br />
11. This brings you back to the [<strong>Print</strong>er Port] dialog box; click the [Close] button to return to the<br />
[<strong>Print</strong>er Properties] dialog box.<br />
48
<strong>Barricade</strong> g <strong>Wireless</strong> <strong>Router</strong> <strong>with</strong> <strong>USB</strong> <strong>Print</strong> <strong>Server</strong> Manual<br />
12. On the [Properties] dialog box click the [Ports] tab at the top and then check or confirm that<br />
you have the new LPR port selected (ex. IP_192.168.2.1).<br />
13. Click on the [Advanced] tab click the [Spool print documents so program finishes printing<br />
faster] and [Start printing after last page is spooled] options.<br />
14. When completed, click the [OK] button, and you are ready to print to the <strong>Barricade</strong> g <strong>with</strong><br />
<strong>USB</strong> <strong>Print</strong> <strong>Server</strong>.<br />
49
<strong>Barricade</strong> g <strong>Wireless</strong> <strong>Router</strong> <strong>with</strong> <strong>USB</strong> <strong>Print</strong> <strong>Server</strong> Manual<br />
Installing a new <strong>Print</strong>er <strong>with</strong> LPR port<br />
1. Open the [<strong>Print</strong>ers] window – Click [Start] button, choose [Settings], and then click [<strong>Print</strong>ers]<br />
option.<br />
On Windows XP you will select the [<strong>Print</strong>ers and Faxes] option.<br />
2. In the [<strong>Print</strong>ers] window, click the [Add <strong>Print</strong>er] icon to launch the [Add <strong>Print</strong>er Wizard].<br />
3. When the Local or Network <strong>Print</strong>er window appears, select the [Local printer] option and<br />
UNCHECK the [Automatically detect and install my Plug and Play printer] option.<br />
50
<strong>Barricade</strong> g <strong>Wireless</strong> <strong>Router</strong> <strong>with</strong> <strong>USB</strong> <strong>Print</strong> <strong>Server</strong> Manual<br />
4. On the [Select the <strong>Print</strong>er Port] step, choose the [Create a new port] option and choose<br />
[Standard TCP/IP Port] from the drop-down menu.<br />
5. This will launch the [Add Standard TCP/IP <strong>Print</strong>er Port Wizard], click [Next] to start the<br />
wizard.<br />
6. On the [Add Port] step, fill in the IP address of the <strong>Barricade</strong> g. The default IP is 192.168.2.1.<br />
This will automatically fill in the port name – but you can change this can be changed.<br />
51
<strong>Barricade</strong> g <strong>Wireless</strong> <strong>Router</strong> <strong>with</strong> <strong>USB</strong> <strong>Print</strong> <strong>Server</strong> Manual<br />
7. When the [Additional Port Information Required] dialog box opens, select the [Custom] option<br />
and click the [Settings…] button.<br />
8. At the [Configure Standard TCP/IP Port Monitor] dialog box, select [LPR] for the protocol and<br />
enter [LPT1] for the Queue name.<br />
Click on the [OK] button to save the settings can close this dialog box.<br />
9. This brings you back to the [Additional Port Information Required”] screen, click the [Next]<br />
button to continue.<br />
10. Once you have completed the [TCP/IP <strong>Print</strong>er Port Wizard], click the [Finish] button to<br />
complete the process.<br />
52
<strong>Barricade</strong> g <strong>Wireless</strong> <strong>Router</strong> <strong>with</strong> <strong>USB</strong> <strong>Print</strong> <strong>Server</strong> Manual<br />
11. Next, you will need to install the latest driver for your <strong>Print</strong>er. Using the [Add <strong>Print</strong>er Wizard],<br />
choose your printers manufacturer and model then click the [Next] button.<br />
NOTE: If your printer is not listed, contact your printer manufacture for help on getting it<br />
installed.<br />
12. On the [Name Your <strong>Print</strong>er] step, you can enter in the Name of your printer, this can be any<br />
value. When completed, click the [Next] button to continue.<br />
53
<strong>Barricade</strong> g <strong>Wireless</strong> <strong>Router</strong> <strong>with</strong> <strong>USB</strong> <strong>Print</strong> <strong>Server</strong> Manual<br />
13. At the [<strong>Print</strong>er Sharing] screen, select the [Do not share this <strong>Print</strong>er] option and click the<br />
[Next] button to continue.<br />
14. At the [<strong>Print</strong> Test Page] screen, select the [No] option and click the [Next} button to continue.<br />
54
<strong>Barricade</strong> g <strong>Wireless</strong> <strong>Router</strong> <strong>with</strong> <strong>USB</strong> <strong>Print</strong> <strong>Server</strong> Manual<br />
15. At this point you have finished the installation of your printer, click the [Finish] button to save<br />
these new settings.<br />
16. When you have finished creating the LPR port and installing the latest printer drivers, then<br />
you are ready to configure the printer settings. To access the printers properties, open the<br />
printers window and right-mouse click on the new <strong>Print</strong>er Icon and choose [Properties]<br />
55
<strong>Barricade</strong> g <strong>Wireless</strong> <strong>Router</strong> <strong>with</strong> <strong>USB</strong> <strong>Print</strong> <strong>Server</strong> Manual<br />
17. On the [Properties] dialog box click the [Ports] tab at the top and then check or confirm that<br />
you have the new LPR port selected (ex. IP_192.168.2.1).<br />
18. Click on the [Advanced] tab click the [Spool print documents so program finishes printing<br />
faster] and [Start printing after last page is spooled] options.<br />
19. When completed, click the [OK] button, and you are ready to print to the <strong>Barricade</strong> g <strong>with</strong><br />
<strong>USB</strong> <strong>Print</strong> <strong>Server</strong>.<br />
56
<strong>Barricade</strong> g <strong>Wireless</strong> <strong>Router</strong> <strong>with</strong> <strong>USB</strong> <strong>Print</strong> <strong>Server</strong> Manual<br />
APPENDIX A | Troubleshooting<br />
The information outlined in this section describes some useful steps for getting your computer and<br />
<strong>Barricade</strong> router online.<br />
A.1 | Verify you are connected to the <strong>Barricade</strong> <strong>Router</strong><br />
If you are unable to access the <strong>Barricade</strong>’s web-based administration pages, then you may not be<br />
properly connected or configured. The screen shots in this section were taken on a Windows 2000<br />
machine, but the same steps will apply to Windows 95/98/Me/XP.<br />
To determine your TCP/IP configuration status, please follow the steps below:<br />
1. Click [Start] then choose [Run]<br />
2. Type “cmd” or “command” (<strong>with</strong>out the quotes) to open a DOS prompt.<br />
3. In the DOS window, type “ipconfig” and verify the information that is displayed.<br />
4. If you computer is setup for DHCP, then your TCP/IP configuration should be similar to the<br />
information displayed:<br />
• IP Address: 192.168.2.X (x is number between 100 and 199)<br />
• Subnet: 255.255.255.0<br />
• Gateway: 192.168.2.1<br />
If you have an IP address that starts <strong>with</strong> 169.254.XXX.XXX then see section A.2.<br />
If you have another IP address configured, see section A.3.<br />
A.2 | I am getting an IP Address that starts <strong>with</strong> 169.254.XXX.XXX<br />
If you are getting this IP Address, then you need to check that you are properly connected to the<br />
<strong>Barricade</strong> <strong>Router</strong>.<br />
Confirm that you have a good link light on the <strong>Barricade</strong>’s port to which this computer is<br />
connected. If not, please try another cable.<br />
If you have a good link light, please open up a DOS window as described in section A.1 and type<br />
“ipconfig /renew” (<strong>with</strong>out the quotes)<br />
If you are still unable to get an IP Address from the <strong>Barricade</strong>, reinstall your network adapter.<br />
Please refer to your adapter manual for instructions.<br />
57
<strong>Barricade</strong> g <strong>Wireless</strong> <strong>Router</strong> <strong>with</strong> <strong>USB</strong> <strong>Print</strong> <strong>Server</strong> Manual<br />
A.3 | I have another IP Address displayed<br />
If you have another IP address listed, then the PC may not be configured for a DHCP connection.<br />
Please refer to Chapter 4 | Configure your Computer for information.<br />
Once you have confirmed your computer is configured for DHCP, and then please follow the steps<br />
below.<br />
1. Open a DOS window as described above.<br />
2. Type “ipconfig /release” (<strong>with</strong>out the quotes)<br />
3. Then type “ipconfig /renew” (<strong>with</strong>out the quotes)<br />
Once you are able to get a valid IP address from the <strong>Barricade</strong> <strong>Router</strong>, then you can now access<br />
the web-based Administration pages.<br />
If you still are not getting an IP address from the <strong>Barricade</strong>, please reset the router as outlined<br />
in Chapter 2 and follow the steps outlined in this appendix again.<br />
If you still cannot access the router once you have reset it, please contact <strong>SMC</strong> Technical<br />
Support.<br />
58
<strong>Barricade</strong> g <strong>Wireless</strong> <strong>Router</strong> <strong>with</strong> <strong>USB</strong> <strong>Print</strong> <strong>Server</strong> Manual<br />
A.4 | I can’t access my e-mail, web or I am getting corrupted data from the Internet.<br />
The Maximum Transmission Unit (MTU) setting may need to be adjusted. By default, the MTU is set<br />
at 1454.<br />
For most DSL users, it is strongly recommended to use MTU 1492.<br />
If you are having some difficulties, perform the following steps:<br />
1. To connect to the <strong>Barricade</strong> g, launch your web browser, and enter http://192.168.2.1 or the<br />
IP address of the <strong>Barricade</strong> in the Address bar.<br />
2. Enter the password, if asked. (The default password is smcadmin.)<br />
3. Click on [WAN] and then select the [PPPoE] option.<br />
4. Look for the MTU option and in the MTU Size field, enter 1492.<br />
5. Click the [SAVE SETTINGS] button to continue.<br />
If your difficulties continue, change the Size to different values. Try this list of values, one value at<br />
a time, in this order, until your problem is solved:<br />
1462<br />
1400<br />
59
<strong>Barricade</strong> g <strong>Wireless</strong> <strong>Router</strong> <strong>with</strong> <strong>USB</strong> <strong>Print</strong> <strong>Server</strong> Manual<br />
APPENDIX B | Troubleshooting Internet Connections<br />
Put information here about specific ISP tricks and how to avoid those basic setup calls.<br />
B.1 | I have a Dynamic IP connection and I can’t get online<br />
Most cable companies use a Dynamic IP configuration to provide Internet access. If you have this<br />
type of connection, and are unable to get connected, please follow the steps outlined below:<br />
1. Unplug the power from your Cable or DSL modem for 2 mins.<br />
2. Confirm that your <strong>Barricade</strong> router is configured for a Dynamic IP configuration<br />
3. Plug the power back into your Modem.<br />
4. Wait for your Modem to connect to the network, and then click on the status page of the<br />
router to confirm that you are online.<br />
The reason this process works is because certain broadband connections require a MAC address to<br />
gain network access. This MAC address can be changed by following the above process to re-set the<br />
approved MAC address to the MAC address of the <strong>Barricade</strong> router.<br />
60
<strong>Barricade</strong> g <strong>Wireless</strong> <strong>Router</strong> <strong>with</strong> <strong>USB</strong> <strong>Print</strong> <strong>Server</strong> Manual<br />
APPENDIX C | Frequently Asked Questions<br />
Put some of the information that we are finding out <strong>with</strong> NoHold here – for examples the<br />
following information is in the linksys manual.<br />
Does the <strong>Router</strong> support ICQ send file?<br />
Yes, <strong>with</strong> the following fix: click ICQ menu -> preference -> connections tab->, and check I am<br />
behind a firewall or proxy. Then set the firewall time-out to 80 seconds in the firewall setting. The<br />
Internet user can then send a file to a user behind the <strong>Router</strong>.<br />
I set up an Unreal Tournament <strong>Server</strong>, but others on the LAN cannot join. What do I need to<br />
do?<br />
If you have a dedicated Unreal Tournament server running, you need to create a static IP for each<br />
of the LAN computers and forward ports 7777, 7778, 7779, 7780, 7781, and 27900 to the IP address<br />
of the server. You can also use a port forwarding range of 7777 ~ 27900. If you want to use the UT<br />
<strong>Server</strong> Admin, forward another port. (Port 8080 usually works well but is used for remote admin.<br />
You may have to disable this.) Then in the [UWeb.Web<strong>Server</strong>] section of the server.ini file, set the<br />
ListenPort to 8080 (to match the mapped port above) and <strong>Server</strong>Name to the IP assigned to the<br />
<strong>Router</strong> from your ISP.<br />
Can multiple gamers on the LAN get on one game server and play simultaneously <strong>with</strong> just one<br />
public IP address?<br />
It depends on which network game or what kind of game server you are using. For example, Unreal<br />
Tournament supports multi-login <strong>with</strong> one public IP.<br />
How do I get Half-Life: Team Fortress to work <strong>with</strong> the <strong>Router</strong>?<br />
The default client port for Half-Life is 27005. The computers on your LAN need to have<br />
“+clientport 2700x” added to the HL shortcut command line; the x would be 6, 7, 8, and on up.<br />
This lets multiple computers connect to the same server. One problem: Version 1.0.1.6 won’t let<br />
multiple computers <strong>with</strong> the same CD key connect at the same time, even if on the same LAN (not<br />
a problem <strong>with</strong> 1.0.1.3). As far as hosting games, the HL server does not need to be in the DMZ.<br />
Just forward port 27015 to the local IP address of the server computer.<br />
Will the <strong>Router</strong> function in a Macintosh environment?<br />
Yes, but the <strong>Router</strong>’s setup pages are accessible only through Internet Explorer 4.0 or Netscape<br />
Navigator 4.0 or higher for Macintosh.<br />
I am not able to get the web configuration screen for the <strong>Router</strong>. What can I do?<br />
You may have to remove the proxy settings on your Internet browser, e.g., Netscape Navigator or<br />
Internet Explorer. Or remove the dial-up settings on your browser. Check <strong>with</strong> your browser<br />
documentation, and make sure that your browser is set to connect directly and that any dial-up is<br />
disabled. Make sure that your browser is set to connect directly and that any dial-up is disabled.<br />
For Internet Explorer, click Tools, Internet Options, and then the Connection tab.<br />
Make sure that Internet Explorer is set to [Never dial a connection]. For Netscape Navigator, click<br />
Edit, Preferences, Advanced, and Proxy. Make sure that Netscape Navigator is set to [Direct<br />
connection to the Internet].<br />
How do I get mIRC to work <strong>with</strong> the <strong>Router</strong>?<br />
Under the Port Forwarding tab, set port forwarding to 113 for the PC on which you are using mIRC.<br />
How do I reset the <strong>Router</strong>?<br />
Press the Reset button on the back panel for about ten seconds. This will reset the <strong>Router</strong> to its<br />
default settings.<br />
61
<strong>Barricade</strong> g <strong>Wireless</strong> <strong>Router</strong> <strong>with</strong> <strong>USB</strong> <strong>Print</strong> <strong>Server</strong> Manual<br />
How do I resolve issues <strong>with</strong> signal loss?<br />
There is no way to know the exact range of your wireless network <strong>with</strong>out testing. Every obstacle<br />
placed between the <strong>Router</strong> and a wireless PC will create signal loss. Lead glass, metal, concrete<br />
floors, water and walls will inhibit the signal and reduce range. Start <strong>with</strong> the <strong>Router</strong> and your<br />
wireless PC in the same room and move it away in small increments to determine the maximum<br />
range in your environment. You may also try using different channels, as this may eliminate<br />
interference affecting only one channel.<br />
I have excellent signal strength, but I cannot see my network.<br />
WEP is probably enabled on the <strong>Router</strong>, but not on your wireless adapter (or vice versa). Verify<br />
that the same WEP keys and levels (64 or 128) are being used on all nodes of your wireless<br />
network.<br />
62
<strong>Barricade</strong> g <strong>Wireless</strong> <strong>Router</strong> <strong>with</strong> <strong>USB</strong> <strong>Print</strong> <strong>Server</strong> Manual<br />
APPENDIX D | <strong>SMC</strong> Port List for Games and Applications<br />
I need to set up online game hosting or use other Internet applications.<br />
If you want to play online games or use Internet applications, most will work <strong>with</strong>out doing any<br />
port forwarding or DMZ hosting. There may be cases when you want to host an online game or<br />
Internet application. This would require you to set up the <strong>Router</strong> to deliver incoming packets or<br />
data to a specific computer. This also applies to the Internet applications you are using. The best<br />
way to get the information on what port services to use is to go to the website of the online game<br />
or application you want to use. Follow these steps to set up online game hosting or use a certain<br />
Internet application:<br />
Access the <strong>Router</strong>’s web interface by going to http://192.168.1.1 or the IP address of the <strong>Router</strong>.<br />
Go to the Applications & Gaming => Port Forwarding tab.<br />
Enter any name you want to use for the Customized Application.<br />
Enter the External Port range of the service you are using. For example, if you want to host Unreal<br />
Tournament (UT), you would enter the range 7777 to 27900.4. Check the protocol you will be<br />
using, TCP and/or UDP.<br />
Check the protocol you will be using, TCP and/or UDP.<br />
Enter the IP address of the PC or network device that you want the port server to go to. For<br />
example, if the web server’s Ethernet adapter IP address is 192.168.1.100, you would enter 100 in<br />
the field provided. Check “Appendix D: Finding the MAC Address and IP Address for Your Ethernet<br />
Adapter” for details on getting an IP address.<br />
Check the Enable option for the port services you want to use. Consider the example below:<br />
Customized External Port TCP UDP IP Address Enable<br />
UT 7777 to 27900 X X 192.168.1.100 X<br />
Halflife 27015 to 27015 X X 192.168.1.105 X<br />
PC Anywhere 5631 to 5631 X 192.168.1.102 X<br />
VPN IPSEC 500 to 500 X 192.168.1.100 X<br />
Web server 80 to 80 X X 192.168.1.100 X<br />
FTP server 21 to 21 X 192.168.1.101 X<br />
SMTP (outgoing) 25 to 25 X X 192.168.1.102 X<br />
POP3 (incoming) 110 to 110 X X 192.168.1.102 X<br />
Put together a list of all the games/applications ports that we know and confirm work.<br />
COUNTER-STRIKE INFO:<br />
Client<br />
======<br />
TCP 6003:<br />
Outgoing connectivity to this port on remote destinations. Used for chat in the HL browser.<br />
UDP 27011:<br />
Outgoing connectivity to this port on remote destinations. Used for the 'custom game' mod<br />
browser.<br />
UDP 27005:<br />
Incoming connectivity to this port (or whatever port the client has changed this to, if not using the<br />
default). Used for game traffic (including voice) between client and server.<br />
63
<strong>Barricade</strong> g <strong>Wireless</strong> <strong>Router</strong> <strong>with</strong> <strong>USB</strong> <strong>Print</strong> <strong>Server</strong> Manual<br />
<strong>Server</strong><br />
======<br />
TCP 7002:<br />
Outgoing connectivity to this port on remote destinations. Used for WON auth.<br />
UDP 27010:<br />
Outgoing connectivity to this port on remote destinations. Used for advertising a server on the<br />
master lists for server browsers.<br />
UDP 27011:<br />
Communicating <strong>with</strong> the BanList <strong>Server</strong> from YOUR <strong>Server</strong> Was formerly 27013 - much in/out traffic<br />
too<br />
UDP 27015:<br />
Incoming connectivity to this port (or whatever port the server had been changed to, if not the<br />
default). Used for all client/server game traffic (including voice), server info requests, etc.<br />
P2P Applications:<br />
Shareaza<br />
KaZaA Lite<br />
bitTorrent<br />
Emule<br />
Trigger TCP 1024-65535 4661<br />
Incoming TCP 1024-65535 4662<br />
Incoming UDP 1024-65535 4665<br />
64
<strong>Barricade</strong> g <strong>Wireless</strong> <strong>Router</strong> <strong>with</strong> <strong>USB</strong> <strong>Print</strong> <strong>Server</strong> Manual<br />
APPENDIX E | Technical Specifications<br />
Below is an outline of the Technical Specifications for the <strong>Barricade</strong> g 2.4 GHz 54 Mbps <strong>Wireless</strong><br />
Broadband <strong>Router</strong> <strong>with</strong> <strong>USB</strong> <strong>Print</strong> <strong>Server</strong> (<strong>SMC</strong>2804WBRP-G)<br />
Standards<br />
802.3, 802.3u, 802.11b, 802.11g, <strong>USB</strong> 1.1<br />
WAN Port<br />
1 - 10/100Mbps RJ45, <strong>with</strong> Auto MDI/MDIX<br />
LAN Port<br />
4 - 10/100Mbps RJ45, <strong>with</strong> Auto MDI/MDIX<br />
<strong>Print</strong>er Port<br />
1 – <strong>USB</strong> 1.1 printer port<br />
Supported WAN type<br />
Static IP<br />
Dynamic IP<br />
PPP over Ethernet<br />
PPTP<br />
Big Pond<br />
NAT<br />
Maximum 253 Users<br />
Protocol<br />
IP Protocol<br />
TCP/IP v4<br />
DHCP server<br />
Proxy DNS server<br />
Management and Configuration<br />
Web-based<br />
Firewall<br />
NAT firewall and SPI firewall<br />
VPN<br />
VPN pass-through including PPTP/L2TP/IPsec<br />
User Authentication<br />
Password protected browser-based UI<br />
PAP/CHAP/MSCHAP Authentication protocol<br />
supported<br />
Upgrade method<br />
Web-based<br />
LEDs<br />
Power<br />
WAN<br />
WLAN<br />
LAN<br />
Link<br />
Activity<br />
65<br />
Security<br />
64/128-bit WEP<br />
Wi-Fi Protected Access<br />
802.1x<br />
Frequency Band:<br />
802.11g Radio: 2.4GHz<br />
802.11b Radio: 2.4GHz<br />
IEEE 802.11b and g compliant:<br />
11 channels (US, Canada)<br />
13 channels (ETSI)<br />
14 channels (Japan)<br />
Antenna Type<br />
Two Detachable Antennas<br />
<strong>with</strong> SMA Connectors<br />
Antenna Gain<br />
2 dBi<br />
Operating Voltage<br />
3.0V ~ 3.6V<br />
Power<br />
9V, 1000 mA<br />
Operating Temperature<br />
0°~40°C<br />
Humidity<br />
10%~90% non-condensing<br />
Storage Temperature<br />
-400~700C<br />
Size<br />
130 x 85 x 32mm<br />
(5.12 x 3.35 x 1.26 in)<br />
Weight<br />
370g (13.05oz)<br />
Compliance<br />
FCC Part 15 Class B, Sec. 15.247<br />
and 15.109<br />
ETS 300 328, ETS 300 826, EN60950<br />
and CE-Mark<br />
CSA/TUV<br />
Industry Canada<br />
DGT
<strong>Barricade</strong> g <strong>Wireless</strong> <strong>Router</strong> <strong>with</strong> <strong>USB</strong> <strong>Print</strong> <strong>Server</strong> Manual<br />
APPENDIX F | Compliances<br />
FCC STATMENT<br />
This equipment has been tested and found to comply <strong>with</strong> the limits for a Class B digital device,<br />
pursuant to Part 15 of the FCC Rules. These limits are designed to provide reasonable protection<br />
against harmful interference in a residential installation. This equipment generates uses and can<br />
radiate radio frequency energy and, if not installed and used in accordance <strong>with</strong> the instructions,<br />
may cause harmful interference to radio communications. However, there is no guarantee that<br />
interference will not occur in a particular installation. If this equipment does cause harmful<br />
interference to radio or television reception, which can be determined by turning the equipment<br />
off and on, the user is encouraged to try to correct the interference by one of the following<br />
measures:<br />
• Reorient or relocate the receiving antenna<br />
• Increase the separation between the equipment or device<br />
• Connect the equipment to an outlet other than the receiver’s<br />
• Consult a dealer or an experienced radio/TV technician for assistance<br />
This device complies <strong>with</strong> Part 15 of the FCC Rules. Operation is subject to the following two<br />
conditions: (1) This device may not cause harmful interference, and (2) this device must accept<br />
any interference received, including interference that may cause undesired operation.<br />
FCC Caution: Any changes or modifications not expressly approved by the party responsible for<br />
compliance could void the user's authority to operate this equipment.<br />
IMPORTANT NOTE: FCC Radiation Exposure Statement<br />
This equipment complies <strong>with</strong> FCC radiation exposure limits set forth for an uncontrolled<br />
environment. This equipment should be installed and operated <strong>with</strong> a minimum distance of 20<br />
centimeters (8 inches) between the radiator and your body. This transmitter must not be colocated<br />
or operating in conjunction <strong>with</strong> any other antenna or transmitter.<br />
INDUSTRY CANADA (CANADA)<br />
This digital apparatus does not exceed the Class B limits for radio noise emissions from digital<br />
apparatus as set out in the interference-causing equipment standard entitled “Digital Apparatus,”<br />
ICES-003 of the Department of Communications.<br />
Cet appareil numérique respecte les limites de bruits radioélectriques applicables aux appareils<br />
numériques de Classe B prescrites dans la norme sur le matériel brouilleur: “Appareils<br />
Numériques,” NMB-003 édictée par le ministère des Communications.<br />
66
<strong>Barricade</strong> g <strong>Wireless</strong> <strong>Router</strong> <strong>with</strong> <strong>USB</strong> <strong>Print</strong> <strong>Server</strong> Manual<br />
EC DECLARATION OF CONFORMITY (EUROPE)<br />
<strong>SMC</strong> contact for these products in Europe is:<br />
<strong>SMC</strong> Networks Europe,<br />
Edificio Conata II,<br />
Calle Fructuós Gelabert 6-8, 2o, 4a,<br />
08970 - Sant Joan Despí,<br />
Barcelona, Spain.<br />
This information technology equipment complies <strong>with</strong> the requirements of the Council Directive<br />
89/336/EEC on the Approximation of the laws of the Member States relating to Electromagnetic<br />
Compatibility and 73/23/EEC for electrical equipment used <strong>with</strong>in certain voltage limits and the<br />
Amendment Directive 93/68/ EEC. For the evaluation of the compliance <strong>with</strong> these Directives, the<br />
following standards were applied:<br />
RFI<br />
• Limit class B according to EN 55022:1998<br />
Emission:<br />
• Limit class B for harmonic current emission according to EN 61000-3-2/1995<br />
• Limitation of voltage fluctuation and flicker in low-voltage supply system according to EN<br />
61000-3-3/1995<br />
Immunity:<br />
• Product family standard according to EN 55024:1998<br />
• Electrostatic Discharge according to EN 61000-4-2:1995 (Contact Discharge: ±4 kV, Air<br />
Discharge: ±8 kV)<br />
• Radio-frequency electromagnetic field according to EN 61000-4-3: 1996 (80 - 1000 MHz<br />
<strong>with</strong> 1 kHz AM 80% Modulation: 3 V/m)<br />
• Electrical fast transient/burst according to EN 61000-4-4:1995(AC/DC power supply: ±1 kV,<br />
Data/Signal lines: ±0.5 kV)<br />
• Surge immunity test according to EN 61000-4-5:1995(AC/DC Line to Line: ±1 kV, AC/DC Line<br />
to Earth: ±2 kV)<br />
• Immunity to conducted disturbances, Induced by radio-frequency fields: EN 61000-4-<br />
6:1996(0.15 - 80 MHz <strong>with</strong> 1 kHz AM 80% Modulation:3 V/m)<br />
• Power frequency magnetic field immunity test according to EN 61000-4-8:1993(1 A/m at<br />
frequency 50 Hz)<br />
• Voltage dips, short interruptions and voltage variations immunity test according to EN<br />
61000-4-11:1994(>95% Reduction @10 ms, 30%<br />
• Reduction @500 ms, >95% Reduction @5000 ms)<br />
LVD:<br />
• EN60950(A1/1992; A2/1993; A3/1993; A4/1995; A11/1997)<br />
67
<strong>Barricade</strong> g <strong>Wireless</strong> <strong>Router</strong> <strong>with</strong> <strong>USB</strong> <strong>Print</strong> <strong>Server</strong> Manual<br />
SAFTEY COMPLIANCE: Underwriters Laboratories Compliance Statement<br />
Important! Before making connections, make sure you have the correct cord set.<br />
Check it (read the label on the cable) against the following:<br />
The unit automatically matches the connected input voltage. Therefore, no additional adjustments<br />
are necessary when connecting it to any input voltage <strong>with</strong>in the range marked on the rear panel.<br />
Operating Voltage Cord Set Specifications<br />
120 Volts<br />
240 Volts (Europe only)<br />
Wichtige Sicherheitshinweise (Germany)<br />
UL Listed/CSA Certified Cord Set<br />
Minimum 18 AWG<br />
Type SVT or SJT three conductor cord<br />
Maximum length of 15 feet<br />
Parallel blade, grounding type attachment plug rated 15 A, 125 V<br />
Cord Set <strong>with</strong> H05VV-F cord having three conductors <strong>with</strong> minimum diameter of 0.75 mm2<br />
IEC-320 receptacle<br />
Male plug rated 10 A, 250 V<br />
1. Bitte lesen Sie diese Hinweise sorgfältig durch.<br />
2. Heben Sie diese Anleitung für den späteren Gebrauch auf.<br />
3. Vor jedem Reinigen ist das Gerät vom Stromnetz zu trennen. Verwenden Sie keine Flüssigoder<br />
Aerosolreiniger. Am besten eignet sich ein angefeuchtetes Tuch zur Reinigung.<br />
4. Die Netzanschlu ßsteckdose soll nahe dem Gerät angebracht und leicht zugänglich sein.<br />
5. Das Gerät ist vor Feuchtigkeit zu schützen.<br />
6. Bei der Aufstellung des Gerätes ist auf sicheren Stand zu achten. Ein Kippen oder Fallen<br />
könnte Beschädigungen hervorrufen.<br />
7. Die Belüftungsöffnungen dienen der Luftzirkulation, die das Gerät vor Überhitzung schützt.<br />
Sorgen Sie dafür, daß diese Öffnungen nicht abgedeckt werden.<br />
8. Beachten Sie beim Anschluß an das Stromnetz die Anschlußwerte.<br />
9. Verlegen Sie die Netzanschlußleitung so, daß niemand darüber fallen kann. Es sollte auch<br />
nichts auf der Leitung abgestellt werden.<br />
10. Alle Hinweise und Warnungen, die sich am Gerät befinden, sind zu beachten.<br />
11. Wird das Gerät über einen längeren Zeitraum nicht benutzt, sollten Sie es vom Stromnetz<br />
trennen. Somit wird im Falle einer Überspannung eine Beschädigung vermieden.<br />
12. Durch die Lüftungsöffnungen dürfen niemals Gegenstände oder Flüssigkeiten in das Gerät<br />
gelangen. Dies könnte einen Brand bzw. elektrischen Schlag auslösen.<br />
13. Öffnen sie niemals das Gerät. Das Gerät darf aus Gründen der elektrischen Sicherheit nur von<br />
authorisiertem Servicepersonal geöffnet werden.<br />
14. Wenn folgende Situationen auftreten ist das Gerät vom Stromnetz zu trennen und von einer<br />
qualifizierten Servicestelle zu überprüfen:<br />
a. Netzkabel oder Netzstecker sind beschädigt.<br />
b. Flüssigkeit ist in das Gerät eingedrungen.<br />
c. Das Gerät war Feuchtigkeit ausgesetzt.<br />
d. Wenn das Gerät nicht der Bedienungsanleitung entsprechend funktioniert oder Sie mit<br />
Hilfe dieser Anleitung keine Verbesserung erzielen.<br />
e. Das Gerät ist gefallen und/oder das Gehäuse ist beschädigt.<br />
f. Wenn das Gerät deutliche Anzeichen eines Defektes aufweist.<br />
15. Stellen Sie sicher, daß die Stromversorgung dieses Gerätes nach der EN 60950 geprüft ist.<br />
Ausgangswerte der Stromversorgung sollten die Werte von AC 7,5-8 V, 50-60 Hz nicht über<br />
oder unterschreiten sowie den minimalen Strom von 1 A nicht unterschreiten.<br />
Der arbeitsplatzbezogene Schalldruckpegel nach DIN 45 635 Teil 1000 beträgt70 dB(A) oder<br />
weniger.<br />
68
<strong>Barricade</strong> g <strong>Wireless</strong> <strong>Router</strong> <strong>with</strong> <strong>USB</strong> <strong>Print</strong> <strong>Server</strong> Manual<br />
APPENDIX G | Technical Support<br />
PHONE<br />
From U.S.A. and Canada (24 hours a day, 7 days a week)<br />
• (800) <strong>SMC</strong>-4-YOU<br />
• (949) 679-8000<br />
• Fax: (949) 679-1481<br />
From Europe (8:00 AM - 5:30 PM UK Time)<br />
• 44 (0) 118 974 8700<br />
• Fax: 44 (0) 118 974 8701<br />
INTERNET<br />
E-mail addresses:<br />
• techsupport@smc.com<br />
• european.techsupport@smc-europe.com<br />
Driver updates:<br />
• http://www.smc.com/index.cfm?action=tech_support_drivers_downloads<br />
World Wide Web:<br />
• http://www.smc.com/<br />
• http://www.smc-europe.com/<br />
U.S.A. and Canada:<br />
Spain:<br />
UK:<br />
France:<br />
Italy:<br />
Benelux:<br />
Central Europe:<br />
Switzerland:<br />
Nordic:<br />
Northern Europe:<br />
Eastern Europe:<br />
Sub Saharan Africa:<br />
North Africa:<br />
Russia:<br />
PRC:<br />
Taiwan:<br />
Asia Pacific:<br />
Korea:<br />
Japan:<br />
Australia:<br />
India:<br />
(800) <strong>SMC</strong>-4-YOU<br />
34-93-477-4935<br />
44 (0) 118 974 8700<br />
33 (0) 41 38 32 32<br />
39 02 739 12 33<br />
31 33 455 72 88<br />
49 (0) 89 92861-0<br />
41 (0) 1 9409971<br />
46 (0) 868 70700<br />
44 (0) 118 974 8700<br />
34 -93-477-4920<br />
27-11 314 1133<br />
34 93 477 4920<br />
7 (095) 290 29 96<br />
86-10-6235-4958<br />
886-2-2659-9669<br />
(65) 238 6556<br />
82-2-553-0860<br />
81-3-5645-5715<br />
61-2-8875-7887<br />
91-22-8204437<br />
If you are looking for other contact information, please visit www.smc.com<br />
69<br />
Fax (949) 679-1481<br />
Fax 34-93-477-3774<br />
Fax 44 (0) 118 974 8701<br />
Fax 33 (0) 41 38 01 58<br />
Fax 39 02 739 14 17<br />
Fax 31 33 455 73 30<br />
Fax 49 (0) 89 92861-230<br />
Fax 41 (0) 1 9409972<br />
Fax 46 (0) 887 62 62<br />
Fax 44 (0) 118 974 8701<br />
Fax 34 93 477 3774<br />
Fax 27-11 314 9133<br />
Fax 34 93 477 3774<br />
Fax 7 (095) 290 29 96<br />
Fax 86-10-6235-4962<br />
Fax 886-2-2659-9666<br />
Fax (65) 238 6466<br />
Fax 82-2-553-7202<br />
Fax 81-3-5645-5716<br />
Fax 61-2-8875-7777<br />
Fax 91-22-8204443
Rev – 1.0 [2804WBRP-G]<br />
<strong>Barricade</strong> g <strong>Wireless</strong> <strong>Router</strong> <strong>with</strong> <strong>USB</strong> <strong>Print</strong> <strong>Server</strong> Manual<br />
70