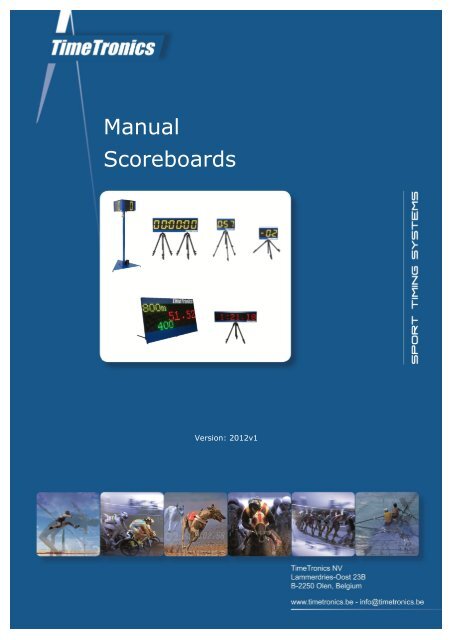
Manual Scoreboards
English [2012v1] - TimeTronics
English [2012v1] - TimeTronics
- No tags were found...
You also want an ePaper? Increase the reach of your titles
YUMPU automatically turns print PDFs into web optimized ePapers that Google loves.
<strong>Manual</strong><br />
<strong>Scoreboards</strong><br />
Version: 2012v1
Table of Contents<br />
PREFACE......................................................................................................2<br />
1. POWER SUPPLY......................................................................................3<br />
2. SCOREBOARD CONNECTIONS..................................................................3<br />
3. SWITCHING THE SCOREBOARD ON AND OFF...........................................3<br />
4. OPERATION IN COMBINATION WITH MACFINISH...................................4<br />
5. INDEPENDENT OPERATION.....................................................................4<br />
5.1. The various (software) modes.......................................................................................4<br />
5.1.1 Chrono mode (= Mode 1 => you see '111111').............................................................4<br />
5.1.2 Concentration clock mode (=mode 2 => you see '222222')........................................5<br />
5.1.3 Day mode (=Mode 3 => you see '3333333').............................................................6<br />
5.1.4 GPS mode for Electromechanical <strong>Scoreboards</strong> or LED mode for LED scoreboards...........7<br />
(= Mode 4 => you see '444444').....................................................................................7<br />
5.1.5 Jumping mode (=Mode 5 => you see '555555')........................................................7<br />
5.1.6 Concentration Clock (3 Digits).................................................................................8<br />
5.1.7 LapCounter (2 Digits or 3 x 2 Digits)........................................................................8<br />
6. GENERAL NOTE........................................................................................9<br />
TimeTronics NV<br />
Lammerdries-Oost 23B<br />
B-2250, Belgium<br />
Tel +32 (0)14 23 19 11<br />
Fax +32 (0)14 23 20 24<br />
VAT BE0440 224 404<br />
HR Turnhout 64540<br />
KBC Bank 414-4191871-52<br />
SWIFT : KREDBE22<br />
IBAN : BE64 4144 1918 7152<br />
www.timetronics.be
2012v1 <strong>Manual</strong> Scoreboard<br />
PREFACE<br />
Welcome to the "Scoreboard" user manual.<br />
May we recommend you to gently leaf through the entire manual first, just to have an initial idea of how the book is<br />
structured. As we cannot possibly explain all details simultaneously, this might help you a bit in understanding and tracing<br />
things back. Of course, the table of contents will also help you in doing so.<br />
Please note that all pictures are examples, the delivered version can be different than shown in this manual please inform<br />
yourself before purchase.<br />
If you, after reading this document, have any further question regarding the operation or service of this or any other<br />
TimeTronics equipment, please contact your local distributor or TimeTronics directly, by email: info@timetronics.be, or call<br />
us at +32 (0) 14 23 19 11<br />
Please also contact us if you have any remarks or advise regarding this user manual: info@timetronics.be.<br />
Good luck with the scoreboard and thank you for your confidence in the TimeTronics products and services.<br />
The editors.<br />
© Copyright 2012 TimeTronics. All rights reserved.<br />
TimeTronics<br />
Lammerdries 23b<br />
B-2250 Olen<br />
Belgium<br />
Tel.: +32 (0) 14 23 19 11<br />
Disclaimer<br />
Under no circumstances shall TimeTronics be liable for any loss, damage or expense suffered or incurred with respect to<br />
any defective product. In no event shall TimeTronics be liable for any incidental or consequential damages that you may<br />
suffer directly or indirectly from use of any product. Windows, Windows XP and Windows VISTA are registered trademarks<br />
of Microsoft Corporation.<br />
2
2012v1 <strong>Manual</strong> Scoreboard<br />
NOTE:<br />
This manual is valid for scoreboards with software version 39 or higher! For both Electromechanical and LED<br />
timing scoreboards. The operation is same for the electromechanical and the LED scoreboards unless<br />
mentioned in this manual.<br />
This manual is not<br />
1. POWER SUPPLY<br />
• All electromechanical scoreboards and TTC408 LED Scoreboard are working on 12 VDC. These scoreboards are<br />
delivered with a battery and charger<br />
• TTC453 LED Scoreboard is working on 12 VDC but delivered with a 100-240VAC to 12VDC converter. A battery and<br />
charger can be ordered optional<br />
Remark:<br />
220VAC power supply and battery chargers are not intent to use in rain condition. The user has to use<br />
appropriate water protection in case of wet conditions.<br />
2. SCOREBOARD CONNECTIONS<br />
Underneath the electromechanical scoreboard, you see 4 connectors; Two “male” 5pin on the<br />
left and two “female” 5pin on the right.<br />
LED timing scoreboards:<br />
– TTC 408: 3 connectors: power, serial in and Remote Control<br />
– TTC 453: same as electromechanical scoreboards<br />
3. SWITCHING THE SCOREBOARD ON AND OFF<br />
Switch ‘ON’ the scoreboard by plugging the battery into the 5 thick-piled male connector named ‘Battery’. By unplugging<br />
the battery, the scoreboard is switched off. Take care that the battery is always charged sufficiently before use.<br />
For TTC453 you have to plug-in the 220VAC power supply which is standard delivered with this scoreboard.<br />
For electromechanical <strong>Scoreboards</strong>:<br />
After you plug in the battery, the scoreboard digits will show the following items in chronological order:<br />
• 6x ‘8’ : 8 8 8 8 8 8<br />
• 6x ‘ ’ : - - - - - - (blanc)<br />
• 3 seconds : IE (stands for original development by IE=Intersoft Electronics)<br />
• 3 seconds : XXX (e.g.: 039) (= software version)<br />
• short : YYYYYY (for example 111111 for scoreboard 'MODE'=1 ; explained later)<br />
• subsequently : ?????? (depending on scoreboard 'MODE' ; explained later)<br />
Pay attention! First switch on the scoreboard (plug in the battery) before making other connections.<br />
If not, the scoreboard may jump to a different mode (see later).<br />
For LED <strong>Scoreboards</strong>:<br />
After you plug in the battery, the scoreboard digits will show the following items in chronological order:<br />
• Scoreboard software version : example TT: 0.64<br />
• Mode number : YYYYYY (for example 111111 for scoreboard 'MODE'=1; explained<br />
later)<br />
• Mode explanation : ?????? (depending on scoreboard 'MODE' ; explained later)<br />
3
2012v1 <strong>Manual</strong> Scoreboard<br />
4. OPERATION IN COMBINATION WITH MACFINISH<br />
For electromechanical scoreboards you can send the running<br />
time to the display independent of the software mode (see 4.1).<br />
In combination with MacFinish, the scoreboard is controlled by<br />
the photo-finish program (see manual MacFinish).<br />
For LED scoreboard you have to set the software mode 4.<br />
Scoreboard connected to a connection reel (mobile<br />
cabling) or connection box (fixed = underground<br />
cabling).<br />
5. INDEPENDENT OPERATION<br />
• Independent operation means that you will operate the scoreboard manually. In other<br />
words, without connection to the MacFinish photofinish but by means of the manual control<br />
device:<br />
• Connect the manual control into the 5 thick-piled female connector named “Remote<br />
control”, underneath your scoreboard.<br />
5.1. The various (software) modes<br />
After ‘Power ON’ you will notice that the scoreboard will display, after the version number, the mode number; for example;<br />
‘1 1 1 1 1 1’. This means that you are now in mode 1 (or chrono mode). Five different modes or functions are covered<br />
within your scoreboard:<br />
1 1 1 1 1 1 (mode 1 = chrono mode)<br />
2 2 2 2 2 2 (mode 2 = count-down mode or concentration clock mode)<br />
3 3 3 3 3 3 (mode 3 = hour mode or day time mode)<br />
4 4 4 4 4 4 (mode 4 = GPS mode in case of Electromechanical displays)<br />
4 4 4 4 4 4 (mode 4 = LED mode in case of LED displays)<br />
5 5 5 5 5 5 (mode 5 = jumping mode)<br />
6 6 6 6 6 6 (mode 6 = WindSpeed mode)<br />
To switch from one mode to another, it is sufficient to simultaneously press<br />
the three buttons on your manual control and to release them again.<br />
You will notice that all<br />
digits on your scoreboard<br />
will display the selected<br />
mode number for one<br />
second. After mode 5<br />
follows mode 1<br />
5.1.1 Chrono mode (= Mode 1 => you see '111111')<br />
The chrono mode is used to display the running time. After ‘1 1 1 1 1 1’, six<br />
‘zeroes’ will appear on your scoreboard, meaning that your scoreboard is now<br />
ready for a start.<br />
The digits go from 0 (zero) to 59:59:99 and again turn to 0. The hundredths of<br />
a second are normally displayed at ‘STOP’ and ‘LAP’.<br />
4
2012v1 <strong>Manual</strong> Scoreboard<br />
• The Start<br />
To start the running<br />
time, press the<br />
“Start”-button on your<br />
Scoreboard Remote<br />
Control.<br />
The scoreboard displays the running time<br />
minutes and seconds.<br />
• <strong>Manual</strong> Split Time<br />
If you wish to<br />
generate a manual<br />
split time, press the<br />
'LAP/RESET'-button:<br />
The scoreboard will now display a split time up<br />
to one hundredth of a second. For example:<br />
This display is frozen for as long as you do not press any other buttons. Display the running time (internal clock) by<br />
pressing the ‘LAP/RESET’-button or ‘START’-button again.<br />
You will notice that the running time jumps to the real time of the race. The clock<br />
continues to run and at the following split point you can again generate a split time.<br />
• Final Time<br />
• To reset your scoreboard for another race, press the<br />
‘LAP/RESET’-button. The scoreboard returns to the<br />
starting point:<br />
5.1.2 Concentration clock mode (=mode 2 => you see '222222')<br />
The concentration clock mode is primarily used for athletic FIELD-events such as high jump, long jump and pole vault,...<br />
Be sure that the scoreboard is in mode 2. To go from mode 1 to mode 2, (see 4.1.: The Various Modes), simultaneously<br />
press the three buttons on your manual control and release them again.<br />
Default Setting<br />
The scoreboard is set default to:<br />
This setting means that the scoreboard starts to count down from<br />
10 seconds to 0 as soon as you press the ‘START’-button on your<br />
manual control:<br />
5
2012v1 <strong>Manual</strong> Scoreboard<br />
When the scoreboard is set to 00:00, you can again return to the ‘inital time’ setting by pressing the ‘RESET’-button.<br />
Should you wish to return sooner to your default setting, press the ‘STOP’- button and subsequently the ‘RESET’-button.<br />
How To Initialize This Countdown Time?<br />
Obviously in reality these 10 seconds are usually not sufficient. Suppose we want to change this default setting and put it<br />
on 1 minute. What is the procedure? As soon as you enter the ‘Countdown’ = ‘Concentration time’ mode 2 (2 2 2 2 2 2),<br />
you can add 10 seconds each time you shortly press the ‘LAP/RESET’-button on your manual control. To change from 10<br />
seconds to 1 minute, you need to press this button five times. To start the countdown, press the ‘START’-button.<br />
In case you have already given a ‘START’ and a ‘RESET’, you can re-adjust the concentration time by keeping the<br />
‘LAP/RESET’-button pressed for about two seconds (3 seconds for LED boards) until you see ‘2 2 2 2 2 2’ on your display.<br />
Maintain pressed for about 2<br />
seconds (3 seconds for LED<br />
boards). Now you can readjust<br />
mode 2<br />
5.1.3 Day mode (=Mode 3 => you see '3333333')<br />
The Start<br />
The day time mode is used for road races such as a marathons. Now hours, minutes and seconds are being displayed<br />
instead of minutes, seconds and hundredths of a second. To start the running time, press the ‘START’-button:<br />
Introducing a new starting time<br />
In case the operation of the scoreboard is interrupted for whatever reason (e.g. broken battery or transportation of the<br />
scoreboard from the start to the finish-line), you can still resume the thread by introducing a time at which you will again<br />
start the timer (the marathon is still going on in the meantime).<br />
What should you do?<br />
• Again you return to the mode 3. After displaying ‘333333’,<br />
the scoreboard now displays six zeroes:<br />
• Suppose you want to start the time after exactly one hour<br />
and five minutes. To add one hour, press the ‘STOP’-button<br />
once. The display on your scoreboard will be:<br />
• Next you will enter the five minutes. To do so, press the<br />
‘LAP/RESET’-button five times. The display on your<br />
scoreboard will now be:<br />
• Exactly after one hour and five minutes after the starting shot (naturally you have kept a backup timing on a digital<br />
watch), you start the running time of this race by pressing the ‘START’- button on your manual control. Now pull out<br />
the manual control to avoid that you would accidentally press the ‘STOP’-button.<br />
6
2012v1 <strong>Manual</strong> Scoreboard<br />
NOTE: This ‘time-setting’ function can be used to re-set the scoreboard for a race time OR to set the scoreboard on a<br />
daytime.<br />
5.1.4 GPS mode for Electromechanical <strong>Scoreboards</strong> or LED mode for LED scoreboards<br />
(= Mode 4 => you see '444444')<br />
GPS mode for electromechanical scoreboards<br />
Is meant to connect a GPS-clock to your scoreboard for the display of an exact day time (via satellite reception). This<br />
is mainly used to display exact starting times for the athletes or cyclists. For example in time trials. Insert the GPSclock<br />
into the serial connection underneath your scoreboard, and the scoreboard will synchronize to the GPS-time<br />
after about one minute. After synchronization, you may unplug the GPS receiver, and let the scoreboard run further<br />
on its internal clock, or leave the GPS receiver connected for continuous GPS time display.<br />
LED mode for LED scoreboards<br />
Our latest MacFinish software programs can send the running time direct to the LED scoreboard once is it set in Mode<br />
4. Other information can be send to the scoreboard using our LED Scoreboard Manager which you can download from<br />
our website. The manual for this LED Scoreboard Manager can be found in the same file which contains the<br />
installation software.<br />
5.1.5 Jumping mode (=Mode 5 => you see '555555')<br />
This mode is especially programmed for equestrian sport.<br />
In equestrian sports, it is sometimes required to know the times realized by a participant over specific parts of the track.<br />
By means of mode 5 you can generate times between for example two obstacles.<br />
The split time at obstacle A is transformed into the starting time for the next part of the course, etc:<br />
At the start of the race, press the ‘START’-button on your manual<br />
control once! Time starts running.<br />
At obstacle A, a time is required over the blue part of the course.<br />
Press the ‘LAP/RESET’-button once to generate this time. For<br />
example:<br />
These split times are being considered as the starting times for the<br />
next part of the track (the internal clock of the scoreboard again<br />
starts from 0 and continues to run!) After a while, press the<br />
‘START’-button to display the running time over the purple part of<br />
the track. For example:<br />
You notice that the time over the purple part is already running for 15 seconds. At obstacle B, you again press the<br />
‘LAP/RESET’-button and you repeat the same procedure for as many times as necessary.<br />
At obstacle C, (final time over the yellow part), simply press ‘STOP’ (as this is the finish-line).<br />
7
2012v1 <strong>Manual</strong> Scoreboard<br />
5.1.6 Wind Result Display (=Mode 6 => you see '666666')<br />
When you connect your TTC408 to a TimeTronics WindSpeed you can display the<br />
result of the wind measurement on your scoreboard.<br />
Approved wind measurement will be displayed in green. Wind measurment<br />
above +2.0 M/S will be displayed in red<br />
5.1.6 Concentration Clock (3 Digits)<br />
Its operation is similar to mode 2 of the running time scoreboard. For that, we refer to chapter<br />
4.1.2.<br />
5.1.7 LapCounter (2 Digits or 3 x 2 Digits)<br />
The manual control of this scoreboard has a different labeling sticker:<br />
Suppose we are dealing with a 10 Km race on a normal athletics track. This means that the athletes will need to run 25<br />
laps. It is thus the intention to display 25. You can simply accomplish that by pressing the ‘+1’-button 25 times in a row,<br />
each time adding one unit.<br />
`<br />
Result<br />
`<br />
When the leading athlete enters the straight, press the ‘-1’ button:<br />
`<br />
Result<br />
`<br />
Repeat the same procedure until reaching 0. When you press the ‘RESET’-button, you will return to 0 at all times. If you<br />
have made a mistake, you can always correct it by either pressing the ‘+1’ or ‘-1’ buttons.<br />
6. GENERAL NOTE<br />
When you pull out the battery (=switch off your scoreboard), the scoreboard will memorize the mode which you last used.<br />
When connecting the battery again, the scoreboard will automatically return to this mode.<br />
8
2012v1 <strong>Manual</strong> Scoreboard<br />
© Copyright 2012 TimeTronics. All rights reserved.<br />
TimeTronics<br />
Lammerdries 23b<br />
B-2250 Olen<br />
Belgium<br />
Tel. : +32 (0) 14 23 19 11<br />
Fax : +32 (0) 14 23 20 24<br />
9


