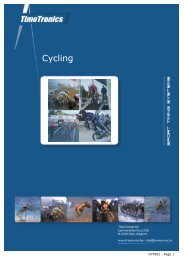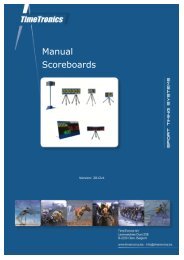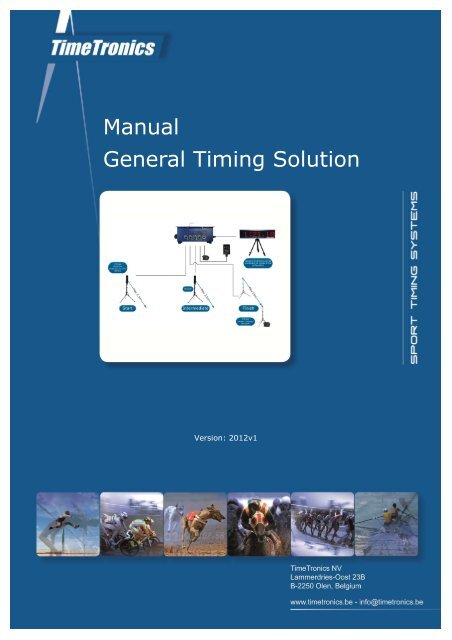
Manual General Timing Solution
2012v1 General Timing Solutions - TimeTronics
2012v1 General Timing Solutions - TimeTronics
- No tags were found...

Create successful ePaper yourself
Turn your PDF publications into a flip-book with our unique Google optimized e-Paper software.
<strong>Manual</strong><br />
<strong>General</strong> <strong>Timing</strong> <strong>Solution</strong><br />
Version: 2012v1
Table of Contents<br />
PREFACE......................................................................................................2<br />
1. Introduction............................................................................................3<br />
1.1 How does it work.........................................................................................................3<br />
1.2 . 2 types of configurations.............................................................................................4<br />
1.2 .1. TTC810: scoreboard NOT included......................................................................4<br />
1.2 .1. TTC811: scoreboard NOT included......................................................................4<br />
2. Setting up of the <strong>General</strong> <strong>Timing</strong> <strong>Solution</strong>...............................................5<br />
1.2. TTC810: photocell principle: reflective...........................................................................5<br />
1.2.1. TTC810: setup 1 = Start – Intermediate - Finish ...................................................5<br />
1.2.2. TTC810: setup 2 = Reset - Start – Finish...............................................................6<br />
1.3 . TTC811: photocell principle: sender - receiver...............................................................6<br />
1.3.1. TTC811: setup 1 = Start – Intermediate – Finish....................................................7<br />
1.3.2. TTC811: setup 2 = Reset - Start – Finish...............................................................7<br />
-----------------------------<br />
TimeTronics NV<br />
Lammerdries-Oost 23B<br />
B-2250, Belgium<br />
Tel +32 (0)14 23 19 11<br />
Fax +32 (0)14 23 20 24<br />
VAT BE0440 224 404<br />
HR Turnhout 64540<br />
KBC Bank 414-4191871-52<br />
SWIFT : KREDBE22<br />
IBAN : BE64 4144 1918 7152<br />
www.timetronics.be
2012v1 <strong>Manual</strong> <strong>General</strong> <strong>Timing</strong> <strong>Solution</strong><br />
PREFACE<br />
Welcome to the "<strong>General</strong> <strong>Timing</strong> <strong>Solution</strong>" user manual.<br />
May we recommend you to gently leaf through the entire manual first, just to have an initial idea of how the book is<br />
structured. As we cannot possibly explain all details simultaneously, this might help you a bit in understanding and tracing<br />
things back. Of course, the table of contents will also help you in doing so.<br />
Please note that all pictures are examples, the delivered version can be different than shown in this manual please inform<br />
yourself before purchase.<br />
If you, after reading this document, have any further question regarding the operation or service of this or any other<br />
TimeTronics equipment, please contact your local distributor or TimeTronics directly, by email: info@timetronics.be, or call<br />
us at +32 (0) 14 23 19 11<br />
Please also contact us if you have any remarks or advise regarding this user manual: info@timetronics.be.<br />
Good luck with FalseStart II and thank you for your confidence in the TimeTronics products and services.<br />
The editors.<br />
© Copyright 2012 TimeTronics. All rights reserved.<br />
TimeTronics<br />
Lammerdries 23b<br />
B-2250 Olen<br />
Belgium<br />
Tel.: +32 (0) 14 23 19 11<br />
Disclaimer<br />
Under no circumstances shall TimeTronics be liable for any loss, damage or expense suffered or incurred with respect to<br />
any defective product. In no event shall TimeTronics be liable for any incidental or consequential damages that you may<br />
suffer directly or indirectly from use of any product. Windows, Windows XP and Windows VISTA are registered trademarks<br />
of Microsoft Corporation.<br />
2
2012v1 <strong>Manual</strong> <strong>General</strong> <strong>Timing</strong> <strong>Solution</strong><br />
1. Introduction<br />
1.1 How does it work<br />
Each version of the TimeTronics electromagnetic numeric timing scoreboards can display any numbers that are serially<br />
send to it by a personal computer (= “display function”), but they also have 3 digital inputs which allows the internal<br />
software to time events (= “timing function”). TimeTronics delivers with each such scoreboard a small black box with three<br />
(3) buttons, to allow anybody to give “Start”, “Stop” and “Lap/Reset” signals to the scoreboard. This black box is called<br />
“Scoreboard Remote Control” box, see picture below.<br />
TTC408: LED <strong>Timing</strong><br />
Scoreboards<br />
P94 Scoreboard remote control<br />
The GTS configuration contains the necessary parts (GTS box, extra battery(s), tripods and photocell(s)) to allow the<br />
scoreboard to automatically time a runner (or other moving objects) when he/she is passing a start and/or stop<br />
photocell barrier. With the latest version of the GTS box, it is even possible to record a “split” time, by using an (optional)<br />
third photocell barrier.<br />
The principle is that you will plug the cable of the GTS box into the scoreboard, and this way replace the push button<br />
signals by the electronic signals of the GTS box (signals that coming from the photocells).<br />
P658: <strong>General</strong> <strong>Timing</strong> <strong>Solution</strong><br />
HOWEVER;<br />
You stay always in control of the scoreboard, by means of the “Scoreboard Remote Control” box, that you also plug into<br />
the GTS box. In other words; the scoreboard will receive the signals from the photocells, but ALSO from the “Scoreboard<br />
Remote Control” box. You will see that the scoreboard will;<br />
• Start if you press the “Start” button, or interrupt the “Start” photocell barrier.<br />
• Stop if you press the “Stop” button, or interrupt the “Stop” photocell barrier.<br />
• Record a SPLIT time or will Reset if you press the “Lap/Reset” button, or interrupt the (optional) “Lap/Reset”<br />
photocell.<br />
3
2012v1 <strong>Manual</strong> <strong>General</strong> <strong>Timing</strong> <strong>Solution</strong><br />
1.2 . 2 types of configurations<br />
There are 2 types of configurations for the <strong>General</strong> <strong>Timing</strong> <strong>Solution</strong>:<br />
• TTC810 = using 2 sets of “reflector type” of photocells, optical range = 2,5 meter<br />
• TTC811 = using 2 sets of “Transmitter + Receiver type” of photocells, optical range = 15 meter<br />
The main difference is the longer range of the photocells, but for this purpose these photocells need an extra battery for<br />
each photocell transmitter. The timing operation of the 2 configurations is the same.<br />
1.2 .1. TTC810: scoreboard NOT included<br />
• 1x Batterypack; to be plugged into the GTS box, to power the photocells.<br />
• 1x Battery charger<br />
• 2x tripod for the photocells<br />
• 2x L-piece for the photocells<br />
• 1x GTS box: cable of the box is 9m<br />
• 2x reflective photocell optical range max 2,5m): cable of the photocells is 20m<br />
• optional:<br />
◦ intermediate or reset:<br />
▪ 1x reflective photocell with reflectors (optical range max 2,5m): cable of the photocells is 20m<br />
▪ 1x tripod for the photocells<br />
▪ 1x L-piece for the photocells<br />
◦ extra reels to extend the cable of the photocells (max. 500m)<br />
1.2 .1. TTC811: scoreboard NOT included<br />
• 3x Batterypack; 1 battery for the GTS box and the photocell receiver(s) + 1 for each photocell transmitter.<br />
• 3x Battery charger<br />
• 4x tripod for the photocells<br />
• 4x L-piece for the photocells<br />
• 1x GTS box: cable of the box is 9m<br />
• 2 pairs of photocells (range max 15m): cable of the photocell receivers is 20m<br />
• optional:<br />
◦ intermediate or reset:<br />
▪ 1pairs of photocells (range max 15m): cable of the photocell receivers is 20m<br />
▪ 2x tripod for the photocells<br />
▪ 2x L-piece for the photocells<br />
◦ Extra reels to extend the cable of the photocells (max. 500m)<br />
4
2012v1 <strong>Manual</strong> <strong>General</strong> <strong>Timing</strong> <strong>Solution</strong><br />
2. Setting up of the <strong>General</strong> <strong>Timing</strong> <strong>Solution</strong><br />
1.2. TTC810: photocell principle: reflective<br />
The <strong>General</strong> <strong>Timing</strong> <strong>Solution</strong> Control Box has 5 connectors on the box + one cable of 9m with male connector.<br />
1. Plug the “Scoreboard Remote Control” box in the connector “Scoreboard Remote Control”.<br />
2. Plug a first photocell in the “Start” connector. You can fix your photocell easily with Velcro strips on the L-<br />
shaped metal plate, which can be screwed on top of the included tripods. Of course, they can also be fixed<br />
more permanently by means of the screws. You can also fix the reflectors with Velcro strips on the L-pieces.<br />
Put the tripods at a suitable height (for your training/sport/test), but make sure that the photocell AND the<br />
reflector are at exactly the same height above the ground level. Already try to point the photocell as good<br />
as possible in the direction of the reflector.<br />
3. Plug a second photocell in the “Stop” connector. Attach also this second photocell and the corresponding<br />
reflector on the tripods, by means of the Velcro straps.<br />
4. Plug the battery in the “12VDC Battery” connector.<br />
5. The cable on the side of the box should be connected directly to the scoreboard in the connector<br />
“Scoreboard Remote Control” or can be extended by a scoreboard cable (12m 5p extension cable: P229).<br />
1.2.1. TTC810: setup 1 = Start – Intermediate - Finish<br />
5
2012v1 <strong>Manual</strong> <strong>General</strong> <strong>Timing</strong> <strong>Solution</strong><br />
1.2.2. TTC810: setup 2 = Reset - Start – Finish<br />
1.3 . TTC811: photocell principle: sender - receiver<br />
1. Plug the “Scoreboard Remote Control” in the connector “Scoreboard Remote Control”.<br />
2. Plug a first photocell receiver in the “Start” connector. You can fix your photocells easily with Velcro strips<br />
on the L-pieces, which can be screwed on top of the included tripods. Of course, they can also be fixed<br />
more permanently by means of the screws. The photocell transmitter should be connected to a battery<br />
pack, to receive power.<br />
3. Plug a second photocell receiver in the “Stop” connector. The photocell transmitter should be connected<br />
to a battery pack, to receive power.<br />
You can identify the transmitter and receiver part of the photocells by the following:<br />
On the photocell transmitter (left) you see an arrow (à) pointing AWAY from the photocell.<br />
On the photocell receiver (right) you see an arrow (->) pointing TO the photocell.<br />
4. Plug the remaining battery in the “12VDC Battery” connector of the GTS box.<br />
5. The cable on the side of the GTS box should be connected directly to the scoreboard in the connector<br />
“Scoreboard Remote Control” or can be extended by a scoreboard cable (12m 5p extension cable:<br />
6
2012v1 <strong>Manual</strong> <strong>General</strong> <strong>Timing</strong> <strong>Solution</strong><br />
1.3.1. TTC811: setup 1 = Start – Intermediate – Finish<br />
1.3.2. TTC811: setup 2 = Reset - Start – Finish<br />
7
2012v1 <strong>Manual</strong> <strong>General</strong> <strong>Timing</strong> <strong>Solution</strong><br />
Good Luck with your operation and use of this <strong>General</strong> <strong>Timing</strong> <strong>Solution</strong><br />
If you have whatever question or advise to us concerning this user manual.<br />
Please contact us by email on info@timetronics.be<br />
© Copyright 2012 TimeTronics. All rights reserved.<br />
TimeTronics<br />
Lammerdries 23b<br />
B-2250 Olen<br />
Belgium<br />
Tel. : +32 (0) 14 23 19 11<br />
Fax : +32 (0) 14 23 20 24<br />
8