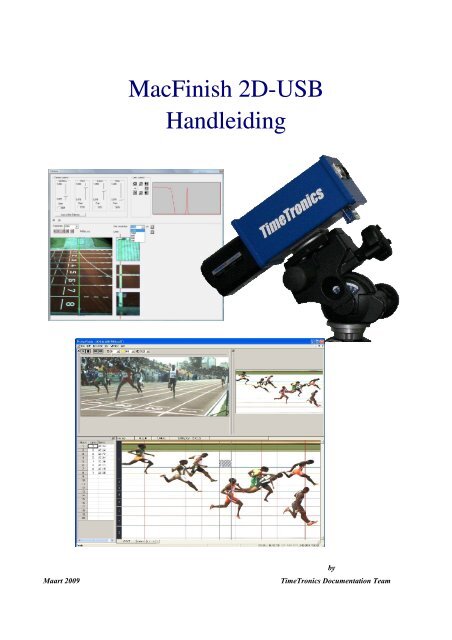
MacFinish 2D-USB Handleiding
Hoofdstuk 1 - TimeTronics
Hoofdstuk 1 - TimeTronics
- No tags were found...

Create successful ePaper yourself
Turn your PDF publications into a flip-book with our unique Google optimized e-Paper software.
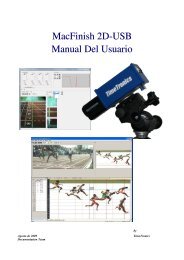
<strong>MacFinish</strong> <strong>2D</strong>-<strong>USB</strong><br />
<strong>Handleiding</strong><br />
Maart 2009<br />
by<br />
TimeTronics Documentation Team
<strong>MacFinish</strong> <strong>2D</strong>-<strong>USB</strong> and MF8.x software Page 3<br />
Index<br />
Voorwoord............................................................................................................................................................................6<br />
Hoofdstuk 1 : Apparatuur configuratie.................................................................................................................................7<br />
Hoofdstuk 1.1 : Basis <strong>MacFinish</strong> configuratie (met 5-polige bekabeling op de baan)...................................................7<br />
Hoofdstuk 1.2 : Uitgebreide <strong>MacFinish</strong> configuratie (met 12-polige bekabeling).........................................................8<br />
Hoofdstuk 2 : Algemene gebruiksprincipes voor het gebruik van <strong>MacFinish</strong> fotofinish.....................................................9<br />
Hoofdstuk 3 : Hoe verbinden we alle kabels?....................................................................................................................10<br />
Hoofdstuk 3.1 : Camera-verbindingen..........................................................................................................................10<br />
Hoofdstuk 3.2 : Monteren van de camera op de driepoot en de lens op de camera......................................................11<br />
Hoofdstuk 3.3 : <strong>MacFinish</strong> Interface Box.....................................................................................................................11<br />
Hoofdstuk 3.4 : Start detectie........................................................................................................................................12<br />
Hoofdstuk 3.4.1 : Klassiek start pistool..................................................................................................................12<br />
Hoofdstuk 3.4.2 : Electronisch start pistool (OPTIE).............................................................................................12<br />
Hoofdstuk 3.4.3 : Manual Start Push Button ..........................................................................................................13<br />
Hoofdstuk 3.4.4 : Cable to switch of starting gate..................................................................................................13<br />
Hoofdstuk 3.5 : Finish Detection..................................................................................................................................13<br />
Hoofdstuk 3.5.1 : Fotocellen...................................................................................................................................13<br />
Hoofdstuk 3.5.2 : Aankomst handbediening...........................................................................................................14<br />
Hoofdstuk 3.6 : Aankomst Remote Control..................................................................................................................14<br />
Hoofdstuk 3.7 : Seriële poort voor Scorebord (Optioneel)...........................................................................................15<br />
Hoofdstuk 3.8 : Serial port for Windspeed (Optioneel)................................................................................................15<br />
Hoofdstuk 3.9 : Serial port for FieldTerminal (Optioneel)...........................................................................................15<br />
Hoofdstuk 3.10 : 12Vdc batterij pak + lader................................................................................................................15<br />
Hoofdstuk 4 : Software installatie......................................................................................................................................16<br />
Hoofdstuk 4.1 : Algemeen............................................................................................................................................16<br />
Hoofdstuk 4.2 : Installatie van de <strong>MacFinish</strong> software.................................................................................................16<br />
Hoofdstuk 4.3 : Belangrijke nota voor windows XP gebruikers !!...............................................................................19<br />
Hoofdstuk 4.4 : <strong>MacFinish</strong> software vensters...............................................................................................................20<br />
Hoofdstuk 4.5 : Invoeren van je registratie sleutel.......................................................................................................21<br />
Hoofdstuk 5 : Uitlijnen van u camera en instelling van de lens..........................................................................................23<br />
Hoofdstuk 5.1 : camera adjustments, using the Camera window.................................................................................25<br />
Hoofdstuk 5.1.1 : Mounting the camera..................................................................................................................26<br />
Hoofdstuk 5.1.2 : Checking the Spirit Level on the Camera...................................................................................26<br />
Hoofdstuk 5.1.3 : In Extension of the Finish line....................................................................................................27<br />
Hoofdstuk 5.1.4 : Camera’s Vertical Direction (TILT), and lens zoom.................................................................27<br />
Hoofdstuk 5.1.5 : Camera’s Horizontal Direction...................................................................................................28<br />
Hoofdstuk 5.1.6 : Adjusting the Lens iris................................................................................................................29<br />
Hoofdstuk 5.1.7 : Adjusting the Lens focus............................................................................................................30<br />
Hoofdstuk 5.1.8 : Infrared filter..............................................................................................................................30<br />
Hoofdstuk 5.1.9 : Steamy lenses.............................................................................................................................30<br />
Hoofdstuk 5.1.10 : Black Blocks on the Finish line (only Athletics T&F).............................................................31<br />
Hoofdstuk 5.2 : Verification of camera and lens settings, using the Scrolling camera view window..........................32<br />
Hoofdstuk 5.3 : Checklist to align the camera and adjust the lens ...............................................................................33<br />
Hoofdstuk 6 : <strong>MacFinish</strong> Preferences.................................................................................................................................34<br />
Hoofdstuk 6.1 : Document Preferences .......................................................................................................................34<br />
Hoofdstuk 6.1.1 : Photo Direction..........................................................................................................................34<br />
Hoofdstuk 6.1.2 : Display Resolution.....................................................................................................................35<br />
Hoofdstuk 6.1.3 : Lane order..................................................................................................................................35<br />
Hoofdstuk 6.1.4 : Automatic import participant list and export results..................................................................35<br />
Hoofdstuk 6.1.5 : Automatic export <strong>MacFinish</strong> photo image as '.jpg' file..............................................................36<br />
Hoofdstuk 6.1.6 : Time Lines..................................................................................................................................36<br />
Hoofdstuk 6.2 : Scoreboards Preferences.....................................................................................................................37<br />
Hoofdstuk 6.3 : General Preferences............................................................................................................................38<br />
Hoofdstuk 6.3.1 : Number (Time rounding)...........................................................................................................38<br />
Hoofdstuk 6.3.2 : Maximize when zoom................................................................................................................39<br />
Hoofdstuk 6.3.3 : Enable Function Keys.................................................................................................................39<br />
Hoofdstuk 6.4 : <strong>MacFinish</strong> Preferences .......................................................................................................................40<br />
Hoofdstuk 6.5 : MeetManager Preferences...................................................................................................................42<br />
Hoofdstuk 6.6 : Port Manager .....................................................................................................................................43<br />
Hoofdstuk 6.7 : Key Registration Preferences..............................................................................................................43
Page 4<br />
<strong>MacFinish</strong> <strong>2D</strong>-<strong>USB</strong> and MF8.x software<br />
Hoofdstuk 6.8 : <strong>MacFinish</strong> photo ‘Window’ Preferences.............................................................................................43<br />
Hoofdstuk 6.9 : Result-‘Table’ Preferences..................................................................................................................44<br />
Hoofdstuk 6.10 : Closing the Preferences Window.....................................................................................................44<br />
Hoofdstuk 7 : Recording a race..........................................................................................................................................45<br />
Hoofdstuk 7.1 : Selecting the recording speed.............................................................................................................45<br />
Hoofdstuk 7.2 : Single race recording (one race at a time)...........................................................................................46<br />
Hoofdstuk 7.2.1 : Recording multiple start signals.................................................................................................48<br />
Hoofdstuk 7.2.2 : Selecting after the race another line for the finish position .......................................................50<br />
Hoofdstuk 7.2.3 : Recording extra participants after you saved the <strong>MacFinish</strong> file...............................................51<br />
Hoofdstuk 7.2.4 : Recording of Electronic Split Times by means of the Finish Photocells...................................52<br />
Hoofdstuk 7.2.5 : Non-electronic split times registration (manual, without photocells!).......................................53<br />
Hoofdstuk 7.2.6 : Windspeed User Mode ..............................................................................................................53<br />
Hoofdstuk 7.2.7 : Running Time on Scoreboard After Arrival of First Athlete.....................................................54<br />
Hoofdstuk 7.3 : Multiple races recording (multiple races possible at a time)..............................................................54<br />
Hoofdstuk 7.4 : Testing the Starting System.................................................................................................................56<br />
Hoofdstuk 8 : Reading the Race Results.............................................................................................................................57<br />
How is the photo window structured.............................................................................................................................57<br />
Hoofdstuk 8.1 : Zooming..............................................................................................................................................58<br />
Hoofdstuk 8.2 : Filling the 'Results table'.....................................................................................................................59<br />
Hoofdstuk 8.2.1 : Races Finishing in Lanes............................................................................................................59<br />
Hoofdstuk 8.2.2 : Races Not Finishing in Lanes.....................................................................................................61<br />
Hoofdstuk 8.2.3 : Time Lines When Filling In Results...........................................................................................62<br />
Hoofdstuk 8.2.4 : Absolute or Relative times in the ‘Result table’.........................................................................62<br />
Hoofdstuk 8.3 : Using the Video-ID system (option)...................................................................................................63<br />
Hoofdstuk 8.4 : Using the ‘Overview’ window............................................................................................................63<br />
Hoofdstuk 9 : Printing the Photo or Race results................................................................................................................65<br />
Hoofdstuk 9.1 : Printing directly to the printer.............................................................................................................65<br />
Hoofdstuk 9.2 : Manually creating a .jpg file that you can use and print later.............................................................66<br />
Hoofdstuk 9.3 : Automatic creating a .jpg file that you can use and print later............................................................67<br />
Hoofdstuk 10 : Using a link with a MeetManager database...............................................................................................68<br />
Hoofdstuk 10.1 : One-directional data transfer to MeetManager.................................................................................68<br />
Hoofdstuk 10.2 : Two-directional data communication with MeetManager................................................................69<br />
Hoofdstuk 10.2.1 : Installation of the MeetManager function................................................................................69<br />
Hoofdstuk 10.2.2 : Import MeetManager data .......................................................................................................69<br />
Hoofdstuk 10.2.3 : Filling in Results when Linked to Meet Manager ...................................................................70<br />
Hoofdstuk 10.2.4 : Export MeetManager data ......................................................................................................71<br />
Hoofdstuk 11 : Overview of the MF Menus.......................................................................................................................72<br />
Hoofdstuk 11.1 : Help Menu.........................................................................................................................................72<br />
Hoofdstuk 11.2 : File Menu..........................................................................................................................................72<br />
Hoofdstuk 11.3 : Document Menu...............................................................................................................................73<br />
Hoofdstuk 11.3.1 : Import, Export, Show Competitors .........................................................................................73<br />
Hoofdstuk 11.3.2 : Send Results, Export Results to File........................................................................................73<br />
Hoofdstuk 11.3.3 : Flip Image.................................................................................................................................74<br />
Hoofdstuk 11.3.4 : Flip Lanes.................................................................................................................................74<br />
Hoofdstuk 11.3.5 : Crop..........................................................................................................................................74<br />
Hoofdstuk 11.3.6 : Hide table and Show table........................................................................................................74<br />
Hoofdstuk 11.3.7 : Hide Overview and Show Overview........................................................................................75<br />
Hoofdstuk 11.3.8 : Time Lines................................................................................................................................75<br />
Hoofdstuk 11.3.9 : Timecorrection.........................................................................................................................76<br />
Hoofdstuk 11.3.10 : Presentation............................................................................................................................76<br />
Hoofdstuk 11.4 : Camera Menu....................................................................................................................................78<br />
Hoofdstuk 11.4.1 : Connect Camera.......................................................................................................................78<br />
Hoofdstuk 11.5 : Windows Menu................................................................................................................................78<br />
Hoofdstuk 11.5.1 : Tools Window with color calibration.......................................................................................78<br />
Hoofdstuk 11.5.2 : Camera Control Window..........................................................................................................81<br />
Hoofdstuk 11.6 : Shortcuts............................................................................................................................................83<br />
Hoofdstuk 12 : Frequently Asked Questions......................................................................................................................84<br />
Hoofdstuk 13 : Troubleshooting.........................................................................................................................................85<br />
APPENDIX A: “Send Results“ Format..............................................................................................................................86<br />
APPENDIX B: “IE 1.0.1.“ SB Protocol.............................................................................................................................87<br />
APPENDIX C: “IE Extended” SB Protocol.......................................................................................................................88
<strong>MacFinish</strong> <strong>2D</strong>-<strong>USB</strong> and MF8.x software Page 5<br />
APPENDIX D: Explanation of Words...............................................................................................................................89<br />
APPENDIX E: Pin Connections.........................................................................................................................................90<br />
APPENDIX F: What is the correct time?...........................................................................................................................91<br />
Appendix G; Working with “.PAR” (Participant) files......................................................................................................92<br />
Link <strong>MacFinish</strong> files – text files..............................................................................................................................92<br />
Manual link with .par files.................................................................................................................................92<br />
Automatic link with .par files............................................................................................................................93<br />
Syntax (= format) of a *.par file..............................................................................................................................94
Page 6<br />
<strong>MacFinish</strong> <strong>2D</strong>-<strong>USB</strong> and MF8.x software<br />
Voorwoord<br />
<strong>MacFinish</strong> foto finish: Concept-Idee<br />
Het idee van de photofinish is, zoals de naam het zegt, foto’s maken van<br />
de aankomstlijn wanneer een atleet of object de aankomstlijn bereikt. In<br />
tegenstelling tot gewone foto’s, gemaakt met uw camera, registreert het<br />
<strong>MacFinish</strong> systeem enkel de aankomstlijn. En dit met een snelheid van 100<br />
tot 2000 lijnen per seconde, de <strong>MacFinish</strong> verzendt de gemaakte foto naar<br />
de <strong>MacFinish</strong> PC. Dit laat de operator toe om tijden te lezen met een<br />
nauwkeurigheid tot 0.5 duizendste van een seconde.<br />
Welkom bij de “<strong>MacFinish</strong> <strong>2D</strong> <strong>USB</strong>” handleiding<br />
De handleiding is hoofdzakelijk geschreven voor het gebruik van ons <strong>MacFinish</strong> fotofinish systeem voor atletiek<br />
(Track&Field), maar waar noodzakelijk de omzetting en de verschillen worden uitgelegd voor andere sporten. In deze<br />
handleiding zullen wij de bediening van de <strong>MacFinish</strong> uitleggen vanuit een gebruikers standpunt, met andere woorden,<br />
op de piste zelf. Natuurlijk kan u beginnen met het systeem en de software op te stellen op uw kantoor of thuis, maar<br />
denk eraan dat wij in de tekst naar de piste of de wedstrijd voorwaarden zullen verwijzen.<br />
Mogen wij u aanraden de volledige handleiding eerst door te bladeren, dit om een eerste idee te krijgen van de structuur<br />
van de handleiding. Aangezien wij alle details niet tegelijkertijd kunnen verduidelijken, kan dit u helpen om nadien<br />
specifieke zaken terug te vinden. Natuurlijk zal de inhoudsopgave u ook hierbij helpen. Als u, na het lezen van dit<br />
document, nog verder vragen heeft aangaande de werking of de dienst van dit of een ander producten van TimeTronics,<br />
gelieve uw lokale verdeler of TimeTronics direct, per e-mail te contacteren; info@timetronics.be, of bel ons op het<br />
nummer: +32 14 23 19 11<br />
Gelieve ons ook te contacteren als u om het even welke opmerkingen of advies heeft aangaande deze handleiding;<br />
info@timetronics.be.<br />
Veel geluk met <strong>MacFinish</strong> en bedankt voor uw vertrouwen in onze producten en diensten.<br />
De redacteurs.<br />
© Copyright 1998...2008 TimeTronics.. All rights reserved.<br />
TimeTronics<br />
Lammerdries-Oost 27<br />
2250 Olen<br />
Belgium<br />
Tel.: +32 14 23 19 11<br />
Fax: +32 14 23 19 44<br />
<strong>MacFinish</strong> II <strong>USB</strong>, <strong>MacFinish</strong> <strong>2D</strong> <strong>USB</strong>, <strong>MacFinish</strong> II Ethernet, <strong>MacFinish</strong> III Ethernet zijn<br />
geregistreerde handelsmerken van TimeTronics. TimeTronics specificaties of functionele kenmerken<br />
kunnen ten alle tijden veranderd worden zonder mededeling. TimeTronics is niet verantwoordelijk<br />
voor de gevolgen van het onjuiste gebruik of werking van de <strong>MacFinish</strong> (eender welke versie).<br />
Windows XP en VISTA zijn geregistreerde handelsmerken van Microsoft Corporation.
<strong>MacFinish</strong> <strong>2D</strong>-<strong>USB</strong> and MF8.x software Page 7<br />
Hoofdstuk 1 : Hardware configuratie<br />
Wanneer u de <strong>MacFinish</strong> configuratie koffer voor het eerst opent zal u verschillende onderdelen terugvinden. De<br />
<strong>MacFinish</strong> InterfaceBox, camera met lens, kabels en enkele toebehoren die u toelaten om een volledige opstelling in<br />
elkaar te zetten. We zullen u eerst proberen uit te leggen hoe een dergelijke volledige configuratie eruit ziet en hoe elke<br />
onderdeel met elkaar verbonden moet worden.<br />
Hoofdstuk 1.1 : Basis <strong>MacFinish</strong> configuratie<br />
(met 5-polige bekabeling op de baan)<br />
Foto van de kabelhaspel met 50m (P063) of 100m (P064) 5-polige kabel en 5 polige connectoren, om de<br />
startdetector of de fotocelontvanger aan te sluiten op de MF interface box.<br />
Zoals u op de schematische tekening hierboven kan zien, kunt u met enkele aansluitingen starten met foto finish timing.<br />
Een optioneel timing scorebord kan verbonden worden via de seriële poort van uw pc met een seriële interface kabel<br />
(P244) en een 5-polige kabelhaspel zoals hierboven, maar als u denkt in de toekomst ook andere optionele apparatuur te<br />
verbinden zoals:<br />
• een ultrasonische WindSpeed windmeter<br />
• één of meerdere FieldTerminals met bijbehorende FieldScorebord(en), WindSpeed en Laser afstandmetingen<br />
dan is het beter om het 12-draad kabelsysteem, dat in het volgende hoofdstuk wordt uitgelegd, onmiddellijk aan te<br />
schaffen.
Page 8<br />
<strong>MacFinish</strong> <strong>2D</strong>-<strong>USB</strong> and MF8.x software<br />
Hoofdstuk 1.2 : Uitgebreide <strong>MacFinish</strong><br />
configuratie (met 12-polige bekabeling)<br />
Als alternatief voor de hierboven getoonde 5-polige bekabeling, kan u kiezen voor een TimeTronics 12-polige<br />
bekabeling. Het grote voordeel is dat men met dergelijk 12-polig systeem ALLE vermelde optionele elementen<br />
(Scoreborden, WindSpeed, FieldTerminals, enz.) verbonden kunnen worden rondom de piste, met één enkele lus<br />
rond uw 200m (binnen) of 400m (openlucht) piste. Gelieve reeds op te merken dat u verder kan kiezen tussen de 12-<br />
polige mobiele kabelhaspels (elke 80m lang), en de 12-polige ‘vaste’ ondergrondse oplossing, met afneembare<br />
connectieboxen (om deze tijdens nacht en/of de winterperiode te bewaren). Zowel de 12-polige kabelhaspels als de<br />
connectieboxen hebben dezelfde 5-polige connectoren voor (1) Startsignaal, (2) Fotocel, (3) WindSpeed, (4) Timing<br />
Scorebord en (5) FieldTerminals en zijn dus volledig compatibel.<br />
Kabelhaspel met 80m 5-polige kabel + aansluitingspaneel.<br />
12-polige “vaste” ondergrondse bekabeling<br />
+ verwijderbare connectieboxen<br />
De schematische tekening hierboven toont de mobiele configuratie met kabelhaspels. Met deze 5 haspels, zijn ALLE<br />
verbindingen beschikbaar op de 5 belangrijkste plaatsen rond de piste. Zo kan ook een vaste configuratie worden<br />
gemaakt, als u de 5 kabelhaspels met 12-polige ondergrondse bekabeling en 5 verwijderbare connectieboxen<br />
vervangt.
<strong>MacFinish</strong> <strong>2D</strong>-<strong>USB</strong> and MF8.x software Page 9<br />
Hoofdstuk 2 : Algemene gebruiksprincipes<br />
voor het gebruik van <strong>MacFinish</strong> fotofinish.<br />
1. De gebruiker monteert de volledige configuratie; appartuur, software, bekabeling, afstelling camera… In de<br />
volgende hoofdstukken zullen wij verklaren hoe u dit moet doen.<br />
2. De gebruiker bereidt de <strong>MacFinish</strong> voor, voor het registreren van een race door de instellingen te kiezen en de<br />
<strong>MacFinish</strong> ‘klaar’ te zetten.<br />
3. De starter geeft het startsignaal met het startpistool (of voor sommige sporten met een drukknop) en de<br />
startdetector (op de loop van het pistool) geeft een startsignaal door aan de <strong>MacFinish</strong>.<br />
4. Bij de aankomstlijn gebeurt het registeren van de aankomst automatisch (via fotocellen) of manueel ( via de<br />
aankomst remote controle drukknop). Het gebruik hiervan wordt later in deze handleiding uitgelegd.<br />
5. Tijdens de aankomst van de atleten, kano’s, etc. slaat de <strong>MacFinish</strong> het beeld van de camera en de<br />
overeenkomstige tijden in zijn geheugen op.<br />
6. Zodra alle deelnemers zijn aangekomen, stopt de operator met opnemen.<br />
7. De operator vraagt aan de software om het volledige beeld naar de computer (harde schijf) te sturen.<br />
Vervolgens verschijnt het beeld op uw computerscherm met de overeenkomstige tijden.<br />
8. De operator zet de <strong>MacFinish</strong> klaar voor de volgende race. Voor de start van, of tijdens de volgende race kan<br />
de operator de plaatsen en tijden van de deelnemers uitlezen, een resultatentabel opmaken, het beeld en de<br />
resultaten van de vorige race afprinten. Het uitlezen van de officiële resultaten kan ook gebeuren op een tweede<br />
computer als u de fotofinish verantwoordelijkheid wil verdelen over 2 personen, elk met hun eigen computer.<br />
In dat geval zal u beide pc’s moeten verbinden met een Ethernet computer netwerk en de opgenomen fotofinish<br />
bestanden delen met elkaar.<br />
9. We zullen later uitleggen hoe het mogelijk is om (optioneel) de <strong>MacFinish</strong> PC met een “MeetManager” PC te<br />
verbinden, welke een database is met alle race gegevens, deelnemende atleteninformatie, wedstrijdschema ,<br />
enz. Door middel van een eenvoudige seriële kabel of netwerk verbinding (Ethernet) tussen de 2 pc’s. De<br />
<strong>MacFinish</strong>-pc ontvangt automatisch alle race -en atleteninformatie van de MeetManager-pc en de<br />
MeetMananger-pc ontvangt alle race resultaten van de <strong>MacFinish</strong>-pc. Op deze manier kan het <strong>MacFinish</strong><br />
systeem de ‘live’ resultaten (de lopende tijd en niet-officiële tijd van de eerste atleet) laten zien op de timing<br />
scorebord(en) en het MeetManager-systeem kan de officiële resultaten tonen aan het publiek (op<br />
stadionscoreborden, televisieschermen, HTML schermen, document printouts, website..)
Page 10<br />
<strong>MacFinish</strong> <strong>2D</strong>-<strong>USB</strong> and MF8.x software<br />
Hoofdstuk 3 : Hoe verbinden we alle kabels?<br />
Opmerking; Installeer eerst de software anders zal de <strong>USB</strong> driver de camera niet herkennen!<br />
In dit hoofdstuk zullen we de aansluitingen bespreken van het <strong>MacFinish</strong> Systeem. We gaan ervan uit dat u een <strong>USB</strong> 2.0<br />
connector heeft op je PC. Een geschikte <strong>USB</strong>2.0 kabel zit in je <strong>MacFinish</strong> koffer. Indien je deze kabel zou moeten<br />
vervangen voor eender welke reden dan ook gelieve erop te letten dat deze niet langer dan 5m is en volledig <strong>USB</strong> 2.0<br />
compatibel!. Om de kabel aan te sluiten gelieve na te kijken of je computer af staan en de batterij van de <strong>MacFinish</strong><br />
Interface Box NIET is aangesloten.<br />
Laten we eerst kijken naar de achterkant van de “<strong>MacFinish</strong> Interface Box”, aan de linker zijde zie je een kabel voor de<br />
verbinding met de camera (8-polige ronde metalen connector welke dient voor het voeden van de optionele<br />
gemotoriseerde lens en het doorgeven van start en aankomst signalen). Langs de rechterzijde vind je een 12-polige<br />
connector voor het doorverbinden van de signalen naar de binnenzijde van de piste<br />
Hoofdstuk 3.1 : Camera-verbindingen<br />
Als eerste verbind je de interface box dmv de 8-polige ronde metalen connector met de achterzijde van de <strong>MacFinish</strong><br />
<strong>2D</strong> camera (rechtsboven, positie C zie foto hieronder).<br />
De volgende stap is het verbinden van de <strong>MacFinish</strong> <strong>2D</strong> <strong>USB</strong> camera met de PC dmv de meegeleverde <strong>USB</strong> kabel<br />
(linksboven, positie A)<br />
Opmerking: Het is aanbevolen op ALTIJD DEZELFDE <strong>USB</strong> POORT TE GEBRUIKEN OP JE PC!
<strong>MacFinish</strong> <strong>2D</strong>-<strong>USB</strong> and MF8.x software Page 11<br />
Hoofdstuk 3.2 : Monteren van de camera op de<br />
driepoot en de lens op de camera.<br />
Monteer de camerakop op de driepoot of paal. Nadien kan je de camera op de camerakop plaatsen<br />
Manurle C-mount lens<br />
Gemotoriseerde C-mount lens<br />
Voor <strong>MacFinish</strong> <strong>2D</strong> <strong>USB</strong> met manuele lens: Schroef de C-mount (=1”schroef) lens op de camera. Eens de de lens<br />
stevig hebt aangedraaid in wijzerszin kan je de lens een klein beetje terug draaien zodat de tekst op de lens (zoom +<br />
focus + iris) terug normaal leesbaar zijn. Een intern lens mechanisme zal verhinderen dat de lens uit de camera komt.<br />
Natuurlijk mag je niet te ver draaien (max 330 graden). De lens is nu goed op de camera gemonteerd. Open het lens<br />
diafragma (=iris) volledig open (=het kleinste nummer bv. “F1.2”). Nu kan je de focus zoeken tussen 10m en “oneindig”<br />
en zoom volledig uit (indien je een zoom lens gebruikt).<br />
Voor <strong>MacFinish</strong> <strong>2D</strong> <strong>USB</strong> met gemotoriseerde lens: Schroef de C-mount (=1”schroef) lens op de camera. Eens de de<br />
lens stevig hebt aangedraaid in wijzerszin kan je de lens een klein beetje terug draaien zodat de tekst op de lens (zoom +<br />
focus + iris) terug normaal leesbaar zijn. Een intern lens mechanisme zal verhinderen dat de lens uit de camera komt.<br />
Natuurlijk mag je niet te ver draaien (max 330 graden). De lens is nu goed op de camera gemonteerd. Je kan nu de lens<br />
controle kabel aansluiten op de achterkant van de camera (7-polige connector , links beneden, positie B op de camera).<br />
Nu kunnen we de lens remote vanuit de computer bedienen eens we alle verbindingen gemaakt hebben in de nodige<br />
software op de pc geïnstalleerd hebben.<br />
Hoofdstuk 3.3 : <strong>MacFinish</strong> Interface Box<br />
Laten we nu even kijken naar de voorkant van de "<strong>MacFinish</strong> Interface Box", we overlopen de connectoren van links<br />
naar rechts; (1) start detectie, (2) aankomst detectie, (3) aankomst afstandsbediening, (4,5,6) seriële poorten , en (7)<br />
connector voor de batterij.<br />
Opmerking: In oudere versies zal je links 2 rode led lichtjes opmerken om de 2 kanalen van de 2 kanaals<br />
startdetecties te kunnen testen (wordt later uitgelegd). In de laatste versie zijn deze leds verwijderd en gemonteerd in een<br />
externe module.
Page 12<br />
<strong>MacFinish</strong> <strong>2D</strong>-<strong>USB</strong> and MF8.x software<br />
Hoofdstuk 3.4 : Start detectie<br />
Het systeem kan op verschillende manieren gestart worden, afhankelijk van de sport waarin het systeem gebruikt<br />
wordt:<br />
• Klassiek start pistool, bv voor atletiek<br />
• Elektronisch start pistool.<br />
• Handmatige start drukknop bv voor wielrennen op de weg waar de wedstrijd verschillende uren duurt<br />
• Een kabel die verbonden wordt met de start switch van de renbaan bv bij paardenrennen, hondenrennen,<br />
BMX,...<br />
Connecteer de gekozen start sensor in de “Start” = uiterst linkse connector aan de voorkant van de “<strong>MacFinish</strong> Interface<br />
Box”. Of in de start connector van de 12-polige bekabeling (kabelhaspel of Connectiebox).<br />
Hoofdstuk 3.4.1 : Klassiek start pistool<br />
De start detectie (zie foto hieronder) is een klein blauw aluminium doosje dat op de loop van het pistool kan worden<br />
bevestigd. Als de detector niet op de loop van het pistool kan worden bevestigd, moet het op een maximale afstand van<br />
10 cm van de loop worden gepositioneerd. De gevoeligheid van de startdetector zal verderop in de handleiding worden<br />
besproken worden.<br />
Opmerking 1: dubbel sensor startdetectie versus (oude) enkelvoudige sensor startdetectie<br />
TimeTronics levert een dubbel sensor start detectie, welke volledig compatibel is met de enkelvoudige sensor start<br />
detector (niet meer in productie). Deze dubbel sensor versie heeft 2 ingebouwde start sensoren en 2 electrische circuits,<br />
dit om tijdregistratie problemen te vermijden indien er plotseling een sensor zou stukgaan. Als 1 van beide sensoren een<br />
startschot registreert zal er een startsignaal aan het <strong>MacFinish</strong> systeem gegeven worden.<br />
Opmerking 2: Hoe kan je ZELF een startdetectie testen?<br />
Deze test kan je altjd uitvoeren om te controleren of beide sensoren en hun respectievelijke elektrische circuits<br />
vlekkeloos functioneren ook indien ze reeds enkele jaren oud zijn! Als je de dubbel sensor startdetectie rechtstreeks<br />
aangesloten in de Start connector van de <strong>MacFinish</strong> InterfaceBox (dus niet in de 12-polige kabel haspels of<br />
connectieboxen op de piste!). Geef nu een grote klap op de startdetectie om een start te simuleren dan zal je 2 test-LED<br />
lichtjes zien oplichten gedurende enkele seconden op de <strong>MacFinish</strong> InterfaceBox of op de externe testmodule. Indien<br />
slechts 1 test-LED zou oplichten dan is 1 van de beide start detectie sensoren stuk. Als bijkomende test kan je<br />
“voorzichtig” langs 1 zijde van de startdetectie kloppen, bv met een vinger, dan zal slechts 1 test-LED oplichten. Zo kan<br />
je ook de sensor testen aan de andere zijde van de startdetectie.<br />
Hoofdstuk 3.4.2 : Electronisch start pistool (OPTIE)<br />
Indien een elektronisch start pistool beschikbaar is (= OPTIE) , zal de geluidsuitgang en start signaal doorgeven aan een<br />
externe versterker en 1 of meerdere luidsprekers (beide zijn afzonderlijke opties), tegelijkertijd zal een interne start<br />
schakelaar een start signaal geven aan de <strong>MacFinish</strong>. Sommige start pistolen zullen enkel een beep geven, andere<br />
hebben een reeks geluidjes waaruit je kan kiezen (beep, schot, bel, ...).<br />
+ or
<strong>MacFinish</strong> <strong>2D</strong>-<strong>USB</strong> and MF8.x software Page 13<br />
Hoofdstuk 3.4.3 : Manual Start Push Button<br />
Als er geen start pistool gebruikt wordt kan een handbediende starttoets het timing proces starten. Let wel op dat de<br />
“elektronische tijden enkel een “handmatige timing nauwkeurigheid hebben!<br />
Hoofdstuk 3.4.4 : Kabel naar schakelaar van een<br />
starthek<br />
Het is ook mogelijk om een eigen start schakelaar (een normaal open-contact, met sluiting van het contact bij de start<br />
van de race) te gebruiken om het <strong>MacFinish</strong> systeem te starten.. De juiste pin-aansluitingen zijn beschreven in de<br />
appendix van deze handleiding.<br />
Opmerking:<br />
Maak je geen zorgen indien personen zouden vertellen dat een normaal gesloten contact beter zou zijn om zo de start<br />
kabel te kunnen testen voor de race. TimeTronics heeft namelijk een 2KS weerstand ingebouwd, parallel met de start<br />
schakelaar. Dit om de start kabel te kunnen testen voor de start, men zal een waarschuwingsbeep krijgen indien de kabel<br />
onderbroken is of indien er een kortsluiting is in de kabel! Onze methode is dus beter dan een normaal gesloten<br />
contact welke enkel kan testen of de kabel onderbroken is!<br />
Hoofdstuk 3.5 : Aankoms Detectie<br />
Het systeem kan verschillende aankomst signalen verwerken, welke meestal afhankelijk zijn van de sport waarin het<br />
systeem gebruikt wordt:<br />
• fotocellen bv voor atletiek<br />
• handmatige aankomst druktoets voor sporten die meerdere uren duren zoals wielrennen.<br />
Maak een verbinding tussen de gekozen aankomst detectie en de ingang “Arrival” aan de voorkant van de “<strong>MacFinish</strong><br />
InterfaceBox” of aan de “Finish” connector op het 12-polige bekabelingsysteem (kabelhaspels of Connectie boxen)<br />
Hoofdstuk 3.5.1 : Fotocellen<br />
Het gebruik van fotocellen is bedoeld om een aankomstsignaal naar de <strong>MacFinish</strong> InterfaceBox te zenden zodat de<br />
opname automatisch kan geschieden. De foto-elektrisch cellen bestaan uit een infrarode lichtzender - en ontvanger die<br />
vlakbij de aankomstlijn en op een juiste hoogte moeten worden opgesteld. Natuurlijk kan dit van sport tot sport<br />
verschillen. Let op dat u de fotocellen niet te hoog monteert daar anders (kleine) atleten die de fotocellen niet<br />
onderbreken niet opgenomen worden! De schematische voorstelling geeft u een idee hoe je de fotocellen moet<br />
monteren.<br />
finish-line<br />
photocells<br />
height H<br />
distance X<br />
Tracht de fotocellen zo dicht mogelijk bij de aankomstlijn te plaatsen, verzeker u zelf dat ze het zicht niet beletten van je<br />
<strong>MacFinish</strong> camera's!<br />
• De fotocel zender verbinden met een batterijpak (12Vdc) voor de voeding<br />
• De fotocel ontvanger moet verbonden worden met het <strong>MacFinish</strong> systeem via de <strong>MacFinish</strong> InterfaceBox of de<br />
12-polige bekabeling
Page 14<br />
<strong>MacFinish</strong> <strong>2D</strong>-<strong>USB</strong> and MF8.x software<br />
Je kan de zender van de ontvanger onderscheiden door;<br />
• fotocel zender: een pijl (→) die weg van de fotocel wijst<br />
• fotocel ontvanger: een pijl (←) die naar de fotocel wijst<br />
De enkelvoudige fotcellen kan je eenvoudig met Velcro op de L-vormige metalen plaatjes plakken, welke op de<br />
meegeleverde driepootjes kan vastschroeven. Natuurlijk kan je de fotocellen op paaltjes schroeven die al dan niet<br />
permanent op de baan blijven staan. Indien de IR lichtstraal tussen zender en ontvanger onderbroken wordt zal het een<br />
signaal sturen naar de <strong>MacFinish</strong> IntefaceBox dat het systeem vertelt dat er een deelnemer aan het aankomen is of net<br />
aangekomen is. U kan zich afvragen hoe het komt de foto's juist worden opgenomen zelfs wanneer de fotocellen na de<br />
aankomstlijn geplaatst zijn! Verder in deze handleiding (zie Parameter instel scherm) zullen we zien hoe u het aantal<br />
opnames kan bepalen voor en na het onderbreken van de fotocellen. Let op dat de fotocellen geplaatst zijn zodat de<br />
fotocel ontvanger het IR licht van de fotocel zender goed ontvangt. U kan dit later controleren wanneer het het<br />
<strong>MacFinish</strong> systeem opgestart heeft, het led lichtje op de handbediening voor aankomst moet uit zijn<br />
Opmerking: TimeTronics heeft voor zijn klanten ook een<br />
oplossing met DUBBELE FOTOCEL palen, welke volledig<br />
compatibel werken met de (oudere) enkelvoudige fotocel<br />
paaltjes (standaard). De dubbel fotocel versie bestaat uit een<br />
blauw gelakt aluminium bar met 2 ingebouwde fotocellen met<br />
hun respectievelijke elektronica om het aankomst signaal te<br />
kunnen doorgeven aan de <strong>MacFinish</strong> wanneer beide en<br />
tegelijkertijd onderbroken zijn. De bedoeling van de<br />
dubbele fotocellen is dat de scorebord stopt (toont de nietofficiële<br />
tijd van de eerste deelnemer) wanneer het lichaam of<br />
torso van de atleet de finishlijn overschrijdt, en nog niet<br />
wanneer een hand van de deelnemer een enkelvoudige fotocel<br />
onderbreekt! Het resultaat is een (statistisch) nauwkeurigere<br />
(niet-officiële) tijd op de scoreborden en televisie! We<br />
kunnen echter NIET garanderen dat het altijd correct zal zijn<br />
daar het nog steeds mogelijk is dat de hand van een atleet de<br />
bovenste IR-straal onderbreekt en de hand van een andere<br />
atleet de onderste! Maar zoals reeds gemeld, statistisch zal de<br />
tijd op het scorebord waarheidsgetrouwer zijn.<br />
Hoofdstuk 3.5.2 : Aankomst handbediening<br />
<strong>MacFinish</strong> kan ook gebruikt worden zonder fotocellen. In geval zal de opname van d fotofinish foto<br />
manueel gebeuren door de operator met een “Manual Arrival” handbediening. Deze handbediening is<br />
standaard meegeleverd bij configuraties voor bv. wielrennen, paardenrennen, enz. Voor andere is dit een<br />
optie.<br />
Hoofdstuk 3.6 : Aankomst Remote Control<br />
Het gebruik van de fotocellen wordt gecombineerd met een Arrival Remote Control box uitgerust met<br />
een Off/Auto/Manual schakelaar en een lampje: Steek de stekker van de Arrival Remote Control box in<br />
de “Remote Control“ aansluiting vooraan de <strong>MacFinish</strong> InterfaceBox. De schakelaar op de<br />
handbediening laat de operator toe om de fotocellen te overbruggen (“Off” positie) of de fotocellen te<br />
activeren (“auto” positie). Dit om toe te laten om de fotocellen te overbruggen wanneer er atleten de<br />
aankomstlijn passeren en nog 1 of meerdere ronden moeten afleggen. De derde schakelaar positie<br />
(schakelaar helemaal naar beneden duwen) dient om handmatig een aankomst signaal te genereren<br />
indien:<br />
• Er geen aankomst fotocellen zijn aangesloten.<br />
• Indien er geen aankomst signaal is bv. Wanneer atleten onder de IR-straal van de fotocellen<br />
duiken.<br />
Indien er fotocellen gebruikt worden gelieve te controleren dat het led-lichtje op de Aankomst Remote Controle uit is.
<strong>MacFinish</strong> <strong>2D</strong>-<strong>USB</strong> and MF8.x software Page 15<br />
Opmerking 1: Dit ledje is enkel uit indien er niemand tussen de fotocellen staat, de fotocellen juist zijn afgesteld<br />
en de zender voeding heeft van een batterij!<br />
Opmerking 2: Het is eenvoudiger om van op een “kleine” afstand de afstelling van de fotocellen te controleren. Maw. ga<br />
enkele meters achter de fotocellen staan om de richting te controleren van de fotocel zender en ontvanger.<br />
Hoofdstuk 3.7 : Seriële poort voor Scorebord<br />
(Optioneel)<br />
De connector “Serial for SB” = seriële poort voor scorebord, moet verbonden worden door middel van een TimeTronics<br />
seriële kabel met product nummer “P244” naar een RS232 seriële poort (“Comx”) op je <strong>MacFinish</strong> computer indien je<br />
een timing scorebord wil aansturen (van welk merk dan ook). Het timing scorebord moet je aansluiten op de 12-polige<br />
bekabeling (kabelhaspels of connectieboxen) op het terrein dmv. een 12m 5-polige kabel (P229) die meegeleverd wordt<br />
met het scorebord of een compatibele 5-polige verlengkabel P063 (=50m) of P064 (100m).<br />
Hoofdstuk 3.8 : Seriële port voor WindSpeed<br />
(Optioneel)<br />
De connector “Serial for WS” = seriële poort voor WindSpeed, moet verbonden worden door middel van een<br />
TimeTronics seriële kabel met product nummer “P244” naar een RS232 seriële poort (“Comx”) op je <strong>MacFinish</strong><br />
computer indien je een (optioneel) ultrasone windmeter WindSpeed wil aansturen.. De WindSpeed zelf moet je<br />
aansluiten op de 12-polige bekabeling (kabelhaspels of connectieboxen) op het terrein dmv. de P532 seriële kabel naar<br />
de 12-polige bekabeling (kabelhaspels of connectieboxen) op het terrein.<br />
Hoofdstuk 3.9 : Seriële port voor FieldTerminal<br />
(Optioneel)<br />
De connector “Serial for FT” = seriële poort voor FieldTerminal, moet verbonden worden door middel van een<br />
TimeTronics seriële kabel met product nummer “P244” naar een RS232 seriële poort (“Comx”) op je MeetManager<br />
computer indien je FieldTerminals wil aansturen. De FieldTerminal moet je aansluiten op de 12-polige bekabeling<br />
(kabelhaspels of connectieboxen) op het terrein dmv. een 50m 5-polige kabel (P63) die meegeleverd wordt met de<br />
FieldTerminal of een compatibele 5-polige verlengkabel P229 (=12m) of P064 (100m).<br />
Hoofdstuk 3.10 : 12Vdc batterij pak + lader<br />
Je kan nu het <strong>MacFinish</strong> systeem opstarten door een volledig opgeladen 12 Vdc batterij pak (P041) in de meest rechtse<br />
connector te steken aan de voorzijde van de <strong>MacFinish</strong> InterfaceBox, deze connector is gemarkeerd met “ 12VDC<br />
Power Supply”. Als je weet dat je de <strong>MacFinish</strong> voor verschillende uren gaat gebruiken raden we je aan om<br />
tegelijkertijd de batterijlader aan het batterij pak te hangen zodat de batterij volledig opgeladen bljft!<br />
Waarschuwing: Controleer dat de batterijlader beschermt is tegen regen of andere vloeistoffen, het heeft een<br />
open structuur en heeft dan ook geen bescherming tegen water of andere vloeistoffen! Het niet beschermen van<br />
de batterijlader kan leiden tot GEVAARLIJKE situaties!<br />
U mag nu de computer en het computerscherm opstarten. We gaan ervan uit dat het operating systeem reeds<br />
geïnstalleerd is. Indien dit niet het geval is gelieve de computer handleiding te volgen die bij u computer meegeleverd is.<br />
Alle apparatuur is nu correct aangesloten. In het volgende hoofdstuk zullen we de installatieprocedure voor de<br />
<strong>MacFinish</strong> software bespreken.
Page 16<br />
<strong>MacFinish</strong> <strong>2D</strong>-<strong>USB</strong> and MF8.x software<br />
Hoofdstuk 4 : Software installatie<br />
Hoofdstuk 4.1 : Algemeen<br />
Het wordt u wellicht snel duidelijk dat het bedienen van de computer vrij makkelijk en eenduidig is. Eens u gewoon bent<br />
aan de “pull-down menu's” en het werken met de muis, kunnen de meeste programma's op dezelfde wijze worden<br />
bediend, met inbegrip de <strong>MacFinish</strong> 8.x software. Sneltoetsen zijn beschikbaar voor de meest gebruikte <strong>MacFinish</strong><br />
functies dmv. “controle” toets + een andere toets! Gelieve u computer handleiding te raadplegen indien u meer<br />
informatie wenst betreffende algemene computer functionaliteiten (Microsoft Windows).<br />
Hoofdstuk 4.2 : Installatie van de <strong>MacFinish</strong><br />
software.<br />
De <strong>MacFinish</strong> software “<strong>MacFinish</strong> <strong>2D</strong> 8.x” wordt<br />
meegeleverd op een CD. Plaats deze CD in de computer en<br />
de installatie zal automatisch starten. Vooraleer verder te<br />
gaan met de installatie raden we aan om eerst door dit<br />
hoofdstuk aandachtig te lezen.<br />
Opmerking: We raden u sterk aan de originele CD als<br />
backup te bewaren. Wanneer u naar een wedstrijd trekt,<br />
is het aangeraden om deze backup mee te nemen en dit<br />
samen met de registratie sleutel. U kan ook ten allen<br />
tijden de laatste versie op onze website terug vinden.<br />
We raden u aan om eerst de volledige CD inhoud te copieren<br />
op de harde schijf van je computer om een lokale backup te<br />
hebben van de software, handleiding en registratie sleutel,<br />
etc.<br />
Op het schermvoorbeeld op de linkerzijde kan je een<br />
voorbeeld zien van de inhoud van de CD. Je registratie<br />
sleutel(s) bevinden zich in de map “Keys”. Indien de<br />
installatie niet automatisch start kan je dubbel klikken op de<br />
file TT_INSTALLER.exe op de installatie te starten.<br />
Je zal nu een hele lijst van schermen moeten doorlopen die<br />
hieronder verder besproken worden<br />
Eerst zal er een noodzakelijke hulpprogramma worden geïnstalleerd. Dit hulpprogramma moet geïnstalleerd worden<br />
vooraleer de <strong>MacFinish</strong> software kan werken. Voor de <strong>MacFinish</strong> <strong>2D</strong> 8.x versie hebben we enkel het hulpprogramma “
<strong>MacFinish</strong> <strong>2D</strong>-<strong>USB</strong> and MF8.x software Page 17<br />
Microsoft Visual C++ 2005 Redistributable” nodig. Indien dit reeds geïnstalleerd is op je PC dan zal het in grijs worden<br />
weergegeven zoals aangegeven op het beeld rechts boven deze tekst.<br />
Indien het nog niet geïnstalleerd is dan zie je het scherm linksboven deze tekst. Klik in beide gevallen op “Next” om de<br />
installatie stap over te slaan of om het hulpprogramma te installeren. Vervolgens krijg je het scherm rechts boven deze<br />
tekst.. Druk op “Install” om de installatie verder te zetten.<br />
Klik links van “I accept the terms in the licence Agreement” = Ik aanvaard de licentie voorwaarden. Druk op “Next”
Page 18<br />
<strong>MacFinish</strong> <strong>2D</strong>-<strong>USB</strong> and MF8.x software<br />
Kies een folder waar de software geïnstalleerd mag worden. De standaard locatie voor installatie is C:\Program<br />
Files\TimeTronics\<strong>MacFinish</strong> <strong>2D</strong>. Klik “Next” om de installatie verder te zetten..<br />
Eens de installatie procedure is afgelopen krijg het het venster rechts boven deze tekst. Klik op “Finish” om de<br />
installatie te voltooien.<br />
De “nieuwe” <strong>MacFinish</strong> folder op je harde schijf bevat nu volgende bestanden en folders:<br />
U kan de <strong>MacFinish</strong> 8.x fotofinish programma opstarten door te dubbel klikken op het icoon rechts boven deze tekst, of<br />
via de Windows START menu.<br />
De <strong>MacFinish</strong> software zal nu een lijst van 1 of meerdere <strong>MacFinish</strong> camera's weergeven die aangesloten zijn op de<br />
PC of netwerk. Indien er geen camera aangesloten is zal deze lijst leeg zijn. Selecteer de <strong>MacFinish</strong> camera die je wil<br />
gebruiken (controleer het serie nummer van de camera en selecteer de overeenkomende nummer op het scherm) en<br />
druk op “Connect”.
<strong>MacFinish</strong> <strong>2D</strong>-<strong>USB</strong> and MF8.x software Page 19<br />
Een waarschuwingsbericht kan verschijnen bij problemen met de registratie sleutel<br />
Dit bericht geeft de melding dat de registratie sleutel nog niet ingevoerd is of dat de registratie sleutel vervallen is. In<br />
het hoofdstuk 4.5 zullen we u uitleggen hoe u de registratie sleutel kan invoeren en de toegewezen functionaliteiten<br />
activeren in de software.<br />
Hoofdstuk 4.3 : Belangrijke nota voor Windows<br />
XP gebruikers !!<br />
Windows XP gebruikers zullen merken dat bij de eerste keer dat je de <strong>USB</strong>-kabel van de <strong>MacFinish</strong> insteekt in een<br />
<strong>USB</strong>-poort van de PC steekt , XP een driver moet installeren voor de <strong>MacFinish</strong> voor die specifieke <strong>USB</strong>-Poort. Dit kan<br />
zich herhalen telkens je een andere <strong>USB</strong>-poort van je PC gebruikt! Het kan gebeuren dat er een pop-up scherm<br />
tevoorschijn komt. Dit venster vraagt je om Windows XP te helpen om de driver bestand “Win<strong>USB</strong>CoInstallers” te<br />
lokaliseren. Je kan deze normaal terug vinden op volgende plaats “C:\WINDOWS\system32”. Wijs deze folder aan en<br />
selecteer de file “Win<strong>USB</strong>CoInstallers”, en druk op de toets “Open”.<br />
Opmerking: Dit is de reden waarom we u aanraden om altijd dezelfde <strong>USB</strong>-poort van u PC te gebruiken om de<br />
<strong>MacFinish</strong> <strong>2D</strong> camera aan te sluiten!
Page 20<br />
<strong>MacFinish</strong> <strong>2D</strong>-<strong>USB</strong> and MF8.x software<br />
Hoofdstuk 4.4 : <strong>MacFinish</strong> software vensters<br />
Wanneer je de <strong>MacFinish</strong> 8.x software hebt opgestart zal je 1 of meerder <strong>MacFinish</strong> venster opmerken;<br />
1) “Actions”het agemeen controle venster met de wedstrijd opname bedieningen<br />
2) "Tools" venster; om licht intensiteit en contrast van elke foto venster te kunnen aanpassen<br />
3) "Parameters" venster; om de <strong>MacFinish</strong> opname snelheid te controleren/veranderen en de WindSpeed<br />
windmeter parameters te kunnen instellen.<br />
4) "Scrolling camera view" venster; om de uitlijning van camera en lens afstellingen te kunnen controleren, zelfs<br />
tijdens de wedstrijd!<br />
5) "Camera" venster; om digitaal de instellingen te kunnen veranderen van de opname snelheid,<br />
rood+groen+blauw gevoeligheid van de camera, gemotoriseerde lenzen, enz.<br />
Als je het “Actions” venster niet kan zien, tracht dan (opnieuw) te verbinden met de <strong>MacFinish</strong> camera via de Menu<br />
balk. “Camera/Connect camera...). U krijgt dan normaal het “Connect” venster met de seriële nummer(s) van de<br />
camera('s) die via <strong>USB</strong> aangesloten zijn op u computer. Selecteer de camera die u wenst te gebruiken en druk op de<br />
“Connect” toets.<br />
Als dit niet werkt gelieve de <strong>USB</strong> verbinden terug te controleren!<br />
U kan steeds, eender wanneer, nu en in de toekomst, de verbinding van je <strong>MacFinish</strong> camera controleren, de seriële<br />
nummer van de <strong>MacFinish</strong> camera uitlezen dmv de menu selectie “Help/About <strong>MacFinish</strong>...”<br />
U krijgt dan een venster met volgende informatie; seriële nummer, calibratie nummer, … van je <strong>MacFinish</strong> systeem
<strong>MacFinish</strong> <strong>2D</strong>-<strong>USB</strong> and MF8.x software Page 21<br />
Indien u nog steeds problemen heeft met het verbinden van de <strong>MacFinish</strong> camera met je PC gelieve dan je computer<br />
volledig te herstarten.<br />
Indien je verbinding in orde is maar je ziet de “Scrolling camera view”, “Parameters”, “Tools” of “Camera Control”<br />
venster niet kan je deze oproepen via de menu-balk optie Windows/...<br />
Hoofdstuk 4.5 : Invoeren van je registratie<br />
sleutel<br />
Wanneer u het programma voor de eerste keer opstart mag je niet vergeten u registratie sleutel in te voeren! U sleutel<br />
(code) kan terug gevonden worden in een eenvoudige .txt type van tekst bestand, welke u kan terugvinden op de CD die<br />
meegeleverd is met het systeem. Hieronder tonen wij u een voorbeeld bestand ((MF<strong>2D</strong>key_4-4-6_PRO.txt)<br />
Opmerking: Vergeet niet dat de <strong>MacFinish</strong> verbonden moet zijn met u PC (d.m.v. een <strong>USB</strong> 2.0 kabel) en voeding<br />
moet krijgen van een batterij die al dan niet aangesloten is aan een batterijlader vooraleer de <strong>MacFinish</strong><br />
software op te starten!
Page 22<br />
<strong>MacFinish</strong> <strong>2D</strong>-<strong>USB</strong> and MF8.x software<br />
U kan u sleutel ingeven door “Preferences” te selecteren in de “File” menu, het volgende venster wordt dan geopend:<br />
Klik op “Registration key” tab drukken, voeg u sleutel in (door over te typen of door kopiëren en plakken). Druk nu op<br />
“Add”, u zal nu merken dat u camera seriële nummer in de lijst komt te staan. Dit was niet mogelijk in oudere versies<br />
van de <strong>MacFinish</strong> software, maar nu heeft u een lijst met verschillende sleutels van verschillende camera's. Dit laat u toe<br />
om snel van de ene naar de andere camera over te schakelen. Als u de juiste sleutel heeft ingegeven dan kan u op de<br />
seriële nummer (in ons voorbeeld 004-004-006) van je camera drukken en krijgt u alle opties zien. Tevens zal je merken<br />
dat sommige functies actief zijn en andere niet, afhankelijk van de opties die besteld zijn geweest.<br />
Klik op “ok” om de “Preferences” te verlaten en terug te keren naar het hoofdscherm.<br />
Herinnering:<br />
• Een registratie sleutel is specifiek voor elke seriële nummer van <strong>MacFinish</strong> camera (in voorbeeld 4/4/6)<br />
Vergelijk je <strong>MacFinish</strong> Seriële nummer van je camera met de nummer die u kan terugvinden in de sleutel file!)<br />
• Het karakter "0" in een sleutel is steeds het cijfer 0 en niet het karakter O (bv de O van Oscar)<br />
Indien er 1 of meerdere opties als status “Disabled” = niet actief, hebben dan betekent dit dat u geen toelating heeft om<br />
deze “optionele” functies te gebruiken. Bv. als de optie “Presentation mode” als status heeft “Disabled” zal je in de<br />
menu balk “Document/Presentation” in het grijs(=niet actief) zien staan. U kan een nieuwe sleutel bestellen die we<br />
nadien per fax, e-mail of zelf per telefoon kunnen doorgeven.<br />
Indien u de <strong>MacFinish</strong> software op de normale manier afsluit ('File' menu, 'Quit' selection, or 'Ctrl+Q' on the keyboard),<br />
dan zal de software de meeste instellingen bewaren, met inbegrip van de <strong>MacFinish</strong> registratie sleutel zodat u een<br />
volgende keer onmiddellijk kan starten met het echte werk, namelijk het opnemen van fotofinish beelden van de<br />
wedstrijden.
<strong>MacFinish</strong> <strong>2D</strong>-<strong>USB</strong> and MF8.x software Page 23<br />
Hoofdstuk 5 : Uitlijnen van de camera en<br />
instelling van de lens<br />
We hebben nu door de eerste 4 hoofdstukken doorlopen en de hardware en software (inclusief de registratie sleutel)<br />
installatie uitgevoerd. U hebt ondertussen kennis gemaakt met de verschillende <strong>MacFinish</strong> vensters. In dit hoofdstuk<br />
zullen we u uitleggen hoe de “scrolling” mode werk in de “Scrolling camera view” venster of d.m.v. “<strong>2D</strong>-view” in het<br />
“Camera” venster om de lens af te regelen en de camera juist uit te lijnen op de aankomstlijn.<br />
Deze 2 vensters alsook de corresponderende methoden voor het uitlijnen van de camera worden in de volgende<br />
hoofdstukken besproken. Wat zijn nu de verschillen en individuele voordelen van de 2 methodes om de camera uit te<br />
lijnen?<br />
• Het “Camera” venster kan een 2 dimensionaal (<strong>2D</strong>) beeld geven van de aankomstlijn, wat het makkelijker<br />
maakt om de camera uit te lijnen. Dit 2 dimensionaal beeld “<strong>2D</strong> view” is enkel beschikbaar voor of tussen 2<br />
races, wanneer je voldoende tijd hebt om van het 1D (fotofinish mode) naar het <strong>2D</strong> beeld te schakelen, de<br />
aanpassingen te maken en terug te schakelen naar de fotofinish mode.<br />
• Het “Scrolling camera view” venster kan je altijd gebruiken, ook tijdens de race.<br />
TimeTronics gelooft dat u nu het beste heeft van beiden (the best of both worlds), gebruikt het “Camera” venster voor<br />
het initieel instellen van de camera en gebruik het “Scrolling camera view” venster voor REGELMATIGE controle een<br />
aanpassingen, zelfs TIJDENS de race!<br />
Deze individuele voordelen geven ook aanleiding aan volgende waarschuwingen,<br />
die u nooit mag vergeten !<br />
Waarschuwing voor hoofdstuk 5.1 :<br />
Om het “Camera” venster VOLLEDIG te openen (om het <strong>2D</strong> beeld van de aankomst lijn en om de instellingen<br />
betreffende opnamesnelheid, verticale resolutie ,... te veranderen) moet je eerst op de “Stop” toets drukken in het<br />
“Action” venster. Met andere woorden het “hand” icoontje moet rood gekleurd zijn.<br />
Waarschuwing voor hoofdstuk 5.2 :<br />
Om de “scrolling” functie te kunnen gebruiken in het “Scrolling camera view” venster moet de camera “actief zijn”,<br />
d.w.z. in het “Action” venster een “klaar” status (=voor de race) of een “in werking” status (= tijdens de race). M.a.w.<br />
Het “lamp” icoontje moet geel gekleurd zijn.<br />
Om een “normaal” beeld ( niet te donker of te licht) op te nemen, moeten we de <strong>MacFinish</strong> de “juiste” opname snelheid<br />
meegeven. bv 400 frames/seconde. Als er veel licht aanwezig is kan je meer frames/seconde op nemen indien minder<br />
licht aanwezig dan nemen we minder frames/seconde op. We zullen u nu uitleggen hoe u de opname snelheid kan<br />
instellen, nadien zullen we u vertellen hoe u de camera richting kan aanpassen alsook hoe u moet werken met zoom, iris<br />
en focus.
Page 24<br />
<strong>MacFinish</strong> <strong>2D</strong>-<strong>USB</strong> and MF8.x software<br />
Hoofdstuk 5.1 : camera afstelling door middel<br />
van het “Camera” venster<br />
Opmerking: Het “Camera” venster kan u ten allen tijden openen (ook tijdens de race), bv. om de camera gevoeligheid<br />
bij te regelen, om de gemotoriseerde lens aan te sturen. Zoals op vorige pagina beschreven moet u, indien u het<br />
“Camera” venster volledig wil openen om het <strong>2D</strong>-beeld te verkrijgen eerst op “Stop” drukken in het “Action” venster<br />
Klik op het kleine pijltje links naast het woord “<strong>2D</strong>”, hierdoor zal het “Camera” venster verder geopend<br />
worden om het <strong>2D</strong> beeld weer te geven.<br />
Indien de licht instellingen redelijk zijn ingesteld (deze worden beïnvloed door op de camera opnamesnelheid, lens iris,<br />
digitaal camera gevoeligheid) zal u onmiddellijk een 2 dimensionaal beeld verkrijgen. 3 zones van dit <strong>2D</strong>-beeld (bovenmidden-onder)<br />
worden uitgezoomd weergegeven om u te assisteren tijdens het afregelen van de camera.<br />
Focus assistent beeld; hoe hoger hoe beter<br />
Automatisch uitlijnen van de camera (optioneel).<br />
Verticale resolutie + Positie .<br />
# lijnen in opname frame (8...24)<br />
Hetgeen weergeven wordt in dit venster (vergroting) kan u zelf<br />
bepalen door in het beeld te klikken.<br />
4 Toetsen om de opname frame te verplaatsen; links (snel) /<br />
links (traag) / rechts (traag) / rechts (snel)<br />
Het ‘<strong>2D</strong>-beeld’ van de aankomstlijn is een NIEUWE functie van <strong>MacFinish</strong>, wat het instellen van de camera<br />
makkelijker maakt:<br />
1. Camera perfect verticaal uitlijnen<br />
2. Camera perfect uitlijnen aan de VOORKANT van de aankomstlijn<br />
3. Aanpassen van de camera gevoeligheid<br />
4. Aanpassen van de camera kleur calibratie (handmatig of automatisch)<br />
5. Aanpassen van opname snelheid (frames/sec.)<br />
6. Aanpassen van de verticale hoogte (resolutie in # beeldpunten) van de beeld opname<br />
7. Aanpassen van de verticale positie van de beeld opname<br />
8. Afregelen van de handmatige lens (Zoom + Focus + Iris)<br />
9. Afregelen van een gemotoriseerde lens handmatig (Zoom + Focus + Iris) of volledig automatisch<br />
In volgende hoofdstukken (5.1.1 en later) zullen we u uitleggen hoe u die aanpassingen kan doen.<br />
We zullen vooral gebruik maken van de 3 vergrotingen, (zoals op de foto hierboven) voor<br />
de camera perfect uit te lijnen aan de VOORKANT van de aankomstlijn. U ziet een (fijn<br />
verticale) GROENE RECHTHOEK, welke het aantal (8...24) verticale lijnen weergeeft<br />
welk opgenomen zullen worden op de harde schijf. Deze 8...24 lijnen zullen vanaf nu<br />
“frames” noemen, welke we zullen opnemen. Indien we dus spreken over de<br />
opnamesnelheid van een camera dan drukken we dit uit in “frames/seconde”. Uiteindelijk<br />
zal slechts één (=1) van de lijnen gekozen worden voor de uiteindelijke fotofinish<br />
tijdregistratie. De smalle rode lijn (zie links) duidt aan welke lijn gebruikt wordt voor de<br />
fotofinish tijdregistratie resultaat. U heeft de mogelijk hebben om een andere positie van<br />
deze rode lijn te kiezen, m.a.w. kan u de rode lijn meer naar links of naar rechts opschuiven.<br />
De reden waarom we frames opnemen (8lijnen of meer) op de harde schijf is dat u de mogelijkheid heeft om een andere<br />
lijn te kiezen voor de fotofinish tijdregistratie, ZELFS LANG NA DE RACE GELOPEN IS !!!
<strong>MacFinish</strong> <strong>2D</strong>-<strong>USB</strong> and MF8.x software Page 25<br />
Hoofdstuk 5.1.1 : Camera bevestiging<br />
Er zijn verschillende type van camerakoppen beschikbaar, afhankelijk van de afstand tussen de camera en het begin van<br />
de aankomstlijn. U kan werken met een eenvoudige camerakop (zoals de linkse foto) bij een beperkte afstand (3 tot 15<br />
m) of een professionele camerakop (zoals op de rechtse foto) bij grote afstanden (20 tot 100m)<br />
mounting of camera<br />
lever to adjust the<br />
camera’s spirit level<br />
lever to adjust the<br />
camera’s inclination<br />
angle<br />
lever to turn the camera<br />
horizontally (left - right)<br />
mounting of geared<br />
head on tripod or<br />
pole<br />
Deze camerakop kan gemonteerd worden op:<br />
• Een driepoot: het meest gebruikte voor eender welke sport, flexibel en praktisch voor mobiel gebruik<br />
• Een constructie die vast zit aan de vloer, muur of plafond (zie middelste 2 foto's), is het meest praktische voor<br />
een vaste installatie.<br />
• Een camera paal ( in 3 stukken, mobiel of vast), wordt gebruikt aan de binnenzijde van de piste<br />
•<br />
Hoofdstuk 5.1.2 : Controleer of de camera waterpas<br />
staat<br />
Gebruik de waterpas die onderaan de camera gemonteerd is om de camera PERFECT horizontaal te positioneren.<br />
Indien de camera links of rechts gekanteld is dan zal u veel problemen hebben tijdens de volgende hoofdstukken waar<br />
we een VOLLEDIGE aankomstlijn willen opnemen, m.a.w. De lijn die u wenst op te nemen zal de aankomstlijn<br />
kruisen en i.p.v. parallel te lopen met de aankomstlijn.<br />
Belangrijk; Indien u later de camera van links naar rechts draait (om het verlengde van de aankomstlijn te vinden), of<br />
op en neer (camera hoek) gelieve dan telkens de waterpas te controleren of de camera nog steeds perfect horizontaal<br />
staat. Indien dit niet het geval is moet u dit bijregelen tot deze waterpas staat vooraleer verder te gaan!
Page 26<br />
<strong>MacFinish</strong> <strong>2D</strong>-<strong>USB</strong> and MF8.x software<br />
Hoofdstuk 5.1.3 : In het verlengde van de aankomstlijn<br />
Voor alle sport toepassingen is het van belang dat de camera zich lineair in het verlengde van de aankomstlijn bevindt<br />
en dat de camera de hele aankomstlijn (alle banen) kan opnemen.<br />
camera<br />
BAD<br />
8 7 6 5 4 3 2 1<br />
OK<br />
Opmerking: Voor atletiek is de juiste aankomst positie de VOORKANT van de aankomstlijn (deze lijn is 5cm breed)!<br />
Tip: Indien de camera op een hoge paal moet worden gemonteerd dan hebben wij een tip om de camera perfect in het<br />
verlengde van de aankomstlijn te positioneren. Verleng de aankomstlijn bijvoorbeeld met een touw door het vast te<br />
houden aan het verste einde van de aankomstlijn en dan het touw op te spannen zodat het touw over de aankomstlijn tot<br />
aan je camera paal loopt. Hang nu een schietlood in het center van de camera en verplaats nu de camerapaal zodat het<br />
schietlood exact boven het touw (= verlengde van de aankomstlijn) komt te hangen. Blijf steeds controleren of de paal<br />
perfect verticaal gepositioneerd is. (= camera horizontaal, kijk naar de waterpas)<br />
BAD<br />
Camera with<br />
plumb line<br />
4<br />
finish-line<br />
3<br />
2<br />
1<br />
string<br />
Plumb line<br />
Hoofdstuk 5.1.4 : Camera’s Verticale Richting (hoek),<br />
en zoom lens<br />
U zal de camera zodanig moet instellen zodat alle atleten (in alle banen 1..10), paarden, wielrenners, etc. volledig<br />
zichtbaar zijn, van beneden tot boven! U kan dit doen door te kijken in het <strong>2D</strong>-beeld en 2 atleten aan de aankomstlijn te<br />
plaatsen, 1 staat in baan 1 en de andere in de uiterste baan, beide atleten moet in beeld van de camera komen zodat<br />
nadien de tijden juist kunnen afgelezen worden. D.w.z. dat u de verticale richting van de camera (hoek) EN de zoom van<br />
de lens (indien u lens een zoomfunctie heeft) moet aanpassen zodat beide atleten volledig zichtbaar zijn.<br />
camera<br />
camera<br />
camera<br />
OK<br />
Bad<br />
Bad<br />
Opmerking: Voor lange afstandsnummer in atletiek, kan u “inzoomen” op baan 1 en 2 om een meer gedetailleerde foto<br />
te kunnen opnemen. Hierdoor heeft u wel meer werk en neemt u altijd het risico dat indien er een atleet aankomst in<br />
baan 5,6 ...Wees voorzichtig met dit en we adviseren dit niet te doen indien u onvoldoende ervaring heeft met fotofinish.
<strong>MacFinish</strong> <strong>2D</strong>-<strong>USB</strong> and MF8.x software Page 27<br />
Hoofdstuk 5.1.5 : Camera’s Horizontal Direction<br />
De volgende opdracht is om de camera horizontaal op de voorkant van de aankomstlijn te richten.<br />
camera<br />
Bad<br />
OK<br />
Bad<br />
De camera is juist gericht (voor atletiek) wanneer u in het venster “Scrolling camera view” een wit beeld met zwarte<br />
horizontale lijnen krijgt.<br />
GOOD<br />
BAD<br />
Tip: Een kleine en fijnregeling van de camera kan gedaan worden door 1 van de poten van de camera driepoot een<br />
beetje te verplaatsen in de richting dat de driepoot een beetje “draait”. Dit is soms veel makkelijker dan aan de<br />
camerakop te draaien tot u de juiste richting vindt en en dan terug te verliezen wanneer u de schroeven vastdraait<br />
om de camerakop vast te zetten.<br />
A<br />
start-line<br />
finish-line<br />
100 m<br />
tripod<br />
camera<br />
Voor een optimale richting en in het belang van de atleten, bewegen we de poot van de driepoot tot u de<br />
rode/oranjekleur van de piste voor de aankomstlijn ziet. Draai nu zachtjes terug tot de witte aankomstlijn volledig (van<br />
boven tot onder) terug zichtbaar wordt in u “Scrolling camera view” venster. U heeft nu de camera uitgelijnd op de<br />
voorkant van de aankomstlijn = aankomstpunt.
Page 28<br />
<strong>MacFinish</strong> <strong>2D</strong>-<strong>USB</strong> and MF8.x software<br />
Hoofdstuk 5.1.6 : Afregelen van de Lens iris.<br />
Met behulp van de iris op de lens kunnen we de hoeveelheid licht bepalen dat de elektronische sensor in de camera<br />
aankrijgt. De (F-stop) cijfers op de lens kunnen variëren van bv 1.4 tot 22.<br />
Kleine cijfers = iris open (heel veel licht wordt doorgelaten), bv F1.2<br />
Grote cijfers = iris gesloten (weinig of geen licht wordt doorgelaten) bv. F22<br />
Verklein of vergroot de opening van de lens afhankelijk van het beschikbare licht.<br />
Opmerking 1: indien u camera uitgerust is met een handmatige lens<br />
Indien gedurende een race of tijdens het opstellen van de camera en lens het beeld van de camera of in het “Scrolling<br />
camera view” venster te donker is, open dan de iris van de lens een beetje verder (=lager F-stop cijfer), of verlaag de<br />
<strong>MacFinish</strong> opname snelheid in het “Camera” of “Parameters” venster. Indien het beeld te licht is, sluit dan de iris dan<br />
verder (=hoger F-stop cijfer)of verhoog de opname snelheid in de “Parameters” venster. Natuurlijk kan u de opname<br />
snelheid enkel veranderen NA de race dus voor de volgende opname! DRUK NIET op de “Stop” toets gedurende een<br />
race want dan verliest u de juiste opgenomen tijd voor die race!<br />
Opmerking 2: indien u camera uitgerust is met een GEMOTORISEERDE lens<br />
Indien gedurende een race of tijdens het opstellen van de camera en lens het beeld van de camera of in het “Scrolling<br />
camera view” venster te donker is, open dan de iris van de lens een beetje verder (=lager F-stop cijfer) d.m.v. De toets<br />
“linksboven” in de “lens” groep van het “Camera” controle venster. Hoe langer je op de toets drukt me de muis hoe<br />
verder de gemotoriseerde lens zich zal openen. De “linksonder” knop dient om de iris te sluiten. De 2 toetsen in het<br />
midden (vergrootglazen met een – en + teken) dienen om in en uit te zoomen. Met de 2 rechtse toetsen kan u de focus<br />
regelen voor kleine en grote afstanden. De “A” toets dient om de licht controle (iris regeling van de gemotoriseerde<br />
lens) in automatische mode te zetten. Met de “||” toets zal de <strong>MacFinish</strong> camera automatisch de focus zoeken.<br />
BELANGRIJKE OPMERKING:<br />
Indien gedurende een toekomstige race het beeld in het “Camera” of “Scrolling camera view” venster te donker of te<br />
licht is kan en moet u ook de digitale programmeerbare camera “Gain” (=versterking) gebruiken d.m.v. De “Gain”<br />
schuiver(s). Probeer dit zelf uit! In het onderstaande voorbeeld staat de “Gain” op 3,094 en de “Gain” bereik gaat van 1<br />
(min) tot 3,1 (max).
<strong>MacFinish</strong> <strong>2D</strong>-<strong>USB</strong> and MF8.x software Page 29<br />
Hoofdstuk 5.1.7 : Focus instelling van een lens<br />
Stel de camera scherp op de juiste afstand (camera ↔ baan). Regel de focus (0.1m … oneindig) van de lens bij zodanig<br />
dat u het scherpst mogelijke beeld krijgt in het “Camera <strong>2D</strong>-view” of “Scrolling camera view” venster. Hierboven zie je<br />
2 voorbeelden van “Scrolling camera view” venster.<br />
De zwarte marker (linkse foto) tussen elke lijn moet scherp zijn. De beste focus is gevonden indien niet alleen de heel<br />
dikke baan markers (5 cm breed) , maar ook de heel kleine deeltje met een grote 2 a 3 mm van de granulaat kunststof<br />
piste goed zichtbaar zijn op het beeld (zie rechtse foto).<br />
We raden u aan om gebruik te maken van de vergrote zones in het<br />
“Camera <strong>2D</strong>-view” venster of in te zoomen in het “Scrolling<br />
camera view” venster.<br />
Voor sprintraces (races welk aankomen in banen), raden we aan<br />
om de focus afstand af te regelen op 1/3 van de aankomstlijn, zie<br />
foto links. Voor lange afstandsraces raden we aan om de focus te<br />
regelen op baan 1.<br />
Hoofdstuk 5.1.8 : Infrarood filter.<br />
Bij vorige versies van de <strong>MacFinish</strong> camera configuratie werd er een infrarode filter meegeleverd. Deze in nu<br />
INGEBOUWD in de camera zodat u niet meer de keuze heeft om deze al dan niet te gebruiken. Het voordeel, indien u<br />
een infrarood filter is dat u JIUSTE kleuren beelden gaat opnemen die tevens ook scherper zijn. Dit door het<br />
verminderen van het lichtspectrum dat doorgelaten wordt door de lens.<br />
Hoofdstuk 5.1.9 : Beslagen lenzen<br />
Soms heeft u last van beslagen lenzen, vooral in warme en vochtige landen. Wanneer u het materiaal in een koele kamer<br />
of kamer met airconditioning opgeslagen heeft, kan het best gebeuren dat er, na blootstelling aan het “tropische” klimaat<br />
condensatie ontstaat gedurende de eerste 15-tal minuten. In dit geval raden we u aan om een 15-tal minuten te wachten<br />
totdat de apparatuur dezelfde temperatuur heeft van zijn nieuwe omgeving. Nadien droogt u de beide lens glazen met<br />
een droge en propere doek.
Page 30<br />
<strong>MacFinish</strong> <strong>2D</strong>-<strong>USB</strong> and MF8.x software<br />
Hoofdstuk 5.1.10 : Zwarte blokjes op de aankomstlijn<br />
(enkel voor atletiek)<br />
In deze handleiding hebben we reeds verschillende malen gesproken over het uitlijnen van de camera op de<br />
aankomstlijn. Wanneer we de camera uitlijnen op de zwarte blokjes (atletiek) kunnen we verhinderen dat atleten ook<br />
maar 1 cm te ver moeten lopen! Om dit te bekomen moeten we de camera op de voorkant van de aankomstlijn richten.<br />
Volgens de reglementering van IAAF moeten de kruising van de witte lijnen gedeeltelijk zwart zijn, NIET helemaal!En<br />
maximaal de eerste 2 cm van de kruising thv de aankomstlijn moet zwart geschilderd zijn. Let op dat het zwarte blokje<br />
NIET voor de aankomstlijn start! De rest van de kruising blijft wit. Op deze manier kunnen op computerscherm nagaan<br />
op de camera juist is uitgelijnd op de voorkant van de aankomstlijn (witte achtergrond met zwarte horizontale lijnen) op<br />
de achterkant van de aankomstlijn (volledig witte achtergrond). Het schematische overzicht hieronder verduidelijkt wat<br />
we bedoelen:<br />
starting<br />
line<br />
1<br />
A<br />
finish-line<br />
B C<br />
D<br />
Preview Scrolling<br />
10-25 mm<br />
2<br />
3<br />
A B C D<br />
bad<br />
perfect<br />
bad<br />
100.00 m<br />
5 0 mm<br />
still<br />
homologated<br />
Starting point<br />
arrival point<br />
Richt nu de camera op positie B voor de beste camera positie! Maak gebruik van de “<strong>2D</strong>-View” mode in het “Camera”<br />
venster of de scrolling mode in het “Scrolling camera view” venster om de juiste positie van de camera te vinden. Een<br />
fotofinish met een volledige witte achtergrond is ook officieel in orde (bv voor het toekennen van wereld records) daar<br />
de atleet zelfs enkele cm's te veel gelopen heeft. Het is dus niet aangeraden dit te doen en dit in het belang van de<br />
atleten!<br />
Opmerking:<br />
Gebruik voor het verven van de zwarte blokjes een matte zwarte verf. Gebruik NOOIT reflecterende tape of verf!<br />
Waarom? Wanneer er veel achtergrond licht is dan zal de de reflecterende tape of verf, grijs of zelfs wit worden op u<br />
computerscherm.
<strong>MacFinish</strong> <strong>2D</strong>-<strong>USB</strong> and MF8.x software Page 31<br />
Hoofdstuk 5.2 : Controle van de camera en lens<br />
instellingen, d.m.v. van het “Scrolling camera<br />
view” venster<br />
'Scroller' toets =<br />
dubbele pijl<br />
Selectie van de timing lijn<br />
binnen opname frame<br />
Baan<br />
verdeling<br />
'X/Y schaal'<br />
selectie<br />
Verticale<br />
slider<br />
'Zoom'<br />
selectie<br />
Het “Scrolling camera view” venster is een venster dat gebruikt wordt voor het “LIVE” weergeven van het camerabeeld<br />
(=series van opeenvolgende lijnen opgenomen door de camera). In deze “Scrolling mode” zullen de “Live” opgenomen<br />
lijnen van links naar rechts of van rechts naar links (afhankelijk van u “Preference” instellingen) op u beeldscherm<br />
bewegen. M.a.w., indien we de camera verdraaien of de lens instellingen veranderen kunnen we dit onmiddellijk<br />
controleren op ons computerscherm. Het is precies of we door de lens kijken maar dit zonder een intern prisma systeem<br />
zoals in oude foto camera's) maar door middel van de digitale opname van de <strong>MacFinish</strong> camera en een beeld op u<br />
computerscherm. Druk op de “Scroller” toets (dubbele pijl) om de “Scrolling” mode te starten. Controleer nu het live<br />
camerabeeld in het “Scrolling camera view” venster en draai de camera over de finishlijn (van links naar rechts of van<br />
rechts naar links).<br />
Indien u de opnamesnelheid, lens instellingen EN het digitaal programeerbare camera “Gain”goed hebt ingesteld krijgt u<br />
ee beeld dat gelijkt op het onderstaande. Het witte gedeelte, met zwarte horizontale lijnen is de AANKOMSTLIJN voor<br />
T&F. Op het linkse gedeelte ziet u witte baannummers op het rode baanoppervlakte. De vervormingen van de nummers<br />
komt doordat de camera handmatig bewogen is en de snelheid dus niet constant was!<br />
Indien u de “Scrolling” mode stop wil zetten kan dit door terug op de “Scrolling” toest (=dubbele pijl) te drukken. De<br />
“Scrolling” zal ook stoppen indien er een startsignaal is gegeven of een aankomst is gedetecteerd.<br />
Opmerking:<br />
We willen u eraan herinneren dat het makkelijker is om de instellingen van de lens en camera af te regelen met behulp<br />
van het beeld “<strong>2D</strong> View” in het “Camera” venster, denk dus 2 keer na vooraleer u de camera afregelt of iets verandert<br />
aan de lens instellingen met behulp van dit “Scrolling camera view” venster. Probeer het zelf uit maar wij geloven dat<br />
het “<strong>2D</strong> View” in het “Camera” venster het beste middel is om de lens en camera af te stellen alsook regelmatig te<br />
CONTROLEREN, zelfs tussen de races door.
Page 32<br />
<strong>MacFinish</strong> <strong>2D</strong>-<strong>USB</strong> and MF8.x software<br />
Hoofdstuk 5.3 : “Checklist” om de camera uit te<br />
lijnen en de lens in te stellen<br />
Opmerking;<br />
De volgorde van handelingen tijdens het afstellen van camera en lens is belangrijk! Zo kan men<br />
bevoorbeeld de camera richting niet controleren indien de iris van de lens volledig gesloten is (= u moet<br />
starten met “aanvaardbare” instellingen. Een ander voorbeeld: u kan de verticale en horizontale richting<br />
niet als eerste instellen om dan nadien de “waterpas” want dan kan u helemaal opnieuw beginnen.<br />
Camera Ricjhting Controle<br />
1. Camera moet perfect 'horizontaal' staan ; zet de camera horizontaal door gebruik te maken van de waterpas. En<br />
controleer deze regelmatig tijdens de volgende stappen!<br />
2. Positie van de camera in het verlengde van de aankomstlijn.<br />
camera<br />
BAD<br />
8 7 6 5 4 3 2 1<br />
OK<br />
BAD<br />
3. Regel de vertikale hoek vande camera + zoom van de lens.<br />
camera<br />
camera<br />
camera<br />
OK<br />
Bad<br />
Bad<br />
4. Regel de horizontale richting van de camera.<br />
camera<br />
Bad<br />
OK<br />
Bad<br />
Lens Controle<br />
1. Maak gebruik van de iris om een optimal licht instelling te verkrijgen, het is mogelijk dat u gebruik moet<br />
maken van de digitale camera “Gain” (=versterking) controle in het “Camera” venster.<br />
2. Regel de focus zodat u een zo scherp mogelijk beeld krijgt.
<strong>MacFinish</strong> <strong>2D</strong>-<strong>USB</strong> and MF8.x software Page 33<br />
Hoofdstuk 6 : <strong>MacFinish</strong> “Preferences”<br />
Met de “preferences” (= voorkeuren) van het <strong>MacFinish</strong> programma kan u u persoonlijke instellingen definieren hoe<br />
U wenst dat het programma zich zal gedragen tijdens de honderden races die u zal opnemen. We hebben het dan<br />
over hoe het programma de foto automatisch moet weergeven, hoe de tijden moeten weergegeven worden, welke<br />
kleurinstellingen enz. Dit wil niet zeggen dat u de settings niet meer kan veranderen na de race. Maar indien u al die<br />
instellingen foto per foto moet ingeven en dat voor enkele 10-tallen of 100-tallen per dag dan zijn we er zeker van<br />
dat u er de voorkeur aan geeft om die instellingen van de eerste keer goed te zetten. Dit is de reden waarom we u de<br />
“Preferences” aanbieden. Dus vooraleer u echte races gaat opnemen met eender welke versie van <strong>MacFinish</strong><br />
camera's is het aanbevolen om eerst u persoonlijke programma instellingen in te voeren om later veel tijd uit te<br />
sparen. Deze instellingen zullen automatisch bewaard worden bij het afsluiten van het venster “Preferences”. Om<br />
deze instellingen te veranderingen of te controleren selecteer “Preferences” onder het “File” menu:<br />
Hoofdstuk 6.1 : Document Voorkeuren<br />
Document voorkeuren zijn instelligen die gegeven worden aan een nieuw document wanneer een beeld uitgelezen wordt<br />
uit de camera. Indien dit nog niet geslecteerd is klik dan op het “Document” toest (=bovenaan het vesnter).<br />
Laten we eens kijken naar de verschillende onderdelen.<br />
Hoofdstuk 6.1.1 : “Photo Direction” = foto richting<br />
Selecteer de gewenste foto richting door het corresponderende bolletje aan te vinken.
Page 34<br />
<strong>MacFinish</strong> <strong>2D</strong>-<strong>USB</strong> and MF8.x software<br />
Hoofdstuk 6.1.2 : Display Resolution = afronding tijden<br />
U kan kiezen om de tijden af te ronden op 1/10, 1/100 of 1/1000 (van een seconde). Dit<br />
wil betekenen dat de tijden onderaan het fotofinish beeld automatisch worden afgerond<br />
en getoond zoals ingesteld (zie later). De naukeurigheid van de tijdsregistratie zal<br />
NIET veranderen, u zal de beelden altijd opnemen met een maximale tijdsresolutie.<br />
Hoofdstuk 6.1.3 : Lane order = Baan volgorde<br />
Hier kan u het aantal banen definieren<br />
alsook de volgorde (naar boven of<br />
naar beneden). Om het aantal banen te<br />
vergroten klik dan op het kleine naar<br />
boven wijzend pijltje. Selecteer of de<br />
banen optellen of aftellen door het<br />
klikken op de grotere pijlen (rechts).<br />
Deze instellingen zal de baan balk in<br />
het “Scrolling camera view” venster<br />
gaan bepalen. Welke nadien voor elke<br />
latere fotofinish opname zal gebruikt<br />
worden. Veder in deze handleiding<br />
zullen we bespreken hoe u deze velden<br />
moet instellen met behulp van de<br />
baanverdelingen op u foto.<br />
Hoofdstuk 6.1.4 : “Import participant / Export results”<br />
= Automatische import van deelnemers en<br />
exporteren van resultaten<br />
Met 2 afzonderlijke aankruisvakjes kan u bepalen of u automatische import van<br />
deelnemers en automatische export van resultaten lijsten (=resultaten tabel met<br />
plaats+ID+Tijd). Automatische import wordt gedaan wanneer u het <strong>MacFinish</strong> beel<br />
uitleest uit de camera, de export gebeurt wanneer deze file opgeslagen wordt.<br />
With two separate checkboxes you can have an automatic import of a participant list and export of result list (= result<br />
table "Place+ID+Time") Such an automatic import is done when you read the MF-photo from the camera, and the<br />
export is done when you save the file again, after you have read the results (rank+ID+time). You can specify which<br />
folder will be used for such an import and export, if you leave the folder field empty, the folder with the <strong>MacFinish</strong> files<br />
will be used.
<strong>MacFinish</strong> <strong>2D</strong>-<strong>USB</strong> and MF8.x software Page 35<br />
Hoofdstuk 6.1.5 : Automatic export <strong>MacFinish</strong> photo<br />
image as '.jpg' file<br />
Hoofdstuk 6.1.6 : Time Lines<br />
With two separate checkboxes you can have an automatic export of the recorded<br />
photo as a '.jpg' file, when you want it. Such an automatic export is done when<br />
you open a <strong>MacFinish</strong> file, and/or when you save a <strong>MacFinish</strong> file. You can<br />
specify which folder will be used for such an export, if you leave the folder field<br />
empty, the folder with the <strong>MacFinish</strong> files will be used. See also chapter 9.3 for<br />
more details on how to add a logo to this .jpg, or chapter 9.2 how you can<br />
manually make customized .jpg- or .png-file(s).<br />
With the "Screen" checkbox you can determine whether or not vertical time lines should be shown on the photo-finish<br />
picture whenever times are read in the result table (see example above). If you also select the ‘Printer’ checkbox, these<br />
vertical time lines will also be printed on paper. By clicking on the little arrow (to the right side of the red colored<br />
rectangle), the 'color selection' window will appear in which you can determine the color of the time lines.<br />
By clicking on 'Other', you have the choice between any possible color that you select or choose by RGB values.<br />
You can also change the thickness of these lines by modifying ‘1’ to ‘2’ or ‘3’....;<br />
Note; A thickness larger than '1' will only be visible in the ‘Presentation mode’, see later.<br />
‘Apply’ makes changes active while the ‘Preferences’ window stays open.<br />
‘OK’ = Apply + ‘Preferences’ window will be closed.
Page 36<br />
<strong>MacFinish</strong> <strong>2D</strong>-<strong>USB</strong> and MF8.x software<br />
Hoofdstuk 6.2 : Scoreboards Preferences<br />
This window can be used to change the settings for a timing scoreboard that is connected to one of the (RS232 or<br />
RS422) serial ports of your computer. This can be a TimeTronics scoreboard, or a board from another manufacturer.<br />
Select the type of scoreboard driver that corresponds to the scoreboard that you are using, by clicking on the little arrow<br />
under 'select scoreboard', for example ;<br />
• Select "Scoreboard IE 101" if you use a TimeTronics timing scoreboard.<br />
• Select "Scoreboard IE Extended" for sending a ‘running time’ to television.<br />
Which scoreboard drivers you can select from the pop-up list depends on the contents of the "Plug-Ins" folder. This<br />
"Plug-Ins" folder should be present in the folder of your <strong>MacFinish</strong> program.<br />
Do NOT forget to select the “Running Time“ check box, to display the running time (during the race) on your board !<br />
When the ‘Result table’ checkbox is marked (currently always), then the software supports the ‘send result’ command<br />
(see later), to send the "Place+ID+Time" results on the stadium scoreboard, over the same serial port!<br />
Baud rate, databits, parity and stop bits shouldn’t normally be touched, as they are normally correct by default. Next to<br />
‘Lap Display Time’, you can select the amount of seconds during which the display of split times will be shown (frozen)<br />
on the scoreboard. Next to ‘Running Time', you determine how many times pro second the scoreboard should be<br />
updated; for TimeTronics (electromagnetic type of) scoreboards 1 tps, for running time on television 10 tps.....
<strong>MacFinish</strong> <strong>2D</strong>-<strong>USB</strong> and MF8.x software Page 37<br />
Hoofdstuk 6.3 : General Preferences<br />
In this window you can find a number of general settings.<br />
Hoofdstuk 6.3.1 : Number (Time rounding)<br />
You can select the parameters for rounding of manual and automatic times in the 'Result table'. Just click in the pop up<br />
field and select the required item. For example; round up, round down or round. Precision of 1/10, 1/100 or 1/1000 of a<br />
second. EXAMPLE;<br />
Round up: Round down: Round:<br />
.350 -> .35 .350 -> .350 .350 -> .35<br />
.351 -> .36 .351 -> .350 .351 -> .35<br />
.352 -> .36 .352 -> .350 .352 -> .35<br />
.353 -> .36 .353 -> .350 .353 -> .35<br />
.354 -> .36 .354 -> .350 .354 -> .35<br />
.355 -> .36 .355 -> .350 .355 -> .36<br />
.356 -> .36 .356 -> .350 .356 -> .36<br />
.357 -> .36 .357 -> .350 .357 -> .36<br />
.358 -> .36 .358 -> .350 .358 -> .36<br />
.359 -> .36 .359 -> .350 .359 -> .36<br />
You could also select a predefined standard rounding. For example: none, athletics, regatta,...<br />
For athletic events under IAAF rules, select ‘athletics’:<br />
When selecting ‘Athletics’ or ‘Regatta’ or ..., the manual and automatic parameter rounding are disabled (= grey). Yet<br />
they show the standard parameter settings for either Athletics or Regatta. When printing the result table, these rounding<br />
parameters will be printed on the right bottom of the paper.<br />
When selecting 'Precision Linked' (marked with 'v'), the times in the 'Result Table' will NOT be rounded, but will be<br />
shown with a resolution identically to the time resolution underneath the photo-finish photo: for example; 1/10 sec on<br />
photo -> 1/10 sec in result table. For athletics we advise to disable the 'Precision Linked' feature, and to display + print<br />
an (IAAF) rounded time result.
Page 38<br />
<strong>MacFinish</strong> <strong>2D</strong>-<strong>USB</strong> and MF8.x software<br />
Hoofdstuk 6.3.2 : Maximize when zoom<br />
If you select 'Maximize when zoom', your photos will be extended over your entire screen when zooming in.<br />
Hoofdstuk 6.3.3 : Enable Function Keys<br />
Select this function if you would like to use function keys ‘F4...F11’ of your keyboard during a race.<br />
F4 = Participant import from MeetManager, BEFORE the race.<br />
F5 = Set <strong>MacFinish</strong> in 'Ready' mode.<br />
F6 = Give an 'operator' start signal, as reference in case of multiple starts recorded from start pistol (see<br />
later)<br />
F7 = Manual arrival signal.<br />
F9 = Record a split time<br />
F11=Save <strong>MacFinish</strong> data to a file on disk (in a new file, or merge to existing file already created).<br />
F12=Start manual windspeed (if selected in parameters window to use manual windspeed mode)
<strong>MacFinish</strong> <strong>2D</strong>-<strong>USB</strong> and MF8.x software Page 39<br />
Hoofdstuk 6.4 : <strong>MacFinish</strong> Preferences<br />
In the <strong>MacFinish</strong> Preferences window, you can make a list for every kind of race with the corresponding recording<br />
settings. You can give each element from this list an appropriate name, for example "Sprint" , "Long Distance" or<br />
"1500m"..... By now defining for each element (race type) the desired recording speed, lines before +lines after, and<br />
'WindSpeed' measurement, you can later gain a lot of time, and avoid errors, during the races, when everything has to go<br />
very quickly. The list already contains the first item; "Default", and these settings will be used 'by default' whenever the<br />
<strong>MacFinish</strong> operator starts up the system, and not yet selected another race setting.<br />
You can add an element to the list, by clicking on the<br />
button. Now the word ‘empty’ will appear.<br />
Point with the mouse and click ‘empty’ twice and type a new name, for example "Sprint". If you click the button<br />
again, you can type the next item, for example "Hurdle races". Continue like this for all required race types.<br />
To delete an item from the list, just click it once (highlighted) and press the button.<br />
Click on the button in case you want a dotted line between two items in the list.<br />
Now you can start to specify the required settings for each item from the list, first for "Default", then for "Sprint"...
Page 40<br />
<strong>MacFinish</strong> <strong>2D</strong>-<strong>USB</strong> and MF8.x software<br />
Please click on each item in the list, and control all its settings !<br />
• The recording speed is expressed in "Frames Per Sec", which means that the camera will record so many times<br />
the second the photographic image of the finish line, and of course also registers the corresponding time for<br />
each frame.<br />
Remember:<br />
- The faster the race, the more frames pro sec you will need to show a good picture.<br />
- The higher the vertical resolution you choose, the more frames pro sec you need to show a<br />
normal picture (f.e. bicycle wheel round and not oval).<br />
- The more light there is available, the more frames you can record pro second.<br />
Guidelines for min & max recording speed, depending on race type<br />
1. Athletics T&F -> 800-1200 l/s (Sprint races)<br />
-> 600-1000 l/s (400-1500m)<br />
-> 400-800 l/s (Long distance)<br />
2. Horse races -> 800-1200 l/s<br />
3. Greyhound races -> 1000-1400 l/s<br />
4. Cycling -> 1400-2000 l/s<br />
5. Canoe & Kayak -> 200-500 l/s<br />
To change the ‘Lines Before’ and ‘Lines After’, (= the amount of lines recorded before and after<br />
interruption of the photocells) click on the number and enter the new amount. By typing here the<br />
desired numbers (1...100) YOU can define how wide the photo is recorded around each athlete, to be<br />
sure that not only the body of the athlete is visible on the photo, but also the arms and legs.<br />
• To select the mode of WindSpeed recording, click ‘None’ and select the required WS-measurement:<br />
Used as :<br />
5s -> 60m race (national rule for Germany and ...)<br />
10s -> 100m race<br />
10/10s -> 200m race (automatic WS start 10 sec after race start)<br />
13s -> 110 meters hurdles race + 100 meters hurdles race<br />
Manual -> 200m race WindSpeed measurement started by dedicated operator<br />
User Mode -> 200m race WindSpeed measurement started by MF operator (see later)<br />
Click the 'Apply' and 'OK' buttons to save the modified parameters:<br />
You can later use this list of recording settings for the recording of real races, by selection in the 'Parameters' window<br />
OR in the 'Scrolling camera view' window.
<strong>MacFinish</strong> <strong>2D</strong>-<strong>USB</strong> and MF8.x software Page 41<br />
Hoofdstuk 6.5 : MeetManager Preferences<br />
<strong>MacFinish</strong> is able to communicate with a MeetManager database system, and it does the communication via a serial<br />
RS232 or over an ethernet network connection. In that case you need to know the 'TCP-IP' address of the MeetManager<br />
PC, and the port number that is used by the MM.<br />
The concept is that the <strong>MacFinish</strong> (MF) requests the MeetManager (MM) database for the complete list of races, and<br />
after the MF operator has selected the race from a list, the MF will request the MM for the names, team, lane # etc of all<br />
the participants of that race.<br />
After the race the MF will send (on command of the MF-operator) the result data (Place+ID+Time) over the same serial<br />
cable (or ethernet connection) to the MM database, which can print it out, send it to the stadium scoreboard, send the<br />
results to television, etc.<br />
If you want to use the MeetManager communication (and it is enabled by your ‘user-key’) please select “Hytek<br />
compatible” by means of the list under ‘Select MeetManager’.<br />
Next to ‘Precision’, you can select to which time resolution you would like to send the results to the MeetManager<br />
computer, the choices are; ‘General Prefs’, or rounding to one tenth, one hundredth or one thousandth of a second.<br />
The ‘Mode’ radio button defines how the ‘Read Image’ command will work. With the "Mode" set to "Automatic", the<br />
MeetManager list of races will automatically be shown to the user when the photo is transferred from the <strong>MacFinish</strong> box<br />
to the computer, by the ‘Read Image’ command (see chapter 7.2).<br />
If not automatic, the (later) import of MeetManager data can be executed manually (under the ‘Document’ menu). A<br />
possible reason for not selecting ‘automatic’ may be that the MeetManager - link is temporarily not available. The<br />
operator can then manually import the MM-data later on (for example after the races).<br />
Note;<br />
If you “manually” import MeetManager data by using the “F4” key on your keyboard (=before the race), the<br />
<strong>MacFinish</strong> will NOT ask again after the race which race this was, as he already knows it.
Page 42<br />
<strong>MacFinish</strong> <strong>2D</strong>-<strong>USB</strong> and MF8.x software<br />
Hoofdstuk 6.6 : Port Manager<br />
Here, both the Scoreboard serial port number (Com 'x') , the MeetManager (serial or ethernet) port, the WindSpeed<br />
serial port, and the Video (serial or ethernet) port number can be chosen. Do bear in mind that all ports should be<br />
different, and available (=not yet used by another program !) on your computer !<br />
If you do not need or want to use a serially driven timing scoreboard, or the MeetManager connection, or the<br />
WindSpeed, select ‘none’ for that feature.<br />
In case you want to use the ethernet network as connection between your <strong>MacFinish</strong> PC and the MeetManager and/or<br />
Video Identification system, select “TCP-IP”, and type the TCP-IP number + the port number of the respectively<br />
connection on the other side (MM and/or Video-ID systems).<br />
Hoofdstuk 6.7 : Key Registration Preferences<br />
See ‘Entering your Registration Key’, in chapter 4.4<br />
Hoofdstuk 6.8 : <strong>MacFinish</strong> photo ‘Window’<br />
Preferences<br />
The settings in this window make it possible to choose with what and how your photo window will be shown;<br />
• If and where (top/bottom/left/right) you would like to show the ‘ResultTable’.<br />
• If and where (top/bottom/left/right) you would like to show the ‘Video-ID’.<br />
• If and where (top/bottom) you would like to show the ‘Overview’.<br />
• Also the size (in pixels on screen) of these windows can be adjusted.<br />
• Also the split position (in pixels on screen) of these windows can be adjusted.<br />
The schematic representation below the settings gives you a live idea how the <strong>MacFinish</strong> window will be visible later.
<strong>MacFinish</strong> <strong>2D</strong>-<strong>USB</strong> and MF8.x software Page 43<br />
Hoofdstuk 6.9 : Result-‘Table’ Preferences<br />
The settings in this window make it possible to choose;<br />
- If and how large you would like to show the ‘Competitors Table’.<br />
- Which column you want to work with to identify the participants.<br />
- How large each of the columns preferable should be.<br />
Hoofdstuk 6.10 : Closing the Preferences<br />
Window<br />
Close the Preferences window by clicking the ‘OK‘ button. The (modified) parameters are automatically saved when<br />
quitting the program or closing the Preferences window.
Page 44<br />
<strong>MacFinish</strong> <strong>2D</strong>-<strong>USB</strong> and MF8.x software<br />
Hoofdstuk 7 : Recording a race<br />
In the previous chapters we have familiarized ourselves with the different <strong>MacFinish</strong> windows, the adjustment of the<br />
camera and lens, and the preferential settings of serial ports, recording speed,.. etc (chapter 6). This means that we now<br />
can start with the real thing: recording a race !<br />
For most sports (except regatta = canoe / kayak / rowing) there will only be one race at a time. This means that we put<br />
the MF-system ready to detect the start, have a race, record the finish, transfer the data to the PC, put the MF-system<br />
ready for the next race, and while we are waiting for the next start, we can read the results of the previous race.<br />
At regatta events it is common to have multiple races at the same time, to prevent too much delays and time loss.<br />
Therefore a start is given for example every five minutes, but the races themself take 8 to ... minutes, so there can be 2<br />
or 3 races going on simultaneously.<br />
Therefore we have developed two versions of the <strong>MacFinish</strong> software: a 'standard' version and a 'regatta' version.<br />
Note from the editor; At this time (march 2009), there is NOT YET a 'regatta' version of the <strong>MacFinish</strong> 8.x software !!<br />
The first one has a simple 'Action' window, which controls 1 timer and the image memory for the 'Single' races.<br />
The second has an extended 'Action' window, which controls the 4 timers and the image memory for the 'Multiple' races.<br />
This software has a suffix '-r' in its name (for example MF6.2.7r) and can only be used if the registration key is made for<br />
this kind of regatta races ; see 'Multi-race' in chapter 4.4.<br />
Hoofdstuk 7.1 : Selecting the recording speed<br />
If you know which is the next race to run, you can choose the desired recording speed in the camera window, and the<br />
number of lines before & after and the required type of WindSpeed measurement in the 'Parameters' window. But if you<br />
have predefined all the recording settings for all types of races in the 'Preferences' window (See chapter 6.4), you can<br />
now simply choose from the list of race types! Select it in the 'Parameters' window or in the 'Scrolling camera view'<br />
window. This is much easier and faster!
<strong>MacFinish</strong> <strong>2D</strong>-<strong>USB</strong> and MF8.x software Page 45<br />
Hoofdstuk 7.2 : Single race recording (one race<br />
at a time)<br />
The 'Action' window as shown below will always be visible on your computer screen for as long as the program is<br />
activated and the <strong>MacFinish</strong> <strong>2D</strong>-<strong>USB</strong> camera is connected. It is used to control the race recording, and displays the<br />
timer.<br />
Top row, from L to R:<br />
Buttons on middle, from L to R;<br />
Arrow button on bottom right;<br />
Start list / Split timing / Time display / Continue time on SB<br />
Ready / Start / Finish / Stop / Save / Empty trash<br />
Further open actions window.<br />
Before the start of a race, the operator presses the lamp-icon to put the <strong>MacFinish</strong> in 'ready' mode.<br />
It is also possible to switch to 'Ready mode' by the 'F5' key of the keyboard, if 'functions keys' are enabled in the<br />
preferences.<br />
Automatically, the lamp-icon will turn 'yellow', meaning that the system is ready to register the start of the race.<br />
If you use a start detector on a start pistol, the red led on the start detector will be on now !<br />
At the same time the 'hand' icon (Stop button) has turned grey! As soon as the starting shot is fired or the start push<br />
button is pressed, the timer starts running, the light on the start detector goes out, the pistol-icon rotates to a horizontal<br />
position, its red 'dot' turns green and a starting shot is heard through the computer speaker(s).<br />
The operator himself can also manually give a start by clicking the pistol-icon, for example if the automatic start<br />
detector did not function. He will always hear a superficial starting shot from the computer speakers. In that case all<br />
timing results for that race will indicate a prefix ‘M’, indicating that the start was given manually.<br />
This new version of <strong>MacFinish</strong> also has the capability to record ALL start signals, not just the first start after the 'ready'<br />
position. It is also possible to give a manual start signal by the 'F6' key of the keyboard, if 'functions keys' are enabled in<br />
the preferences. We will explain these functions in detail in chapter 7.2.1<br />
When the athletes, horses, cyclists,... are crossing the finish line, the arrival detector (photocells or manual push button)<br />
will give an arrival signal to the <strong>MacFinish</strong> system. At that moment, the switch of the 'arrival remote control box' (see<br />
picture below) decides whether or not a photo and time is recorded in memory.<br />
• In the Off position, no images will be recorded, even when a finish detector gives a signal.<br />
• In the Auto position, an image will automatically be recorded if the finish detector gives a signal.<br />
• In the Manual position, lines are recorded (independent from finish detector signal) , until the memory is full.<br />
It is also possible to give an arrival signal by the 'F7' key of the keyboard, if 'functions keys' are enabled in the<br />
preferences.<br />
During the period that the <strong>MacFinish</strong> is storing image lines in its memory, the 'Memory Usage' bar in your box-window<br />
will gradually be filled (= will turn grey), and the flag-icon will quickly flip over showing ‘A’ (arrival), as if a real flag<br />
was being waved at the finish of each competitor.
Page 46<br />
<strong>MacFinish</strong> <strong>2D</strong>-<strong>USB</strong> and MF8.x software<br />
The easiest recording of photo finish pictures is in automatic mode, with photocell detectors. But practice has shown<br />
that it may sometimes (very exceptionally) occur that a hurdle-runner stumbles just before the finish line and crosses the<br />
finish below photocell height. If you do not react, the athlete will not appear on the photo-finish photo. To avoid this<br />
kind of a situation, you should switch immediately to manual recording just before the athlete in question would cross<br />
the finish line. Of course, here the operator must be capable to react in a fraction of a second !<br />
As soon as all competitors have finished, the operator must click the 'hand'-icon (= 'Stop' button).<br />
The hand-icon will turn red and the pistol will again turn to the initial vertical position. The trash-icon turns grey and<br />
cannot be clicked upon. Now, we can transfer the recorded photo-finish photo from the memory to the hard disk of the<br />
computer by clicking the disk icon in your 'Action' window, or press the key F11 (if enabled) :<br />
The program will ask you to immediately save the document (now as type “.MF4”) under a given name:<br />
Type in a filename, select the map in which to store the image and click ‘Save’. If you select ‘Cancel’, the reading<br />
function will not be executed.<br />
This new version of <strong>MacFinish</strong> also has the capability to record participants, even AFTER you have saved the image to<br />
a file on disk. We will explain these functions in detail in chapter 7.2.3<br />
The trash-icon can only be clicked during a race to delete an image recorded by mistake (for example a photographer<br />
walking over the finish line, or a recording of (an) athlete(s) that still had to run a number of laps). Do NOT first press<br />
the 'Stop' button of the 'Actions' window, as this would also stop the timer ! After you clicked the trash-icon, a message<br />
will appear;<br />
Click OK to delete the COMPLETE image, and ‘Cancel’ to preserve the recorded image.<br />
The same dialogue-box will appear after having clicked the ‘ready’ icon (which will always delete the recorded image)<br />
or after having changed any recording parameters (recording speed, line before or after, WindSpeed settings,...).<br />
Note: In case of a false start, click the 'Stop' button followed by the 'Ready' button.
<strong>MacFinish</strong> <strong>2D</strong>-<strong>USB</strong> and MF8.x software Page 47<br />
Hoofdstuk 7.2.1 : Recording multiple start signals<br />
This new version of <strong>MacFinish</strong> also has the capability to record ALL start signals, not just the FIRST start after the<br />
'ready' position, but also multiple later signals from the start pistol, AND all manually given start signals (mouse click on<br />
start pistol icon or 'F6' function key). In the past it could happen that an accidental shock was given to the start pistol,<br />
only one or two seconds before the REAL start shot, which resulted in an 'early start' of the photofinish, with incorrect<br />
race times. Only when the operator was very concentrated (and fast enough) to press the 'stop' button, and 'ready' again,<br />
such a problem could be avoided. This is not a problem any more, as ALL start signals are recorded! But we also<br />
provided a solution to be able to know WHICH of the multiple start signals is the correct one! We will show you that the<br />
operator can LIVE press a keyboard button, or a real button on a plastic box, to indicate the <strong>MacFinish</strong> system<br />
immediately that he heard the real starting shot. This will provide an extra timing indication in the 'start timing list', so<br />
that the correct start time can be chosen from that list (during or after the race !!!). We will demonstrate this now.<br />
Make sure that are cables are connected, the MF-software is started, and put the MF in 'Ready mode'. Now ask<br />
somebody to give a start signal with the start detector and you should react IMMEDIATELY by pressing the 'F6'<br />
function key. If you now click with the mouse on the 'up-arrow' button above the start pistol, you can see the 'start times<br />
list'. In the example below our operator reacted in 0.152849 seconds , which is VERY fast. Most of the time, this<br />
reaction will be about 0.1 to 0.25 seconds, at least, when you are a trained and concentrated operator, which did not fall<br />
asleep, or forgot to press the function key ! So this is an example of a 'Normal start', with only ONE start signal from the<br />
pistol (see pistol icon) and one 'F6' timing record.<br />
In the following example we show you that there were 3 (three) start signals (of the start detector on the pistol) recorded,<br />
and one timing record 'F6' from the keyboard. The BLUE color indicates the ORIGINAL start of the <strong>MacFinish</strong> timing<br />
system. The 'F6' record is recorded about 0.15 sec after the SECOND start signal (+1.860596), which means that not the<br />
first, or the third, but the 2nd pistol signal was the REAL starting shot. That will also mean that the running time in the<br />
actions window and on the timing scoreboards (and perhaps even on TV) is NOT correct.<br />
But if you now use the mouse to point to that second record (+1.860596, and release the mouse button, the 'running time'<br />
on the scoreboards will be corrected IMMEDIATELY.If you click again on the arrow, the list is updated with the new<br />
relative times, and the GREEN color will now indicate the CURRENT start moment of the <strong>MacFinish</strong> timing system.<br />
Note; The BLUE color still indicates the ORIGINAL start of the <strong>MacFinish</strong> timing system.<br />
You can always switch back to the original start record, or to another start record.<br />
We will now show you that a correction of the start moment is also possible AFTER the race. Open the <strong>MacFinish</strong> file
Page 48<br />
<strong>MacFinish</strong> <strong>2D</strong>-<strong>USB</strong> and MF8.x software<br />
from which you want to verify or change the 'start times list', and select 'Properties from the 'Document' menu.<br />
You can now see the list with start time records. This example shows the same 4 relative start times as shown on the<br />
previous page.<br />
Note: There is also a second 'Tab' field on top of the window, which allows you to see a '2-D' view of the finish line.<br />
This allows you to verify the alignment of the camera on the finish line. See chapter 7.2.2 for this feature.<br />
Also on this window you can select the second start, as the real start. Then you will see that the list is updated with the<br />
new relative times, and the GREEN color will now indicate the CURRENT start moment of the <strong>MacFinish</strong> timing<br />
system. Note; The BLUE color still indicates the ORIGINAL start of the <strong>MacFinish</strong> timing system.<br />
Of course, if you select another timing record as being the start moment, all times in the photo and in the result table are<br />
recalculated. If your new start record is an electronically recorded start the time in the result table wil only show the<br />
prefix “C” (from 'Corrected'), if the new start record is a manual start, then the prefix will be “C M” from 'Corrected +<br />
Manual'. In that last case, the result times will of course be displayed up to 1/10 of a second resolution.
<strong>MacFinish</strong> <strong>2D</strong>-<strong>USB</strong> and MF8.x software Page 49<br />
Hoofdstuk 7.2.2 : Selecting after the race another line<br />
for the finish position<br />
Like we explained in the previous chapter 7.2.1, you can open the 'Properties window' of any earlier recorded <strong>MacFinish</strong><br />
file, and click on the “<strong>2D</strong>” 'TAB' field. You now see the following window, which allows you to show the '<strong>2D</strong>-view' of<br />
the finish line , or a window with the (8 or 16 or 24..) different lines of each frame that was recorded .<br />
Press the escape key ('Esc') to close the <strong>2D</strong>-view. Here below you see a <strong>MacFinish</strong> photo + the “Possible lines” window<br />
from the 'Properties' menu selection. The bottom half of the photo shows a white finish line with the black lane markers,<br />
but on the top half of the photo you can recognize the red color of the synthetic track, in front of the finish line. This<br />
means that the camera was not perfectly aligned ON the finish line. If you study the 7 different rectangles on the front<br />
window named “Possible lines”, you see that the leftmost rectangle has a RED contour. The RED color means it is the<br />
ACTUAL selected line for photofinish.<br />
If you double-click on the third or fourth rectangle, which contains only a white background (finish line) and black<br />
horizontal lines (black markers on each lane boundary), you choose another line for the photofinish picture. Note; The<br />
<strong>MacFinish</strong> photo will be automatically updated, but not the result table (because all lines of a frame are recorded at the<br />
same time). This means that if you already made up results in the 'result table', you need to check them again, and<br />
correct these readings if necessary.
Page 50<br />
<strong>MacFinish</strong> <strong>2D</strong>-<strong>USB</strong> and MF8.x software<br />
Hoofdstuk 7.2.3 : Recording extra participants after<br />
you saved the <strong>MacFinish</strong> file<br />
Sometimes you want to read the photofinish results IMMEDIATELY after one or two or ... athletes crossed the finish<br />
line, if you want to announce the OFFICIAL (=photofinish) results asap to the media (TV, radio and press). You could<br />
already do this, but to create one <strong>MacFinish</strong> file with ALL results, you needed to create the 'Result table' twice (once<br />
with the first two or three participants, and once with all participants). It is now possible to let the <strong>MacFinish</strong> software<br />
'MERGE' the two parts together to one file, even if you already read some results in the 'results table'.<br />
WARNING: Never press the 'stop' button of the 'action' window, if there are still athletes running ! Otherwise you<br />
will loose the timing information for these athletes.<br />
Procedure to follow;<br />
1. Record the start of the race, and the finish of the first 'x' athletes, but do NOT press the 'stop' button.<br />
2. Press the 'save' button (or F11 if the function keys are enabled). Give a filename, and save the file on disk.<br />
3. If you want, you can create a partial official result by filling the result table.<br />
4. At the same time you can continuously record extra athletes that are finishing.<br />
5. After the finish of the last athletes you can merge (add to the same file) the photo and time recording of these<br />
participants, by pressing the 'save' button (or F11 if the function keys are enabled) again. You will then see the<br />
following window on your screen.<br />
This window indicates that the <strong>MacFinish</strong> software already has a filename, and request you to confirm to merge the two<br />
data packets. The text message on that window informs you that an update on screen (of the result table) will only be<br />
done if you first have saved and closed the photo window, and then pressed the save button in the actions window.
<strong>MacFinish</strong> <strong>2D</strong>-<strong>USB</strong> and MF8.x software Page 51<br />
Hoofdstuk 7.2.4 : Recording of Electronic Split Times<br />
by means of the Finish Photocells<br />
By means of the small arrow pointing down in the Actions-window (bottom-right), you can 'open' the actions window, to<br />
be able to electronically record a split time using the photocells. As you can see, the box-window has now a 'Split<br />
timing' flag (disabled, this means inclusive a red cross), but is still in 'Arrival mode' (check box 'ON', see picture<br />
below). There is NO difference with this condition and the previous situation, before you further opened the actions<br />
window, or after you close the window again.<br />
Arrival mode, image recording, SPLIT timing disabled<br />
If you disable the arrival check box, no finish time can be displayed on a timing scoreboard, but a photo could be<br />
recorded ('Record' check box is still ON) .<br />
Split mode, image recording, SPLIT timing disabled<br />
If you now click on the 'split flag', the red cross is gone (left picture), to indicate that split timing is now enabled. During<br />
split timing mode, there can be no 'finish timing' mode, so the 'arrival' check box is out. The next signal of the photocells<br />
will initiate a split timing (time paused on the scoreboard for a predefined time), IF your arrival remote control box is set<br />
in “auto” position. For split timing you can choose to enable or disable the photo recording (see 2 pictures below).<br />
Split mode, image recording, SPLIT timing Enabled<br />
Split mode, NO image recording, SPLIT timing Enabled<br />
When the photocells are now interrupted by the leading athlete, (or you press 'F7' and the function keys are enabled in
Page 52<br />
<strong>MacFinish</strong> <strong>2D</strong>-<strong>USB</strong> and MF8.x software<br />
the preferences), the <strong>MacFinish</strong> system will register a split time which is displayed on your 'Actions' box-window (in the<br />
example below 51.44 sec) and on your scoreboards for a number of seconds (period is adjustable in the scoreboard<br />
'Preferences'). The 'Split flag' automatically is disabled again (+ red cross), until YOU enable it for the NEXT split time<br />
(probably the next lap or the next kilometre, or the next mile).<br />
DO NOT FORGET: Before the finish of the first athlete, activate recording of a photo-finish photo plus a final time by<br />
enabling the ‘Arrival’ check box !!! You will notice that automatically the ‘Record’ check box is selected as well. Of<br />
course the switch on the 'Arrival Remote Control box' should be set on ‘AUTO’ position for a finish of a race.<br />
Note: When closing the ‘split times’ extension again, ‘Arrival’ and ‘Record’ will be automatically ON:<br />
Hoofdstuk 7.2.5 : Non-electronic split times<br />
registration (manual, without photocells!)<br />
For a manual (non-electronic) registration of split times, you can use any of the following methods;<br />
1. Open the 'actions window' (see 7.2.3) and use the Function key 'F7'.<br />
2. Open the 'actions window' (see 7.2.3) and push the switch on the 'Arrival Remote Control box' to ‘Manual’<br />
position.<br />
3. Leave the 'actions window' closed, and use the Function key 'F9'.<br />
4. Leave the 'actions window' closed, and click with the mouse in the 'split time' button (button on the left of the<br />
running time indicator, with two vertical lines).<br />
Time will be paused in your 'Actions' window and on your scoreboards for a number of seconds as adjusted in your<br />
‘Scoreboard Preferences'. After that period, the running time display will start again.<br />
WARNING; Be VERY CAREFULL that you do NOT press the STOP button (hand icon) inside the ‘Actions’ window,<br />
as this would STOP the timing of your race !!!!!!!<br />
Hoofdstuk 7.2.6 : Windspeed User Mode<br />
When having selected the Windspeed ‘User Mode’ (see Preferences and Parameter setup window), an air sock icon will<br />
appear on the 'Actions' window enabling the <strong>MacFinish</strong> operator to manually give a start to the WindSpeed<br />
measurement for a 200m race. According to the IAAF rules, this should be done "as soon as the FIRST runner enters the<br />
straight". Please notice that the icon will remain grey for as long as a start hasn’t been given !<br />
If a start signal is given, the air sock icon becomes highlighted and the <strong>MacFinish</strong> operator can now click it in order to<br />
start a 10 seconds wind measurement. The shortcut to do this is the "F12" key on the keyboard (if enabled).<br />
On the photo-finish window itself you will find ‘??’ in front of the windspeed indication, telling you that the ‘user mode’<br />
was applied in this race.
<strong>MacFinish</strong> <strong>2D</strong>-<strong>USB</strong> and MF8.x software Page 53<br />
Hoofdstuk 7.2.7 : Running Time on Scoreboard After<br />
Arrival of First Athlete<br />
At arrival of the first athlete, the unofficial time of that first athlete will be displayed on the scoreboard and in your<br />
'Actions' window. Now suppose that we are dealing with a 1500m race in athletics. Wouldn’t it be interesting for the<br />
other runners that they could still keep an eye on their running time? Indeed, that is possible. After arrival of the first<br />
athlete, your box window might look like:<br />
The time as portrayed in your 'Actions' window (and on your scoreboard) is halted. To display the running time for the<br />
other athletes, simply click the small button in the top-right corner, showing a small arrow to the right. As you will<br />
notice, now the real time display starts running again:<br />
Keep recording the photo-finish photos for as long as athletes are arriving. When the last athlete has crossed the finish<br />
line, click the STOP-button in your 'Actions' window and read the photo-finish photo.<br />
Hoofdstuk 7.3 : Multiple races recording<br />
(multiple races possible at a time)<br />
Note from the editor; At this time (march 2009), there is NOT YET a 'regatta' version of the <strong>MacFinish</strong> 8.x software !!<br />
Let’s have a closer look at the 'actions' window and its operation method.<br />
As you can see, there are 4 chronometers available on the box-window, enabling the<br />
operator to register and record four races simultaneously. Each chronometer has got six<br />
different buttons, a WindSpeed indicator and its timer:<br />
Each time a race is about to start, the operator presses the grey arrow on the left-hand side<br />
of the next available chronometer.<br />
The grey arrow will now turn green, meaning that the operator has denominated the selected<br />
chronometer to record the race. In fact by clicking a specific ‘on air’ arrow, the running time<br />
of that particular race will be shown on the scoreboard (of course if connected and<br />
appropriate protocol selected).<br />
Subsequently the operator clicks the ‘ready’ icon (lamp button), to put the <strong>MacFinish</strong> 'ready'<br />
to record the start time. The lamp icon will turn yellow, and the ‘Ready’ modes of the other<br />
races are disabled = turn grey.<br />
As soon as the start signal is given (starting pistol or manual push button), the timer starts running, the pistol-icon rotates<br />
to a horizontal position and its red led turns green. Also notice that the air shaft-icon is highlighted whenever a<br />
'WindSpeed' apparatus is connected and if the wind speed measurement is selected (see parameter window). The wind<br />
speed can only be measured after the race has been started.<br />
Pay attention: always read the windspeed measurement result (by clicking the air-shaft icon) before putting
Page 54<br />
<strong>MacFinish</strong> <strong>2D</strong>-<strong>USB</strong> and MF8.x software<br />
another race into the ‘Ready’ mode! The air-shaft icon becomes highlighted! If not, the result will have vanished!<br />
Note; Manual start by clicking the pistol-icon!<br />
Lets imagine that the second race starts about one minute after the first race.<br />
No problem for the operator; again he should set the second chronometer bar in ‘ready’ mode and have the race started.<br />
You will notice that the timer of the second race indicates a time difference of about 1 minute compared to timer 1:<br />
You can do the same for the chronometer 3 and 4.<br />
Warning; If you already recorded something in the 'image memory', BEFORE the finish of the first competitor, (look<br />
in the 'Memory Usage bar' = top part of the 'Actions' window), clear that unwanted photo by clicking in the 'Trash' icon !<br />
As soon as any competitor is about to arrive, the operator should press the 'Arrival Remote Control' switch (no<br />
photocells are used). Then a photo-finish photo is manually being recorded. Naturally the operator needs to be sharpeyed<br />
and alert!<br />
Each time the Arrival Remote Control button is pressed, the flag-icon will quickly flip over showing ‘A’ (arrival), as if a<br />
real flag was being waved at the finish of each competitor:<br />
Do notice that for as long as the Arrival Remote Control push button is pressed (= as long as recording is going on), the<br />
'Memory Usage bar' on top will gradually be filled with grey, marking the amount of box memory that has been used so<br />
far.<br />
So each time the Remote Arrival button is pressed, we are recording a part of a photo-finish photo.<br />
In order to have a look at what we have recorded so far (even if not all of the competitors have finished yet), you should<br />
click the eye-icon in the Scrolling camera view-window:<br />
The recorded image will be shown in your 'Scrolling camera view' window.<br />
As soon as all competitors have finished and the photo-finish photo has fully been recorded, the operator will click the<br />
Stop-icon (hand) of that race;<br />
Next, we can read the recorded photo-finish photo by clicking the disk-icon of that race in the 'Actions' window:<br />
The program will now ask you to save the document (now as type “.MF4”) under a given name:<br />
Now type a filename and click ‘SAVE’. In case you would select ‘CANCEL’, the reading function will not be executed.<br />
The chronometer automatically jumps back to 00:00:00. This means that the race photo has been read and saved to disk.<br />
WARNING: After the document has been saved on disk, click the trash-icon:<br />
That way you can clear the used image memory. The 'Memory Usage bar' will then become empty, to record the next<br />
finish :<br />
In case you would forget to do this, the memory used to record the last race will be adhered to the memory used to<br />
record the next race. As a consequence, the photo-finish picture of the next recorded race will be attached to the photofinish<br />
photo of the race as previously recorded. This would make everything very complicated, and possibly prevent you<br />
of recording all competitors if the memory gets 100% filled up!<br />
After having clicked the trash-icon, the following message will appear:<br />
Click OK to delete or CANCEL to preserve the recorded image.
<strong>MacFinish</strong> <strong>2D</strong>-<strong>USB</strong> and MF8.x software Page 55<br />
Hoofdstuk 7.4 : Testing the Starting System<br />
The test can be performed when the starter makes use of a starting pistol, on which we attach an electronic start detector.<br />
The test is merely meant to verify whether the 'start detection' timing is functioning well. It should be executed before<br />
the start of an important (international) meet or championship.<br />
The starter should put the barrel of the pistol on top of the finish line, and fire the gun.<br />
Before that shot the <strong>MacFinish</strong> operator should click the 'Ready' button in the 'Actions' window, and continuously press<br />
the “F7” function key (and function keys should be enabled) until he hears the starting shot. That way the camera<br />
will take an image of the flash from the starting pistol.<br />
start detector<br />
finish-line<br />
flash from the gun on top<br />
of the finish-line.<br />
As soon as the sensor(s) inside the start detector register the explosion, time will start running within 0.5 microseconds<br />
after the starting shot. This should coincide with the camera registration of the flash from the starting pistol:<br />
Picture of the flash from the<br />
gun on the finish-line.<br />
First vertical marker at<br />
0.01 = one hundred of a<br />
second after the<br />
starting shot<br />
0.1 = one tenth of a<br />
second after the starting<br />
shot.<br />
Test OK; time<br />
started running<br />
immediately<br />
after the shot<br />
had been fired.<br />
This time bar below the<br />
image can be made<br />
visible (on paper) by<br />
selecting Print Window.<br />
As you can see from the picture taken, a number of lines before and after the starting shot are recorded.<br />
Note; Be sure that the starter or any other person or object is not hiding the flash of the pistol for the camera.
Page 56<br />
<strong>MacFinish</strong> <strong>2D</strong>-<strong>USB</strong> and MF8.x software<br />
Hoofdstuk 8 : Reading the Race Results<br />
How is the photo window structured<br />
1. Optional<br />
indication of<br />
2. Amount of<br />
<strong>MacFinish</strong><br />
3. Recording<br />
speed<br />
wind speed (type memory that has<br />
of measurement been used for the<br />
and result (m/s)) picture<br />
Table of results: places, lanes (explanation see<br />
further up in the manual), times (rounding<br />
according to predefined parameters)<br />
4. Date and hour<br />
of recording<br />
5. Titling pop-up menu<br />
(see Preferences):<br />
predefined titles can be<br />
selected by clicking and<br />
dragging<br />
Scroll bars; by clicking the grey bars or arrows,<br />
you can both horizontally and vertically ‘walk’<br />
through the photo-finish picture<br />
‘Lane indication fields’.<br />
Tip: first acknowledge<br />
the size of all lanes (first<br />
lane 1). Adaptation is<br />
valid for all images<br />
which are used from<br />
that moment on.<br />
‘Lane separation line’.<br />
Pinpoint the cursor<br />
exactly to this location.<br />
The cursor’s arrow will<br />
be converted into a<br />
small cross, indicating<br />
that you’re right on top<br />
of the separation line.<br />
Press mouse button and<br />
drag the lane separation<br />
line to correct position.<br />
Pinpoint the cursor<br />
(vertical time line)<br />
and read the<br />
corresponding time.<br />
Times can be<br />
rendered in one<br />
thousandth, one<br />
hundredth or one<br />
tenth of a second.<br />
Simply click this field<br />
again and again.<br />
Zooming field: click and drag<br />
towards the required<br />
zooming scale. Zoom selection<br />
field: click to<br />
select horizontal, vertical or<br />
horizontal and vertical<br />
zooming.<br />
Horizontal line moving simultaneously with the cursor.<br />
This line helps you to identify and determine the lanes.
<strong>MacFinish</strong> <strong>2D</strong>-<strong>USB</strong> and MF8.x software Page 57<br />
Hoofdstuk 8.1 : Zooming<br />
You can make your selection by simply clicking the particular zooming fields underneath the photo-finish photo. The<br />
first thing what you can do is change the vertical to horizontal relationship, to make an object (athlete / horse / bicycle)<br />
look wider or taller. In other words, to make it look more natural or realistic.<br />
If the picture of a bicycle would look like this;<br />
Then we could change the vert:hor relationship to 1:2 to make the bicycle look ‘normal’.<br />
Now we can start zooming in or out.<br />
Notice that when zooming out to a line-width on screen that is smaller than 1/100 sec, a ‘±’ is put before the times<br />
corresponding with your cursor on the picture. The reason for this is that when zooming out so much, the times as shown<br />
will no longer be accurate enough for an 'official' time reading.<br />
The maximum zooming scale is 600%.
Page 58<br />
<strong>MacFinish</strong> <strong>2D</strong>-<strong>USB</strong> and MF8.x software<br />
Hoofdstuk 8.2 : Filling the 'Results table'<br />
Lane Popup Menu<br />
The second column we call the "Identification" column, where we need to fill in the identification of the athlete.<br />
Normally you will use lane numbers for 'sprint' races that are run in lanes, and ID's or HIP numbers for 'long distance'<br />
races , in which the competitors do not finish in separate lanes, but normally all in lane 1.<br />
Click the small vertical arrow in the 'Lane' column, which will reveal a 'Lane/Hip/ID' popup menu. Select the item that<br />
you wish to use to fill in the result table, using the RIGHT MOUSE BUTTON.<br />
Lane = lane number.<br />
Hip = hip number, usually coinciding with the lane number.<br />
ID = a registration / identification number (might be the chest number or a fixed ID federation number of the<br />
athlete).<br />
ID+Lane = Will show both the athlete ID and the lane number.<br />
Hoofdstuk 8.2.1 : Races Finishing in Lanes<br />
Note; Before you start filling in the results, make sure that the lane indication fields in the photo are correctly<br />
positioned! Do remember that it is the best to align these 'lane indicators' in the 'Scrolling camera view' window,<br />
BEFORE the race. This way you will have to do this only once, as these alignments will then be used for all the next<br />
photo recordings also!<br />
To select a random field in the result table, just click in it! The field is now highlighted ( = selected). The 'fill' color will<br />
depend on your system settings (Windows. First click in the field which is to be entered under “Lane“:<br />
Next, press the 'Control'-key and click the mouse in the correct 'Lane'-field, lane 5 in the example below;<br />
'Control'-key + click in ‘Lane’ field
<strong>MacFinish</strong> <strong>2D</strong>-<strong>USB</strong> and MF8.x software Page 59<br />
The number of the lane will now appear in the previously selected field under “Lane“.<br />
The following field is automatically selected. Notice that the corresponding lane indication field has turned black<br />
meaning that it has already been used! Follow the same procedures for ALL the lanes where a competitor has run or<br />
should have run.<br />
To fill in the corresponding times, you should follow subsequent procedure: move the cursor to the field which is to be<br />
selected under “Time“ and click. The field is now being selected:<br />
Next, drag the vertical line on your image (cursor) to the front (torso) of the athlete (wheel, horse,..) (for athletics see<br />
APPENDIX F) in question (e.g. winning competitor in lane 1), pinpoint the cursor correctly, press the 'Control'-key and<br />
click the mouse button. The corresponding time (rounded according to predefined parameters) will now appear under<br />
“Time“. The field underneath is automatically selected. Follow the same procedure for all lanes.<br />
In case there is an ‘M’ positioned in front of the times, the start has been given manually (thus by clicking the pistol-icon<br />
on the operator’s 'Actions' window). If the start is given by pressing the Remote Control Start button or by the starting<br />
pistol itself, there will be no ‘M’ in front of the times (as in the example above).<br />
To select multiple fields (e.g. to copy them or to erase a number of fields), you should select a first field by clicking in it,<br />
then press the 'Shift' button on the keyboard and click in the second field, in the opposite corner. The result:<br />
A much faster way = to simultaneously fill in the lane numbers + corresponding times ; select the next lane field;<br />
then move your cursor in the photo-finish photo, press the ‘Control’ key (keep it pressed) and click the cursor after<br />
having positioned the mouse so that the VERTICAL line is positioned on the torso, wheels,.... and the HORIZONTAL<br />
line is positioned in the correct lane field (lane 7 in the example below);
Page 60<br />
<strong>MacFinish</strong> <strong>2D</strong>-<strong>USB</strong> and MF8.x software<br />
Now, both lane numbers and corresponding times are simultaneously being filled! Automatically the following field<br />
underneath ‘Lane’ is selected. Follow the same procedure for all competitors.<br />
In the time fields, you can also enter the following options;<br />
DNF: Did not finish<br />
DNS: Did not start<br />
DIS: Disqualified<br />
NR: No result.<br />
To do that, press the 'Control'-key on the keyboard and click in a random time field and drag towards the required<br />
option:<br />
Hoofdstuk 8.2.2 : Races Not Finishing in Lanes<br />
For races not finishing in lanes (e.g. a 1500m or 5000m race), select ‘ID’ in the ‘Lane Popup Menu’, WITH THE<br />
RIGHT MOUSE BUTTON DOWN ! Now click the first field under ‘ID’ to select it.<br />
Now you can manually type the ID-number of each corresponding athlete. Press the ‘Return’ key to jump to the<br />
following field under ‘ID’. Follow the same procedure for all competitors. As soon as all ID-numbers have been<br />
completed, you can again enter the times in the way as explained above.
<strong>MacFinish</strong> <strong>2D</strong>-<strong>USB</strong> and MF8.x software Page 61<br />
Hoofdstuk 8.2.3 : Time Lines When Filling In Results<br />
As we have already explained before, you can attach vertical time lines to your photo-finish picture when completing<br />
results. To do so, select ‘Time Lines’ under the ‘Document’ menu. Select either ‘Screen’ or ‘Printer’ or both and finally<br />
select the color of the time lines. This can look like this;<br />
In the example above you can see that time lines can be helpful to distinguish the athletes that finished from the ones<br />
that were lapped, and still had to run one or more laps! The lapped athletes are on the photo, but do not show a time line,<br />
as they were not read out (on that position of the photo).<br />
Note; You can also enable the automatic display of 'Time Lines' in the 'Preferences' (see chapter 6.1.5).<br />
Hoofdstuk 8.2.4 : Absolute or Relative times in the<br />
‘Result table’<br />
Lets look at the following (theoretical) example of a cycling race, where the times have a prefix ‘C’ for ‘Corrected’ (we<br />
have typed a time of 5:26:47 for the winner and the other times are calculated by the pc). There is also a prefix ‘M’ as<br />
the start was given ‘Manually’ by the mouse button instead of by the start pistol or push button.<br />
If you would like to know the difference time between each participant, you can select the mode ‘Relative to<br />
Previous’ in the TOP OF THE ‘Time column’, WITH THE RIGHT MOUSE BUTTON DOWN ! Very useful<br />
for most cycling races, because then the participants will get the same time (group time) if there is LESS<br />
THAN 1 second between two successive participants.<br />
You can also display the time difference between each participant and the winner, by selecting “Relative to First’ (not<br />
shown).
Page 62<br />
<strong>MacFinish</strong> <strong>2D</strong>-<strong>USB</strong> and MF8.x software<br />
Hoofdstuk 8.3 : Using the Video-ID system<br />
(option)<br />
The (optional) Video-ID system of TimeTronics makes it much easier,<br />
faster, and with less errors, to identify the participants (athletes in a<br />
long distance race or the participants in a BMX cycling race or...).<br />
You can “play” the finish video file in a separate window (see picture),<br />
or just point in the MF-photo-window to any participant, and see<br />
automatically that athlete finishing in the video window (video-ID<br />
system will search the corresponding point in the video file, select it,<br />
and show a static picture).<br />
You can modify a time offset between the MF-photo and the Video<br />
window, but you can also modify the light intensity and contrast of the<br />
video window. Use the 3 controls on top of the video window.<br />
Last but not least, you can zoom the video window, just by clicking !<br />
In the example on the right you see that the next finishing athlete is<br />
ID=46. To fill the identification column for place = 4 of the 'result table'<br />
you simply press the control key on the keyboard and click on the<br />
number '46' in the ID column.<br />
Of course, the Video-identification system can also be used in<br />
combination with the the pop-up list (see chapter 10.2.3).<br />
Hoofdstuk 8.4 : Using the ‘Overview’ window<br />
The overview window, which is placed by most operators on top of the actual picture window shows the complete race,<br />
and can sometimes very practically be used to select the next competitor. As you can see on the photo above, the<br />
competitor nr 33 has won the race, because we selected the first part of the race (see small rectangle in the ‘Overview’<br />
window on the top of the picture, representing the large zoomed window with cyclist 33 and the others).
<strong>MacFinish</strong> <strong>2D</strong>-<strong>USB</strong> and MF8.x software Page 63<br />
By simply clicking somewhere in the overview window, we can ‘jump’ from one part of the photo to another part, for<br />
example the end of the group of cyclists. Notice the small rectangle, on the top right corner of the picture.
Page 64<br />
<strong>MacFinish</strong> <strong>2D</strong>-<strong>USB</strong> and MF8.x software<br />
Hoofdstuk 9 : Printing the Photo or Race<br />
results<br />
Hoofdstuk 9.1 : Printing directly to the printer<br />
The 'File' menu contains 3 menu items, to control the printing of the <strong>MacFinish</strong> photo and/or the 'Result table'.<br />
These selections are; Print Setup..., Print preview and Print....<br />
'Print setup' enables you to adjust your page (size, orientation, ...) for the printer.<br />
When selecting ‘Print Preview’, an example of how the photo will eventually be printed on paper will be shown on<br />
screen. You can then make selections (Image/Result table/Both, Photo/Window, Image lines or not) and when approved,<br />
you can give the printer the assignment to print the portrayed example. You can also cancel the printing process.<br />
If you want to print out a selected image, select Print... under the File menu.<br />
If you want to print the WHOLE PHOTO (possible more than visible on screen), click the 'Photo' radio button. Now<br />
the entire picture which is recorded will be printed (for example the red rectangle):<br />
If you only want to print the window = ONLY THE VISIBLE part , click the 'Window' radio button.<br />
Now you will get a print out of that part of the image that is visible on your <strong>MacFinish</strong> window, and in the very same<br />
condition (for example zoomed in or out,...). In case you (also) want a printout of the place and time results, select<br />
‘Print Results’<br />
Note that the 'Result Table' will be printed on a separate page than the <strong>MacFinish</strong> photo printout! If you want to print the<br />
photo and the result table on ONE page (optional with extra logo), you can do this by first creating a .jpg-file : see next<br />
chapter.
<strong>MacFinish</strong> <strong>2D</strong>-<strong>USB</strong> and MF8.x software Page 65<br />
Hoofdstuk 9.2 : Manually creating a .jpg file that<br />
you can use and print later.<br />
If you want to print the photo and the result table on ONE page (optional with extra<br />
logo), you can do this by first creating a .jpg-file, which you could use to print on<br />
paper, to include in a report, to put on a website, or .... Select 'Export image to jpeg', or<br />
press the 'Alt +R' keys on the keyboard.<br />
When you see the preview of the export window (see picture below) , you can first<br />
select which part of this photo you want to export (click on mouse, move mouse and<br />
release, you will see a blue rectangle). Double click to take the full image.<br />
You have the possibility to add one or<br />
two logos, to position them, to show the<br />
timescale or not, to show the time lines or<br />
not, to show the result table or not, to<br />
choose where you put this result table,<br />
etc.<br />
Press the button “Make jpeg” to go to the<br />
next screen. There you can give the file a<br />
name, and choose which TYPE of file<br />
you want to make; a .JPG file or a .PNG<br />
file.<br />
This photo on disk could look like;
Page 66<br />
<strong>MacFinish</strong> <strong>2D</strong>-<strong>USB</strong> and MF8.x software<br />
Hoofdstuk 9.3 : Automatic creating a .jpg file<br />
that you can use and print later.<br />
In chapter 6.1.5. we already have explained that you can program the 'Preferences' to have the <strong>MacFinish</strong> program automatically<br />
make a .jpg file, when the software is opening and/or saving the <strong>MacFinish</strong> data file.<br />
You can leave the folder address field empty, so that the file will be save in the folder where the original <strong>MacFinish</strong> file<br />
is saved, or you specify another folder (use the “...” button to point to the desired folder).<br />
The filename of the automatically created .jpg file will be the same as the filename of the <strong>MacFinish</strong> file that you<br />
opened, but of course of the type .jpg<br />
If you have a logo picture file saved in the folder “Graphics” (this folder should be present next to the <strong>MacFinish</strong> software),<br />
and this picture file is named “logo.jpg” or “logo.bmp” or “logo.gif” then this logo wil be automatically included<br />
in the created .jpg files, on the fixed position : “bottom-right” of the created picture.
<strong>MacFinish</strong> <strong>2D</strong>-<strong>USB</strong> and MF8.x software Page 67<br />
Hoofdstuk 10 : Using a link with a<br />
MeetManager database<br />
If you have a separate PC running some kind of database program with the list of events (athletic or other sports), the<br />
time schedule, the names of athletes, teams, etc.. you can make a 'link' between that MeetManager computer and the<br />
<strong>MacFinish</strong> computer to exchange information.<br />
Such a link can be different in;<br />
A) Type of connection; - Serial connection (cable or wireless, RS232 or RS422)<br />
- Network connection (ethernet TCP-IP)<br />
- File transfer (<strong>USB</strong>-memory key, <strong>USB</strong>-harddisk,, network, .....)<br />
B) One or Two-directional - One directional; <strong>MacFinish</strong> results are send to MeetManager<br />
- Two directional; MM data is send to MF and later the MF results are send<br />
to MM.<br />
The top three menu selections of the “Document” menu are for the most<br />
interesting type; the two-directional data communication with a ‘real’<br />
MeetManager. The following two items (‘Send Results’ and ‘Export to File’) are<br />
used for the ‘simpler’ one-directional transmission of data to a ‘simpler’ database<br />
program.<br />
Note; The reason that such a MeetManager program should run on a separate<br />
computer is NOT due to computer limitations, but due to human limitations! It is<br />
not possible for the photo finish operator to do other jobs during his photo finish<br />
recording activities! If he also should take care of participant lists, printing jobs,<br />
sending data to scoreboards, television, etc, that would create a disaster! Let him<br />
concentrate on one of the most difficult jobs there are; perform a perfect timing,<br />
and remember; he only gets ONE chance, you can not re-run the race!<br />
Hoofdstuk 10.1 : One-directional data transfer<br />
to MeetManager<br />
There are NO limitations on the use of a one-directional link. In other words; you can use the following menucommands<br />
without any special registration key or license code;<br />
- “Send Results” to send the results out over a serial port (scoreboard port).<br />
- “Export Results to File” where the results are written in a .TXT file on your PC.<br />
Of course, you will need to make the correct setting of serial port, baud rate speed, etc before you can use the ‘Send<br />
Results’ feature.<br />
The feature ‘Export Results to File’ can be set to be manually activated or automatically when you close the <strong>MacFinish</strong><br />
photo file. See your ‘Preferences, explained in chapter 6.1.4.
Page 68<br />
<strong>MacFinish</strong> <strong>2D</strong>-<strong>USB</strong> and MF8.x software<br />
Hoofdstuk 10.2 : Two-directional data<br />
communication with MeetManager<br />
The use of a two-directional ‘link’ with a MeetManager requires that you have a valid key code (also called registration<br />
key) to perform such a data exchange. This is explained in the following chapter. The large advantage of such method is<br />
that the <strong>MacFinish</strong> can LIVE use the event list and participants data of the MeetManager database, and similar the<br />
MeetManager can LIVE receive and process the <strong>MacFinish</strong> race data.<br />
Hoofdstuk 10.2.1 : Installation of the MeetManager<br />
function<br />
The installation of the MM function with <strong>MacFinish</strong> takes the following two steps;<br />
A) Entering the valid registration key; see chapter 4.5<br />
B) Enabling the MM function and selecting an automatic or manual import of MM data; see chapter 6.5<br />
Hoofdstuk 10.2.2 : Import MeetManager data<br />
A) If you selected “Automatic” import of data;<br />
then you will get automatically when you started a “Read Image” command (by 'save' button = 'diskette' icon or by<br />
pressing the 'F11' key if function keys are enabled) the “MeetManager Link” window, where you see a list of races.<br />
Automatically the next race is selected, but you can always change the order, and select the corresponding race. Then<br />
press the ‘Select’ button.<br />
B) If you selected “Manual” import of data;<br />
You simply first read the Photo finish data, and later you can manually add competitor data from the MM by the<br />
‘Import’ menu selection.<br />
But even if you enabled the ‘automatic’ import, you can ‘re-import’ new MM-data by the ‘Import’ menu selection!
<strong>MacFinish</strong> <strong>2D</strong>-<strong>USB</strong> and MF8.x software Page 69<br />
If a communication error occurred, the following (alert and reconnection) windows can appear:<br />
Press the ‘Link’ button to try to (re-)establish a link with the MM-computer, and then select the race in question.<br />
Hoofdstuk 10.2.3 : Filling in Results when Linked to<br />
Meet Manager<br />
If you have recorded a photo with a link to a 'MeetManager', you can choose to display the competitor list in the ‘Result<br />
table’, and you can choose how to display it (width of column, ID or lane,..).<br />
For the identification of athletes (second column in the 'Result table'), you can now also use this competitor list. Simply<br />
Press the control key and click in the line of the competitor (click on the ID or the athlete name field) to automatically<br />
fill it into the 'Result table' (at cursor position).
Page 70<br />
<strong>MacFinish</strong> <strong>2D</strong>-<strong>USB</strong> and MF8.x software<br />
You can also pinpoint your cursor in your photo-finish photo, on the chest of the first athlete to identify his time, press<br />
the ‘Control’-key, click your mouse button and drag towards the correct ID-number of the athlete in question. Loosen<br />
your mouse button again:<br />
That way, both ID-numbers and times are filled in simultaneously in the<br />
'Result' table: Follow the same procedure for all other competitors.You can<br />
consult your competitor list to verify whether all competitors have<br />
received a result.<br />
If you have to wait (probably the case) for the finish line judges for the<br />
finish order of the athletes, you can already enter the times first and later<br />
add the identification by clicking in the 'competitor list' in the correct<br />
order.<br />
The (optional) Video-ID system of TimeTronics makes it of<br />
course much easier, and faster, to identify the participants<br />
(athletes in a long distance race or the participants in a BMX<br />
cycling race or...). See also chapter 8.3. You can “play” the finish<br />
video file in a separate window (see picture), or just point in the<br />
MF-photo-window to any participant, and see automatically that<br />
athlete finishing in the video window (video-ID system will<br />
search the corresponding point in the video file, select it, and<br />
show a static picture). In the example on the right you see that the<br />
next finishing athlete is ID=46. So to fill the identification<br />
column for place = 4 in of the 'result table' you simply press the<br />
control key on the keyboard and click on the number '46' in the<br />
ID column.<br />
Of course, the Video-identification system can also be used in<br />
combination with the the pop-up list (see top of this page).<br />
Hoofdstuk 10.2.4 :<br />
Export MeetManager data<br />
The “Rank and ID and Time and Wind and ...” results for the active <strong>MacFinish</strong> document are exported to the<br />
MeetManager PC through selection of ‘Export...” under the ‘Document’ menu.
<strong>MacFinish</strong> <strong>2D</strong>-<strong>USB</strong> and MF8.x software Page 71<br />
Hoofdstuk 11 : Overview of the MF Menus<br />
We would like to repeat that the <strong>MacFinish</strong> program is structured similarly to most programs on your PC, as it contains<br />
the usual ‘pull-down’ menus. Only those commands, which are shown in black, can be executed. Commands in grey<br />
cannot be executed at that particular moment. A command followed by three dots (for example "Print...") evokes a new<br />
selection window. Some commands can be called up by means of a shortcut (shortcut = control key + character, for<br />
example "control-C" for Copy).<br />
There are currently 5 different menus in the <strong>MacFinish</strong> program:<br />
Although most menu-selections already have been explained in the previous chapters, we would like to give here an<br />
overview of the different <strong>MacFinish</strong> menus.<br />
Hoofdstuk 11.1 : Help Menu<br />
The Help menu contains general information about the <strong>MacFinish</strong> program. Select ‘About <strong>MacFinish</strong>’ and a window<br />
similar to the one as portrayed below will appear rendering more information about your system:<br />
Hoofdstuk 11.2 : File Menu<br />
By selecting Open, a <strong>MacFinish</strong> file from disk (your hard-disk, or anywhere on the network)<br />
can be opened.<br />
These files can be closed using the close box (='X' in the upper right corner of the window) or<br />
the Close command. As soon as they are all closed, the close command turns grey and can no<br />
longer be selected.<br />
Save is used to write the image<br />
onto the disk under a given name.<br />
Save as is used to write an existing<br />
active image onto the disk under a<br />
new name. In this case, a dialogue<br />
box appears on the screen enabling<br />
you to give the image a new name.<br />
You can also select the disk and<br />
folder on which to save the image.
Page 72<br />
<strong>MacFinish</strong> <strong>2D</strong>-<strong>USB</strong> and MF8.x software<br />
For the 'Printing' menu items; see chapter 9; Printing the Photo or Race Results.<br />
The 'File' menu can contain a list (of up to ten) previously opened <strong>MacFinish</strong> documents. If you select any of them, that<br />
document will be opened on top.<br />
For the 'Preferences' menu item; see chapter 6; <strong>MacFinish</strong> Preferences.<br />
The Quit menu item will close all open documents, after asking the operator if he wants to save any unsaved documents,<br />
and will then end the <strong>MacFinish</strong> program.<br />
Hoofdstuk 11.3 : Document Menu<br />
Hoofdstuk 11.3.1 : Import, Export, Show Competitors<br />
The upper part of the Document menu covers the interaction with the MeetManager database.<br />
Obviously you should first connect to a MeetManager program in order to activate these menu selections.<br />
For more details regarding the use of a two-directional link with a 'MeetManager', see chapter 10.2<br />
Hoofdstuk 11.3.2 : Send Results, Export Results to<br />
File...<br />
By selecting ‘Send Result’, you can send the results from the result table to another computer, for example to show it on<br />
a stadium scoreboard. This is done via the same port as selected for the scoreboard and with a well-determined protocol,<br />
described in the appendix A of this manual.<br />
By selecting ‘Export Results to File...’, you can create a ".TXT' file on disk with the results from the result table. The<br />
format of this file is described in the “Appendix A” of this manual.<br />
For more details regarding the transmission of <strong>MacFinish</strong> results to a 'MeetManager', see chapter 10.1<br />
For more details regarding the “Import Competitors from File...”', see “Appendix G”
<strong>MacFinish</strong> <strong>2D</strong>-<strong>USB</strong> and MF8.x software Page 73<br />
Hoofdstuk 11.3.3 : Flip Image<br />
By selecting ‘Flip Image’, you can switch the direction in which the photo-finish image is displayed (to the left or to the<br />
right).<br />
Hoofdstuk 11.3.4 : Flip Lanes<br />
Determines the order of lanes (1 to 25 / 25 to 1) in the vertical direction. This menu selection is only enabled (shown in<br />
black) for images, which have already been saved on disk.<br />
Hoofdstuk 11.3.5 : Crop<br />
You can cut certain pieces of the <strong>MacFinish</strong> image through the 'Crop' function. Example:<br />
We have selected a part that we wish to cut (between the two vertical lines) by pointing with the mouse, press the mouse<br />
button, move the mouse and release the mouse button. Now we select ‘Crop’ under the ‘Document’ menu. It will remove<br />
the part that we wanted to cut out, but this will have no influence however on the time display for the participants.<br />
NEW FEATURE; If you have cropped a photo, and save the result, you can revert this back to the original (uncropped)<br />
photo, by pressing the “shift” button on the keyboard, while you are opening that file !<br />
Hoofdstuk 11.3.6 : Hide table and Show table<br />
When selecting ‘Table’ from the ‘Document’ menu, the table of results will disappear or appear. The picture on the left<br />
shows no ‘Table’, and the picture on the right includes a ‘Table’
Page 74<br />
<strong>MacFinish</strong> <strong>2D</strong>-<strong>USB</strong> and MF8.x software<br />
Hoofdstuk 11.3.7 : Hide Overview and Show Overview<br />
When selecting ‘Overview’ from the ‘Document’ menu, the ‘Overview’ window will disappear or appear.<br />
Hoofdstuk 11.3.8 : Time Lines<br />
By means of this menu selection, you can attach vertical time lines to the<br />
torsos on your photo-finish picture. In fact you are making an imprint of<br />
your cursor.<br />
Select ‘Screen’ and/or ‘Printer’ depending on the fact whether you want<br />
time lines only on your screen or printed on the photo as well. Now you<br />
can also select the color of the respective time lines:<br />
Following window appears in which you can randomly select the color:<br />
You will only see these vertical time lines on your photo-finish photo when you have read the times in the result table.
<strong>MacFinish</strong> <strong>2D</strong>-<strong>USB</strong> and MF8.x software Page 75<br />
Hoofdstuk 11.3.9 : Timecorrection...<br />
The ‘Timecorrection’ mode is a software feature to recalculate all participant times, after you typed the real time of the<br />
first competitor. If you did not register the real start of the race (for example if you were not present a the start of a<br />
cycling race), you can simply let the pc calculate all relative times.<br />
Hoofdstuk 11.3.10 : Presentation<br />
The presentation mode is a software feature to display a photo finish picture 'Full screen' on your PC, in other words,<br />
without any window header or the windows menus. The purpose is to have a nice looking photo for a live display on<br />
local or national television, without disturbing elements.<br />
It is possible to show or hide the 'Time Lines', even with a selectable line width, and it is further possible to display your<br />
own '.BMP. type' of images (made for example with 'Paint' software) on top of the photo finish picture.<br />
Note; To use this feature, you need a suitable 'registration key', see chapter 4.4, as the 'presentation' feature is optional.<br />
After the selection of the 'Presentation' menu item, you will see the following window;<br />
For the example above, we have created a folder named "Graphics" that SHOULD BE PLACED inside the <strong>MacFinish</strong><br />
folder where you have your <strong>MacFinish</strong> software !!! Inside this folder you should place the .BMP bitmap files of the
Page 76<br />
<strong>MacFinish</strong> <strong>2D</strong>-<strong>USB</strong> and MF8.x software<br />
images that you would like to display; see picture below. In the 'Presentation' window (see above) you can select which<br />
image you want to display (2 out of 4 in the example). When you select an image from the list, it will first be shown on<br />
the top-left corner of the photo. With the mouse you can then click and drag the image to any desired position inside the<br />
visible part of the <strong>MacFinish</strong> photo (bottom-left in the example).<br />
You can further select the 'Time Line Size' from a pull-down choice list, and when you click in the 'OK' button, your<br />
<strong>MacFinish</strong> photo will be 'Presented' in 'Full screen mode'. Just click with the mouse button to end the 'Presentation<br />
mode'.<br />
Note; Most of the time, a photo finish operator does not have enough time to wait until the Television crew had the<br />
chance to broadcast the race finish photo, but this should not be a problem, as most or probably all external professional<br />
video converters ( to convert your RGB computer video signal to NTSC or PAL television video format) have a 'freeze'<br />
function to memorize a screen. This means that the photo finish operator only has to use the 'Presentation mode' for a<br />
second, just enough time to press the 'freeze' button on the video converter, and he can continue his normal photo finish<br />
job.
<strong>MacFinish</strong> <strong>2D</strong>-<strong>USB</strong> and MF8.x software Page 77<br />
Hoofdstuk 11.4 : Camera Menu<br />
Hoofdstuk 11.4.1 : Connect Camera<br />
If the <strong>MacFinish</strong> <strong>2D</strong>-<strong>USB</strong> camera has not been connected or powered on at the start of the program, supply power to the<br />
interface-box, connect the camera and select ‘Connect Camera’ under the 'Camera' menu.<br />
Should the connection between the <strong>MacFinish</strong> camera and the PC fail during operation, for example due to a<br />
disconnection of the <strong>USB</strong>-cable, you can use ‘Connect camera’ to re-establish the link.<br />
Now the program will start looking for the camera. Subsequent window will appear. Select the camera number that you<br />
want to use, and click 'Connect.'<br />
Hoofdstuk 11.5 : Windows Menu<br />
For the use of the ‘Scrolling camera view’ window; see chapter 5.1.<br />
For the use of the ‘Parameters’ window; see chapter 7.1.<br />
Hoofdstuk 11.5.1 : Tools Window with color calibration<br />
When selecting ‘Tools’, the window as shown below appears:
Page 78<br />
<strong>MacFinish</strong> <strong>2D</strong>-<strong>USB</strong> and MF8.x software<br />
Image Intensity and Contrast<br />
With the top part of the 'Tools' window, you can adjust the intensity and the contrast of any photo window or the<br />
'Scrolling camera view' window.<br />
Note; Remember that any modification of the 'Tools' settings for a photo window is ONLY valid for that window, where<br />
a modification for the 'Scrolling camera view' window will be valid for the 'Scrolling camera view' window AND all<br />
following recorded photos.<br />
Just move the slider in the upper bar to the right or to the left and the image will become respectively lighter or darker.<br />
The image contrast is increased if the slider in the lower bar is moved to the right, and the contrast is reduced if the<br />
slider is moved to the left. Both actions will be applied to all the colors present in the picture.<br />
By clicking the small arrows on top of each bar (arrows facing down), it is also possible to return to the default (=<br />
original) settings.<br />
Here is an example of how you can manipulate a picture by means of the Tools window:<br />
In the above series, the left picture was set to its default color intensity and contrast setting.<br />
By sliding the lower bar to the right, we have increased the contrast of the picture in the middle.<br />
In the right photo we made the picture lighter, by sliding the upper bar (a little bit) to the right.<br />
Click the tiny arrows on top of each bar to return to default settings.<br />
Tip; We recommend to use the standard setting (both sliders as close as possible to the middle position) for the<br />
'Scrolling camera view' window, for the recording of new races!<br />
RGB Color Calibration<br />
The Red, Green and Blue on screen color calibration is a tool for color fine-tuning of the photo-finish picture.<br />
To select the RGB color calibration function, click the little arrow facing down in the tools window, and the extension in<br />
the tools window will appear (see right):<br />
As you have noticed, the RGB color calibration is divided in both 'Offset' and 'Gain %'.<br />
Offset can in fact be compared with the 'Intensity' function, be it that now you can adjust the intensity per separate color.<br />
You can enter a value between -31 and +31 (decreasing or increasing the color components).<br />
Gain (in %) adjusts the color contrast per color. It is an amplification or attenuation of each separate color. It is valid for<br />
the entire picture. The 100% gain is a default setting.<br />
Suppose we would get the following photo-finish picture on our screen after recording and for example, we amplify the<br />
red color contrast by 265%, the green color contrast by 150% and leave the blue untouched. Just fill in these values in<br />
the rectangles under Gain%:
<strong>MacFinish</strong> <strong>2D</strong>-<strong>USB</strong> and MF8.x software Page 79<br />
Not exactly a pretty sight, is it? But of course this example was only to demonstrate what the Gain function is all about.<br />
To return to the default ‘Offset’ and ‘Gain’ settings, click the button covering the two green arrows;<br />
Obviously the idea is to look for the ideal combination so as to become the perfect color proportions.<br />
The most important (and therefore first step) is to 'calibrate' the colors so that a white object becomes really white on<br />
your computer screen.<br />
We all know that for athletics T&F the finish line is (or should be) perfectly white, so that we should also become a<br />
more or less white background (being the finish line) in our picture. In the default picture of our previous example, this<br />
is not the case. The background shows a slightly yellow undertone, due to;<br />
- The uncalibrated RGB sensitivity of the CCD (camera sensor).<br />
- The use or absence of the IR-filter.<br />
- The illumination by non-white light (artificial light or even sunlight)<br />
To change this 'yellow' into a more or less white finish line, select a part of the photo-finish picture that represents that<br />
finish line. To do so, point, press the mouse button, move to another point, and release the mouse button. As you can<br />
see, that part of the picture is selected. Then click the white rectangle in your RGB color calibration window:<br />
The result of this is visible here below; you can see that the following RGB factors (100,109,167%) are much better than<br />
the standard numbers (100,100,100%), in case you recorded the photo with sun light and used the IR-filter in front of<br />
the lens.
Page 80<br />
<strong>MacFinish</strong> <strong>2D</strong>-<strong>USB</strong> and MF8.x software<br />
Now you can also calibrate the 'black offset'. Select a 'black' part on the photo and click the black rectangle on the<br />
bottom of the 'Tools' window. After you have done this, the new values under ‘Gain’ and ‘Offset’ will be automatically<br />
displayed.<br />
The RGB color calibration is also applicable to the Scrolling camera view window! We recommend you to use this<br />
feature because this color calibration will be valid for all the following recorded pictures !<br />
When saving this picture after you changed the color-calibration numbers, these new adjustments will be saved as well.<br />
The original data are always preserved meaning that you can always return to the original recording if desired.<br />
Hoofdstuk 11.5.2 : Camera Control Window<br />
The picture above-right shows the basic “Camera control window”, not yet further opened.<br />
It can be used to live control the camera sensitivity and the camera color calibration, but also to live control the<br />
(optional) motorized lens. Such a motorized lens has 3 motors for iris (light control), zoom, and focus (to record sharp<br />
pictures). You also choose to press the “auto-iris” button and/or the “auto-focus” button.<br />
Note; The “auto-iris” button will make the <strong>MacFinish</strong> camera permanently control the motorized iris of the lens to let<br />
the photo have an average intensity equal to the moment that you pressed the button. When you switch the “auto-iris”<br />
function ON, the manual iris control buttons are made invisible. Of course it is possible to switch this auto-iris function<br />
OFF again.
<strong>MacFinish</strong> <strong>2D</strong>-<strong>USB</strong> and MF8.x software Page 81<br />
If we press the “2-D” button, the camera control window opens up to the full control, with a 2-dimensioanl view of the<br />
finish line.<br />
Warning ; This is only possible if the 'Actions' window is stopped ! (see chapter 5).<br />
You can see that you can here control the ;<br />
1. Camera recording speed = amount of FRAMES recorded pro second.<br />
2. Height of frame = Vertical resolution of each recorded frame.<br />
3. Lines (8,16 or 24) = amount of vertical lines recorded for each frame.<br />
4. Vertical position of the recorded frame (if height is set to 1000pixels or less).<br />
5. Horizontal position of the recorded frame (use arrows to move the GREEN rectangle L and R).<br />
6. Horizontal position of the PHOTOFINISH position (use arrows to move the RED line L and R).<br />
7. Vertical position of the upper zoomed window (yellow) ; click in live window.<br />
The window on the top-right shows a live chart how good or how bad the actual focus control of the lens is.<br />
If you are doing the focus control manually (using manual lens or using a motorized lens controlled manually by<br />
pressing the buttons on the screen), find the MAXIMUM (highest) value in this chart curve.
Page 82<br />
<strong>MacFinish</strong> <strong>2D</strong>-<strong>USB</strong> and MF8.x software<br />
Hoofdstuk 11.6 : Shortcuts<br />
In the <strong>MacFinish</strong> software there are some menu commands which are used more frequently than others, such as Read<br />
Image, Save, etc. Every user who has mastered a program knows that it is faster to take a shortcut (= 'control' key +<br />
character), than to select a command in the menu bar by means of the mouse .<br />
The following table shows the most relevant shortcuts for <strong>MacFinish</strong>:<br />
Shortcut Command Standard Command in Windows<br />
Control + O Open Yes<br />
Control + S Save Yes<br />
Control + P Print Yes<br />
Control + Q Quit Yes<br />
Control + Z Undo Yes<br />
Control + X Cut Yes<br />
Control + C Copy Yes<br />
Control + V Paste Yes<br />
Control + W Close No<br />
Control + I Read Image Only <strong>MacFinish</strong><br />
Control + T Show / Hide Table Only <strong>MacFinish</strong><br />
Control + R Show competitors Only <strong>MacFinish</strong><br />
Alt + R Export image to .jpg Only <strong>MacFinish</strong><br />
Alt + Del Crop Only <strong>MacFinish</strong><br />
Alt + M Import from MM Only <strong>MacFinish</strong><br />
Alt + N Export to MM Only <strong>MacFinish</strong><br />
Alt + I Import competitors from file Only <strong>MacFinish</strong><br />
Alt + T Import Transponderdata from file Only <strong>MacFinish</strong><br />
Alt + E Export results to file Only <strong>MacFinish</strong><br />
Alt + S Send results (serial out) Only <strong>MacFinish</strong><br />
Alt + C Open timecorrection dialog Only <strong>MacFinish</strong><br />
Alt + P Presentation mode Only <strong>MacFinish</strong>
<strong>MacFinish</strong> <strong>2D</strong>-<strong>USB</strong> and MF8.x software Page 83<br />
Hoofdstuk 12 : Frequently Asked Questions<br />
Why are there no official times after a manual start (= not electronically detected)?<br />
Because the manual start does not exactly coincide with the starting shot or signal, these times may not be officially<br />
acknowledged. The times in the result table are showed with a ‘M’ prefix. The images however can be used at<br />
championships to determine the competitors’ places.<br />
How much light is required on the finish line to obtain a good image quality?<br />
You must obtain a clear image which can possibly be adjusted by the iris (on your lens).<br />
We advise you to have 300 lux on the finish line if you would like to record up to 1000 lines per second and if you have<br />
a lens of F 1.4.<br />
Other examples:<br />
2400 lux / 1000 lines per second / F 4<br />
600 lux / 500 lines per second / F 2.8<br />
1200 lux / 1000 lines per second / F 2.8<br />
REMEMBER: the more light you dispose of, the better image quality.<br />
Especially the depth of field is better when you have more light because you can further close the iris of your lens.<br />
Can I change the sensitivity of the start detector?<br />
This item is actually meant for operator using a starting pistol.<br />
From experience, the manufacturer knows how to perfectly balance and adjust the start detection device (with click<br />
system) for a common starting pistol. As such, it is delivered with a factory adjustment that we think is the best.<br />
TimeTronics can change the sensitivity, but the customer should not try to do this.<br />
Why is it important that the start detection is adjusted well?<br />
•If the start detection is too sensitive, the <strong>MacFinish</strong> box may register starts, which haven’t actually been given; fixing<br />
the pistol’s fuse pin causes a click on the pistol and may thus be interpreted by the start detection as being the starting<br />
signal.<br />
For this, starters should bear in mind to fix the fuse pin with great caution!<br />
•If the start detection is not sensitive enough, it may occur that the start detection does not “see“ or register certain starts,<br />
which have indeed been given.<br />
For example, a wet bullet may cause the start detection to “skip“ the start<br />
How many serial ports on your PC are needed?<br />
It is possible that you need one or more (RS232) serial ports on your (desktop or portable) PC, for example to drive the<br />
(timing) scoreboard, for a serial link with the MeetManager, for a connection with the WindSpeed (only for <strong>MacFinish</strong><br />
II or III ETHERNET).<br />
What to do if you do not have (enough) serial ports on your PC ?<br />
You can plug in extra PCI serial interface card(s) if you have a desktop PC, or you can connect an <strong>USB</strong> to serial<br />
converter (for desktop or portable PC’s). We advise the Keyspan 4-port adapter, to immediately have enough serial<br />
ports available.<br />
When do i need to have my <strong>MacFinish</strong> system recalibrated?<br />
We advise our customers to send their <strong>MacFinish</strong> system each 3 years to TimeTronics, for regular check-up, and timing<br />
verification and (re-)calibration procedure. This period is agreed with some national athletic federations, and has<br />
nothing to do with the stability of the timing reference of the <strong>MacFinish</strong> (which is much better), but is proposed by the<br />
federations to all photo finish manufacturers to avoid technical problems if photo finish systems would never be<br />
checked.
Page 84<br />
<strong>MacFinish</strong> <strong>2D</strong>-<strong>USB</strong> and MF8.x software<br />
Hoofdstuk 13 : Troubleshooting<br />
Note: Following actions are DANGEROUS and can harm your computer if you do not follow the right steps. We advise<br />
to contact a computer specialist if you need to follow these steps.<br />
If due to any wrong operation or computer crash, one of the <strong>MacFinish</strong> windows (e.g. actions, tools, parameters) is<br />
INVISIBLE or out of reach, for example: on a second or third unused computer screen, follow next steps.<br />
Solution:<br />
First of all, close the <strong>MacFinish</strong> software.<br />
Make sure that you have somewhere a copy of your registration ‘key’ because these steps will delete all the <strong>MacFinish</strong><br />
preferences and you will have to specify all settings in the preferences window again.<br />
Click then on the ‘Start’ button at the bottom of your computer screen in the left-hand corner and select ‘Run’.<br />
Type ‘regedit’ and click ‘OK’<br />
Click respectively on the ‘plus’ sign of ‘Current User’, ‘Software’ and ‘TimeTronics’.<br />
Click once on the folder <strong>MacFinish</strong> <strong>2D</strong> <strong>USB</strong> and delete it.<br />
Now you can again start up the <strong>MacFinish</strong> software. You need to specify all the preferences and keys again.
<strong>MacFinish</strong> <strong>2D</strong>-<strong>USB</strong> and MF8.x software Page 85<br />
APPENDIX A: “Send Results“ Format<br />
In the <strong>MacFinish</strong> program it is possible to send the result table via the same serial port which is used for<br />
the scoreboard. This means that during the race we CAN send the running time trough this serial port<br />
(depending on the scoreboard settings, see chapter 6.2) and after the race, when the result table contains<br />
the Place+ID+Time results, we can send these results over the same serial port. You just have to select<br />
“Send Result” from the document menu. Underneath the ‘Send Result’ protocol:<br />
Format<br />
Header+Data+Endofdata<br />
Header= [SOH] @ [STX]<br />
Data= [TAB] [CR]<br />
[TAB] [TAB] [CR]<br />
'n times for n participants’<br />
Endofdata= [ETX]<br />
Definitions: [SOH] = 01 Hex<br />
[STX] = 02 Hex<br />
[ETX] = 03 Hex<br />
[TAB] = 09 Hex<br />
[CR] = 13 Hex<br />
@ = 40 Hex<br />
= name of the document in ASCII<br />
10_:_ {-}x.x _ = space<br />
13_:_ {-}x.x<br />
{} = optional<br />
10*:_ {-}x.x<br />
Man:_ {-}x.x<br />
N/A N/A = not available<br />
= 1 up to 225<br />
= Lane number 1 up to 32<br />
OR<br />
= Athlete ID 1 up 99 999<br />
< Time> = {M}{HH:}{MM:}{S}S.T{H} M = Manual Start Time<br />
OR<br />
“DNF” -Did Not Finish-<br />
“DNS” -Did Not Start-<br />
“DIS” -Disqualified”<br />
“NR” -No Results-<br />
EXAMPLE: (Note: The characters between brackets are ‘not printable’ characters)<br />
100 m Boys Series 1[TAB]10 : -1.3[CR]<br />
1[TAB]3[TAB]11.21[CR]<br />
2[TAB]4[TAB]11.37[CR]<br />
3[TAB]6[TAB]12.36[CR]
Page 86<br />
<strong>MacFinish</strong> <strong>2D</strong>-<strong>USB</strong> and MF8.x software<br />
APPENDIX B: “IE 1.0.1.“ SB Protocol<br />
The serial string that is send to the SB (scoreboard) is 'ASCII' and the string length = 8 Chars<br />
Structure of the string: [D]MMSShh[CR]<br />
MM: minutes (with leading spaces)<br />
SS : seconds (with leading spaces)<br />
hh: hundredths of a second (with leading zero)<br />
[D] : ASCII “D”<br />
[ ] : space<br />
[CR] : carriage return (0D Hex)<br />
Update period = 0.1 or 1 second (see scoreboard preferences in the <strong>MacFinish</strong> program)<br />
Lap display time = 5 , 10, 15,... seconds<br />
<strong>MacFinish</strong> ready: The system will send : [D][ ][ ][ ]000[CR]<br />
Running time:<br />
Every ‘update period’ the system sends: [D]MMSS[ ][ ][CR]<br />
Split time :<br />
The system sends a split time record : [D]MMSShh[CR]<br />
The system will wait for ‘Lap display time’ seconds<br />
Arrival time :<br />
The system sends the arrival time record : [D]MMSShh[CR]<br />
Example , with standard update period of 1 second, and lap time period of 5 sec :<br />
D 000<br />
<strong>MacFinish</strong> ready<br />
D 1<br />
After 1 second<br />
D 2<br />
After 2 seconds<br />
.....<br />
D 9<br />
After 9 seconds<br />
D 997 Split time 9”97<br />
D 15<br />
After 15 seconds<br />
.....<br />
D 19<br />
After 19 seconds<br />
D 20<br />
After 20 seconds<br />
D 2082 Split time 20”82<br />
D 26<br />
After 26 seconds<br />
.....<br />
D 59<br />
After 59 seconds<br />
D 100<br />
After 1 minute<br />
D 101<br />
After 1 minute 1 second<br />
D 10107 Split time 1’01”07<br />
D 107<br />
After 1 minute 7 seconds<br />
.....<br />
D 139<br />
After 1 minute 39 seconds<br />
D 13975 Arrival time 1’39”75
<strong>MacFinish</strong> <strong>2D</strong>-<strong>USB</strong> and MF8.x software Page 87<br />
APPENDIX C: “IE Extended” SB Protocol<br />
The serial string that is send to the SB (scoreboard) is 'ASCII' and the string length = 11 Chars<br />
Structure of the string : [STX][Mode]HHMMSShh[CR]<br />
[STX] = 02 Hex = Start of text<br />
Mode= 05 Hex<br />
-> Clock has stopped<br />
Mode= 00 Hex<br />
-> Clock is running<br />
Mode= 04 Hex<br />
-> Split time<br />
[CR] = 0D Hex<br />
= carriage return<br />
HH : hours (with leading zeros)<br />
MM : minutes (with leading spaces)<br />
SS : seconds (with leading spaces)<br />
hh : hundredths of a second (with leading zero)<br />
[ ] : ASCII space character<br />
Update period = 0.1 or 1 second (see scoreboard preferences in the <strong>MacFinish</strong> program)<br />
Lap display time = 5, 10, 15,... seconds<br />
<strong>MacFinish</strong> ready :<br />
Running time:<br />
Split time:<br />
Arrival time:<br />
The system will send : [STX][05Hex]00000000[CR]<br />
Every ‘Update period’ seconds the system sends : [STX][ 00Hex]HHMMSShh[CR]<br />
The system sends a split time record : [STX][04Hex]HHMMSShh[CR]<br />
The system will wait for ‘Lap display time’ seconds.<br />
The system sends the arrival time record : [STX][05Hex]HHMMSShh[CR]<br />
Example :Update =0.1 sec and lap display = 5 sec, Start of text and Mode are not printable chars.<br />
00000000 <strong>MacFinish</strong> ready<br />
00000010 After 0.1 sec<br />
00000020 After 0.2 sec<br />
.....<br />
00000100 After 1 sec<br />
00000110 After 1.1 sec<br />
00000120 After 1.2 sec<br />
.....<br />
00000980 After 9.8 sec<br />
00000990 After 9.9 sec<br />
00000997 Split time 9”97<br />
00001500 After 15 seconds<br />
00001510 After 15.1 seconds<br />
.....<br />
00013960 After 1 min 39.6 seconds<br />
00013970 After 1 min 39.7 seconds<br />
00013975 Arrival time 1’39”75
Page 88<br />
<strong>MacFinish</strong> <strong>2D</strong>-<strong>USB</strong> and MF8.x software<br />
APPENDIX D: Explanation of Words<br />
• Baud<br />
◦ 1) The signalling rate of a line. It’s the switching speed, number of transitions that are made per second.<br />
Only at low speeds are bauds equal to bits per second; for example: 300 baud is equal to 300 bps.<br />
However, one baud can be made to represent more than one bit per second. For example, the V.22bis<br />
modem generates 1200 bps at 600 baud.<br />
◦ 2) Commonly (and erroneously) used to specify bits per second for modem speed. For example: 1200 baud<br />
means 1200 bps. See previous paragraph.<br />
• Baud Rate<br />
◦ A redundant reference to baud. Baud is a rate.<br />
• Parity bit<br />
◦ An extra bit attached to the byte, character or word used to detect errors in transmission.<br />
• Parity Checking<br />
◦ An error detection technique that tests the integrity of digital data within the computer system or over a<br />
network. Parity checking uses an extra ninth bit that holds a 0 or 1 depending on the data content of the<br />
byte. Each time a byte is transferred or transmitted, the parity bit is tested.<br />
◦ Even parity systems make the parity bit 1 when there is an even number of 1 bits in the byte. Odd parity<br />
systems make it 1 when there is an odd number of 1 bits.<br />
• Stop Bit<br />
◦ In asynchronous communications, a bit transmitted after each character.
<strong>MacFinish</strong> <strong>2D</strong>-<strong>USB</strong> and MF8.x software Page 89<br />
APPENDIX E: Pin Connections<br />
NC means “Not Connected”.<br />
Pin connections on front panel <strong>MacFinish</strong> interfacebox<br />
Start detection : 1 : +12VDC (not used) Same pin connection on cable reels<br />
2 : Ground<br />
3 : Ready led (connect to anode of led, connect cathode of Led to ground)<br />
4 : Start signal (not connected=+12V, start det. conn.=+6v, start=
Page 90<br />
<strong>MacFinish</strong> <strong>2D</strong>-<strong>USB</strong> and MF8.x software<br />
APPENDIX F: What is the correct time?<br />
The following is an extract from the IAAF rulebook (edition 2006-2007)<br />
The pictures below give you 3 examples how to read the athletes’ correct and official photofinish time.<br />
Correct reading for picture 1 = T1<br />
Correct reading for picture 2 = T3<br />
Correct reading for picture 3 = T6
<strong>MacFinish</strong> <strong>2D</strong>-<strong>USB</strong> and MF8.x software Page 91<br />
Appendix G; Working with “.PAR”<br />
(Participant) files<br />
This document describes a way to import competitor’s data into <strong>MacFinish</strong> files by using simple text files.<br />
As you may know, there are two methods of importing competitor’s data (name, team, id, lane, info, ...) into the<br />
<strong>MacFinish</strong> software. One method is by using a LIVE serial or ethernet BIDIRECTIONAL link to a MeetManager<br />
(especially usefull for athletics), the other method is by using “.par” text files. The syntax (format) of such .par files will<br />
be described later in this document.<br />
Link <strong>MacFinish</strong> files – text files<br />
There are two methods to import data from a text file into a <strong>MacFinish</strong> file : manual and automatic.<br />
Manual link with .par files<br />
Click in <strong>MacFinish</strong> on menu “Document -> Import Competitors from File”, or by shortcut key ALT+I and select the<br />
*.par file in the browser (notice the “All Files” selection).<br />
Picture 1<br />
Picture 2
Page 92<br />
<strong>MacFinish</strong> <strong>2D</strong>-<strong>USB</strong> and MF8.x software<br />
Automatic link with .par files<br />
Select in the preferences (menu “File -> Preferences...) the tab “Document”. There are two checkboxes, one for<br />
automatically importing competitor’s data (at each open and at each new file that is read from the camera) and one for<br />
automatically exporting result data to the resultfile.<br />
Under the checkboxes, there is a field that can contain a folder. The software will check for the file to load in this<br />
specific folder. If it is left empty, the software will check the same folder as the <strong>MacFinish</strong> file (*.mf3).<br />
A <strong>MacFinish</strong> file and a *.par file are linked by filename, this means that e.g 902261.par will hold the data for<br />
902261.mf3.<br />
Picture 3<br />
In the two pictures below, you can find two examples of settings, one for an empty folder (Picture 4) and one where the<br />
*.par files are in a separate folder (Picture 5).<br />
Picture 4: <strong>MacFinish</strong> file and *.par file in the same folder
<strong>MacFinish</strong> <strong>2D</strong>-<strong>USB</strong> and MF8.x software Page 93<br />
Picture 5: <strong>MacFinish</strong> files and *.par files in different folder<br />
Syntax (= format) of a *.par file<br />
It is important that the syntax of a *.par file is followed very punctually as described below, otherwise the software can<br />
give unexpected results.<br />
A *.par file can begin with lines of comment, starting with the # character (see example below, picture 6).<br />
After that, every line represents a competitor. You have the possibility to define 4 fields of data for each competitor. The<br />
fields are separated by a TAB character (hex 09).<br />
The first field is the ID, the second the lane, the third the name and the last extra info.<br />
Here is an example of a *.par file and how it looks in <strong>MacFinish</strong>.<br />
Picture 6<br />
You can use the 'name' and 'info' field theoretically for whatever purpose you want! Some customers put in the name<br />
field a name of a competitor, other use it for the name of a team, other put the 'athlete name + his/her teamname' in it.<br />
Also the info field is sometimes used for special purposes, like for example the category or the class of the competitors,<br />
the handicap of the horse or the owners name, the country name, ...etc.