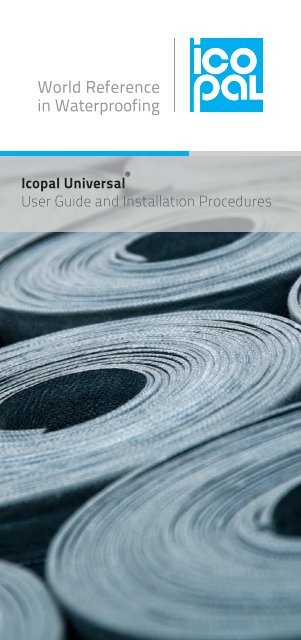
Icopal Universal User Guide and Installation Procedures
Icopal Universal User Guide and Installation Procedures
Icopal Universal User Guide and Installation Procedures
Create successful ePaper yourself
Turn your PDF publications into a flip-book with our unique Google optimized e-Paper software.
<strong>Icopal</strong> <strong>Universal</strong> ®<br />
<strong>User</strong> <strong>Guide</strong> <strong>and</strong> <strong>Installation</strong> <strong>Procedures</strong>
2<br />
Content<br />
<strong>Icopal</strong> <strong>Universal</strong> ® <strong>User</strong> <strong>Guide</strong>lines 01/2012.<br />
Copyright © <strong>Icopal</strong> UK. All rights reserved.No<br />
part of this publication may be published<br />
without prior permission from <strong>Icopal</strong> UK.<br />
Subject to changes of print <strong>and</strong> typographic<br />
errors <strong>and</strong> subject to price changes. No rights<br />
can be derived from the information given in<br />
this publication.
<strong>Icopal</strong> <strong>Universal</strong> ® <strong>User</strong> <strong>Guide</strong><br />
<strong>Icopal</strong> <strong>Universal</strong> ® 4<br />
All the benefits at a glance! 6<br />
Storage <strong>and</strong> equipment 8<br />
Product data 11<br />
Wind loading <strong>and</strong> mechanical fixings 18<br />
Washer & fastener combinations 21<br />
Xtra-Seal Membrane Spray Adhesive 25<br />
Membrane application 28<br />
Suitable Substrates 36<br />
Single layer mechnically fixed 38<br />
Single layer ballasted "inverted roof" 40<br />
Single layer spray bonded overlay to 42<br />
existing waterproofing<br />
Single layer overlay bonded to existing 44<br />
waterproofing<br />
Detailing 46<br />
St<strong>and</strong>ard CAD Details 56<br />
Accessories 64<br />
<strong>Icopal</strong> <strong>Universal</strong> ® – A perfect combination 67<br />
Notes 68<br />
3
4<br />
Flexible & light<br />
Reliable<br />
Safe to use<br />
Sustainable<br />
Wide applications<br />
<strong>Icopal</strong> <strong>Universal</strong> ®<br />
<strong>Icopal</strong> <strong>Universal</strong> ® consists of a POCB (polyolefine copolymerisate<br />
binder) reinforced with polyester <strong>and</strong> glass fibre. The result is a<br />
strong, flexible, <strong>and</strong> extremely stable single layer roof covering<br />
that is UV resistant <strong>and</strong> tough.<br />
<strong>Icopal</strong> <strong>Universal</strong> ® is 3.2mm thick, lightweight <strong>and</strong> ideal for detailed<br />
roofing features, whilst also requiring a minimum of raw materials<br />
in manufacture.<br />
<strong>Icopal</strong> <strong>Universal</strong> ® can be applied rapidly to insulation materials,<br />
timber, concrete or profiled metal roofs, or as an overlay to<br />
existing bituminous roofing systems.
<strong>Icopal</strong> <strong>Universal</strong> ® <strong>User</strong> <strong>Guide</strong><br />
The three variations of <strong>Icopal</strong> <strong>Universal</strong> ® meet a wide range of<br />
applications:<br />
• <strong>Icopal</strong> <strong>Universal</strong> ® - can be mechanically fixed, spray bonded,<br />
loose laid with ballast.<br />
• <strong>Icopal</strong> <strong>Universal</strong> ® SA - heat activated/self adhesive making<br />
detailing easy <strong>and</strong> safe.<br />
• <strong>Icopal</strong> <strong>Universal</strong> ® WS – resistant to root penetration making it<br />
ideal for green roof applications.<br />
Safe to apply<br />
As the application of <strong>Icopal</strong> <strong>Universal</strong> ® requires no open flame, it’s<br />
very safe to use, <strong>and</strong> on larger surfaces, overlaps can be permanently<br />
sealed using fully automatic, high speed welding equipment. <strong>Icopal</strong><br />
<strong>Universal</strong> ® SA is ideal for the flame-free sealing of details <strong>and</strong> can<br />
be attached to both <strong>Icopal</strong> <strong>Universal</strong> ® <strong>and</strong> other bituminous roof<br />
materials.<br />
<strong>Icopal</strong> <strong>Universal</strong> ® is fully recyclable <strong>and</strong> together with the product’s<br />
low mass, long life cycle, <strong>and</strong> manufacture from clean raw materials, it<br />
demonstrates a highly favourable Life Cycle Assessment, <strong>and</strong> meets<br />
the strictest st<strong>and</strong>ards for sustainable construction. Therefore, it<br />
can be used to reduce a building’s environmental impact, making a<br />
significant contribution to any sustainable procurement policy.<br />
In addition, <strong>Icopal</strong> <strong>Universal</strong> ® SA is the ideal foundation for ICOSUN ®<br />
<strong>Universal</strong> ® flexible solar cells.<br />
5
6<br />
All the benefits<br />
at a glance!<br />
£<br />
Reliable, waterproof roof covering<br />
• Dimensionally stable<br />
• Durable <strong>and</strong> strong<br />
• Weather <strong>and</strong> UV resistant<br />
• Homogeneous Overlaps<br />
Responsible roof covering<br />
• Can be applied without open flame<br />
• Resistant to wind-spread fire<br />
• Free of softening agents <strong>and</strong> chlorine<br />
• Resistant to chemical attack<br />
Cost-saving roof covering<br />
• Single layer system<br />
• Easy to fit<br />
• Speedy application<br />
• Low maintenance
<strong>Icopal</strong> <strong>Universal</strong> ® <strong>User</strong> <strong>Guide</strong><br />
Environmentally friendly roof covering<br />
• Efficient production process<br />
• Low-energy in use <strong>and</strong> application<br />
• Fully recyclable<br />
• Long life span<br />
<strong>Universal</strong>ly applicable roof covering<br />
• Several application methods<br />
• Suitable for flat <strong>and</strong> pitched roofs<br />
• <strong>Icopal</strong> <strong>Universal</strong> ® WS is suitable as a root-<br />
penetration resistant layer<br />
• Wide temperature application window<br />
Guaranteed roof covering<br />
• Option of fully-comprehensive<br />
project guarantee<br />
7
8<br />
Storage <strong>and</strong><br />
equipment<br />
Transport <strong>and</strong> Storage<br />
The products are delivered in roll form stood on end on pallets <strong>and</strong><br />
covered by a shrink wrap bag. Product must be transported <strong>and</strong><br />
stored on end. If rolls are removed from original pallet they must<br />
be stored on end, upright on a firm flat surface. Do not store with<br />
rolls laid flat. Keep dry <strong>and</strong> out of direct exposure to the elements<br />
at temperatures of
Equipment<br />
<strong>Icopal</strong> <strong>Universal</strong> ® <strong>User</strong> <strong>Guide</strong><br />
The following is intended as a basic guide to the required tools <strong>and</strong><br />
equipment along with their operation necessary to install <strong>Icopal</strong><br />
<strong>Universal</strong> ® . Depending on the project, other tools <strong>and</strong> equipment<br />
may be required. Additionally, these instructions are provided as<br />
recommended guidelines to ensure proper performance of the<br />
equipment <strong>and</strong> successful installation of the <strong>Icopal</strong> <strong>Universal</strong> ®<br />
membranes. <strong>Icopal</strong> does not endorse or recommend any particular<br />
br<strong>and</strong> of equipment.<br />
Tools for main roof area & Insulation Fixing<br />
1. Hot-air automatic welder<br />
2. Fastening drill<br />
3. Knife (hook & straight blades)<br />
4. Silicone roller 40mm<br />
5. Silicone Roller 80mm<br />
6. Heavy steel lap roller<br />
H<strong>and</strong> tools for detail work<br />
7. H<strong>and</strong> held hot air welder<br />
8. Silicone rubber roller 80mm<br />
9. Silicone rubber roller 40mm<br />
10. Brass “Penny” roller<br />
6<br />
4 5<br />
7<br />
9<br />
10<br />
3<br />
8<br />
1<br />
2<br />
9
10<br />
Welding Equipment<br />
There are several models available in both the h<strong>and</strong> held <strong>and</strong><br />
automatic versions, <strong>and</strong> proper operating instruction in the use<br />
of each model is the responsibility of the manufacturer/supplier<br />
of the equipment. Always read <strong>and</strong>/or ask the manufacturer/<br />
supplier of the equipment for the correct <strong>and</strong> safe operating<br />
procedure.<br />
Fastener Drills<br />
Again many models are available <strong>and</strong> the correct equipment<br />
should be chosen to suit the type of fixing. Consideration should<br />
be given to the use of specialist drills with torque settings which<br />
can be set to avoid over tightening fixings, damaging membranes<br />
<strong>and</strong>/or reducing the performance of fixings.<br />
H<strong>and</strong> Rollers<br />
80mm <strong>and</strong> 40mm silicone rubber rollers <strong>and</strong> brass penny rollers<br />
are used with h<strong>and</strong> held welders for secure overlap welding.<br />
Health & Safety<br />
All power supplies to electrical equipment should be as<br />
recommended by the manufacturer, with appropriate cabling,<br />
transformers <strong>and</strong> circuit breakers to protect operators <strong>and</strong><br />
equipment. Health <strong>and</strong> Safety advice should be sought from the<br />
local Health <strong>and</strong> Safety Executive to ensure compliance with local<br />
regulations.
Product data<br />
<strong>Icopal</strong> <strong>Universal</strong> ® Membranes<br />
Nominal Roll<br />
Length<br />
<strong>Icopal</strong><br />
<strong>Universal</strong> ®<br />
<strong>Icopal</strong><br />
<strong>Universal</strong> ® SA<br />
<strong>Icopal</strong> <strong>Universal</strong> ® <strong>User</strong> <strong>Guide</strong><br />
<strong>Icopal</strong><br />
<strong>Universal</strong> ®<br />
WS<br />
10m 10m 10m<br />
Nominal Roll Width 1m 1m 1m<br />
Nominal Roll<br />
Weight<br />
31.5kg 35kg 31.5kg<br />
Nominal Thickness 3.2mm 3.5mm 3.2mm<br />
Rolls per Pallet 18 15 18<br />
Tensile Strength<br />
(MD)<br />
Tensile Strength<br />
(TD)<br />
1185N/50mm 1185N/50mm 1185N/50mm<br />
1000N/50mm 1000N/50mm 1000N/50mm<br />
Elongation (MD) 30% 30% 30%<br />
Elongation (TD) 30% 30% 30%<br />
Cold Bond -20 o C -20 o C -20 o C<br />
11
12<br />
<strong>Universal</strong> KSK Primer<br />
Container Size 4.5kg<br />
Coverage 100-200g/m 2 depending on substrate absorbency<br />
Flashpoint Lower than 0 0 C<br />
Colour Brown - Dries Black<br />
Shelf Life 12months in original sealed container<br />
Surface Preparation<br />
Ensure the surface is structurally sound, free of surface latence,<br />
grease, oil <strong>and</strong> sharp projections.<br />
Application<br />
Apply by brush or roller ensuring the primer is well applied into<br />
the surface. Apply a thin coat <strong>and</strong> avoid pooling. Allow to dry<br />
thoroughly before over coating.<br />
Absorbing substrates (Bitumen, concrete, timber) allowed if:<br />
Substrate<br />
Application Temperature Dry Damp 1<br />
> 0 0 C Yes Yes<br />
> 0 0 C + frost warning Yes No<br />
> -10 0 C Yes No
<strong>Icopal</strong> <strong>Universal</strong> ® <strong>User</strong> <strong>Guide</strong><br />
Absorbing substrates (Bitumen, concrete, timber)allowed if:<br />
Substrate<br />
Application Temperature Dry Damp 1<br />
> 0 0 C Yes Yes<br />
> 0 0 C + frost warning Yes No<br />
> -10 0 C Yes No<br />
Cleaning<br />
Clean tools with ethyl-acetate or petrol.<br />
Insulation<br />
Thermazone insulation boards, manufactured from CFC/HCFC free<br />
Polyisocyanurate must be used below the <strong>Icopal</strong> <strong>Universal</strong> ® membrane<br />
<strong>and</strong> be laid over a suitable vapour control layer. Insulation thickness<br />
must be calculated to meet the latest insulation requirements as<br />
detailed in Building Regulation Approved Document L1 <strong>and</strong> L2.<br />
Contact <strong>Icopal</strong> Technical Services Department on 0161 865 4444 for<br />
details.<br />
Delivery <strong>and</strong> Storage<br />
<strong>Universal</strong> KSK Primer is delivered in sealed containers. Store in<br />
closed original containers in a fire proof environment <strong>and</strong> keep away<br />
from open flames <strong>and</strong> other sources of ignition. In closed original<br />
containers <strong>Icopal</strong> KSK Primer will remain in good condition for at least<br />
12 months.<br />
13
14<br />
Thermazone Roofboard<br />
Faced on both sides of the Polyicocyanurate foam with<br />
autohesively bonded mineral coated glass tissue is suitable for<br />
use with spray bonded waterproofing systems.<br />
Spray bonding to Thermazone Roofboard.<br />
Board Sizes<br />
Flat Board<br />
Board Size(mm) 2400 x 1200<br />
Board Size)mm) 1200 x 600<br />
Thickness (mm)<br />
Thickness (mm)<br />
25, 30, 40, 50, 60, 80, 90,<br />
100, 110, 120<br />
140 (60mm + 80mm)<br />
200 (100mm + 100mm)
Thermazone Foilboard<br />
<strong>Icopal</strong> <strong>Universal</strong> ® <strong>User</strong> <strong>Guide</strong><br />
Faced on both sides with autohesively bonded low emissivity<br />
composite foil. The foil facings are highly resistant to the<br />
transmission of water vapour.<br />
150mm overlap onto field areas.<br />
Board Sizes<br />
Flat Board<br />
Board Size (mm) 2400 x 1200<br />
Thickness (mm)<br />
30, 35, 40, 50, 60, 70, 80,<br />
90, 100, 110, 120<br />
15
16<br />
When using Thermazone insulation boards over metal decks<br />
attention must be paid to the requirement of the insulation board<br />
to comply with the minimum thicknesses shown in the table<br />
below.<br />
Trough Width (mm) Minimum Board<br />
< 75 25<br />
76-100 30<br />
101-125 35<br />
126-150 40<br />
151-175 45<br />
176-200 50<br />
Thermazone Insulation is also available for tapered roof schemes,<br />
please contact <strong>Icopal</strong> Technical Services Department on 0161 865<br />
4444 for details <strong>and</strong> design service.
Packaging & Storage<br />
<strong>Icopal</strong> <strong>Universal</strong> ® <strong>User</strong> <strong>Guide</strong><br />
The boards are supplied in labelled shrink wrapped packs. The<br />
polythene packaging of Thermazone Insulation products should<br />
not be considered adequate for long term outdoor protection.<br />
Ideally, boards should be stored inside a building. If, however,<br />
outside storage cannot be avoided, then the boards should be<br />
stacked clear of the ground <strong>and</strong> covered with a polythene sheet or<br />
weatherproof tarpaulin.<br />
Boards that have been allowed to get wet should not be used. For<br />
board quantities per pack see tables below.<br />
Flat Board<br />
Board Thickness Pack Size (No. Boards)<br />
(mm) 1200 x 600 2400 x 1200<br />
25 12 12<br />
30 10 10<br />
40 8 8<br />
50 6 6<br />
60 8 5<br />
80 6 4<br />
90 4 3<br />
100 5 3<br />
110 4 3<br />
120 4 2<br />
140 2x60 & 2x80 N/A<br />
200 4x100 N/A<br />
17
18<br />
Wind loading <strong>and</strong><br />
mechanical fixings<br />
Wind Loading<br />
The affect of wind upon a single layer roof covering should be<br />
determined at an early stage.<br />
Wind loads are determined by completion of a calculation as<br />
recommended in the current edition of BSEN 1991-1-4. The<br />
calculation will take the following factors into account:<br />
• Geographical Location (eg, coastal, urban, rural).<br />
• Site topography<br />
• Building height<br />
• Building design<br />
• Large openings<br />
• Method of attachment<br />
Completion of the membrane wind uplift calculation will confirm<br />
the fastener centres / spacings for the following roof zones:<br />
• Corners / Perimeter<br />
• Field Area or central zone<br />
• Width of the perimeter zone<br />
Mechanical Fastening<br />
Regardless of the type of membrane attachment, mechanical<br />
fasteners are always required at the roof’s perimeter, angle<br />
changes <strong>and</strong> any details. This ensures that any tensions generated<br />
in the field membrane are not transferred to other areas.<br />
In warm roofs, the insulation boards may also be mechanically<br />
attached. This should always be kept separate from the<br />
attachment of the waterproofing membrane.
<strong>Icopal</strong> <strong>Universal</strong> ® <strong>User</strong> <strong>Guide</strong><br />
<strong>Icopal</strong> recommends that Thermazone Insulation boards should<br />
be secured at a rate of 11 fasteners per 2400 x 1200mm<br />
(3.8 fixings/m²).<br />
11 No. per board (2.4 x 1.2 m board - 3.81 fixings / m 2 ).<br />
NB Mechanical fixings e.g. telescopic tube fasteners, must be<br />
arranged in an even pattern. Fasteners at board edges must be<br />
located > 50 mm <strong>and</strong> < 150 mm from edges <strong>and</strong> corners of the<br />
board <strong>and</strong> not overlap board joints.<br />
<strong>Icopal</strong> can provide the required calculations for mechanically<br />
fastened systems; please contact Technical Services Department<br />
on 0161 865 4444 for further information.<br />
19
20<br />
Description<br />
<strong>Icopal</strong> <strong>Universal</strong> ® membrane <strong>and</strong> Thermazone insulation should<br />
be attached using <strong>Icopal</strong> Thermally Broken Tubular Washers<br />
<strong>and</strong> Fasteners. The size of washer <strong>and</strong> fastener is primarily<br />
determined by the thickness of insulation <strong>and</strong> the deck type. For<br />
confirmation of the appropriate size of washers <strong>and</strong> fasteners to<br />
use, refer to the reference tables below.<br />
Performance <strong>and</strong> Properties<br />
<strong>Icopal</strong> Fastener Carbon Coated Steel<br />
Compostion Stainless Steel<br />
Mean Pull Out Value<br />
Minimum Penetration<br />
<strong>Icopal</strong> Tube Fasteners, Plates <strong>and</strong> Fasteners.<br />
Fastener Guarantees for Timber & Metal<br />
1.305kN (0.7mm metal)<br />
2.745kN (18mm ply)<br />
20mm (metal)<br />
15mm (ply)<br />
Carbon Coated Steel Up to 15 years<br />
Stainless Steel Up to 20 years<br />
Tubular Washer<br />
Tubular Washer Diameter 50mm<br />
Timber & Metal - Yellow<br />
Concrete – White
<strong>Icopal</strong> <strong>Universal</strong> ® <strong>User</strong> <strong>Guide</strong><br />
Washer & fastener<br />
combinations<br />
Metal Deck Application - Product Name:<br />
<strong>Icopal</strong> Carbon Steel Fastener<br />
<strong>Icopal</strong> Stainless Steel Fastener<br />
• Minimum deck penetration to be 20mm.<br />
• 4.8mm fastener diameter.<br />
<strong>Icopal</strong> Tubular Washers<br />
Insulation<br />
Thickness (mm)<br />
<strong>Icopal</strong> Fastener<br />
Length (mm)<br />
<strong>Icopal</strong> Tubular<br />
Washer Length<br />
(mm)<br />
60 50 35<br />
70 60 35<br />
80 50 55<br />
90 60 55<br />
100 70 55<br />
110 80 55<br />
120 50 95<br />
130 60 95<br />
140 70 95<br />
150 80 95<br />
160 90 95<br />
170 50 145<br />
180 60 145<br />
190 70 145<br />
200 80 145<br />
210 90 145<br />
220 100 145<br />
230 110 145<br />
240 120 145<br />
250 130 145<br />
260 140 145<br />
21
22<br />
Aerated Concrete Deck Application<br />
<strong>Icopal</strong> Carbon Steel Fastener (Aerated Concrete)<br />
• Minimum deck penetration to be 60mm<br />
• 8.0mm fastener diameter<br />
<strong>Icopal</strong> Tubular Washers (Concrete)<br />
Insulation Thickness<br />
(mm)<br />
<strong>Icopal</strong> Fastener (mm)<br />
Plywood Application<br />
<strong>Icopal</strong> Carbon Steel Fastener<br />
Insulation Thickness (mm)<br />
<strong>Icopal</strong> tubular Fixing (mm)<br />
<strong>Icopal</strong> Stainless Steel Fastener<br />
35 65 105 165 225<br />
100 60 90 130 190 250<br />
120 80 110 150 210 270<br />
160 120 150 190 250 310<br />
200 160 190 230 290 350<br />
240 200 230 270 330 390<br />
• Minimum deck penetration to be 15mm<br />
• 4.8mm fastener diameter
<strong>Icopal</strong> Tubular Washers<br />
Insulation<br />
Thickness (mm)<br />
<strong>Icopal</strong> Fastener<br />
Length (mm)<br />
<strong>Icopal</strong> <strong>Universal</strong> ® <strong>User</strong> <strong>Guide</strong><br />
<strong>Icopal</strong> Tubular<br />
Washer Length<br />
(mm)<br />
60 70 35<br />
70 80 35<br />
80 70 55<br />
90 80 55<br />
100 90 55<br />
110 100 55<br />
120 70 95<br />
130 80 95<br />
140 90 95<br />
150 100 95<br />
160 110 95<br />
170 70 145<br />
180 80 145<br />
190 90 145<br />
200 100 145<br />
210 110 145<br />
220 120 145<br />
230 130 145<br />
240 140 145<br />
250 150 145<br />
260 140 145<br />
23
24<br />
Dense Concrete Deck Applications<br />
<strong>Icopal</strong> Carbon Steel Fastener (Aerated Concrete).<br />
Tubular Washer Product Name:<br />
<strong>Icopal</strong> Tubular Washers (Concrete).<br />
• Minimum deck penetration to be 30mm.<br />
• Pilot hole diameter to be 5mm.<br />
• Drill depth to be 45mm.<br />
• 6.3mm fastener diameter.<br />
Insulation Thickness (mm)<br />
<strong>Icopal</strong> Fastener (mm)<br />
Insulation Thickness (mm)<br />
<strong>Icopal</strong> Tubular Washer (mm)<br />
50 90 150 210 225<br />
50 80 120 180 240 210<br />
60 90 130 190 250 240<br />
70 100 140 200 260 250<br />
90 120 160 220 280 260<br />
110 140 180 240 300 280<br />
130 160 200 260 320 300<br />
170 200 240 300 360 320<br />
210 240 280 340 400 360<br />
220 210 240 280 340 400
<strong>Icopal</strong> <strong>Universal</strong> ® <strong>User</strong> <strong>Guide</strong><br />
Xtra-Seal Membrane<br />
Spray Adhesive<br />
Adhesive<br />
Xtra-Seal Membrane Spray Adhesive is a versatile, high<br />
performance industrial contact adhesive designed for use with<br />
<strong>Icopal</strong> <strong>Universal</strong> ® membranes. The adhesive is water resistant <strong>and</strong><br />
offers instant adhesion between the membrane <strong>and</strong> substrate.<br />
2<br />
5<br />
Xtra-Seal membrane Spray Equipment.<br />
1. Xtra-Seal Membrane Spray Adhesive 13.5 kg Cannister.<br />
2. Spray Hoses.<br />
3. Cleaner Cannister.<br />
4. Cleaner Aerosol.<br />
5. Pressure Rollers.<br />
5<br />
6. Adjustable Spray Nozzle.<br />
7. Economy Spray Nozzle.<br />
8. Spray Nozzle & Extension.<br />
3<br />
8<br />
7<br />
1<br />
6<br />
4<br />
2<br />
25
26<br />
Colour Green<br />
% solids 28 – 33%<br />
Specific Gravity 0.68 to .72 gm/cc<br />
Solvent Type Hexane / Acetone<br />
Shelf Life 12 months<br />
Canister Size / Weight 13.6kg<br />
Coverage (subject to surface) 70 – 100m²<br />
Delivery <strong>and</strong> Storage<br />
The product will not be damaged by freezing, however it should be<br />
returned to room temperature prior to use. For canister products,<br />
keep cylinders off floor when the temperature is below 16 o C.<br />
Disposal<br />
• Invert canister.<br />
• Point nozzle away from operator <strong>and</strong> carefully open valve to<br />
evacuate the canister of any residual pressure.<br />
• Identify the puncture bung in the top of canister.<br />
• Pierce or remove the pressure relief bung using a brass<br />
punch.<br />
• Dispose in suitable waste unit.<br />
Cleaner<br />
Xtra-Seal B Safe Cleaner is an environmentally friendly,<br />
biodegradable cleaner, derived from soybean extract. 100% organic,<br />
the cleaner contains no water, terpenes or citrus oil. The cleaner<br />
is available in a 4kg canister for flushing equipment <strong>and</strong> hoses <strong>and</strong><br />
a 0.4kg aerosol for general cleaning <strong>and</strong> removing spillages.
Uses<br />
<strong>Icopal</strong> <strong>Universal</strong> ® <strong>User</strong> <strong>Guide</strong><br />
Used to clean existing spray equipment <strong>and</strong> to remove adhesive<br />
spillages from a variety of surfaces.<br />
% VOC 0%<br />
Specific Gravity 0.85 to .90 gm/cc<br />
Solvent Type d-limonene<br />
Shelf Life 12 months<br />
Aerosol Size 0.4kg<br />
Canister Size 4kg<br />
27
28<br />
Membrane<br />
application<br />
End/Head Laps<br />
All end/head laps must be overlapped a minimum of 130mm <strong>and</strong><br />
sealed using hot air welding equipment, ensuring a continuous<br />
5mm bead of bitumen extrudes from the lap joint as work proceeds.<br />
All lap joints must be checked for security as work proceeds.<br />
5mm continuous bead extruding from overlap.<br />
Side Laps<br />
All side laps must follow the printed selvedge line on the upper<br />
surface of the membrane <strong>and</strong> must be a minimum of 130mm <strong>and</strong><br />
sealed using hot air welding equipment, ensuring a continuous<br />
5mm bead of bitumen extrudes from the lap joint as work<br />
proceeds. All lap joints must be checked for security as work<br />
proceeds.<br />
130mm side overlap.<br />
Mechanical Fixing line.<br />
Overlap line.
Overlaps of details onto field areas<br />
<strong>Icopal</strong> <strong>Universal</strong> ® <strong>User</strong> <strong>Guide</strong><br />
All laps of detail sheets onto field area membrane must be a<br />
minimum of 150mm <strong>and</strong> sealed using hot air welding equipment,<br />
ensuring a continuous 5mm bead of bitumen extrudes from the<br />
lap joint as work proceeds. All lap joints must be checked for<br />
security as work proceeds.<br />
150mm overlap onto field area.<br />
150mm overlap onto field areas.<br />
Enveloping Insulation<br />
To ensure the insulation is completely enveloped the Vapour<br />
Control Layer (VCL) should be turned up all upst<strong>and</strong>s <strong>and</strong><br />
projections to terminate a minimum of 100mm above the finished<br />
level of the applied insulation.<br />
The field area <strong>Universal</strong> membrane is turned up 65mm <strong>and</strong> heat<br />
welded to the VCL; enveloping the insulation <strong>and</strong> creating a<br />
temporary overnight seal at perimeters etc.<br />
65 mm<br />
100 mm<br />
Enveloping Insulation with <strong>Universal</strong> & VCL.<br />
Enveloping Insulation with <strong>Universal</strong> & VCL.<br />
150 mm<br />
VCL<br />
<strong>Icopal</strong> <strong>Universal</strong> ®<br />
29
30<br />
Mechanical Fixing<br />
Mechanical fixed systems must be attached to through the<br />
insulation to the structural substrate using <strong>Icopal</strong> Tube fasteners<br />
<strong>and</strong> fixings. The fixing pattern must follow the recommended<br />
centres for both the field zone <strong>and</strong> perimeter/corner zones as<br />
detailed in the <strong>Icopal</strong> Fixing calculation plan.<br />
Mechanical fixings to field & perimeter zones.<br />
The overlap must be welded a minimum of 80mm beyond the<br />
extent of the fastener head.<br />
80 mm<br />
130 mm<br />
VCL<br />
<strong>Icopal</strong> <strong>Universal</strong> ®
Spray Bonding<br />
<strong>Icopal</strong> <strong>Universal</strong> ® <strong>User</strong> <strong>Guide</strong><br />
1. Prepare the surface to be bonded; ensuring both faces are<br />
clean, free of dust, dirt <strong>and</strong> grease.<br />
2. Hold spray gun at a constant distance of between 100-225mm<br />
from the surface, allowing the adhesive to cobweb across the<br />
surface with minimal overlap (note - correct coat weight must<br />
be achieved).<br />
Correct - Keep spray head 90 0 to surface.<br />
Wrong – Do not tilt Spray Head.<br />
3. Maintain a constant speed of application during spraying,<br />
applying a consistent <strong>and</strong> thorough coating without allowing<br />
the adhesive to puddle or heavily ‘wet’ the surface. Maximum<br />
bond strength is achieved with coverage of between 80-100%,<br />
<strong>and</strong> a recommended minimum coat weight of 20 dry grams per<br />
square metre.<br />
✓<br />
✘<br />
31
32<br />
<strong>Guide</strong> to spray coverage<br />
Coverage too Heavy.<br />
Coverage too Light.<br />
Correct Coverage.<br />
4. Maximum adhesion will be obtained by spraying mating faces<br />
at 90° to each other, i.e. one face vertically, the other face<br />
horizontally.<br />
Double coating perimeter of face <strong>and</strong> edges is recommended,<br />
including areas around subsequent cutting positions.<br />
Mating faces sprayed at 90 0 to each other.<br />
✘<br />
✘<br />
✓
<strong>Icopal</strong> <strong>Universal</strong> ® <strong>User</strong> <strong>Guide</strong><br />
5. Do not angle spray gun or move in an arc while spraying. Hold<br />
gun at 90° to surface while spraying. Release the trigger at<br />
the end of each pass to optimize coverage (see illustrations on<br />
previous page)<br />
6. Best results are obtained by multiple coats rather than one<br />
heavy coat which may result in heavy wetting of surface <strong>and</strong><br />
extended drying times. Always test before using in production.<br />
7. Allow adhesive to dry. Test for dryness using back of finger only.<br />
Surface should be tacky but adhesive should not transfer to<br />
skin. Position substrates correctly <strong>and</strong> press together working<br />
from the centre outwards. Apply adequate pressure using<br />
weighted rollers, in order to achieve at least 35 psi at glue line.<br />
Note that repositioning is not possible after contact has been<br />
made.<br />
Roll bonded areas with weighted roller.<br />
8. Immediate trimming is possible. Full strength is achieved after<br />
24-48 hours depending on temperature <strong>and</strong> humidity.<br />
33
34<br />
Special Precautions<br />
For best results store canister above 18°C during use. Allow<br />
substrates to acclimatize to ambient temperature (18°C) for 48<br />
hours before bonding.<br />
Do not exceed open time of adhesive.<br />
Keep canister off cold concrete floors during use.<br />
If adhesive is expelled wet or as a jet, canister is too cold — move<br />
to a warm environment <strong>and</strong> allow to thoroughly acclimatise<br />
before reusing.<br />
Caution<br />
• Do not thin or reactivate with solvents.<br />
• Do not puncture or incinerate canister.<br />
• Do not expose to extreme heat.<br />
• Keep away from sources of ignition.<br />
• Local exhaust ventilation may be required.<br />
• Release pressure before disconnecting hose.<br />
• Test for suitability before use.<br />
• MSDS <strong>and</strong> technical data sheets must be read <strong>and</strong> understood<br />
before use.<br />
Cleaning<br />
Xtra-Seal B Safe Cleaner<br />
Xtra-Seal B Safe Cleaner is an environmentally friendly,<br />
biodegradable cleaner, derived from soybean extract. 100% organic,<br />
the cleaner contains no water, terpenes or citrus oil. The cleaner is<br />
available in a 4kg canister for flushing equipment <strong>and</strong> hoses <strong>and</strong> a<br />
0.4kg aerosol for general cleaning <strong>and</strong> removing spillages.
Xtra-Seal B Safe Cleaner.<br />
Application - Aerosol<br />
Shake can well before using.<br />
<strong>Icopal</strong> <strong>Universal</strong> ® <strong>User</strong> <strong>Guide</strong><br />
Spray approximately 150-200mm from surface. Allow cleaner to<br />
remain on surface for a few seconds then using a clean cloth, wipe<br />
off adhesive.<br />
Wipe thoroughly to obtain a residue free clean surface. For<br />
very obstinate adhesive, allow cleaner to come in contact with<br />
adhesive for longer time before wiping, or successive applications<br />
may be required.<br />
Make sure that the surface is thoroughly dry before applying new<br />
adhesive.<br />
Application - Canister<br />
To clear <strong>and</strong> flush through pipes <strong>and</strong> spray nozzles, disconnect<br />
from spray canister <strong>and</strong> connect to the 4kg B Safe Cleaner<br />
canister <strong>and</strong> flush through until the exhaust spray runs clear.<br />
Turn off canister <strong>and</strong> disconnect.<br />
35
36<br />
Suitable Substrates<br />
Profiled Metal Decking<br />
A profile metal deck does not provide a continuous supporting<br />
upper surface for the direct application of the waterproofing<br />
system, therefore the crowns should comprise approximately 50%<br />
of the total area. Profiled metal decking should be manufactured<br />
either in galvanised steel to BS EN 10147:2000 or in aluminium to<br />
BS EN 485-2:1995. All profiled metal decking must be installed in<br />
accordance with the manufacturers instructions.<br />
Concrete<br />
Concrete decking can include both insitu <strong>and</strong> pre-cast concrete,<br />
<strong>and</strong> all flush finish cementitious screeds. Concrete decks should<br />
be finished with a wood float to provide a suitably smooth surface<br />
free from ridges <strong>and</strong> hollows. In order to ensure a good degree<br />
of bonding of the waterproofing new concrete or screeded decks<br />
must be given adequate time to dry out, prior to installing the<br />
waterproofing system.
Plywood/OSB 3<br />
<strong>Icopal</strong> <strong>Universal</strong> ® <strong>User</strong> <strong>Guide</strong><br />
Plywood should comply with BS EN 636:2003 clause 8 regarding<br />
exterior use. For roofs with joist spacings of up to 450mm a<br />
minimum thickness of 15mm may be used <strong>and</strong> for joist spacings<br />
of up to 600mm a minimum thickness of 18mm should be used.<br />
Any preservative treatments used on the plywood must be<br />
compatible with the waterproofing system.<br />
Oriented Str<strong>and</strong> Board (OSB) must be type OSB/3 or OSB/4<br />
conforming to BS EN 300:1997.<br />
Boards must be protected from rain/water <strong>and</strong> remain dry.<br />
For roofs with joist spacings of up to 450mm a minimum thickness<br />
of 15mm may be used <strong>and</strong> for joist spacings of up to 600mm a<br />
minimum thickness of 18mm should be used.<br />
37
38<br />
Single layer<br />
mechnically fixed<br />
Vapour Control Layer<br />
Roll Size: 1.08m x 50m<br />
Apply Micoral NB Heat Activated Self Adhesive VCL bonded to<br />
primed substrate with 75mm side laps <strong>and</strong> 100mm end laps<br />
sealed. The VCL must be dressed at all details to a minimum of<br />
100mm above finished insulation level to allow encapsulation of<br />
insulation.<br />
Insulation<br />
Board Size: 2400mm x 1200mm<br />
Apply Thermazone Foilboard to VCL in half board pattern,<br />
mechanically fixed.<br />
Insulation Boards Laid Half Board Pattern.<br />
<strong>Icopal</strong> <strong>Universal</strong> ®<br />
mechanically fixed<br />
Thermazone Foil<br />
board Insulation<br />
mechanically fixed<br />
Micoral NB Vapour<br />
Control Layer bonded<br />
to primed deck<br />
Metal deck primed<br />
with Xtra-Seal SF<br />
Bitumen Primer
Roof covering<br />
<strong>Icopal</strong> <strong>Universal</strong> ® <strong>User</strong> <strong>Guide</strong><br />
Install <strong>Icopal</strong> <strong>Universal</strong> ® mechanically fixed in the longitudinal<br />
overlap (width 130mm) with <strong>Icopal</strong> tube fasteners <strong>and</strong> fixings,<br />
frequency of fixings is determined by calculation in accordance<br />
with the current edition of BSEN 1991-1-4.<br />
1200 x 2400 board. Insulation 11 fixings per 1200mm x 2400mm board.<br />
<strong>Icopal</strong> <strong>Universal</strong> ® must be dressed to all upst<strong>and</strong>s a minimum<br />
of 65mm <strong>and</strong> bonded to the vapour control layer, enveloping<br />
the insulation <strong>and</strong> creating a temporary seal/night joint leaving<br />
approximately 35mm of the vapour control layer exposed for<br />
inspection until detailing can be completed.<br />
Weld all overlaps as work proceeds with an <strong>Icopal</strong>-approved hot<br />
air welder; sidelaps 130mm minimum <strong>and</strong> end/head laps 150mm<br />
minimum. overlap 150mm. Ensure a continuous bead of bitumen<br />
extrudes fro all laps as work proceeds. All laps must be checked<br />
for security as work proceeds.<br />
5mm Bitumen Bead.<br />
39
40<br />
Single layer<br />
ballasted “inverted<br />
roof”<br />
Paving or Washed<br />
River Gravel<br />
Monarperm 700<br />
Thermazone<br />
Hydroshield IVR<br />
Exp<strong>and</strong>ed Polystyrene<br />
(EPS) insulation<br />
loose laid<br />
Filter Layer<br />
<strong>Icopal</strong> <strong>Universal</strong> ®<br />
Bonded with Xtra-<br />
Seal Spray Membrane<br />
Adhesive<br />
Concrete Deck<br />
Primed with Xtra-<br />
Seal SF Bitumen<br />
Primer
Roof covering<br />
<strong>Icopal</strong> <strong>Universal</strong> ® <strong>User</strong> <strong>Guide</strong><br />
<strong>Icopal</strong> <strong>Universal</strong> ® with sidelap (width 130mm) bonded to substate<br />
with Xtra-Seal membrane Spray Adhesive. <strong>Icopal</strong> <strong>Universal</strong> ®<br />
must be dressed to all upst<strong>and</strong>s a minimum 65mm <strong>and</strong> bonded<br />
to create a temporary seal/night joint until detailing can be<br />
completed. Weld all overlaps as work proceeds with an <strong>Icopal</strong>-<br />
approved hot air welder; sidelaps minimum 130mm <strong>and</strong> end/<br />
head laps overlap 130mm minimum.<br />
Insulation<br />
Loose lay Thermazone Hydroshield IVR Exp<strong>and</strong>ed Polystyrene<br />
(EPS) insulation over <strong>Icopal</strong> <strong>Universal</strong> ® . A filter layer must be<br />
installed between the <strong>Icopal</strong> <strong>Universal</strong> ® <strong>and</strong> the insulation.<br />
Ballast layer<br />
Apply a layer of Monarperm 700 breather membrane loose<br />
laid over the insulation to act as a filter layer <strong>and</strong> increase the<br />
minimum lambda value of the insulation.<br />
Apply a minimum 50mm deep layer of washed river gravel or<br />
50mm thick concrete paving slabs.<br />
41
42<br />
Single layer spray<br />
bonded overlay to<br />
existing waterproofing<br />
<strong>Icopal</strong> <strong>Universal</strong> ®<br />
spray bonded<br />
Thermazone<br />
Roofboard bonded<br />
in Instastik<br />
Existing Waterproofing<br />
Existing insulation<br />
Existing vapour<br />
control layer<br />
Existing deck <strong>and</strong><br />
primer
Pre-treatment<br />
<strong>Icopal</strong> <strong>Universal</strong> ® <strong>User</strong> <strong>Guide</strong><br />
Ensure the existing waterproofing is well bonded to the roof substrate.<br />
Make necessary repairs to blisters <strong>and</strong> splits in existing system.<br />
Roof covering<br />
Clean <strong>and</strong> repair existing roof waterproofing as required ensuring<br />
all blisters <strong>and</strong> splits are cut <strong>and</strong> re-sealed. Prime existing<br />
waterproofing with Xtra-Seal QD Bitumen Primer in accordance<br />
with the application instructions on the container <strong>and</strong> allow to dry<br />
thoroughly.<br />
Install <strong>Icopal</strong> Thermazone Roofboard (25mm) bonded in<br />
Instastik Insulation Adhesive in accordance with manufacturers<br />
instructions. Install <strong>Icopal</strong> <strong>Universal</strong> ® spay bonded with Xtra-Seal<br />
Spray membrane adhesive with 130mm side <strong>and</strong> end/head laps<br />
sealed by heat welding.<br />
<strong>Icopal</strong> <strong>Universal</strong> ® must be dressed <strong>and</strong> bonded to all upst<strong>and</strong>s a<br />
minimum 65mm above finished height of insulation <strong>and</strong> bonded<br />
to create a temporary seal/night joint until detailing can be<br />
completed.<br />
Weld all overlaps as work proceeds with an <strong>Icopal</strong>-approved hot<br />
air welder; sidelaps 130mm <strong>and</strong> transverse overlap 150mm.<br />
43
44<br />
Single layer overlay<br />
bonded to existing<br />
waterproofing<br />
<strong>Icopal</strong> <strong>Universal</strong> ®<br />
bonded with PUR<br />
glue<br />
Existing Waterproofing<br />
Existing insulation<br />
Existing vapour<br />
control layer<br />
Existing deck <strong>and</strong><br />
primer
Pre-treatment<br />
<strong>Icopal</strong> <strong>Universal</strong> ® <strong>User</strong> <strong>Guide</strong><br />
Ensure the existing waterproofing is well bonded to the roof<br />
substrate. Make necessary repairs to blisters <strong>and</strong> splits in existing<br />
system.<br />
roof covering<br />
Install <strong>Icopal</strong> <strong>Universal</strong> ® bonded with <strong>Icopal</strong> PUR adhesive allowing<br />
a minimum of of 4 stripes of adhesive per 1m width of membrane<br />
<strong>and</strong> ensure the 130mm side <strong>and</strong> end/head laps to are remain open<br />
to be sealed by heat welding. <strong>Icopal</strong> <strong>Universal</strong> ® must be dressed <strong>and</strong><br />
bonded to all upst<strong>and</strong>s a minimum 65mm <strong>and</strong> bonded to create a<br />
temporary seal/night joint until detailing can be completed. Weld all<br />
overlaps as work proceeds with an <strong>Icopal</strong>-approved hot air welder;<br />
sidelaps 130mm <strong>and</strong> transverse overlap 150mm.<br />
45
46<br />
Detailing<br />
Upst<strong>and</strong> to Warm Roof<br />
All details must be terminated a minimum of 150mm above the<br />
finished roof level including any surface finishes.<br />
Upst<strong>and</strong> to Inverted/Green Roof<br />
For inverted <strong>and</strong> green roofs measure the height of the detail<br />
from the finished level of the added paving or ballast.<br />
Welted Drip Trim<br />
At the edges of added insulation a timber hard edge must<br />
be provided. The timber edge should be 150mm wide <strong>and</strong><br />
the thickness should be 10mm thinner than the thickness of<br />
the insulation to avoid a water check when membranes are<br />
overlapped.<br />
150mm upst<strong>and</strong> height<br />
warm roof.<br />
150mm upst<strong>and</strong> height<br />
inverted or green roof.<br />
Hard edge 10mm thinner<br />
than insulation.
Key<br />
VCL<br />
<strong>Icopal</strong> <strong>Universal</strong> ®<br />
<strong>Icopal</strong> <strong>Universal</strong> ® SA<br />
<strong>Icopal</strong> <strong>Universal</strong> ® <strong>User</strong> <strong>Guide</strong><br />
<strong>Universal</strong> ® SA heat activated detail membrane is used on all<br />
detail works <strong>and</strong> must be dressed onto the field area membrane<br />
a minimum of 150mm <strong>and</strong> heat welded to the field membrane<br />
using hot air equipment <strong>and</strong> ensuring a continuous 5mm bead of<br />
bitumen extrudes from all overlaps as work proceeds.<br />
For more comprehensive detail drawings see pages 55-62 or<br />
contact <strong>Icopal</strong> Technical Services on 0161 865 4444.<br />
47
48<br />
Corners<br />
All corners must be reinforced with <strong>Icopal</strong> <strong>Universal</strong> ® Internal/<br />
External reinforcing pieces<br />
<strong>Universal</strong> ® Internal Reinforcement.<br />
<strong>Universal</strong> ® Internal/External Reinforcement.
Application of lower internal corner reinforcement.<br />
<strong>Icopal</strong> <strong>Universal</strong> ® <strong>User</strong> <strong>Guide</strong><br />
Stage 1.<br />
Locate reinforcement centrally over<br />
corner.<br />
Stage 2.<br />
Warm <strong>and</strong> mould disc into corner.<br />
Stage 3.<br />
Weld base of disc to field membrane.<br />
Stage 4.<br />
Weld sides of disc into corner.<br />
Stage 5.<br />
completed corner reinforcement.<br />
49
50<br />
Application of <strong>Universal</strong> ® upper internal corner reinforcement<br />
Stage 1.<br />
Locate reinforcement centrally over<br />
corner.<br />
Stage 2.<br />
Weld upper portion into place.<br />
Stage 3.<br />
Secure with roller.<br />
Stage 4.<br />
Weld lower flanges.<br />
Stage 5.<br />
Completed corner reinforcement.
Membrane overlaps in box gutter.<br />
Membrane overlaps at welted drip.<br />
Roof Edge Drip Trim detail.<br />
Key<br />
Membrane overlaps at upst<strong>and</strong>.<br />
substrate<br />
substrate<br />
VCL<br />
10mm<br />
substrate<br />
200mm<br />
<strong>Icopal</strong> <strong>Universal</strong> ®<br />
<strong>Icopal</strong> <strong>Universal</strong> ® SA<br />
10mm<br />
10mm<br />
<strong>Icopal</strong> <strong>Universal</strong> ® <strong>User</strong> <strong>Guide</strong><br />
150mm<br />
51
52<br />
<strong>Installation</strong> of <strong>Universal</strong> ® POCB Parapet Outlet.<br />
Stage 1.<br />
Install field area <strong>and</strong> upst<strong>and</strong><br />
waterproofing as before <strong>and</strong> cut around<br />
opening for outlet ensure all edges are<br />
well sealed.<br />
Stage 2.<br />
Offer up pre-fabricated <strong>Universal</strong> ® POCB<br />
Parapet outlet ensuring bent flange sits<br />
securely into base of upst<strong>and</strong>.<br />
Stage 3.<br />
Weld Parapet outlet flange to main<br />
waterproofing membrane ensuring a<br />
5mm bead of bitumen extrudes around<br />
the complete flange edge.<br />
Stage 4.<br />
Weld base of flange to field area<br />
ensuring a secure bond across overlap of<br />
flashing to field area.<br />
Stage 5.<br />
Finished outlet. Ensure a parapet outlet<br />
leaf grate is properly secured.<br />
Outlet can be recessed into a sump if<br />
required
<strong>Installation</strong> of <strong>Universal</strong> ® POCB Roof Outlet<br />
<strong>Icopal</strong> <strong>Universal</strong> ® <strong>User</strong> <strong>Guide</strong><br />
Stage 1.<br />
Install field area waterproofing as before<br />
<strong>and</strong> cut around opening for outlet ensure<br />
all edges are well sealed.<br />
Stage 2.<br />
Offer up pre-fabricated <strong>Universal</strong> ® POCB<br />
Roof outlet ensuring flange sits securely<br />
onto field area membrane<br />
Stage 3.<br />
Weld flange over full area ensuring a full<br />
bond to field area membrane<br />
Stage 4.<br />
Finish welding around full perimeter of<br />
outlet flange ensuring a 5mm bead of<br />
bitumen around the flange edge.<br />
Stage 5.<br />
Finished outlet. Ensure a roof outlet leaf<br />
grate is properly secured.<br />
Outlet can be recessed into a sump if<br />
required.<br />
53
54<br />
<strong>Installation</strong> of <strong>Universal</strong> ® Telescopic Vent Pipe<br />
Stage 1.<br />
Install Field area membrane around pipe<br />
penetration.<br />
Stage 2.<br />
Offer up pre-fabricated <strong>Universal</strong> ® POCB<br />
upst<strong>and</strong> pipe <strong>and</strong> flange.<br />
Stage 3.<br />
Ensure flange sits tight to field area<br />
membrane.<br />
Stage 4.<br />
Fully bond flange to field area membrane<br />
ensuring a 5mm bead of bitumen<br />
extrudes from the flange edge.<br />
Stage 5.<br />
Finished Vent Pipe. Ensure all “O” rings<br />
are properly located <strong>and</strong> cowl is secured<br />
by self taping screws.
<strong>Installation</strong> of <strong>Universal</strong> ® Cable & Pipe Duct<br />
<strong>Icopal</strong> <strong>Universal</strong> ® <strong>User</strong> <strong>Guide</strong><br />
Stage 1.<br />
Install field area membrane around pipe<br />
penetration.<br />
Stage 2.<br />
Offer up prefabricated <strong>Universal</strong> ® POCB<br />
Cable <strong>and</strong> Pipe Duct.<br />
Stage 3.<br />
Ensure flange sits tight to field area <strong>and</strong><br />
bond POCB Flange to field area<br />
Stage 4.<br />
Fully bond flange to field area membrane<br />
ensuring a 5mm bead of bitumen<br />
extrudes from the flange edge<br />
Stage 5.<br />
Finished Cable <strong>and</strong> Pipe Duct. Ensure<br />
plastic elbows are secured to the metal<br />
upst<strong>and</strong> pipe <strong>and</strong> the red plastic bung is<br />
secured in the plastic elbow to prevent<br />
the ingress of insects etc.<br />
55
56<br />
St<strong>and</strong>ard CAD<br />
Details<br />
The following st<strong>and</strong>ard CAD details <strong>and</strong> others are available from<br />
<strong>Icopal</strong> Technical Services.<br />
<strong>Universal</strong> ® POCB Telescopic Vent<br />
1. <strong>Icopal</strong> <strong>Universal</strong> ® bitumen single layer membrane.<br />
2. Thermazone Roofboard insulation, mechanically<br />
fastened.<br />
3. Micoral NB Vapour Control Layer.<br />
4. Substrate, prepared in accordance with current instructions.<br />
5. Roofguard Telescopic Vent, with <strong>Icopal</strong> <strong>Universal</strong> ®<br />
POCB bitumen flange.<br />
6. Timber batten.<br />
7. Compressible rubber ‘O’ ring seal.<br />
8. Telescopic Double Pipe.<br />
9. Vented Cowl, secured with self-tapping screws.
Warm Roof with <strong>Universal</strong> POCB Outlet<br />
<strong>Icopal</strong> <strong>Universal</strong> ® <strong>User</strong> <strong>Guide</strong><br />
1. <strong>Icopal</strong> <strong>Universal</strong> ® bitumen single layer membrane.<br />
2. Thermazone Roofboard insulation, mechanically<br />
fastened.<br />
3. Micoral NB Vapour Control Layer.<br />
4. Substrate, prepared in accordance with current instructions.<br />
5. Timber hard edge.<br />
6. Roofgard Leaf Grate, secured with exp<strong>and</strong>ing ‘A’ clamp.<br />
7. Roofgard Outlet with <strong>Icopal</strong> <strong>Universal</strong> ® POCB bitumen<br />
flange, installed over main waterproofing.<br />
8. Compressible rubber ‘O’ rings to seal downpipe.<br />
57
58<br />
Warm Roof Change of Level<br />
1. <strong>Icopal</strong> <strong>Universal</strong> ® bitumen single layer membrane.<br />
2. Thermazone Roofboard insulation.<br />
3. Micoral NB Vapour Control Layer.<br />
4. Substrate, prepared in accordance with current instructions.<br />
5. <strong>Icopal</strong> Tubular Washer <strong>and</strong> mechanical fixings.<br />
6. Thermazone Roofboard insulation, to upst<strong>and</strong>.<br />
7. <strong>Icopal</strong> <strong>Universal</strong> ® SA, at details.<br />
8. Treated timber edge batten, securely fixed to<br />
substrate.
<strong>Icopal</strong> <strong>Universal</strong> ® <strong>User</strong> <strong>Guide</strong><br />
Warm Roof Expansion Joint with Pre-formed Metal capping<br />
1. <strong>Icopal</strong> <strong>Universal</strong> ® bitumen single layer membrane.<br />
2. Thermazone Roofboard insulation, mechanically<br />
fastened.<br />
3. Micoral NB Vapour Control Layer.<br />
4. Substrate, prepared in accordance with current instructions.<br />
5. <strong>Icopal</strong> <strong>Universal</strong> ® SA, at details.<br />
6. Thermazone Roofboard insulation, at details.<br />
7. Non-flammable compressible insulation.<br />
8. Preformed metal capping, by others. Consult relevant<br />
manufacturer for fixing instructions.<br />
9. Timber batten.<br />
10. <strong>Icopal</strong> Tubular Washer <strong>and</strong> mechanical fasteners.<br />
59
60<br />
Warm Roof Eaves Detail with Welted Drip<br />
1. <strong>Icopal</strong> <strong>Universal</strong> ® bitumen single layer membrane.<br />
2. Thermazone Roofboard insulation.<br />
3. Micoral NB Vapour Control Layer.<br />
4. Substrate, prepared in accordance with current instructions.<br />
5. Timber hard edge (10mm thinner than insulation<br />
thickness).<br />
6. Drip batten.<br />
7. <strong>Icopal</strong> <strong>Universal</strong> ® SA, as welted drip reinforced with<br />
hardboard former.<br />
8. External rainwater gutter.
Warm Roof Water Check with welted Drip<br />
<strong>Icopal</strong> <strong>Universal</strong> ® <strong>User</strong> <strong>Guide</strong><br />
1. <strong>Icopal</strong> <strong>Universal</strong> ® bitumen single layer membrane.<br />
2. Thermazone Roofboard insulation.<br />
3. Micoral NB Vapour Control Layer.<br />
4. Substrate, prepared in accordance with current instructions.<br />
5. <strong>Icopal</strong> Tubular Washer <strong>and</strong> mechanical fixings.<br />
6. Timber fillet.<br />
7. <strong>Icopal</strong> <strong>Universal</strong> ® SA, at detail.<br />
8. Timber hard edge.<br />
9. Drip batten.<br />
10. <strong>Icopal</strong> <strong>Universal</strong> ® SA, as welted drip reinforced with<br />
hardboard former.<br />
11. Angle fillet.<br />
61
62<br />
Warm Roof to Internal Box Gutter<br />
1. <strong>Icopal</strong> <strong>Universal</strong> ® bitumen single layer membrane.<br />
2. Thermazone Roofboard insulation mechanically<br />
fastened.<br />
3. Micoral NB Vapour Control Layer.<br />
4. Substrate, prepared in accordancce with current<br />
instructions.<br />
5. <strong>Icopal</strong> <strong>Universal</strong> ® SA, at details.<br />
6. Thermazone Roofboard insulation, at details.<br />
7. Non-flammable compressible insulation.<br />
8. <strong>Icopal</strong> <strong>Universal</strong> ® bitumen single layer membrane, to<br />
gutter sole.
Warm Roof Upst<strong>and</strong> to Parapet wall with Coping<br />
<strong>Icopal</strong> <strong>Universal</strong> ® <strong>User</strong> <strong>Guide</strong><br />
1. <strong>Icopal</strong> <strong>Universal</strong> ® bitumen single layer membrane.<br />
2. Thermazone Roofboard insulation.<br />
3. Micoral NB Vapour Control Layer.<br />
4. Substrate, prepared in accordance with current instructions.<br />
5. <strong>Icopal</strong> Tubular Washer <strong>and</strong> mechanical fixings.<br />
6. Cavity insulation, by others.<br />
7. Cavity tray by others. Ensure cavity tray cavity tray is<br />
postioned above cover flashing.<br />
8. Coping Stone.<br />
9. Damp Proof course.<br />
10. Non-flammable compressible insulation.<br />
11. Mechanical fixing with Terminaton Bar.<br />
12. FormFlash cover flashing securely wedged with<br />
FormFlash Clips 350mm centres <strong>and</strong> pointed with<br />
suitable sealant.<br />
13. <strong>Icopal</strong> <strong>Universal</strong> ® SA, at details.<br />
14. Angle fillet.<br />
15. Thermazone Roofboard insulation, at details.<br />
63
64<br />
Accessories<br />
<strong>Icopal</strong> <strong>Universal</strong> ® POCB Lightning Conductor Pads<br />
Product Code 3007327 Coated<br />
Product Code 3007328 Bare<br />
<strong>Icopal</strong> <strong>Universal</strong> ® POCB Cable & Pipe Duct<br />
Product Code 3007329<br />
Roofgard <strong>Icopal</strong> <strong>Universal</strong> ® POCB Parapet Outlet with Leaf Grate<br />
Product Code 3007330 100mm<br />
Outlet<br />
Product Code 3005279 Parapet<br />
Outlet Leaf Grate<br />
Product Code 3007359 Parapet<br />
Outlet with Leaf Grate
Roogard <strong>Icopal</strong> <strong>Universal</strong> ® POCB Outlet with<br />
Turbo Leaf Grate/<strong>Universal</strong> ® Leaf Grate<br />
<strong>Universal</strong> ® Leaf Grate<br />
<strong>Icopal</strong> <strong>Universal</strong> ® <strong>User</strong> <strong>Guide</strong><br />
Product Code 3007345 50mm<br />
Product Code 3007346 62mm<br />
Product Code 3007347 80mm<br />
Product Code 3007348 90mm<br />
Product Code 3007349 95mm<br />
Product Code 3007350 145mm<br />
<strong>Universal</strong> ® Turbo Leaf Grate<br />
<strong>Icopal</strong> <strong>Universal</strong> ® Cowled Telescopic Vent<br />
SafeSeal Drip Trim<br />
Product Code 3007351 50mm<br />
Product Code 3007352 62mm<br />
Product Code 3007353 80mm<br />
Product Code 3007354 90mm<br />
Product Code 3007355 95mm<br />
Product Code 3007356 145mm<br />
Product Code 3007331<br />
Product Code 3005227<br />
65
66<br />
FormFlash Lead Free Flashing<br />
FormFlash fixing Clips<br />
Product Code 2003728 120mm<br />
Product Code 2003730 150mm<br />
Product Code 2003731 200mm<br />
Product Code 2003732 250mm<br />
Product Code 2003733 300mm<br />
Product Code 2003734 450mm<br />
Product Code 2003735 650mm<br />
Product Code 3005926 950 mm<br />
Product Code 3006140 FormFlash<br />
Fixing Clip- pack<br />
25 clips<br />
<strong>Icopal</strong> <strong>Universal</strong> ® External Corner Reinforcement<br />
Product Code 3007339<br />
<strong>Icopal</strong> <strong>Universal</strong> ® Internal Corner Reinforcement<br />
Product Code 3007340
<strong>Icopal</strong> <strong>Universal</strong> ® <strong>User</strong> <strong>Guide</strong><br />
<strong>Icopal</strong> <strong>Universal</strong> ® –<br />
A perfect combination<br />
<strong>Icopal</strong> <strong>Universal</strong> ® can be applied as a substrate for the Eco-Activ ®<br />
system ICOSUN ® .<br />
Eco-Activ ®<br />
<strong>Icopal</strong> invests in many sustainable roof developments. The<br />
products that result from these investments are marketed<br />
under the name Eco-Activ ® . By applying the innovative Eco-<br />
Activ ® systems, each m² of roofing surface acquires an additional<br />
function, which ensures that roofs make a positive contribution to<br />
environmental <strong>and</strong> climate issues.<br />
ICOSUN ®<br />
By using flexible solar cells, sunlight is converted directly into<br />
electricity. This generated electric energy can be supplied to a<br />
battery or the grid. That is good for the environment <strong>and</strong> the roof<br />
returns the investment.<br />
ICOSUN ®<br />
67
68<br />
Notes
<strong>Icopal</strong> <strong>Universal</strong> ® <strong>User</strong> <strong>Guide</strong><br />
69
<strong>Icopal</strong> <strong>Universal</strong> ® <strong>User</strong> <strong>Guide</strong><br />
71
<strong>Icopal</strong> Ltd<br />
Barton Dock Road<br />
Stretford<br />
Manchester<br />
United Kingdom<br />
M32 0YL<br />
Tel: +44 (0) 161 865 4444<br />
Fax: +44 (0) 161 864 2616<br />
info.uk@icopal.com<br />
www.icopal.co.uk


