Raketenwurm 2b - Stratair Modelltechnnik GmbH
Raketenwurm 2b - Stratair Modelltechnnik GmbH
Raketenwurm 2b - Stratair Modelltechnnik GmbH

You also want an ePaper? Increase the reach of your titles
YUMPU automatically turns print PDFs into web optimized ePapers that Google loves.
STRATAIR - Modelltechnik <strong>GmbH</strong>, Stierberg 11, A-4153 Peilstein<br />
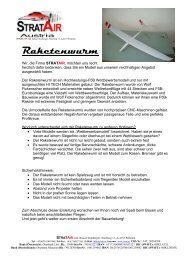
<strong>Raketenwurm</strong> <strong>2b</strong><br />
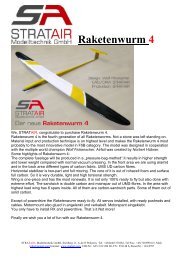
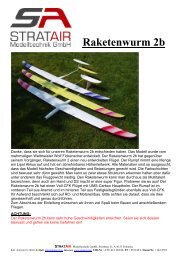
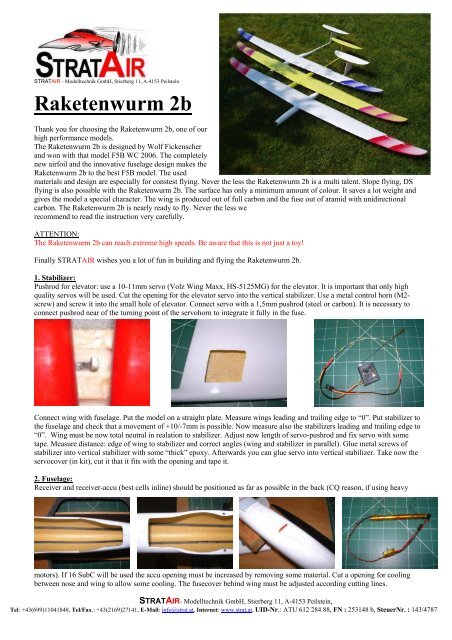
Thank you for choosing the <strong>Raketenwurm</strong> <strong>2b</strong>, one of our<br />
high performance models.<br />
The <strong>Raketenwurm</strong> <strong>2b</strong> is designed by Wolf Fickenscher<br />
and won with that model F5B WC 2006. The completely<br />
new airfoil and the innovative fuselage design makes the<br />
<strong>Raketenwurm</strong> <strong>2b</strong> to the best F5B model. The used<br />
materials and design are especially for constest flying. Never the less the <strong>Raketenwurm</strong> <strong>2b</strong> is a multi talent. Slope flying, DS<br />
flying is also possible with the <strong>Raketenwurm</strong> <strong>2b</strong>. The surface has only a minimum amount of colour. It saves a lot weight and<br />
gives the model a special character. The wing is produced out of full carbon and the fuse out of aramid with unidirectional<br />
carbon. The <strong>Raketenwurm</strong> <strong>2b</strong> is nearly ready to fly. Never the less we<br />
recommend to read the instruction very carefully.<br />
ATTENTION:<br />
The <strong>Raketenwurm</strong> <strong>2b</strong> can reach extreme high speeds. Be aware that this is not just a toy!<br />
Finally STRATAIR wishes you a lot of fun in building and flying the <strong>Raketenwurm</strong> <strong>2b</strong>.<br />
1. Stabilizer:<br />
Pushrod for elevator: use a 10-11mm servo (Volz Wing Maxx, HS-5125MG) for the elevator. It is important that only high<br />
quality servos will be used. Cut the opening for the elevator servo into the vertical stabilizer. Use a metal control horn (M2screw)<br />
and screw it into the small hole of elevator. Connect servo with a 1,5mm pushrod (steel or carbon). It is necessary to<br />
connect pushrod near of the turning point of the servohorn to integrate it fully in the fuse.<br />
Connect wing with fuselage. Put the model on a straight plate. Measure wings leading and trailing edge to “0”. Put stabilizer to<br />
the fuselage and check that a movement of +10/-7mm is possible. Now measure also the stabilizers leading and trailing edge to<br />
“0”. Wing must be now total neutral in realation to stabilizer. Adjust now length of servo-pushrod and fix servo with some<br />
tape. Measure distance: edge of wing to stabilizer and correct angles (wing and stabilizer in parallel). Glue metal screws of<br />
stabilizer into vertical stabilizer with some “thick” epoxy. Afterwards you can glue servo into vertical stabilizer. Take now the<br />
servocover (in kit), cut it that it fits with the opening and tape it.<br />
2. Fuselage:<br />
Receiver and receiver-accu (best cells inline) should be positioned as far as possible in the back (CQ reason, if using heavy<br />
motors). If 16 SubC will be used the accu opening must be increased by removing some material. Cut a opening for cooling<br />
between nose and wing to allow some cooling. The fusecover behind wing must be adjusted according cutting lines.<br />
STRATAIR- Modelltechnik <strong>GmbH</strong>, Stierberg 11, A-4153 Peilstein,<br />
Tel: +43(699)11041848, Tel/Fax.: +43(2169)27141, E-Mail: info@strat.at, Internet: www.strat.at, UID-Nr.: ATU 612 284 88, FN : 253148 b, SteuerNr. : 143/4787
3. Wing:<br />
Open the windows for the wing servos. Check that servos fit. To safe some weight profis remove parts of servos.<br />
Make wiring of the servocables and lead them to the back-middle of the wing.<br />
Cut down horns to make them fit. Sometimes it is necessary to make new holes in the horns.<br />
Bend a “z” at the end of the pushrod. Glue the servohorns into the aileron and flap. Be careful that the horns have absolute<br />
perfect contacted to the top and bottom side of<br />
the ail. and flap. Otherwise fluttering is<br />
possible. Now make a 10-15mm slot for the<br />
pushrod into the wingsurface in front of the<br />
wing.<br />
Put the servo incl. linkage in the wing and make a “L” bend at the right position that you can connect it with the horn of aileron<br />
or flap. For servopositioning use some tape. Final fixing of servos at the very end of building recommended.<br />
STRATAIR- Modelltechnik <strong>GmbH</strong>, Stierberg 11, A-4153 Peilstein,<br />
Tel: +43(699)11041848, Tel/Fax.: +43(2169)27141, E-Mail: info@strat.at, Internet: www.strat.at, UID-Nr.: ATU 612 284 88, FN : 253148 b, SteuerNr. : 143/4787
If slot is exactelly there is no need of a sucker. Continue with wing wiring. Use a 6-pin connector. Connect positive and<br />
negative together and solder them on 2 pins. The other 4 pins are for the signal of each servo. On the other side of the 6-pin<br />
conntector solder cables to the receiver.<br />
Finally glue servos with “thick” CA or silicon or epoxy into the wing. Check that servos have contact to main spar, up and<br />
bottom surface!!! If this is not so, the turning-force of servos can not be transfered to the moving surfaces. Finally close the<br />
servo windows with the covers (tape).<br />
4. Motor:<br />
Attach motor with motormount. For better<br />
glueing some slots can be cut into the<br />
sides. Run some epoxy or CA inside the<br />
lip (fuselage) and also some to<br />
motormount and move motor to the front<br />
into fuse. Let it harden.<br />
5. General:<br />
No mechanical tolerances are allowed in the pushrods. Wing should be taped with fuse at leading- and trailing edge for flight.<br />
6. Movements:<br />
Elevator: + 7/-6mm<br />
Aileron: +10/–5mm<br />
Snapflap (flap and aileron): -5mm<br />
CQ: 69mm behind leadingedge<br />
Recommended components:<br />
Motor: 200-320g brushless, MEGA AC 22/30/1+5:1, Plettenberg 220/37/A1 P4 7:1, Hacker<br />
B50 7M FAI,..<br />
Regler: Schulze future 18.149F, MGM TMM 22416-3 FAI, Castle Creation CC125<br />
Accu: 8-16 x GP3700 or other SubC cells<br />
Servos: Aileron: D60 DYMOND, Volz Wing Maxx, Hitec HS 5125MG<br />
Flap: Volz Wing Maxx, Hitec HS 5125MG<br />
Elevator: Volz Wing Maxx, Hitec HS 5125MG, Futaba 3150<br />
Receiver accu: 4x150-250mAh<br />
STRATAIR- Modelltechnik <strong>GmbH</strong>, Stierberg 11, A-4153 Peilstein,<br />
Tel: +43(699)11041848, Tel/Fax.: +43(2169)27141, E-Mail: info@strat.at, Internet: www.strat.at, UID-Nr.: ATU 612 284 88, FN : 253148 b, SteuerNr. : 143/4787
Technical informations:<br />
Wing span: 1900mm<br />
Length: 995mm<br />
Max FAI weight (75g/dm²): 2107g<br />
Empty weight: ca. 440g<br />
Total wing area: 28,09 dm²<br />
Spinner: 36mm<br />
Removable Tail:<br />
For some reasons a removable tail could be helpful. Here some solutions of pilots.<br />
Version1:<br />
Top side must be opened a little where turning screws are located. M3 screws must be removed and with 3mm driller increased.<br />
A metal part with radius for turning mechanism must be produced.<br />
Version2:<br />
Use some 5mm carbon rod and glue it between the two M3 screws. Take some carbon tub which fits over the 5mm carbon rod<br />
in the elevator, move them together. In the bigger tube mill some small openings for the M3 screws of the elevator that you can<br />
move these 2 carbon parts as far as possible together. Finally drill a 3mm hole through both tubes and fix them with a bolt.<br />
Secure bolt with some tape on both sides of vertical stabilizer.<br />
STRATAIR- Modelltechnik <strong>GmbH</strong>, Stierberg 11, A-4153 Peilstein,<br />
Tel: +43(699)11041848, Tel/Fax.: +43(2169)27141, E-Mail: info@strat.at, Internet: www.strat.at, UID-Nr.: ATU 612 284 88, FN : 253148 b, SteuerNr. : 143/4787