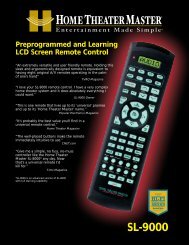
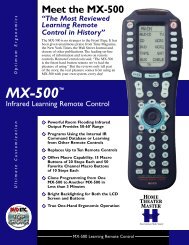
Home Theater Master® SL-9000 Manual - Universal Remote Control
Home Theater Master® SL-9000 Manual - Universal Remote Control
Home Theater Master® SL-9000 Manual - Universal Remote Control

Create successful ePaper yourself
Turn your PDF publications into a flip-book with our unique Google optimized e-Paper software.
<strong>Home</strong> <strong>Theater</strong> Master<br />
Prepr Preprogrammed<br />
ogrammed & Learning Learning<br />
<strong>Remote</strong> <strong>Control</strong> <strong>Control</strong><br />
<strong>SL</strong>-<strong>9000</strong><br />
Operating<br />
<strong>Manual</strong>
Table of Contents<br />
Page<br />
Introduction 2<br />
Battery Installation 3<br />
A. To Open and Close Battery Compartment Cover 3<br />
B. Low Battery Message 3<br />
Using Your <strong>Remote</strong> <strong>Control</strong> 4<br />
A. Function Table Reference 4<br />
Function Tables 5<br />
B. Preprogrammed Set Up 8<br />
Three Digit Code Method 8<br />
Recalling the Set Up Code Number 12<br />
C. Learning Set Up 13<br />
Learning New Functions on the Main Keypad 13<br />
Learning New Functions on Device Buttons 16<br />
Erasing Learned Functions 17<br />
Erasing Individual Buttons 17<br />
Erasing All Buttons in One Device Mode 18<br />
Erasing All Buttons in All Device Modes 18<br />
D. Operation 19<br />
Device Buttons 20<br />
Main Device Mode 21<br />
Automatic Audio Mode 21<br />
Backlighting 22<br />
Advanced Features 23<br />
A. Punch Through <strong>Control</strong>s 23<br />
Volume “Punch Through” 23<br />
Channel “Punch Through” 24<br />
Transport “Punch Through” 26<br />
B. Memory Buttons 28<br />
Programming Memory Buttons 30<br />
Erasing Memory Buttons 31<br />
C. Changing the LCD Display 32<br />
D. Programming a Second TV, VCR, etc. to other Device Buttons 33<br />
Warranty and Specifications 35<br />
Glossary 36<br />
Appendix 38<br />
Assignment of Audio/Video Equipment 38<br />
Set Up Code Tables 39<br />
Audio 39<br />
Satellite 42<br />
TV 44<br />
VCR 47<br />
Cable 50<br />
CD 52<br />
DVD 55<br />
AUX 56<br />
1
A: Function Table Reference<br />
AUD CD DVD AUX<br />
SAT<br />
POWER<br />
MUTE T/ V<br />
R<br />
E<br />
W<br />
PAUSE<br />
STOP<br />
VOL CH<br />
GUIDE MENU<br />
EXIT<br />
SEL F<br />
.<br />
PLAY F<br />
1 2 3<br />
4 5 6<br />
7 8 9<br />
+10<br />
PIP<br />
TV<br />
0<br />
Using Your <strong>Remote</strong><br />
ENTER<br />
SHIFT<br />
PRE.<br />
CH<br />
FAV<br />
<strong>SL</strong>EEP<br />
INFO<br />
PRO.L<br />
NEXT<br />
3.CH<br />
ALT<br />
TEST<br />
TUNER CD TAPE1 TAPE2 PHONO<br />
VCR1 VCR2/SAT LDP AUX<br />
M1 M2 M3 M4<br />
LIGHT<br />
VCR<br />
HOME THEATER MASTER<br />
LEARNING REMOTE CONTROL<br />
CBL<br />
TV<br />
4<br />
1<br />
10<br />
21<br />
23<br />
9<br />
11<br />
2 3 4<br />
5 6 7 8<br />
16<br />
19 20<br />
17<br />
12<br />
13<br />
18<br />
14<br />
15<br />
22<br />
24<br />
25 26 27 37<br />
28 29 30<br />
38<br />
31 32 33 39<br />
35<br />
34<br />
40<br />
41 42 43 44 45<br />
46 47 48 49 50<br />
51 52 53 54<br />
55<br />
36
Introduction<br />
The <strong>Home</strong> <strong>Theater</strong> Master <strong>SL</strong>-<strong>9000</strong> remote control is<br />
preprogrammed to operate over 1,000 Audio and Video<br />
components so that you can set it up by simply punching<br />
in a three digit code number that matches your equipment.<br />
The <strong>SL</strong>-<strong>9000</strong> also has the ability to learn new functions from<br />
your original remote controls, allowing you to customize<br />
the remote to your own needs and update it as you add<br />
new equipment. Please refer to page 8 - 18 for instructions<br />
on setting up the remote control.<br />
The <strong>Home</strong> <strong>Theater</strong> Master <strong>SL</strong>-<strong>9000</strong> remote control operates<br />
up to eight different audio and video devices in your home<br />
entertainment system. They are listed below:<br />
1 TVs, Monitors, Video/LCD Projectors<br />
2 VCRs, TV/VCR combination units<br />
3 Cable boxes, Internet set-tops<br />
4 Satellite receivers - DSS, Primestar, Dish, DBS,<br />
C-Band<br />
5 Audio receivers, Preamplifiers, Surround processors<br />
6 Compact disc players, Multi-Disc changers<br />
7 DVD, Laser disc players, Cassette decks<br />
8 Cassette Tape Players, DAT, MiniDisc, Switchers,<br />
Lighting, <strong>Home</strong> <strong>Control</strong> Devices, and Line Doublers<br />
Setting up the remote control to work with your equipment<br />
is simple. The remote control also has many advanced<br />
features that can add ease and enjoyment to the operation<br />
of your home entertainment system. Please follow the<br />
instructions in this manual, and retain the manual for future<br />
reference.<br />
For any questions or comments about this remote control,<br />
please contact <strong>Universal</strong> <strong>Remote</strong> <strong>Control</strong>, Inc., 271 North<br />
Avenue, New Rochelle, NY 10801, or call (914) 235-2610.<br />
Service hours are 9:00 AM to 6:00 PM EST, Monday- Friday.<br />
2
Battery Installation<br />
This remote control uses four AAA 1.5 V batteries. Please<br />
be sure to match the batteries with the (+) and (–) markings<br />
inside the battery compartment during installation.<br />
A: To Open and Close the Battery<br />
Compartment Cover<br />
1 To open the battery cover, push the latch forward toward<br />
the top of the remote control, and lift the latch up.<br />
2 To close the battery cover, slide the battery cover straight<br />
back in (toward the top of the remote) and push down<br />
until it “clicks” into place.<br />
B: Low Battery Message<br />
When the Liquid Crystal Display (LCD) flashes L__BAT,<br />
the batteries should be replaced.<br />
Note: Batteries should last about 6 months under normal conditions.<br />
The <strong>SL</strong>-<strong>9000</strong> remote control will retain its programmed<br />
memory for up to one year after the batteries are removed and up<br />
to ten years after the batteries go “dead”.<br />
3
Function Table<br />
No. Button Name<br />
1-8 Device Name<br />
9 Power<br />
10 Mute<br />
11 T/V Input<br />
12 VOL Up<br />
13 VOL Down<br />
14 CH Up<br />
15 CH Down<br />
16 Up/Pause<br />
17 Down/Stop<br />
18 Right/F.F.<br />
19 Left/Rew<br />
20 Sel/Play<br />
21 Guide/I>I<br />
23 Exit/Rec<br />
24 Pre. Ch./Eject<br />
25-34 1—0<br />
35 10+<br />
36 Enter/Shift<br />
37 Fav/Sleep<br />
38 Info/Pro. L.<br />
39 Next/3 Ch.<br />
40 Alt/Test<br />
41 Tuner<br />
42 CD<br />
43 Tape 1<br />
44 Tape 2<br />
45 Phono<br />
46 VCR1<br />
47 VCR2/SAT<br />
48 LD/DVD<br />
49 Aux<br />
50 TV<br />
51 M1<br />
52 M2<br />
53 M3<br />
54 M4<br />
55 Light<br />
Using Your <strong>Remote</strong><br />
Audio Functions<br />
AUDIO (ON)<br />
On/Off (OFF)<br />
Mute<br />
Band/FM<br />
Vol Up<br />
Vol Down<br />
Preset +<br />
Preset -<br />
Center +<br />
Center -<br />
Rear +<br />
Rear -<br />
Select/Sub.Bass<br />
Display<br />
Surround<br />
Delay -<br />
Delay+<br />
1—0<br />
Plus 10<br />
Shift<br />
Sleep<br />
Pro. Logic<br />
3 Ch.<br />
Test Tone<br />
Tuner/AM/FM<br />
CD<br />
Tape 1<br />
Tape 2<br />
Phono<br />
VCR1<br />
VCR2<br />
LD/DVD<br />
Aux<br />
TV<br />
5<br />
SAT Functions<br />
SAT (ON)<br />
On/Off (OFF)<br />
Mute<br />
TV/SAT<br />
Vol Up<br />
Vol Down<br />
Ch. Up<br />
Ch. Down<br />
Up<br />
Down<br />
Right<br />
Left<br />
Select<br />
Guide<br />
Menu<br />
Exit/Cancel<br />
Prev. Ch.<br />
1—0<br />
Enter<br />
Fav<br />
Info/Fetch<br />
Next Prog.<br />
Alt. Audio<br />
Rec.<br />
TV Functions<br />
TV (ON)<br />
On/Off (OFF)<br />
Mute<br />
TV/Video<br />
Vol Up<br />
Vol Down<br />
Ch. Up<br />
Ch. Down<br />
Up<br />
Down<br />
Right/Picture<br />
Left/Audio<br />
Select/Enter<br />
Display/Recall<br />
Menu<br />
Exit/Clear<br />
Q. View/Last Ch.<br />
1—0<br />
100/Ch. Scan<br />
Ch. Scan<br />
Sleep<br />
Caption<br />
Ant<br />
Reset<br />
PIP On/Auto Ch.<br />
PIP Swap, Add<br />
PIP Freeze/Delete<br />
PIP Off/Position<br />
TV/CATV<br />
Auto<br />
Add<br />
Delete
Function Table<br />
No. Button Name<br />
1-8 Device Name<br />
9 Power<br />
10 Mute<br />
11 T/V Input<br />
12 VOL Up<br />
13 VOL Down<br />
14 CH Up<br />
15 CH Down<br />
16 Up/Pause<br />
17 Down/Stop<br />
18 Right/F.F.<br />
19 Left/Rew<br />
20 Sel/Play<br />
21 Guide/I>I<br />
23 Exit/Rec<br />
24 Pre. Ch./Eject<br />
25-34 1—0<br />
35 10+<br />
36 Enter/Shift<br />
37 Fav/Sleep<br />
38 Info/Pro. L.<br />
39 Next/3 Ch.<br />
40 Alt/Test<br />
41 Tuner<br />
42 CD<br />
43 Tape 1<br />
44 Tape 2<br />
45 Phono<br />
46 VCR1<br />
47 VCR2/SAT<br />
48 LD/DVD<br />
49 Aux<br />
50 TV<br />
51 M1<br />
52 M2<br />
53 M3<br />
54 M4<br />
55 Light<br />
Using Your <strong>Remote</strong><br />
VCR Functions<br />
VCR (ON)<br />
On/Off (OFF)<br />
Mute<br />
VCR/TV<br />
Vol Up<br />
Vol Down<br />
Ch Up<br />
Ch Down<br />
Pause<br />
Stop<br />
Fast Forward<br />
Rewind<br />
Play<br />
F. Adv./Slow<<br />
X2/Intro/Slow><br />
Record<br />
Eject<br />
1—0<br />
1—100<br />
Enter<br />
Program<br />
Display<br />
C-Counter<br />
Reset<br />
Auto Ch<br />
Add +<br />
Delete -<br />
Tape Speed<br />
VCR Plus<br />
Tracking +<br />
Tracking -<br />
Auto Tracking<br />
Slow -<br />
Slow +<br />
Index<br />
QTR On<br />
QTR Off<br />
Edit<br />
6<br />
Cable Functions<br />
CABLE (ON)<br />
On/Off (OFF)<br />
Mute<br />
Switch/A/B<br />
Vol Up<br />
Vol Down<br />
Ch Up<br />
Ch Down<br />
Up/Fine +<br />
Down/Fine -<br />
Right/Fine R<br />
Left/Fine L<br />
Select<br />
Guide/Recall<br />
Menu<br />
Exit<br />
Prev. Ch<br />
1—0<br />
*/Help<br />
Enter/Memory<br />
Fav<br />
Info<br />
PPV/Buy<br />
P/Delete<br />
Page -<br />
Page +<br />
Day -.<br />
Day +<br />
Record
Function Table<br />
No. Button Name<br />
1-8 Device Name<br />
9 Power<br />
10 Mute<br />
11 T/V Input<br />
12 VOL Up<br />
13 VOL Down<br />
14 CH Up<br />
15 CH Down<br />
16 Up/Pause<br />
17 Down/Stop<br />
18 Right/F.F.<br />
19 Left/Rew<br />
20 Sel/Play<br />
21 Guide/I>I<br />
23 Exit/Rec<br />
24 Pre. Ch./Eject<br />
25-34 1—0<br />
35 10+<br />
36 Enter/Shift<br />
37 Fav/Sleep<br />
38 Info/Pro. L.<br />
39 Next/3 Ch.<br />
40 Alt/Test<br />
41 Tuner<br />
42 CD<br />
43 Tape 1<br />
44 Tape 2<br />
45 Phono<br />
46 VCR1<br />
47 VCR2/SAT<br />
48 LD/DVD<br />
49 Aux<br />
50 TV<br />
51 M1<br />
52 M2<br />
53 M3<br />
54 M4<br />
55 Light<br />
Using Your <strong>Remote</strong><br />
CD Functions<br />
CD (ON)<br />
On/Off (OFF)<br />
Mute/Fader<br />
Random<br />
Vol Up<br />
Vol Down<br />
Track +/Skip +<br />
Track-/Skip -<br />
Pause<br />
Stop<br />
FF/Search +<br />
REW/Search -<br />
Play<br />
Search -<br />
Search +<br />
Eject/Intro<br />
1—0<br />
Plus 10<br />
Disc<br />
Program<br />
Display<br />
Repeat<br />
Clear<br />
Disc 1<br />
Disc 2<br />
Disc 3<br />
Disc 4<br />
Disc 5<br />
A-B<br />
Time<br />
Intro<br />
Edit<br />
7<br />
DVD Functions<br />
DVD (ON)<br />
On/Off (OFF)<br />
Skip >>I<br />
Skip I
B: Preprogrammed Set Up<br />
The <strong>Home</strong> <strong>Theater</strong> Master universal remote control can<br />
operate up to eight separate audio and video devices<br />
(equipment). To program the remote control for your<br />
devices, please use the following steps:<br />
Three Digit Code Method<br />
1 Turn on the device you would like the remote control to<br />
operate, either manually or with your original remote<br />
control.<br />
2 Find the three digit Set-Up Code number for your<br />
device from the tables on pages (39 - 57).<br />
Example: To set up the remote to operate with a SONY<br />
TV, go to the TV Set-Up Code table found on pages (43 -<br />
45) and look for SONY under the Manufacturer/Brand<br />
column. You will find that the Set-Up Code numbers for<br />
SONY TVs are 070, 085, 139 and 147.<br />
3 Press the corresponding Device Button (TV, VCR, SAT,<br />
CBL, AUD, CD, DVD, or AUX) and the MUTE button<br />
on the remote control simultaneously. SET will appear<br />
in the LCD.<br />
Mute Button<br />
Using Your <strong>Remote</strong><br />
AUD AUD CD CD DVD DVD AUX<br />
AUX<br />
SAT<br />
SAT<br />
POWER<br />
POWER<br />
MUTE MUTE T/ T/ V<br />
V<br />
VOL VOL CH<br />
CH<br />
GUIDE GUIDE MENU<br />
MENU<br />
PAUSE<br />
PAUSE<br />
Example: To set-up the remote to operate a TV, press the<br />
EXIT<br />
EXIT<br />
R<br />
R<br />
E<br />
E<br />
W<br />
W<br />
SEL SEL F<br />
.<br />
F<br />
.<br />
F<br />
.<br />
PLAY<br />
PLAY F<br />
F<br />
8<br />
STOP<br />
STOP<br />
1 1 2 2 3<br />
3<br />
4 4 5 5 6<br />
6<br />
7 7 8 8 9<br />
9<br />
+10<br />
+10<br />
PIP<br />
PIP<br />
TV<br />
TV<br />
0<br />
0<br />
VCR<br />
VCR<br />
TV Device Button and the Mute button, simultaneously.<br />
ENTER<br />
ENTER<br />
SHIFT<br />
SHIFT<br />
CBL<br />
CBL<br />
PRE.<br />
PRE.<br />
CH<br />
CH<br />
FAV<br />
FAV<br />
<strong>SL</strong>EEP<br />
<strong>SL</strong>EEP<br />
INFO<br />
INFO<br />
PRO.L<br />
PRO.L<br />
NEXT<br />
NEXT<br />
3.CH<br />
3.CH<br />
ALT<br />
ALT<br />
TEST<br />
TEST<br />
TUNER TUNER CD CD TAPE1 TAPE1 TAPE2 TAPE2 PHONO<br />
PHONO<br />
Device Buttons
Using Your <strong>Remote</strong><br />
Note: SET appears in the LCD for 20 seconds to indicate that<br />
the remote control is ready to be programmed. The following<br />
steps must be entered while SET appears in the LCD.<br />
4 Point the remote control toward the device that was<br />
turned on in Step 1 and press in the first three-digit Set-<br />
Up Code number for that device using the number buttons<br />
(0-9) on the remote control. SET followed by the number<br />
will appear in the LCD.<br />
Your device will turn off when the correct Set-Up Code<br />
number has been selected. If the device does not turn<br />
off, press in the next Set-Up Code number from the listing.<br />
Continue to select Set-Up Code numbers until your<br />
device turns off, before you proceed to Step 5.<br />
Note: If you have tried all of the three digit Set-Up Code<br />
numbers listed for your device and it still did not turn off, please<br />
proceed to the Auto Search Method on page (10) to<br />
program your remote control.<br />
5 Once your device turns off, press the Device Button<br />
selected in Step 3 once again to store the Set-Up Code<br />
number. PASS will flash in the LCD.<br />
6 Test the remote control for your device. Try the POWER,<br />
CHANNEL UP AND DOWN, VOLUME UP AND DOWN<br />
buttons, etc. If any of the buttons do not perform as they<br />
should, please repeat the set-up from Step 1 using the<br />
next Set-Up Code number for your device.<br />
Note: Some audio/video devices have separate buttons for<br />
POWER ON and POWER OFF. To operate these devices on<br />
the remote, press the corresponding DEVICE Button to turn the<br />
equipment ON and press the POWER button to turn the<br />
equipment OFF.<br />
7 Please repeat the above steps to program the remote<br />
control for each of your other devices.<br />
9
Recalling the Set-Up Code Number<br />
To display the three digit Set-Up Code number that was<br />
stored for a device.<br />
1 Press the Device Button and the MUTE button, simultaneously.<br />
SET will appear in the LCD.<br />
2 Press the T/V button. The LCD will quickly flash the<br />
three digit Set-Up Code number that was stored for your<br />
device in that mode.<br />
3 Please write your Set-Up Code numbers in the chart<br />
below, for future reference.<br />
Set-Up Code Numbers:<br />
Audio<br />
SAT<br />
TV<br />
VCR<br />
Using Your <strong>Remote</strong><br />
12<br />
Cable<br />
CD<br />
DVD<br />
AUX
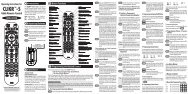
HOME THEATER MASTER<br />
LEARNING REMOTE CONTROL<br />
LIGHT<br />
VCR1 VCR2/SAT LDP AUX<br />
TV<br />
M1 M2 M3 M4<br />
TUNER CD TAPE1 TAPE2 PHONO<br />
PIP<br />
SHIFT<br />
TEST<br />
+10<br />
0<br />
ENTER<br />
ALT<br />
3.CH<br />
7 8 9<br />
NEXT<br />
PRO.L<br />
4 5 6<br />
INFO<br />
<strong>SL</strong>EEP<br />
1 2 3<br />
FAV<br />
Using Your <strong>Remote</strong><br />
C: Learning Set Up<br />
The <strong>Home</strong> <strong>Theater</strong> Master <strong>SL</strong>-<strong>9000</strong> has the ability to learn<br />
new functions from your original remote controls:<br />
• There are 8 “pages” of learning with each page corresponding<br />
to the 8 Device modes on the remote control: AUDIO, CD,<br />
DVD, AUX, SAT, TV, VCR, CBL.<br />
• All buttons in all Device modes can learn, except the LIGHT<br />
button.<br />
• Learned functions override any existing preprogrammed<br />
functions on the remote control.<br />
• Learned functions are automatically erased when a new<br />
function is learned on the same button.<br />
• Learned functions are retained even after a different three<br />
digit code number is programmed into the remote control.<br />
• To erase a learned function and return to an original<br />
preprogrammed function, please refer to the section<br />
Erasing Learned Functions (page 17).<br />
Learning New Functions on the Main Keypad<br />
1 Select the mode in which you wish to learn the new<br />
function by pressing the corresponding Device button.<br />
2 Place the <strong>SL</strong>-<strong>9000</strong> and the original remote control to be<br />
learned from, on a flat surface. Line up the remote<br />
controls head to head, about 2 to 3 inches apart.<br />
EXIT<br />
PRE.<br />
CH<br />
STOP<br />
R<br />
E<br />
W<br />
SEL F<br />
.<br />
PL PLAY AY F<br />
GUIDE MENU<br />
PAUSE<br />
MUTE T/ V<br />
VOL CH<br />
POWER<br />
AUD CD<br />
SAT TV<br />
VCR<br />
CBL<br />
CD DVD AUX<br />
2” to 3”<br />
13<br />
+<br />
VOL<br />
-<br />
<strong>SL</strong>-<strong>9000</strong> Original remote<br />
+<br />
CH<br />
-<br />
1 2 3<br />
4 5 6<br />
7 8 9
Using Your <strong>Remote</strong><br />
3 Press and hold both the Device button selected in Step 1<br />
and the SEL/PLAY button for about three seconds, until<br />
the LCD on the <strong>SL</strong>-<strong>9000</strong> shows LEARN. The <strong>SL</strong>-<strong>9000</strong> is<br />
now in the learning mode.<br />
AUD AUD CD CD DVD DVD AUX<br />
AUX<br />
SAT<br />
SAT<br />
POWER<br />
POWER<br />
MUTE MUTE T/ T/ V<br />
V<br />
R<br />
R<br />
E<br />
E<br />
W<br />
W<br />
PAUSE<br />
PAUSE<br />
STOP<br />
STOP<br />
VOL VOL CH<br />
CH<br />
GUIDE GUIDE MENU<br />
MENU<br />
EXIT<br />
EXIT<br />
TV<br />
TV<br />
SEL SEL F .<br />
F<br />
. .<br />
PL PLAY PL PLAY AY<br />
F<br />
F<br />
1 1 2 2 3<br />
3 FAV<br />
FAV<br />
Note: Each of the following steps must be completed within 20<br />
<strong>SL</strong>EEP<br />
<strong>SL</strong>EEP<br />
seconds. If the remote does 4 4 not 5 5 receive 6<br />
6 INFO<br />
INFO any new commands with-<br />
PRO.L<br />
PRO.L<br />
in the allotted time, it will return to its normal operating mode.<br />
7 7 8 8 9<br />
9 NEXT<br />
NEXT<br />
3.CH<br />
3.CH<br />
4 Press and release a button on the <strong>SL</strong>-<strong>9000</strong> you have<br />
+10<br />
+10 0<br />
0 ENTER<br />
ENTER ALT<br />
ALT<br />
selected to learn the new function. SHIFT TEST<br />
PIP<br />
SHIFT TEST The LCD will show<br />
PIP<br />
READY.<br />
5 Press and hold the button on the original remote control<br />
VCR1 VCR1 VCR2/SAT<br />
VCR2/SAT LDP LDP AUX<br />
AUX TV<br />
TV<br />
for about 3 seconds from which you are learning the new<br />
M1 M1 M2 M2 M3 M3 M4<br />
M4<br />
function. The LCD on the <strong>SL</strong>-<strong>9000</strong> will show – – – –<br />
LIGHT<br />
LIGHT<br />
indicating that it is receiving the information from the<br />
original remote control. HOME HOME THEATER THEATER MASTER<br />
MASTER<br />
LEARNING LEARNING REMOTE REMOTE CONTROL<br />
CONTROL<br />
6 Release the button on the original remote control. The<br />
LCD on the <strong>SL</strong>-<strong>9000</strong> will show RETRY.<br />
7 Press and hold the same button on the original remote<br />
once again, for about 3 seconds. The LCD on the <strong>SL</strong>-<strong>9000</strong><br />
will flash GOOD, the Device Mode and then return to<br />
LEARN, verifying that the new function has been<br />
learned.<br />
14<br />
VCR<br />
VCR<br />
CBL<br />
CBL<br />
PRE.<br />
PRE.<br />
CH<br />
CH<br />
TUNER TUNER CD CD TAPE1 TAPE1 TAPE2 TAPE2 PHONO<br />
PHONO<br />
Device Buttons<br />
SEL/PLAY Button
Using Your <strong>Remote</strong><br />
Repeat Steps 4 through 7 for any other buttons you wish to<br />
learn new functions.<br />
8 Once you have completed the learning for all the desired<br />
buttons in a Device mode, store the learned functions by<br />
pressing the Device and SEL/PLAY buttons simultaneously,<br />
once again. The LCD in the <strong>SL</strong>-<strong>9000</strong> will show<br />
SAVED and then return to the Device Mode. The<br />
remote has now returned to the original operating mode.<br />
Once you have stored the learned functions, test the buttons<br />
that have been taught. If any of the buttons do not<br />
operate as they should, please repeat from Step 1 for those<br />
buttons.<br />
Note: If the LCD shows FAIL at any time during the learning<br />
process, the <strong>SL</strong>-<strong>9000</strong> was unable to learn the new functions.<br />
Please repeat from Step 4. If the <strong>SL</strong>-<strong>9000</strong> continues to show<br />
FAIL during the learning process, please try the following<br />
suggestions:<br />
* Increase or decrease the head to head distance between the two<br />
remote controls, within a 1 to 5 inch range.<br />
* Increase or decrease the time you press and hold the button on<br />
the original remote control in step 5, for 1 to 2 seconds.<br />
* Avoid fluorescent lights or strong sunlight during the set up.<br />
These lighting conditions can cause interference with the learning<br />
process.<br />
* Verify that the original remote control contains fresh batteries.<br />
Some remote controls operate at non-standard IR, UHF or<br />
ultrasonic frequencies, and are unable to be learned. If you<br />
continue to experience difficulty during set up, please<br />
contact our customer service department for assistance.<br />
15
Using Your <strong>Remote</strong><br />
Learning New Functions on Device Buttons<br />
The eight Device buttons at the top of the remote control<br />
can also learn new functions. These buttons can only learn<br />
when the <strong>SL</strong>-<strong>9000</strong> remote is in the corresponding Device<br />
mode, e.g. AUDIO, VCR, TV etc.<br />
1 Place the <strong>SL</strong>-<strong>9000</strong>, and the original remote control to be<br />
learned from, on a flat surface. Line up the remote<br />
controls head-to-head about 2 to 3 inches apart.<br />
2 Press the corresponding Device button so the Device name<br />
appears in the LCD. E.g. AUDIO, VCR, TV etc.<br />
3 Press and hold the Device button and SEL/PLAY buttons<br />
simultaneously, until LEARN appears in the LCD.<br />
The <strong>SL</strong>-<strong>9000</strong> is now ready to learn.<br />
Note: Each of the following steps must be completed within<br />
20 seconds. If the remote does not receive any commands<br />
within this allotted time, it will return to its normal<br />
operating mode.<br />
4 Press the Device button selected in Step 2. once again.<br />
READY will appear in the LCD<br />
5 Press and hold the button on the original control you<br />
would like to teach into the <strong>SL</strong>-<strong>9000</strong> for about three<br />
seconds. (----) will appear in the LCD.<br />
6 Release the button on the original remote. RETRY will<br />
appear in the LCD.<br />
7 Press and hold the same button on the original remote,<br />
once again. The LCD on the <strong>SL</strong>-<strong>9000</strong> will flash GOOD,<br />
the DEVICE Mode and then return to LEARN, verifying<br />
that the new function has been learned.<br />
16
Using Your <strong>Remote</strong><br />
8 Press and hold the DEVICE button and the SEL/PLAY<br />
button simultaneously, once again. SAVED will flash<br />
three times in the LCD and return to the DEVICE mode,<br />
indicating that the programming has been stored.<br />
Erasing Learned Functions<br />
To erase learned functions, please refer to the following<br />
procedures:<br />
Erasing Individual Buttons:<br />
1 Press the Device button for the mode where the learned<br />
function has been stored.<br />
2 Press and hold the Device and the SEL/PLAY buttons<br />
simultaneously, for about 3 seconds, until the LCD<br />
shows LEARN.<br />
3 Press and release the button to be erased. The LCD will<br />
show READY.<br />
4 Press the LIGHT button. The LCD will flash ERASE,<br />
CLEAR, the Device Mode and then return to LEARN.<br />
Repeat Steps 3 and 4 for any other buttons to be erased.<br />
5 To return to the normal operating mode, press the<br />
Device and the SEL/PLAY buttons simultaneously.<br />
The learned functions on the selected buttons have now<br />
been erased. The preprogrammed functions for these<br />
buttons will now operate on the remote control.<br />
17
Using Your <strong>Remote</strong><br />
Erasing All Buttons in One Device Mode:<br />
1 Press the Device button for the mode to be erased.<br />
2 Press and hold the Device and SEL/PLAY buttons<br />
simultaneously, for about 3 seconds, until the LCD<br />
shows LEARN.<br />
3 Press and hold the Device and LIGHT buttons simultaneously<br />
for approximately five seconds and then release<br />
the buttons. The LCD will flash ERASE and then alternately<br />
CLEAR and the Device Mode.<br />
Note: When the LCD on the remote returns to the Device<br />
Mode, all the learned functions in the selected Device mode have<br />
been erased. All the buttons in that Device mode will now operate<br />
with the preprogrammed functions in that mode.<br />
Erasing All Buttons in All Device Modes<br />
1 Press and hold the TV Device Button and the LIGHT<br />
button simultaneously, for approximately ten seconds.<br />
The LCD will flash ERASE ten times, flash CLEAR<br />
and then return to the TV mode.<br />
When the LCD on the remote returns to TV, all the<br />
learned functions in all eight Device modes have been<br />
erased. All the buttons in all Device modes will now operate<br />
with the preprogrammed functions in their respective<br />
modes.<br />
18
D: Operation<br />
Using Your <strong>Remote</strong><br />
After you have programmed the remote control for your<br />
equipment, use the following procedures to operate your<br />
home entertainment system:<br />
1 Press the Device Button that you wish to operate: e.g. to<br />
operate a TV, press the TV Device Button; to operate a<br />
VCR, press the VCR Device Button, etc.<br />
2 Aim the remote control at the device and press the<br />
POWER button to turn on the device.<br />
3 Press the buttons that send out the commands you<br />
desire.<br />
Note: Some audio/video devices have separate buttons for<br />
POWER ON and POWER OFF. To operate these devices on<br />
the remote, press the corresponding DEVICE Button to turn the<br />
equipment ON and press the POWER button to turn the<br />
equipment OFF.<br />
Please try all the functions of this remote control with your<br />
equipment. The most common functions are labeled on the<br />
remote. However, some of the secondary functions might<br />
be stored under a button that has a different name from the<br />
one on your original remote control. Please refer to the<br />
Function Tables on pages (5 - 7) for details.<br />
19
Using Your <strong>Remote</strong><br />
Device Buttons<br />
Any press of a Device button at the top of the remote control<br />
can perform the following functions:<br />
1 Changes the Device AUD mode CD on DVD the AUX <strong>SL</strong>-<strong>9000</strong> remote control.<br />
2 Sends out a preprogrammed SAT TV VCR POWER CBL ON command for a<br />
Device, if applicable.<br />
POWER<br />
3 Sends out a learned and/or joined VOL selection.<br />
CH<br />
MUTE T/ VV<br />
4 Toggles between the Main Device mode and the Automatic<br />
GUIDE MENU<br />
Audio mode if the Automatic Audio Mode is active.<br />
Joining to Device Buttons<br />
RR<br />
SEL F F<br />
EE<br />
. .<br />
W PLAY FF<br />
The 10 preprogrammed Audio input selects and the key-<br />
STOP<br />
pad buttons 0-9 found on the <strong>SL</strong>-<strong>9000</strong> PRE. in the AUDIO Device<br />
EXIT<br />
CH<br />
mode can be joined to individual Device buttons. Once<br />
joined, any press of the Device button will also emit the<br />
11 22 33<br />
FAV<br />
<strong>SL</strong>EEP<br />
joined command.<br />
AUD CD DVD DVD<br />
PRO.L<br />
AUX<br />
77 88 99<br />
NEXT<br />
SAT<br />
+10<br />
PIP<br />
POWER<br />
TV<br />
00<br />
PAUSE<br />
44 55 66<br />
TUNER CD<br />
VOL CH<br />
TAPE1 TAPE2 PHONO<br />
MUTE T/ V<br />
VCR1 VCR2/SAT LDP AUX TV<br />
GUIDE M1 M2 M3<br />
MENU<br />
M4<br />
PAUSE<br />
Setting Up:<br />
LIGHT<br />
R<br />
SEL F E<br />
.<br />
W<br />
PLAY<br />
F<br />
1 Press the AUDIO and ENTER buttons simultaneously on<br />
HOME THEATER MASTER<br />
LEARNING REMOTE CONTROL<br />
the remote control. JOIN will appear in the LCD.<br />
STOP<br />
PRE.<br />
EXIT<br />
CH<br />
2 Press the Device button that you would like to assign a<br />
joined function. CLEAR will flash and INPUT will then<br />
1 2 3<br />
FAV<br />
appear in the LCD.<br />
<strong>SL</strong>EEP<br />
4 5 6<br />
INFO<br />
3 Select a button to be joined from PRO.L<br />
the remote control, e.g. ,<br />
VCR1, VCR2, CD, etc. 7 or 8 1, 1, 9<br />
NEXT<br />
2 etc.). The LCD will display<br />
3.CH<br />
IN_XX indicating +10 +10 the 0<br />
Audio input ALT selected (IN_V1,<br />
ENTER<br />
ALT<br />
SHIFT<br />
TEST<br />
IN_V2, IN_CD, etc. or PIP<br />
IN_0, IN_1, IN_2 etc.) and then JOIN.<br />
20<br />
TUNER CD TAPE1 TAPE2 PHONO<br />
VCR1 VCR2/SAT<br />
LDP AUX<br />
TV<br />
M1 M2 M3 M4<br />
LIGHT<br />
VCR<br />
ENTER<br />
SHIFT<br />
HOME THEATER MASTER<br />
LEARNING REMOTE CONTROL<br />
INFO<br />
3.CH<br />
CBL<br />
ALT<br />
TEST<br />
Device Buttons<br />
Audio Input Buttons
Using Your <strong>Remote</strong><br />
4 Press the ENTER button. SAVE will flash twice and the<br />
LCD will return to AUDIO indicating that the joined<br />
function has been stored.<br />
Every time that the Device button is pressed it will also emit<br />
the joined function.<br />
To erase a joined function from a Device button:<br />
1 Press the AUDIO and ENTER buttons simultaneously on<br />
the remote control. JOIN will appear in the LCD.<br />
2 Press the Device button that you would like to erase a<br />
joined function. CLEAR will flash and INPUT will then<br />
appear in the LCD.<br />
3 Press the ENTER button. The LCD will flash SAVE twice<br />
and return to AUDIO indicating that the join has been<br />
erased.<br />
Main Device Mode<br />
When the main device is displayed in the LCD, the<br />
<strong>SL</strong>-<strong>9000</strong> will perform all of the preprogrammed, joined,<br />
learned and punch through features for that device mode.<br />
Automatic Audio Mode<br />
The remote is defaulted to the Automatic Audio. When the<br />
remote control is in this mode, pressing a Device button a<br />
second time will display A_XXX in the LCD indicating that<br />
the Volume and Mute controls of the device programmed<br />
into the Audio mode of the <strong>SL</strong>-<strong>9000</strong> is active, while full<br />
function control of all other buttons of the current Device<br />
mode is maintained.<br />
Main Device Mode Automatic Audio Mode<br />
21
No IR commands are emitted during the second press of a<br />
Device button when the remote is in the Automatic Audio<br />
mode. Pressing the Device button again will return the<br />
remote to the Main Device Mode.<br />
To Delete the Automatic Audio for a Device mode:<br />
1 Press and hold the AUDIO Device button and the LIGHT<br />
button simultaneously. A_SET will appear in the LCD.<br />
2 Press the Device button corresponding to the Device mode<br />
to be deleted for Automatic Audio. E.g. VCR, CD etc.<br />
A_OFF will appear in the LCD indicating the deleted<br />
status of the automatic Audio mode for the Device mode.<br />
3 Press the ENTER button to store the programming.<br />
SAVE will flash in the LCD and then return to AUDIO.<br />
To Return to Automatic Audio for a Device mode:<br />
1 Press and hold the AUDIO Device button and the LIGHT<br />
button simultaneously. A_SET will appear in the LCD.<br />
2 Press the Device button corresponding to the Device mode<br />
to be added for Automatic Audio. E.g. VCR, CD etc.<br />
A_ON will appear in the LCD indicating the active<br />
status of the Automatic Audio mode for the Device mode.<br />
3 Press ENTER to store the programming. SAVE will flash<br />
in the LCD and then return to AUDIO.<br />
Backlighting<br />
Using Your Your<br />
<strong>Remote</strong><br />
All the buttons and the LCD on the <strong>SL</strong>-<strong>9000</strong> are back-lit<br />
for 7 seconds when the LIGHT button is pressed. The backlight<br />
is extended an additional 7 seconds with any button<br />
press while the backlight is on.<br />
22
Advanced Features<br />
After you set-up the remote control to operate your<br />
equipment, you can also program advanced features on<br />
the remote control. The advanced features are designed<br />
to enhance the use of the remote control with your home<br />
entertainment system.<br />
A: Punch Throughs<br />
Volume <strong>Control</strong> “Punch Through”<br />
You can program the remote control so that either the<br />
AUDIO or TV Volume <strong>Control</strong> (VOLUME UP, DOWN AND<br />
MUTE) will also operate in other modes on the remote control.<br />
Example: Raise, lower and mute the VOLUME of your<br />
Audio receiver while the remote control is in the Satellite<br />
mode.<br />
Note: When this feature is active, the AUDIO or TV VOLUME<br />
and MUTE will override any existing volume controls in that<br />
mode.<br />
To Set-Up:<br />
1 Select the mode that you wish to program for Volume<br />
<strong>Control</strong> “Punch Through.”<br />
2 Press the corresponding Device Button and the MUTE<br />
button simultaneously. SET will appear in the LCD.<br />
3 Press the VOLUME UP button. PUNCH will appear<br />
in the LCD.<br />
4 Press either the AUDIO Device Button to set-up for Audio<br />
Volume <strong>Control</strong> or the TV Device Button to set-up for TV<br />
Volume <strong>Control</strong>. AUDIO or TV will flash in the LCD,<br />
depending on which Device Button was selected.<br />
AUDIO or TV Volume <strong>Control</strong> will now override the<br />
original VOLUME and MUTE in this mode.<br />
23
Advanced Features<br />
To Return to the Original Setting:<br />
1 Select the mode that you want to turn off the Volume<br />
<strong>Control</strong> “Punch Through.”<br />
2 Press the corresponding Device Button and the MUTE<br />
button simultaneously. SET will appear in the LCD.<br />
3 Press the VOLUME UP button. PUNCH will appear in<br />
the LCD.<br />
4 Press the Device Button again. The DEVICE Mode will<br />
flash in the LCD.<br />
The AUDIO or TV Volume <strong>Control</strong> “Punch Through” is<br />
now turned off. The VOLUME and MUTE of the original<br />
device will operate on the remote control.<br />
Channel <strong>Control</strong> “Punch Through”<br />
You can program the remote so that either the SAT or Cable<br />
Channel <strong>Control</strong>s (CHANNEL UP and DOWN) will also<br />
operate in other modes on the remote control.<br />
Example: Change CHANNELS UP and DOWN on your<br />
cable box while the remote is in the TV mode.<br />
Note: When this feature is active, SAT or Cable CHANNEL<br />
UP and DOWN will override any existing channel controls in<br />
that mode.<br />
To Set-Up:<br />
1 Select the mode that you wish to program for Channel<br />
<strong>Control</strong> “Punch Through.”<br />
2 Press the corresponding Device Button and the MUTE<br />
button simultaneously. SET will appear in the LCD.<br />
3 Press the VOLUME DOWN button. PUNCH will appear<br />
in the LCD.<br />
24
Advanced Features<br />
4 Press either the SAT Device Button to set-up for SAT<br />
Channel <strong>Control</strong> or the CBL Device Button to set-up for<br />
Cable Channel <strong>Control</strong>. Either SAT or CBL will flash<br />
in the LCD, depending on the Device Button selected.<br />
SAT or Cable Channel <strong>Control</strong>s will now override the<br />
original CHANNEL UP and DOWN in this mode.<br />
To Return to the Original Setting:<br />
1 Select the mode that you want to turn off the Channel<br />
<strong>Control</strong> “Punch Through.”<br />
2 Press the corresponding Device Button and the MUTE<br />
button, simultaneously. SET will appear in the LCD.<br />
3 Press the VOLUME DOWN button. PUNCH will appear<br />
in the LCD.<br />
4 Press the same Device Button again. The DEVICE Mode<br />
will flash in the LCD.<br />
The SAT or Cable Channel <strong>Control</strong> “Punch Through” is<br />
now turned off. The CHANNEL UP and DOWN of the<br />
original device will now operate on the remote control.<br />
25
Advanced Features<br />
Transport <strong>Control</strong> AUD “Punch CD Through”<br />
DVD AUX<br />
You can set-up your SAT remote TV control VCR CBL so that VCR or CD<br />
Transport <strong>Control</strong>s (PLAY, STOP, FAST FORWARD,<br />
POWER<br />
REWIND, PAUSE, and RECORD) will also operate in other<br />
VOL CH<br />
modes on the remote MUTE control. T/ V<br />
GUIDE MENU<br />
EXIT<br />
R<br />
E<br />
W<br />
PAUSE<br />
SEL F<br />
.<br />
F<br />
.<br />
PL PLAY PL PLAY AY F<br />
STOP<br />
1 2 3<br />
<strong>SL</strong>EEP<br />
Example: <strong>Control</strong> VCR 4 functions 5 6 INFO INFOwhile<br />
operating the<br />
PRO.L<br />
remote control in the TV mode.<br />
7 8 9<br />
+10 +10<br />
0<br />
ENTER<br />
Note: When this feature is active, SHIFT the TEST<br />
PIP<br />
VCR or CD functions<br />
(PLAY, STOP, FAST FORWARD, REWIND, PAUSE, and<br />
TUNER CD TAPE1 TAPE2 PHONO<br />
RECORD) will override any existing functions pre-assigned to<br />
these buttons in that mode. VCR1 VCR2/SAT LDP AUX TV<br />
To Set-Up:<br />
LIGHT<br />
1 Select the mode into which you want to program<br />
HOME THEATER MASTER<br />
LEARNING REMOTE CONTROL<br />
Transport <strong>Control</strong> “Punch Through.”<br />
2 Press the corresponding Device Button and the MUTE<br />
button simultaneously. SET will appear in the LCD.<br />
3 Press the SELECT/PLAY button. PUNCH will appear in<br />
the LCD.<br />
4 Press either the VCR Device Button to set-up for VCR<br />
Transport <strong>Control</strong> or the CD Device Button to set-up for<br />
CD Transport <strong>Control</strong>. VCR or CD will flash in the LCD,<br />
depending on the Device Button selected.<br />
26<br />
PRE.<br />
CH<br />
FAV<br />
NEXT<br />
3.CH<br />
ALT<br />
M1 M2 M3 M4<br />
Transport <strong>Control</strong>s
Advanced Features<br />
The VCR or CD Transport <strong>Control</strong>s (PLAY, STOP, FAST<br />
FORWARD, REWIND, PAUSE, and RECORD) will now<br />
override the original functions of the buttons in this mode.<br />
To Return to the Original Setting:<br />
1 Select the mode that you want to turn off the Transport<br />
<strong>Control</strong> “Punch Through.”<br />
2 Press the corresponding Device Button and the MUTE<br />
button simultaneously. SET will appear in the LCD.<br />
3 Press the SELECT/PLAY button. PUNCH will appear<br />
in the LCD.<br />
4 Press the Device Button again. The Device Mode will<br />
flash in the LCD.<br />
The VCR or CD Transport <strong>Control</strong> “Punch Through”<br />
feature is now turned off. The original functions<br />
assigned to these buttons are restored.<br />
27
Advanced Features<br />
B: Memory Buttons<br />
There are five memory buttons (M1~M4, Power) that are<br />
designed to store up to 15 commands in each button.<br />
AUD CD DVD AUX<br />
Pressing any one of the memory button will send out the<br />
SAT<br />
TV<br />
VCR<br />
CBL<br />
series of commands that are stored in the button.<br />
POWER<br />
You can either turn on or off up VOL to eight CH<br />
devices by storing<br />
Power on/off commands MUTE T/ V<br />
or use it to select the favorite<br />
channels by storing channel numbers into the button. You<br />
GUIDE MENU<br />
can also combine Power on/off, select favorite channel and<br />
PAUSE<br />
any of the features in the remote control to these buttons.<br />
W<br />
You can program any of the memory buttons (M1~M4,<br />
STOP<br />
Power) in AUD mode and it will send PRE.<br />
out the stored com-<br />
EXIT<br />
CH<br />
mands in Audio, CD, DVD and AUX modes. You can also<br />
program the memory buttons in SAT mode and it will<br />
1 2 3<br />
FAV<br />
AUD CD DVD AUX<br />
send out the stored commands in Satellite, <strong>SL</strong>EEP<br />
TV, VCR and<br />
4 5 6<br />
INFO<br />
CBL modes.<br />
SAT TV VCR CBL<br />
Power Button<br />
POWER<br />
MUTE MUTEPIP PIP T/ V<br />
PAUSE<br />
28<br />
VOL ENTER<br />
ALT<br />
CH<br />
TUNER GUIDE CD TAPE1 TAPE2 PHONO<br />
MENU<br />
M1 R M2 SEL M3 F<br />
E<br />
.<br />
F M4<br />
E<br />
.<br />
W PLAY F<br />
STOP<br />
PRE.<br />
EXIT<br />
HOME THEATER MASTER<br />
CH<br />
1 2 3<br />
4 5 6<br />
7 8 9<br />
+10 +10<br />
R<br />
E<br />
PIP<br />
0<br />
SEL F<br />
.<br />
F<br />
.<br />
PLAY<br />
F<br />
7 8 9<br />
+10<br />
0<br />
ENTER<br />
SHIFT<br />
FAV<br />
<strong>SL</strong>EEP<br />
INFO<br />
PRO.L<br />
NEXT<br />
3.CH<br />
ALT<br />
TEST<br />
TUNER CD TAPE1 TAPE2 PHONO<br />
VCR1 VCR2/SAT LDP AUX<br />
TV<br />
M1 M2 M3 M4<br />
LIGHT<br />
SHIFT<br />
VCR1 VCR2/SAT<br />
LDP AUX<br />
LIGHT<br />
LEARNING REMOTE CONTROL<br />
HOME THEATER MASTER<br />
LEARNING REMOTE CONTROL<br />
PRO.L<br />
NEXT<br />
3.CH<br />
TEST<br />
Memory Buttons<br />
TV<br />
M1~M4 Buttons
Advanced Features<br />
• Macro Commands:<br />
Memory Buttons can store and emit up 15 commands<br />
including multiple Power On/Off sequences.<br />
Example: In the Audio mode, the POWER Memory Button<br />
can be programmed to turn on the TV, turn on the Audio<br />
receiver, turn on the VCR and turn on the Satellite receiver<br />
with one button push.<br />
Note: The MUTE buttons is used to designate POWER commands<br />
during Memory Button programming. See the Example:<br />
Memory Button Programming for further description.<br />
• Favorite Channels:<br />
Memory Buttons can provide direct access to your channels<br />
with one button push.<br />
Example: In the SAT device mode each of the Memory<br />
Buttons M1, M2, M3, M4 can provide direct access to a<br />
different satellite channel by sending out the three digit<br />
channel number for that channel to your satellite receiver<br />
with one button push.<br />
29
Advanced Features<br />
Programming Memory Buttons:<br />
1 Select the section that you wish to program the Memory<br />
Button in by pressing the corresponding Device Button<br />
(AUD, or SAT) and MUTE button, simultaneously. SET<br />
will appear in the LCD.<br />
2 Press one of the Memory Buttons (M1, M2, M3, M4, or<br />
POWER) into which you wish to store the functions.<br />
M(1-5)_# # will appear in the LCD.<br />
3 Press in up to fifteen commands that you want stored in<br />
that Memory button. Each successive button selection<br />
will appear as M(1-5)__(01-15) in the LCD.<br />
You can select functions from another mode by first<br />
pressing the corresponding Device Button and then the<br />
buttons where those functions are located in that mode.<br />
The pressing a Device Button also counts as one command.<br />
Note: Each insertion of a Device Button adds a 1/2 second<br />
delay to the command sequence.<br />
4 Press the CHANNEL UP button to store your selections.<br />
SAVE will flash three times in the LCD to confirm the<br />
programming.<br />
Note: It can take up to 15 seconds to send out 15<br />
commands from a memory button. Please continue to point<br />
the remote control at the device(s) until all the commands on the<br />
Memory Button have been sent out. This will ensure that all the<br />
commands are received by the device(s).<br />
Example: Memory Button Programming.<br />
To program Memory Button M2 in the Audio mode to send<br />
the following commands: turn on the Audio receiver, turn<br />
on the TV, turn on the VCR, and turn on the satellite<br />
receiver.<br />
30
Advanced Features<br />
1 Press the Audio Device Button and the MUTE button<br />
simultaneously. SET will appear in the LCD.<br />
2 Press Memory Button M2. M2_ # # will appear in the LCD.<br />
3 Press the MUTE button (to turn on the Audio receiver)<br />
M2__01 will appear in the LCD.<br />
Press the TV Device Button (to change to the TV mode)<br />
M2__02 will appear in the LCD.<br />
Press the MUTE button (to turn on the TV)<br />
M2__03 will appear in the LCD.<br />
Press the VCR Device Button (to change to the VCR mode)<br />
M2__04 will appear in the LCD.<br />
Press the MUTE button (to turn on the VCR)<br />
M2__05 will appear in the LCD.<br />
Press the SAT Device Button (to change to SAT mode)<br />
M2__06 will appear in the LCD.<br />
Press the MUTE button (to turn on the Satellite receiver)<br />
M2__07 will appear in the LCD.<br />
*Power On/Off is located on the MUTE button during the<br />
programming mode.<br />
4 Press the CHANNEL UP button. SAVE will flash in the<br />
LCD, and the remote will return to the AUDIO mode.<br />
Erasing Memory Buttons<br />
1 Select the mode (AUD or SAT) in which you want to<br />
erase the Memory Button.<br />
2 Press the corresponding Device Button (AUD or SAT) and<br />
MUTE button, simultaneously. SET will appear in the<br />
LCD. Press the Memory Button to be erased. M(1-5)_# #<br />
will appear in the LCD.<br />
3 Press the CHANNEL UP button. SAVE will flash in the<br />
LCD. The Memory Button is now erased.<br />
Note: Any previously stored commands on a Memory Button<br />
will be erased when new commands are stored on the same<br />
Memory Button.<br />
31
Using Your <strong>Remote</strong><br />
C. Changing the LCD Display<br />
Twenty-seven different LCD displays can be selected for<br />
each Device mode of the remote control. To select an alternate<br />
LCD display, please use the following procedure:<br />
1 Press and hold the Device button for which you would<br />
like to change the LCD setting.<br />
2 While pressing the Device button, press and release the<br />
MENU button. Each time the MENU button is pressed,<br />
the LCD will show one of twenty-seven displays.<br />
3 Release the Device button when you find the new LCD<br />
display you wish to assign to the Device mode.<br />
AUD CD DVD DVD AUX<br />
SAT<br />
POWER<br />
MUTE T/ V<br />
R<br />
E<br />
W<br />
PAUSE<br />
PAUSE<br />
STOP<br />
VOL VOL CH<br />
CH<br />
GUIDE MENU<br />
EXIT<br />
SEL F .<br />
PLAY<br />
PL PLAY AY F<br />
Choice of LCD Displays<br />
TV VCR CABLE 1 2 3<br />
SATFAV FAV<br />
AUDIO CD<br />
DVD AUX 4 TV2 5 <strong>SL</strong>EEP<br />
6<br />
VCR2 INFO<br />
TUNER AMP1<br />
AMP2<br />
PROJE<br />
TAPE1<br />
AUX2<br />
TAPE2<br />
7 8 LD<br />
PRO.L<br />
WEBTV<br />
9<br />
NEXT<br />
AUD2 3.CH<br />
SURR<br />
LIGHT<br />
DAT<br />
DSS<br />
AV TAPE<br />
+10 +10 +10 0<br />
DAB<br />
ENTER<br />
ALT<br />
PIP<br />
TV<br />
SHIFT<br />
32<br />
PRE.<br />
CH<br />
TEST<br />
TUNER CD TAPE1 TAPE2 PHONO<br />
VCR1 VCR2/SAT<br />
LDP AUX<br />
TV<br />
M1 M2 M3 M4<br />
LIGHT<br />
VCR<br />
HOME THEATER MASTER<br />
LEARNING REMOTE CONTROL<br />
CBL
Advanced Features<br />
LCD Displays in the Automatic Audio Mode<br />
A_TV A_VCR A_CAB A_SAT AUDIO A_CD<br />
A_DVD A_AUX A_TV2 A_VC2 A_TUN A_AM1<br />
A_AM2 A_TAP1 A_TAP2 A_WEB A_SUR A_DAT<br />
A_PRJ A_AX2 A_LD A_A2 A_LIT A_DSS<br />
A_AV A_TAP A_DAB<br />
D: Programming a Second TV, VCR, etc.<br />
to Other Device Buttons.<br />
This feature is used to program the remote control for two<br />
or more TVs, VCRs, etc., or to program a device into a<br />
mode with a different Device Button name. You can store<br />
the three-digit Set-Up Code number for any device into any<br />
other unused Device Button.<br />
Example: If your home entertainment system contains<br />
two VCRs. First, using the VCR Device button, program<br />
the remote via standard set-up to operate the first VCR.<br />
Then, program your second VCR into a Device Button that<br />
is not being used, e.g., AUX using this method.<br />
1 Turn on the device.<br />
2 On the remote control, press the Device Button that<br />
you will assign for the device and the MUTE button,<br />
simultaneously. SET will appear in the LCD.<br />
3 Press the Device Button that corresponds to the original<br />
device. SET will still appear in the LCD.<br />
4 Locate the Set-Up Code number for the device from the<br />
tables found on pages (39 - 57).<br />
5 Point the remote toward the device and press<br />
in the first Set-Up Code number. SET, followed by the<br />
Set-Up Code number will appear in the LCD.<br />
33
Advanced Features<br />
Your device will turn off when the correct Set-Up Code<br />
number has been selected. If it does not turn off, select the<br />
next Set-Up Code number from the table, and press in that<br />
code number. When your device turns off, proceed to Step 6.<br />
6 Press the Device Button that was selected in Step 2.<br />
to store the Set-Up Code number. PASS will flash in the<br />
LCD to confirm the programming.<br />
The second device can now be operated by pressing the<br />
assigned Device Button and using the buttons within this<br />
mode.<br />
34
Warranty<br />
The <strong>Home</strong> <strong>Theater</strong> Master <strong>SL</strong>-<strong>9000</strong> remote control comes<br />
with a one-year warranty from the date of purchase.<br />
Specifications<br />
Model<br />
<strong>SL</strong>-<strong>9000</strong>, infrared remote control.<br />
Power<br />
Four 1.5 V AAA Batteries.<br />
Dimensions (h/w/d)<br />
8.88 x 2.5 x 1.25 inches<br />
Weight<br />
6.5 oz. (with batteries)<br />
35
Glossary<br />
Cursor <strong>Control</strong><br />
Buttons that correspond to the UP, DOWN, LEFT, RIGHT,<br />
SELECT, GUIDE, MENU and EXIT functions of your<br />
audio/video equipment.<br />
Device<br />
Audio or video equipment, e.g. Television, VCR, Cable<br />
box, Audio receiver, Satellite receiver, etc.<br />
Device Button<br />
Any of the eight buttons located at the top of the remote<br />
control labeled AUD, CD, DVD, AUX, SAT, TV, VCR and<br />
CBL. Device Buttons are used to select modes of operation<br />
and to program the remote control.<br />
Joining<br />
Transfer of a function from the AUDIO input selects and<br />
keypad(0-9) on the <strong>SL</strong>-<strong>9000</strong> to a Device button at the top of<br />
the remote control<br />
Learning<br />
Transfer of a function from a button of an original remote<br />
control to a button on the <strong>SL</strong>-<strong>9000</strong> remote control.<br />
LCD<br />
Liquid crystal display window located at the top of the<br />
remote control. During normal operation the LCD<br />
indicates the mode. The LCD also indicates the remote’s<br />
programming status.<br />
Memory Buttons<br />
Buttons labeled M1, M2, M3, M4, and POWER. These buttons<br />
can be programmed to store Favorite Channels, Macro<br />
Commands, or to “relocate” functions from one mode to<br />
another.<br />
Modes<br />
Modes correspond to Device Button selections. Modes are<br />
displayed in the LCD as AUDIO, CD, DVD, AUX, SAT, TV,<br />
VCR and CABLE. Modes indicate the type of device the<br />
remote control is currently operating.<br />
36
Glossary<br />
Punch Through<br />
Advanced feature that enables you to operate Volume,<br />
Channel or Transport <strong>Control</strong> functions of one device<br />
while in another mode.<br />
Example: Audio Volume <strong>Control</strong> “Punch Through” gives<br />
you the ability to raise, lower and mute your Audio<br />
receiver volume while operating the remote control in the<br />
TV mode.<br />
Set-Up Code Number<br />
The three-digit number that is used to program the remote<br />
control for your particular manufacturer or brand of audio/<br />
video equipment. Set-Up Code numbers are located in<br />
tables in the appendix on pages 38 - 56 of the instruction<br />
manual. Set-Up Code numbers are categorized by type of<br />
device, e.g. TV, VCR, Audio, CD, DVD, Cable, AUX and<br />
Satellite.<br />
More than one Set-Up Code number may work with your<br />
device. You should test the functions for each of the Set-Up<br />
Code numbers that work with your device to determine the<br />
best Set-Up Code number for your particular device.<br />
Note: Some devices, such as CD players and DVD Decks that<br />
do not have POWER buttons on their original remote controls,<br />
may not shut off during programming. For these devices, it may<br />
be necessary to first store the Set-Up Code number and then test<br />
functions like PLAY, STOP, etc., to determine if the correct Set-<br />
Up Code number has been selected.<br />
Transport <strong>Control</strong><br />
Buttons that correspond to the PLAY, STOP, REWIND,<br />
FAST FORWARD, PAUSE, SEARCH/SKIP and RECORD<br />
functions on your audio/video equipment.<br />
37
A: Assignment of Audio/Video<br />
Equipment<br />
Please use the following listing to locate the correct Set-Up<br />
Code Tables for your equipment:<br />
AUDIO Set-Up Code Table:<br />
Audio Receivers, Preamplifiers, Surround Processors<br />
Satellite Set-Up Code Table:<br />
DSS, Primestar, DBS, Echostar, C Band receivers<br />
TV Set-Up Code Table:<br />
TVs, Monitors, Video/LCD Projectors<br />
VCR Set-Up Code Table:<br />
VCRs, TV/VCR combination units<br />
CABLE Set-Up Code Table:<br />
Cable Boxes, Internet/TV Set-Tops<br />
CD Set-Up Code Table:<br />
CD Players, CD Changers<br />
DVD Set-Up Code Table:<br />
DVD Players, Laser Disc<br />
Appendix<br />
AUX Set-Up Code Table:<br />
Cassette Tape Players, DAT systems, MiniDisc,<br />
Switchers, Lighting, <strong>Home</strong> <strong>Control</strong> Devices,<br />
and Line Doublers<br />
38
Set-Up Code Tables<br />
Audio<br />
Manufacturer/Brand Set-Up Code Number<br />
ADC 007<br />
ADCOM 082 092 225 161 269<br />
AIWA 018 104 170 202 203 213 211 188<br />
AKAI 138 189<br />
AMC 125 126 127 128 258<br />
AMEND 054<br />
AMX 196<br />
ANGSTROM 142<br />
ARCAM 141<br />
AUDIO ACCESS 147<br />
AUDIO ALCHEMY 135<br />
AUDIO DESIGN 194 221 011<br />
AUDIO EASE 021 196 207<br />
AUDIO FILE 071<br />
AUDIO MATRIX 167<br />
AUDIO SOURCE 273<br />
AUDIO TECHNICA 134<br />
B & K 096 097<br />
BOSE 070 170 224<br />
BRYSTON 023<br />
CARVER 006 028 061 071 201 214 226 180 185 022 029 077<br />
CASIO 076<br />
CHIRO 140<br />
CINEMA SOUND 034 134<br />
CITATION 148 272<br />
CLARION 026<br />
CURTIS MATHES 076<br />
DENON 002 034 109 215 229 230 027 037 234 259<br />
EIGER 149<br />
ELAN 057<br />
ENLIGHTENED AUDIO 099 098<br />
FISHER 047 214 180 182<br />
FOSGATE 062 231<br />
GE 056 260<br />
GOLDSTAR 008<br />
HAFLER 174<br />
HARMAN KARDON 231 233 254 153 154 118 121 227<br />
HITACHI 020<br />
INKEL 197<br />
JBL 263<br />
JCPENNY 076 216<br />
39
Set-Up Code Tables<br />
Audio<br />
Manufacturer/Brand Set-Up Code Number<br />
JEFF ROWLAND 206<br />
JENSEN 058<br />
JVC 240 163 191 114 266<br />
KENWOOD 026 066 145 146 181 190 197 192 182 199 151 222 180<br />
005<br />
KINERGETICS 220<br />
KOSS 216<br />
KRELL 150 072<br />
KYOCERA 007<br />
LEXICON 120 235 236 237<br />
LINN 124<br />
LUXMAN 137 139 052 165 115 004 009<br />
LXI 076 056<br />
MAGNAVOX 086 164 152 208<br />
MARANTZ 006 028 031 040 063 185 186 251 265<br />
MCINTOSH 238<br />
MCS 076<br />
MERIDIAN 100 012 013<br />
MITSUBISHI 242 243 204<br />
MONDIAL 157 158 042 043 081 112<br />
NAD 186 113<br />
NAKAMICHI 111 244 245 172 183<br />
NEC 176<br />
ONKYO 017 046 064 107 108 187 079 080 090 179 209 270<br />
OPTIMUS 026 041 138<br />
PANASONIC 032 195 219 177<br />
PARASOUND 129 130 132 261<br />
PHAST 196<br />
PHILIPS 249 250 251 063<br />
PIONEER 014 033 039 044 045 050 069 159 168 116 035 078 198<br />
PROCEED 144 268<br />
RCA 010 048 117 156 067<br />
REALISTIC 019 056 073 075 095<br />
REVOX 162<br />
ROTEL 074 083 085<br />
SAMSUNG 016<br />
SANSUI 040 048 110 119 065 228<br />
SANYO 047 059<br />
SCOTT 019 091<br />
SEARS 076<br />
SHARP 026 094 131 175 181<br />
40
Set-Up Code Tables<br />
Audio<br />
Manufacturer/Brand Set-Up Code Number<br />
SHERWOOD 024 038 055 102 103 105 106 051 030<br />
SONY 018 093 223 247 248 160 166 015 101 184 218 271<br />
SOUNDESIGN 036<br />
SOUNDSTREAM 084 088<br />
SSI 068<br />
SUMO 171<br />
TAEKWANG 138<br />
TEAC 005 019 049 111 212 217<br />
TECHNICS 122 176 193 219 178 177 200 257 262<br />
THETA DIGITAL 136<br />
TOSHIBA 060 087 198<br />
WARDS 180<br />
YAMAHA 026 253 169 067 173 205 264 232 089 264<br />
ZENITH 143 210<br />
41
Set-Up Code Tables<br />
Satellite<br />
Manufacturer/Brand Set-Up Code Number<br />
ALPHASTAR 123<br />
AMPLICA 050<br />
BIRDVIEW 129 113 051 126<br />
BSR 053<br />
CAPETRONICS 053<br />
CHANNEL MASTER 013 014 015 018 036 055<br />
CHAPARRAL 008 009 012 077<br />
CITOH 054<br />
CURTIS MATHES 050<br />
DRAKE 005 006 007 010 011 112 116 141 052<br />
DX ANTENNA 024 046 056 076<br />
ECHOSTAR 038 040 057 058 093 094 095 096 097 098 099 100 122<br />
ELECTROHOME 089<br />
EUROSAT 114<br />
FUJITSU 017 021 022 027 133 134<br />
GENERAL ELECTRIC 151 106 150<br />
GENERAL INSTRUMENT 003 004 016 029 031 059 101 148<br />
HITACHI 139 140<br />
HOME CABLE 080 044 029<br />
HOUSTON TRACKER 033 037 039 104 057 051<br />
HUGHES 068<br />
HYTEK 053<br />
HYUNDAI 149<br />
ICR 023<br />
JANIEL 060 147<br />
KATHREIN 108<br />
LEGEND 057<br />
LUTRON 132<br />
LUXOR 144 062<br />
MACOM 010 059 063 064 065<br />
MEMOREX 057<br />
NEXTWAVE 028 124 125<br />
NORSAT 069 070<br />
PACE 143<br />
PANASONIC 142 060<br />
PANSAT 121<br />
PERSONAL CABLE 117<br />
PHILIPS 071 152 153<br />
PL 023 026<br />
PRESIDENT 019 102<br />
PRIMESTAR 110 030<br />
42
Set-Up Code Tables<br />
Satellite<br />
Manufacturer/Brand Set-Up Code Number<br />
PROSAT 072<br />
PROSCAN 151 106 150<br />
RCA 151 106 150<br />
REALISTIC 043 074<br />
SAMSUNG 123<br />
SATELLITE SERVICE 028 035 047 085<br />
SONY 103<br />
STARCAST 041<br />
SUPERGUIDE 020 124 125<br />
TEECOM 023 026 075 087 088 090 107 130 137<br />
TOSHIBA 002 127<br />
TOWN & COUNTRY 023 026<br />
UNIDEN 016 025 042 043 044 045 048 049 078 079 080 086<br />
101 135 136<br />
VIEWSTAR 115<br />
WINEGARD 128 146<br />
ZENITH 081 082 083 084 091 120<br />
43
Set-Up Code Tables<br />
TV<br />
Manufacturer/Brand Set-Up Code Number<br />
ADMIRAL 072 081 161 160<br />
AKAI 197 146<br />
AMARK 112 143<br />
AMPRO 073 167<br />
AMSTRAD 052<br />
ANAM 043 054 056 080 112 131<br />
AOC 197 004 112 058<br />
AUDIOVOX 076<br />
BLAUPUNKT 088<br />
CANDLE 197 002 003 004<br />
CAPEHART 058<br />
CETRONIC 043<br />
CITIZEN 197 002 003 004 043 101 103 143<br />
CLASSIC 043<br />
CONCERTO 004<br />
CONTEC 043 050 051<br />
CORONADO 143<br />
CRAIG 043 054<br />
CROWN 043 143<br />
CURTIS MATHES 197 101 004 143<br />
CXC 043<br />
DAEWOO 004 016 043 044 076 103 114 125 127 143<br />
DAYTRON 004 143<br />
DWIN 177<br />
DYNASTY 043<br />
DYNATECH 062<br />
EIKI 187<br />
ELECTROHOME 024 076 143 196<br />
EMERSON 197 004 005 028 043 047 048 050 051 076 096 143 151<br />
153 154 155<br />
FISHER 007 057<br />
FUJITSU 198<br />
FUNAI 028 043<br />
FUTURETECH 043<br />
GE 197 008 009 034 056 073 074 130 144 155 160 161 165<br />
004 091<br />
GOLDSTAR 004 102 106 112 113 116 119 127 143<br />
HALL MARK 004<br />
HITACHI 004 009 010 011 012 023 075 143 158 163 166 072<br />
INFINITY 164<br />
JBL 164<br />
44
Set-Up Code Tables<br />
TV<br />
Manufacturer/Brand Set-Up Code Number<br />
JCPENNY 197 004 008 009 024 030 065 101 143 156 160<br />
JENSEN 013<br />
JVC 034 038 070 083 145 199<br />
KEC 043<br />
KENWOOD 197 070<br />
KLOSS 002 059<br />
KMC 143<br />
KTV 197 043 143 154<br />
LODGENET 072<br />
LOGIK 072<br />
LUXMAN 004<br />
LXI 166 007 015 052 081 160 164<br />
MAGNAVOX 197 003 004 022 059 060 061 063 064 127 160 164 094<br />
MARANTZ 197 164<br />
MATSUI 164<br />
MEMOREX 007 072 004<br />
METZ 088<br />
MGA 197 004 024 028 042<br />
MINERVA 088<br />
MITSUBISHI 004 024 028 040 042 109 124 146 191<br />
MTC 197 004 062 101<br />
NAD 015 025<br />
NEC 132 130 134 197 040 016 024 056 019<br />
NIKEI 043<br />
ONKING 043<br />
ONWA 043<br />
OPTONICA 019 081<br />
ORION 096<br />
PANASONIC 034 056 080 092 164<br />
PHILCO 197 003 024 056 059 060 063 064 164 004<br />
PHILIPS 197 003 004 005 038 059 093 164 127<br />
PIONEER 197 018 023 025 116 135 190<br />
PORTLAND 004 143<br />
PROSCAN 144 160 161 165 167<br />
PROTON 004 058 131 143 171 173 193<br />
QUASAR 034 056 092<br />
RADIO SHACK 019 043 143 004 127<br />
RCA 160 161 165 065 156 144 197 004 023 024 056 074 152<br />
REALISTIC 007 019 043 047<br />
ROCTEC 186<br />
RUNCO 168 169 178 179 180 181 182 183<br />
45
Set-Up Code Tables<br />
TV<br />
Manufacturer/Brand Set-Up Code Number<br />
SAMPO 197 058 004<br />
SAMSUNG 004 050 089 101 105 127 143 160<br />
SANYO 166 007 020 053 057 082 187<br />
SCOTT 004 028 043 048 143<br />
SEARS 015 030 004 007 028 057 143 094 160 082 165 166<br />
SELECO 189<br />
SHARP 170 081 019 028 029 014 004 022 143 175<br />
SIEMENS 088<br />
SIGNATURE 072<br />
SONY 070 085 139 147 126 185 194<br />
SOUNDESIGN 004 028 003 043<br />
SPECTRICON 112<br />
SSS 004 043<br />
SUPRE MACY 002<br />
SYLVANIA 197 003 059 060 063 064 164 044 160 127<br />
TANDY 081<br />
TATUNG 056 062<br />
TECHNICS 034 080<br />
TECHWOOD 004<br />
TEKNIKA 002 003 004 024 028 043 072 101 143<br />
TELEFUNKEN 037 046 086 087<br />
TELERENT 072<br />
TERA 172<br />
TMK 004<br />
TOSHIBA 007 015 030 040 062 101 138<br />
TOTEVISION 143<br />
UNIVERSAL 008 009<br />
VIDEO CONCEPTS 146<br />
VIDIKRON 174 184 188 192<br />
VIDTECH 004<br />
WARDS 004 008 009 019 028 060 061 063 064 072 074 143 164<br />
034<br />
WESTING HOUSE 076<br />
YAMAHA 197 004<br />
YORK 004<br />
YUPITERU 043<br />
ZENITH 072 073 095 103 157<br />
ZONDA 112<br />
46
Set-Up Code Tables<br />
VCR<br />
Manufacturer/Brand Set-Up Code Number<br />
AIWA 034 161<br />
AKAI 016 043 046 124 125 142 146<br />
AMPRO 072<br />
ANAM 031<br />
AUDIO DYNAMICS 012 023 039 043<br />
BROOKSONIC 035 037 129<br />
CANON 028 031<br />
CAPEHART 108<br />
CRAIG 003 040 135<br />
CURTIS MATHES 031 041<br />
DAEWOO 005 007 010 065 108 110 111 112 116 117 119<br />
DAYTRON 108<br />
DBX 012 023 039 043<br />
DYNATECH 034 053<br />
ELECTROHOME 059<br />
EMERSON 006 017 025 027 029 031 034 035 036 037 046 101 129<br />
131 138 153 162 116<br />
FISHER 003 008 009 010<br />
FUNAI 034<br />
GE 031 063 072 107 109 144 147<br />
GO VIDEO 132 136 155 040 115<br />
GOLDSTAR 012 013 020 101 106 114 123<br />
HARMAN KARDON 012 045<br />
HITACHI 004 018 026 034 043 063 137 150 160 013<br />
INSTANTREPLAY 031<br />
JCL 031<br />
JCPENNY 012 013 015 040 066 101<br />
JENSEN 043<br />
JVC 012 031 043 048 050 055 060 130 150 152<br />
KENWOOD 014 048 034 047<br />
LLOYD 034<br />
LXI 003 009 017 034 106<br />
MAGIN 040<br />
MAGNAVOX 031 034 041 067 068 156 164<br />
MARANTZ 012 031 067 069<br />
MARTA 101<br />
MATSUI 027 030<br />
MEI 031<br />
MEMOREX 003 010 014 031 034 053 072 101 102 134 139<br />
MGA 045 046 059<br />
MINOLTA 013 020<br />
47
Set-Up Code Tables<br />
VCR<br />
Manufacturer/Brand Set-Up Code Number<br />
MITSUBISHI 013 020 045 046 051 059 061 142 151 049<br />
MTC 034 040<br />
MULTITECH 024 034<br />
NEC 012 023 039 043 048<br />
NORDMENDE 043<br />
OPTONICA 053 054<br />
ORION 025<br />
PANASONIC 066 070 083 133 140 145 157 163 074<br />
PENTAX 013 020 031 063<br />
PHILCO 031 034 067<br />
PHILIPS 031 034 054 067 071 101<br />
PILOT 101<br />
PIONEER 013 021 048<br />
PORTLAND 108<br />
PULSAR 072<br />
QUARTZ 002 014<br />
QUASAR 066 145 075<br />
RADIO SHACK 123<br />
RCA 013 020 041 107 109 140 144 145 147 034 040 158<br />
REALISTIC 003 008 010 014 031 034 040 053 054 101<br />
RICO 058<br />
RUNCO 148<br />
SALORA 014<br />
SAMSUNG 032 040 066 102 104 107 109 112 113 115 120 122 125<br />
SANSUI 022 043 048 135<br />
SANYO 003 007 010 014 134 102<br />
SCOTT 017 037 112 129 131<br />
SEARS 003 008 009 010 013 014 081 101 017 073 112<br />
SHARP 031 054 149 159 165<br />
SHINTOM 024<br />
SIGNATURE 034<br />
SONY 003 031 052 056 057 058 076 077 078 149 154<br />
SOUNDESIGN 034<br />
STS 013<br />
SYLVANIA 031 034 059 067<br />
SYMPHONIC 034<br />
TANDY 010 034<br />
TATUNG 039 043<br />
TEAC 034 039 043<br />
TECHNICS 031 070<br />
TEKNIKA 019 031 034 101<br />
48
Set-Up Code Tables<br />
VCR<br />
Manufacturer/Brand Set-Up Code Number<br />
THOMAS 034<br />
TMK 006<br />
TOSHIBA 008 013 042 047 059 079 082 112 131 081<br />
TOTEVISION 040 101<br />
UNITECH 040<br />
VECTOR RESEARCH 012<br />
VICTOR 048<br />
VIDEO CONCEPTS 012 034 046 141<br />
VIDEOSONIC 040<br />
WARDS 003 013 017 024 031 034 040 053 054 131<br />
YAMAHA 012 034 039 043<br />
ZENITH 034 048 056 058 072 080 101<br />
49
Set-Up Code Tables<br />
Cable<br />
Manufacturer/Brand Set-Up Code Number<br />
ABC 103 003 004 039 042 046 053<br />
AMERICAST 099<br />
ANTRONIX 014<br />
ARCHER 005 007 014<br />
BELL SOUTH 099<br />
CENTURION 092<br />
CENTURY 007<br />
CITIZEN 007<br />
COMBANO 080 081<br />
COMSAT 074<br />
COMTRONICS 030<br />
DIGICABLE 101<br />
EAGLE 020 030 040<br />
EASTERN 057 066<br />
ECHOSTAR 106<br />
ELECTRICORD 032<br />
GEMINI 008 054<br />
GENERAL ELECTRIC 072<br />
GENERAL INSTRUMENT 103 074 104<br />
GNC 099<br />
GOLDEN CHANNEL 030<br />
HAMLIN 049 050 055<br />
HITACHI 103 055<br />
JERROLD 103 002 003 004 008 009 010 069 074<br />
MAGNAVOX 010 012 064 079 095 094<br />
MEMOREX 052<br />
MITSUBISHI 102<br />
M-NET 037<br />
MOVIE TIME 028 032<br />
NOVAPLEX 092<br />
NSC 015 028 038 071<br />
OAK 031 037 053<br />
PANASONIC 044 047<br />
PARAGON 052<br />
PHILIPS 006 012 013 020 085 095<br />
PIONEER 103 034 051 063 076 105<br />
PRUCER 059<br />
PTS 011 071 074<br />
PULSAR 052<br />
RCA 047<br />
RECOTON 098<br />
50
Set-Up Code Tables<br />
Cable<br />
Manufacturer/Brand Set-Up Code Number<br />
REGAL 049 050<br />
REGENCY 057<br />
SAMSUNG 030<br />
SCIENTIFIC ATLANTA 003 011 041 042 043 045 046<br />
SIGNAL 030<br />
SIGNATURE 103<br />
<strong>SL</strong> MARX 030<br />
SONY 096<br />
SPRUCER 047 078<br />
STARCOM 002 004 008 009<br />
STARGATE 008 030 097 104<br />
TADIRAN 030<br />
TOCOM 039 040 056<br />
TOSHIBA 052<br />
UNIKA 007 014<br />
UNITED CABLE 004 053<br />
UNIVERSAL 005 007 014 032 035<br />
VIEWSTAR 012 015 018 086 087 088 089<br />
ZENITH 052 060 093 100<br />
51
Set-Up Code Tables<br />
CD<br />
Manufacturer/Brand Set-Up Code Number<br />
ADCOM 062 042<br />
AIWA 059 065 088 089 105 122 170 187<br />
AKAI 085 195 202<br />
AMC 231 232<br />
AMEND 118<br />
ARCAM 238<br />
AUDIO ACCESS 119 147<br />
AUDIO EASE 165<br />
AUDIO TECHNICA 046<br />
BSR 037 057<br />
CALIFORNIA AUDIO 103 008<br />
CAPETRONIC 063<br />
CARRERA 057 080<br />
CARVER 185 041 044 050 086 107 130 134 135 138 139 203 204<br />
167<br />
CASIO 111 182<br />
CLARINETTE 182<br />
CREEK 159<br />
CROWN 035<br />
DENON 002 123<br />
EMERSON 042 069 102<br />
FISHER 050 185 134 008<br />
FRABA 111<br />
GENEXXA 010 069 102<br />
GOLDSTAR 080<br />
HAITAI 093<br />
HARMAN KARDON 018 033 047 208<br />
HITACHI 042 175<br />
INKEL 130 143 144<br />
JC PENNY 014 061 092 141<br />
JENSEN 158<br />
JVC 004 022 136 163 213 214 242<br />
KENWOOD 185 007 023 055 071 072 142 137<br />
KOSS 061<br />
KRELL 241<br />
KYOCERA 005<br />
LOTTE 102<br />
LUXMAN 011 028 070 076<br />
LXI 059<br />
MAGNAVOX 044 107<br />
MARANTZ 027 041 044 051 077 107 209<br />
52
Set-Up Code Tables<br />
CD<br />
Manufacturer/Brand Set-Up Code Number<br />
MCINTOSH 212<br />
MCS 014 073 092<br />
MEMOREX 010<br />
MISSION 044 107<br />
MITSUBISHI 179<br />
MITSUMI 153<br />
MODULAIRE 182<br />
MONDIAL 147<br />
NAD 006 005 067 178<br />
NAKAMICHI 217 218 219 095<br />
NEC 014 062<br />
NIKKO 046<br />
NSM 044 107<br />
ONKYO 030 038 039 168 169<br />
OPTIMUS 010 050 057 058 081 082 083 085 093 195<br />
PANASONIC 103 201 172 008 068<br />
PARASOUND 233<br />
PHILIPS 041 044<br />
PIONEER 010 020 025 056 174 175 176<br />
PROCEED 239<br />
PROTON 044 107 228<br />
QUASAR 103 008<br />
RADIO SHACK 182<br />
RCA 017 042 150<br />
REALISTIC 042 050 051 102 181 182 187<br />
ROTEL 044 107 161 178<br />
SAE 044 107<br />
SANSUI 044 069 107 128 171 190 125<br />
SANYO 050<br />
SCOTT 069 102<br />
SHARP 026 031 051 066<br />
SHERWOOD 003 019 051 096 112 115 119 166<br />
SIGNATURE 033<br />
SONY 048 081 097 126 133 177 225 226 164<br />
SOUNDESIGN 251<br />
SUMO 155<br />
SYLVANIA 044 107<br />
SYMPHONIC 052 181<br />
TAEKWANG 195 085<br />
TANDY 010<br />
TEAC 015 034 036 051 052 101 131 140 079<br />
53
Set-Up Code Tables<br />
CD<br />
Manufacturer/Brand Set-Up Code Number<br />
TECHNICS 060 103 200 172 184 008 068<br />
TECHWOOD 076<br />
THETA DIGITAL 234 235<br />
TOSHIBA 006 067 091 160 148<br />
VECTOR RESEARCH 080<br />
VICTOR 004 022 114 124<br />
WARDS 185 033<br />
YAMAHA 024 046 054 186 183<br />
YORX 182<br />
54
Set-Up Code Tables<br />
DVD<br />
Manufacturer/Brand Set-Up Code Number<br />
DENON 007 206 207 080<br />
FUNAI 120<br />
GE 026 027<br />
GOLDSTAR 057<br />
JVC 012<br />
KENWOOD 152 013<br />
MAGNAVOX 066 032 121<br />
MARANTZ 211<br />
MITSUBISHI 017 121<br />
NAD 121<br />
ONKYO 076 035<br />
OPTIMUS 049 013<br />
PANASONIC 021 113 042<br />
PHILIPS 066 032<br />
PIONEER 023 106 117 121<br />
PROSCAN 026 027<br />
RADIO SHACK 120<br />
RCA 026 027 002<br />
REALISTIC 049<br />
RUNCO 127<br />
SAMSUNG 056 070<br />
SANYO 075<br />
SHARP 152 013<br />
SONY 033 053 110<br />
TECHNICS 113<br />
THETA DIGITAL 032<br />
THOMPSON 026 027<br />
TOSHIBA 035 152 106<br />
YAMAHA 042 129 043<br />
ZENITH 057 074<br />
55
Set-Up Code Tables<br />
AUX<br />
Manufacturer/Brand Set-Up Code Number<br />
3M 152<br />
AIWA 015 071 100 114 164<br />
ARCHER 155<br />
AUTON 191<br />
CARVER 006 008 027 024 036<br />
DENON 105 227 229<br />
DMX 156<br />
DRAPER SCREEN 204<br />
DWIN 080<br />
EVERQUEST 206<br />
EXTRON 151<br />
FAROUDJA 184<br />
FISHER 064<br />
FUJI 209<br />
GOLDSTAR 011<br />
HARMAN KARDON 233<br />
JERROLD 153<br />
JVC 106 116 239 240 185<br />
KENWOOD 005 013 023 026 064 145 146 181 190 185<br />
LINN 124<br />
LITE-TOUCH 208<br />
LUTRON 158 159 077<br />
LUXMAN 035 137 139<br />
MAGNAVOX 027<br />
MAKITA 186 201<br />
MARANTZ 014 027 056 065 087<br />
MCINTOSH 238<br />
MINDPATH 205<br />
MITSUBISHI 242 243<br />
NAD 029 048<br />
NAKAMICHI 244 245 025<br />
NILES 160 187<br />
NSM 161<br />
ONKYO 002 012 016 017 018 019 115<br />
OPTIMUS 026 054 055<br />
PANASONIC 007 010 032 088 195<br />
PHILIPS 027 087<br />
PIONEER 003 039 047 050 066 098 222<br />
POLKAUDIO 162<br />
QUASAR 007 088<br />
REPLAY 075<br />
56
Set-Up Code Tables<br />
AUX<br />
Manufacturer/Brand Set-Up Code Number<br />
RUSSOUND 081<br />
SANSUI 027 113 119 224<br />
SCIENTIFIC ATLANTA 163 156<br />
SHARP 026 057 131 175 181<br />
SHERWOOD 038 004 028 030 033 034<br />
SIMA 082<br />
SOLO ELECTRONICS 207<br />
SOMFY 078 079<br />
SONY 020 022 052 084 089 164 165 166<br />
STARCOM 153<br />
TEAC 009 059 212<br />
TECHNICS 007 010 076 088 109 122 193<br />
TOSHIBA 112<br />
TURBOSCAN 167<br />
VELODYNE 203<br />
VICTOR 106<br />
X-10 183<br />
XANTECH 168 169 170 171 172 188 189<br />
YAMAHA 021 026 031 067<br />
57
OEE-0031S<br />
Rev.1