Create successful ePaper yourself
Turn your PDF publications into a flip-book with our unique Google optimized e-Paper software.
CONTENT PAGE FOR SELL MEDIA:<br />
Introduction:<br />
Pge4/27 What is <strong>Sell</strong> <strong>Media</strong> –General overview of<br />
what <strong>Sell</strong> <strong>Media</strong> does, and the plugins that go with it.<br />
• 18 PLUGINS - GRAPPRESS<br />
- Pge27/32 <strong>Sell</strong> <strong>Media</strong> <strong>S3</strong> –Note: Only newly uploaded files<br />
are uploaded to Amazon <strong>S3</strong>.<br />
NOTE – THAT BEFORE UPLOADING ANY STOCK IMAGES *<br />
MUST HAVE SIGNED UP FOR ACCOUNT – AND THE PLUGIN<br />
INSTALLED – AND ACTIVATED)Activating this plugin does not<br />
move previous uploads to Amazon <strong>S3</strong>. Similarly, deactivating the<br />
plugin does not move files back onto your server.<br />
- Pge33/34 <strong>Sell</strong> <strong>Media</strong> Access Control – NOTE – The<br />
Access Control extension for <strong>Sell</strong> <strong>Media</strong> allows you to assign<br />
free access to specific products or product galleries. Free<br />
access can be granted to either everyone or clients with valid<br />
passwords.<br />
- Pge35/36 <strong>Sell</strong> <strong>Media</strong> Add Bulk - NOTE – The “Add Bulk”<br />
extension for our <strong>Sell</strong> <strong>Media</strong> plugin enables you to upload<br />
multiple products at once and assign collections, licenses and<br />
other price settings in one click.<br />
- Pge37/38 <strong>Sell</strong> <strong>Media</strong> Expire Download - NOTE –This<br />
premium extension for <strong>Sell</strong> <strong>Media</strong> allows sellers to set an<br />
expire time for purchased downloads. This helps protect your<br />
paid downloads from being shared online well after the files<br />
have been purchased.<br />
- Pge39/41 <strong>Sell</strong> <strong>Media</strong> Free Downloads - NOTE – The Free<br />
Downloads extension for our <strong>Sell</strong> <strong>Media</strong> plugin makes it easy<br />
to generate leads and grow your mailing list by allowing you to<br />
offer free downloads. When visitors click the download button<br />
on an image, they will be prompted to submit their name and<br />
e-mail address to complete the download. The extension<br />
integrates with MailChimp, an e-mail marketing system<br />
Page | 1
- Pge42/45 <strong>Sell</strong> <strong>Media</strong> Reprints - NOTE – The Reprints<br />
(Self-Fulfillment) extension for <strong>Sell</strong> <strong>Media</strong> allows store owners<br />
to sell photo reprints directly out of their WordPress site and<br />
print and ship them directly to their customers. Now you can<br />
sell both downloadable files and prints using <strong>Sell</strong> <strong>Media</strong>! You<br />
can create an unlimited number of print sizes that buyers can<br />
purchase directly from your WordPress site. You can print the<br />
images yourself, or send them to your preferred print vendor<br />
of choice. Below are some screenshots of the Reprints (Self-<br />
Fulfillment) extension in action:<br />
- Pge46/50 <strong>Sell</strong> <strong>Media</strong> Stripe - NOTE - The Stripe payment<br />
gateway extension for our <strong>Sell</strong> <strong>Media</strong> plugin allows you to<br />
accept credit card purchases from buyers world-wide. Buyers<br />
will not leave your site to process their credit card purchase,<br />
which is shown to help increase conversion rates and<br />
ultimately, increase sales.<br />
- Pge51/54 <strong>Sell</strong> <strong>Media</strong> Subscription - NOTE – <strong>Sell</strong> monthly<br />
or yearly subscription plans to your stock library using the<br />
enterprise-level extension for our <strong>Sell</strong> <strong>Media</strong> plugin. Think of it<br />
like your own private iStockPhotos website where you set all<br />
prices and keep 100% of all sales revenue.<br />
- Pge54 <strong>Sell</strong> <strong>Media</strong> Watermark - NOTE - The extension<br />
doesn’t watermark the original source file (which is<br />
already protected if you’re using the <strong>Sell</strong> <strong>Media</strong><br />
plugin).For best results use a transparent PNG and make<br />
sure your watermark is smaller than your image (100 pixels by<br />
100 pixels works great). This Watermark extension does<br />
not overwrite, create new images, or harm existing<br />
images. Images must be hosted locally, not on a CDN.<br />
- Pge55/56 <strong>Sell</strong> <strong>Media</strong> Model Release - NOTE - The Model<br />
Release extension for our <strong>Sell</strong> <strong>Media</strong> plugin allows you to<br />
attach a waiver documents to your products for safe keeping<br />
and future reference. The documents will be uploaded into<br />
your media library, which can be quickly attached and<br />
reattached to one or many products<br />
- Pge57/58 <strong>Sell</strong> <strong>Media</strong> Manual Purchases - NOTE – The<br />
Manual Purchases extension for the <strong>Sell</strong> <strong>Media</strong> plugin allows<br />
buyers to arrange an offline payment (check, wire, cash,<br />
etc) with sellers on the checkout page. This is useful if you<br />
Page | 2
have established, pre-existing payment arrangements with<br />
your buyers. See how it works below.<br />
- Pge59 <strong>Sell</strong> <strong>Media</strong> Mailchimp - NOTE – The MailChimp<br />
extension for the <strong>Sell</strong> <strong>Media</strong> plugin for WordPress allows your<br />
buyers to sign up for your preferred MailChimp newsletter list.<br />
Buyers will see a “Sign Up for Newsletter” checkbox on the<br />
checkout page. This option will only appear for users who are<br />
not logged in<br />
- Pge60 <strong>Sell</strong> <strong>Media</strong> Magnifier - NOTE – This extension for<br />
the <strong>Sell</strong> <strong>Media</strong> plugin adds a “magnifying glass” over images,<br />
allowing buyers to inspect the image closer for sharpness.<br />
Simply upload and activate this plugin and the magnifier will<br />
be added on all single sell media item pages<br />
- Pge61/63 <strong>Sell</strong> <strong>Media</strong> Discount Codes - NOTE –The<br />
Discount Codes extension for <strong>Sell</strong> <strong>Media</strong> allows store owners<br />
to create an infinite number of discount codes. Share them<br />
with your customers to help drive sales. This works with the<br />
reprints extensions, also, so you can offer discounts for<br />
printed images, too.<br />
- Pge 63/64 <strong>Sell</strong> <strong>Media</strong> Commissions - NOTE - reward<br />
contributors with sales commissions - Imagine if you ran a<br />
small photo agency or collective and you wanted to reward<br />
each photographer with a percentage of the total sale for<br />
his/her photos.<br />
- Pge64/65 <strong>Sell</strong> <strong>Media</strong> Download Lightbox - NOTE -<br />
When we get bigger – once we start taking other<br />
people products. Also, could be a way I could give %<br />
of sale for incentive<br />
- Pge66/82 GPP Shortcodes – GPP Shortcodes is a free<br />
WordPress plugin that allows you to easily add “flat design”<br />
buttons, boxes, icons, pricing tables, tabs, toggles and column<br />
layouts in your posts and pages without modifying CSS, HTML<br />
or PHP.<br />
Page | 3
What is <strong>Sell</strong> <strong>Media</strong>?<br />
<strong>Sell</strong> <strong>Media</strong> is a free WordPress plugin that allows anyone to sell<br />
photos, prints or any other digital media directly from your website.<br />
The following documentation will help get you rolling so you can<br />
start selling your work online.<br />
Getting Involved<br />
<strong>Sell</strong> <strong>Media</strong> is an open-source project. Feedback and collaboration<br />
are highly encouraged!<br />
1. Roadmap – Follow along on our public roadmap on Trello.<br />
2. Bugs – Find a bug? Report it on our GitHub issue tracker.<br />
3. Feature Requests – Have a feature request? Email it to us .<br />
4. Translations – Translate the plugin to new languages and email<br />
us the translation file.<br />
Requirements<br />
1. You must have a website. Need one? Get a website.<br />
2. You must have WordPress installed on your website.<br />
3. You must run your website on an Apache server. You most likely<br />
do.<br />
4. You must have the GD Image Library installed on your server. You<br />
most likely do. If not, ask your web host to install it.<br />
5. You must have PHP Sessions configured on your server. You<br />
most likely do. If not, ask your web host to install it.<br />
6. You must have a PayPal account to accept online payments. You<br />
can also use Stripe.<br />
Page | 4
Installation<br />
<strong>Sell</strong> <strong>Media</strong> installs just like a normal WordPress plugin:<br />
1. Go to Plugins > Add New.<br />
2. Under Search, type in “<strong>Sell</strong> <strong>Media</strong>”<br />
3. Find the <strong>Sell</strong> <strong>Media</strong> plugin by Graph Paper Press.<br />
4. Click Install Now to install <strong>Sell</strong> <strong>Media</strong>.<br />
5. Click Activate Plugin to activate it.<br />
Configuration<br />
After you have activated the plugin, you’ll need to do a couple<br />
things before you’re able to start selling:<br />
1. Visit <strong>Sell</strong> <strong>Media</strong> -> Settings and configure your selling preferences.<br />
2. Insert the required shortcodes onto your preferred pages.<br />
3. Complete the 3 required steps to integrate PayPal with your<br />
website.<br />
4. Upload your first item to sell on the <strong>Sell</strong> <strong>Media</strong> -> Add New page.<br />
Page | 5
Settings<br />
The <strong>Sell</strong> <strong>Media</strong> -> Settings page has detailed instructions below<br />
each option that quite is self-explanatory. Here is how it looks:<br />
Page | 6
PayPal<br />
Visit the <strong>Sell</strong> <strong>Media</strong> -> Settings -> Payment page in WordPress and<br />
add your PayPal email address. You are now ready to receive<br />
PayPal payments.<br />
If you enable Test Mode (<strong>Sell</strong> <strong>Media</strong> -> Settings -> General -><br />
Mode) then you must set your PayPal email address to a valid<br />
PayPal Sandbox Test Account and you must checkout using a valid<br />
PayPal Sandbox Test Buyer Account.<br />
PayPal Problems<br />
Scenario #1 – Payments Recorded as $0 in <strong>Sell</strong><br />
<strong>Media</strong><br />
If you are receiving empty payments with a price of $0, you have an<br />
invalid PayPal setting. You need to set PayPal’s IPN Message<br />
Format option to “UTF-8” in PayPal. You can do this by following<br />
these steps:<br />
1. Log into your PayPal account<br />
2. Go to your profile<br />
3. Look for the “PayPal button language encoding” section under the<br />
My selling tools<br />
4. Make sure your website language is set to the correct language<br />
5. Click the more options button<br />
6. Make sure encoding is set to UTF-8<br />
7. Then save settings<br />
8. Confirm it’s working by trying another purchase<br />
Scenario #2 – No Payments Recorded in <strong>Sell</strong> <strong>Media</strong><br />
If payments aren’t being recorded at all in <strong>Sell</strong> <strong>Media</strong> after payment<br />
at PayPal, check these possible problems:<br />
Page | 7
1. Thanks Page – Make sure you have created your Thanks page<br />
and that it has the following shortcode: [sell_media_thanks].<br />
2. Missing PHP Dependencies – You don’t have the required PHP<br />
cURL extension installed on your server. This is how PayPal/Stripe<br />
talk back to your website. Ask your web host to install if it’s not<br />
installed.<br />
3. PayPal Sandbox Confusion – You are incorrectly testing PayPal<br />
Sandbox. Both the Buyer and <strong>Sell</strong>er accounts have to be PayPal<br />
Sandbox accounts. You cannot mix a REAL PayPal account with a<br />
TEST PayPal Sandbox account. It won’t work.<br />
4. Firewall – Your web host has a firewall that is blocking incoming<br />
pings from PayPal or Stripe. We’ve seen this happen once before<br />
with European servers (Germany). They blocked all incoming<br />
pings (IPN notifications) that didn’t have a User-Agent defined.<br />
PayPal uses IP ranges 66.211.. and 173.0.. and visit the IPN URL<br />
with NO User-Agent. Some web hosting companies have their<br />
servers set up to block incoming pings when the User-Agent is not<br />
explicitly set (as is the case with PayPal’s IPN). In this case, you’ll<br />
want to modify your .htaccess file to override user-agent blocking<br />
with these address ranges.<br />
5. Server Errors – You have a server misconfiguration that is<br />
preventing PayPal from receiving the required status code 200.<br />
Check your PayPal IPN History to see what the status codes are to<br />
help troubleshoot.<br />
6. Auto-Return – If all else fails, log into PayPal and change your<br />
PayPal Settings to enable Auto-Return and Payment Data<br />
Transfer. Set the Return URL to your Thank You page. Some<br />
foreign PayPal users have had to enable these in order for<br />
transactions to be recorded in <strong>Sell</strong> <strong>Media</strong>.<br />
Page | 8
Price Groups<br />
All products can be assigned different prices by using the Price<br />
Group feature in <strong>Sell</strong> <strong>Media</strong>. To add a new Price Group, visit the<br />
<strong>Sell</strong> <strong>Media</strong> -> Settings -> Pricing page. Here is how the Price Group<br />
feature looks to site owners<br />
Think of price groups like this:<br />
You shoot photographs for a client or customer and you decide to<br />
create a special price group for all the photos that you shot. You<br />
could create a Price Group for this. Example:<br />
Page | 9
Price Group 1 (Cheap)<br />
• 1000 x 1000 px image, $10<br />
• 2000 x 2000 px image, $20<br />
• 3000 x 3000 px image, $30<br />
Price Group 2 (Expensive)<br />
• 1000 x 1000 px image, $100<br />
• 2000 x 2000 px image, $200<br />
• 3000 x 3000 px image, $300<br />
Price Groups allow you to create and assign different price<br />
options to different photographs. Each option within the Price<br />
Group you create becomes available to your buyers to<br />
purchase, so always make sure that the image you’re selling is<br />
big enough to be sold at the sizes you specify within your<br />
Price Groups.<br />
Page | 10
Licenses - The Licenses feature in <strong>Sell</strong> <strong>Media</strong> allows store<br />
owners to add and assign usage licenses to products sold.<br />
Buyers must select their appropriate usage license on the cart<br />
when purchasing the product.<br />
For example, if you’re a photographer, you might want to increase<br />
the price of your images if the buyers intended use is for<br />
commercial purposes. Create a new license on the <strong>Sell</strong> <strong>Media</strong> -><br />
Licenses page, describe the license and assign markup to to the<br />
license. Then, add or edit a product and assign that license as an<br />
option for your buyers. You can create an unlimited number of<br />
licenses.<br />
Page | 11
Keywords & IPTC<br />
<strong>Sell</strong> <strong>Media</strong> copies the following IPTC data from all image uploads:<br />
• Keywords<br />
• Creator<br />
• City<br />
• State<br />
This IPTC data is saved alongside your images in <strong>Sell</strong> <strong>Media</strong>.<br />
Archive pages are automatically created for each Keyword, Creator,<br />
City and State so that, for instance, a buyer could view all images<br />
with the Keyword “bikes” or all images shot in, say, New York.<br />
EXIF data (shutter speed, ISO, aperture, etc) can also be displayed<br />
alongside single images by adding the EXIF widget to the <strong>Sell</strong><br />
<strong>Media</strong> Single Item Sidebar widget area.<br />
Page | 12
Adding Your First Product<br />
When you are ready to add your first product, visit the <strong>Sell</strong> <strong>Media</strong> -><br />
Add New page. The page looks like this:<br />
1. Give you product a title.<br />
2. Upload the files you want to sell. You can upload one file or many<br />
files. If you upload many files, they will display like a gallery and<br />
the price you define below will be for each item in the gallery.<br />
3. Give the product a custom price (it defaults to the default price you<br />
created on your <strong>Sell</strong> <strong>Media</strong> -> Settings page).<br />
4. Optionally assign a Price Group. If you only want to sell the<br />
originally uploaded file, leave the Price Group select box set to<br />
“Select a Price Group.”<br />
5. Optionally write about the product in the main text area below the<br />
product details section.<br />
6. Optionally assign the product to a Collection (right hand column).<br />
Page | 13
7. Optionally assign Licenses to the product.<br />
8. Click Save and you’re done!<br />
Adding Galleries<br />
Sometimes you might have 10 or 20 or 30 photos that share the<br />
same attributes (price, license, etc). Doing this is incredibly simple:<br />
Just upload more than one file. If you upload multiple files, the page<br />
will display like a gallery and the price you define below will be for<br />
each item in the gallery.<br />
Adding Videos, PDF’s & Other <strong>Media</strong><br />
If you plan on selling videos, <strong>pdf</strong>’s or other non-image files, be sure<br />
you:<br />
1. Don’t select a Price Group. That only applies to images.<br />
2. Upload images or embed video trailer in the main text area below<br />
the product details section.<br />
3. Add a Featured Image. This image will be shown on archive pages<br />
and on the cart.<br />
Page | 14
Bulk Uploading<br />
Any folders that you place inside the wp-content/uploads/sellmedia/packages/<br />
folder will be listed in the select dropdown box<br />
shown in the Bulk Uploading below.<br />
Select the folder containing the images (JPG only, sRGB mode<br />
only) that you want to add and click Add Files. Please note: Bulk<br />
importing can be a server-intensive process depending on the<br />
quantity and size of files that you’re importing. The capability of this<br />
feature is dependent on the performance of your server. Upload in<br />
small batches to ensure all items uploaded are added correctly.<br />
Most image editing software (Lightroom, Aperture, etc) have plugins<br />
available for FTPing images to a server. Use these approaches for<br />
placing your gallery folders on your server so you can Bulk Upload<br />
into <strong>Sell</strong> <strong>Media</strong>.<br />
Page | 15
Bulk Editing<br />
You can edit many products at once using the Bulk Editing feature<br />
in WordPress:<br />
1. Visit the <strong>Sell</strong> <strong>Media</strong> -> All Products page.<br />
2. Check the box next to each item you want to edit.<br />
3. Select Bulk Actions -> Edit.<br />
4. Click Apply.<br />
5. Reassign the selected products to different Price Groups, assign<br />
Licenses, assign to a Collection and add Keywords.<br />
6. Click Update.<br />
Page | 16
Shortcodes<br />
Shortcodes are small snippets of code that when added to a Post,<br />
Page or Widget add functionality to your site. You must add the<br />
following shortcodes to your preferred Pages to use <strong>Sell</strong> <strong>Media</strong>:<br />
• Checkout – (REQUIRED) Create a page called “Checkout” and<br />
add this shortcode to it: [sell_media_checkout]<br />
• Thanks – (REQUIRED) Create a page called “Thanks” and add<br />
this shortcode to it: [sell_media_thanks]<br />
• Search Form – (OPTIONAL) Used to display a search form<br />
exclusively for searching items for sale within <strong>Sell</strong><br />
<strong>Media</strong>: [sell_media_searchform]<br />
• All Items – (OPTIONAL) Displays all (or a certain collection) items<br />
in a grid view: [sell_media_all_items collection="type-your-collection-namehere"]<br />
• Download List – (OPTIONAL) List logged in users<br />
downloads: [sell_media_download_list]<br />
• Login – (OPTIONAL) Used to show a custom login form for your<br />
customers: [sell_media_login_form]<br />
• Buy Button – (OPTIONAL) Used for displaying specific items for<br />
sale: [sell_media_item id="id-of-the-item"]<br />
• Lightbox – (OPTIONAL) Used for displaying images buyers add<br />
to their lightbox: [sell_media_lightbox]<br />
• Widgets Widgets are optional and can be added to your website<br />
on the Appearance -> Widgets page. <strong>Sell</strong> <strong>Media</strong> ships with the<br />
following widgets:<br />
• <strong>Sell</strong> <strong>Media</strong> EXIF – Displays image exif data (shutter speed,<br />
aperture, ISO, etc). Only use this on Single Sidebar Widgetized<br />
areas.<br />
• <strong>Sell</strong> <strong>Media</strong> Featured Items – Displays a grid of featured items<br />
thumbnails.<br />
Page | 17
• <strong>Sell</strong> <strong>Media</strong> Keywords – Displays a tag cloud of popular<br />
keywords on your site.<br />
• <strong>Sell</strong> <strong>Media</strong> Recent Items – Displays a grid of recently added<br />
items.<br />
• <strong>Sell</strong> <strong>Media</strong> Similar Items – Displays a thumbnail grid consisting<br />
of similar items to the item currently being viewed.<br />
The Shopping Cart<br />
The shopping cart is displayed only after<br />
the [sell_media_checkout] shortcode has been added to a page. You<br />
can display various pieces of information currently in your<br />
customer’s shopping cart by following these instructions:<br />
Show Cart Quantity In Menu<br />
1. Visit the Appearance -> Menu page<br />
2. Toggle open the Pages menu box and add your Checkout page to<br />
the menu.<br />
3. Save the Menu.<br />
Show Cart Total In Menu<br />
1. Visit the Appearance -> Menu page<br />
2. Toggle open the Pages menu box and add your Checkout page to<br />
the menu.<br />
3. Toggle open the Screen Options (top right) and make sure that<br />
CSS Classes is checked.<br />
4. Toggle open the Checkout page menu item that you just added to<br />
the menu<br />
5. Add a class of “total” in the the CSS Classes field.<br />
6. Save the Menu.<br />
Page | 18
Extensions<br />
Extensions add to the functionality of the core <strong>Sell</strong> <strong>Media</strong> plugin.<br />
They are not required and can be purchased and downloaded<br />
directly from the <strong>Sell</strong> <strong>Media</strong> Extensions page. Upload an extension<br />
just like you would any normal WordPress plugin.<br />
In order to keep your extensions up-to-date, please install and<br />
activate GPP Plugin Updates.<br />
Developer API<br />
The following section is for developers and anyone else who wants<br />
to customize <strong>Sell</strong> <strong>Media</strong>.<br />
Actions<br />
Actions allow you to add html and/or execute code when specific<br />
events occur in <strong>Sell</strong> <strong>Media</strong>. For example, say you wanted to email<br />
Frankie after a successful payment was recorded. You would tap<br />
into this action hook:<br />
sell_media_after_successful_payment<br />
The actual action inside <strong>Sell</strong> <strong>Media</strong> looks like this:<br />
do_action( 'sell_media_after_successful_payment', $payment_id );<br />
So lets add our own custom action to email Frankie when this<br />
action is fired in <strong>Sell</strong> <strong>Media</strong>. Your code might look something like<br />
this:<br />
function my_sell_media_after_successful_payment( $payment_id ){<br />
wp_mail( 'frankie@email.com', 'New Sale!', 'A new payment was successfully recorded and I figured yo<br />
}<br />
add_action( 'sell_media_after_successful_payment', 'my_sell_media_after_successful_payment' );<br />
view rawsell-media-example-after-successful-payment hosted with<br />
by GitHub<br />
Page | 19
How about another example, yeah? Let’s say that you wanted to<br />
add a custom message between the product thumbnail and the<br />
select options on the cart popup:<br />
function my_sell_media_above_item_form(){<br />
}<br />
echo 'This text will show up between the product thumbnail and the size and license select boxes on<br />
add_action( 'sell_media_above_item_form', 'my_sell_media_above_item_form' );<br />
view rawsell-media-above-cart-items-hook hosted with<br />
by GitHub<br />
Paste that code into either you active theme’s functions.php or<br />
better yet, create your own simple “Functionality Plugin” to house<br />
your <strong>Sell</strong> <strong>Media</strong> plugin customizations. Here is a blank example<br />
plugin that you can copy/paste to start adding your own code<br />
customizations:<br />
<br />
view rawexample-functionality-plugin hosted with<br />
by GitHub<br />
After you add your code to that file, save it, upload it into your<br />
WordPress plugins folder and activate it. There are a lot of available<br />
actions (also called action hooks) in <strong>Sell</strong> <strong>Media</strong>. The best place to<br />
find them all is directly in the source code: View all available Actions<br />
in <strong>Sell</strong> <strong>Media</strong> on GitHub<br />
Page | 20
Filters<br />
Filters can be used to modify text or variables throughout the <strong>Sell</strong><br />
<strong>Media</strong> plugin. Unlike Actions, which simply allow us to “do stuff”<br />
when something happens in <strong>Sell</strong> <strong>Media</strong>, Filters allow us to modify<br />
existing text or variables inside <strong>Sell</strong> <strong>Media</strong>. How about an example,<br />
yeah? Lets say that we wanted to change the text from “Size” on<br />
the cart popup to something else. You would use a Filter for that.<br />
Your filter might look something like this:<br />
function my_sell_media_download_size_text(){<br />
return 'Parameters';<br />
}<br />
add_filter( 'sell_media_download_size_text', 'my_sell_media_download_size_text' );<br />
view rawexample-filter-sell-media hosted with<br />
by GitHub<br />
How about another filter example, yeah? Let’s say that you want to<br />
change the “Continue Shopping” text and link that appear on the<br />
Checkout page:<br />
There are a lot of available Filters in <strong>Sell</strong> <strong>Media</strong>. The best place<br />
to find them all is directly in the source code: View all available<br />
Filters in <strong>Sell</strong> <strong>Media</strong> on GitHub<br />
Page | 21
Functions<br />
Display a buy button:<br />
<br />
Display the product thumbnail or icon:<br />
<br />
Display the except of a product:<br />
<br />
Display a semantic list of Collections assigned to a product:<br />
<br />
Display the original, custom price of a product:<br />
<br />
Display the <strong>Sell</strong> <strong>Media</strong> search form. The $url argument should<br />
equal the url to the page containing your [sell_media_searchform]<br />
shortcode.<br />
<br />
Page | 22
Classes<br />
The main <strong>Sell</strong>_<strong>Media</strong>() class provides access to six additional<br />
classes. Each class contain methods, which can be used in your<br />
own themes and plugins like this:<br />
<br />
The get_lowest_price method above will display the lowest price of<br />
a product ($post_id). Please note, it is recommended to always<br />
check if functions and classes exist before directly calling them. The<br />
for some reason the class or function doesn’t exist, it will throw a<br />
fatal error. Not good. Here is an example of the same function<br />
about that first checks if the <strong>Sell</strong>_<strong>Media</strong> class exists:<br />
<br />
There are hundreds of functions and methods that you can use in<br />
your own themes and plugins to extend <strong>Sell</strong> <strong>Media</strong>. The classes are<br />
heavily documented, so use them as needed:<br />
• Customer class<br />
Download class<br />
• Images class<br />
• Payments class<br />
• Products class<br />
• Search class<br />
Page | 23
Theming<br />
<strong>Sell</strong> <strong>Media</strong> template files are located in the sell-media/themes<br />
folder:<br />
• archive.php<br />
• cart.php<br />
• collection-password.php<br />
You can override these files by copying them into your active theme<br />
folder. Then, you can modify these files as needed.<br />
Updates<br />
Updates to <strong>Sell</strong> <strong>Media</strong> are handled natively through the core<br />
WordPress update notification system. To update extensions for<br />
<strong>Sell</strong> <strong>Media</strong>, install GPP Plugin Updates to automatically update to<br />
the most recent version. Simply add this plugin to your website and<br />
then visit the Dashboard -> Updates page to start the update<br />
process.<br />
Frequently Asked Questions<br />
Are there any limits to the number of files I can upload and<br />
sell?<br />
No. <strong>Sell</strong> <strong>Media</strong> and WordPress can easily handle thousands of files.<br />
You are only limited by the capacity of your web server.<br />
How are my original, high-resolution images protected?<br />
<strong>Sell</strong> <strong>Media</strong> moves the original, high-resolution image to a protected<br />
directory on your server. <strong>Sell</strong> <strong>Media</strong> then makes lower-resolution<br />
copies of the original image and places them the web-accessible<br />
uploads directory. The sizes of the lower-resolution images are<br />
controlled by your Settings -> <strong>Media</strong> sizes. Thieves can only steal<br />
lower-resolution copies of the image. The original file is always<br />
protected.<br />
Page | 24
How do I password protect an item?<br />
The Password Protection option is located in the Publish box when<br />
editing a <strong>Sell</strong> <strong>Media</strong> item. Click the Visibility – Public – Edit link,<br />
select Password Protected, type in a password and click Save.<br />
How do I password protect a collection?<br />
Click <strong>Sell</strong> <strong>Media</strong> -> Collections -> Click “Edit” next to the Collection<br />
you want to hide, fill in the “Password” click update. Password<br />
protected Collections are hidden from being listed on archive pages<br />
and homepage of some themes.<br />
Why are the image colors that my customers download<br />
different from the image I originally uploaded?<br />
You need to convert your images to sRGB mode before uploading<br />
into WordPress. More about color profile conversion degradation in<br />
WordPress can be found here.<br />
How do I display a gallery of images for sale?<br />
<strong>Sell</strong> <strong>Media</strong> includes a new “Collections” taxonomy, which you can<br />
see on the right side of the screen when adding a new item to <strong>Sell</strong><br />
<strong>Media</strong>. Assign each item to a specific Collection and the items will<br />
be displayed on that specific collection’s archive page. You can<br />
then link to the collection like this: http://example.com/collection/mycollection-name/.<br />
A list of collecitons also shows up on the<br />
Appearance -> Menus page so you can add them to any menu.<br />
How do I increase the maximum upload size in<br />
WordPress?<br />
Depending on the web hosting company you choose and the<br />
package you select, each of you will see maximum file upload limit<br />
on your <strong>Media</strong> Uploader page in WordPress. For some it is as low<br />
as 2MB which is clearly not enough for large images or videos. You<br />
can increase this by doing one of the following:<br />
Page | 25
1. Theme Functions File – There are cases where we have<br />
seen that just by adding the following code in the theme<br />
function’s file, you can increase the upload size:@ini_set(<br />
'upload_max_size', '64M' );<br />
@ini_set( 'post_max_size', '64M');<br />
@ini_set( 'max_execution_time', '300' );2. Create or Edit an<br />
existing PHP.INI file – In most cases if you are on a<br />
shared host, you will not see a php.ini file in your<br />
directory. If you do not see one, then create a file called<br />
php.ini and upload it in the root folder. In that file add the<br />
following code:upload_max_filesize = 64M<br />
post_max_size = 64M<br />
max_execution_time = 3003. htaccess Method – Some people<br />
have tried using the htaccess method where by<br />
modifying the .htaccess file in the root directory, you can<br />
increase the maximum upload size in WordPress. Open<br />
or create the .htaccess file in the root folder and add the<br />
following code:php_value upload_max_filesize 64M<br />
php_value post_max_size 64M<br />
php_value max_execution_time 300<br />
php_value max_input_time 300<br />
Again, it is important that we emphasize that if you are on a shared<br />
hosting package, these techniques may not work. In that case, you<br />
would have to contact your web hosting provider to increase the<br />
limit for you<br />
Transactions are not posting. Why?<br />
Please visit the Add <strong>Media</strong> -> Settings -> Payments page and<br />
double check all of your settings. Also, if you are using PayPal, you<br />
need to make sure you have [added your IPN Listener URL to<br />
PayPal](https://cms.paypal.com/us/cgi-bin/?cmd=_rendercontent&content_ID=developer/e_howto_admin_IPNSetup).<br />
Also, PayPal computers use IP ranges 66.211.*.* and 173.0.*.* and<br />
visit the IPN URL with NO User-Agent. Some web hosting<br />
companies have their servers set up to block incoming pings when<br />
the User-Agent is not explicitly set (as is the case with PayPal’s<br />
IPN). In this case, you’ll want to modify your .htaccess file to<br />
override user-agent blocking with these address ranges.<br />
Page | 26
My Checkout page is empty. Why?<br />
Shopping carts use something called PHP Sessions to save items<br />
when buyers add something to their shopping cart. If PHP Sessions<br />
aren’t enabled or the PHP setting “session.save_path” is undefined,<br />
no sessions will be saved and your checkout page won’t work.<br />
In most cases, this is just a matter of enabling PHP Sessions and<br />
making sure that the “session.save_path” setting has a valid server<br />
path defined in your server’s main PHP configuration file (php.ini).<br />
For example:<br />
session.save_path = /tmp<br />
<strong>Sell</strong> <strong>Media</strong> <strong>S3</strong><br />
The Amazon <strong>S3</strong> extension for <strong>Sell</strong> <strong>Media</strong> provides secure, durable<br />
and highly-scalable cloud storage for your precious file uploads. It<br />
protects your original high-resolution files so that they cannot be<br />
downloaded by thieves. This extension brings enterprise-level cloud<br />
storage capabilities to single WordPress installs.<br />
Once activated, all uploads will be served from your own private<br />
Amazon <strong>S3</strong> cloud account.<br />
Amazon <strong>S3</strong> is trusted by media companies like<br />
Netflix, Pinterest, Smugmug and tens of thousands of other<br />
small and large businesses. Learn more about Amazon <strong>S3</strong>.<br />
How does it work?After properly configuring your Amazon <strong>S3</strong><br />
account and the <strong>S3</strong> extension (see Initial Setup below), all newly<br />
uploaded files using <strong>Sell</strong> <strong>Media</strong> will be stored in your Amazon <strong>S3</strong><br />
bucket of choice. Both original size images and intermediate size<br />
images (low resolution versions generated by WordPress from your<br />
Settings -> <strong>Media</strong> sizes) are uploaded to your Amazon <strong>S3</strong> bucket.<br />
Original images are saved without public access (private);<br />
intermediate image sizes have public access and are displayed on<br />
your website. When a customer purchases from your website, <strong>Sell</strong><br />
Page | 27
<strong>Media</strong> grabs this original high resolution file from Amazon <strong>S3</strong> and<br />
dynamically generates the right files size for the customer.<br />
Note: Only newly uploaded files are uploaded to Amazon <strong>S3</strong>.<br />
( NOTE – THAT BEFORE UPLOADING ANY STOCK IMAGES *<br />
MUST HAVE SIGNED UP FOR ACCOUNT – AND THE PLUGIN<br />
INSTALLED – AND ACTIVATED)Activating this plugin does not<br />
move previous uploads to Amazon <strong>S3</strong>. Similarly, deactivating the<br />
plugin does not move files back onto your server.<br />
Starting in version 2.0, no local files are stored on your server.<br />
Screenshots<br />
Amazon <strong>S3</strong> settings page.<br />
Page | 28
(<strong>Sell</strong> <strong>Media</strong> <strong>S3</strong>)<br />
Admin view after uploading a gallery of images to Amazon <strong>S3</strong>.<br />
(<strong>Sell</strong> <strong>Media</strong> <strong>S3</strong>)<br />
<strong>Media</strong> library showing Amazon <strong>S3</strong> urls.<br />
Page | 29
(<strong>Sell</strong> <strong>Media</strong> <strong>S3</strong>)<br />
Original, high resolution files are protected on Amazon <strong>S3</strong>.<br />
(<strong>Sell</strong> <strong>Media</strong> <strong>S3</strong>)<br />
Initial Setup<br />
In order to use this extension, you must:<br />
1. Sign up for an Amazon <strong>S3</strong> account.<br />
2. Create an IAM user or group with “Full Access” to your Amazon <strong>S3</strong><br />
account.<br />
3. Save the Security Credentials (Access Key ID and Secret Access<br />
Key) for your IAM user.<br />
4. Edit the Permissions of the user or group and assign the<br />
“Amazon<strong>S3</strong>FullAccess” policy.<br />
Page | 30
5. Create a Bucket in your Amazon <strong>S3</strong> account. Set and save<br />
the Region endpoint.<br />
6. Log into your WordPress website.<br />
7. Upload and activate the Amazon <strong>S3</strong> extension for <strong>Sell</strong> <strong>Media</strong><br />
8. Visit <strong>Sell</strong> <strong>Media</strong> -> Settings -> Misc -> Amazon <strong>S3</strong> and fill in<br />
your Access Key ID, Secret Access Key, and Region. Click<br />
Save.<br />
9. Scroll back down to the Amazon <strong>S3</strong> setting and now select<br />
the Bucket from the selectbox.<br />
FAQ<br />
Where are my uploaded files stored?<br />
All uploaded files will be stored in your Amazon <strong>S3</strong> bucket that you<br />
selected on Dashboard > <strong>Sell</strong> <strong>Media</strong> > Settings > Misc > Amazon<br />
<strong>S3</strong> > Bucket. Both original size images and thumbnail size images<br />
are uploaded to your Amazon <strong>S3</strong> bucket.<br />
Note: Only newly uploaded files are uploaded to Amazon<br />
<strong>S3</strong>. Activating this plugin does not move previous uploads. Also,<br />
deactivating the plugin doesn’t move files back onto your server.<br />
(<strong>Sell</strong> <strong>Media</strong> <strong>S3</strong>)<br />
How to I access my files in Amazon <strong>S3</strong>?<br />
You can either use the Amazon <strong>S3</strong> web app or you can download<br />
free desktop software like 3Hub (Mac) or <strong>S3</strong> Browser (PC).<br />
What is a “bucket” and how do I create one?<br />
A bucket is simply Amazon lingo for “folder”. I’m sure there are<br />
technical reasons why Amazon distinguishes between the two, but<br />
for average users, just think of buckets as folders. Each bucket is<br />
folder that contains stuff that you want to store in your Amazon <strong>S3</strong><br />
cloud storage account.<br />
Page | 31
You can create a new bucket by logging into the Amazon <strong>S3</strong> web<br />
app and click the “Create Bucket” button.<br />
Will this upload files that I’ve previously uploaded into<br />
WordPress?<br />
No. Once you activate Amazon <strong>S3</strong>, any new files that you upload<br />
will be sent to your Amazon <strong>S3</strong> account. If I need to regenerate<br />
my thumbnail images using Regenerate Thumbnails plugin will<br />
my new thumbnail images be uploaded to Amazon <strong>S3</strong>?<br />
Yes. New image sizes will be generated, uploaded and stored in<br />
your Amazon <strong>S3</strong> bucket. Now are my original files protected in<br />
my Amazon <strong>S3</strong> account?<br />
Amazon <strong>S3</strong> has three different permission levels for each file added<br />
to the account: Read/Write, Read, and None. The original, highresolution<br />
file has a permission level of “None”. Only you, the<br />
account owner, can access it. When a customer purchases from<br />
your website, <strong>Sell</strong> <strong>Media</strong> grabs this original high resolution file using<br />
the security credentials your supplied in step 4 above and<br />
dynamically generates the right files size for the customer. Lower<br />
resolution files (the files that are displayed on your website) have<br />
“Read” access.<br />
Page | 32
<strong>Sell</strong> <strong>Media</strong> Access Control<br />
The Access Control extension for <strong>Sell</strong> <strong>Media</strong> allows you to assign<br />
free access to specific products or product galleries. Free access<br />
can be granted to either everyone or clients with valid passwords.<br />
Use Cases<br />
1. Client Photo Proofing<br />
Need to give you clients access to download your<br />
photographs? Simply upload an image or a gallery of images and<br />
password protect the post. When your clients access the post with a<br />
valid password, they’ll be able to immediately download the original<br />
file and bypass the checkout process entirely. This client photo<br />
proofing WordPress solution is fast and simple for both you and<br />
your clients.<br />
2. Free Downloads<br />
Offer free downloads in your store to help drive traffic and sales.<br />
You can grant free access to either everyone or limit it to users with<br />
a valid password.<br />
3. Exclusive Content For Subscribers<br />
Offer free exclusive content to your email subscribers by sending<br />
them the password to your free product or product gallery.<br />
Live Example<br />
Use the password “NYC” (without the quotes) to access the<br />
following product gallery and download the original files: View live<br />
example.<br />
Page | 33
(<strong>Sell</strong> <strong>Media</strong> Access Control)<br />
Screenshots<br />
Access control – admin view<br />
Access control – client proofing<br />
Page | 34
<strong>Sell</strong> <strong>Media</strong> Add Bulk<br />
The “Add Bulk” extension for our <strong>Sell</strong> <strong>Media</strong> plugin enables you to<br />
upload multiple products at once and assign collections, licenses<br />
and other price settings in one click.<br />
Use Cases<br />
1. Add Multiple Products In Bulk<br />
The Add Bulk extension allows sellers to quickly and easily upload<br />
multiple products at once. Each image that you upload on the Add<br />
Bulk page will get it’s own dedicated product page.<br />
2. Product Collections<br />
While <strong>Sell</strong> <strong>Media</strong> already includes the ability to sell multiple images<br />
(a gallery) from a single product entry, some sellers might want<br />
each image to have it’s own dedicated product page. Using the Add<br />
Bulk extension, you can upload multiple products at once and<br />
assign these products to a single “Collection” for grouping.<br />
3. Product Keywords<br />
By default, each product in <strong>Sell</strong> <strong>Media</strong> is assigned the keywords of<br />
any images that were uploaded to it. This is an important concept to<br />
understand because it has implications to how the search<br />
functionality works on your website.<br />
For example, imagine that you’ve just photographed an event<br />
featuring the movie star Jennifer Lawrence. You create a single<br />
product in <strong>Sell</strong> <strong>Media</strong> called “Jennifer Lawrence at the Oscars” and<br />
upload all of your images of Jennifer Lawrence to that product. <strong>Sell</strong><br />
<strong>Media</strong> will take all of the keywords attached to your images and<br />
apply them to the product. Now, when visitors come to your website<br />
and search for “Jennifer Lawrence” they are taken to that specific<br />
product page. Perfect! Works as expected!<br />
Page | 35
(<strong>Sell</strong> <strong>Media</strong> Add Bulk)<br />
But now consider this use case: You photograph multiple movie<br />
stars at one event and upload all of those images to a single<br />
product in <strong>Sell</strong> <strong>Media</strong> called “The Oscars”. Since you tagged the<br />
names of each movie star as keywords, searching for “Jennifer<br />
Lawrence” might actually show images of other celebrities because<br />
you added their names as keywords, which were assigned to the<br />
product. Not ideal.<br />
You have two options in this case: First, consider only adding<br />
images that contain the same keywords to each product. Second,<br />
consider using the Add Bulk approach and let each image have it’s<br />
own dedicated product page with highly relevant and targeted<br />
keywords.<br />
Screenshots<br />
Page | 36
<strong>Sell</strong> <strong>Media</strong> Expire Download<br />
This premium extension for <strong>Sell</strong> <strong>Media</strong> allows sellers to set an<br />
expire time for purchased downloads. This helps protect your paid<br />
downloads from being shared online well after the files have been<br />
purchased.<br />
Use Case Scenarios<br />
1. Shared Download Links – This extension helps prevent<br />
unscrupulous users from downloading your paid products after the<br />
expire time that you set.<br />
2. Double Protection – Accessing paid downloads requires a special<br />
link that is only sent to buyers after they have paid. Adding an<br />
expire time adds another layer of protection.<br />
Requirements<br />
This extension requires the free <strong>Sell</strong> <strong>Media</strong> plugin to work.<br />
Installation & Configuration<br />
1. Download the extension on the Customer Dashboard.<br />
2. Log into your WordPress site.<br />
3. Click Plugins -> Add New -> Upload Plugin.<br />
4. Select the ZIP that you downloaded above.<br />
5. Activate the plugin.<br />
6. Visit <strong>Sell</strong> <strong>Media</strong> -> Settings -> Misc -> Download Expire.<br />
7. Choose the time variable that works best for your store.<br />
8. Now, all download links sent via email will expire accordingly.<br />
Page | 37
(<strong>Sell</strong> <strong>Media</strong> Expire Download)<br />
<strong>Sell</strong> <strong>Media</strong> Subscription<br />
November 1, 2016<br />
Similar post<br />
<strong>Sell</strong> <strong>Media</strong><br />
October 8, 2012<br />
Similar post<br />
Page | 38
<strong>Sell</strong> <strong>Media</strong> Free Downloads<br />
The Free Downloads extension for our <strong>Sell</strong> <strong>Media</strong> plugin makes it<br />
easy to generate leads and grow your mailing list by allowing you to<br />
offer free downloads. When visitors click the download button on an<br />
image, they will be prompted to submit their name and e-mail<br />
address to complete the download. The extension integrates with<br />
MailChimp, an e-mail marketing system.<br />
Powerful Marketing Tool<br />
Remember those “Subscribe to my email newsletter” forms and<br />
links? Here’s a secret: They really aren’t any good at lead<br />
generation or growing your mailing list. Oh, the truth hurts! Giving<br />
away free downloads is a great way to grow your mailing list<br />
because users are actually receiving something in exchange for<br />
their email address. This a critical piece of running a successful<br />
online business. The bigger your list, the more potential customers.<br />
How it works<br />
1. You must be using WordPress and our free <strong>Sell</strong> <strong>Media</strong> plugin.<br />
2. Install and activate the Free Downloads extension just like a<br />
normal plugin.<br />
3. Visit the <strong>Sell</strong> <strong>Media</strong> > Settings > Misc > Free Downloads Settings<br />
4. Fill in your MailChimp API Key. You can find your MailChimp API<br />
Key on the Account > Extras > API Keys page at MailChimp.com<br />
5. Add a new item to <strong>Sell</strong> <strong>Media</strong> and make sure the Free Download<br />
checkbox is checked. This turns this download into a free<br />
download, replaces the “Buy” buttons with “Download” buttons.<br />
6. Visitors will add their name and email address to the Free<br />
Download form, the extension emails them their download, and<br />
their contact info is added to your mailing list in MailChimp.<br />
Page | 39
(<strong>Sell</strong> <strong>Media</strong> Free Downloads)<br />
Screenshots<br />
Page | 40
Page | 41<br />
(<strong>Sell</strong> <strong>Media</strong> Free Downloads)
<strong>Sell</strong> <strong>Media</strong> Reprints<br />
VIDEO:<br />
https://graphpaperpress.com/plugins/sellmedia-reprints/<br />
The Reprints (Self-Fulfillment) extension for <strong>Sell</strong> <strong>Media</strong> allows store<br />
owners to sell photo reprints directly out of their WordPress site and<br />
print and ship them directly to their customers. Now you can sell<br />
both downloadable files and prints using <strong>Sell</strong> <strong>Media</strong>! You can create<br />
an unlimited number of print sizes that buyers can purchase directly<br />
from your WordPress site. You can print the images yourself, or<br />
send them to your preferred print vendor of choice. Below are some<br />
screenshots of the Reprints (Self-Fulfillment) extension in action:<br />
Shopping Cart<br />
The shopping cart pops up on the page and allows your customers<br />
to purchase either downloads or reprints. The screenshot above<br />
those the layout of the reprint tab. Buyers can purchase any<br />
number of sizes and finishes that your can control on the settings<br />
page.<br />
Page | 42
(<strong>Sell</strong> <strong>Media</strong> Reprints)<br />
Settings Page<br />
Page | 43
(<strong>Sell</strong> <strong>Media</strong> Reprints)<br />
Configure an unlimited number of reprint sizes and finishes, set<br />
prices and configure flat, quantity and total shipping rates. The<br />
Photo Reprints (Self-Fulfillment) extensions also makes it possible<br />
to completely hide the option for buyers to purchase downloads on<br />
a store-wide basis.<br />
Page | 44
(<strong>Sell</strong> <strong>Media</strong> Reprints)<br />
You can optionally make individual images available for reprint only<br />
(not a downloadable product) by checking the “Reprint Only” option<br />
when editing an item in <strong>Sell</strong> <strong>Media</strong>.<br />
Limited Edition Photos, Prints, and Artwork<br />
You can choose to sell limited edition prints by checking the<br />
“Limited Editions” checkbox, saving the post, and later adding the<br />
total quantity that you want to sell.<br />
Page | 45
Page | 46<br />
<strong>Sell</strong> <strong>Media</strong> Stripe<br />
VIDEO:<br />
https://graphpaperpress.com/plugins/sellmedia-stripe/<br />
The Stripe payment gateway extension for our <strong>Sell</strong> <strong>Media</strong> plugin<br />
allows you to accept credit card purchases from buyers world-wide.<br />
Buyers will not leave your site to process their credit card purchase,<br />
which is shown to help increase conversion rates and ultimately,<br />
increase sales.<br />
Main Benefits<br />
• Anyone with a credit card can buy from you. No Paypal account<br />
required.<br />
• Look professional by accepting credit card purchases directly on<br />
your site.<br />
• Increase sales by simplifying the checkout process.<br />
• Grow a healthy business with advanced analytics and financial<br />
reporting.<br />
• Incredibly easy to implement. Test your first transaction within<br />
minutes.<br />
Compare the User Experience<br />
Paypal<br />
1. Re-direct customers to PayPal’s website, away from yours<br />
2. Customer enters credit card details or logs into Paypal account<br />
3. Customer confirms they want to allow company to bill them<br />
4. Customer is redirected back to your site<br />
5. Customer gets what they paid for
(<strong>Sell</strong> <strong>Media</strong> Stripe)<br />
Stripe<br />
1. Customer enters credit card details<br />
2. Customer gets what they paid for<br />
Screenshots<br />
<strong>Sell</strong> <strong>Media</strong> Settings Page With Stripe Fields<br />
Page | 47
(<strong>Sell</strong> <strong>Media</strong> Stripe)<br />
Checkout Page With Stripe Credit Card Fields<br />
Stripe Overview Admin Page<br />
Page | 48
(<strong>Sell</strong> <strong>Media</strong> Stripe)<br />
Stripe Payments Admin Page<br />
Stripe Customers Admin Page<br />
Page | 49
(<strong>Sell</strong> <strong>Media</strong> Stripe)<br />
Stripe Account Settings Page<br />
Requirements<br />
1. You must have a free Stripe account. After signing up, you will<br />
need to obtain four keys (two for testing mode, two for live<br />
mode) on your settings page and paste them into your <strong>Sell</strong> <strong>Media</strong> -<br />
> Settings -> Payment page.<br />
2. You will need an SSL certificate, which Stripe requires to<br />
process live payments. Read Stripe’s documentation about this.<br />
Page | 50
<strong>Sell</strong> <strong>Media</strong> Subscription<br />
<strong>Sell</strong> monthly or yearly subscription plans to your stock library using<br />
the enterprise-level extension for our <strong>Sell</strong> <strong>Media</strong> plugin. Think of it<br />
like your own private iStockPhotos website where you set all prices<br />
and keep 100% of all sales revenue.<br />
Customizable Plans<br />
You can configure up to 5 monthly and 5 yearly subscription plans<br />
and can set download limits for each plan. When download limits<br />
are reached for each plan, new downloads are disabled until the<br />
next billing cycle and the customer is sent an email notification.<br />
Recurring Billing<br />
All plans come with automatic monthly or yearly recurring billing.<br />
Your customers will sign up to your website once and their accounts<br />
will be billed each month or year until they either cancel their<br />
accounts or payment fails. The more your store grows, the greater<br />
value it brings to your customers.<br />
Page | 51
(<strong>Sell</strong> <strong>Media</strong> Subscription)<br />
Beautiful, Simple Shopping Experience<br />
This extension integrates with the existing Quick View dialog popup<br />
so that your subscription plans are easy to sign up.<br />
<strong>Sell</strong> Both Single Products and Subscriptions<br />
Still want to offer single product sales? No problem! Simply set the<br />
<strong>Sell</strong>ing Preferences option to enable both single product and<br />
subscription sales.<br />
Page | 52
Email Notifications<br />
Store owners can configure up to 4 different outgoing email<br />
notifications sent to buyers including:<br />
1. Activation Email – Sent when accounts becomes active.<br />
2. Expiration Email – Sent when subscriptions expire.<br />
3. Download Limit Reached – Sent when download limits are<br />
reached.<br />
4. Cancellation Email – Sent when accounts are cancelled or billing<br />
fails.<br />
Marketing and Up-<strong>Sell</strong> Emails<br />
You can use the email notifications system to cross-market and upsell<br />
customers on various plans and store offerings. For<br />
Page | 53
(<strong>Sell</strong> <strong>Media</strong> Subscription)<br />
example, when download limits are reached, you can use this<br />
opportunity to cross-market and up-sell higher level plans via the<br />
notification email. When an account is cancelled, you can send the<br />
customer a discount code asking them to rejoin. It’s proven that<br />
these transactional emails have a much higher engagement level<br />
than any email marketing campaign, so don’t let this opportunity go<br />
to waste.<br />
The Benefits of <strong>Sell</strong>ing Subscription Plans<br />
Offering subscription plans turns a one-time product sale into a<br />
recurring sale. The more photos and videos you add, the more<br />
valuable your service is for your customers. The key benefits of<br />
selling subscription plans include:<br />
• Provides your customers with greater value.<br />
• Builds brand loyalty.<br />
• Increases revenue.<br />
<strong>Sell</strong> <strong>Media</strong> Watermark<br />
The Watermark extension for <strong>Sell</strong> <strong>Media</strong> allows you to protect your<br />
large images in one click using a watermark image of your choice.<br />
You can choose to protect all large images on your site, or just<br />
those that you plan on selling using the <strong>Sell</strong> <strong>Media</strong> plugin. Simply<br />
check the “Watermark All Images” checkbox on the Settings page<br />
The extension doesn’t watermark the original source file<br />
(which is already protected if you’re using the <strong>Sell</strong> <strong>Media</strong><br />
plugin).For best results use a transparent PNG and make sure<br />
your watermark is smaller than your image (100 pixels by 100 pixels<br />
works great). This Watermark extension does not overwrite,<br />
create new images, or harm existing images. Images must be<br />
hosted locally, not on a CDN.<br />
Page | 54
<strong>Sell</strong> <strong>Media</strong> Model Release<br />
The Model Release extension for our <strong>Sell</strong> <strong>Media</strong> plugin allows you<br />
to attach a waiver documents to your products for safe keeping and<br />
future reference. The documents will be uploaded into your media<br />
library, which can be quickly attached and reattached to one or<br />
many products.<br />
Why You Need A Model Release<br />
Photographers who publish images of people (adults, minors,<br />
groups) for sale online need signed releases to protect themselves<br />
legally. A model release provides this protection. Also known as a<br />
liability waiver, a model release is a legal document typically signed<br />
by the subject of a photograph granting permission to publish the<br />
photograph in one form or another.<br />
Example Use Case<br />
So, let’s say that you’re a photographer and you plan on creating a<br />
stock photography website using our <strong>Sell</strong> <strong>Media</strong> plugin. If you plan<br />
on selling stock photos of people on your website, you’ll definitely<br />
want to have the subjects sign a release form. You can get a<br />
sample release form from ASMP.<br />
Example Workflow<br />
1. Print copies of your preferred model release document or use one<br />
of the many available waiver mobile apps.<br />
2. Have your subjects sign your waiver.<br />
3. Take a photo of the signed waiver after the shoot.<br />
4. Upload your photos in <strong>Sell</strong> <strong>Media</strong> and click the “Choose” button in<br />
the “Model Release” section on the page.<br />
5. Choose the model release from your computer.<br />
6. Done!<br />
Page | 55
Now, your model release document is forever attached to the<br />
photos or videos that it relates to in your store. The text “Model<br />
Release: Yes” will appear below the “Buy” button on every<br />
product that has an attached model release.<br />
Screenshots<br />
Model release notice to buyers<br />
Model release admin interface<br />
Page | 56
<strong>Sell</strong> <strong>Media</strong> Manual Purchases<br />
The Manual Purchases extension for the <strong>Sell</strong> <strong>Media</strong> plugin allows<br />
buyers to arrange an offline payment (check, wire, cash, etc) with<br />
sellers on the checkout page. This is useful if you have established,<br />
pre-existing payment arrangements with your buyers. See how it<br />
works below.<br />
PayPal is the default payment gateway available in <strong>Sell</strong> <strong>Media</strong>. With<br />
the Manual Purchases extension activated, an additional payment<br />
option will appear above PayPal.<br />
When the Manual Purchase radio button is selected, additional<br />
fields will be shown to buyers so they can bypass the PayPal or<br />
(Stripe) payment gateways altogether.<br />
Page | 57
(<strong>Sell</strong> <strong>Media</strong> Manual Purchases)<br />
After the buyer fills out the fields and clicks Checkout Now, an email<br />
will be sent to either the seller or the contributor (the creator of the<br />
work).<br />
Page | 58
<strong>Sell</strong> <strong>Media</strong> Mailchimp<br />
The MailChimp extension for<br />
the <strong>Sell</strong> <strong>Media</strong> plugin for WordPress allows your buyers to sign up<br />
for your preferred MailChimp newsletter list. Buyers will see a “Sign<br />
Up for Newsletter” checkbox on the checkout page. This option will<br />
only appear for users who are not logged in.<br />
MailChimp is one of the most popular and feature rich web apps for<br />
creating and sending newsletters to your customers. According to<br />
their website, more than 2.5 million people use MailChimp to design<br />
email newsletters, share them on social networks, integrate with<br />
services you already use, and track your results.<br />
Page | 59
<strong>Sell</strong> <strong>Media</strong> Magnifier<br />
This extension for the <strong>Sell</strong> <strong>Media</strong> plugin adds a “magnifying glass”<br />
over images, allowing buyers to inspect the image closer for<br />
sharpness. Simply upload and activate this plugin and the magnifier<br />
will be added on all single sell media item pages.<br />
View a demo of the Magnifier extension.<br />
Whether you are building a stock photography website or posting<br />
images for client viewing, the Magnifier extension is both highly<br />
useful and a fun interactive tool that empowers buyers, promoting<br />
sales. The Magnifier only works on modern browsers.<br />
Page | 60
<strong>Sell</strong> <strong>Media</strong> Discount Codes<br />
The Discount Codes extension for <strong>Sell</strong> <strong>Media</strong> allows store owners<br />
to create an infinite number of discount codes. Share them with<br />
your customers to help drive sales. This works with the reprints<br />
extensions, also, so you can offer discounts for printed images, too.<br />
Main Features<br />
• Percentage or Flat Amount – You can set either 20% off or $20<br />
off.<br />
• Start and End Dates – Perfect for holidays or time-sensitive<br />
offers.<br />
• Maximum Uses – Set the maximum number of uses for each<br />
coupon.<br />
Screenshots<br />
Add New Discount Code<br />
Page | 61
(<strong>Sell</strong> <strong>Media</strong> Discount Codes)<br />
View All Discount Codes<br />
Discount Code Field on Checkout Page<br />
Page | 62
(<strong>Sell</strong> <strong>Media</strong> Discount Codes)<br />
Discount Applied To Total On Checkout Page<br />
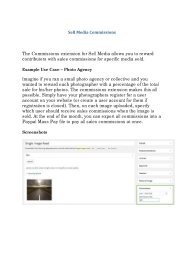
<strong>Sell</strong> <strong>Media</strong> Commissions<br />
The Commissions extension for <strong>Sell</strong> <strong>Media</strong> allows you to reward<br />
contributors with sales commissions for specific media sold.<br />
Example Use Case – Photo Agency<br />
Imagine if you ran a small photo agency or collective and you<br />
wanted to reward each photographer with a percentage of the total<br />
sale for his/her photos. The commissions extension makes this all<br />
possible. Simply have your photographers register for a user<br />
account on your website (or create a user account for them if<br />
registration is closed). Then, on each image uploaded, specify<br />
which user should receive sales commissions when the image is<br />
sold. At the end of the month, you can export all commissions into a<br />
Paypal Mass Pay file to pay all sales commissions at once.<br />
Page | 63
(<strong>Sell</strong> <strong>Media</strong> Commissions)<br />
Screenshots<br />
<strong>Sell</strong> <strong>Media</strong> Download Lightbox<br />
This extension allows visitors to download the high resolution<br />
versions of all images in their Lightbox with a valid passcode.<br />
Use Case Scenarios<br />
1. Editor Access – Many photographers work with clients whom they<br />
trust, such as editors at magazines and newspapers. This<br />
extension would allow these photographers to provide their trusted<br />
clients with an easy way download their favorite images in one<br />
swoop.<br />
2. Client Downloads – Event photographers might want to provide<br />
their clients the ability to download the high resolution images in<br />
one batch.<br />
Requirements<br />
This extension requires the ZIP Archive PHP library, which is<br />
already installed on most reputable web hosting providers. Ask your<br />
Page | 64
(<strong>Sell</strong> <strong>Media</strong> Download Lightbox)<br />
web hosting provider to activate the ZIP Archive PHP library in<br />
order to use this extension.<br />
Installation & Configuration<br />
1. Download the extension on the Customer Dashboard.<br />
2. Log into your WordPress site.<br />
3. Click Plugins -> Add New -> Upload Plugin.<br />
4. Select the ZIP that you downloaded above.<br />
5. Activate the plugin.<br />
6. Visit <strong>Sell</strong> <strong>Media</strong> -> Settings -> Misc -> Download Lightbox<br />
Passcode.<br />
7. Type in your Passcode. This is the passcode that you will share<br />
with your clients to allow them to download everything in their<br />
Lightbox.<br />
8. To test the functionality, add one or many items to your Lightbox.<br />
9. On the Lightbox page, click the Download All link and provide the<br />
passcode.<br />
10. All files will be zipped up and the download will immediately<br />
begin.<br />
Page | 65
GPP Shortcodes<br />
GPP Shortcodes is a free WordPress plugin that allows you to<br />
easily add “flat design” buttons, boxes, icons, pricing tables, tabs,<br />
toggles and column layouts in your posts and pages without<br />
modifying CSS, HTML or PHP.<br />
Use the navigation below to jump to specific instructions:<br />
1. Flat Buttons<br />
2. Boxes<br />
3. Icons<br />
4. Highlights<br />
5. Dividers<br />
6. Accordions<br />
7. Toggles<br />
8. Tabs<br />
9. Google Maps<br />
10. Pricing Table<br />
11. Grids<br />
Page | 66
1. Flat Buttons<br />
Button Colors<br />
Grey Button<br />
Yellow Button<br />
Green Button<br />
Red Block Button<br />
Blue Button<br />
Purple Button<br />
Black Button<br />
Button Sizes<br />
Small Button<br />
Medium Button<br />
Large Button<br />
Button Style<br />
Medium Inline Button<br />
Medium Block Button<br />
Buttons with Icons<br />
Button Text<br />
Page | 67
Basic Usage:<br />
[gpp_button url="http://graphpaperpress.com"]Button Text[/gpp_button]<br />
Generates:<br />
Button Text<br />
Advanced Usage:<br />
[gpp_button color="blue" url="http://graphpaperpress.com" title="themes"<br />
icon_left="twitter" target="_blank" size="large" display="block"]Button<br />
Text[/gpp_button]<br />
Generates:<br />
Button Text<br />
Attributes:<br />
color, url, title, target, rel, class, icon_left, icon_right, size, display<br />
Available colors:<br />
black, green, blue, red, yellow, pink, purple<br />
Available sizes:<br />
small, medium, large<br />
Available displays:<br />
inline, block<br />
Page | 68
Available icon_left and icon_right:<br />
standard, aside, image, gallery, video, status, quote, link, chat,<br />
audio, github, dribble, twitter, facebook, facebook-alt, wordpress,<br />
googleplus, linkedin, linkedin-alt, pinterest, pinterest-alt, flickr,<br />
vimeo, youtube, tumblr, instagram, codepen, polldaddy, comment,<br />
category, tag, time, user, day, week, month, pinned, search,<br />
unzoom, zoom, show, hide, close, close-alt, trash, star, home, mail,<br />
edit, reply, feed, warning, share, attachment, location, checkmark,<br />
menu, top, minimize, maximize, 404, spam, summary, cloud, key,<br />
dot, next, previous, expand, collapse, dropdown, dropdown-left, top,<br />
draggable, phone, send-to-phone, plugin, cloud-download, cloudupload,<br />
external, document, book, cog, unapprove, cart, pause,<br />
stop, skip-back, skip-ahead, play, tablet, send-to-tablet, info, notice,<br />
help, fastforward, rewind, portfolio, uparrow, rightarrow, downarrow,<br />
leftarrow<br />
3. Icons<br />
Icons courtesy of Genericons.<br />
Available rel:<br />
self, blank, target<br />
2. Boxes<br />
Page | 69
Duis aute irure dolor in reprehenderit.<br />
Duis aute irure dolor in reprehenderit.<br />
Duis aute irure dolor in reprehenderit.<br />
Duis aute irure dolor in reprehenderit.<br />
Duis aute irure dolor in reprehenderit.<br />
Duis aute irure dolor in reprehenderit.<br />
Left aligned text<br />
Right aligned text<br />
Basic Usage:<br />
[gpp_box]Alert Box Text[/gpp_box]<br />
Generates:<br />
Alert Box Text<br />
Advanced Usage:<br />
Page | 70
[gpp_box color="green" width="50%" text_align="left" margin_bottom="50px"<br />
margin_top="50px"]Alert Box Text[/gpp_box]<br />
Alert Box Text<br />
Attributes:<br />
color, width, text_align, margin_bottom, margin_top, class<br />
Available colors:<br />
black, green, blue, red, yellow, pink, purple<br />
Text align:<br />
left, right, center<br />
Usage:<br />
[gpp_icon type="image"]<br />
Generates:<br />
4. Highlights<br />
Lorem ipsum dolor sit amet, consectetur adipisicing elit, sed do<br />
eiusmod tempor incididunt ut labore et dolore magna aliqua. Ut<br />
enim ad minim veniam, quis nostrud exercitation ullamco laboris<br />
nisi ut aliquip ex ea commodo consequat. Duis aute irure dolor in<br />
reprehenderit in voluptate velit esse cillum dolore eu fugiat nulla<br />
pariatur. Excepteur sint occaecat cupidatat non proident, sunt in<br />
culpa qui officia deserunt mollit anim id est laborum.<br />
Usage:<br />
[gpp_highlight]text to highlight[/gpp_highlight]<br />
Generates<br />
text to highlight<br />
Attributes:<br />
Page | 71
color<br />
Available colors:<br />
grey, black, green, blue, red, yellow, pink, purple<br />
Advanced Usage:<br />
[gpp_highlight color="green"]text to highlight[/gpp_highlight]<br />
5. Dividers<br />
Page | 72
Usage:<br />
[gpp_divider]<br />
Generates:<br />
Attributes:<br />
type, color<br />
Available types:<br />
solid, dashed, dotted, double<br />
Available colors:<br />
grey, black, green, blue, red, yellow, pink, purple<br />
Advanced Usage:<br />
[gpp_divider type="dashed" color="green"]<br />
6. Accordions<br />
Section #1<br />
Lorem ipsum dolor sit amet, consectetur adipisicing elit, sed do<br />
eiusmod tempor incididunt ut labore et dolore magna aliqua. Ut<br />
enim ad minim veniam, quis nostrud exercitation ullamco laboris<br />
nisi ut aliquip ex ea commodo consequat. Duis aute irure dolor in<br />
reprehenderit in voluptate velit esse cillum dolore eu fugiat nulla<br />
pariatur. Excepteur sint occaecat cupidatat non proident, sunt in<br />
culpa qui officia deserunt mollit anim id est laborum.<br />
Section #2<br />
Section #3<br />
Page | 73
Basic Usage:<br />
[gpp_accordion][gpp_accordion_section title="Section #1"]Section 1<br />
text[/gpp_accordion_section][gpp_accordion_section title="Section #2"]Section 2<br />
text[/gpp_accordion_section][gpp_accordion_section title="Section #3"]Section 3<br />
text[/gpp_accordion_section][/gpp_accordion]<br />
Advanced Usage:<br />
[gpp_accordion][gpp_accordion_section title="Section #1"]Section 1<br />
text[/gpp_accordion_section][gpp_accordion_section title="Section #2"]Section 2<br />
text[/gpp_accordion_section][gpp_accordion_section title="Section #3"]Section 3<br />
text[/gpp_accordion_section][/gpp_accordion]<br />
Attributes:<br />
title, class<br />
7. Toggles<br />
Toggle #1<br />
Another Toggle<br />
Usage:<br />
[gpp_toggle title="Toggle Title"]Toggle text[/gpp_toggle]<br />
Attributes:<br />
title, class<br />
Page | 74
8. Tabs<br />
• Tab #1<br />
• Tab #2<br />
• Tab #3<br />
Lorem ipsum dolor sit amet, consectetur adipisicing elit, sed do<br />
eiusmod tempor incididunt ut labore et dolore magna aliqua. Ut<br />
enim ad minim veniam, quis nostrud exercitation ullamco laboris<br />
nisi ut aliquip ex ea commodo consequat. Duis aute irure dolor in<br />
reprehenderit in voluptate velit esse cillum dolore eu fugiat nulla<br />
pariatur. Excepteur sint occaecat cupidatat non proident, sunt in<br />
culpa qui officia deserunt mollit anim id est laborum.<br />
Usage:<br />
[gpp_tabgroup][gpp_tab title="Tab #1"]Tab 1 text [/gpp_tab][gpp_tab title="Tab<br />
#2"]Tab 2 text[/gpp_tab][/gpp_tabgroup]<br />
Attributes:<br />
title, class<br />
9. Google Maps<br />
Usage:<br />
[gpp_googlemap location="new york,usa"]<br />
Advanced Usage:<br />
[gpp_googlemap location="new york,usa" zoom="5" title="New York" height="500"]<br />
Attributes:<br />
location, height, title, zoom, class<br />
Page | 75
10. Pricing Tables<br />
Gold<br />
$200<br />
per month<br />
• 100GB Storage<br />
• 4GB Ram<br />
• 10 databases<br />
• 1,000 Emails<br />
• 500GB Bandwidth<br />
Sign Up<br />
Silver<br />
$100<br />
per month<br />
• 30GB Storage<br />
• 1GB Ram<br />
• 10 databases<br />
• 1,000 Emails<br />
• 50GB Bandwidth<br />
Sign Up<br />
Bronze<br />
$40<br />
per month<br />
• 10GB Storage<br />
• 512MB Ram<br />
• 10 databases<br />
• 1,000 Emails<br />
• 25GB Bandwidth<br />
Sign Up<br />
Usage:<br />
[gpp_pricing plan="Premium" cost="$200" per="per month"<br />
button_url="http://graphpaperpress.com" button_text="Sign Up" button_color="green"<br />
button_target="self" button_rel="nofollow"]<br />
Page | 76
• plan feature<br />
• plan feature<br />
• plan feature<br />
• plan feature<br />
[/gpp_pricing]<br />
Attributes:<br />
plan, cost, per, button_url, button_text, button_color, button_target,<br />
button_rel, position, class<br />
11. Grids<br />
You can combine grid with many of the shortcodes above to create<br />
complex page layouts. One important point to remember is this:<br />
When you are adding your grid shortcodes in the WordPress editor,<br />
WordPress will transform all RETURNS as linebreaks and add a<br />
tag. This can cause your grids to display in a stair step layout,<br />
which isn’t good. To fix this, do not RETURN when adding your grid<br />
shortcodes to the WordPress editor. For example, this is correct:<br />
[one_half_first]<br />
This is the first column<br />
[/one_half_first][one_half_last]<br />
This is the first column<br />
[/one_half_last]<br />
This is incorrect:<br />
[one_half_first]<br />
This is the first column<br />
[/one_half_first]<br />
[one_half_last]<br />
This is the first column<br />
[/one_half_last]<br />
Page | 77
Notice that there is a RETURN after the [/one_half_first]? This will<br />
cause layout problems (the stair step effect, which we don’t want).<br />
Simply make sure that your ending and beginning grid shortcodes<br />
but directly up against each other, like this:<br />
[/one_half_first][one_half_last]<br />
Now, onto the full grid shortcodes…<br />
Six Columns<br />
Usage:<br />
[one_sixth_first]<br />
This is the first column<br />
[/one_sixth_first][one_sixth]<br />
This is the second column<br />
[/one_sixth][one_sixth]<br />
This is the third column<br />
[/one_sixth][one_sixth]<br />
This is the fourth column<br />
[/one_sixth][one_sixth]<br />
This is the fifth column<br />
[/one_sixth][one_sixth_last]<br />
This is the sixth and last column<br />
[/one_sixth_last]<br />
Generates:<br />
Donec sed tellus eget sapien fringilla nonummy. Mauris a ante.<br />
Suspendisse quam sem, consequat at, commodo vitae, feugiat in,<br />
nunc.<br />
Donec sed tellus eget sapien fringilla nonummy. Mauris a ante.<br />
Suspendisse quam sem, consequat at, commodo vitae, feugiat in,<br />
nunc.<br />
ColumnDonec sed tellus eget sapien fringilla nonummy. Mauris a<br />
ante. Suspendisse quam sem, consequat at, commodo vitae,<br />
feugiat in, nunc.<br />
onec sed tellus eget sapien fringilla nonummy. Mauris a ante.<br />
Suspendisse quam sem, consequat at, commodo vitae, feugiat in,<br />
nunc<br />
onec sed tellus eget sapien fringilla nonummy. Mauris a ante.<br />
Suspendisse quam sem, consequat at, commodo vitae, feugiat in,<br />
nunc.<br />
Page | 78
Donec sed tellus eget sapien fringilla nonummy. Mauris a ante.<br />
Suspendisse quam sem, consequat at, commodo vitae, feugiat in,<br />
nunc.<br />
Four Columns<br />
Usage:<br />
[one_fourth_first]<br />
This is the first column<br />
[/one_fourth_first][one_fourth]<br />
This is the second column<br />
[/one_fourth][one_fourth]<br />
This is the third column<br />
[/one_fourth][one_fourth_last]<br />
This is the fourth and last column<br />
[/one_fourth_last]<br />
Generates:<br />
First Column<br />
Donec sed tellus eget sapien fringilla nonummy. Mauris a ante.<br />
Suspendisse quam sem, consequat at, commodo vitae, feugiat in,<br />
nunc.<br />
Second Column<br />
Donec sed tellus eget sapien fringilla nonummy. Mauris a ante.<br />
Suspendisse quam sem, consequat at, commodo vitae, feugiat in,<br />
nunc.<br />
Third Column<br />
Donec sed tellus eget sapien fringilla nonummy. Mauris a ante.<br />
Suspendisse quam sem, consequat at, commodo vitae, feugiat in,<br />
nunc.<br />
Fourth Column<br />
Donec sed tellus eget sapien fringilla nonummy. Mauris a ante.<br />
Suspendisse quam sem, consequat at, commodo vitae, feugiat in,<br />
nunc.<br />
Page | 79
Three Columns<br />
Usage:<br />
[one_third_first]<br />
This is the first column<br />
[/one_third_first][one_third]<br />
This is the second column<br />
[/one_third][one_third_last]<br />
This is the third and last column<br />
[/one_third_last]<br />
Generates:<br />
First Column<br />
Donec sed tellus eget sapien fringilla nonummy. Mauris a ante.<br />
Suspendisse quam sem, consequat at, commodo vitae, feugiat in,<br />
nunc.<br />
Second Column<br />
Donec sed tellus eget sapien fringilla nonummy. Mauris a ante.<br />
Suspendisse quam sem, consequat at, commodo vitae, feugiat in,<br />
nunc.<br />
Third Column<br />
Donec sed tellus eget sapien fringilla nonummy. Mauris a ante.<br />
Suspendisse quam sem, consequat at, commodo vitae, feugiat in,<br />
nunc.<br />
Page | 80
Two Columns<br />
Usage:<br />
[one_half_first]<br />
This is the first column<br />
[/one_half_first][one_half_last]<br />
This is the second and last column<br />
[/one_half_last]<br />
Generates:<br />
First Column<br />
Donec sed tellus eget sapien fringilla nonummy. Mauris a ante.<br />
Suspendisse quam sem, consequat at, commodo vitae, feugiat.<br />
Last Column<br />
Donec sed tellus eget sapien fringilla nonummy. Mauris a ante.<br />
Suspendisse quam sem, consequat at, commodo vitae, feugiat.<br />
One-Sixth & Five-Sixth Columns<br />
Usage:<br />
[one_sixth_first]<br />
This is the first column<br />
[/one_sixth_first][five_sixth_last]<br />
This is the second and last column<br />
[/five_sixth_last]<br />
First Column<br />
Donec sed tellus eget sapien fringilla nonummy. Mauris a ante.<br />
Page | 81
Last Column<br />
Donec sed tellus eget sapien fringilla nonummy. Mauris a ante.<br />
Suspendisse quam sem, consequat at, commodo vitae, feugiat in,<br />
nunc. Donec sed tellus eget sapien fringilla nonummy. Mauris a<br />
ante. Suspendisse quam sem, consequat at, commodo vitae,<br />
feugiat in, nunc. Donec sed tellus eget sapien fringilla nonummy.<br />
Mauris a ante. Suspendisse quam sem, consequat at, commodo<br />
vitae, feugiat in, nunc. Donec sed tellus eget sapien fringilla<br />
nonummy. Mauris a ante. Suspendisse quam sem, consequat at,<br />
commodo vitae, feugiat in, nunc. Donec sed tellus eget sapien<br />
fringilla nonummy. Mauris a ante. Suspendisse quam sem,<br />
consequat at, commodo vitae, feugiat in, nunc.<br />
One-Third & Two-Third Columns<br />
Usage:<br />
[one_third_first]<br />
This is the first column<br />
[/one_third_first][two_thirds_last]<br />
This is the second and last column<br />
[/two_thirds_last]<br />
First Column<br />
Donec sed tellus eget sapien fringilla nonummy. Mauris a ante.<br />
Suspendisse quam sem, consequat at, commodo vitae, feugiat in,<br />
nunc.<br />
Last Column<br />
Donec sed tellus eget sapien fringilla nonummy. Mauris a ante.<br />
Suspendisse quam sem, consequat at, commodo vitae, feugiat in,<br />
nunc. Donec sed tellus eget sapien fringilla nonummy. Mauris a<br />
ante. Suspendisse quam sem, consequat at, commodo vitae,<br />
feugiat in, nunc. Donec sed tellus eget sapien fringilla nonummy.<br />
Mauris a ante. Suspendisse quam sem, consequat at, commodo<br />
vitae, feugiat in, nunc.<br />
Page | 82