RKL 460-480 GB-S05 - Remko
RKL 460-480 GB-S05 - Remko
RKL 460-480 GB-S05 - Remko

You also want an ePaper? Increase the reach of your titles
YUMPU automatically turns print PDFs into web optimized ePapers that Google loves.
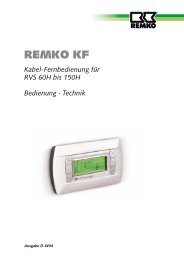
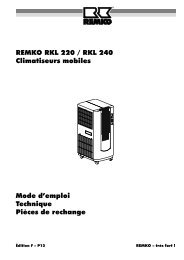
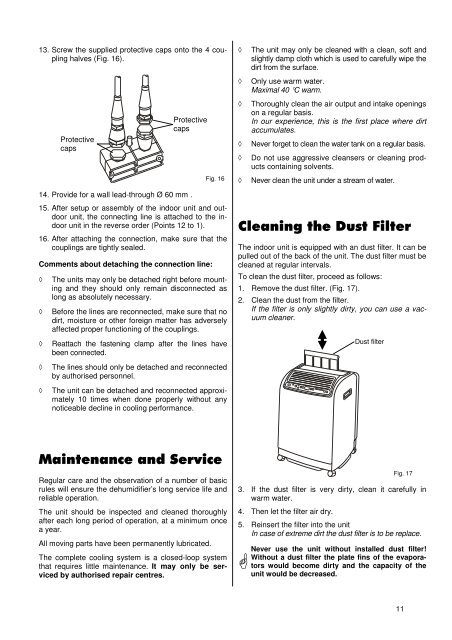
13. Screw the supplied protective caps onto the 4 coupling<br />
halves (Fig. 16).<br />
Protective<br />
caps<br />
Protective<br />
caps<br />
14. Provide for a wall lead-through Ø 60 mm .<br />
15. After setup or assembly of the indoor unit and outdoor<br />
unit, the connecting line is attached to the indoor<br />
unit in the reverse order (Points 12 to 1).<br />
16. After attaching the connection, make sure that the<br />
couplings are tightly sealed.<br />
Comments about detaching the connection line:<br />
The units may only be detached right before mounting<br />
and they should only remain disconnected as<br />
long as absolutely necessary.<br />
Before the lines are reconnected, make sure that no<br />
dirt, moisture or other foreign matter has adversely<br />
affected proper functioning of the couplings.<br />
Reattach the fastening clamp after the lines have<br />
been connected.<br />
The lines should only be detached and reconnected<br />
by authorised personnel.<br />
The unit can be detached and reconnected approximately<br />
10 times when done properly without any<br />
noticeable decline in cooling performance.<br />
' 3<br />
Fig. 16<br />
Regular care and the observation of a number of basic<br />
rules will ensure the dehumidifier’s long service life and<br />
reliable operation.<br />
The unit should be inspected and cleaned thoroughly<br />
after each long period of operation, at a minimum once<br />
a year.<br />
All moving parts have been permanently lubricated.<br />
The complete cooling system is a closed-loop system<br />
that requires little maintenance. It may only be serviced<br />
by authorised repair centres.<br />
The unit may only be cleaned with a clean, soft and<br />
slightly damp cloth which is used to carefully wipe the<br />
dirt from the surface.<br />
Only use warm water.<br />
Maximal 40 °C warm.<br />
Thoroughly clean the air output and intake openings<br />
on a regular basis.<br />
In our experience, this is the first place where dirt<br />
accumulates.<br />
Never forget to clean the water tank on a regular basis.<br />
Do not use aggressive cleansers or cleaning products<br />
containing solvents.<br />
Never clean the unit under a stream of water.<br />
& 0 1<br />
The indoor unit is equipped with an dust filter. It can be<br />
pulled out of the back of the unit. The dust filter must be<br />
cleaned at regular intervals.<br />
To clean the dust filter, proceed as follows:<br />
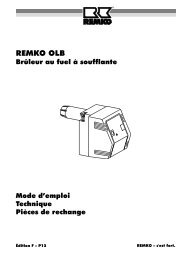
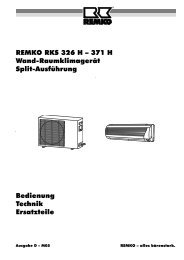
1. Remove the dust filter. (Fig. 17).<br />
2. Clean the dust from the filter.<br />
If the filter is only slightly dirty, you can use a vacuum<br />
cleaner.<br />
3. If the dust filter is very dirty, clean it carefully in<br />
warm water.<br />
4. Then let the filter air dry.<br />
Dust filter<br />
Fig. 17<br />
5. Reinsert the filter into the unit<br />
In case of extreme dirt the dust filter is to be replace.<br />
Never use the unit without installed dust filter!<br />
Without a dust filter the plate fins of the evaporators<br />
would become dirty and the capacity of the<br />
unit would be decreased.<br />
11