RKL 460-480 GB-S05 - Remko
RKL 460-480 GB-S05 - Remko
RKL 460-480 GB-S05 - Remko

Create successful ePaper yourself
Turn your PDF publications into a flip-book with our unique Google optimized e-Paper software.
10 Operating mode and fan setting display<br />
This display provides information about the operating<br />
mode and the fan setting which have been selected.<br />
11 "DRAIN WATER" display (Water tank full)<br />
When the water tank is full, the "DRAIN WATER" and<br />
"MODE" displays blink and an alarm goes off. The<br />
compressor automatically switches off. After the water<br />
tank has been emptied and replaced, the unit<br />
switches back to automatic operation.<br />
Information about the water tank:<br />
During normal operation, the water tank will not fill up<br />
because the condensation is pumped out of the tank via<br />
the connecting line to the outdoor unit.<br />
Make sure that the lower edge of the outdoor unit<br />
is 1.8 meters above the lower edge of the indoor<br />
unit.<br />
The water tank must be emptied when fixing malfunctions.<br />
Proceed as follows:<br />
1. Remove the water tank drainage tube on the back of<br />
the indoor unit from its holder.<br />
2. Remove the sealing cap from the tube.<br />
3. Collect the water that drains out.<br />
4. Then reinsert the sealing cap into the tube.<br />
5. Replace the tube into its holder.<br />
. ' 2 &<br />
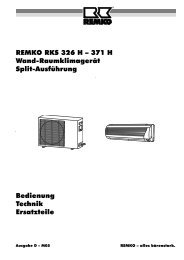
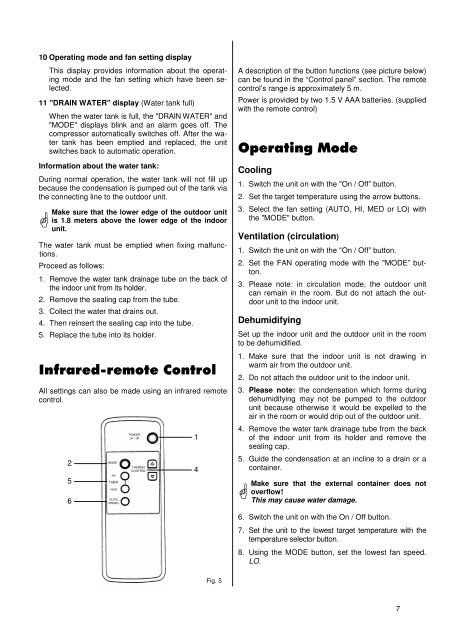
All settings can also be made using an infrared remote<br />
control.<br />
2<br />
5<br />
6<br />
MODE<br />
set<br />
TIMER<br />
reset<br />
AUTO<br />
SWING<br />
POWER<br />
on / off<br />
THERMO<br />
CONTROL<br />
1<br />
4<br />
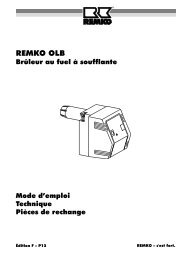
Fig. 5<br />
A description of the button functions (see picture below)<br />
can be found in the “Control panel” section. The remote<br />
control’s range is approximately 5 m.<br />
Power is provided by two 1.5 V AAA batteries. (supplied<br />
with the remote control)<br />
Cooling<br />
'<br />
1. Switch the unit on with the "On / Off” button.<br />
2. Set the target temperature using the arrow buttons.<br />
3. Select the fan setting (AUTO, HI, MED or LO) with<br />
the "MODE" button.<br />
Ventilation (circulation)<br />
1. Switch the unit on with the "On / Off” button.<br />
2. Set the FAN operating mode with the "MODE” button.<br />
3. Please note: in circulation mode, the outdoor unit<br />
can remain in the room. But do not attach the outdoor<br />
unit to the indoor unit.<br />
Dehumidifying<br />
Set up the indoor unit and the outdoor unit in the room<br />
to be dehumidified.<br />
1. Make sure that the indoor unit is not drawing in<br />
warm air from the outdoor unit.<br />
2. Do not attach the outdoor unit to the indoor unit.<br />
3. Please note: the condensation which forms during<br />
dehumidifying may not be pumped to the outdoor<br />
unit because otherwise it would be expelled to the<br />
air in the room or would drip out of the outdoor unit.<br />
4. Remove the water tank drainage tube from the back<br />
of the indoor unit from its holder and remove the<br />
sealing cap.<br />
5. Guide the condensation at an incline to a drain or a<br />
container.<br />
Make sure that the external container does not<br />
overflow!<br />
This may cause water damage.<br />
6. Switch the unit on with the On / Off button.<br />
7. Set the unit to the lowest target temperature with the<br />
temperature selector button.<br />
8. Using the MODE button, set the lowest fan speed.<br />
LO.<br />
7