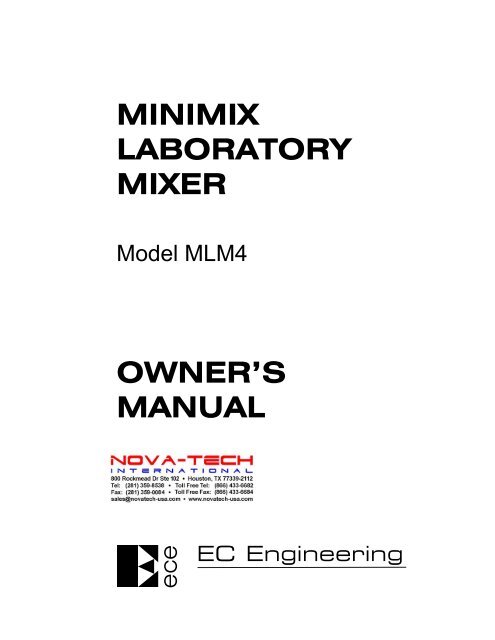
minimix laboratory mixer owner's manual - Nova-Tech International ...
minimix laboratory mixer owner's manual - Nova-Tech International ...
minimix laboratory mixer owner's manual - Nova-Tech International ...

Create successful ePaper yourself
Turn your PDF publications into a flip-book with our unique Google optimized e-Paper software.
MINIMIX<br />
LABORATORY<br />
MIXER<br />
Model MLM4<br />
OWNER’S<br />
MANUAL<br />
ece<br />
EC Engineering<br />
6223 – 186 Street, Edmonton, Alberta, Canada T5T 2T3<br />
Phone 780.487.0249 Fax 780.487.6883 www.ecengineering.net
Table of Contents<br />
Table of Contents<br />
Packing list<br />
Safety precautions<br />
1. Introduction......................................................................................... 1.1<br />
2. Equipment description ....................................................................... 2.1<br />
Main components..........................................................................................2.1<br />
Mixer unit........................................................................................................2.1<br />
Jar assembly..................................................................................................2.1<br />
Power supply .................................................................................................2.2<br />
Carrying case.................................................................................................2.2<br />
3. Jar test procedures ............................................................................ 3.1<br />
4. Maintenance ........................................................................................ 4.1<br />
General...........................................................................................................4.1<br />
Cleaning.........................................................................................................4.1<br />
Lubrication .....................................................................................................4.1<br />
Fuse replacement..........................................................................................4.1<br />
Tools...............................................................................................................4.1<br />
5. Specifications...................................................................................... 5.1<br />
Unit .................................................................................................................5.1<br />
Basic features ................................................................................................5.1<br />
Dimensions ....................................................................................................5.1<br />
Weights ..........................................................................................................5.1<br />
Materials of construction ...............................................................................5.1<br />
Illustration showing main components ....................................... Follows Page 1.1<br />
Rev 26 Nov 03<br />
http://www.novatech-usa.com/Products/Laboratory-Equipment-Supply-Products Tel: (281) 359-8538 Toll Free:(866) 433-6682
Packing list i<br />
Packing list<br />
The items listed below should be included in the Minimix shipping carton.<br />
Please check that all items are present and undamaged, and contact ECE or<br />
your dealer if there is a problem.<br />
• Minimix <strong>mixer</strong> unit.<br />
• Sample container (jar) assembly, with 4 compartments.<br />
• Five each: 50 mL beaker, 5 mL syringe, 1 mL syringe, threaded adapter,<br />
stopcock, cap, tubing adapter, tubing.<br />
• Plug-in 115VAC or 230VAC to 12VDC wall transformer with cord.<br />
• Foam-lined carrying case.<br />
• Owner’s <strong>manual</strong>.<br />
Serial number<br />
Each Minimix has a unique four-digit serial number. This can be found on the<br />
back of the <strong>mixer</strong> unit, immediately above the power jack.<br />
http://www.novatech-usa.com/Products/Laboratory-Equipment-Supply-Products Tel: (281) 359-8538 Toll Free:(866) 433-6682
Safety precautions i<br />
Safety precautions<br />
Please read the entire <strong>manual</strong> before attempting to unpack, set up, or operate<br />
the equipment and pay attention to all the warnings, cautions and notes. Failure<br />
to do so may result in injury to the operator or damage to the equipment.<br />
1. The Minimix <strong>mixer</strong> unit is designed to operate from a 12 volt DC power<br />
source. The system is supplied with a wall transformer power supply<br />
unit which provides 12V DC from a either a 115V or a 230V AC outlet (as<br />
specified at the time of ordering). If an alternative power source is used,<br />
be sure that the <strong>mixer</strong> unit receives only 12V DC, with positive to the<br />
center pin of the jack.<br />
2. The Minimix operates on low voltage DC power and is therefore very<br />
safe electrically. However, take care to avoid submerging the unit or<br />
subjecting it to unnecessary amounts of water - this can damage<br />
internal components or interfere with their operation. If water does enter<br />
the unit, immediately disconnect the equipment from the power supply<br />
and leave it to drain and dry out completely.<br />
3. Do not hold the paddles while they are turning, or in any other way try to<br />
stop them from rotating. This could cause injury or damage the drive<br />
mechanism.<br />
4. The power supply to the unit is protected by a 1 amp fuse. Repeated<br />
failure of this fuse indicates a faulty electrical condition and the<br />
equipment should be checked by a qualified electrician. Do not replace<br />
the fuse with one of a higher rating.<br />
http://www.novatech-usa.com/Products/Laboratory-Equipment-Supply-Products Tel: (281) 359-8538 Toll Free:(866) 433-6682
Introduction 1.1<br />
1. Introduction<br />
The so-called jar test is an old water treatment test procedure, first introduced in<br />
the 1930s. It has remained essentially unchanged since then, although there<br />
have been various refinements such as increased mixing speeds and the use<br />
of square jars instead of cylindrical beakers.<br />
As basic as the jar test may be, it remains one of the best methods of<br />
assessing and optimizing the various processes and options available for<br />
treatment of potable and other types of water. Properly done, it can provide a<br />
great deal of information during all phases of a treatment system’s<br />
development - initial process screening and development, equipment sizing,<br />
operational optimization, and evaluation of potential alternative treatment<br />
processes. All this can be achieved at relatively little cost, and without the need<br />
for a great deal of high-tech knowledge and expertise.<br />
However, unlike most analytical procedures used in the water supply industry,<br />
there is no standardization of jar testing procedures and the results are almost<br />
always open to different interpretations and conclusions. Therefore, a great deal<br />
of thought and care, as well as more than a little experience, is essential if the<br />
jar test procedure is to achieve its full potential.<br />
Equipment for conducting jar tests has been available for a long time, but most<br />
of the available units tend to be bulky, heavy, and subject to various operating<br />
problems. EC Engineering offers several jar testing systems, each intended for<br />
a different purpose. The Minimix is specifically designed for very small size, light<br />
weight, portability, ease of operation, and low cost.<br />
It is not the intent of this <strong>manual</strong> to discuss in detail all the various planning,<br />
objectives, calculations, procedures, and other considerations that are involved<br />
in conducting a jar test; this information is available from many different<br />
sources. Rather, the intent is to describe the aspects of the procedures that are<br />
specific to the Minimix.<br />
http://www.novatech-usa.com/Products/Laboratory-Equipment-Supply-Products Tel: (281) 359-8538 Toll Free:(866) 433-6682
1 MAIN HOUSING<br />
2 DRIVE SYSTEM HOUSING<br />
3 PADDLES<br />
4 POWER ON/OFF SWITCH<br />
5 MOTOR SPEED CONTROL DIAL<br />
6 LATCHING SYSTEM<br />
ece<br />
6<br />
12<br />
EC Engineering<br />
6223 - 186 Street, Edmonton, Alberta, Canada T5T 2T3<br />
Phone 780.487.0249 Fax 780.487.6883 www.ecengineering.net<br />
9<br />
2<br />
3<br />
7<br />
5<br />
4<br />
8<br />
7 POWER JACK (ON BACK OF UNIT)<br />
8 JAR ASSEMBLY<br />
9 500 mL SAMPLE COMPARTMENTS<br />
10 GRADUATION MARKS<br />
11 SAMPLING STOPCOCKS<br />
12 120VAC/12VDC WALL TRANSFORMER<br />
10<br />
11<br />
1<br />
MINIMIX LABORATORY MIXER<br />
MAIN COMPONENTS<br />
http://www.novatech-usa.com/Products/Laboratory-Equipment-Supply-Products Tel: (281) 359-8538 Toll Free:(866) 433-6682
Equipment description 2.1<br />
2. Equipment description<br />
Main components<br />
The illustration shows the main features of the Minimix system. It has two main<br />
components - the <strong>mixer</strong> unit, and the integrated four-compartment jar<br />
assembly. The system also includes a plug-in wall transformer to supply the<br />
12V DC power used by the <strong>mixer</strong> unit, and a padded carrying case for storing<br />
and transporting the equipment.<br />
Mixer unit<br />
The <strong>mixer</strong> unit is made up of two main parts:<br />
• Main housing. This enclosure contains the <strong>mixer</strong> drive motor; its coupling to<br />
the paddle drive shaft; speed control circuit board; power on/off switch; and<br />
speed adjustment control. The housing also has a power jack on the rear<br />
(for connection to a 12V DC power source) and two alignment pins that<br />
engage corresponding holes in the jar assembly. Access to the inside of<br />
the housing is by removing the four screws holding the end panel on the<br />
right side of the housing.<br />
• Drive system housing. The basic structure consists of an aluminum<br />
housing with rear cover plate. It also contains two aluminum end blocks<br />
with bearings for the main drive shaft; a bearing for each of the four paddle<br />
shafts; a latching system to lock the <strong>mixer</strong> unit to the jar assembly; and a<br />
third alignment pin on the left end. The four paddle shafts are coupled to the<br />
main drive shaft by nylon miter gears.<br />
Jar assembly<br />
The jar assembly is constructed from clear acrylic sheet and contains four<br />
sample compartments with graduation marks at the 500 mL level. Each jar<br />
compartment is supplied with an adapter which threads into the jar wall; a<br />
sampling stopcock which attaches to the threaded adapter; a flexible sampling<br />
tube with connector; a 50 mL beaker; 1 mL and 5 mL syringes; and a cap that<br />
can be used in place of the stopcock when subsurface sampling is not<br />
required. One spare of each of the above fittings is also provided. Additional jar<br />
assemblies and fittings are available separately.<br />
http://www.novatech-usa.com/Products/Laboratory-Equipment-Supply-Products Tel: (281) 359-8538 Toll Free:(866) 433-6682
Equipment description 2.2<br />
Power supply<br />
The Minimix can be powered from any 12V DC supply, through the standard<br />
power jack on the rear of the main housing. Normally, this power would be<br />
provided by the 115VAC or 230VAC 1 plug-in wall transformer supplied with the<br />
system.<br />
If the internal fuse blows when a user-supplied transformer (or other power<br />
source such as a battery) is connected, the most likely cause is that the polarity<br />
is reversed. Be sure that the output plug has the center pin positive. A<br />
transformer should have a label similar to this:<br />
-<br />
Many different styles and sizes of power connectors are available in the<br />
electronics marketplace. The input power jack on the Minimix is designed to<br />
accept a plug with a 2.1 mm inside diameter, 5.5 mm outside diameter, and<br />
12 mm barrel length. Different plugs (such as those that are slightly shorter, or<br />
which have a slightly larger inside diameter) will often work well enough if the<br />
standard plug cannot be found. Plugs with inside diameters larger than 2.1 mm<br />
(2.5 mm is quite common) will usually work satisfactorily if the split in the center<br />
pin of the power jack is widened slightly using a small screwdriver or similar<br />
tool.<br />
Voltages of up to 16 volts DC can be used with the Minimix.<br />
Carrying case<br />
The Minimix is supplied in a padded, molded plastic carrying case. The case<br />
can hold the <strong>mixer</strong> unit, jar assembly, and power supply with a useful amount of<br />
space left over. This space can be used for storage and transportation of other<br />
frequently used items such as chemical reagent bottles, dosing syringes,<br />
sample containers, or other equipment.<br />
_____________________________<br />
1 The transformer normally supplied for 230 VAC operation has a European style input plug (two<br />
round prongs, 4 mm diameter, 18 mm spacing, on a raised hexagonal base). A transformer for<br />
use in the UK (three flat pins) is also available.<br />
For other configurations, it will be necessary for the user to supply either a plug style adapter, or<br />
a different transformer to suit local conditions. These are easily available nearly everywhere, at<br />
very low cost. The transformer should have an output of 12 volts DC (unregulated) at 500 mA (a<br />
higher current rating would be OK but is not necessary).<br />
http://www.novatech-usa.com/Products/Laboratory-Equipment-Supply-Products Tel: (281) 359-8538 Toll Free:(866) 433-6682
Jar test procedures 3.1<br />
3. Jar test procedures<br />
The basic objective of the so-called jar testing procedure is to simulate, as far<br />
as is practical, the processes that are being, or might be, used in a full-scale<br />
treatment plant. Because there are fundamental differences between batch and<br />
continuous flow processes, the jar test does have its limitations. Nevertheless, it<br />
can prove very useful as a simple, rapid, and economical means of evaluating<br />
how well proposed water treatment processes can be expected to work, and in<br />
determining certain process parameters such as chemical dosages and<br />
reaction times.<br />
Of course, each situation will be unique, with its own circumstances and<br />
objectives. Therefore, only a simplified, general test procedure can be given;<br />
this must be modified as required by the specific situation.<br />
Following is a suggested basic jar test procedure.<br />
1. The jar assembly is usually supplied with the threaded adapters already<br />
in the sample ports on the front of the jar assembly. If not, insert them<br />
and tighten snugly (do not overtighten). These adapters are normally left<br />
permanently in position. Depending on whether subsurface sampling is<br />
required, attach either a stopcock or cap (both are supplied for each jar<br />
compartment) to the threaded adapters. Usually, the stopcocks would<br />
be used, together with the supplied tubing adapters and sample tubing.<br />
2. Fill the jars to the 500 mL mark with the water being tested.<br />
3. Lift the locking tab on the left end of the <strong>mixer</strong> unit, and place the <strong>mixer</strong><br />
in position on top of the jar assembly. Slide the <strong>mixer</strong> unit to the left so<br />
the alignment pins engage the three guide holes in the jar assembly,<br />
then push the locking tab down to lock the <strong>mixer</strong> and jars together. The<br />
whole assembly can now be lifted and moved about as desired.<br />
4. For each of the test stations being used, fill syringes with the<br />
appropriate amount of stock chemical (such as alum coagulant and/or<br />
polymer).<br />
5. Start the <strong>mixer</strong> motor and set it to the desired speed on the control<br />
panel dial (usually full speed for the coagulant addition stage).<br />
6. Inject the chemicals into the jars. It should be easily possible to dose all<br />
jars within one or two seconds of each other. For simulation of the short,<br />
high-intensity “flash mixing” often used in coagulant addition, the <strong>mixer</strong><br />
speed should be reduced after a time corresponding as closely as<br />
possible to the actual mixing time that would be used in a full-scale<br />
plant. In many cases, this would be almost immediately after coagulant<br />
addition.<br />
http://www.novatech-usa.com/Products/Laboratory-Equipment-Supply-Products Tel: (281) 359-8538 Toll Free:(866) 433-6682
Jar test procedures 3.2<br />
7. Set the <strong>mixer</strong> speed to provide the mixing intensity desired for the first<br />
flocculation stage. The speed control system is configured so that the<br />
dial scale is expanded towards the lower end of the speed range, which<br />
allows easier and more accurate adjustments at the low speeds (20 to<br />
100 rpm) where most jar testing work is carried out. The <strong>mixer</strong> speeds<br />
selected by the dial will be somewhat approximate, but will generally be<br />
more than accurate enough for most jar test procedures.<br />
8. At the end of the first flocculation time period, adjust the <strong>mixer</strong> speed.<br />
Repeat as appropriate for the number of flocculation stages desired.<br />
9. After completion of the flocculation stages, pull the <strong>mixer</strong> unit locking<br />
tab up, move the <strong>mixer</strong> slightly to the right so that the alignment pins<br />
clear the jars, and lift it out of the jar assembly. Allow the contents of the<br />
jars to settle for the desired periods.<br />
10. Carry out observation, sampling, and evaluation procedures as desired.<br />
Before returning the Minimix to its carrying case, be sure to remove the<br />
stopcocks from the jar assembly. If this is not done, the stopcocks and<br />
possibly the theaded adapters may be damaged.<br />
http://www.novatech-usa.com/Products/Laboratory-Equipment-Supply-Products Tel: (281) 359-8538 Toll Free:(866) 433-6682
Maintenance 4.1<br />
4. Maintenance<br />
General<br />
The Minimix requires very little maintenance, other than cleaning and occasional<br />
minor lubrication.<br />
Cleaning<br />
The unit should be cleaned up immediately after each run, particularly the jars. If<br />
solids such as floc are allowed to dry out on component surfaces, they may be<br />
much more difficult to remove later. Rinse with clean water, or wipe down with a<br />
damp cloth, as appropriate. Do not use organic solvents such as acetone or<br />
alcohol, which may damage plastic surfaces or paint finishes.<br />
Lubrication<br />
All bearings in the Minimix are oil-impregnated bronze, and should require<br />
lubrication only very occasionally. If the <strong>mixer</strong> seems rough or noisy, a small<br />
amount of light oil can be applied to the paddle shaft bearings.<br />
Fuse replacement<br />
The electrical system of the Minimix is protected by a 1 amp fuse, located inside<br />
the main <strong>mixer</strong> housing. To replace the fuse, remove the four screws holding<br />
the end cover in place. Insert the new fuse and replace the end cover. If the<br />
fuse blows repeatedly, have the electrical system checked by a qualified<br />
electrician.<br />
Tools<br />
No special tools are needed for operation and maintenance of the Minimix.<br />
http://www.novatech-usa.com/Products/Laboratory-Equipment-Supply-Products Tel: (281) 359-8538 Toll Free:(866) 433-6682
Specifications 5.1<br />
5. Specifications<br />
Unit MLM4<br />
Basic features<br />
Number of stations 4<br />
Sample volume 500 mL<br />
Sample container (jar) volume 615 mL<br />
Mixer speed range 10 to 300 rpm<br />
Electrical supply (to <strong>mixer</strong> unit) 12V DC<br />
Maximum current draw 0.3 amp<br />
Dimensions<br />
Mixer/jar units, assembled 342 x 178 x 76 mm<br />
(13.5 x 7.0 x 3.0 in.)<br />
Carrying case 430 x 315 x 140 mm<br />
(17.0 x 12.5 x 5.5 in.)<br />
Shipping carton 445 x 345 x 165 mm<br />
(17.5 x 13.5 x 6.5 in.)<br />
Weights<br />
Base unit 1.0 kg (2.2 lb)<br />
Jar module with fittings 0.7 kg (1.6 lb)<br />
Wall transformer and jar accessories 0.4 kg (0.8 lb)<br />
Carrying case 1.4 kg (3.0 lb)<br />
Total for equipment and carrying case 3.5 kg (7.6 lb)<br />
Total shipping weight with carton 3.8 kg (8.4 lb)<br />
Materials of construction<br />
Mixer unit Aluminum and PVC, with<br />
epoxy paint coating<br />
Paddles and shafts Stainless steel<br />
Paddle system bearings Oil-impregnated bronze<br />
Paddle system gears Nylon<br />
Sample jars Clear acrylic<br />
Carrying case Molded polyethylene<br />
http://www.novatech-usa.com/Products/Laboratory-Equipment-Supply-Products Tel: (281) 359-8538 Toll Free:(866) 433-6682