

AngularJS Essentials

You also want an ePaper? Increase the reach of your titles
YUMPU automatically turns print PDFs into web optimized ePapers that Google loves.
Chapter 2<br />
The following code is the compiled directive without the original element:<br />
<br />
<br />
Something went wrong!<br />
<br />
<br />
You must inform the plate and the color of the car!<br />
<br />
<br />
restrict<br />
We attached our first directive by defining it as an attribute of the element. However,<br />
when we create a new directive as a reusable component, it doesn't make much<br />
sense. In this case, a better approach can restrict the directive to be an element.<br />
By default, the directives are restricted to be applied as an attribute to a determined<br />
element, but we can change this behavior by declaring the restriction property inside<br />
our directive configuration object. The following table shows the possible values for<br />
the restriction property:<br />
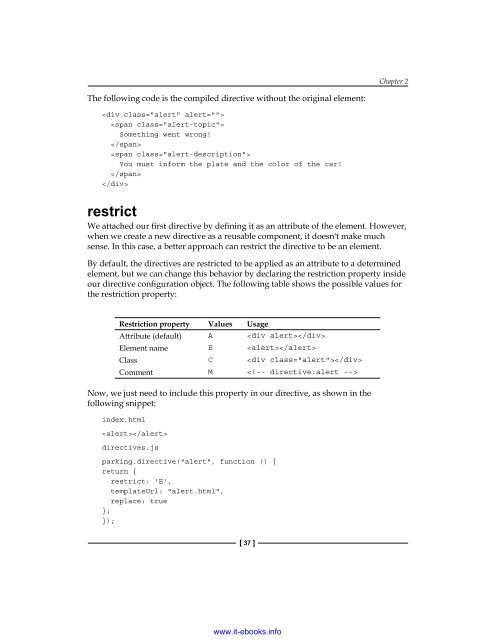
Restriction property Values Usage<br />
Attribute (default) A <br />
Element name E <br />
Class C <br />
Comment M <br />
Now, we just need to include this property in our directive, as shown in the<br />
following snippet:<br />
index.html<br />
<br />
directives.js<br />
parking.directive("alert", function () {<br />
return {<br />
restrict: 'E',<br />
templateUrl: "alert.html",<br />
replace: true<br />
};<br />
});<br />
[ 37 ]<br />
www.it-ebooks.info