Ursalink UR51 Industrial Cellular Router Quick Start Guide

Create successful ePaper yourself
Turn your PDF publications into a flip-book with our unique Google optimized e-Paper software.
<strong>UR51</strong><br />
<strong>Industrial</strong> <strong>Cellular</strong> <strong>Router</strong><br />
<strong>Quick</strong> <strong>Start</strong> <strong>Guide</strong><br />
1<br />
<strong>Ursalink</strong> Technology Co., Ltd.
Welcome<br />
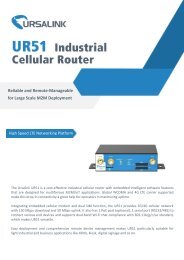
Thank you for choosing <strong>Ursalink</strong> <strong>UR51</strong> industrial cellular router.<br />
This guide describes how to install the <strong>UR51</strong> and how to log in the Web GUI to configure the device. Once<br />
you complete the installation, refer to the <strong>Ursalink</strong> <strong>UR51</strong> User Manual for instructions on how to perform<br />
configurations on the device.<br />
Related Documents<br />
This <strong>Start</strong> <strong>Guide</strong> only explains the installation of <strong>Ursalink</strong> <strong>UR51</strong> router. For more functionality and advanced<br />
settings, please refer to the relevant documents as below.<br />
Document<br />
<strong>Ursalink</strong> <strong>UR51</strong> Datasheet<br />
<strong>Ursalink</strong> <strong>UR51</strong> User <strong>Guide</strong><br />
Description<br />
Datasheet for the <strong>Ursalink</strong> <strong>UR51</strong> industrial cellular router.<br />
Users could refer to the guide for instruction on how to log in the<br />
Web GUI, and how to configure all the settings.<br />
The related documents are available on <strong>Ursalink</strong> website: http://www.ursalink.com.<br />
Declaration of Conformity<br />
<strong>Ursalink</strong> <strong>UR51</strong> is in conformity with the essential requirements and other relevant provisions of the CE, FCC,<br />
and RoHS.<br />
For assistance, please contact<br />
<strong>Ursalink</strong> technical support:<br />
Email: support@ursalink.com<br />
Tel: 86-592-5023060<br />
Fax: 86-592-5023065<br />
www.ursalink.com 1
<strong>Ursalink</strong> <strong>UR51</strong> <strong>Quick</strong> <strong>Start</strong> <strong>Guide</strong><br />
1. Packing List<br />
Before you begin to install the <strong>UR51</strong> router, please check the package contents to verify that you have<br />
received the items below.<br />
1.1 Package Contents<br />
1 × <strong>UR51</strong> <strong>Router</strong> 1 × Ethernet Cable 1 × Power Adapter 2 × SIM Card Slots<br />
1 × 2-Pin Pluggable<br />
Terminal<br />
1 × Warranty Card 1 × <strong>Quick</strong> <strong>Start</strong> <strong>Guide</strong> 2 × Magnetic Mount<br />
<strong>Cellular</strong> Antennas (Default)<br />
2 × Stubby <strong>Cellular</strong><br />
Antennas (Optional)<br />
2 × Rack Mount Kits<br />
(Default)<br />
1 × Wall Mounting<br />
Bracket (Optional)<br />
1 × DIN Rail Kit (Optional)<br />
1 × Terminal Block with a DB9<br />
Male Connector for Serial Port<br />
Connection(Optional)<br />
If any of the above items is missing or damaged, please contact your <strong>Ursalink</strong> sales<br />
Representative.<br />
www.ursalink.com 2
<strong>Ursalink</strong> <strong>UR51</strong> <strong>Quick</strong> <strong>Start</strong> <strong>Guide</strong><br />
2. Hardware Introduction<br />
2.1 Overview<br />
A. Front Panel<br />
1 Main <strong>Cellular</strong> Antenna Connector<br />
2 Micro SD Card Interface<br />
3 LED Indicator Area<br />
POWER: Power Indicator<br />
STATUS: Status Indicator<br />
: Signal Strength Indicator<br />
VPN: VPN Indicator<br />
SIM1: SIM1 Status Indicator<br />
SIM2: SIM2 Status Indicator<br />
4 SIM Card Slot 1 & SIM Card Slot 2<br />
5 AUX <strong>Cellular</strong> Antenna Connector<br />
B. Rear Panel<br />
1 Grounding Stud<br />
2 Power Connector<br />
3 Ethernet Port Indicator:<br />
Orange for data transmission;<br />
Green for network rate<br />
4 Serial Port: RS232 or RS485<br />
5 Reset Button<br />
6 GPS Antenna Connector<br />
2.2 Dimensions (mm)<br />
www.ursalink.com 3
<strong>Ursalink</strong> <strong>UR51</strong> <strong>Quick</strong> <strong>Start</strong> <strong>Guide</strong><br />
2.3 Pinouts<br />
PIN RS232 RS485 Description<br />
1 --- A Data +<br />
2 RXD --- Receive Data<br />
3 TXD --- Transmit Data<br />
4 --- --- ---<br />
5 GND --- Ground<br />
6 --- B Data -<br />
7 --- --- ---<br />
8 --- --- ---<br />
9 --- --- ---<br />
PIN<br />
Description<br />
10 Positive<br />
11 Negative<br />
2.4 LED Indicators<br />
LED Indication Status Description<br />
POWER<br />
STATUS<br />
VPN<br />
SIM1/SIM2<br />
Power Status<br />
System Status<br />
VPN Status<br />
SIM Card Status<br />
Signal strength Signal 1/2/3<br />
On<br />
Off<br />
Green Light<br />
Off<br />
Green Light<br />
Off<br />
Off<br />
Green Light<br />
Off<br />
Green Light<br />
The power is switched on<br />
The power is switched off<br />
Static: <strong>Start</strong>-up<br />
Blinking slowly: the system is running properly<br />
The system goes wrong<br />
VPN is connected<br />
VPN is disconnected<br />
SIM1 or SIM2 is registering or fails to register (or there<br />
are no SIM cards inserted)<br />
Blinking slowly: SIM1 or SIM2 has been registered and<br />
is ready for dial-up<br />
Blinking rapidly: SIM1 or SIM2 has been registered and<br />
is dialing up now<br />
Static: SIM1 or SIM2 has been registered and dialed up<br />
successfully<br />
No signal<br />
Static/Off/Off: weak signals with 1-10 ASU (please<br />
check if the antenna is installed correctly, or move the<br />
antenna to a suitable location to get better signal)<br />
Static/Static/Off: normal signals with 11-20 ASU<br />
(average signal strength)<br />
Static/Static/Static: strong signals with 21-31 ASU<br />
(signal is good)<br />
www.ursalink.com 4
<strong>Ursalink</strong> <strong>UR51</strong> <strong>Quick</strong> <strong>Start</strong> <strong>Guide</strong><br />
2.5 Reset Button<br />
Function<br />
Reboot<br />
Reset<br />
Description<br />
STATUS LED<br />
Blinking<br />
Static Green<br />
Blinking<br />
Static Green →<br />
Rapidly Blinking<br />
Off → Blinking<br />
Action<br />
Press and hold the reset button for about 5-15 seconds.<br />
Release the button and wait for system to reboot.<br />
Press and hold the reset button for more than 15 seconds.<br />
Release the button and wait.<br />
The router is now reset to factory defaults.<br />
2.6 Ethernet Port Indicator<br />
Indicator Status Description<br />
On<br />
Connected<br />
Link Indicator (Orange) Blinking<br />
Transmitting data<br />
Off<br />
Disconnected<br />
Rate Indicator (Green)<br />
On<br />
1000 Mbps mode<br />
Off<br />
100 Mbps mode<br />
www.ursalink.com 5
<strong>Ursalink</strong> <strong>UR51</strong> <strong>Quick</strong> <strong>Start</strong> <strong>Guide</strong><br />
3. Hardware Installation<br />
Environmental Requirements<br />
- Power Input: 9-48 VDC (48 V Power Input is Needed for 802.3af PoE Output)<br />
- Power Consumption: Typical 1.8 W (Max 2.7 W)<br />
- Operating Temperature: -20°C to 70°C (4°F -158°F)<br />
- Relative Humidity: 0% to 95% (non-condensing) at 25°C/77°F<br />
3.1 SIM Card/Micro SD Card Installation<br />
3.1.1 SIM Card Installation<br />
A. Push the yellow button on the left panel of the B. Put SIM card onto the slot then insert the<br />
slot router, and then you will see the SIM card<br />
back into the hole.<br />
slot popping out directly.<br />
3.1.2 Micro SD Card Installation<br />
Insert Micro SD card<br />
3.2 Rotate the Antenna into the Antenna Connector<br />
www.ursalink.com 6
<strong>Ursalink</strong> <strong>UR51</strong> <strong>Quick</strong> <strong>Start</strong> <strong>Guide</strong><br />
The external antenna should be installed vertically always on a site with a good cellular signal.<br />
3.3 Connect the <strong>Router</strong> to a Computer<br />
3.4 Mount the <strong>Router</strong><br />
The router can be placed on a desktop or mounted to a wall or a DIN rail.<br />
3.4.1 Wall Mounting (Measured in mm)<br />
Use 4 pcs of M3 × 6 flat head Phillips screws to fix the wall mounting kit to the router, and then use 2 pcs of<br />
M3 drywall screws to mount the router associated with the wall mounting kit on the wall.<br />
Recommended torque for mounting is 1.0 N·m, and the maximum allowed is 1.2 N·m.<br />
3.4.2 DIN Rail Mounting (Measured in mm)<br />
www.ursalink.com 7
<strong>Ursalink</strong> <strong>UR51</strong> <strong>Quick</strong> <strong>Start</strong> <strong>Guide</strong><br />
Use 2 pcs of M3 × 6 flat head Phillips screws to fix the DIN rail to the router, and then hang the DIN rail on<br />
the mounting bracket. It is necessary to choose a standard bracket.<br />
Recommended torque for mounting is 1.0 N·m, and the maximum allowed is 1.2 N·m.<br />
3.5 Power Supply Installation<br />
A. Take out the terminal from the router and unscrew the bolt on terminal<br />
B. Screw down the bolt after inserting power cable into the terminal<br />
Connecting the Power Cable<br />
Color<br />
Polarity<br />
Red +<br />
Yellow -<br />
If the wires are inserted into the reverse holes, the router will not start and the user must switch the<br />
wires into the correct holes.<br />
3.6 Protective Grounding Installation<br />
A. Remove the grounding nut.<br />
B. Connect the grounding ring of the cabinet’s grounding wire onto the grounding stud and screw up the<br />
grounding nut.<br />
The router must be grounded when deployed. According to operating environment, the ground wire<br />
should be connected with grounding stud of router.<br />
www.ursalink.com 8
<strong>Ursalink</strong> <strong>UR51</strong> <strong>Quick</strong> <strong>Start</strong> <strong>Guide</strong><br />
Getting <strong>Start</strong>ed<br />
4. PC Configuration for Web GUI Accessing to <strong>Router</strong><br />
Please connect PC to GE port of <strong>UR51</strong> router directly. PC can obtain an IP address, or you can configure a<br />
static IP address manually. The following steps are based on Windows 10 operating system for your<br />
reference.<br />
1 Click “Search Box” to search “Control Panel” on the<br />
Windows 10 taskbar.<br />
2 Click “Control Panel” to open it, and then<br />
click “View network status and tasks”.<br />
3 Click “Ethernet” (May have different names).<br />
4 Click “Properties”.<br />
www.ursalink.com 9
<strong>Ursalink</strong> <strong>UR51</strong> <strong>Quick</strong> <strong>Start</strong> <strong>Guide</strong><br />
5 Double Click “Internet<br />
Protocol Version 4<br />
(TCP/IPv4)” to configure IP<br />
address and DNS server.<br />
6 Method 1: click “Obtain an IP<br />
address automatically”;<br />
Method 2: click “Use the<br />
following IP address” to assign a<br />
static IP manually within the<br />
same subnet of the router.<br />
(Note: Remember to click “OK” to finish configuration.)<br />
www.ursalink.com 10
<strong>Ursalink</strong> <strong>UR51</strong> <strong>Quick</strong> <strong>Start</strong> <strong>Guide</strong><br />
5. Access to Web GUI of <strong>Router</strong> for <strong>Cellular</strong> Connection<br />
This chapter explains how to log in <strong>UR51</strong> router’s Web GUI, and connect the router to cellular network.<br />
<strong>Ursalink</strong> router provides web-based configuration interface for management. If this is the first time you<br />
configure the router, please use the default settings below:<br />
IP Address: 192.168.1.1<br />
Username: admin<br />
Password: password<br />
5.1 To Log in the <strong>Router</strong>:<br />
Make sure your PC is connected to the same network as the router as per Section 4.<br />
A. <strong>Start</strong> a Web browser on your PC (Chrome and IE are recommended), type in the IP address, and press<br />
Enter on your keyboard.<br />
B. Enter the username and password, click “Login”.<br />
If you enter the username or password incorrectly more than 5 times, the login page will be locked<br />
for 10 minutes.<br />
C. When you login with the default username and password, you will be asked to modify the password. It’s<br />
suggested that you change the password for the sake of security. Click “Cancel” button if you want to modify<br />
it later.<br />
www.ursalink.com 11
<strong>Ursalink</strong> <strong>UR51</strong> <strong>Quick</strong> <strong>Start</strong> <strong>Guide</strong><br />
D. After you log in the Web GUI, you can view system information and perform configuration on the router.<br />
5.2 Configure the <strong>Cellular</strong> Connection<br />
Take inserting SIM card into SIM1 slot as an example; please refer to the following detailed operations.<br />
A. Click “Network” → “Interface” → “<strong>Cellular</strong>” → “<strong>Cellular</strong> Setting” to configure the cellular info.<br />
B. Enable SIM1.<br />
C. Choose relevant network type. “Auto”, “4G First”, “4G Only”, “3G First”, “3G Only”, “2G First” and “2G<br />
Only” are optional.<br />
D. Click “Save” and “Apply” for configuration to take effect.<br />
www.ursalink.com 12
<strong>Ursalink</strong> <strong>UR51</strong> <strong>Quick</strong> <strong>Start</strong> <strong>Guide</strong><br />
If you select “Auto”, the router will obtain ISP information from SIM card to set APN, Username, and<br />
Password automatically. This option will only be taken effect when the SIM card is issued from a well-known<br />
ISP.<br />
If you select “4G First” or “4G Only”, you can click “Save” to finish the configuration directly.<br />
If you select “3G First”, “3G Only”, “2G First” or “2G Only”, you should manually configure APN, Username,<br />
Password, and Access Number.<br />
<strong>UR51</strong> router has two cellular interfaces, named SIM1 & SIM2. Only one cellular interface is active at one<br />
time. If both cellular interfaces are enabled, SIM1 interface takes precedence by default.<br />
5.3 Check the <strong>Cellular</strong> Connection Status<br />
5.3.1. Check the <strong>Cellular</strong> Connection Status by WEB GUI of <strong>Router</strong><br />
Click “Status” → “<strong>Cellular</strong>” to view the status of the cellular connection. If it shows “Connected”, it means<br />
SIM1 has dialed up successfully.<br />
www.ursalink.com 13
<strong>Ursalink</strong> <strong>UR51</strong> <strong>Quick</strong> <strong>Start</strong> <strong>Guide</strong><br />
5.3.2. Check the <strong>Cellular</strong> Connection Status by Hardware<br />
On the other hand, you can check the status of SIM1 indicator. If it keeps on green light statically, it means<br />
SIM1 has dialed up successfully.<br />
5.4 Check out if Network Works Properly by Browser on PC<br />
Open your preferred browser on PC, then type any available web address into address bar and see if it is<br />
able to visit Internet via <strong>UR51</strong> router.<br />
[END]<br />
www.ursalink.com 14