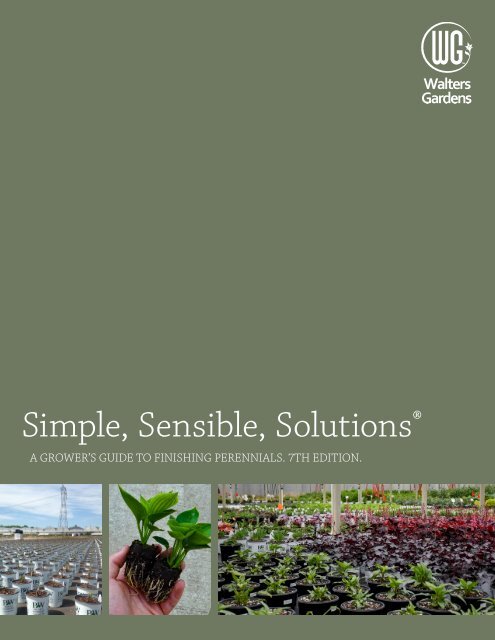
Simple Sensible Solutions
The 7th edition of our Simple, Sensible, Solutions® guide. This color guide is packed with helpful information for green industry businesses who are growing and merchandising perennials.
The 7th edition of our Simple, Sensible, Solutions® guide. This color guide is packed with helpful information for green industry businesses who are growing and merchandising perennials.

You also want an ePaper? Increase the reach of your titles
YUMPU automatically turns print PDFs into web optimized ePapers that Google loves.
TM<br />
<strong>Simple</strong>, <strong>Sensible</strong>, <strong>Solutions</strong> ®<br />
A GROWER’S GUIDE TO FINISHING PERENNIALS. 7TH EDITION.<br />
www.WaltersGardens.com • 1-888-925-8377 • sales@waltersgardens.com | 1
Table of Contents<br />
Product Profile 3 - 5<br />
Bare Root 6 - 9<br />
Plug / Liners 10 - 13<br />
Culture Guide 14 - 28<br />
Grower’s Reference Chart 29 - 33<br />
Plant Health 34 - 37<br />
Summer / Early Fall Planting & Overwintering Recommendations 38 - 42<br />
Additional Resources 43<br />
Walters Gardens<br />
Home of Proven Winners® Perennials<br />
P.O. Box 137 • Zeeland, MI 49464 • Phone: 888-925-8377 • Fax: 800-752-1879 • Email: sales@waltersgardens.com<br />
www.WaltersGardens.com • www.PerennialResource.com • www.ProvenWinners.com<br />
Disclaimer of Liabilities: While every effort has been made to ensure the accuracy of the information provided in this growers guide, Walters Gardens, Inc. makes<br />
no guarantee, express or implied, as to the procedures contained here. Walters Gardens, Inc. will not be liable for direct, indirect, incidental or consequential<br />
damages in connection with or arising from the furnishing, performance, or use of this booklet.<br />
© Walters Gardens, Inc. 2019<br />
2 | Walters Gardens
Product Profile<br />
Timing Chart<br />
Product Size When to Plant Finish Size Average Finish Time<br />
General Perennials #1 Grade Late Summer - Early Spring 1-gal 6-10 wks<br />
#2 Grade Late Summer - Early Spring 1-gal 8-12 wks<br />
#3 Grade Late Summer - Early Spring 1-qt 4-6 wks<br />
20ct plugs Early Spring 1-gal 6-10 wks<br />
30ct plugs<br />
72ct plugs<br />
128ct plugs<br />
Early Spring<br />
Spring<br />
Late Summer<br />
Early Spring<br />
Spring<br />
Late Summer<br />
Early Spring<br />
Spring<br />
1-gal<br />
1-qt<br />
1-gal<br />
1-qt<br />
6-pk<br />
1-gal<br />
1-qt<br />
6-pk<br />
6-10 wks<br />
4-6 wks<br />
8-10 wks<br />
4-6 wks<br />
3-4 wks<br />
12-16wks<br />
5-8wks<br />
4-5wks<br />
Hibiscus #1 Grade Spring 3-gal 8-10 wks (flowers in 14-16 wks)<br />
72ct plugs Spring 2-gal 10-12 wks (flowers in 14-16 wks)<br />
Hosta 20ct plugs Midsummer - Early Spring<br />
Late Summer<br />
72ct plugs<br />
Late Spring - Early Summer<br />
Midsummer - Late Summer<br />
Early Spring<br />
1-gal<br />
1-qt (Mini Hosta)<br />
1-gal<br />
1-qt<br />
6-pk<br />
8-10 wks<br />
6-10 wks<br />
16-20 wks<br />
8-10 wks<br />
6-8 wks<br />
Succulents 72ct plugs Early Spring - Late Spring 1-qt 20-24 wks<br />
Mangave 72ct plugs Early Summer 1-qt 10-14 wks<br />
Tropicals 20ct plugs Early Spring<br />
Early Spring<br />
72ct plugs<br />
Spring<br />
Early Spring<br />
1-gal<br />
2-gal<br />
4-in<br />
1-gal<br />
* Finish times vary by variety and growing environment (temperature, water, amount of light, fertilizer, etc.).<br />
6-10 wks<br />
10-12 wks<br />
4-6 wks<br />
8-10 wks<br />
Based on zone 5, min<br />
55-60ºF constant ghse temp<br />
Based on zone 5, 65-70ºF or<br />
warmer natural temps<br />
www.WaltersGardens.com • 1-888-925-8377 • sales@waltersgardens.com | 3
Product Profile<br />
We’re Your Biggest Fan<br />
We grade ahead of the curve<br />
to give your daylilies more<br />
fans and fuller containers.<br />
Our Crowning Achievement<br />
We’ve got our eyes on the<br />
prize. Our goal is larger crowns<br />
and more rewarding results.<br />
The Root Cause<br />
Our sandy fields promote fast<br />
root growth to ensure that<br />
what’s below matches what’s<br />
above.<br />
Bare Root<br />
As the largest wholesale grower of bare root perennials in North America, we offer the widest selection of generously graded varieties. Most<br />
are grown for one season and are sold as #1 grade transplants or divisions. Hemerocallis, Hosta, and select perennials that require it are grown<br />
for two seasons in order to offer the best product. Our most popular varieties are offered in economically priced #2 and #3 grade divisions.<br />
#1 Grade (G1)<br />
Most #1 grade perennials are one year<br />
plants or generously graded divisions of a<br />
one year plant. #1 Grade Hemerocallis and<br />
Hosta are sold as 3-5 eye/fan divisions of<br />
a two year field clump depending on the<br />
variety. Intersectional peonies are sold as<br />
divisions of a two year field clump.<br />
Count: sold in multiples of 25<br />
Minimum order: 1 box of 25<br />
4 | Walters Gardens<br />
#2 Grade (G2) #3 Grade (G3)<br />
Most #2 grade perennials are one year<br />
plants or divisions of a one year plant. #2<br />
Grade Hemerocallis and Hosta are sold as<br />
smaller 2-3 eye/fan divisions of a two year<br />
field clump.<br />
Count: sold in multiples of 100<br />
Minimum order: 1 box of 100<br />
Select Hemerocallis and Hosta varieties<br />
are sold as a #3 Grade division. These are<br />
some of our most popular varieties offered<br />
in an economical 1-3 eye/fan division of a<br />
two year field clump.<br />
Count: sold in multiples of 250<br />
Minimum order: 1 box of 250
Product Profile<br />
Plug Liners<br />
Many of the products offered in this catalog are grown in plug form. Several sizes are available including 20, 30, 72, and 128 count. The<br />
majority of our plugs are easy to transplant Elle Plugs, while others are traditional loose fill plugs. The type of plug used is based upon the<br />
specific needs of the plant.<br />
Larger 20 and 30ct plugs are best suited to customers looking for faster turnaround times and sales the same season. Smaller 72 and<br />
128ct plugs are better suited for growers looking to produce larger quantities at a lower input cost. They are typically planted in summer<br />
for sales the following spring.<br />
We offer a number of perennials in economically priced 72 and 128ct plugs which are ideal for growers looking to produce larger quantities<br />
of their best selling items at a lower input cost. Don’t see exactly what you’re looking for? We accept custom orders for 72s and 128s<br />
(minimums apply). Please contact us for details.<br />
Size Plug Measurements Minimum Order<br />
20ct Elle Tray 31/4” deep x 23/4” wide 1 Tray of 20<br />
20ct Deep Cell Tray 41/2” deep x 23/4” wide 1 Tray of 20<br />
30ct Elle Tray 3” deep x 2” wide 1 Tray of 30<br />
30ct Deep Cell Tray 41/4” deep x 2” wide 1 Tray of 30<br />
72ct Elle Tray 21/2” deep x 11/3” wide 1 Tray of 72<br />
128ct Elle Tray 2” deep x 11/8” wide 1 Tray of 128<br />
www.WaltersGardens.com • 1-888-925-8377 • sales@waltersgardens.com | 5
Bare Root<br />
Walters Gardens is one of the largest field growers of perennials in the US, with over 1,500 acres dedicated to bare root production. In West<br />
Michigan, we are blessed with sandy loam soil and moderate temperatures from our close proximity to Lake Michigan. Perennials thrive in<br />
our fields, most reaching saleable size in just one growing season.<br />
Our bare root perennial guide is meant to help you with the entire process of growing our perennials to finished size. To learn more about<br />
our bare root sizes, see p. 4.<br />
Roots<br />
Fibrous Root<br />
Taproot<br />
Rhizome<br />
Corm<br />
A mass of profusely branched<br />
roots, often with no main taproot.<br />
Typically easy to divide.<br />
Ex: Achillea, Veronica, Daylilies<br />
The main descending root of a<br />
plant, often with little branching.<br />
Division is not recommended.<br />
Ex: Gypsophila or Baptisia<br />
A horizontal underground stem<br />
with branching close to the soil<br />
surface. Roots and shoots are<br />
often produced along its length.<br />
Ex: Siberian Iris<br />
A solid, underground, bulb-like<br />
portion of the stem of a plant<br />
bearing roots at the base.<br />
Ex: Crocosmia<br />
Divisions<br />
Eye<br />
A bud or shoot atop the crown of a<br />
plant from which foliage grows. Some<br />
perennials that are graded by their<br />
number of eyes include Paeonia,<br />
Astilbe, and Hosta.<br />
Fan<br />
A fan refers to an individual unit of a<br />
clump that includes one crown with<br />
a set of leaves and roots attached.<br />
Hemerocallis are typically graded by<br />
their number of fans.<br />
6 | Walters Gardens
Bare Root<br />
Scheduling delivery of your bare root perennials<br />
As a grower, you know that timing is everything. Sometimes it takes<br />
a little experimenting to figure out what works best in your specific<br />
climate. To help take the guesswork out of finishing your bare root<br />
perennials, we offer you some guidelines in our timing chart on p. 3.<br />
Be sure to keep in mind that finish times vary by variety and growing<br />
environment.<br />
As a general rule for many perennials, schedule delivery of your<br />
spring order in time to allow 6-10 weeks of growing time for 1-gal<br />
containers in a cool 50-60°F greenhouse. If plants will be grown<br />
outdoors with no frost protection, schedule delivery after risk of hard<br />
frost has passed as it is important to keep plants from freezing.<br />
What to do when your plants arrive<br />
Step 1: Open the Boxes<br />
When your order arrives, it is important to open all of the boxes and<br />
transplant all of the roots as soon as possible. Be sure to have plant<br />
labels on hand when potting to ensure correct identification. If you<br />
are not able to transplant the roots immediately, they may be stored<br />
in a cool (35-40°F) area for a limited time.<br />
Step 2: Inspect the Roots<br />
When you open the boxes, check the condition of the bare root<br />
plants. They should be firm, relatively dry, and typically are light<br />
brown in color. Since some bare root plants may have been stored<br />
in freezers where humidity is present, light surface mold may<br />
appear on some roots. It is not harmful to the plant and typically<br />
disappears once the boxes are opened and good air circulation is<br />
provided. It is not necessary to spray them with fungicide or remove<br />
the surface mold, though some customers prefer to do so.<br />
If any roots are still frozen, allow them to thaw slowly in a cool (40-<br />
50°F) room before handling. Do not put them immediately into a<br />
warm greenhouse. If the roots are dry, soak them in a tub of water<br />
containing a small amount of soluble fertilizer for one hour before<br />
potting. This will help the plants get established more quickly.<br />
If you are concerned about the condition of the plants in your<br />
shipment, contact your sales representative or broker or Walters<br />
Gardens, Inc. immediately so the issue can be resolved quickly.<br />
Step 3: Determine Planting Order<br />
The highest priority for transplanting bare root perennials should be<br />
given to all evergreen types such as Iberis, Lavandula, and Phlox<br />
subulata. Since their foliage is evergreen, these types of perennials<br />
can dessicate more quickly if left exposed. Those perennials which<br />
have thick, fleshy roots can typically be held over a bit longer before<br />
planting. However, remember to pot up all of your bare root material<br />
as soon as possible after receipt.<br />
Step 4: When You’ve Finished Planting<br />
We highly recommend that you apply a broad spectrum fungicide<br />
drench at the time of transplant to prevent crown and root rots. This<br />
is an important step that may take time now, but will save you time<br />
and money in the long run. After the drench has been applied, move<br />
the newly potted plants into a cool 50-60°F location with high light<br />
levels. Leave them there until roots have been established, and then<br />
raise the temperature slightly or move them to a warmer<br />
greenhouse to encourage top growth.<br />
www.WaltersGardens.com • 1-888-925-8377 • sales@waltersgardens.com | 7
Bare Root<br />
General Culture Guidelines for Bare Root Perennials<br />
The cultural information presented here is intended to give you<br />
general guidelines on how to grow bare root perennials. More<br />
specific cultural guidelines for special categories of perennials can<br />
be found on p. 22-28. In addition, a wealth of growing information is<br />
available on our website, www.WaltersGardens.com. Cultural sheets<br />
are provided for most genera, especially those that are more of a<br />
challenge to grow. Direction to the Culture Sheets portion of our<br />
website can be found under the Grower’s Corner section, or in the<br />
tab at the bottom of an individual plant page.<br />
Recommended Pot Sizes<br />
#1 Grade Plants — Most finish best in 1-gal containers, though<br />
some varieties such as Hibiscus are large enough to pot in 3-gal<br />
containers.<br />
#2 Grade Plants — Can be finished in 1-qt or trade 1-gal containers.<br />
#3 Grade Plants — Can be finished in 1-qt or trade 1-gal containers.<br />
Growing Media<br />
We suggest potting up your new perennial liners in a well-drained<br />
potting mix for optimum growth. A number of excellent bark or peatbased,<br />
soilless commercial mixes are available. Aim for a soil pH<br />
of 5.5-6.2 and an irrigation water pH of 5.4-7.0 for best results. For<br />
moisture loving plants, use growing media with little to no bark that<br />
will hold more moisture. Using a larger pot size will also keep the<br />
plants from drying out so quickly.<br />
Light and Temperature<br />
For optimum rooting, most perennials should be planted in full sun.<br />
For shade-loving plants such as ferns, hostas, Astilbe, and Dicentra,<br />
50-70% shade is recommended.<br />
When potting plants up in spring, be sure to keep the temperature<br />
above freezing. Cold, wet conditions may cause plants to decline<br />
or rot. Most perennials prefer to be grown at 50-55°F for 10-14 days<br />
after potting to promote root growth and then grown at 55-60°F<br />
until finished. Lower temperatures may be used to delay or suspend<br />
growth, while warmer temperatures generally help to accelerate<br />
growth.<br />
Bare Root Perennials to Grow Cool: Achillea, Amsonia, Astilbe,<br />
Artemesia, Baptisia, Clematis, Dicentra, Euphorbia, Irises, Lavandula,<br />
Nepeta, Paeonia, Papaver, Phlox subulata, and Salvia. See the<br />
Grower’s Reference Chart on p. 29 for a complete list.<br />
Bare Root Perennials to Grow Warm: Coreopsis, Crocosmia,<br />
Gypsophila, Hibiscus, Perovskia, Phlox paniculata, Rudbeckia, and<br />
Yucca. See the Grower’s Reference Chart on p. 29 for a complete list.<br />
Watering<br />
After potting up your bare root plants, water them in thoroughly to<br />
eliminate air pockets. Most bare root perennials benefit from being<br />
kept on the drier side initially because they are unable to absorb<br />
much moisture at this stage. The bare root plants need to develop<br />
feeder roots, and keeping them dry forces them to seek moisture,<br />
thereby initiating root growth.<br />
It is best to water early in the day so that the foliage will have a<br />
chance to dry out before the sun sets and the temperatures dip.<br />
This will help to avoid foliar diseases.<br />
Recommended<br />
Planting Depth<br />
Hemerocallis<br />
(Daylily)<br />
8 | Walters Gardens<br />
Hosta<br />
Allium<br />
(Ornamental Onion)<br />
Salvia<br />
(Perennial Salvia)<br />
Veronica<br />
(Spike Speedwell)
Bare Root<br />
When watering perennials with pubescent foliage, remember that<br />
water tends to collect in the center of the plant, causing crown rot.<br />
It is best to water pubescent and mildew-prone perennials early in<br />
the morning so they have plenty of time to dry out during the day.<br />
Monitoring Moisture Levels<br />
Some bare root perennials prefer to be grown slightly dry. Plant<br />
them in a very well-drained growing media, water them in, and<br />
then water sparingly thereafter. Perennials that prefer to be grown<br />
dry include: Amsonia, Artemisia, Euphorbia, Gypsophila, Iberis,<br />
Lavandula, Nepeta, Penstemon, Perovskia, Platycodon, Salvia,<br />
Sedum, and Yucca.<br />
Other bare root perennials prefer to be grown with consistent<br />
moisture levels. Their foliage tends to scorch and grow slowly if<br />
they do not receive enough moisture. Grow these plants moist:<br />
Astilbe, Dicentra, Hibiscus, Iris (Japanese, Louisiana, and Siberian),<br />
Polygonatum, and Tradescantia.<br />
Fertilizing<br />
When bare root plants are first potted up, they are not able to<br />
absorb fertilizer until they have established some feeder roots. Wait<br />
to fertilize newly potted plants until they show some foliage growth,<br />
approximately 4-6 inches for daylilies and other leafy perennials.<br />
Once the bare root plants are actively growing, they can be<br />
fertilized. Most growers use water soluble or slow release fertilizers<br />
or a combination thereof. In general, most perennials benefit from<br />
20-10-20 water soluble fertilizer at a rate of 50-150 ppm Nitrogen at<br />
every watering.<br />
To prevent salt build-up in the soil, avoid using slow-release fertilizer<br />
in the soil until the weather begins to warm up in spring (around<br />
April 1st in the north). Very little fertilizer is released before that<br />
time when it is cold and cloudy. Always follow the manufacturer’s<br />
recommendations when using fertilizer.<br />
When potting up bare root plants in fall, do not use slow-release<br />
fertilizer. Doing so will promote soft growth which could result in<br />
severe die-back or death if exposed to freezing conditions.<br />
When potting plants in spring, if you are using a slow release<br />
fertilizer, it is best to incorporate it into the growing media at a rate<br />
of 3/4 to 1 pound per cubic yard. Alternatively, you may top dress the<br />
pots taking care not to apply the fertilizer directly to the crown of<br />
the plants.<br />
perennials, such as Hibiscus, prefer to have more space than others<br />
when being grown to their finished size. In general, the more space<br />
you can give plants to finish, the better their finished appearance<br />
will be.<br />
Air Circulation<br />
Adequate air circulation is essential to avoiding disease issues when<br />
growing perennials. This is especially important for mildew-prone<br />
varieties such as Phlox paniculata and Pulmonaria. Be sure to<br />
space plants well so the air has room to circulate around them. Use<br />
fans or other ventilation if necessary.<br />
Weed Control<br />
We do our best to deliver clean, weed-free stock to our customers.<br />
However, weeds are opportunists that will grow wherever they<br />
possibly can. Some herbicides can be used successfully on certain<br />
crops, but it is safest to pull weeds on a weekly basis before they<br />
grow large and establish their roots.<br />
Forcing Bare Root Perennials<br />
Since most bare root material that is shipped from Walters Gardens,<br />
Inc. in spring in a dormant state has already been vernalized, it can<br />
be forced easily for sale anytime you’d like as long as the required<br />
day length is met. Supplemental lighting may be required to<br />
achieve satisfactory results. Alternatively, plants can be allowed<br />
to come into flower naturally. The amount of time it takes to bring<br />
plants into bloom varies widely by genus.<br />
Plant Placement<br />
The growing surface you select should have good drainage so that<br />
plants never sit in water for an extended period. Landscape fabric<br />
can be used for weed prevention. Be sure to space plants well<br />
and use fans if necessary to provide good air circulation. Some<br />
www.WaltersGardens.com • 1-888-925-8377 • sales@waltersgardens.com | 9
Plugs / Liners<br />
Of our wide selection of over 1,000 perennials, approximately half of our product line is offered in plug form. Depending on the needs of the plant,<br />
it may be grown in an Elle Plug or a traditional loose fill plug tray. A full range of plug sizes, including 20, 30, 72, and 128 count trays, is available<br />
to finish in your gallon, quart, or 6-pack sized containers. See timing chart on p. 3 for additional details.<br />
Sizes<br />
12”<br />
11”<br />
10”<br />
9”<br />
8”<br />
7”<br />
6”<br />
5”<br />
4”<br />
3”<br />
2”<br />
1”<br />
128ct Plug<br />
(Elle)<br />
72ct Plug<br />
(Elle)<br />
30ct Plug<br />
(Elle)<br />
30ct Plug<br />
(Deep Cell)<br />
20ct Plug<br />
(Elle)<br />
20ct Plug<br />
(Deep Cell)<br />
10 | Walters Gardens
Plugs / Liners<br />
Scheduling delivery of your plug perennials<br />
As a grower, you know that timing is everything. Sometimes it<br />
takes a little experimenting to figure out what works best in your<br />
specific climate. To help take the guesswork out of finishing your<br />
plug perennials, we offer you some guidelines in our timing chart on<br />
p. 3. Be sure to keep in mind that finish times vary by variety and<br />
growing environment.<br />
As a general rule for many perennials, schedule delivery of your spring<br />
order in time to allow 6-10 weeks of growing time for 20 or 30ct plugs<br />
finishing in 1-gal containers and 4-6 weeks for 72ct plugs finishing<br />
in quarts (see timing chart on p. 3 for details.) If plants will be grown<br />
outdoors with no frost protection, schedule delivery after risk of hard<br />
frost has passed. It is important to keep plants from freezing.<br />
What to do when your plants arrive<br />
Step 1: Open the Boxes<br />
When your plug order arrives, it is important to open all of the boxes<br />
and transplant all of the plugs as soon as possible. Be sure to have<br />
plant labels on hand when potting to ensure correct identification. If<br />
you are not able to transplant the plugs immediately, they may be<br />
stored in a cool area for a limited time.<br />
Step 2: Inspect the Plugs<br />
When you open the boxes, check the condition of the plugs.<br />
Depending on the time of year and the variety, the plants may<br />
be dormant or fully leafed out. If any plugs have frozen during<br />
shipment, allow them to thaw slowly in a cool (40-50°F) room before<br />
handling. Do not put them immediately into a warm greenhouse.<br />
We strive to ship our plugs with sufficient moisture to last through<br />
shipping. However, if any plugs appear dry they should be watered<br />
immediately. Since all of our plugs contain a wetting agent in the<br />
soil, they should re-wet easily.<br />
If you are concerned about the condition of the plants in your<br />
shipment, contact your sales representative or broker or Walters<br />
Gardens immediately so the issue can be resolved quickly.<br />
Step 3: Determine Planting Order<br />
If there are both bare root and plug perennials included in your<br />
perennial shipment, the highest priority for transplanting should be<br />
the bare root varieties.<br />
Once all of your bare root plants are potted up, you should begin<br />
transplanting your plug perennials beginning with the smallest sized<br />
plugs.<br />
If you plan to hold over your plugs for a short period of time before<br />
transplanting them, be sure to check them regularly to ensure they<br />
are kept evenly moist. Never let the plugs dry out.<br />
Step 4: When You’re Finished Planting<br />
We highly recommend that you apply a broad spectrum fungicide<br />
drench at the time of transplant to prevent crown and root rots.<br />
This is an important step that may take time now, but will save you<br />
time and money in the long run. After the drench has been applied,<br />
move the newly potted plants into a cool 55-60°F location with high<br />
light levels.Leave them there until roots have been established, and<br />
then raise the temperature to 60-65°F or move them to a warmer<br />
greenhouse to encourage top growth.<br />
www.WaltersGardens.com • 1-888-925-8377 • sales@waltersgardens.com | 11
Plugs / Liners<br />
General Culture Guidelines for Plug Perennials<br />
The cultural information presented here is intended to give you<br />
general guidelines on how to grow plug perennials. More specific<br />
cultural guidelines for special categories of perennials can be found<br />
on p. 22-28.<br />
In addition, a wealth of growing information is available on our<br />
website, www.WaltersGardens.com. Cultural Sheets are provided for<br />
most genera, especially those that are more of a challenge to grow.<br />
Direction to the Culture Sheets portion of our website can be found<br />
under the Grower’s Corner section, or in the tab at the bottom of an<br />
individual plant page.<br />
Recommended Pot Sizes<br />
20 and 30ct Plugs — Most finish best in 1-gal containers, though<br />
smaller varieties such as miniature hostas may work better in quarts.<br />
72ct Plugs — Can be finished in trade 1-gal, 1-qt, or 6 pack containers.<br />
Transplanting<br />
When transplanting Elle Plugs, it is not necessary to remove the<br />
paper sleeve since it will naturally degrade over time. The thinner<br />
Elle Plug paper that is being used now degrades more quickly than<br />
when the technology was new. However, some customers are more<br />
comfortable removing the paper. This is acceptable only if it will not<br />
harm the root structure of the plant.<br />
As a general rule, perennials grown in traditional or Elle Plugs should<br />
be potted up with the crown at the same soil level it was growing<br />
in the plug. The Elle Plug paper should not stick up above the soil<br />
surface after transplanted. Elle Plugs should be thoroughly watered<br />
prior to transplanting.<br />
Planting Depth<br />
Most Plug Perennials,<br />
such as the Hosta<br />
pictured here, should be<br />
planted even with the soil<br />
level, or just a bit below<br />
Growing Media<br />
We suggest potting up your new perennial liners in a well-drained<br />
potting mix for optimum growth. A number of excellent bark or peatbased,<br />
soilless commercial mixes are available. Aim for a soil pH<br />
of 5.5-6.2 and an irrigation water pH of 5.4-7.0 for best results. For<br />
moisture loving plants, use growing media with little to no bark that<br />
will hold more moisture. Using a larger pot size will also keep the<br />
plants from drying out so quickly.<br />
Light and Temperature<br />
For optimum rooting, most perennials should be planted in full sun.<br />
For shade-loving plants such as ferns and hostas, 50-70% shade is<br />
recommended.<br />
When potting plants up in spring, be sure to keep the temperature<br />
above freezing. Cold, wet conditions may cause plants to decline<br />
or rot. Most perennials prefer to be grown at 48-55°F for 10-14 days<br />
after potting to promote root growth and then grown at 55-60°F<br />
until finished. Lower temperatures may be used to delay or suspend<br />
growth, while warmer temperatures generally help to accelerate<br />
growth.<br />
Plug Perennials to Grow Cool: Aquilegia, Brunnera, Delphinium,<br />
Dicentra, Digitalis, Geranium, Grass-cool season, Helleborus,<br />
Heuchera, Heucherella, Leucanthemum, and Lupinus. See the<br />
Grower’s Reference Chart on p. 29 for a complete list.<br />
Plug Perennials to Grow Warm: Buddleia, Campanula, Coreopsis,<br />
Echinacea, Grasses-warm season, Gypsophila, Heliopsis, Perovskia,<br />
Rudbeckia, non-hardy Succulents and Tropicals. See the Grower’s<br />
Reference Chart on p. 29 for a complete list.<br />
Watering<br />
After potting up your plug perennials, water them in thoroughly to<br />
eliminate air pockets. Initially, Elle Plug perennials benefit from extra<br />
watering to help the plug absorb moisture. It is best to water early<br />
in the day so that the foliage will have a chance to dry out before<br />
the sun sets and the temperatures dip. This will help to avoid foliar<br />
diseases.<br />
When watering perennials with pubescent foliage, remember that<br />
water tends to collect in the center of the plant, causing crown rot.<br />
It is best to water pubescent and mildew-prone perennials early in<br />
the morning so they have plenty of time to dry out during the day.<br />
12 | Walters Gardens
Plugs / Liners<br />
Once the plants are actively growing, they can be fertilized.<br />
Most growers use water soluble or slow release fertilizers or a<br />
combination thereof. In general, most perennials benefit from<br />
20-10-20 water soluble fertilizer at a rate of 50-150 ppm Nitrogen at<br />
every watering.To prevent salt build-up in the soil, avoid using slowrelease<br />
fertilizer in the soil until the weather begins to warm up in<br />
spring (around April 1st in the north). Very little fertilizer is released<br />
before that time when it is cold and cloudy. Always follow the<br />
manufacturer’s recommendations when using fertilizer.<br />
When potting up plugs in fall, do not use slow-release fertilizer.<br />
Doing so will promote soft growth which could result in severe dieback<br />
or death if exposed to freezing conditions.<br />
For the most<br />
accurate snapshot<br />
of a container’s<br />
moisture level,<br />
check the drainage<br />
holes at it’s base.<br />
Monitoring Moisture Levels<br />
When growing perennials in a polyhouse, moisture levels can<br />
vary depending on location and exposure. Areas that are prone to<br />
drying out, such as those along sidewalks or near fans, should be<br />
monitored closely. Perennials such as Dianthus and ornamental<br />
grasses which prefer drier conditions would be good candidates for<br />
such dry areas of the polyhouse.<br />
Do not rely upon surface moisture to determine when it is time to<br />
water. Instead, check the drain hole in the bottom of the container<br />
for moisture. Most perennials prefer when the soil dries down a bit<br />
between waterings.<br />
Some plug perennials prefer to be grown slightly dry. Plant them in<br />
a very well-drained growing media, water them in, and then water<br />
sparingly thereafter. Grow these plants slightly dry: Aquilegia,<br />
Asclepias tuberosa, Corydalis, Delosperma, Dianthus, Echinacea,<br />
Epimedium, Gaillardia, Heuchera, Lupinus, Nepeta, Oenothera,<br />
Perovskia, Stachys, Thymus, and Yucca. See the Grower’s Reference<br />
Chart on p. 29 for a complete list.<br />
Other plug perennials prefer to have consistent moisture levels.<br />
Their foliage tends to scorch and grow slowly if they do not receive<br />
enough moisture. Grow these plants moist: Cimicifuga, Dicentra<br />
(except ‘Fire Island’ and ‘Pink Diamonds’), Galium, Ligularia, Lobelia,<br />
Primula, Pulmonaria, Tiarella, and Trollius. See the Grower’s<br />
Reference Chart on p. 29 for a complete list.<br />
Fertilizing<br />
When plugs are first potted up, they are not able to absorb fertilizer<br />
until they have established some feeder roots. Wait to fertilize newly<br />
potted plants until they show some foliage growth.<br />
Plant Placement<br />
The growing surface you select should have good drainage so that<br />
plants never sit in water for an extended period.<br />
Landscape fabric can be used for weed prevention. Be sure to space<br />
plants well and use fans if necessary to provide good air circulation.<br />
Some perennials, such as Hibiscus, prefer to have more space<br />
than others when being grown to their finished size. In general, the<br />
more space you can give plants to finish, the better their finished<br />
appearance will be.<br />
Air Circulation<br />
Adequate air circulation is essential to avoiding disease issues when<br />
growing perennials. This is especially important for mildew-prone<br />
varieties such as Phlox paniculata and Pulmonaria. Be sure to space<br />
plants well so the air has room to circulate around them. Use fans or<br />
other ventilation if necessary.<br />
Weed Control<br />
We do our best to deliver clean, weed-free stock to our customers.<br />
However, weeds are opportunists that will grow wherever they<br />
possibly can. Some herbicides can be used successfully on certain<br />
crops, but it is safest to pull weeds on a weekly basis before they<br />
grow large and establish their roots.<br />
Forcing Plug Perennials<br />
When purchasing fresh material, plants should be bulked up and<br />
vernalized over winter. Many perennials require vernalization to<br />
bloom, while others may benefit from but not require vernalization.<br />
Few do not require any vernalization to bloom. When receiving<br />
plugs in spring from Walters Gardens, they will already have been<br />
vernalized for the necessary amount of time in order to flower. Once<br />
vernalized, plug perennials can be bulked and forced easily for<br />
sale anytime you’d like as long as the required day length is met.<br />
Alternatively, they can be allowed to come into flower naturally.<br />
www.WaltersGardens.com • 1-888-925-8377 • sales@waltersgardens.com | 13
Culture Guide<br />
Five Recommendations for Growers<br />
If you’re struggling with a certain crop or just starting out and need some good pointers, here are the top five things growers need to watch<br />
for when finishing perennials.<br />
1. Not all perennials are alike. If you plan to grow many different kinds of perennials, you’ll need multiple kinds of growing environments<br />
in which to grow them. See p. 22-28 for cultural recommendations for specialized plants.<br />
2. Many perennials benefit from planting the summer or fall prior to the season of sales. Often, you can start with a smaller plug and<br />
yield bigger results by starting plants this way. See p. 38-39 for details.<br />
3. Growing media is crucial. Know your soil and test it regularly for pH and EC levels. Choose the right growing media for each type of<br />
perennial you are growing, whether it’s one that holds a lot of moisture for water loving plants or one that drains freely for those that<br />
like it on the dry side.<br />
4. Some top selling perennials with dark foliage, such as Hibiscus, need to be grown outdoors in order for the optimum color to be<br />
developed. Creating the proper growing environment goes a long way towards growing the best quality finished perennials.<br />
5. Many perennials, especially those that were started the summer or fall prior, can be forced into bloom for early spring sales. Keep in<br />
mind however that most will require supplemental lighting and heat to force into bloom out of their natural cycle.<br />
Watering Practices<br />
Water quality is very important in perennial production. It is one of<br />
the foundations of growing a quality crop of perennials. It is wise<br />
to have your water source tested regularly for pH, salt levels, and<br />
alkalinity. Perennials grow best when water is slightly acidic. You<br />
may need to make adjustments to your water supply. If it is too<br />
alkaline, you may need to inject acid into the water or use an acidic<br />
fertilizer. If it is too acidic, you may need to inject a basic fertilizer.<br />
When plants need water, it is best to water them well all the way<br />
through the pots and then allow them to dry slightly between<br />
irrigations. This will promote root growth to the bottom of the pots. If<br />
plants are watered lightly but more frequently, they tend to produce<br />
more surface roots and have a difficult time pushing roots to the<br />
bottom of the pots. It is best to water your perennials early in the<br />
morning to allow plenty of time for the foliage to dry before evening.<br />
This will help to prevent disease issues such as root and crown rots.<br />
An average growing media used for perennials contains a balanced<br />
blend of peat, perlite, and bark. However, if you plan to use overhead<br />
watering as the primary irrigation source, use a soil mix that is very<br />
well-drained, containing a high concentration of bark and perlite and<br />
less peat. An exception would be plants that require consistently<br />
moist soil—those should be potted in a peat/perlite media with<br />
minimal bark. When overhead watering, it is very important to<br />
monitor pH and EC levels to ensure proper fertility since this practice<br />
tends to leach fertilizer out of the soil.<br />
Certain crops, especially those with pubescent leaves like Stachys<br />
or Pulmonaria, perform better if drip or sub-irrigation is used. This<br />
allows the foliage to stay dry and lessens the chances for rot. Be<br />
sure to water such crops in the morning to allow plants to dry<br />
thoroughly before nightfall.<br />
When growing perennials that require consistent moisture in<br />
outdoor growing facilities, it is important to monitor moisture levels<br />
very closely. Such crops as Hibiscus may need to be watered<br />
several times per day. Drip irrigation works best in situations like this<br />
since it can be set on a timer or turned on any time of day without<br />
getting the foliage wet, preventing foliar diseases.<br />
14 | Walters Gardens
Culture Guide<br />
Water by Number<br />
Proper watering techniques can be difficult to teach to new<br />
employees, especially when there is a language barrier. Tagawa<br />
Greenhouse in Colorado developed a watering system that consists<br />
of five levels from extremely dry (level 1) to wet (level 5) and is based<br />
on visual and tactile clues for the worker. We have adapted their<br />
system for our customers growing finished product, shown at right.<br />
The primary watering range for most perennials is 2-4, meaning<br />
they are watered up to a level 4 and allowed to dry down to a level<br />
2 before they are watered again. Perennials that prefer drier soils<br />
Levels<br />
Level 1 - Extremely Dry<br />
• Soil is light brown all the way through, dry to the touch, and separates easily from the edge of the pot.<br />
• Soil will not stick together if pinched between fingers and may become hard and crumbly.<br />
• Soil is difficult to re-wet even with a wetting agent.<br />
• Plants may begin to wilt.<br />
• Container is very lightweight.<br />
Level 2 - Slightly Dry<br />
• Soil is light brown at the top and slightly darker brown further down in the pot.<br />
• Soil is fairly dry to the touch.<br />
• Soil will stick together if pinched between fingers but falls apart easily.<br />
• Container is lightweight.<br />
are watered up to a level 3 and dried down to a level 2. Conversely,<br />
perennials that prefer more moist soils are typically watered up to<br />
a level 4 and dried down to a level 3. Few perennials can handle the<br />
extremes of levels 1 and 5.<br />
Below is a visual and descriptive account of each of the five<br />
watering levels. We recommend that you adapt this system to your<br />
own nursery, using your own plants, and post it in a prominent<br />
location for your workers to reference on a regular basis.<br />
Level 3 - Average<br />
• Soil is medium brown most of the way through the pot but darker brown at the very bottom.<br />
• Soil is slightly damp to the touch.<br />
• Soil will stick together if pinched between fingers.<br />
• Pots around the edges of the crop block dry out quicker and should be monitored for moisture.<br />
• Container is of moderate weight but does not drip water.<br />
Level 4 - Moist<br />
• Soil is dark brown all the way through the pot.<br />
• Soil feels moist to the touch.<br />
• Some water can be squeezed from the pot.<br />
• Container is slightly heavy but does not drip much water.<br />
Level 5 - Wet<br />
• Soil is dark brown to black all the way through the pot because it is fully saturated.<br />
• Soil feels wet to the touch.<br />
• Water drips from the pot when you pick it up.<br />
• Container is very heavy and drips a lot of water.<br />
www.WaltersGardens.com • 1-888-925-8377 • sales@waltersgardens.com | 15
Culture Guide<br />
Onsite Soil Testing<br />
In addition to water quality, onsite soil testing is one of the<br />
foundations of growing a quality crop of perennials. Surprisingly,<br />
it is often overlooked by growers. Investing in onsite soil testing<br />
is well worth the effort and minimal expense as it helps to prevent<br />
nutritional deficiencies and grow more vigorous, healthier, pest and<br />
disease resistant crops. We recommend that you invest in a good<br />
quality pH/EC soil testing kit. They are readily available online for<br />
approximately $200-$300.<br />
There are several methods of testing soil, but the one we<br />
recommend is called the pour thru method. You will notice the EC<br />
rates given in this guide specify they are using this method. You will<br />
also find recommended pH and EC rates on our cultural sheets on<br />
www.WaltersGardens.com<br />
There are seven basic steps to testing soil for pH and EC levels<br />
using the pour through method, as defined by North Carolina State<br />
University’s Floriculture Research department.<br />
1. Irrigate the plants you are going to test one hour before testing<br />
begins. Make sure the growing media is completely saturated.<br />
2. Put a saucer or something to catch the water under the pots right<br />
before you start the test.<br />
3. Pour enough distilled water on the potted plants to get 50ml of<br />
leachate (the water that drains through the container). For a one<br />
gallon pot, this is typically 150ml of distilled water. Water must be<br />
distilled or deionized to obtain accurate readings.<br />
4. Collect the leachate in a clean container so you can measure its<br />
pH and EC.<br />
5. Before testing the leachate, calibrate your pH and EC meters.<br />
Skipping this step may lead to inaccurate readings.<br />
6. Measure the pH and EC of your samples as soon as possible after<br />
they are collected.<br />
7. Make adjustments to the pH and EC levels of your soil as needed.<br />
NC State University is an excellent source of information about soil<br />
testing. Visit their website: www.ces.ncsu.edu/depts/hort/floriculture<br />
Tips for Successful PGR Applications<br />
Some perennials benefit from applications of growth regulators to<br />
ensure the highest quality crop. While ideal growing conditions and<br />
spacing go a long way to improve quality, it is not always possible<br />
to have the best environment for every crop and some plants that<br />
are naturally quite tall can benefit from PGR applications even when<br />
grown in the very best possible situation. Here are some tips on<br />
applying growth regulators and rate suggestions for starting with<br />
on the genera that you might find needing some control on a more<br />
frequent basis. Keep in mind that these rates are just suggestions,<br />
and will vary based on your regional location, environment and even<br />
the water quality in your operation.<br />
• Apply foliar PGR applications early in the morning (or on a cloudy<br />
day) for best results – this allows them to dry the slowest and<br />
gives the most uptake. If in a greenhouse with retractable shade<br />
curtains, you can also pull the shade on a sunny day in a pinch.<br />
You can increase uptake by running a LIGHT MIST of water over<br />
the crop when it is almost dry from the application – not enough<br />
to rinse the chemical off, just enough to rewet the foliage.<br />
• Uniconazole (Sumagic/Concise) and Paclobutrazol (Bonzi/Piccolo)<br />
require stem contact for best absorption.<br />
• Familiarize yourself with the labels, and make sure to use a<br />
surfactant if suggested on the label – for example, Configure has<br />
the best efficacy if applied with a surfactant. Capsil is a good<br />
example, the rate typically used with Capsil is 6oz/100gals. Apply<br />
volumes based on label suggestions. Some PGRs require only a<br />
light spray (ie. Cycocel) whereas others require a heavier spray.<br />
• Some PGRs (Dikegulac Sodium, Fascination/Fresco, Cycocel,<br />
Florel) may cause either yellowing or a halo – this is normal and<br />
plants will outgrow it.<br />
• When drenching, try to apply when soil has been allowed to dry<br />
slightly so you get the most uptake of the chemical, and then be<br />
careful not to apply so much water as to leach the chemical out<br />
for the 7-10 days.<br />
• Everyone has their own method, but the “safest” way (and often<br />
the best results) is to layer lighter spray applications on as<br />
needed rather than a one-time punch of a drench or higher rate<br />
spray.<br />
• There is a lot of good information out there (less so on<br />
perennials, but getting better!). A great resource is the annually<br />
published Grower Talks PGR guide – one on annuals, one on<br />
perennials. Start there and make adjustments as needed based<br />
on your crop and growing conditions.<br />
16 | Walters Gardens
Plant Growth Regulator (PGR) Recommendations<br />
Genus<br />
Hardy Perennials<br />
Plant Growth<br />
Regulator (PGR)<br />
Rate<br />
Achillea Daminozoide 2500 ppm<br />
Daminozide + Uniconazole<br />
Uniconazole<br />
Configure<br />
2000 + 3 ppm<br />
7-15 ppm<br />
2500-5000 ppm<br />
Agastache Daminozide 2500-5000 ppm<br />
Daminozide + Chlormequat<br />
Chloride<br />
Paclobutrazol<br />
Uniconazole<br />
Configure<br />
2500-5000 + 1000-1500<br />
ppm<br />
30-60 ppm<br />
5-10 ppm<br />
300-500 ppm<br />
Alcea Paclobutrazol 5-15 ppm<br />
Paclobutrazol<br />
Uniconazole<br />
3-6 ppm drench<br />
2.5-5 ppm<br />
Amsonia Paclobutrazol 15 ppm<br />
Uniconazole<br />
Uniconazole<br />
5-10 ppm<br />
1 ppm drench<br />
Anemone Daminozide + Uniconazole 2000 + 3 ppm<br />
Aquilegia Daminozide 1500-2500 ppm<br />
Daminozide + Uniconazole<br />
Uniconazole<br />
1875 + 3 ppm<br />
5-15 ppm<br />
Arabis Daminozide 2500 ppm<br />
Notes<br />
Culture Guide<br />
PGRs may need to be applied multiple times to get good<br />
control.<br />
Apply PGRs as sprays early, before elongation has<br />
occurred. If elongation has already occurred, best<br />
control is through the Paclobutrazol drench.<br />
Apply just as flower stems are beginning to elongate.<br />
Not required on some varieties.<br />
Artemisia Daminozide 5000 ppm Growing cool and dry will reduce the need for PGR.<br />
Daminozide + Chlormequat<br />
Chloride<br />
Paclobutrazol<br />
5000 + 1500 ppm<br />
40-50 ppm<br />
Aruncus Uniconazole 5 ppm<br />
Asclepias Daminozide 3750-5000 ppm<br />
Uniconazole<br />
5-10 ppm<br />
Aster Daminozide 2500-5000 ppm Make first application 5-7 days after pinching.<br />
Paclobutrazol<br />
30-50 ppm<br />
www.WaltersGardens.com • 1-888-925-8377 • sales@waltersgardens.com | 17
Culture Guide<br />
Plant Growth Regulator (PGR) Recommendations<br />
Genus<br />
18 | Walters Gardens<br />
Plant Growth<br />
Regulator (PGR)<br />
Rate<br />
Astilbe Daminozide 2500-5000 ppm Apply PGR when flower stem appears above foliage.<br />
Daminozide + Uniconazole<br />
Paclobutrazol<br />
Uniconazole<br />
2000 + 3 ppm<br />
15-30 ppm<br />
5-10 ppm<br />
Baptisia Paclobutrazol 6-10 ppm drench<br />
Uniconazole<br />
Uniconazole<br />
1 ppm drench<br />
5-15 ppm<br />
Notes<br />
Growing cool is the best height control. Make first PGR<br />
applications early in the crop, when shoots are just a few<br />
inches tall.<br />
Brunnera Daminozide 2500 ppm If toning is required, often not needed.<br />
Uniconazole<br />
5 ppm<br />
Buddleia Paclobutrazol 6 ppm drench Begin PGR applications 1-2 weeks after pinching.<br />
Uniconazole<br />
5-15 ppm<br />
Campanula Daminozide 2500-3750 ppm<br />
Paclobutrazol<br />
Uniconazole<br />
10-30 ppm<br />
2-5 ppm<br />
Clematis (Herbaceous) Uniconazole 5-10 ppm<br />
Coreopsis Daminozide 2500-5000 ppm<br />
Daminozide + Uniconazole<br />
Uniconazole<br />
2000 + 3 ppm<br />
5-10 ppm<br />
Apply just as flower stems are beginning to elongate.<br />
Compact varieties will need little to no PGR, start on<br />
these with 2500 ppm Daminozide.<br />
Delphinium Paclobutrazol 30 ppm Apply when flower stems grow above foliage.<br />
Uniconazole<br />
5 ppm<br />
Dianthus Daminozide + Uniconazole 2000 + 3 ppm Typically not needed if grown cool.<br />
Dicentra Daminozide 2500 ppm<br />
Digitalis Ancimidol 25 ppm<br />
Daminozide<br />
Uniconazole<br />
2500 ppm<br />
5 ppm<br />
Echinacea Daminozide 2500 ppm<br />
Daminozide + Uniconazole<br />
Uniconazole<br />
Uniconazole<br />
2000-2500 + 3-5 ppm<br />
5 ppm<br />
1 ppm drench<br />
Euphorbia Flurprimidol 45 ppm<br />
Paclobutrazol<br />
Uniconazole<br />
30 ppm<br />
5 ppm
Plant Growth Regulator (PGR) Recommendations<br />
Genus<br />
Plant Growth<br />
Regulator (PGR)<br />
Rate<br />
Gaillardia Daminozide 2500-5000<br />
Daminozide + Chlormequat<br />
Chloride<br />
Daminozide + Paclobutrazol<br />
Daminozide + Uniconazole<br />
2500-3750 + 1000 ppm<br />
2500-3750 + 15 ppm<br />
2000-2500 + 3-5 ppm<br />
Gaura Daminozide 2500 ppm<br />
Uniconazole<br />
5 ppm<br />
Geranium Daminozide + Uniconazole 2000 + 3 ppm<br />
Uniconazole<br />
5 ppm<br />
Notes<br />
Culture Guide<br />
Geum Paclobutrazol 30 ppm Apply as flower stems grow above foliage.<br />
Uniconazole<br />
5 ppm<br />
Heliopsis Daminozide 2500 ppm<br />
Uniconazole<br />
5-10 ppm<br />
Hemerocallis Uniconazole 1 ppm drench<br />
Heuchera Uniconazole 5-10 ppm Typically not needed if grown under ideal conditions.<br />
Heucherella Uniconazole 5-10 ppm Typically not needed if grown under ideal conditions.<br />
Hibiscus<br />
Daminozide + Chlormequat<br />
Chloride<br />
Uniconazole<br />
Paclobutrazol<br />
3750 + 1000 ppm Apply PGRs about 5 days after a pinch.<br />
2.5-15 ppm<br />
1 ppm drench<br />
Hosta Daminozide 2500 ppm<br />
Uniconazole<br />
Uniconazole<br />
5 ppm<br />
1 ppm drench<br />
Iberis Paclobutrazol 15 ppm<br />
Uniconazole<br />
2.5 ppm<br />
Knautia Daminozide 2500 ppm<br />
Paclobutrazol<br />
Uniconazole<br />
30 ppm<br />
5 ppm<br />
Kniphofia Paclobutrazol 30-45 ppm<br />
Uniconazole<br />
5-7.5 ppm<br />
Lavandula Uniconazole 5 ppm<br />
Leucanthemum Uniconazole 5-7.5 ppm<br />
Liatris Uniconazole 5.10 ppm<br />
Be aware of what size class of hosta you are growing.<br />
Mini, small, and unvernalized hosta will not typically<br />
need any PGR.<br />
www.WaltersGardens.com • 1-888-925-8377 • sales@waltersgardens.com | 19
Culture Guide<br />
Plant Growth Regulator (PGR) Recommendations<br />
Genus<br />
Plant Growth<br />
Regulator (PGR)<br />
Rate<br />
Lobelia Ancimidol 25 ppm<br />
Daminozide<br />
Uniconazole<br />
2500 ppm<br />
5 ppm<br />
Lupinus Daminozide 2500 ppm<br />
Daminozide + Uniconazole<br />
Paclobutrazol<br />
2000 + 3 ppm<br />
20 ppm<br />
Malva Paclobutrazol 15 ppm<br />
Uniconazole<br />
2.5 ppm<br />
Monarda Daminozide + Uniconazole 2000 + 3 ppm<br />
Nepeta Paclobutrazol 30 ppm<br />
Uniconazole<br />
5 ppm<br />
Oenothera Uniconazole 5-10 ppm<br />
Papaver Daminozide 2500 ppm<br />
Penstemon Daminozide 2500 ppm<br />
Uniconazole<br />
5-10 ppm<br />
Perovskia Daminozide 2500 ppm<br />
Daminozide + Uniconazole<br />
Uniconazole<br />
2000 + 3 ppm<br />
5-10 ppm<br />
Phlox (Tall Garden) Paclobutrazol 45 ppm<br />
Uniconazole<br />
10 ppm<br />
Platycodon Daminozide 2500 ppm<br />
Uniconazole<br />
5 ppm<br />
Rudbeckia Daminozide 2000 ppm<br />
Uniconazole<br />
3 ppm<br />
Salvia Daminozide 2500 ppm<br />
Uniconazole<br />
5-10 ppm<br />
Scabiosa Daminozide 2500 ppm<br />
Paclobutrazol<br />
Uniconazole<br />
30 ppm<br />
5 ppm<br />
Sedum Daminozide 2500-5000 ppm<br />
Paclobutrazol<br />
Uniconazole<br />
20-30 ppm<br />
5-10 ppm<br />
Spigelia Uniconazole 5-10 ppm PGR not typically needed if grown under ideal conditions.<br />
Stokesia<br />
Daminozide + Chlormequat<br />
Chloride<br />
2000 + 1000 ppm<br />
Notes<br />
20 | Walters Gardens
Plant Growth Regulator (PGR) Recommendations<br />
Genus<br />
Plant Growth<br />
Regulator (PGR)<br />
Rate<br />
Notes<br />
Tiarella Uniconazole 5 ppm Typically not needed.<br />
Tradescantia<br />
Veronica Uniconazole 5-10 ppm<br />
Viola Daminozide 2500 ppm<br />
Grasses & Sedges<br />
Best growth control is growing in cool temperatures.<br />
Calamagrostis Flurprimidol 10 ppm Make first application when plants are 6-12" tall.<br />
Paclobutrazol<br />
Uniconazole<br />
10 ppm<br />
1 ppm drench<br />
Miscanthus Flurprimidol 10 ppm<br />
Paclobutrazol<br />
Uniconazole<br />
10 ppm<br />
2 ppm<br />
Panicum Flurprimidol 10 ppm<br />
Paclobutrazol<br />
Uniconazole<br />
10 ppm<br />
2 ppm<br />
Pennisetum Flurprimidol 10 ppm<br />
Tropicals<br />
Paclobutrazol<br />
Uniconazole<br />
10 ppm<br />
2 ppm<br />
Digiplexis Uniconazole 10 ppm Apply PGRs just as flower spikes are starting to elongate.<br />
Uniconazole<br />
1 ppm drench<br />
Culture Guide<br />
www.WaltersGardens.com • 1-888-925-8377 • sales@waltersgardens.com | 21
Culture Guide<br />
Culture Recommendations for Specialized Plants<br />
Astilbe<br />
Plant in 1-gal containers with the eyes just at or slightly below the<br />
soil surface.<br />
Begin growing plants cool at 50-55°F for the first 10-14 days. After<br />
that, increase the temperature to 55-60°F to speed flowering or<br />
lower temperature to delay flowering.<br />
The most critical growing factor for Astilbe is water. Increase<br />
watering as the foliage emerges and plumes mature. Plants should<br />
never be allowed to dry out. If the margins of the leaves turn brown<br />
and crispy, the plants are not being kept moist enough. Avoid<br />
watering after mid-afternoon.<br />
Astilbes are moderate feeders. We recommend a constant liquid<br />
feed of 50-100ppm N.<br />
Because they are sensitive to high salts, the plants may experience<br />
root injury and become scorched if the soluble salt levels are<br />
allowed to build up. We recommend an EC of 1.5-2.0 using the pour<br />
through method.<br />
• Use mouse bait when overwintering.<br />
• Plants should be shaded during periods of high light intensity.<br />
A 55% shade cloth is recommended in the north when<br />
temperatures reach 65-70°F. A heavier 70% shade cloth will be<br />
necessary in the south.<br />
Baptisia (False Indigo)<br />
The big concern with bare root Baptisia is that the roots will dry out<br />
since dry roots are almost always connected to poor performance.<br />
Fortunately, there are a few quick and easy steps that can be taken<br />
to ensure success in growing.<br />
First, plant your bare root Baptisia as soon as possible into a<br />
true 1-Gallon container or larger. If the roots are too large for the<br />
container you can trim them slightly right before potting.<br />
Planting depth is very important. The eyes should be planted right at<br />
the soil line so the crown is completely submerged. If the crown sits<br />
above the soil the roots will become significantly drier than if the<br />
crown is below and result in poorer performance.<br />
Due to the dense nature of the root system there is a probability<br />
that air gaps will form below the crown and surrounding roots when<br />
planting from bare root. Taking care to fill in between the roots when<br />
planting, as well as a thorough watering after planting will solve this<br />
concern.<br />
A porous peat based growing media or well drained bark are usually<br />
good choices.<br />
Despite heavy concerns over dry roots, Baptisias are not a thirsty<br />
plant. Once the roots are established, they require only low to<br />
moderate watering.<br />
Start cool at 55-60°F and provide high light levels with good air<br />
movement.<br />
Pinching is not necessary and has a good chance of removing or<br />
damaging the emerging flowers. Baptisia are vigorous growers,<br />
drenching with Bonzi at 6” tall will effectively control plant height.<br />
Planting Depth<br />
Baptisia plugs should be<br />
about 1/2” below the soil<br />
line. This will promote<br />
better eye development<br />
and more stems the<br />
following year.<br />
Clematis (Herbaceous, non-Vining)<br />
When most people think of Clematis they are usually thinking of<br />
the vining types, but bush Clematis are much easier to control in<br />
containers than their vining counterparts and have unique, bellshaped<br />
flowers that lend a very different look to the garden.<br />
Bush Clematis, or herbaceous<br />
clematis, are offered as bare root<br />
inputs and should be planted<br />
with the crown slightly below the<br />
soil line in late winter to spring.<br />
The bare root material will have<br />
received a vernalization in the<br />
fields, so no additional cold<br />
treatment is needed.<br />
In the landscape, bush Clematis<br />
benefits from either some<br />
perennial neighbors or an<br />
obelisk to help support the foliage. Likewise in containers, a trellis<br />
will help to maintain the upright form.<br />
High light levels will help to grow the highest quality plants.<br />
22 | Walters Gardens
Culture Guide<br />
Echinacea (Coneflower)<br />
Walters Gardens begins to ship vegetatively propagated, actively<br />
growing Echinaceas in the beginning of April. Prior to April 1st,<br />
Echinacea are shipped in either a dormant or newly emerging state.<br />
If you do not have a heated greenhouse in which to keep them<br />
actively growing, schedule your delivery later in spring when night<br />
temperatures average 50-60°F and daytime temperatures average<br />
65-70°F.<br />
• High light intensities are required for best growth.<br />
• Echinaceas flower best under 14 hour days or a four hour night<br />
interruption between 10PM and 2AM.<br />
• Best performance comes in well-drained soil of moderate<br />
to slightly dry moisture. Allow the soil to dry down between<br />
waterings for best root growth.<br />
• Echinacea will become stunted and lack overall vigor if fertilizer<br />
and EC levels are too high. Use slightly acidic soil with an EC of<br />
1.5-2.0 using the pour through method for best results.<br />
Helleborus (Lenten Rose)<br />
Hellebores are a long crop, but worth the wait. We offer several<br />
different plug inputs that can be utilized at varying time of year.<br />
• 128ct plugs are the smallest and should be planted in late winter<br />
to early spring in the south, or early summer in northern regions,<br />
and can be sold green later the same season or overwintered<br />
for the following spring’s sales. Expect only 10-15% flowering<br />
that following spring, since they will have received only one<br />
vernalization.<br />
• 30ct plugs are a larger input and should be planted in late winter<br />
to early spring in the south, and in the late winter in the north.<br />
Follow similar timing as for the 128s, selling green plants later<br />
that summer or lightly flowering plants the following spring.<br />
• 20ct plugs are the largest plug size we offer and are available in<br />
both the fall and the spring. Fall planted 20cts bulk and develop<br />
roots well at that time of year since hellebore actively grow<br />
during the cooler months, and then will bloom at about 80%<br />
capacity the following spring. Spring planted 20cts have already<br />
received a second vernalization in the plug, so can be planted<br />
and sold the same season at about 80% flowering capacity.<br />
Hellebores are cold weather plants which are actively growing<br />
from late winter through spring. They stop growing in summer but<br />
resume growth again in the fall. Plants in production through the<br />
summer should be pushed tightly together to help maintain a cooler<br />
environment around the roots. Reflective aluminum shade cloth<br />
also helps to keep plants cooler during the summer months.<br />
When plants are actively growing, fertilize moderately with 100-<br />
150ppm N at every irrigation. Reduce to 75-150ppm N at every other<br />
irrigation in summer and mid-winter.<br />
Use a bark-based growing media with a slightly acidic pH of 5.8-6.4.<br />
In production, Hellebores prefer average moisture, and should be<br />
allowed to dry only slightly between waterings. In the garden, they<br />
are quite drought tolerant.<br />
Use a 50-75% shade cloth for this shade perennial during the<br />
summer months.<br />
Vernalization is required for flowering. Plants that are produced from<br />
tissue culture bloom about 85% after one vernalization compared to<br />
those produced from seed which bloom about 10-15%. All plants will<br />
bloom after the second vernalization. After the potted plants have<br />
been bulked up from spring through fall, vernalize them for up to<br />
8-10 weeks at 35-40°F and keep them cold until you want them to<br />
flower. Flowering often begins even in unheated greenhouses in the<br />
late winter, especially when temperatures are above 35°F.<br />
Hemerocallis (Daylilies)<br />
Daylilies are one of the most widely<br />
recognized perennials, are deer and<br />
rabbit resistant, and are very<br />
versatile in the landscape.<br />
Hardy from zones 3 to 9, they<br />
can be used throughout a wide<br />
range of garden conditions.<br />
Our daylilies are all grown in<br />
our bare root fields and roots<br />
are trimmed before shipping.<br />
Root pruning is preferable to<br />
cramming the roots into a pot, and<br />
will not result in any setback in<br />
growth. In many cases trimming will<br />
actually accelerate rooting in.<br />
Bare root divisions should be planted in<br />
well-drained media and watered in thoroughly.<br />
Hemerocallis prefer even moisture until established, but then can<br />
be allowed to dry down slightly between irrigations until bud set, at<br />
which point returning to consistent moisture application will improve<br />
flower quality.<br />
For the first few weeks after planting, daylilies do not require<br />
fertilizer. Once actively growing they are moderate feeders and will<br />
perform best under a constant liquid feed program of 75-125 ppm N.<br />
Too much fertilizer will encourage soft, weak growth.<br />
Late summer planting will result in bigger plants and more flowers.<br />
Allow at least 6-8 weeks to establish roots before temperatures<br />
drop consistently below freezing, and do not fertilize at this time.<br />
When overwintering, trim plants to 2 inches as late in the season as<br />
possible, as trimming too early will result in unwanted regrowth.<br />
www.WaltersGardens.com • 1-888-925-8377 • sales@waltersgardens.com | 23
Culture Guide<br />
Hibiscus (Culture for Spring Planting)<br />
• Pot up bare root Hibiscus immediately upon arrival.<br />
• Grow Hibiscus in full sun at 68°F or warmer constant<br />
temperature. Bare root plants can be grown colder outdoors.<br />
• Grow cultivars with purple foliage outdoors to achieve proper<br />
coloration.<br />
• Pinch top growth back once to 3-5 nodes.<br />
• Drench each pot with 1ppm Sumagic® one week after pinching.<br />
• Keep plants moist at all times to prevent flower buds from<br />
aborting.<br />
• Feed with 150-200ppm N to ensure vigorous growth. Maintain EC<br />
levels of 2.5-3.5 using the pour thru method.<br />
• Watch for aphids, whiteflies, mites, and sawfly larvae.<br />
Hostas<br />
Growing Hostas in Early Spring<br />
It is quite normal for different hosta varieties to re-emerge at<br />
significantly different rates in spring. Some will virtually explode<br />
from the soil while others are slower to emerge. The speed of<br />
emergence can depend on:<br />
• Growing Temperature: Hostas grown in a cool 40-50°F<br />
environment can take much longer to emerge than plants grown<br />
at 60-70°F. However, if you flush them out too quickly, the leaf<br />
substance will be thinner, so it is better to reemerge them in cool<br />
temperatures.<br />
• Length of Vernalization: Many hostas require a full 10 week<br />
vernalization (35°F temperatures) to grow properly the following<br />
spring. Hostas that do not receive the necessary cold treatment will<br />
take significantly longer to reemerge. Hostas received from Walters<br />
Gardens, Inc. in early spring will be dormant vernalized plants.<br />
• Cultivar/Species: Generally, tokudama and fortunei types emerge<br />
much slower than those with undulata, sieboldiana, plantaginea,<br />
and montana parentage. Long days are required for hostas to<br />
bulk up their foliage and root systems.<br />
General Recommendations for Hostas<br />
We strongly recommend that you pot up<br />
your plug and bare root hostas the summer<br />
prior to sale. Such hostas will develop more<br />
eyes, a better root system, and more mature<br />
traits including proper variegation. They also<br />
will be saleable quicker in spring and have a<br />
much higher perceived value.<br />
• Pot up plants in a well-drained, bark-based,<br />
soilless mix with the eyes at or just below the<br />
soil surface.<br />
• When transplanting in spring, keep<br />
hostas at 50°F for the first two<br />
weeks to promote root growth.<br />
Minimum temperatures may then<br />
be lowered to 40°F.<br />
• Keep soil moist early in the growing<br />
season without overwatering. Later in<br />
the season, allow soil to dry slightly<br />
between waterings. Dormant hostas<br />
require very little water.<br />
• Hostas will benefit from a light<br />
application of liquid fertilizer (20-10-<br />
20 with 50ppm Nitrogen) in early<br />
spring. Since it is critical to keep all<br />
granular fertilizers out of the crown<br />
Walters Gardens has a<br />
zero tolerance policy for<br />
Hosta Virus X (HVX), and<br />
tests regularly for the virus<br />
to avoid injury, liquid feed is safest. Alternatively, a top dressing<br />
of slow release fertilizer may be used. Roots will rot if too much<br />
fertilizer is applied. Aim for an EC rate of 1.5-2.0 using the pour<br />
through method. In the fall, only a light fertilizer application, if<br />
any, is necessary. Apply very little Nitrogen in the fall to allow<br />
plants to go dormant.<br />
• The use of a 50% shade cloth in the north (70% in the south)<br />
is recommended since excessive light may cause irregular<br />
bleached areas (sun scald) on the leaves of sensitive varieties.<br />
Shading will also help blue hostas retain their attractive blue<br />
color later into the season.<br />
Lagerstroemia<br />
• Lagerstroemia, commonly called Crapemyrtles, are traditionally<br />
a southern plant but because of advances in their genetics some<br />
varieties are now hardy to Zone 6. 30ct plugs can be planted<br />
in spring through summer, and will finish in 12-14 weeks in a<br />
premium 2 gallon container.<br />
• Suggested container size is 2-3 gallons.<br />
• Due to their southern heritage, Crapemyrtles are a heat loving<br />
plant and will put on the most growth in the heat of the summer.<br />
24 | Walters Gardens
Culture Guide<br />
When planting in the greenhouse in spring, you will want to<br />
maintain temperatures of at least 68-70°F.<br />
• Crapemyrtles grow best under high light levels and in a welldrained<br />
media with a pH of 5.5-6.<br />
• They are moderate feeders, taking a constant liquid feed of 100-<br />
125ppm Nitrogen.<br />
• Crapemyrtles bloom in August on new growth and will die back<br />
to the ground over winter in the north.<br />
Lavandula (Lavender)<br />
Lavender is trending right now due to its multiple uses as an<br />
ornamental perennial, culinary herb and fantastic aromatic foliage.<br />
Three input sizes of lavender are available to purchase from Walters<br />
Gardens:<br />
• 30ct plugs should be planted in late winter to spring and will fill a<br />
trade gallon in 7-9 weeks.<br />
• 72ct plugs may be planted either in the late summer and sold<br />
the following spring, or in late winter to spring, filling a trade<br />
gallon container in 8-12 weeks depending on the season.<br />
• Bare root lavender is best planted in late winter to spring in<br />
1-2 gallon containers, and finishes in 8-10 weeks. The foliage<br />
is shaped by us, enabling you to finish an attractive plant with<br />
no trimming required on your part. When receiving bare root<br />
lavender, we recommend that it be one of the first things you<br />
get out of the box and plant, and water in immediately and<br />
thoroughly to eliminate air pockets in the media and to hydrate<br />
the plants. It is also beneficial to cover bare root lavender with<br />
remay cloth after planting to prevent the dormant evergreen<br />
foliage from dessication, until new roots form and can support<br />
the new growth.<br />
Most lavender requires 8-10 weeks of vernalization in order to flower,<br />
with the exception of SWEET ROMANCE®, which is cold beneficial<br />
but will flower without vernalization. All bare root lavender will have<br />
received the necessary cold treatment in the field.<br />
Lavender will perform best when planted in a well-drained mix and<br />
grown with moderate moisture to slightly dry. Do not grow too dry<br />
(do not allow to wilt) or too wet, as both extremes may lead to root<br />
rots. Avoid high humidity and overhead watering late in the day to<br />
minimize foliar issues.<br />
Fertilizer levels for lavender should be fairly low, in the 50-75 ppm N<br />
range when using constant liquid feed, as they are light feeders.<br />
Rhizoctonia, Phytopthora, Botrytis and other fungal pathogens<br />
can be problematic if grown under less than ideal conditions. A<br />
preventative drench after transplant and preventative sprays will<br />
help keep pathogens at bay.<br />
Lupines<br />
Lupines can be grown from larger 30ct plugs in spring or smaller<br />
72ct plugs the fall before sales. If planting in spring, grow them cool<br />
at 60-65°F constant temperatures. If growing in fall, keep plants<br />
above 50°F until they are finished and then vernalize them for 6-8<br />
weeks or longer in a minimally heated greenhouse or unheated cold<br />
frame.<br />
• Use a well-drained, bark based growing media with a pH of 5.8-<br />
6.2 to ensure proper drainage. Maintain average to moist soil<br />
moisture.<br />
• Lupines are light to moderate feeders. Fertilize with a constant<br />
liquid feed of 75-100ppm N at every irrigation and aim for an EC<br />
rate of 2.0-2.5 using the pour through method.<br />
• PGRs may be used to control the height of the foliage and flower<br />
stalks.<br />
www.WaltersGardens.com • 1-888-925-8377 • sales@waltersgardens.com | 25
Culture Guide<br />
Soil Level<br />
11/2-2” Planting Depth<br />
Eyes<br />
Peonies<br />
Garden Peony<br />
Eyes<br />
Crown<br />
Intersectional Peony<br />
Garden Peonies<br />
The most critical aspect of growing peonies is their planting depth.<br />
For garden peonies, the eyes on the root should be planted to a<br />
depth of 11/2-2 inches below the soil surface. The lower roots may<br />
be trimmed to fit the pot if necessary. Proper planting will help to<br />
ensure a good flowering performance.<br />
Intersectional Peonies<br />
For intersectional peonies, the crown should be planted 11/2-2 inches<br />
below soil level. If the eyes have already begun to grow, they may<br />
stick up above the soil a bit after planting the crown below soil level.<br />
General Cultural Recommendations for Peonies<br />
When you receive your shipment of peonies, open the boxes and<br />
inspect the roots. If they look dry, soak them in water for 12 hours<br />
or overnight before planting. If you are not able to plant them right<br />
away, repack them in the materials in which they were shipped and<br />
store them in 38-42°F temperatures for up to 10 days.<br />
• 2/3 eye divisions should be potted in 1 gallon containers.<br />
• 3/5 eye divisions should be potted in 2-3 gallon containers.<br />
• Use a well-drained, bark-based, commercial growing mix with a<br />
pH of 6.5-7.0. Peonies need good drainage and air circulation for<br />
disease control.<br />
Planting peonies in the fall will result in improved flowering the<br />
following spring. Fall planting is highly recommended.<br />
If planting peonies in the spring, it is important to grow them cool<br />
in order to yield stronger plants and prevent them from growing too<br />
fast. We recommend 45-50°F days and cold nights of 35-40°F. It<br />
may become necessary to run the fans in the greenhouse on sunny<br />
days to maintain this cool temperature. When grown at higher<br />
temperatures, the plants slow their bud development, the flowers<br />
age faster, and leaf curl may occur.<br />
In the spring, use a low rate fertilizer such as 18-6-8 at 100-150ppm<br />
at every other watering. Over-fertilization can inhibit flowering. Aim<br />
for an EC rate of 1.5-2.5 using the pour through method.<br />
Perovskia<br />
• Bare Root Perovskia are best planted in Spring. They should be<br />
potted in a 1-Gal container and kept at 68-72°F to finish in 6-8<br />
weeks.<br />
• Perovskia grown from plugs finish in a 1-Gal container as well but<br />
will finish in 10-12 weeks. We recommend plug Perovskia as a<br />
late summer planting to overwinter.<br />
• Vernalization is beneficial to bloom but not necessary.<br />
• We recommend 75-100ppm Nitrogen in a constant liquid feed but<br />
if you prefer slow release fertilizers we recommend a rate of 1.0-<br />
1.25 lbs. per cubic yard of growing media.<br />
• The EC rate is 1.5-2.0 using the pour through method.<br />
• In the landscape, Perovskia are drought tolerant. In production,<br />
we recommend keeping your plants moderately moist to slightly<br />
dry with either drip or overhead irrigation.<br />
• Grow this crop under clear plastic or indoors or in direct sunlight.<br />
Proper lighting will keep the plant more compact.<br />
• Perovskia overwinter best in a minimally heated greenhouse.<br />
They can be successfully overwintered outdoors under a frost<br />
blanket or in an unheated greenhouse.<br />
Creeping Phlox (Bare Root)<br />
• Since this is an evergreen perennial, it should be potted up<br />
immediately upon receipt.<br />
• Pot into wide, shallow containers such as a 7-8 inch mum pan or<br />
azalea pot. Standard 1-gal containers are too small for bare root<br />
creeping phlox.<br />
• Excellent root to soil contact is essential! Take care when potting<br />
up bare root creeping phlox to make sure all of the fine root<br />
mass is covered.<br />
• Water thoroughly after potting to allow the soil to settle around<br />
the roots. Then water lightly until new growth appears.<br />
• Creeping Phlox needs high light levels, good air circulation, cool<br />
temperatures (40-50°F), and an EC rate of 1.5-2.5 using the pour<br />
through method to thrive.<br />
• For spring planting, pot plants up in late March or early April (in<br />
the north) and place directly outside under white, lightweight,<br />
breathable row cover. Monitor soil moisture daily and water through<br />
the fabric as needed. Remove the row cover when buds appear.<br />
Prepare to cover the plants again in the event of a late, hard frost.<br />
26 | Walters Gardens
Culture Guide<br />
Spigelia<br />
This stunning perennial is native to the Eastern United States<br />
and creates a splash of red in the landscape that will entice the<br />
neighborhood hummingbirds to stop by for a snack. They are a very<br />
versatile perennial, growing well in sun or part shade and in a wide<br />
range of soils as long as drainage is good.<br />
We are vegetatively propagating our spigelia to ensure good<br />
uniformity, and will be offering it as grade 1 bare root divisions and as<br />
72ct plugs. Bare root should be planted in spring to summer, and will<br />
take 10-12 weeks to finish depending on temperature. 72cts should be<br />
planted in late summer and overwintered for following spring sales.<br />
Spigelia does require vernalization to bloom, provide at least 8<br />
weeks between 35-40° F. Bare root material will have received the<br />
needed cold treatment in the fields.<br />
Higher light levels are preferable in production to produce higher<br />
quality plants. If toning is needed, apply Uniconazole (Sumagic/<br />
Concise) starting at 5 ppm.<br />
Ferns<br />
Good irrigation practices are essential when growing ferns. Plants<br />
need to be kept moist, but not soaked, from the time they are potted<br />
up until they are planted in the ground. It is best to water early in<br />
the day to allow the fronds plenty of time to dry before nightfall.<br />
Allow the soil to dry slightly between waterings.<br />
Ferns can be sensitive to high salt levels incurred from fertilizing.<br />
Aim for an EC rate of 1.0-1.5 using the pour through method and<br />
use about half the amount of fertilizer you would use with other<br />
perennials.<br />
To prevent sun scorch in summer, grow ferns under at least 50%<br />
shade in the north and up to 70% shade in the south.<br />
Ferns should be planted before mid-August or wait until the<br />
following spring to ensure survival. Potting them up early will give<br />
them an adequate amount of time to become established before<br />
overwintering. Upon receipt of your order, it is best to place them in<br />
a cool, shaded location.<br />
Ornamental Grasses and Sedges<br />
• Roots must be kept moist prior to potting and plants must be<br />
kept from freezing, preferably above 45°F, both before and after<br />
transplanting.<br />
• Pot up in a well-drained, commercial soil mix.<br />
• Water sparingly until a significant amount of new growth appears.<br />
• Most grasses are moderate feeders and perform well with an EC<br />
rate of 2.0-3.0 (pour through method). Sedges are lighter feeders,<br />
preferring an EC rate of 1.5-2.0 (pour through method).<br />
Cool Season Grasses<br />
Cool season grasses are at their prime during the cooler months<br />
of fall, winter, and spring, and usually bloom before the warmer<br />
summer weather arrives. Many are evergreen. Cool season<br />
grasses should be received in fall or early spring and be potted<br />
up immediately. They will put on the most growth during these<br />
cooler months. Though they should be kept from freezing over the<br />
winter, they do not require much, if any, supplemental heat. Cool<br />
season grasses include: Calamagrostis acutiflora, Deschampsia,<br />
Festuca, Helictotrichon, and Sesleria.<br />
Warm Season Grasses<br />
Warm season grasses grow most actively during the warmer<br />
months, then flower in late summer or fall. Most go completely<br />
dormant in winter. Warm season grasses are not recommended<br />
for fall planting. It is best to receive them from early spring<br />
through late summer and pot them up immediately. If necessary,<br />
provide supplemental heat to keep the plants at 60°F or higher to<br />
stimulate top growth. Warm season grasses include: Andropogon,<br />
Bouteloua, Calamagrostis brachytricha, Hakonechloa, Miscanthus,<br />
Panicum, Pennisetum, Schizachyrium, and Sporobolus.<br />
Sedge<br />
Though it is not a true grass, Sedge, or Carex, tends to grow much<br />
like a warm season grass. It is best to receive Carex from early<br />
spring through late summer rather than in the fall.<br />
Ornamental & Edible Strawberries from Plugs<br />
• Plant ornamental and edible strawberries such as Fragaria a.<br />
‘Tristan’ in spring for summer sales.<br />
• Plant one 72ct plug per 1-Qt or trade 1-Gal container.<br />
• Grow these plants cool at 55-60°F with high light intensities for<br />
best results. Temperature may be raised slightly once plants are<br />
rooted out. Plants will generally finish in 1-Qt containers in 4-6<br />
weeks and in trade 1-Gal containers in 8-10 weeks.<br />
• Use a well-drained, balanced soil with a pH of 5.8-6.5 and an EC<br />
rate of 1.5-2.5 using the pour through method.<br />
• Maintain slightly moist soil consistently. Do not let plants dry out.<br />
Edible Strawberries from Bare Root<br />
• Plant edible strawberries such as ‘Allstar’ in spring for summer<br />
sales.<br />
• Plant one bare root per 1-Qt or trade 1-Gal container.<br />
• Take care when potting to spread the roots well in the container<br />
and to keep the crown at the soil line. Do not pot these deep.<br />
• Water roots in well after potting to eliminate air pockets.<br />
• Follow remaining guidelines for Ornamental & Edible Strawberries<br />
listed above.<br />
www.WaltersGardens.com • 1-888-925-8377 • sales@waltersgardens.com | 27
Culture Guide<br />
Tropicals<br />
• Recommended pot size depends on the variety. Colocasias<br />
typically require larger containers; plants will grow larger if given<br />
more root space. Smaller tropicals can be finished in 4-in to 1-gal<br />
containers.<br />
• Tropicals can be grown successfully in a general perennial soil mix.<br />
• Grow warm with a constant temperature in the upper 60s,<br />
and provide high light intensities as this will mimic their native<br />
environment.<br />
• Maintain average to high moisture levels. Do not let these plants<br />
dry out.<br />
• Once plants are actively growing, feed with 20-10-20 water<br />
soluble fertilizer at a rate of 75-125ppm Nitrogen at every<br />
watering.<br />
• Not all tropicals grow at the same rate. For example, Colocasias<br />
are very fast growers compared to Cordylines. Plan your timing<br />
accordingly.<br />
• Some tropical temperennials have very tender foliage that is<br />
easily torn or damaged. Take care when handling them.<br />
DIGIPLEXIS®<br />
DIGIPLEXIS® are a combination of hardy Digitalis purpurea and the<br />
Canary Islands native Isoplexis canariensis. These award-winning<br />
plants have the enviable traits of long season of flowering, heavy<br />
flower performance, and vigorous growth rates.<br />
DIGIPLEXIS® are vigorous growers and a 2-Gallon container is<br />
recommended.<br />
Plants finish in 8-10 weeks at 55-60°F. This is a tender perennial—if<br />
temperatures fall below 38°F there is a good chance of damaging<br />
the plant.<br />
High light levels and cool temperatures will keep them neatly<br />
compact. Flower color will be significantly more vibrant when grown<br />
in direct sunlight than under clear plastic.<br />
Moderate to consistent moisture levels are recommended. Drip<br />
irrigation is very effective at getting water past the thick foliage to<br />
the roots. Irrigating in the morning is more effective as this plant<br />
does not like to sit too wet for too long.<br />
DIGIPLEXIS® are moderate feeders. A constant liquid feed of 100-<br />
125ppm Nitrogen during the rooting stage and increased to 200-<br />
250ppm Nitrogen just before blooming is recommended.<br />
The suggested EC rate is 2.0-3.0 using the pour through method.<br />
Pinching the main flower stem will stimulate production of additional<br />
stems and bulk up the plant. If left unpinched the main flower stem<br />
will grow very tall and require staking.<br />
Succulents (Non-Hardy)<br />
• Finish in 1-qt containers using a coarse, very well-drained soil.<br />
• Be sure to wear heavy gloves when transplanting to avoid injury<br />
as some Agave and Mangave varieties have sharp spines.<br />
• Grow warm with a constant temperature in the upper 60s,<br />
and provide high light intensities as this will mimic their native<br />
environment.<br />
• Succulents grow best at a moderate moisture level except for<br />
the slow growing Agave which prefer low to average moisture.<br />
Hold Agave dry but give them an occasional deep watering.<br />
• Succulents grow well with average fertility.<br />
• Succulents tend to be slow growers so plan your timing<br />
accordingly.<br />
Mangave<br />
Mangave are a hybrid created by crossing Manfreda and Agave,<br />
and the result are fun plants that have the best traits of both of their<br />
parents. Mangave have the great habit of Agave, but are quicker<br />
to produce and display interesting patterns due to the manfreda<br />
parentage.<br />
Walters Gardens offers Mangave in 72ct plugs, both as single variety<br />
trays and in two pre-mixed trays. Plugs should be planted in quarts<br />
in early summer, and will take between 8-15 weeks to finish a quart<br />
depending on variety. Plants with broad foliage tend to be quicker<br />
to finish than narrow foliaged varieties.<br />
Mangave love warm temperatures, and should be grown under<br />
68-75°F + conditions. They can be held at cooler temperatures<br />
down to 60°F once the desired size is achieved.<br />
The distinctive colors and<br />
spotted patterns of mangave are<br />
intensified by UV light. During<br />
the winter months or when<br />
grown in a greenhouse under<br />
poly, the coloration and spotting<br />
will be subdued.<br />
A common misconception about<br />
mangave is that they should be<br />
grown dry. They actually require<br />
moderate moisture in order to<br />
achieve the best growth, but<br />
avoid saturated conditions as<br />
that can lead to crown and root<br />
rots – a good rule of thumb is to<br />
water mangave like you would a<br />
hosta.<br />
While a tray may arrive “green”,<br />
a few weeks under UV or sunlight<br />
will bring out the bright colors<br />
28 | Walters Gardens
Grower’s Reference Chart<br />
Recommended EC Using<br />
the Pour Through Method<br />
Consistent Water Needs<br />
Grow Cool: 50-60° F<br />
Grow Warm: 65-70° F<br />
Start Warm: 65-70° F<br />
Evergreen in Some or<br />
All Climates<br />
Average Water Needs<br />
Long Days to Break<br />
Dormancy<br />
Recommended pH<br />
Low Water Needs<br />
Easy to Grow<br />
Full Shade<br />
Part Shade<br />
Full Sun<br />
Hardy Perennials<br />
Achillea 5.5-6.2 1.5-2.0 ✺ ✺ ✺ ✺ ✺<br />
Aconitum 5.8-6.5 1.5-2.0 ✺ ✺ ✺ ✺ ✺<br />
Agapanthus 6.2-6.5 1.5-2.5 ✺ ✺ ✺ ✺<br />
Agastache 5.8-6.2 1.2-1.4 ✺ ✺ ✺ ✺ ✺ ✺ ✺<br />
Ajuga 6.0-6.5 1.5-2.5 ✺ ✺ ✺ ✺ ✺ ✺ ✺ ✺<br />
Alcea 5.5-6.2 2.0-3.0 ✺ ✺ ✺<br />
Alchemilla 5.8-6.5 1.0-1.2 ✺ ✺ ✺ ✺ ✺ ✺<br />
Allium 5.8-6.8 1.5-2.0 ✺ ✺ ✺ ✺ ✺<br />
Amsonia 5.6-6.2 1.5-2.0 ✺ ✺ ✺ ✺ ✺ ✺ ✺<br />
Anemone 5.8-6.4 1.5-2.0 ✺ ✺ ✺ ✺ ✺<br />
Anthemis 5.5-6.2 1.5-2.0 ✺ ✺ ✺ ✺<br />
Aquilegia 5.8-6.4 1.0-2.0 ✺ ✺ ✺ ✺ ✺ ✺<br />
Arabis 5.5-6.5 1.0-1.5 ✺ ✺ ✺ ✺ ✺<br />
Aralia 5.0-7.4 2.0-3.0 ✺ ✺ ✺ ✺<br />
Armeria 5.8-6.2 1.2-1.4 ✺ ✺ ✺ ✺ ✺ ✺ ✺<br />
Artemisia 5.5-6.0 1.5-2.0 ✺ ✺ ✺ ✺ ✺<br />
Aruncus 5.5-6.5 1.5-2.5 ✺ ✺ ✺ ✺ ✺ ✺<br />
Asarum 5.8-6.2 1.0-2.0 ✺ ✺ ✺ ✺ ✺ ✺<br />
Asclepias tuberosa 5.8-6.2 1.5-2.0 ✺ ✺ ✺ ✺ ✺<br />
Aster 6.0-6.5 2.0-3.0 ✺ ✺ ✺ ✺ ✺<br />
*For more information visit the Culture Sheets section of our website.<br />
www.WaltersGardens.com • 1-888-925-8377 • sales@waltersgardens.com | 29
Grower’s Reference Chart<br />
Recommended EC Using<br />
the Pour Through Method<br />
Consistent Water Needs<br />
Grow Warm: 65-70° F<br />
Start Warm: 65-70° F<br />
Average Water Needs<br />
Evergreen in Some or<br />
All Climates<br />
Grow Cool: 50-60° F<br />
Long Days to Break<br />
Dormancy<br />
Recommended pH<br />
Low Water Needs<br />
Easy to Grow<br />
Full Shade<br />
Part Shade<br />
Full Sun<br />
Astilbe 5.8-6.2 1.5-2.0 ✺ ✺ ✺ ✺ ✺ ✺<br />
Baptisia 5.8-6.5 2.0-3.0 ✺ ✺ ✺ ✺<br />
Belamcanda 5.8-6.5 2.0-3.0 ✺ ✺ ✺ ✺<br />
Bergenia 5.8-6.5 1.5-2.5 ✺ ✺ ✺ ✺ ✺ ✺ ✺<br />
Brunnera 5.8-6.2 2.0-2.5 ✺ ✺ ✺ ✺ ✺<br />
Buddleia 5.8-6.5 2.0-3.0 ✺ ✺ ✺ ✺ ✺<br />
Calamintha 6.0-6.6 1.5-2.0 ✺ ✺ ✺ ✺ ✺ ✺<br />
Campanula 5.8-6.2 1.0-1.2 ✺ ✺ ✺ ✺<br />
Cerastium 6.0-6.5 1.2-1.5 ✺ ✺<br />
Ceratostigma 5.8-6.2 1.5-2.5 ✺ ✺ ✺ ✺ ✺<br />
Cimicifuga 5.8-6.8 1.5-2.0 ✺ ✺ ✺ ✺ ✺<br />
Clematis (Bush) 5.8-6.2 2.0-3.0 ✺ ✺ ✺<br />
Convallaria 5.8-6.5 1.5-2.0 ✺ ✺ ✺ ✺ ✺ ✺<br />
Coreopsis 5.8-6.2 1.5-2.0 ✺ ✺ ✺ ✺ ✺<br />
Corydalis 5.8-6.8 1.0-1.5 ✺ ✺ ✺ ✺ ✺ ✺ ✺<br />
Crocosmia 5.8-6.8 1.5-2.0 ✺ ✺ ✺<br />
Delosperma 5.8-6.2 1.5-2.0 ✺ ✺ ✺ ✺ ✺<br />
Delphinium 5.8-6.2 1.5-2.0 ✺ ✺ ✺ ✺<br />
Dianthus 5.5-5.8 1.25-2.0 ✺ ✺ ✺ ✺ ✺ ✺ ✺<br />
Dicentra 5.5-6.2 1.5-2.0 ✺ ✺ ✺ ✺ ✺ ✺ ✺<br />
Digitalis 5.8-6.2 1.0-1.5 ✺ ✺ ✺ ✺<br />
Echinacea 5.5-6.5 1.5-2.0 ✺ ✺ ✺ ✺ ✺<br />
Echinops 5.8-6.8 1.0-1.5 ✺ ✺ ✺ ✺ ✺<br />
Epimedium 5.8-6.2 1.0-1.75 ✺ ✺ ✺ ✺ ✺ ✺<br />
Eryngium 5.5-6.5
Grower’s Reference Chart<br />
Recommended EC Using<br />
the Pour Through Method<br />
Consistent Water Needs<br />
Grow Warm: 65-70° F<br />
Start Warm: 65-70° F<br />
Average Water Needs<br />
Evergreen in Some or<br />
All Climates<br />
Grow Cool: 50-60° F<br />
Long Days to Break<br />
Dormancy<br />
Recommended pH<br />
Low Water Needs<br />
Easy to Grow<br />
Full Shade<br />
Part Shade<br />
Full Sun<br />
Geum 5.8-6.4 1.5-2.0 ✺ ✺ ✺ ✺ ✺ ✺<br />
Gypsophila 5.8-6.2 1.25-2.0 ✺ ✺ ✺ ✺ ✺<br />
Heliopsis 5.8-6.2 2.5-3.0 ✺ ✺ ✺ ✺ ✺<br />
Helleborus 5.8-6.4 1.5-2.0 ✺ ✺ ✺ ✺ ✺ ✺ ✺<br />
Hemerocallis 6.0-6.5 2.0-3.0 ✺ ✺ ✺ ✺ ✺<br />
Heuchera 5.5-6.2 2.0-3.0 ✺ ✺ ✺ ✺ ✺ ✺ ✺<br />
Heucherella 5.5-6.2 2.0-3.0 ✺ ✺ ✺ ✺ ✺ ✺<br />
Hibiscus 5.5-6.2 2.5-3.5 ✺ ✺ ✺ ✺ ✺ ✺<br />
Hosta 5.8-6.5 1.5-2.0 ✺ ✺ ✺ ✺ ✺ ✺<br />
Iberis 5.5-6.2 1.2-1.4 ✺ ✺ ✺ ✺<br />
Iris (Japanese) 5.8-6.2 1.0-1.5 ✺ ✺ ✺ ✺<br />
Iris (Lousiana) 5.8-6.2 1.0-1.5 ✺ ✺ ✺ ✺<br />
Iris (Siberian) 5.0-6.8 1.0-1.5 ✺ ✺ ✺ ✺ ✺<br />
Knautia 5.8-6.5 1.5-2.0 ✺ ✺ ✺ ✺<br />
Kniphofia 5.5-6.0 1.5-2.0 ✺ ✺ ✺<br />
Lagerstroemia 5.5-6.0 2.0-3.0 ✺ ✺ ✺ ✺ ✺ ✺<br />
Lavandula 5.8-6.2 1.25-1.75 ✺ ✺ ✺ ✺<br />
Leucanthemum 5.8-6.2 2.0-3.0 ✺ ✺ ✺ ✺ ✺<br />
Liatris 6.5-7.0 1.5-2.0 ✺ ✺<br />
Ligularia 5.8-6.2 1.5-2.5 ✺ ✺<br />
Liriope 5.8-6.2 1.0-1.5 ✺ ✺ ✺ ✺ ✺ ✺ ✺ ✺<br />
Lobelia 5.8-6.4 1.1-1.3 ✺ ✺ ✺ ✺<br />
Lupinus 5.8-6.2 2.0-2.5 ✺ ✺ ✺ ✺ ✺<br />
Lychnis 5.8-6.8 1.0-1.5 ✺ ✺ ✺ ✺<br />
Malva 5.2-6.5 2.0-2.5 ✺ ✺ ✺<br />
Monarda 5.8-6.4 1.5-2.5 ✺ ✺ ✺ ✺ ✺<br />
Mukdenia 5.8-6.2 1.5-2.0 ✺ ✺ ✺ ✺<br />
Nepeta 6.0-6.5 1.5-2.0 ✺ ✺ ✺ ✺ ✺<br />
Oenothera 5.8-6.2 2.0-3.0 ✺ ✺ ✺ ✺ ✺<br />
Ophiopogon 5.8-6.2 1.0-1.5 ✺ ✺ ✺ ✺ ✺ ✺ ✺<br />
Paeonia (Garden) 6.5-7.0 1.5-2.5 ✺ ✺ ✺ ✺ ✺ ✺<br />
Paeonia (Intersectional) 6.5-7.0 1.5-2.5 ✺ ✺ ✺ ✺ ✺ ✺<br />
Papaver 5.5-6.2 1.5-2.5 ✺ ✺ ✺<br />
*For more information visit the Culture Sheets section of our website.<br />
www.WaltersGardens.com • 1-888-925-8377 • sales@waltersgardens.com | 31
Grower’s Reference Chart<br />
Recommended EC Using<br />
the Pour Through Method<br />
Consistent Water Needs<br />
Grow Warm: 65-70° F<br />
Start Warm: 65-70° F<br />
Average Water Needs<br />
Evergreen in Some or<br />
All Climates<br />
Grow Cool: 50-60° F<br />
Long Days to Break<br />
Dormancy<br />
Recommended pH<br />
Low Water Needs<br />
Easy to Grow<br />
Full Shade<br />
Part Shade<br />
Full Sun<br />
Penstemon 5.9-6.5 1.5-2.0 ✺ ✺ ✺ ✺ ✺<br />
Perovskia 6.0-6.5 1.2-1.4 ✺ ✺ ✺ ✺ ✺<br />
Phlox paniculata 5.8-6.5 2.0-3.5 ✺ ✺ ✺ ✺<br />
Phlox subulata 5.8-6.2 1.5-2.5 ✺ ✺ ✺ ✺ ✺ ✺<br />
Platycodon 5.5-6.0 1.5-2.0 ✺ ✺ ✺ ✺<br />
Polygonatum 5.8-6.2 1.0-1.5 ✺ ✺ ✺ ✺<br />
Primula 5.8-6.2 2.0-3.0 ✺ ✺ ✺ ✺ ✺<br />
Pulmonaria 5.6-6.8 2.0-2.5 ✺ ✺ ✺ ✺ ✺<br />
Rudbeckia 5.8-6.5 1.5-2.0 ✺ ✺ ✺ ✺ ✺ ✺<br />
Salvia 5.8-6.2 2.0-3.0 ✺ ✺ ✺ ✺ ✺<br />
Sanguisorba 5.5-7.0 1.5-2.0 ✺ ✺ ✺ ✺ ✺ ✺<br />
Saponaria 6.8-7.5 1.0-1.5 ✺ ✺ ✺<br />
Scabiosa 5.8-6.2 1.0-1.5 ✺ ✺ ✺ ✺<br />
Sedum 5.8-6.5 2.0-3.5 ✺ ✺ ✺ ✺<br />
Sempervivum 5.8-6.2 1.0-1.5 ✺ ✺ ✺ ✺<br />
Sisyrinchium 5.8-6.2 1.5-2.0 ✺ ✺ ✺ ✺ ✺<br />
Spigelia 5-5=6.5 2.0-3.0 ✺ ✺ ✺ ✺ ✺ ✺<br />
Stachys 5.8-6.5 1.0-1.5 ✺ ✺ ✺ ✺ ✺ ✺<br />
Stokesia 5.8-6.8 1.5-2.0 ✺ ✺ ✺ ✺ ✺<br />
Tanacetum 5.8-6.8 1.5-2.0 ✺ ✺ ✺<br />
Thymus 6.0-7.0 1.5-2.0 ✺ ✺ ✺ ✺ ✺<br />
Tiarella 5.5-6.5 1.5-2.0 ✺ ✺ ✺ ✺ ✺ ✺<br />
Tradescantia 6.0-6.5 1.5-2.0 ✺ ✺ ✺ ✺ ✺ ✺<br />
Tricyrtis 5.8-6.2 1.5-2.0 ✺ ✺ ✺ ✺ ✺<br />
Trollius 5.8-6.8 1.5-2.0 ✺ ✺ ✺ ✺<br />
Vernonia 5.5-7.0 1.5-2.0 ✺ ✺ ✺ ✺ ✺<br />
Veronica 5.5-6.2 2.0-3.0 ✺ ✺ ✺ ✺ ✺<br />
Viola 5.8-6.8 1.5-2.0 ✺ ✺ ✺ ✺ ✺ ✺<br />
Yucca 6.0-6.5 1.5-2.0 ✺ ✺ ✺ ✺ ✺ ✺ ✺<br />
Ferns<br />
Athyrium 5.5-6.5 1.0-1.5 ✺ ✺ ✺ ✺ ✺<br />
Dryopteris 5.5-6.5 1.0-1.5 ✺ ✺ ✺ ✺ ✺ ✺<br />
Matteuccia 5.5-6.5 1.0-1.5 ✺ ✺ ✺ ✺ ✺<br />
*For more information visit the Culture Sheets section of our website.<br />
32 | Walters Gardens
Grower’s Reference Chart<br />
Recommended EC Using<br />
the Pour Through Method<br />
Consistent Water Needs<br />
Grow Warm: 65-70° F<br />
Start Warm: 65-70° F<br />
Average Water Needs<br />
Evergreen in Some or<br />
All Climates<br />
Grow Cool: 50-60° F<br />
Long Days to Break<br />
Dormancy<br />
Recommended pH<br />
Low Water Needs<br />
Easy to Grow<br />
Part Shade<br />
Full Shade<br />
Full Sun<br />
Grasses & Sedges<br />
Andropogon 5.8-6.3 2.0-3.0 ✺ ✺ ✺ ✺ ✺<br />
Bouteloua 5.5-7.0 1.5-2.0 ✺ ✺ ✺ ✺ ✺ ✺ ✺<br />
Calamagrostis 5.8-6.3 2.0-3.0 ✺ ✺ ✺ ✺ ✺<br />
Carex 5.8-6.3 1.5-2.0 ✺ ✺ ✺ ✺ ✺ ✺ ✺ ✺<br />
Festuca 5.8-6.3 1.5-2.0 ✺ ✺ ✺ ✺ ✺ ✺<br />
Hakonechloa 5.8-6.3 1.75-2.25 ✺ ✺ ✺ ✺ ✺ ✺<br />
Helictotrichon 5.8-6.3 1.5-2.0 ✺ ✺ ✺ ✺<br />
Imperata 5.8-6.3 2.0-2.5 ✺ ✺ ✺ ✺<br />
Miscanthus 5.8-6.3 2.0-3.0 ✺ ✺ ✺ ✺ ✺ ✺ ✺<br />
Panicum 5.8-6.3 2.5-3.5 ✺ ✺ ✺ ✺ ✺ ✺ ✺<br />
Pennisetum 5.8-6.3 2.0-3.5 ✺ ✺ ✺ ✺ ✺ ✺<br />
Schizachyrium 5.8-6.3 1.5-2.5 ✺ ✺ ✺ ✺ ✺ ✺<br />
Sesleria 5.5-7.0 1.5-2.0 ✺ ✺ ✺ ✺ ✺<br />
Sporobolus 5.8-6.3 1.5-2.5 ✺ ✺ ✺ ✺<br />
Fruits & Vegetables<br />
Asparagus 5.5-6.2 1.5-2.0 ✺ ✺ ✺ ✺ ✺<br />
Rhubarb 6.0-6.5 1.5-2.0 ✺ ✺ ✺ ✺<br />
Strawberries 5.8-6.5 1.5-2.5 ✺ ✺ ✺<br />
Tropicals<br />
Colocasia 6.0-6.5 2.0-2.5 ✺ ✺ ✺ ✺ ✺ ✺ ✺ ✺<br />
Cordyline 5-5-6.5 1.5-2.5 ✺ ✺ ✺ ✺ ✺ ✺<br />
Digiplexis® 5.5-6.0 2.0-3.0 ✺ ✺ ✺<br />
Succulents (Non-Hardy)<br />
Agave 6.0-6.5 0.5-1.0 ✺ ✺ ✺ ✺ ✺ ✺ ✺<br />
Hansara 6.2-6.8 0.5-1.0 ✺ ✺ ✺ ✺ ✺ ✺ ✺<br />
Manfreda 6.0-6.5 0.5-1.0 ✺ ✺ ✺ ✺ ✺ ✺ ✺<br />
Mangave 6.0-6.5 0.5-1.0 ✺ ✺ ✺ ✺ ✺ ✺ ✺<br />
*For more information visit the Culture Sheets section of our website.<br />
www.WaltersGardens.com • 1-888-925-8377 • sales@waltersgardens.com | 33
Plant Health<br />
Walters Gardens has made a strong commitment to provide only the<br />
most healthy, vigorous product to our customers. All of our crops are<br />
tested regularly for the most common viruses as well as additional<br />
genus-specific viruses where needed. Our fields and greenhouses are<br />
also regularly scouted for signs of pests or diseases. In addition to the<br />
dedicated efforts of our Growers and Plant Health Team, we make an<br />
effort company-wide to maintain clean and preventative practices to<br />
limit the spread and introduction of pests, diseases, and viruses.<br />
How to Identify<br />
Virus-Indexed Plants (VIP)<br />
A virus-indexed variety is one that has been tested and deemed<br />
free of the viruses listed (right) up to the point of testing. A bow<br />
tie symbol is located in the key code of each variety that has<br />
been virus-indexed.<br />
Sustainable Production Practice<br />
and Integrated Pest Management<br />
In the Fields<br />
Understanding the vital importance of plant health, we remain<br />
vigilant in preventing problems in our fields. Before a crop is planted<br />
in the field, we make sure our planting stock is clean and diseasefree.<br />
We then diversify our plantings so that disease prone items are<br />
never planted in the same place twice. All of the equipment used<br />
to plant and harvest our hosta stock blocks is sanitized between<br />
cultivars. We also scout weekly for weeds, insect damage, unusual<br />
variations in growth, trueness to type, and overall plant health.<br />
In the Greenhouse<br />
Prevention is key when it comes to pest and disease management<br />
in our greenhouses. We do weekly scouting for any pest, disease, or<br />
nutritional issues and do preventative spraying in regular intervals<br />
to prevent the onset of disease. Our goal is to catch problems at the<br />
earliest stage possible and to target the treatment to the specific<br />
crop before it spreads to other plants. When treatment is needed,<br />
we use beneficial insects or reduced-risk pesticides which target<br />
specific pests rather than using broad spectrum chemicals. We have<br />
not used neonicotinoid containing products on our production crops<br />
since 2014.<br />
Virus Prevention and Index<br />
We take great pride in the attentiveness of our Plant Health and<br />
Greenhouse staff when it comes to identifying and preventing viruses<br />
in our plants. All of our plants are tested on a regular basis regardless<br />
of appearance or history. Because there is always risk of a crop being<br />
exposed to a virus, and more so in a field environment, we will not<br />
give VIP status to a variety if we feel there is too much risk of infection<br />
between testing and shipping. If a variety is prone to viral infection,<br />
extra steps are taken to ensure that our stock and production lines<br />
always start with clean material.<br />
Plants are tested here at Walters Gardens, Inc. for the viruses listed<br />
below and are designated with a bow tie symbol.<br />
General Perennials<br />
• Alfalfa Mosaic Virus (AMV)<br />
• Alternanthera/Papaya Mosaic Virus (AltMV/PapMV)<br />
• Arabis Mosaic Virus (ArMV)<br />
• Cucumber Mosaic Virus (CMV)<br />
• Impatiens Necrotic Spot Virus (INSV)<br />
• Potyvirus Group (POTY)<br />
• Tobacco Mosaic Virus (TMV)<br />
• Tobacco Ringspot Virus (TRSV)<br />
• Tobacco Streak Virus (TSV)<br />
• Tomato Aspermy Virus (TAV)<br />
• Tomato Ringspot Virus (ToRSV)<br />
• Tomato Spotted Wilt Virus (TSWV)<br />
Dianthus<br />
• 12 General Perennial tests<br />
• Carnation Etched Ring Virus (CERV)<br />
• Carnation Latent Virus (CLV)<br />
• Carnation Mottle Virus (CarMV)<br />
• Carnation Necrotic Fleck Virus (CNFV)<br />
• Carnation Ringspot Virus (CRSV)<br />
Hosta<br />
• Arabis Mosaic Virus (ArMV)<br />
• Cucumber Mosaic Virus (CMV)<br />
• Hosta Virus X (HVX)<br />
• Impatiens Necrotic Spot Virus (INSV)<br />
• Tobacco Ringspot Virus (TRSV)<br />
• Tobacco Streak Virus (TSV)<br />
• Tomato Ringspot Virus (ToRSV)<br />
• Tomato Spotted Wilt Virus (TSWV)<br />
Anemone, Astilbe, Dicentra, Epimedium, Iris, Paeonia<br />
• 12 General Perennial tests<br />
• Tobacco Rattle Virus (TRV)<br />
34 | Walters Gardens
Common Insects Affecting Herbaceous Perennials<br />
Plant Health<br />
Pest<br />
Biological Control<br />
Biological Control Compatible<br />
Insecticides<br />
Other Insecticides<br />
Aphid<br />
Aphidoletes aphidimyza, Aphidius<br />
colemani, Chrysopa carnea,<br />
Adalia bipunctata<br />
Azatin O, Botanigard, Endeavor,<br />
Rycar<br />
Altus, Horticultural oil, Orthene<br />
Black Vine Weevil<br />
Steinernema spp. and<br />
Heterorhabditis spp.<br />
Botanigard<br />
Orthene drench for larvae;<br />
Orthene or Talstar for adults<br />
Caterpillars<br />
Chrysopa carnea<br />
Azatin O, Botanigard, DiPel,<br />
Overture<br />
Conserve, Decathlon,<br />
Mainspring, Orthene<br />
Fungus Gnats & Shorefly Larvae<br />
Steinernema feltiae, Hypoaspis<br />
miles, Atheta coriaria<br />
Adept, Citation, Distance, Gnatrol<br />
Duraguard (SF), Talstar (FG)<br />
Leafhoppers Chrysopa carnea Rycar Altus, Orthene<br />
Leafminers Steinernema spp, Diglyphus isea Azatin O, Conserve, Citation Avid, Conserve, Orthene<br />
Mealybugs<br />
Chrysopa carnea,<br />
Cryptolaemus spp.<br />
Rycar<br />
Altus, Orthene Drench<br />
Mites<br />
Phytoseiulus persimillis,<br />
Amblyseius californicus<br />
Floramite, Hexygon, Ovation,<br />
Shuttle O, Sultan<br />
Avid, Judo, Pylon, Sanmite,<br />
Tetrasan<br />
Scale<br />
Amblyseius spp, Chrysopa<br />
Carnea, Cryptolaemus spp.<br />
N/A<br />
Altus, Horticultural oil, Suffoil-X,<br />
Orthene Drench<br />
Slugs & Snails N/A Sluggo Mesurol<br />
Thrips<br />
Amblyseius cucumeris,<br />
Amblyseius swirskii, Orius<br />
insidiosus, Steinernema feltiae<br />
Botanigard, Mainspring, Overture<br />
Altus, Avid, Conserve, Mesurol,<br />
SuffOil-X<br />
Whitefly<br />
Amblyseius swirskii, Encarsia<br />
formosa, Eretmocerus eremicus,<br />
Delphastus spp.<br />
Azatin O, Botanigard, Distance,<br />
Endeavor, Rycar<br />
Altus, Avid, Decathlon, Judo,<br />
Sanmite, SuffOil-X<br />
Note: Refer to product label for specific application instructions.<br />
Aphid Slug Leafminer damage<br />
www.WaltersGardens.com • 1-888-925-8377 • sales@waltersgardens.com | 35
Plant Health<br />
Common Diseases Affecting Herbaceous Perennials<br />
Disease<br />
Alternaria Leaf Spot<br />
Anthracnose Leaf Spot<br />
Aster Yellows<br />
Bacteria Leaf Spots (ex:<br />
Xanthamonas, Pseudomonas)<br />
Botrytis<br />
Cercospora Leaf Spot<br />
Downy Mildew<br />
Fusarium Crown or Root Rot<br />
Galls-Agrobacterium<br />
tumefaciens (Crown Gall) &<br />
Rhodococcus fascians (Leafy<br />
Gall)<br />
Favorable Environmental<br />
Conditions for Development<br />
Warm temps, humidity,<br />
prolonged standing water on<br />
leaf surface<br />
Warm temps, prolonged<br />
standing water on leaf surface<br />
Symptoms of infection usually<br />
most evident mid-spring thru<br />
summer<br />
Warm temps, prolonged<br />
standing water on leaf surface<br />
and high humidity<br />
Moderate to cool temps, high<br />
humidity or prolonged standing<br />
water on leaf surface<br />
Moderate to cool temps and<br />
prolonged leaf wetness<br />
Warm to cool temperatures,<br />
prolonged standing water<br />
on leaf surface, high relative<br />
humidity, cloudy days<br />
Warm soil, excess water and/<br />
or fertilizer<br />
Symptoms of infection usually<br />
most evident mid to end of<br />
summer<br />
Typical Symptoms Cultural Management Chemical Management<br />
Reddish or purple spots usually<br />
with brown/necrotic centers<br />
Tan, black, or brown leaf spots<br />
irregular spots; sometimes<br />
spores can be observed in spot<br />
with hand lens<br />
Flowers become green and<br />
distorted; new shoots are<br />
yellow, spindly, & stunted.<br />
Red, brown, black, purple<br />
irregular or round shaped spots<br />
with yellow halo<br />
White/grey spores; primarily<br />
attacks dead, decaying, or<br />
diseased plant parts and<br />
spreads to healthy plant tissue<br />
if uncontrolled.<br />
Spots with tan centers and<br />
purple borders; sometimes small<br />
black spores visible in center<br />
Faint or bright red/purple/tan<br />
angular leaf spots (similar to foliar<br />
nematodes); white fuzzy spores<br />
may be seen on leaf undersides<br />
Initially older leaves yellow & wilt;<br />
in time, roots & crown become<br />
completely brown with rot<br />
Crown Gall-Tumors in the shape<br />
of irregular spheres. Leafy Gall-<br />
Excessive shoot proliferation<br />
without elongation.<br />
Good air flow around plants,<br />
Keep foliage dry, remove<br />
diseased foliage<br />
Good air flow around plants, Keep<br />
foliage dry, remove diseased<br />
foliage<br />
Clean stock<br />
Clean stock<br />
Good air flow around plants to<br />
dry out decaying plant tissue<br />
Good air flow around plants,<br />
Keep foliage dry, remove<br />
diseased foliage<br />
Good air flow around plants; Keep<br />
foliage dry, decrease relative<br />
humidity if it's too high, remove<br />
diseased foliage<br />
Avoid overwatering, reduce<br />
fertilization<br />
Clean stock<br />
Affirm WDG, Broadform, Chipco<br />
26019, Daconil Ultrex, Heritage,<br />
Medallion, Pageant<br />
Daconil Ultrex, Heritage,<br />
Broadform, Pageant, Medallion,<br />
Cease<br />
Monitor for 6-spotted Aster<br />
leafhopper (the Aster Yellows<br />
vector) and start control early<br />
in spring.<br />
Camelot, Kocide, or Phyton 27<br />
can reduce symptoms/spread,<br />
but will not eliminate bacteria<br />
Affirm, Broadform, Chipco<br />
26GT, Daconil Ultrex, Decree,<br />
Medallion, Milstop/Cease,<br />
Pageant, Terraguard<br />
Daconil Ultrex, Eagle, Heritage,<br />
Protect<br />
Adorn, Fenstop, Micora, Orvego,<br />
Segovis, Segway, Stature,<br />
Subdue<br />
Chipco 26GT, Heritage,<br />
Medallion, Pageant, Terraguard<br />
None<br />
Note: Refer to product label for specific application instructions.<br />
Aster Yellows damage on Echinacea Crown Gall Downy Mildew<br />
Hosta with Anthracnose<br />
36 | Walters Gardens
Plant Health<br />
Common Diseases Affecting Herbaceous Perennials<br />
Disease<br />
Phytophthora Root/Crown Rot<br />
Powdery Mildew<br />
Pythium Root/Crown Rot<br />
Rhizoctonia Crown Rot<br />
Rhizoctonia Web Blight (Foliar<br />
Blight)<br />
Rust<br />
Septoria Leaf Spot<br />
Thielaviopsis Root/Crown Rot<br />
Virus<br />
Favorable Environmental<br />
Conditions for Development<br />
Excess soil moisture or root tips<br />
in standing water under pots,<br />
excess fertilizer, plant stress<br />
Moderate or cool temps, high<br />
humidity, cloudy days<br />
Excess soil moisture or root tips<br />
in standing water under pots,<br />
excess fertilizer, plant stress<br />
Warm temps, high humidity,<br />
excess water and/or fertilizer,<br />
plant stress<br />
Warm temps, prolonged<br />
standing water on leaf surface,<br />
dense canopy<br />
Moderate temps, prolonged<br />
standing water on leaf surface<br />
& high humidity<br />
Moderate temps, prolonged<br />
standing water on leaf surface<br />
& high humidity<br />
Excess soil moisture, high soil<br />
pH (>6.0), cool soil temps, plant<br />
stress<br />
Symptoms usually most evident<br />
mid-spring thru early summer, can<br />
persist or disappear during summer<br />
Typical Symptoms Cultural Management Chemical Management<br />
Yellow, stunted or wilted plants,<br />
roots turn brown, sometimes<br />
outer root tissue pulls away,<br />
leaving only vascular tube<br />
Powdery white/grey spots on<br />
leaf surface that spread to cover<br />
whole leaves.<br />
Yellow, stunted or wilted plants,<br />
roots turn brown, sometimes<br />
outer root tissue pulls away,<br />
leaving only vascular tube<br />
Foliage may turn yellow and wilt;<br />
reddish brown lesions/cankers on<br />
infected roots and crown<br />
Foliage becomes water-soaked and<br />
rots, sometimes the brown web-like<br />
growth if the fungus is noticeable<br />
Sometimes brown, red, or<br />
orange leaf spots on upper leaf;<br />
round, raised brown or orange<br />
pustules on the underside of leaf<br />
Spots have red/purple margins<br />
with tan, necrotic centers (can<br />
look similar to Alternaria) or<br />
brown necrotic angular spots<br />
Lower leaves turn yellow & wilt;<br />
roots start with dark brown or<br />
black spots & eventually turn<br />
completely black with rot<br />
Ringspots, mosaic, mottling,<br />
stunted growth, necrotic or<br />
chlorotic spots, leaf distortion<br />
Avoid overwatering, reduce<br />
fertilization, avoid plant stress<br />
Good air flow; remove diseased<br />
foliage<br />
Avoid overwatering, reduce<br />
fertilization, avoid plant stress<br />
Avoid overwatering, reduce<br />
fertilization<br />
Good air flow around plants,<br />
Keep foliage dry, remove<br />
diseased foliage<br />
Good air flow around plants;<br />
Keep foliage dry, remove<br />
disease foliage<br />
Good air flow around plants,<br />
Keep foliage dry, remove<br />
diseased foliage<br />
Keep soil pH≤6.0, warm soil<br />
temps (>65 degrees); avoid<br />
overwatering, do not reuse pots<br />
or soil<br />
Clean stock<br />
Adorn, Micora, Segovis, Subdue,<br />
Truban<br />
Broadform, Eagle, Heritage,<br />
Milstop, Pageant, Pipron,<br />
Terraguard<br />
Segovis, Subdue, Truban<br />
Affirm, Broadform, Chipco<br />
26GT, Cleary 3336, Heritage,<br />
Medallion, Pageant<br />
Affirm, Broadform, Clearys<br />
3336, Daconil Ultrex, Eagle,<br />
Heritage, Pageant, Palladium.<br />
Broadform, Clearys 3336,<br />
Eagle, Heritage, Mural, Protect<br />
DF, Pageant<br />
Broadform, Clearys 3336,<br />
Daconil Ultrex, Heritage,<br />
Pageant<br />
Affirm, Banrot, Clearys 3336,<br />
Medallion, Terraguard<br />
None<br />
Note: Refer to product label for specific application instructions.<br />
Virus in Phlox Phytophthora Root/Crown Rot<br />
Powdery Mildew Rust<br />
www.WaltersGardens.com • 1-888-925-8377 • sales@waltersgardens.com | 37
Summer / Early Fall Planting &<br />
Overwintering Recommendations<br />
Summer & Fall Planting<br />
Many experienced growers know that late<br />
summer and early fall are excellent times<br />
for planting perennials. Trials have shown<br />
that many varieties of perennials have a<br />
tremendous advantage when started the<br />
season prior over those planted in spring.<br />
They are stronger, more well-established,<br />
display mature characteristics, and have<br />
a higher perceived value. The pictures on<br />
the next page show a few key genera that<br />
benefit greatly from late summer planting.<br />
A trial conducted at Walters Gardens<br />
comparing the finish rates of freshly dug,<br />
actively growing hostas to those of freshly<br />
dug, dormant hostas grown in summer<br />
demonstrated that those finished from<br />
dormant plants are far superior in size, bulk,<br />
and root mass than those finished from<br />
actively growing plants.<br />
On p. 39 you’ll find a chart listing some<br />
types of perennials that benefit greatly<br />
from summer and early fall planting.<br />
Perennials such as Hosta and Hibiscus<br />
require long days and some heat to grow,<br />
so they need to be planted in summer<br />
rather than fall when the light intensities<br />
are greater and temperatures are warmer.<br />
Note on this chart the color coding which<br />
indicates whether the plants should ideally<br />
be overwintered indoors or out.<br />
Planting Bare Root Hostas in Summer<br />
As a result of the trial, bare root hostas<br />
are now dug from our fields in early<br />
spring before they break dormancy and<br />
held in freezers until they are shipped to<br />
our customers from early June into early<br />
August. We recommend that our customers<br />
receive their bare root hostas as early in<br />
summer as possible to take advantage of<br />
the long, warm growing days, resulting in a<br />
higher quality finished crop.<br />
Overwintering<br />
Precaution<br />
If properly cared for going into<br />
winter, perennials that are potted<br />
up in summer and early fall should<br />
overwinter well and emerge as large,<br />
vigorous plants in spring. Overwintering<br />
methods are described in the section<br />
below. If you do not have the necessary<br />
facilities for overwintering your<br />
perennials, we suggest that you have<br />
your order shipped in spring rather than<br />
in summer or fall.<br />
Factors such as soil moisture,<br />
temperature fluctuations, and root<br />
development in the container can<br />
greatly affect a plant’s survival. Since<br />
there are so many factors beyond our<br />
control, Walters Gardens, Inc. does<br />
not guarantee the survival of plants<br />
overwintered in containers or in the<br />
ground.<br />
38 | Walters Gardens
Benefits of Summer and Early Fall Planting<br />
You’ll save money.<br />
When you grow perennials in summer and fall, there is no need for costly supplemental<br />
heating or lighting. There’s less maintenance cost too since perennials<br />
grown outdoors tend to grow more compactly because the wind, rain, and sun act<br />
as natural PGRs.<br />
You’ll save time and labor.<br />
If you have overwintering capabilities, it is not necessary or even recommended to<br />
plant all of your plants in spring. You’ll be better off if you time your crops properly,<br />
splitting them into two groups: those best planted in summer or early fall (see chart<br />
below for some examples) and those that are best planted in spring. This will save<br />
time and make better use of your labor force–and of course lighten your stress<br />
load–in the spring.<br />
You’ll have larger, better performing<br />
plants to sell in spring.<br />
It’s no doubt that some perennials perform exponentially better if potted in summer<br />
or early fall the year before they are sold. The perennials pictured here are great<br />
examples of that.<br />
Perennials build stronger root systems, have larger crowns that flush out nicer,<br />
and are more floriferous the following spring when they are planted summer or fall<br />
before. They’ll not only have a higher perceived value–they will deliver a stronger<br />
performance for everyone from the grower to the consumer.<br />
Overwintering Methods<br />
If properly cared for going into winter, perennials that are potted up in summer and<br />
early fall should overwinter well and emerge as large, vigorous plants in spring.<br />
There are four basic methods of overwintering perennials: Thermoblanket Technique<br />
• Sandwich Method • Minimally Heated Greenhouse or Polyhouse • Unheated Polyhouse<br />
Under a Foam Blanket. Details on the following pages.<br />
If you do not have the necessary facilities for overwintering your perennials, we<br />
suggest that you have your order shipped in spring rather than summer or fall.<br />
Left: Vernalized 20ct Hosta planted in a Premium 1-gal pot in spring.<br />
Right: Fresh 20ct Hosta planted in a Premium 1-gal pot in late summer.<br />
Hostas planted earlier develop more eyes, a better root system, and<br />
more mature traits including proper variegation.<br />
Left: Vernalized 20ct Monarda planted in a trade 1-gal pot in spring.<br />
Right: Fresh 72ct Monarda planted in a Premium 1-gal pot in late<br />
summer. The smaller plug filled out the larger container with fuller<br />
foliage and more flowers, commanding a higher price at retail.<br />
Summer Planting<br />
Aruncus 72ct Grasses - Sedges Monarda 72ct<br />
Brunnera 72ct Grasses - Warm season Perovskia 72ct<br />
Coreopsis - Threadleaf 72ct Gypsophila 72ct Phlox - All<br />
Daylilies - Any Size Heliopsis 72ct Rudbeckia ‘Little Goldstar’ 72ct<br />
Dianthus 72ct Hostas Sedum - Upright forms 72ct<br />
Dicentra 72ct Leucanthemum 72ct Stokesia 72ct<br />
Euphorbia 72ct Ligularia 72ct Veronica 72ct<br />
Geranium<br />
Ligularia ‘Bottle Rocket’ benefits greatly from being planted the year<br />
before it is sold. Those potted in late summer for sales the following<br />
spring (right) are much fuller with larger leaves and more flowers per<br />
plant than those potted up and sold the same spring (left).<br />
Aquilegia 72ct<br />
Epimedium 20ct<br />
Grasses - Cool season<br />
Paeonia - Garden and<br />
Intersectional types<br />
Early Fall Planting<br />
Color Key:<br />
Primula 72ct<br />
Pulmonaria 72ct<br />
Salvia 72ct<br />
Tiarella 72ct<br />
Best Overwintered Outdoors<br />
Best Overwintered Indoors<br />
www.WaltersGardens.com • 1-888-925-8377 • sales@waltersgardens.com | 39
Overwintering Recommendations<br />
Going into Winter<br />
Rooting<br />
The most important factor in overwintering perennials is having<br />
healthy, well-rooted plants going into winter. Poorly rooted and potbound<br />
plants tend to overwinter poorly. Time the delivery of your<br />
bare root and plug perennials so that they can be well-rooted in<br />
their containers by the time winter arrives.<br />
Shearing and Moisture<br />
• Evergreen Perennials<br />
Perennials with evergreen foliage should not be cut back going<br />
into winter. In order to prevent crushing or rotting the foliage,<br />
they are best stored either on their sides or with an inverted tray<br />
placed atop their foliage.<br />
• Dormant Perennials<br />
Most leafy perennials with dormant foliage will benefit from<br />
being cut back and cleaned up before winter. Trim their foliage<br />
back to the crown before storing them for winter.<br />
• Moisture<br />
When preparing your plants to be overwintered, check their roots<br />
to make sure they are not dry. Most perennials like to have moist<br />
roots going into winter since the moisture helps to insulate the<br />
roots and prevent dessication. However, there are exceptions of<br />
plants that prefer to be stored dry.<br />
Baiting for Rodents<br />
Several blends of rodent bait are available. Rotating the types<br />
of baits used will increase their effectiveness. Begin baiting for<br />
rodents about a month before covering your plants. This will help<br />
to reduce their population going into winter. Place traps every<br />
15-20 feet. Be sure to use pet-friendly traps to prevent accidentally<br />
poisoning your pets.<br />
Deciding When to Cover Your Plants<br />
Timing is critical when it comes to covering your plants for winter.<br />
If covered too early, heat can build up under the cover and damage<br />
the plants. If the cover is left on too long in spring, the plants can<br />
put on a soft flush of new growth that is easily damaged by late<br />
frosts. When deciding when to cover your plants for winter, be sure<br />
to monitor weather conditions closely. Nighttime temperatures near<br />
freezing allow the plants to harden off before covering, but if the<br />
forecast predicts nighttime temperatures below 25°F, it’s time to<br />
cover your plants.<br />
Dealing with Extremes<br />
Extreme Cold<br />
When perennials are overwintered above ground in containers,<br />
they are effected to a greater degree by extreme winter<br />
temperatures. Wide fluctuations between day and nighttime<br />
temperatures, particularly in late winter and early spring, can<br />
cause the plants to freeze and thaw, potentially damaging the<br />
plants. Therefore, containerized perennials must be protected from<br />
extreme cold when they are overwintered. They should be stored at<br />
temperatures above freezing.<br />
Excess Heat<br />
On sunny days in late winter and early spring, heat can rapidly build<br />
up in polyhouses. Good air circulation and ventilation is critical to<br />
preventing plants from growing prematurely. Plants stored outside<br />
on these sunny days may need to be uncovered and then recovered<br />
based on the weather patterns.<br />
A well-developed,<br />
healthy root<br />
system will solve a<br />
number of common<br />
overwintering issues<br />
40 | Walters Gardens
Overwintering Recommendations<br />
Overwintering Challenging Plants<br />
Many kinds of perennials overwinter easily. However, some require<br />
a little special treatment to make it through the winter in containers<br />
successfully. Here are some tips for those types of plants.<br />
Perennials that like to be kept dry<br />
• Perennials that like to be kept dry during the winter should be<br />
planted in a very well-drained growing media that can stay<br />
relatively dry over the winter.<br />
• Be sure to protect these types of plants from heavy fall rains<br />
and from below freezing temperatures while they are being<br />
stored for winter.<br />
• Trim their foliage back and lay the pots on their sides if possible.<br />
Make sure that no covering material comes in direct contact<br />
with the foliage.<br />
Ornamental Grasses<br />
• Before potted grasses are stored for winter, water them<br />
thoroughly. After they have gone dormant, they will need little<br />
to no water until the temperatures begin to warm up again<br />
the following spring. At that time, watering can be resumed as<br />
needed to maintain proper moisture levels.<br />
• After the plants have gone completely dormant for the winter,<br />
you can trim the foliage all the way back. Do not cut the foliage<br />
back until it is totally dormant.<br />
• When overwintering grasses, make sure the temperature of the<br />
root ball remains at or above freezing. Exposure to temperatures<br />
below freezing may result in plant losses.<br />
• Be sure to bait liberally for rodents since they have a fondness<br />
for grasses.<br />
Outdoor Overwintering Methods<br />
Thermoblanket Technique<br />
An insulated foam blanket (polyfoam or microfoam) is placed over the containers during the coldest months of the year. It is important<br />
that the blanket be covered by white reflective nursery polyfilm, preferably 4-mil one year white poly. Pull the plastic tight over the<br />
containers and secure the edges about 12 inches beyond the pots with concrete blocks.<br />
Sandwich Method<br />
Plastic sheeting or spun-bonded fabric is placed directly over the plants and then covered with a 12 inch deep layer of straw. The<br />
straw layer is then covered with another layer of plastic sheeting. This technique is especially effective in northern regions where<br />
temperatures remain consistently cold all winter long.<br />
Frost Blanket Method (for hardy plants in zones 5 or warmer)<br />
In this method, pots are set directly on the ground and covered with a heavy frost blanket once the temperatures dip below 25°F.<br />
Pull the blanket tight over the containers and secure the edges about 12 inches beyond the pots with stakes or blocks. This method is<br />
best used in northern climates where temperatures remain consistently cold all winter. Snow cover is beneficial, but not required for<br />
overwintering success.<br />
Indoor Overwintering Methods<br />
Greenhouse or Polyhouse Kept at Low Temperatures<br />
This overwintering method is the best for temperature control, especially if minimal heat is used. It also gives you more control over<br />
moisture levels, growth, and heat build-up. Good air circulation and ventilation is critical with this method. Pubescent plants such as<br />
Stachys are best overwintered in a polyhouse kept at low temperatures since these kinds of plants resent being covered with foam.<br />
Unheated Polyhouse Under a Foam Blanket<br />
With this method, the containers are stored in a narrow hoop house which is covered with white poly. Foam blankets are placed over the<br />
plants. The house is not heated, so it is possible for plants to freeze using this method.<br />
www.WaltersGardens.com • 1-888-925-8377 • sales@waltersgardens.com | 41
Overwintering Methods<br />
Echinacea<br />
• Echinacea tends to overwinter better in larger containers, so we<br />
recommend that you pot them up into 1-gal containers by early<br />
fall at the latest. It is best to root them in completely before they<br />
go naturally dormant.<br />
• When receiving Echinacea in summer, we recommend that<br />
you do one preventative fungicide drench immediately after<br />
transplanting, and another drench about 14 days later. This<br />
can help to protect the plants from disease as they begin to go<br />
dormant in fall.<br />
• Before overwintering, it is best to trim the plants back lightly<br />
and allow what remains to go fully dormant, removing the dead<br />
foliage in spring. Removing the foliage all the way to the crown<br />
before overwintering encourages botrytis to set in, so take care<br />
not to trim plants too far back (no more than halfway).<br />
• When overwintering finished Echinaceas, hold plants at a<br />
constant temperature of 38-40°F.<br />
• Keep plants on the dry side, but not too dry or it may be difficult<br />
to rehydrate them if they’ve dried out too much.<br />
• Monitor salt levels and keep soluble salts low.<br />
Hostas<br />
Best Method - Overwintering in Unheated Structures Covered with<br />
White Copolymer<br />
• Place the pots inside the unheated structure and cover them<br />
with microfoam. Turn larger pots on their sides if necessary.<br />
• Bait liberally for mice.<br />
• As the warmer days of spring arrive, remove the microfoam<br />
cover.<br />
• Once the volatile spring weather has subsided, take the white<br />
copolymer off the structure and replace with 50% shade cloth (or<br />
70% for blue hostas).<br />
• If necessary, open the ends of the houses to provide ventilation.<br />
Good Method - Overwintering in Minimally Heated Polyhouses<br />
• Place the plants inside the minimally heated polyhouse and do<br />
not cover them.<br />
• Bait liberally for mice.<br />
• Maintain temperatures above freezing. 35°F works well.<br />
• Once the volatile spring weather has subsided and<br />
temperatures have moderated, the plants may be moved<br />
outside for finishing off.<br />
• Be sure to provide at least 50% shade in the north and 80%<br />
shade in the south.<br />
Not Preferred - Overwintering in Cold Frames<br />
• This overwintering method is not preferred because the plants<br />
become exposed to extreme temperature changes along with<br />
excessive wind and moisture once the covering is removed in<br />
spring. This can cause foliage and root damage, possibly leading<br />
to plant losses.<br />
• If you must overwinter your hostas in a cold frame, turn the<br />
larger pots on their sides if possible.<br />
• Cover the pots with a layer of microfoam and a layer of white<br />
copolymer. Remove this covering in early spring.<br />
• Bait liberally for mice.<br />
Peonies<br />
It is best to overwinter potted peonies in a covered structure such as<br />
a greenhouse or covered polyhouse.<br />
Peonies require 500-700 hours at 32-37°F to be vernalized.<br />
After that, it is best to let them acclimate naturally to outdoor<br />
temperatures.<br />
Please note: Peonies received after January 1 have already been<br />
vernalized at Walters Gardens.<br />
Tender Perennials<br />
• Tender perennials should be treated as annuals and kept actively<br />
growing in a warm area (minimum 55°F) through the winter<br />
months.<br />
• Succulents require very little water during the winter.<br />
• Tropical Perennials prefer slightly moist soil.<br />
42 | Walters Gardens
Additional Resources<br />
Growing perennials is what we do, and we’ve been doing it for over 70 years. We are here to help our customers be more successful growers<br />
so they can grow their businesses too. Our knowledgeable staff is always ready to help you find the answers to your questions, whether<br />
you’re brand new to the industry or one of our many longtime loyal customers. In addition to the information provided in this <strong>Simple</strong>, <strong>Sensible</strong>,<br />
<strong>Solutions</strong>® guide, here are some more recommended resources.<br />
Recommended Websites<br />
• Walters Gardens: www.WaltersGardens.com<br />
• Proven Winners professional growers site: www.PWCertified.com<br />
• Michigan State University Extension Floriculture Team —<br />
Herbaceous Perennial Plant Production:<br />
http://www.flor.hrt.msu.edu/perennials/<br />
• Cornell University Cooperative Extension — 2012 Pest<br />
Management Guide for the Production and Maintenance of<br />
Herbaceous Perennials:<br />
http://ipmguidelines.org/HerbaceousPerennials/<br />
• University of Vermont Extension — Perry’s Perennial Pages:<br />
http://www.uvm.edu/~pass/perry/<br />
Recommended Books<br />
Perennial <strong>Solutions</strong>—A Grower’s Guide to Perennial Production<br />
Author: Paul Pilon<br />
Respected Green Industry consultant<br />
Paul Pilon has compiled a comprehensive<br />
book covering all aspects of producing<br />
perennial crops--propagation, fertility,<br />
media, pest and disease management,<br />
weed control, height control, and<br />
overwintering. A large section of the<br />
book is devoted to forcing perennials into<br />
bloom to maximize sell through at the<br />
retail level.<br />
Visit www.Perennial<strong>Solutions</strong>.com for helpful articles and<br />
additional information from Paul Pilon.<br />
Ball Redbook—Volume 2: Crop Production 18th edition<br />
Editor: Jim Nau<br />
Offers professional tips on greenhouse<br />
horticulture, from pest control to<br />
plant nutrition. 162 flower, herb, and<br />
vegetable crops are covered. An essential<br />
resource for growers that offers advice<br />
and techniques that work in real-life<br />
production.<br />
Trade Magazines<br />
• GrowerTalks<br />
• Green Profit<br />
• Greenhouse Product News (GPN)<br />
• Greenhouse Grower<br />
• Garden Center Magazine<br />
• Greenhouse Management<br />
• Nursery Management<br />
• Greenhouse Canada<br />
Consults from Walters Gardens<br />
We’re growers just like you and we’re here to help. If you need help<br />
with something that is not covered here or have other growing<br />
questions and concerns, please feel free to contact Walters<br />
Gardens and we will do our best to help you resolve the issue. We<br />
are happy to do whatever we can to help you be successful with<br />
our bare root and plug perennials.<br />
Pictured here are Laura Robles, Barb Balgoyen, and Janet DeVries.<br />
Laura is our Trial Manager with many years of experience growing<br />
finished product for trials, events, and retail. Barb and Janet both<br />
have years of experience answering technical questions.<br />
Laura Robles<br />
Trial Manager<br />
lsr@waltersgardens.com<br />
Barb Balgoyen<br />
Technical Customer Care Rep<br />
1-800-925-8377 ext. 1202<br />
blb@waltersgardens.com<br />
Janet DeVries<br />
Technical Customer Care Rep<br />
1-800-925-8377 ext. 1206<br />
jld@waltersgardens.com<br />
Culture Sheets<br />
Cultural sheets for most of the perennials we offer can be found<br />
on www.WaltersGardens.com. They contain detailed information<br />
such as growing temperatures, soil pH, planting level, weeks to<br />
finish, watering, fertilizing, and pest and disease management<br />
recommendations.<br />
www.WaltersGardens.com • 1-888-925-8377 • sales@waltersgardens.com | 43
Walters Gardens<br />
Home of Proven Winners® Perennials<br />
P.O. Box 137 • Zeeland, MI 49464 • Phone: 888-925-8377 • Fax: 800-752-1879 • Email: sales@waltersgardens.com<br />
www.WaltersGardens.com • www.PerennialResource.com • www.ProvenWinners.com<br />
Copyright © 2019 Walters Gardens, Inc. No portion of this booklet may be reproduced without permission from Walters Gardens, Inc.