NZPhotographer Issue 23, September 2019
As of December 2022, NZPhotographer magazine is only available when you purchase an annual or monthly subscription via the NZP website. Find out more: www.nzphotographer.nz
As of December 2022, NZPhotographer magazine is only available when you purchase an annual or monthly subscription via the NZP website. Find out more: www.nzphotographer.nz

Create successful ePaper yourself
Turn your PDF publications into a flip-book with our unique Google optimized e-Paper software.
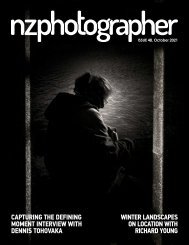
EVENING LIGHT ON MT RUAPEHU<br />
F11, 30s, ISO 64<br />
Hyperfocal Distance – If we were to focus on the<br />
closest subject in the landscape (e. g. the rock at our<br />
feet), then the background (e. g. the distant mountain<br />
peaks) would be out of focus. Likewise, if we were to<br />
focus on the distant mountain peaks, the rocks in the<br />
foreground would be out of focus. Therefore we need<br />
to focus on a midpoint within the landscape to obtain<br />
focus throughout; this point is called the hyperfocal<br />
distance. Hyperfocal distance is a complicated<br />
subject, as it depends on many factors. A good rule<br />
of thumb is to focus at a third of the way through the<br />
landscape.<br />
Depth of Field – Depth of field extends in both<br />
directions from our focus point, but not in equal<br />
amounts. It is also dependent on lots of factors such<br />
as our choice of lens focal length and distance to our<br />
closest subject, but we also need to select the correct<br />
aperture to obtain enough depth of field. When<br />
shooting landscape photographs, this will generally<br />
lead us to use a narrow aperture (e. g. from f11 to f22)<br />
to get everything in sharp focus, but we also need<br />
to be mindful of diffraction when using these narrow<br />
apertures.<br />
CAMERA MOVEMENT<br />
Tripod – When shooting landscapes, you often end<br />
up using longer shutter speeds, which require the use<br />
of a tripod. Tripods also have the added benefit of<br />
allowing us to slow down to master the composition,<br />
along with your focus and depth of field. A sturdy<br />
tripod is a must for landscape photography, all too<br />
often I see people with a lightweight flimsy tripod<br />
which cannot hold the weight of the camera on a fine<br />
day, let alone when shooting outside in the elements<br />
like a strong wind!<br />
Cable Release – There is little point using a tripod then<br />
wobbling the camera by pressing the shutter button,<br />
which happens on even the sturdiest of tripods. So<br />
make sure you use a cable release to allow you to<br />
take your hands away from the camera, preventing<br />
you from shaking it when you press the shutter button.<br />
Mirror Lock-Up – On high-end full-frame DSLRs the<br />
vibrations caused by the mirror slap can be enough<br />
to cause a slight blur to your image. To prevent<br />
this, shoot with the “mirror up” feature. Likewise, the<br />
movement of the mechanical shutter curtain on DSLR<br />
and Mirrorless cameras can also cause vibration.<br />
Some cameras now feature an “electronic first curtain<br />
shutter” to also eliminate this.<br />
Vibration Reduction – A lot of lenses or camera bodies<br />
feature a “Vibration Reduction” system (also called<br />
Image Stabilisation, Optical Stabilizer, Vibration<br />
Compensation), which is designed to reduce vibration<br />
for handheld shooting. Vibration Reduction should<br />
be turned off when on a tripod as it leads to softer<br />
images due to the movement of the lens elements or<br />
the camera sensor.<br />
RICHARD YOUNG IS A FULL-TIME LANDSCAPE PHOTOGRAPHER BASED IN WELLINGTON AND<br />
TEACHES ON WORKSHOPS THROUGHOUT NEW ZEALAND WITH NEW ZEALAND PHOTOGRAPHY<br />
WORKSHOPS