
Create successful ePaper yourself
Turn your PDF publications into a flip-book with our unique Google optimized e-Paper software.
WHAT’S INSIDE<br />
ROBOT SHOWDOWN | PYTHON EDITOR | GIRL’S INTO CODING<br />
ISSUE 5 | AUGUST 2019<br />
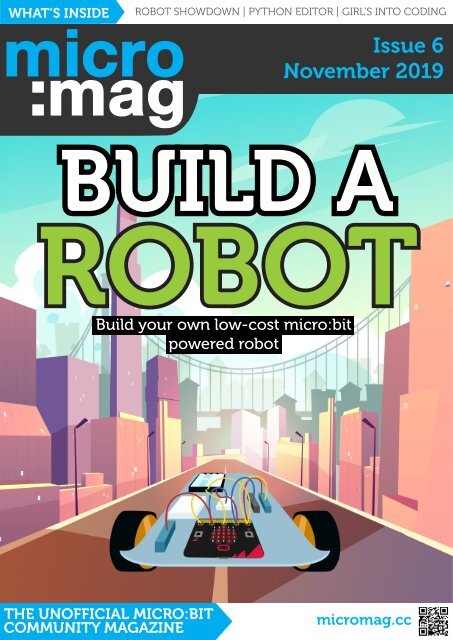
Issue 6<br />
November 2019<br />
BUILD A<br />
ROBOT<br />
Build your own low-cost micro:bit<br />
powered robot<br />
THE UNOFFICIAL MICRO:BIT<br />
COMMUNITY MAGAZINE<br />
<strong>micromag</strong>.cc
IN THIS ISSUE<br />
Issue 6<br />
Contents<br />
BUILD A<br />
DIY ROBOT<br />
News<br />
P4 micro:bit Live 2020 - Call for hosts!<br />
P5 4tronix’s new motor driver board<br />
P6 Python Editor V2<br />
P8 Team Update<br />
Features<br />
P10 3D Printed battery holder + stand<br />
P12 The creation of Z-Bot<br />
P14 Meet Avye Couloute - Girls into coding<br />
P16 Stepping stones towards student activism<br />
P18 What Pimoroni Learned at Deer Shed Festival<br />
Cover Feature<br />
P20 Low Cost DIY Robot<br />
P22 Budget Robotics<br />
P23 Build the robot<br />
P25 Code it with MakeCode<br />
P27 Code it with MicroPython<br />
P30 Robot Showdown<br />
Cover Feature | P20<br />
Pimoroni + micro:bit At Deershed| P18<br />
Makes<br />
P32 3D Printed Servo Magic 8 Ball<br />
P34 Learn how to use MakeCode functions<br />
P36 Create a virtual pet with Tynker<br />
Reviews<br />
P38 :VIEW text32 LCD<br />
P39 :ZIP Halo<br />
P40 Tobbie II<br />
P41 New Accessories Showcase<br />
2<br />
<strong>micromag</strong>.cc<br />
How to use Functions in MakeCode | P34
HELLO<br />
WELCOME<br />
Hello<br />
World<br />
Kerry Kidd<br />
Editor In Chief<br />
Welcome to issue 6 of micro:mag!<br />
It has been a busy few months<br />
for us here at micro:mag as we<br />
were getting this issue ready for release the<br />
team took a trip to micro:bit LIVE. to show off<br />
micro:mag and meet a lot of you lovely people<br />
from the micro:bit community in person<br />
rather than over email or Twitter! It was great<br />
meeting you all and hearing your love for<br />
micro:mag. This has made us want to commit<br />
more time to the magazine and maybe<br />
even make bigger and better issues. Anyway<br />
enough about the future, let’s take a look at<br />
what we have in store for you in Issue 6!<br />
Within this issue, you can make a cheap<br />
micro:bit robot using our cover feature<br />
produced by Les Pounder. Thanks Les! As well<br />
as this you can read about Pimoroni’s do’s and<br />
don’ts for running workshops within a tent in<br />
the middle of a field, make a magic 8 ball using<br />
a servo and a 3d printed bracket and Hear<br />
about Avye’s mission to inspire more girls into<br />
STEM.<br />
As well as all that we also have some news<br />
for you about the new python editor & the new<br />
motor controller from 4tronix.<br />
On behalf of the micro:mag team enjoy<br />
issue 6!<br />
Meet the team<br />
Kerry Kidd<br />
Editor In Chief<br />
Kerry is a freelance<br />
programmer/educator who<br />
enjoys writing tutorials and<br />
tinkering with the micro:bit<br />
Follow me:<br />
@RaspiKidd<br />
raspikidd.com<br />
Joshua Lowe<br />
Senior Editor<br />
Josh is a young coder &<br />
creator of the Edublocks<br />
tool for micro:bit He has<br />
delivered lots of workshops<br />
& talks around the world.<br />
Follow me:<br />
@all_about_code<br />
edublocks.org<br />
James Bastone<br />
Copy Editor<br />
James runs a local<br />
Makerspace and joined the<br />
team because he genuinely<br />
enjoys proofreading<br />
articles.<br />
Follow me:<br />
@NJBastone<br />
Contributors<br />
»»<br />
Les Pounder<br />
»»<br />
David Whale<br />
»»<br />
Vlastimil Hovan<br />
»»<br />
Avye Couloute<br />
»»<br />
Helene Virolan<br />
»»<br />
Michelle Valtas<br />
»»<br />
Dave Del Gobbo<br />
»»<br />
Tanya Fish<br />
»»<br />
Robert Wiltshire<br />
»»<br />
Meridith Ebbs<br />
»»<br />
Tynker<br />
»»<br />
Kitronik<br />
»»<br />
Micro:bit Educational<br />
Foundation<br />
»»<br />
Elenco<br />
»»<br />
4tronix<br />
P04<br />
P10<br />
P40<br />
CALL FOR HOSTS! M:B LIVE 2020<br />
Now that micro:bit Live 2019 is over, the<br />
foundation are looking for hosts for 2020!<br />
3D PRINTED BATTERY HOLDER<br />
We talk to David & Vlastimil about the<br />
3D printed battery holder & stand.<br />
TOBBIE II REVIEWED<br />
We review a super cool micro:bit powered<br />
humanoid robot kit.<br />
<strong>micromag</strong>,cc 3
:NEWS<br />
micro:bit Live<br />
After a successful micro:bit Live 2019, the foundation<br />
are looking for hosts of micro:bit Live 2020 regional events!<br />
Call for hosts!<br />
ABOVE:<br />
micro:bit Live.<br />
Credit: Les<br />
Pounder<br />
Last month, over 200<br />
micro:bit community<br />
members gathered<br />
together at the BBC in<br />
Media City, Salford for two<br />
days of micro:bit themed<br />
talks, workshops and even<br />
parties.<br />
The micro:mag team<br />
got the chance to attend the<br />
event and enjoyed every part<br />
of it, so did all the attendees.<br />
The Micro:bit Educational<br />
Foundation are excited to<br />
announce their plans for<br />
micro:bit Live 2020 which<br />
will be a different format to<br />
this years event. The foundation<br />
want people from<br />
around the globe to have the<br />
chance to attend micro:bit<br />
Live, however, they realise<br />
that everyone travelling to<br />
Salford isn’t possible. The<br />
idea for micro:bit Live 2020<br />
is to have regional events<br />
around the world under the<br />
“micro:bit Live” banner and<br />
they want the community to<br />
offer to host an event. If you<br />
think this is something you’d<br />
be interested in knowing<br />
more about, you can fill in<br />
the form linked on the right<br />
to get added to the mailing<br />
list. We can’t wait to see<br />
where the event will go next<br />
year and hopefully attend<br />
some of them! If you’re<br />
interested in reading about<br />
micro:bit Live 2019, we’ve<br />
got a micro:bit Live special<br />
coming up next issue so<br />
make sure you’re subscribed<br />
to the magazine to be the<br />
first to know when Issue 7 is<br />
released.<br />
Fill in the form below to hear back from<br />
the foundation about hosting a micro:bit<br />
Live 2020 event:<br />
bit.ly/microbit2020<br />
4<br />
<strong>micromag</strong>,cc
micro:bit Live + Makecode<br />
:NEWS<br />
4tronix drive:bit<br />
By Les Pounder<br />
Some hot news that<br />
has just made the<br />
deadline for this<br />
issue! 4tronix have<br />
just released a new robot<br />
board for micro:bit.<br />
Drive:bit is a low cost, small<br />
profile motor controller based<br />
around the popular DRV8833<br />
chip. It features a slot to connect<br />
and power the micro:bit<br />
and two outputs for motors.<br />
There are also connections for<br />
other micro:bit GPIO pins and<br />
a single neopixel LED. Both the<br />
motors and micro:bit can be<br />
powered from a single 7-10V<br />
power source which makes<br />
for a tidy and hassle free robot<br />
build. To code Drive:bit there is<br />
a MakeCode extension which<br />
will enable any coder to quickly<br />
build their first robot. For the<br />
Python programmers amongst<br />
you, it can also be controlled<br />
using MicroPython.<br />
In this issue we covered<br />
building a robot as cheaply as<br />
possible, and with Drive:bit we<br />
can build a cost effective and<br />
simple robot for only a little<br />
more money. Drive:bit would<br />
be an ideal platform for schools<br />
with limited budgets and space<br />
wishing to build motorised<br />
micro:bit based projects to<br />
ignite the spark of imagination.<br />
Drive:bit is smaller and<br />
lower in cost than other motor<br />
control boards, and this means<br />
that our robots can be smaller link below and there will be a<br />
and more cost effective. full review in the next issue of<br />
Drive:bit is available as a black micro:mag, so don’t miss it!<br />
and gold PCB for £9 from the<br />
go.<strong>micromag</strong>.cc/drivebit<br />
<strong>micromag</strong>,cc 5
:NEWS<br />
Python Editor V2<br />
PYTHON EDITOR V2<br />
RELEASED!<br />
The Official Python Editor for the micro:bit has just got an update.<br />
By Micro:bit Educational Foundation.<br />
About the Author<br />
The Micro:bit<br />
Educational<br />
Foundation is a not<br />
for profit organisation.<br />
Our vision is to inspire<br />
every child to create<br />
their best digital future.<br />
The Foundation was<br />
legally established with<br />
the support of our<br />
founding members in<br />
September 2016.<br />
microbit.org<br />
6<br />
<strong>micromag</strong>.cc<br />
The October 2019 release of the micro:bit<br />
Python Editor (python.microbit.org)<br />
brings with it a number of new features<br />
and UI changes. This release is version 2<br />
of the editor. We are currently testing this version<br />
out in the beta editor python.microbit.org/v/beta<br />
before moving this version of the editor live at<br />
python.microbit.org.<br />
Previous programs still work<br />
You are still be able to import .Hex files and<br />
Python scripts created in the previous version of the<br />
editor and use them in the latest version. Load them<br />
into the editor by drag-and-drop, or using the file<br />
picker and simply download them again to ensure they<br />
are up to date. The underlying version of MicroPython<br />
in the v2 editor has not changed from the current live<br />
editor, so all programs will continue to work in the<br />
same way.<br />
Access the old editor<br />
Should you need to, you can always access the<br />
previous version of the editor, which will be available<br />
for the next two years at<br />
python.microbit.org/v1<br />
The Menu<br />
The updated menu consolidates the Load/Save<br />
buttons into one place that also provides access to the<br />
new File System. You will also see options to connect<br />
and interact with your micro:bit via the serial interface.
Python Editor V2<br />
:NEWS<br />
These are enabled if you’re using a browser that supports WebUSB,<br />
like Google Chrome and you have a recent version of the firmware<br />
on your micro:bit. If you are using a browser that doesn’t support<br />
WebUSB, a message will tell you that these features are unavailable.<br />
browser asking you to choose the micro:bit, you want to connect to.<br />
If you see the message ‘no compatible devices found’, you may<br />
need to update the micro:bit firmware. When you are connected you<br />
will see this menu item change to ‘Disconnect’.<br />
The File system<br />
Above:<br />
The new Python Editor menu<br />
with updated icons<br />
The Open/Close Serial button allows you to dynamically interact<br />
with MicroPython on the micro:bit once you have entered the REPL.<br />
You will need to flash the micro:bit with a MicroPython hex in order<br />
to use the REPL.<br />
The Read, Evaluate, Print Loop(REPL) is a way of dynamically<br />
interacting with the micro:bit using MicroPython. To interact with<br />
the REPL on the micro:bit, when youOpen Serial you will be asked to<br />
‘Click here or press CTRL-C to enter the REPL’. Once you have done<br />
so, try typing something in MicroPython. For example:<br />
>>> help()<br />
>>> from microbit import *<br />
>>> display.scroll(“Hello from the REPL”)<br />
>>> import this<br />
>>> import love<br />
>>> import antigravity<br />
When the micro:bit is flashed with MicroPython, it enables a<br />
simple file system to store files on device. Selecting the load button<br />
in the menu will bring up the files modal window and you are able to<br />
inspect the files on your micro:bit. Initially this will just be your program<br />
script main.py, but you can also add modules here too that can<br />
be called form your program. This makes using python libraries for<br />
micro:bit add on boards much easier to use with the online Python<br />
editor.<br />
Translations<br />
WebUSB<br />
When using a browser that supports WebUSB, like Google<br />
Chrome or the latest Edge Beta, the options for connecting to and<br />
interacting with your micro:bit in the browser will be enabled.<br />
The Connect button allows you to connect to your micro:bit via<br />
webUSB. When you choose to connect, a window will pop up in your<br />
From this menu you have the option to select a language for the<br />
editor. The functionality here is demonstrating the capability to load<br />
translations and as yet there are only basic examples in place. Learn<br />
more on how to do this at go.<strong>micromag</strong>.cc/pyeditortranslate<br />
<strong>micromag</strong>,cc <strong>micromag</strong>.cc 7
:NEWS<br />
Team Update<br />
Some exciting things have happened for micro:mag<br />
since Issue 5, so here is a quick update from our editing team<br />
Team Update<br />
ABOVE:<br />
A printed copy of<br />
Issue 5. Buy one<br />
today!<br />
Since the launch of Issue 5,<br />
some really exciting things<br />
have happened in the world<br />
of micro:mag which we’d<br />
like to make our readers aware<br />
of. We hope you are as excited as<br />
we are to see the magazine grow<br />
from a small voluteer project to a<br />
whole community effort. As always,<br />
we couldn’t do this without your<br />
support. Here’s a few updates from<br />
the team about what’s happened<br />
since Issue 5!<br />
micro:mag CIC<br />
When we started the magazine,<br />
we had no real idea of how it would<br />
take off. It was hard to imagine us<br />
getting past Issue 1. As we started to<br />
grow and do new things (like bring on<br />
advertisers), we soon realized that we<br />
needed to register a business here in<br />
the UK. As of the 1st October 2019,<br />
we are now a “Community Interest<br />
Company” which basically means that<br />
what we do is for the benefit of the<br />
community and we are committed<br />
to investing in it. We’re really excited<br />
by registering micro:mag CIC and<br />
see this as a big step forward for the<br />
magazine.<br />
Printed Copies<br />
You may or may not have seen<br />
on Twitter that we started selling the<br />
micro:mag as a physical magazine<br />
on our website. The first run went<br />
really well and we learnt a lot. We’re<br />
proud to announce that pre orders<br />
for physical copies will be availble for<br />
every future issue for a 4 week period<br />
from release date. We did have some<br />
printing issue on the first run, but we<br />
manaaged to sort them out as fast as<br />
possible to make sure that everyone<br />
got a quality product. You’ll be able<br />
to buy your own printed copy of<br />
micro:mag as well as the occasional<br />
special item on our brand new store<br />
website over at <strong>micromag</strong>store.com.<br />
Next Issue & The<br />
Future<br />
Next Issue’s special cover feature<br />
will be from micro:bit manufacturers<br />
Farnell where they’ll be sharing<br />
how the micro:bit is made and what<br />
is involved in the process. We’re<br />
really looking forward to sharing<br />
this exclusive article with you in<br />
December when Issue 7 is released.<br />
Our team have some exciting plans<br />
for other things we’d like to do in<br />
2020 to help the magazine grow even<br />
more. 2019 has been an amazing year<br />
for micro:mag and we’re glad you’ve<br />
been with us on the journey. We can’t<br />
wait to see where 2020 takes us and<br />
the exciting micro:bit content we’ll<br />
publish in the magazine. Once again,<br />
thank you for reading micro:mag.<br />
8<br />
<strong>micromag</strong>,cc
A micro:bit challenge for<br />
the Global Goals for young<br />
people across the world.<br />
Visit doyourbit.microbit.org<br />
for inspiration, teaching<br />
resources and information<br />
on how to take part.<br />
Co-creators<br />
In collaboration with
:FEATURE<br />
Battery Holder<br />
3D PRINTED<br />
MICRO:BIT BATTERY<br />
HOLDER AND STAND<br />
We interviewed David Whale and Vlastimil Hovan on why the battery<br />
holder and stand was developed<br />
About the Author<br />
micro:mag: We understand you’ve designed a<br />
3D printed battery holder for the micro:bit – can<br />
you tell us a bit about it?<br />
David Whale<br />
David is an embedded<br />
software engineer,<br />
book author, book<br />
and magazine editor,<br />
general micro:bit<br />
Wizard.<br />
@whaleygeek<br />
David Whale: Well, Vlastimil did all the hard work,<br />
I was just the first user of the battery holder. It’s great<br />
because it slides securely onto the micro:bit holds<br />
a standard battery pack on the back and even has a<br />
slot for the battery wire to stop it getting tangled.<br />
Vlastimil Hovan: I first got into 3D design after<br />
I bought a 3D printer. I used my new skills to design<br />
the first micro:bit battery pack holder, using a free<br />
package called “Design Spark Mechanical” from RS<br />
Components.<br />
About the Author<br />
Vlastimil Hovan<br />
Vlastimil is a full-time<br />
college lecturer in<br />
electronics, loves<br />
designing electronic<br />
circuits, tinkering<br />
with software, and 3D<br />
printing anything and<br />
everything.<br />
@Vlastimi_Hovan<br />
10<br />
<strong>micromag</strong>.cc<br />
m:m: Where did the idea for the design come<br />
from?<br />
DW: I had been invited by BBCClick to build a 300<br />
micro:bit orchestra for their live stage show in 2017,<br />
and I needed a fast and simple way to fix 300 battery<br />
packs! I tweeted the challenge and had many good<br />
(and strange!) replies over a few days. I used elastic<br />
bands in the end, but Vlastimil also had this innovative<br />
idea for a 3D printed clip.<br />
VH: I saw the challenge posted by David and got my<br />
gears in motion. It was a good way to practice my<br />
newly developed 3D design skills, and as micro:bit<br />
user I shared the same issue as to what to do with<br />
the battery pack. I enjoy a challenge and after a little<br />
while, the first battery pack holder was born. The first<br />
design took 15 minutes to print but the latest model<br />
takes about 60 minutes.<br />
DW: … and I didn’t have my own 3D printer so<br />
Vlastimil printed some and posted them to me!<br />
m:m: Fantastic! How has the clip been developed<br />
since?<br />
VH: After the first design, I kept on thinking about<br />
different ways that the micro:bit is used, and came<br />
up with the idea of an electronic badge. That’s when<br />
I created a different version of the holder with a hole<br />
at the top for a lanyard clip.<br />
DW: … don’t forget the stand feature!<br />
VH: oh yes! One night I was balancing the holder<br />
on my table and thought if I make the bottom of the<br />
holder the correct angle it will stand up on its own,<br />
and version 3 was born.<br />
ABOVE:<br />
The original blue<br />
holder
Battery Holder<br />
:FEATURE<br />
not least, there is a slot for a strap, so it can be turned into a wearable/watch.<br />
Above:<br />
Added lanyard-clip feature<br />
m:m: How many different generations of the battery holder are<br />
there?<br />
Above:<br />
Line-up of all the<br />
versions<br />
VH: There are around five different designs but even I am losing<br />
track. The great thing about 3D printing is that you can re-iterate a<br />
design many times quickly to perfect it.<br />
DW: Yes, Vlastimil keeps refining the design, it’s great that all the<br />
ideas have made it into a single integrated product now.<br />
m:m: That’s great! How do you know each other?<br />
VH: Via Twitter!<br />
DW: Vlastimil and I are ‘virtual friends’ – we’ve never actually met in<br />
real life. But it shows the power of the community and social media,<br />
we’ve become great friends over the last year!<br />
VH: Yes, we chat on twitter several times a week, even though we<br />
are at opposite ends of the country.<br />
m:m: What’s next, do you think?<br />
DW: They make great prizes or handouts at events, the school<br />
teachers I work with love them, and the students find them really<br />
useful too!<br />
Above:<br />
Fig 3: Now self-balancing<br />
VH: I’ve been designing a 3D printed tray that holds a class-set of<br />
micro:bits with battery holders fitted. I’m hoping that school teachers<br />
will find it useful to keep everything organised.<br />
DW: I think customised engraving on the back would be great for<br />
making ‘show specials’ for handing out at events; who knows, there<br />
might be a new craze with people collecting them all. Oh, and one<br />
day, I hope to meet Vlastimil in real life and shake his hand in thanks<br />
for all his great work!<br />
VH: After great feedback from various users I looked at all the different<br />
designs and thought hard on how to combine them together into<br />
a single combined design, which became the final holder version. It<br />
can be clipped on a lanyard, stand on its own on a flat surface, and<br />
hold the battery pack and micro:bit securely in place secured by a<br />
single grub screw. Also note how the USB port is not obstructed,<br />
so that you can upload software without moving the holder, and a<br />
refinement that allows for crocodile clips to still be attached. Last but<br />
m:m: Where can our readers get hold of the battery holders?<br />
VH: If your school or college has a 3D printer, you can get the<br />
design of the older version of the battery holder from Thingiverse<br />
https://www.thingiverse.com/thing:2666671 I am currently looking<br />
at how to develop the latest model into a product that can be widely<br />
available; but please get in contact (e.g. via Twitter) as I do sell them<br />
directly at the moment.<br />
<strong>micromag</strong>,cc <strong>micromag</strong>.cc 11
:FEATURE<br />
Z-BOT<br />
THE CREATION OF<br />
Z-BOT<br />
The Humanoid robot that can move and talk. By Zayd Nashed.<br />
About the Author<br />
I is 11 years old, from<br />
Syria living in Saudi<br />
Arabia<br />
He started in<br />
electronics and<br />
coding when he was<br />
9 years’ old<br />
I won the micro: bit<br />
Global Challenge<br />
for the Middle East<br />
region in 2018.<br />
12<br />
<strong>micromag</strong>.cc<br />
This summer, I volunteered in a tech camp<br />
in Saudi Arabia, which aims to teach kids<br />
electronics and coding to achieve the<br />
targets of global goals.<br />
During that time, I was working on my own<br />
project, which was called Z-Bot; it was a humanoid<br />
robot that can move and talk by using the micro:bit<br />
Therefore, I decided to make my robot to guide<br />
and introduce the global goals for kids.<br />
What I Used<br />
3 x Card board for the head, body, and the front box<br />
2 x MAX7219 LED Matrix<br />
3 x servo motor, one for the mouth, and two for the<br />
neck<br />
1x Kitten bot extension Keypad<br />
4 x Microbits<br />
1x Speaker<br />
What Z-bot Does<br />
The main idea of this project is that Z-bot has a keypad<br />
in front of it, so when anyone presses any global goal<br />
number, the robot will move it’s head and mouth, in<br />
addition, to say the global goal name and scroll it on a<br />
long LED Matrix.<br />
Link for Z-bot’s video go.<strong>micromag</strong>.cc/zbotvid<br />
How Z-bot Works<br />
I used four micro:bits three of them connected<br />
together by radio, while the last one was an individual<br />
micro:bit and each micr:obit has different tasks.<br />
The first one is the main micro:bit, which is<br />
connected to the keypad and knows what global goal<br />
number has been pressed; it is also connected to<br />
three servos to move the mouth and the head, I used<br />
MakeCode to code it. The second micro:bit is a speech<br />
one and coded by MicroPython, its task is to speak the<br />
global goal name.<br />
The third micro:bit is connected to an LED Matrix<br />
to scroll the goals name on the robot’s body. I used
Z-BOT<br />
:FEATURE<br />
Left:<br />
Z-bot on display<br />
MakeCode to code it too.<br />
While the last one was a separate micro:bit, which is connected<br />
to the LED Matrix for eyes. I also used MakeCode to code it.<br />
When any number was pressed on the keypad, the first<br />
micro:bit will move the servos (mouth and head) and send two radio<br />
notifications, one for the second micro:bit to say the global goal<br />
name and the other notification to the third micro:bit to scroll the<br />
global goals name on an LED Matrix.<br />
What problems I faced<br />
I faced many problems during the work on this robot, one of<br />
them was when I tried to send a message from blocks to python, the<br />
python wasn’t able to understand any character from blocks instead<br />
it showed me a bunch of question marks, and the solution was a<br />
piece of code needed to be written before the “on start”.<br />
Another problem I faced was when he tried to add some<br />
additional words to explain the global goals, the micro:bit showed<br />
the number 844 and then a sad face, which mean that is an error<br />
in the memory; the solution for this problem was to make the code<br />
shorter by cancelling some words.<br />
Conclusion<br />
To conclude I thought it would be difficult to make when I only<br />
had the thought, but it turned out to be super easy after hard work,<br />
searching and never giving up, and that’s how I ended up with my<br />
amazing project: Z-Bot.<br />
Above:<br />
micro:bits all wired up within<br />
Z-bot<br />
<strong>micromag</strong>,cc <strong>micromag</strong>.cc 13
VYE<br />
INTERVIEW<br />
Avye Couloute<br />
This issue, we got the chance to interview girls in tech pioneer Avye Couloute<br />
who’s mission is to inspire more girls to choose a career in STEM subjects.<br />
Recently, Avye has started her own business, Girls into Coding, where she<br />
organsises regular events in London for girls to attend and learn how to code<br />
through a number of talks and workshop. In this interview, we learn more<br />
about these events and how the micro:bit plays a big part in them.
AVYE<br />
COUL<br />
AVYE<br />
OULO<br />
micro:mag: Thanks for letting us interview<br />
you for micro:mag, please tell us a bit<br />
about yourself!<br />
Avye: I’m Avye, I’ve just turned 12 years old.<br />
I love coding & making stuff and I’m on a<br />
mission to inspire more girls to get into coding<br />
and technology. In my spare time, I lead<br />
regular coding & physical computing workshops<br />
for young people and I enjoy playing<br />
football & swimming with my local swim<br />
squad.<br />
MM: What made you get into coding?<br />
AV: When I was 7 years old, I started going<br />
to coding clubs and workshops which introduced<br />
me to scratch & then the Microbit. I<br />
loved how I could use code to move things<br />
on the screen or to control electronic components.<br />
MM: You inspire lots of young people in<br />
the UK through your “Girls into Coding”<br />
events. Please tell us about them.<br />
AV: Well, in the past girls and women have<br />
been under-represented in STEM and this<br />
generation has a chance to change that. For<br />
me, “Girls Into Coding” is my way of contributing<br />
to that change. The events are free to<br />
attend and provide an opportunity for girls<br />
aged 10 -14 to explore coding and physical<br />
computing in a supportive environment. As<br />
well as participating in hands-on workshops,<br />
the events give the girls an opportunity to<br />
listen to lightning talks throughout the day,<br />
delivered by inspiring female role models<br />
who are doing cool stuff in the tech world.<br />
With support from members of the tech &<br />
maker community, the girls receive a really<br />
positive experience and get a Microbit & a<br />
physical computing starter kit, so they can<br />
continue their tech journey at home and<br />
beyond.<br />
MM: What do you like the most about the<br />
micro:bit?<br />
AV: I love the size of the micro:bit and the<br />
number of things it’s got packed into it. It’s<br />
also compatible with so many different addons<br />
and extensions.<br />
MM: What’s your favourite project that<br />
you’ve made with the micro:bit?<br />
AV: A set of robot kits which I jointly developed<br />
for my last girls into coding event. The<br />
kits used proximity sensors, LEDs, motors,<br />
buzzers & radio controllers. The idea for<br />
the project was a new challenge for myself<br />
because the kits were designed so that all of<br />
the main components could be slotted on to<br />
the robot chassis without the use of tools.<br />
MM: Have you got any future plans for<br />
micro:bit related projects?<br />
AV: I am working on ideas for my next Girls<br />
into Coding workshop; I’m quite interested<br />
in developing a Microbit robotics activity<br />
using the new kitronik servo & motor driver<br />
board. I think it will be a good way to bring<br />
servos & motors together in one project.<br />
I have a couple of other things in the pipeline<br />
which I’ll soon be able to say a bit more<br />
about.<br />
Learn more about Avye’s work:<br />
Blog: 10tonolimit.com<br />
Twitter: @helenevirolan<br />
Microsoft Video: go.<strong>micromag</strong>.cc/avyemsft<br />
Above:<br />
Avye’s July Girls into coding<br />
event at Microsoft<br />
<strong>micromag</strong>,cc 15
:FEATURE Stepping Stones Towards Student Activism Dave Del Gobbo tells us about Social<br />
STEPPING STONES<br />
TOWARDS STUDENT<br />
ACTIVISM<br />
issues in micro:bit Board Games<br />
About the Author<br />
Dave is a Canadian<br />
science and special<br />
education teacher at<br />
Peel District School<br />
Board. He enjoys 3D<br />
printing, gaming in<br />
education and giant<br />
espresso machines.<br />
@DaveDelGobbo<br />
@FCLedu<br />
Right:<br />
The game featured<br />
the micro:bit displaying<br />
a custom victory<br />
message.<br />
Critical thinking, collaboration and creativity<br />
have been identified as important skills<br />
for modern students to attain. In this project,<br />
students leverage these skills, while<br />
teaching fellow classmates about complex social<br />
issues via self-created multimodal board games.<br />
This article has been submitted by Fair Chance<br />
Learning on behalf of Dave. We’ve been a fan of Dave’s<br />
work for some time. We value our relationship and the<br />
leadership he offers the education space.<br />
General Learning Strategies (GLE) is a special<br />
course offered to Ontario secondary students with<br />
Individualized Education Plans. In these classrooms,<br />
you will find students identified with a wide range<br />
of exceptionalities working to enhance their literacy<br />
and numeracy skills. My challenge has been to design<br />
projects that meet my students’ personal needs, while<br />
also providing opportunities for them to find their own<br />
voice.<br />
As I explored options for what to include in my<br />
GLE course, coding was selected as a vehicle to explore<br />
critical thinking and numeracy goals. Initially, students<br />
worked on an introductory set of lessons based on the<br />
great work of Douglas & Mary Kiang. Coding on the<br />
micro:bit allows students to iterate quickly and ‘fail forward’,<br />
so that they strive to be conscientious. After only<br />
a week of learning of computer science concepts, a<br />
pair of students developed a tribute to Nintendo’s 1984<br />
classic “Duck Hunt”; view the video here.<br />
Our final class project was inspired by the work<br />
of Professor Larry Bencze, a University of Toronto<br />
professor who encourages students to take an activist<br />
stance on social issues. Students were asked to create<br />
micro:bit based board games that revolved around an<br />
issue important to them. Once again, I was impressed<br />
by the student’s ingenuity in creating games that<br />
showed both technical sophistication and a nuanced<br />
understanding of their issue.<br />
The game creator also 3D scanned (using a Kinect<br />
Sensor) and 3D printed a small version of himself to act<br />
as the playing piece, essentially putting ‘himself’ in the<br />
game. These projects highlight the micro:bit’s key advantage:<br />
it allows abstract computer science concepts<br />
to come alive in a physical device a student can interact<br />
with, untethered to the confines of a screen.<br />
16<br />
<strong>micromag</strong>.cc
for less than £25 (Ex. VAT)<br />
the simple<br />
robotics kit
:FEATURE<br />
Pimoroni’s Festival Experience<br />
WHAT PIMORONI<br />
LEARNED<br />
FROM THEIR FESTIVAL WORKSHOP<br />
About the Author<br />
Tanya has been<br />
a Pimoroni pirate<br />
since 2016 - making<br />
learning materials<br />
for schools, running<br />
workshops, & doing<br />
talks. Often to be<br />
found in possession of<br />
cardboard and glitter.<br />
Twitter: @tanurai<br />
Web: tanyafish.com<br />
Deer shed Festival (deershedfestival.com) is<br />
a family festival that attracts over 10,000<br />
people for music, arts, science and spoken<br />
word based fun. We were invited to run a<br />
coding workshop in the science tent last year, and<br />
then this year we were invited back (so we must have<br />
done something right)!<br />
In this article, we’ll share lessons learned, top tips,<br />
and how to prepare for the onslaught of sign-ups.<br />
We decided that we’d teach MicroPython by using a<br />
micro:bit and an add-on board (the Pimoroni scroll:bit<br />
display).<br />
control. We learned from the previous year that we<br />
would have to carry all of the resources across a bumpy<br />
grass field. To add to the fun, it was raining when we<br />
unloaded. We used Really Useful boxes with clip lids<br />
and a trolley. The sealable clip lids kept everything dry<br />
and it meant that we could stack the boxes. Taking no<br />
chances, inside each box were more boxes like little<br />
technical matryoshkas. If you want to stop them sliding<br />
around inside the box, a layer of packing foam with<br />
slots cut in it is a good way to store things.<br />
Above:<br />
The queue of people<br />
waiting to get in and<br />
sign up stretched back<br />
as far as the eye could<br />
see<br />
18<br />
<strong>micromag</strong>.cc<br />
The first thing to note about working at a festival is<br />
that you’re very limited in space, resources, and climate<br />
Above:<br />
Safely packed micro:bits
Pimoroni’s Festival Experience<br />
:FEATURE<br />
When you’re staying in a tent yourself, there is not really an option<br />
to rework things if you have problems on site. If you are running Raspberry<br />
Pi with SD cards, it is a good idea to take some spare ones that are<br />
already prepared with software in case of corruption. We made sure ours<br />
had the Mu editor pre-loaded, along with the scroll:bit libraries (because<br />
there’s no internet in the middle of nowhere - more about that later).<br />
Left:<br />
Prepared SD card<br />
to see when the venue is full of people so make sure you take something<br />
above eye level for people to spot easily (we used the banner). Another<br />
thing to consider is that your audience is very mixed. People bring tiny<br />
babies right up to grandparents, and it helps to think about your audience.<br />
Think about what skill level they are at, and what other skills will be<br />
needed such as reading level or motor skills like using a mouse or typing.<br />
We decided to set a limit on ours, based on a reading age of eight. We<br />
also had examples of the materials at signup, so that parents could judge<br />
for themselves whether their child was able to work independently. We<br />
write our materials specifically with this event in mind. When the tent is<br />
full it is excessively noisy, constantly. This means that you are unlikely to<br />
be able to teach like a classroom environment, and instead, it has to be<br />
self-led and have troubleshooting built-in.<br />
Again, due to the way that you have to store and carry all of your<br />
materials, more streamlined it is the better. We designed some tiny portable<br />
screens for the occasion and you can see that these pack into small<br />
white boxes. Monitors are just not an option due to the bulkiness and<br />
not being stackable. For the same reason, we chose Raspberry Pi, as it<br />
was easy to take a pair of backups without taking up too much space. It’s<br />
also a good idea to take spare mice - we took two full sets of equipment<br />
spare. Stuff *will* fail over the course of a long weekend of muddy, rainy,<br />
suncream-covered children.<br />
We chose to do a booklet with stand-alone tasks that did not necessarily<br />
build on the previous task. This meant that if children wanted,<br />
they could just do the tasks that interested them and skip the others,<br />
without any loss of progress. We tried to anticipate problems, and added<br />
a troubleshooting box to the bottom of each activity. In addition to this,<br />
we added extension tasks so that each task could be expanded if the<br />
child wanted to or they could skip straight onto the next task. We aimed<br />
at having half an hour of activities so that we could have 120 children<br />
through during each day.<br />
Another consideration we had was that in the middle of a field, there<br />
is no Wi-Fi. No Wi-Fi means everything had to be off-line. As mentioned<br />
before, this means you need to do all the updates and installations<br />
*before* you head off to the festival. Out of the off-line editors we could<br />
use, we chose an editor called Mu. The reasoning was that we were able<br />
to change font sizes and theme for accessibility reasons, and the simplicity<br />
of having recognisable buttons such as save, flash, check, and quit,<br />
saved on the explanation of the interface to people.<br />
Above:<br />
Equipment laid out ready<br />
In a marquee, you have to be aware of leaks in the event of rain or<br />
other inclement weather. Never set up right next to the tent wall. We<br />
found this out the hard way when a deluge started and a steady drip drip<br />
drip of water started plopping down onto one of our unfortunate participants.<br />
Also, if you have ever been camping, you’ll know that things have<br />
a tendency to get damp overnight, and this had an adverse effect on our<br />
printed materials. Store paper and other moisture-sensitive materials in<br />
an airtight box overnight, if possible, instead of leaving them out with the<br />
equipment.<br />
Above:<br />
A bug during coding<br />
We wanted to use MicroPython, to show that the micro:bit can be<br />
coded in ways that are not just block coding. It also meant that printed<br />
materials did not have to be in colour, which was a consideration when<br />
releasing them to teachers as not everybody has access to a colour<br />
printer.<br />
All in all, the workshops went smoothly. We did have a few bugs, but<br />
they were of the hoverfly variety, attracted to the lights on the scroll:bit.<br />
Having a clear explanation of what the workshops were about meant<br />
that our audience was largely self-selected and able to access the materials.<br />
Although the venue provides signs at a low level, it can be difficult<br />
The materials are now available at edu.pimoroni.com, for download<br />
as a PDF in black and white. We can truly say that these were destruct<br />
tested in the harshest of environments and next year we hope to go<br />
back with more materials, more workstations, and even more fun stuff to<br />
tinker with.<br />
<strong>micromag</strong>,cc <strong>micromag</strong>.cc 19
Cover Feature<br />
PYTHON<br />
BUILD A<br />
ROBO
PYTHON<br />
Cover Feature<br />
Les Pounder shows us how the micro:bit can be built<br />
into a cost effective robot for beginners<br />
T<br />
One of the most common projects people build with<br />
the micro:bit is a robot. The micro:bit makes this<br />
super simple both on the hardware and software<br />
side of things. The majority go out and purchase a<br />
prebuilt robot that makes it super easy to get started<br />
with robotics and the micro:bit. However, most of<br />
the time, this can set you back £40+. For this special<br />
issue, we set Creative Technologist and regular<br />
micro:mag contributor Les Pounder the challenge<br />
of building the ultimate low-cost micro:bit powered<br />
robot that anyone can build, with just a few parts.<br />
<strong>micromag</strong>,cc <strong>micromag</strong>.cc 21
Cover Feature<br />
ROBOTS<br />
Budget Robotics<br />
Robots are cool and they are even more cool when you make your own. In this feature<br />
we take a look at building a really simple budget robot that will provide you with a<br />
foundation to learn more about robot building. We shall code the robot in two ways.<br />
Firstly using the Makecode editor, and secondly via MicroPython. But before a line of<br />
code is written, we need to make sure that we understand what a robot is and what<br />
components makes a robot.<br />
A robot will follow instructions blindly, if we tell it to go forward, it will and it will never<br />
stop until we tell it to do so. So what does this mean? Well it means that we must be<br />
careful when writing and issuing instructions. If we get something wrong then the robot<br />
will quickly show us, typically by driving off in any direction.<br />
The components that make a robot are two (or more) motors with wheels. These are<br />
typically bright yellow DC motors that can be found cheaply online. But these motors<br />
need a controller in order for them to safely work and these controllers come in all<br />
manner of configurations. From large industrial precisely calibrated controllers to simple<br />
hobbyist level models, every motor needs a controller and there is one for every budget.<br />
But what is the brains behind the robot? Well in our case it is the humble micro:bit on to<br />
which we will write code that will send signals from the micro:bit GPIO to the controller<br />
board, turning the motors on and off to drive in any direction we choose.<br />
22<br />
<strong>micromag</strong>.cc
ROBOTS<br />
Cover Feature<br />
Building the robot<br />
Building the robot is where the fun begins!<br />
Parts List:<br />
»»<br />
A micro:bit<br />
»»<br />
Pimoroni Pinbetween<br />
»»<br />
L9110S motor controller<br />
»»<br />
LD1117AV33 3.3V Regulator<br />
»»<br />
4 x AA battery box<br />
»»<br />
4 x AA batteries<br />
»»<br />
Breadboard<br />
»»<br />
3 x Female to male jumper<br />
wires<br />
»»<br />
5 x Female to female jumper<br />
wires<br />
»»<br />
1 x Male to male jumper wire<br />
»»<br />
A robot chassis (from eBay)<br />
1. The build starts by inserting the micro:bit into the pinbetween board. This<br />
will open up all of the usable GPIO pins on the micro:bit.<br />
Top Tip:<br />
All of the code and high<br />
resolution images / diagrams<br />
can be downloaded via our<br />
Github repository:<br />
go.<strong>micromag</strong>.cc/robotgh<br />
2. The complete circuit sees the micro:bit connect to the L9110S motor<br />
controller using female to female jumper wires. This connection will enable the<br />
micro:bit to control the L9110S which in turn will control the motors connected<br />
to the two screw terminals of the L9110S.<br />
The connections from the micro:bit to L9110S motor controller are:<br />
<strong>micromag</strong>.cc 23
Cover Feature<br />
ROBOTS<br />
Building the robot<br />
Building the robot is where the fun begins!<br />
From the pinbetween<br />
to the L9110S motor<br />
controller we need to<br />
make a connection<br />
between the GND of the<br />
micro:bit and the L9110S.<br />
This ensures that the<br />
two components share a<br />
common GND.<br />
To create a single power source to power both the micro:bit and motors<br />
we need to use a voltage regulator to drop the 5V from the AA batteries<br />
to 3.3V for the micro:bit. Into the breadboard insert the voltage regulator<br />
so that the black side of the chip is facing you. Using a female to male<br />
jumper wire, connect the first leg (from the left) of the regulator to GND<br />
on the micro:bit then connect the GND (black) wire from the battery<br />
pack to the same leg. For the second leg connect this to the 3V pin of the<br />
micro:bit using another female to male jumper wire. Lastly connect the<br />
third leg of the regulator to the VCC pin of the L9110S motor controller<br />
and then connect the VCC (red) wire to the same leg. This completes the<br />
power supply for the micro:bit and motor controller.<br />
The last step is to connect the motors to the screw terminals of the L9110S motor<br />
controller. Don’t worry about the polarity, motors do not have a polarity.<br />
Important!<br />
When programming the micro:bit, or powering it from the micro USB<br />
lead, remove the VCC wire from the battery to the voltage regulator from<br />
the breadboard. But reconnect when the robot is ready to run.<br />
24<br />
<strong>micromag</strong>.cc
ROBOTS<br />
Cover Feature<br />
Coding the Robot<br />
Parts List:<br />
With Microsoft MakeCode<br />
1. For this part of the project we shall use the Makecode editor<br />
found on the micro:bit website microbit.org.<br />
Create a new project and for now ignore the “on start” and<br />
“forever” blocks.<br />
To control the robot we shall create a series of functions that<br />
store a series of commands. To use them we simply call the<br />
function and the function runs. To make a function we need to<br />
go to Advanced >> Functions and click on “Make a Function…”<br />
In the Edit Function window, change the name of the function<br />
from “doSomething” to “stop” and click Done.<br />
2. The code for the function<br />
is made using blocks from<br />
the Pins section. Here we<br />
see the blocks to turn off<br />
pins 0,1,2,8, which will turn<br />
off any running motors.<br />
Then the “show string”<br />
block from Basic will print<br />
a STOP message to the LED<br />
matrix.<br />
3. Let’s make another<br />
function, again go to<br />
the Functions blocks<br />
and make a new<br />
function. But this time<br />
our “forward” function<br />
requires a parameter<br />
(an extra instruction)<br />
which is going to be a<br />
number between 0 and<br />
1023. Click on Number<br />
and then Done.<br />
4. To write the code for the<br />
forward function we use<br />
“analog write pin” from<br />
Pins. We number the pins to<br />
match those used to control<br />
the motor (0,1,2,8) and then<br />
set pins 0 and 8 to zero.<br />
But pins 1 and 2 will use<br />
the parameter number. To<br />
use this drag the red “num”<br />
block next to “forward” and<br />
drop it over the correct<br />
space.<br />
5. The process is<br />
repeated to create<br />
a function to turn<br />
the robot left.<br />
Note that the pins<br />
that will receive<br />
the parameter are<br />
different as to turn<br />
left, we need the<br />
right wheel to go<br />
forward, and the<br />
left wheel to move<br />
backwards.<br />
<strong>micromag</strong>.cc 25
Cover Feature<br />
ROBOTS<br />
Coding the Robot<br />
Parts List:<br />
With Microsoft MakeCode<br />
6. The next function will make the robot turn right 7. The next function will trigger the robot to reverse<br />
8. With the functions created, lets create a short test script that will call<br />
each of the functions in turn, so that we can check that our robot is<br />
working. Inside “on start” we shall use the “call” blocks from Functions<br />
and call each of the functions. We start with “stop”, then forward at<br />
half speed (512) then use a pause from Basic to force the robot to<br />
travel for 2 seconds. And the process carries on with each function<br />
call, and pause until we reach the end and add another stop.<br />
Download the code and copy it to your micro:bit. When it has<br />
finished, remove the micro USB lead and connect the micro:bit to<br />
the 3.3V output of the voltage regulator. Your robot will come to life<br />
and start driving around. Check that it follows the correct sequence,<br />
forward, backward, left, right. If a motor moves in the wrong direction,<br />
unscrew the wires from the motor controller and swap them around.<br />
When you are happy, change the sequence of code so that your robot<br />
draws a square, navigates around the room, delivers you food! This is<br />
your robot, and it will do what you tell it to do!<br />
26<br />
<strong>micromag</strong>.cc
ROBOTS<br />
Cover Feature<br />
Coding the Robot<br />
With MicroPython<br />
Parts List:<br />
1. To take this project further we can code the robot using<br />
MicroPython using Mu. Mu can be downloaded by visiting<br />
https://codewith.mu/ and installing for your operating<br />
system.<br />
We start writing the code for the robot by importing the<br />
micro:bit library and then create four variables that refer<br />
to the connections between the micro:bit and the L9110S<br />
motor controller.<br />
from microbit import *<br />
motorA1 = pin0<br />
motorA2 = pin1<br />
motorB1 = pin2<br />
motorB2 = pin8<br />
2. The next step is to write a series of functions that will<br />
group the instructions needed to perform a task and by<br />
calling the name of the function, the task is completed.<br />
The first function is called “stop” and it will turn off all of the<br />
pins connected to the motor controller, ensuring that the<br />
motors stop moving. Lastly we scroll “STOP” across the LED<br />
matrix of the micro:bit.<br />
def stop():<br />
motorA1.write_digital(0)<br />
motorA2.write_digital(0)<br />
motorB1.write_digital(0)<br />
motorB2.write_digital(0)<br />
display.scroll(“STOP”)<br />
3. The next function will drive the motors backwards<br />
(reverse) and the way in which our motors are wired we<br />
turn on A1 and B2 and turn off the other connections. This<br />
will flip the motors to turn in the direction that we require.<br />
This function also takes an argument (an extra instruction)<br />
which in this case is the speed, as a value between 0 and<br />
1023.<br />
def backward(speed):<br />
motorA1.write_analog(speed)<br />
motorA2.write_analog(0)<br />
motorB1.write_analog(0)<br />
motorB2.write_analog(speed)<br />
Now we’ll create more functions for forward, left & right.<br />
Forward<br />
def forward(speed):<br />
motorA1.write_analog(0)<br />
motorA2.write_analog(speed)<br />
motorB1.write_analog(speed)<br />
motorB2.write_analog(0)<br />
Left<br />
def left(speed):<br />
motorA1.write_analog(0)<br />
motorA2.write_analog(speed)<br />
motorB1.write_analog(0)<br />
motorB2.write_analog(speed)<br />
<strong>micromag</strong>.cc 27
Cover Feature<br />
ROBOTS<br />
Coding the Robot<br />
Right<br />
Parts List:<br />
def right(speed):<br />
motorA1.write_analog(speed)<br />
motorA2.write_analog(0)<br />
motorB1.write_analog(speed)<br />
motorB2.write_analog(0)<br />
With MicroPython<br />
That’s all the functions complete. If you were to download<br />
and run the code you’ve just written, it won’t actually do<br />
anything. This is because we haven’t “called” the functions.<br />
The next part of the code will do this. Making functions is a<br />
great way to reuse code multiple times in a program without<br />
having to copy and paste it every time, therefore making the<br />
code shorter and more efficient.<br />
4. In the last section of code we create a sequence that will<br />
test each of the functions to ensure that our robot has full<br />
movement. For functions that involvement movement, for<br />
example forward, we pass a value to control the speed of<br />
the motor. We chose to use 512 as this provides half speed<br />
for the motors. Fast enough to move around freely, but the<br />
robot will not travel too far. Between each function we add<br />
a sleep so that the robot performs the movement/task for a<br />
set amount of time.<br />
stop()<br />
forward(512)<br />
sleep(3000)<br />
backward(512)<br />
sleep(3000)<br />
left(512)<br />
sleep(3000)<br />
right(512)<br />
sleep(3000)<br />
stop()<br />
5. Flash the code to your micro:bit and check that the robot performs the sequence of code. If the<br />
motors move in the wrong direction, simple unscrew their wires from the motor controller and swap<br />
them over. Re-test and when happy design a new sequence to perform a cool task.<br />
So there we have it, one simple, cost effective robot which can be programmed in Makecode or<br />
MicroPython. This is your robot, decorate and add to the project, have competitions with your<br />
friends and their robots and above all else. Have fun building new robots.<br />
Share your robots!<br />
We want to see what you’ve built<br />
using our Low Cost DIY micro:bit<br />
powered robot guide. Tweet us a<br />
picture using:<br />
@micro_mag @biglesp<br />
About Les Pounder<br />
Les is a maker and trainer who<br />
has worked with the Raspberry Pi<br />
Foundation and the BBC to deliver<br />
computing training<br />
@biglesp<br />
bigl.es<br />
28<br />
<strong>micromag</strong>.cc
PRINT EDITIONS NOW AVAILABLE<br />
GRAB YOUR<br />
PRINT EDITION<br />
OF MICRO:MAG<br />
TODAY!<br />
Each Issue will now be available in print for a<br />
month after it’s release date for £5.99 each!<br />
BUY YOUR PRINT COPY ON<br />
OUR STORE AT<br />
MICRO:MAG.CC/STORE<br />
You can still download the free digital edition from our<br />
website. View the catalogue at <strong>micromag</strong>.cc/issues
Robot Showdown<br />
4Tronix MiniBit<br />
This brand new robot from 4tronix is certainly<br />
impressive at only £25. It’s the cheapest robot<br />
on the list and is by far the best for those on a<br />
budget.<br />
The 4tronix minibit packs a bunch of features like 4 NeoPixel<br />
LEDs, ultrasonic sensor connectors, grippy wheels and a<br />
pen holder that you can find on the more expensive robots<br />
we’ve featured. However, with choosing a cheaper robot you<br />
can expect to lose some features like line following sensors,<br />
these do not appear on the minibit. Fear not though, the<br />
robot has some “croc clip” pads which allow you to attach<br />
add-on modules like line following sensors (bought separately<br />
from 4tronix). There is also a super cool connector on<br />
the front for the ultrasonic sensor you can buy which is also<br />
“Breakout Garden” compatible. This robot is super easy to<br />
work with thanks to its handy MakeCode library which is an<br />
adaptation of the already easy to use BitBot library. If you<br />
want to go a bit further than MakeCode, there’s Python support<br />
too.<br />
Buy a minibit<br />
go.<strong>micromag</strong>.cc/minib<br />
Dexter GiggleBot<br />
So far out of the robots we’ve done a full review<br />
of, the Dexter Industries GiggleBot is the only<br />
one to get a 10/10. It just gets so much right<br />
across the board. Here’s why.<br />
The Dexter Gigglebot has all the features you could expect<br />
from a robot: NeoPixels, Grippy Wheels, Line Following,<br />
Light Sensing, Pen Holder, Ultrasonic sensor support, Servo<br />
Connections & Pin Breakouts. If you’re looking for a robot<br />
that does it all, the GiggleBot is the one to get. The software<br />
support is also incredible. The GiggleBot has extensions<br />
for all the major micro:bit editors (MakeCode, Python and<br />
EduBlocks). One welcome feature of the GiggleBot is the<br />
fact it comes prebuilt so if you’re buying in bulk for a school,<br />
you don’t need to worry about assembling them all. Dexter<br />
also run a Free Teacher Trial for schools in the USA and<br />
Canada for 45 days where they’ll loan you a GiggleBot to try<br />
before you buy.<br />
Buy a GiggleBot<br />
go.<strong>micromag</strong>.cc/buygiggle<br />
Final Verdict:<br />
Best for Budget<br />
MiniBit
We’ve reviewed a fair few robots over the past six issues of micro:mag, so we thought it would<br />
be good to get some of the kids at the Harris Museum Code Club to rate them.<br />
Inksmith K8<br />
We reviewed the Inksmith K8 only last issue<br />
and gave it a 7/10. This robot is more on the<br />
expensive side, however, it lacks a lot of features<br />
for the money.<br />
Don’t get us wrong, the Inksmith K8 is really well designed<br />
and thought out and the curriculum that goes alongside<br />
it is a welcome addition. Though, it’s really hard for us to<br />
recommend when you can get the Dexter Gigglebot for the<br />
same price. The robot requires quite a bit of assembly and is<br />
quite fiddly in places. However, there are some upsides. The<br />
grippy wheels provide a good grip to the floor, something<br />
we find useful at Code Club due to the uneven wooden<br />
floor. There are also line sensors and an ultrasonic sensor<br />
included however the line sensors are not very secure<br />
in the casing. Two big things are missing with the K8 and<br />
that’s neopixels and a pen holder. This might not be important<br />
for some, but it gives a robot some life and is a feature<br />
that we definitely expect on a robot of this price range. The<br />
Inksmith K8 isn’t bad at all, we’d just not pick it up over the<br />
others.<br />
Buy a K8<br />
go.<strong>micromag</strong>.cc/buyk8<br />
4Tronix BitBot XL<br />
A<br />
familiar robot in a brand new package.<br />
Introducing the 4tronix BitBot XL. An improved<br />
version of the already popular 4Tronix BitBot.<br />
If you’ve looked into micro:bit robots before, you’ll<br />
have seen the 4tronix bitbot. This is an amazing midrange<br />
micro:bit robot that packs a number of features:<br />
12 NeoPixels, Ultrasonic sensor support, Grippy<br />
Wheels, Pen holder, line following and buzzer. The<br />
robot is super easy to control and zips around a robot<br />
course with no problems. The software support for<br />
BitBot XL is good too with extensions for MakeCode<br />
and examples on the 4tronix website for MicroPython.<br />
One thing that sets the BitBot line of robots apart from<br />
the others is its range of community written resources,<br />
this is due to the popularity of the original BitBot.<br />
You won’t be short of examples, tutorials and lesson<br />
plans for the BitBot whether you’re a beginner or pro<br />
programmer.<br />
Buy a BitBot XL<br />
go.<strong>micromag</strong>.cc/bitbot<br />
Ease of use<br />
GiggleBot<br />
Software<br />
GiggleBot<br />
Resources<br />
BitBot XL
:MAKE<br />
Magic 8 Ball<br />
micro:bit Servo<br />
MAGIC 8 BALL<br />
Above:<br />
Image of STL<br />
files<br />
How to 3D print and build your very own BBC micro:bit powered<br />
Magic 8 Ball.<br />
BY Robert Wiltshire<br />
About the Author<br />
Robert works for Software<br />
Cornwall in Education<br />
Outreach for the software<br />
industry. Software<br />
Cornwall connects,<br />
promotes, represents and<br />
supports Cornwall’s digital<br />
tech community.<br />
softwarecornwall.org<br />
32<br />
<strong>micromag</strong>.cc<br />
The Magic 8 Ball is a device that answers<br />
questions you put to it with random<br />
prearranged answers.<br />
This exercise produces much the same thing<br />
except that the answer is indicated by a pointer.<br />
Get Creative<br />
The first stage is to create artwork that will adorn<br />
your creation. This will consist of the base with your<br />
answers and the pointer. Consider what answers you<br />
want your device to give. They may be helpful or not!<br />
It is entirely up to you.<br />
Draw around the rounded base and the arrow onto<br />
some paper. Get creative with how the base looks.<br />
Also, design your pointer too. Cut the designs out,<br />
glue gently onto the servo base and the arrow. Don’t<br />
put the arrow onto the servo just yet.<br />
First Code<br />
These instructions are a simplified version. The full<br />
unabridged text is available online.<br />
Startup the Mu editor with a new tab and enter the<br />
following code. With the servos we have the value for<br />
the middle is 75.<br />
from from microbit microbit import import * *<br />
pin0.set_analog_period(20)<br />
pin0.write_analog(75)<br />
Of these three lines of code, the last is the one<br />
that controls where the servo rotates to. Connect<br />
the micro:bit to the computer and the servo to the
Magic 8 Ball<br />
:MAKE<br />
micro:bit. Pin0 is just because the servo is connected to zero. Run<br />
the code by flashing to the micro:bit using the Flash button. The<br />
servo should rotate and stop. Now place the arrow onto the servo<br />
spindle pointing up and screw into place.<br />
Finding the Limits<br />
Using the code below keep adjusting the values upwards towards<br />
180 and down towards 1 until the arm swings smoothly. Keep<br />
changing the clockwise/anticlockwise values and reflashing the code<br />
until you are happy.<br />
from microbit import import * *<br />
pin0.set_analog_period(20)<br />
clockwise = 30 = 30<br />
anticlockwise = 130 = 130<br />
while while True: True:<br />
pin0.write_analog(clockwise)<br />
pin0.write_analog(clockwise)<br />
sleep(2000)<br />
sleep(2000)<br />
pin0.write_analog(anticlockwise)<br />
pin0.write_analog(anticlockwise)<br />
sleep(2000)<br />
sleep(2000)<br />
Point to the Answers<br />
Once you have found the limits then find the positions of your<br />
artistically placed and drawn answers. Add more variables and adjust<br />
until the arrow can point at the answers.<br />
Use the code below to set your positions up. Label them to match<br />
your answers. Your labels must be a single word such as not_likely or<br />
notLikely.<br />
from microbit microbit import import * *<br />
pin0.set_analog_period(20)<br />
yes yes = 25= 25<br />
never = 58= 58<br />
likely = 93 = 93<br />
no no = 145 = 145<br />
while True: True:<br />
pin0.write_analog(yes)<br />
sleep(2000) sleep(2000)<br />
pin0.write_analog(never)<br />
sleep(2000) sleep(2000)<br />
pin0.write_analog(likely)<br />
sleep(2000) sleep(2000)<br />
pin0.write_analog(no)<br />
sleep(2000) sleep(2000)<br />
Type in this at the chevrons.<br />
>>> outcomes = {“yes”:25, “never”:58, “likely”:93, “no”:145}<br />
>>> outcomes = {“yes”:25, “never”:58, “likely”:93, “no”:145}<br />
This is a dictionary with names and corresponding values.<br />
To access the values, code needs to ask for a key and then the value<br />
of that key.<br />
dictionaryName = {“keyName1” : value1, “keyName2” : value2}<br />
A specific value for a known key can be found by asking for it. But<br />
this presumes the name is already known and therefore is not a<br />
random choice.<br />
>>>outcomes[“yes”]<br />
outcomes[“yes”]<br />
>>>25<br />
25<br />
This extracts just the values as a list.<br />
>>>list(outcomes.values())<br />
>>>[25, 58, 93, 58, 145] 93, 145]<br />
The following lines import the random ability into Python and then<br />
makes a random choice from the list of outcomes values.<br />
>>>import random random<br />
>>>random.choice(list(outcomes.values()))<br />
>>>25<br />
The Full Code<br />
The final part is to get an answer when a button is pressed. So if<br />
button A is pressed only then look up a random value and point the<br />
servo using that value.<br />
from from microbit microbit import import * *<br />
import random<br />
pin0.set_analog_period(20)<br />
pin0.set_analog_period(20)<br />
outcomes = {“yes”:23, “never”:58, “likely”:93, “no”:140}<br />
outcomes = {“yes”:23, “never”:58, “likely”:93, “no”:140}<br />
while True:<br />
while if button_a.is_pressed():<br />
True:<br />
answer if button_a.is_pressed():<br />
= random.choice(list(outcomes.values()))<br />
pin0.write_analog(answer)<br />
answer = random.choice(list(outcomes.values()))<br />
sleep(200)<br />
pin0.write_analog(answer)<br />
sleep(200)<br />
Obtaining the Random Choice<br />
Our code has four answers and four corresponding servo values. The<br />
task now is to randomly select one answer.<br />
To demonstrate this random ability switch to the Read, Evaluate,<br />
Print, Loop mode on Mu, by clicking the REPL button.<br />
<strong>micromag</strong>.cc 33
:MAKE<br />
Virtual Pet<br />
Create a<br />
VIRTUAL PET<br />
Above:<br />
Virtual pet mobile<br />
games have been popular<br />
for many years.<br />
Use the Tynker iPad & android app to create your own virtual pet<br />
with the BBC micro:bit<br />
BY The Tynker Team<br />
About the Author<br />
Tynker is an online<br />
coding platform used<br />
by over 60 million kids<br />
across 150 countries.<br />
Tynker’s self-guided<br />
courses enable<br />
students to learn at<br />
their own pace<br />
tynker.com<br />
In this tutorial, we’ll create a Virtual Pet using<br />
Tynker and your micro:bit. This simple, crowdpleasing<br />
project will have kids create an onscreen<br />
animal that responds to the micro:bit’s<br />
buttons. Even better, it’s easy for kids to expand on<br />
the project and explore their own creativity.<br />
Tynker Workshop (tynker.com) has recently<br />
added micro:bit support to their popular online blockbased<br />
coding platform. It’s a great simplified coding<br />
environment for micro:bit, especially as it allows for<br />
wireless Bluetooth deployment.<br />
You can follow along at gotyn.kr/virtualpet or<br />
open a blank micro:bit Tynker project at<br />
gotyn.kr/microbitprojects<br />
Programs for the micro:bit<br />
First, let’s write some code for the micro:bit itself.<br />
With these, the micro:bit will change its LED display<br />
whenever the buttons are pressed. You’ll find the<br />
micro:bit blocks in the Hardware section of Tynker’s<br />
coding palette.<br />
34<br />
<strong>micromag</strong>.cc
Virtual Pet<br />
:MAKE<br />
Above:<br />
Virtual pet<br />
mobile games<br />
have been<br />
popular for<br />
many years.<br />
Now let’s get the code onto your micro:bit. To set up your micro:bit<br />
for wireless interaction with Tynker, click the SET UP MY MICROBIT<br />
button above the Stage. Follow the on-screen instructions. Once<br />
that’s complete, click the big orange run button to deploy this<br />
project to the micro:bit.<br />
Take a nap<br />
Then let’s program our Virtual Pet to respond to button A. We’ll<br />
have our Virtual Pet change costumes and play a sound.<br />
Then try interacting with your new pet. Both the micro:bit display<br />
and the on-screen pet should respond to the micro:bit’s buttons.<br />
What other commands could you add to your pet? What about using<br />
variables to keep track of how hungry your pet is?<br />
This virtual pet project is a fun and simple way to get kids to see the<br />
possibilities of physical computing!<br />
Get the Tynker app!<br />
You can download the Tynker app for free on your iPad or Android<br />
device using the links below!<br />
Eat Food<br />
We’ll program button B to make our pet chow down!<br />
go.<strong>micromag</strong>.cc/tynkerapple<br />
Stand Up<br />
We’ll program button A+B to make our pet stand back up.<br />
go.<strong>micromag</strong>.cc/tynkerandroid<br />
<strong>micromag</strong>.cc 35
:MAKE<br />
Functions<br />
LEARNING FUNCTIONS WITH<br />
STAR WARS<br />
BY Meridith Ebbs<br />
Learn how to cut your code down by using Functions<br />
in MakeCode<br />
About the Author<br />
Educational Engineer |<br />
Apple Teacher | Makey<br />
Makey Ambassador |<br />
Digital Technologies<br />
| NSW CSER Project<br />
Officer<br />
@imerinet<br />
The Microbit can be used to create<br />
music. I recently watched the<br />
MicroMonsters YouTube video.<br />
The video is easy to follow and<br />
the purpose of the video is to learn to use<br />
a Piezo speaker. So of course I composed<br />
the code but I found the code very long<br />
and complex. Then I wondered how can<br />
you simplify the code to make it shorter<br />
and easier to manage.<br />
Definition<br />
Functions are a way to store information<br />
that can called at anytime during the<br />
program. Functions remove the need to<br />
type the same code over and over and allow<br />
you to reuse repetitive pieces of code.<br />
This reduces the number of lines of code<br />
and errors.<br />
Example<br />
For example, the tune of Star Wars has<br />
several parts that are repeated throughout<br />
the song. By creating a Function for each<br />
repeating part it is possible to use the function<br />
multiple times. This creates simpler<br />
code.<br />
The first phrase of Star Wars can be rewritten<br />
as SWIntro. It contains the opening<br />
phrase of Star Wars Da Da Da Dum Da “G,<br />
G, G, C, G”. Instead of writing these 5 notes<br />
every time they can be replaced with the<br />
Function SWIntro.<br />
36<br />
<strong>micromag</strong>.cc
Functions<br />
:MAKE<br />
Once you have created each function you can then<br />
use them to replace the series of notes in the program.<br />
Rather than have a big long block of code we now have<br />
a series of single blocks that call the sequence of notes<br />
as required. To make the code play longer it is put inside<br />
a repeat block and repeated 3 times.<br />
The next phrase of music in the picture to the right<br />
“F, E, D, C, G” is also repeated. This was made into a<br />
Function SW2ndPhrase. The phrase is used each time<br />
you want to call that series of notes.<br />
Because the music goes for a long time it is important<br />
to be able to stop the music. To do this you can<br />
add another event called On Button B pressed. When<br />
you press Button B we want to reset the code to start.<br />
This will turn off the music and replace it with a cleared<br />
screen.<br />
In the original video they used a control block to<br />
trigger the Star Wars introduction text to play in the<br />
background while the music is playing. The way the<br />
code was written in the video the text starts playing<br />
immediately. I wanted the text to scroll when Button A<br />
was pressed and not before.<br />
The 3rd series of notes in the Star Wars these is “F,<br />
E, F, D” This series of notes is replaced with SW3rd-<br />
Phrase.<br />
In the control menu there is a block “on the event<br />
Microbit_ID_Button_A” with an option to choose a<br />
value - for this code “Microbit_Button_Evt_Up” was<br />
selected, this means when the A button is lifted up after<br />
being pressed execute the series of blocks inside this<br />
event. For this program when Button A is pressed and<br />
lifted up it will trigger the show string block.<br />
Put all the code together download the code to<br />
your micro:bit and it will play the Star Wars theme.<br />
Button A will trigger the theme to play 3 times. When<br />
Button A lifts up after being depressed it will also trigger<br />
the Star Wars text to scroll. Button B will reset the<br />
program or stop the music.<br />
<strong>micromag</strong>.cc 37
Reviews<br />
:VIEW 32<br />
:VIEW text32<br />
Add a super cool LCD display to your micro:bit with the :view<br />
text32 LCD display from Kitronik . By Kerry Kidd<br />
AVAILABLE FROM<br />
Kitronik<br />
kitronik.co.uk/5650<br />
What’s Included?<br />
- :VIEW text32 LCD<br />
Price<br />
$24.60 USD<br />
€22.27 EUR<br />
£19.20 GBP<br />
Approx<br />
The :VIEW is a cool text<br />
display add on for the<br />
micro:bit! It allows you to<br />
display 2 lines of text at<br />
16 characters per line.<br />
:VIEW would be great to make a<br />
name badge for conferences where<br />
you would want your name, company<br />
name and maybe even a Twitter<br />
handle. This is a lot of information<br />
to try and display on the 5 x 5 LED<br />
matrix of the micro:bit but perfect to<br />
use the :VIEW text32 addon for.<br />
It is very easy to get up and<br />
running with the :VIEW all you need<br />
it 3 AAA batteries which powers the<br />
:VIEW and the micro:bit. There is a<br />
MakeCode extension for the :VIEW<br />
which helps you to get the :VIEW up<br />
and running quickly. We were able to<br />
get the text displaying on the :VIEW<br />
within a couple of minutes playing<br />
with it.<br />
The :VIEW has another cool<br />
feature where it can be attached to<br />
another micro:bit add-on to add<br />
even more functionality to your<br />
micro:bit!<br />
The board is reasonably priced<br />
at around £20 for what it can do and<br />
there are not really any other options<br />
on the market for an all in one LCD<br />
add-on board for the micro:bit.<br />
The board features a super<br />
handy backlight for illuminating the<br />
back of the LCD display so that you<br />
can view it in low light or dark conditions.<br />
This can be toggled on via the<br />
MakeCode library.<br />
If you’d like to go a bit further<br />
than MakeCode, Kitronik also provide<br />
a really simple and easy to use<br />
Python library that is even more easier<br />
to use now thanks to the recent<br />
MicroPython editor update! (Read<br />
about it on pages 6 & 7)<br />
Overall this is a great product<br />
and a great way to display text messages<br />
using your micro:bit, Whether<br />
this, be a name badge or added onto<br />
another micro:bit add-on board to<br />
display the output from it.<br />
OUR RATING<br />
10/10<br />
Below:<br />
The :VIEW text32<br />
displaying text<br />
with a backlight<br />
Similar<br />
Products<br />
Two other products<br />
to consider...<br />
01 Elecrow<br />
LCD1602<br />
This product is much<br />
cheaper at only<br />
$5.50 but has slow<br />
delivery from china<br />
and no MakeCode<br />
library.<br />
02 Waveshare<br />
Screen<br />
This 1.8 inch colour<br />
LCD from Waveshare<br />
is an intresting<br />
add-on board which<br />
allows you to display<br />
images in colour!<br />
38<br />
<strong>micromag</strong>.cc
:ZIP Halo<br />
Reviews<br />
:ZIP Halo<br />
The “Halo” shaped 24 neopixel add-on board for the micro:bit<br />
from Kitronik. By Kerry Kidd<br />
AVAILABLE FROM<br />
Kitronik<br />
kitronik.co.uk/5625<br />
What’s Included?<br />
- :ZIP Halo board<br />
Price<br />
$17.69 USD<br />
€16.01 EUR<br />
£13.80 GBP<br />
Approx<br />
ZIP:Halo is a ring of 24<br />
individually addressable<br />
neopixels that connect<br />
with screws to the bottom<br />
of the edge connector of the<br />
micro:bit.<br />
To get up and running with the<br />
:ZIP Halo you require a screwdriver<br />
to connect it to the micro:bit using<br />
the 5 screws included. :ZIP Halo can<br />
be programmed through the Make-<br />
Code or Python Editors.<br />
The :ZIP Halo is a simple way<br />
to add a ring of Neopixels to your<br />
micro:bit projects never the less we<br />
had great fun reviewing the :ZIP Halo<br />
by adding some colour to a compass<br />
and spirit level. Using the lesson<br />
plans from Kitronik’s website.<br />
The lesson plans are very well<br />
written and great for a beginner to<br />
pick up and learn how to program<br />
the micro:bit using the :ZIP Halo.<br />
The :ZIP Halo is part of a wider<br />
range of neopixel products from<br />
Kitronik and these products include<br />
a very nicely laid out getting started<br />
guide which shows you what you<br />
need to do to get up and running<br />
this the :ZIP Halo.<br />
We did feel however that this<br />
product is slightly overpriced for<br />
what it is at £13.80 as many other<br />
micro:bit neopixel products are<br />
slightly cheaper.<br />
There’s also some connections<br />
on the bottom of the board which<br />
allows you to connect more :ZIP<br />
LEDs which are sold by Kitronik.<br />
The :ZIP halo needs to be powered<br />
externally as the micro:bit can<br />
only handle up to 8 LEDs on it’s own.<br />
This is slightly inconvienient but we<br />
can’t complain as the board simply<br />
wouldn’t work without it.<br />
Overall this is a well-designed<br />
piece of kit and easy to put together<br />
We had a lot of fun programming it.<br />
OUR RATING<br />
8/10<br />
Below:<br />
The LEDs on the<br />
:ZIP Halo are very<br />
bright!<br />
Similar<br />
Products<br />
Two other products<br />
to consider...<br />
01<br />
micro:pixel<br />
Quite similar to the<br />
unicorn pHat for the<br />
Raspberry Pi. The<br />
proto:pic micro:pixel<br />
is another neopixel<br />
add on.<br />
02 KEYES<br />
LED Matrix<br />
Similar to the<br />
micro:pixel. This is<br />
another option for<br />
a neopixel add-on<br />
board.<br />
<strong>micromag</strong>,cc 39
Reviews<br />
Tobbie II<br />
Tobbie II<br />
A unique micro:bit powered humanoid robot from the makers<br />
of Snap Circuits, Elenco. By Joshua Lowe<br />
AVAILABLE FROM<br />
Elenco<br />
go.<strong>micromag</strong>.cc/<br />
tobbie<br />
What’s Included?<br />
- Tobbie II Kit<br />
Price<br />
$84.95 USD<br />
€76.88 EUR<br />
£66.27 GBP<br />
Approx<br />
Here at micro:mag,<br />
we review a LOT of<br />
micro:bit robots. It’s<br />
not hard to go wrong<br />
when buying a micro:bit robot<br />
(sure, some are better than others)<br />
but most of the time you’ll get<br />
two wheels, a distance sensor and<br />
some LEDs. However, that trend<br />
ends with the Tobbie II, a micro:bit<br />
powered, humanoid robot that<br />
caught our attention when it did<br />
the rounds on Twitter the other<br />
month. We just knew we had to<br />
get one to review for this issue to<br />
see what it was all about. Did it live<br />
up to our expectation? Well, you’ll<br />
have to read on.<br />
The Tobbie II for the micro:bit is certainly<br />
unique. It’s not got two wheels<br />
but instead, it has six legs of which it<br />
can use to walk. Pretty cool right?<br />
The robot comes as a kit which took<br />
us around two hours to build. The<br />
parts are plastic and they all come in<br />
a grid of which you can snap off the<br />
individual parts. The kit takes around<br />
two hours to build and isn’t easy in<br />
places so we’d recommend getting<br />
some help from an adult if you’re<br />
stuck.<br />
Tobbie II’s head houses the micro:bit.<br />
There’s a PCB with an edge connector<br />
that the micro:bit slots into<br />
and a plastic flap that covers the<br />
micro:bit up. There are two sensors<br />
on the front that can detect objects<br />
and two buttons that connect to the<br />
buttons on the micro:bit so you can<br />
access them with the flap closed. We<br />
like the overall design of the Tobbie<br />
II and it’s certainly something different.<br />
It’s eye-catching and caught the<br />
attention of many attendees visiting<br />
the micro:mag stand at micro:bit<br />
Live last month. The Tobbie II is<br />
easily programmed via a Makecode<br />
library but unfortunately, there is no<br />
official Python support.<br />
However, Tobbie II isn’t all that<br />
great. It’s got poor build quality,<br />
it’s overpriced and just doesn’t feel<br />
that premium. Within five minutes<br />
of testing both the robots, we got<br />
sent with the kids at Code Club, the<br />
legs of the Tobbie II broke apart and<br />
had to be reconnected to the slots<br />
at the bottom of the casing. Whilst<br />
we appreciate this product, we wish<br />
it had better build quality and was<br />
significantly cheaper. These issues<br />
make it hard to recommend, but it’s<br />
certainly worth buying if you’re looking<br />
for something different and have<br />
the money to spare.<br />
OUR RATING<br />
6/10<br />
Below:<br />
Tobbie’s Legs are<br />
omnidirectional!<br />
Similar<br />
Products<br />
It’s unique, but here<br />
are two other robots...<br />
01 4tronix<br />
mini:bit<br />
This super cheap<br />
budget robot has<br />
most of the features<br />
you need to get<br />
started with robotics<br />
& the micro:bit.<br />
02 Dexter<br />
GiggleBot<br />
We gave this robot<br />
a 10/10, we love the<br />
fact that it supports<br />
basically every<br />
micro:bit editor out<br />
there.<br />
40<br />
<strong>micromag</strong>.cc
New Accessories<br />
SHOWCASE<br />
We take a look at some of the brand new micro:bit accessories<br />
that have just hit the shelves!<br />
Kitronik MI:power board<br />
The MI:sound board is a speaker board for the BBC microbit.<br />
It features on-board; speaker, CR2032 battery holder, thumb<br />
wheel volume control and an easy access on/off switch. The<br />
MI:sound board can either be powered by the CR2032 battery<br />
(provided) or via the micro:bit USB or JST connections.<br />
Price: £6 Buy: kitronik.co.uk/5649<br />
Inksmith Climate Action Kit<br />
With the Climate Action Kit, you can monitor the climate around<br />
you with the different sensors and periferals in the kit. In the kit<br />
you will find the following: a Breakout Board, Alligator Clips,<br />
DC Water Pump, DC Motor & Fan, Moisture Sensor, 360 Servo<br />
Motor, Infrared Sensor, Tube & Connectors and some pH strips.<br />
Price: £35 Buy: go.<strong>micromag</strong>.cc/cak<br />
Air:bit micro:bit Drone<br />
Air:Bit combines the micro:bits ease of use with the excitement<br />
of a drone. It is the world’s first ever developed micro:bit dronet<br />
is a STEAM learning kit, which will engange students with a<br />
more practical and creative way of learning. It is fully repairable<br />
and withstands a lot of crashes. The best of all - it is affordable<br />
compared to other drones.<br />
Price: £37 Buy: makekit.no/airbit<br />
<strong>micromag</strong>,cc 41
YOUR PRODUCT/AD HERE<br />
ADVERTISE<br />
IN THE NEXT<br />
ISSUE OF<br />
MICRO:MAG<br />
Grab the attention of thousands of micro:bit<br />
community members by Advertising.<br />
42<br />
We’ve got reasonable rates available for full and half page<br />
advertisements.<br />
<strong>micromag</strong>.cc<br />
GET IN TOUCH WITH OUR<br />
TEAM FOR MORE INFO AT:<br />
hello@<strong>micromag</strong>.cc
DONATE TO MICRO:MAG<br />
HELP US<br />
COVER THE<br />
COSTS OF<br />
MICRO:MAG<br />
We are run by a team of passionate community<br />
volunteers, but we still need help covering costs.<br />
DONATE TO MICRO:MAG<br />
VIA PAYPAL:<br />
<strong>micromag</strong>.cc/donate<br />
Previous donations have helped us get a designer to design<br />
the new layout, cover domain costs and much more!<br />
<strong>micromag</strong>,cc 43
<strong>micromag</strong>.cc