Style Magazine April 2020
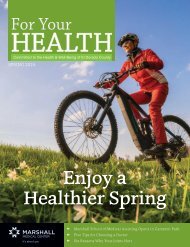
This month’s magazine focuses on myriad ways to soak up the springtime sunshine. Freelance writer, photographer, and former wilderness guide, Ryan Martinez, takes us through some of his favorite alfresco activities—mountain biking, backpacking, bouldering, etc.—in our cover story, “Your (Local) Guide to the Great Outdoors” (page 43), with some top spots to try each adventure, “know before you go” tips, must-have apps, and more. After perusing the incredible pictures and reading his recommendations, I definitely feel inspired and more prepared to explore more.
This month’s magazine focuses on myriad ways to soak up the springtime sunshine. Freelance writer, photographer, and former wilderness guide, Ryan Martinez, takes us through some of his favorite alfresco activities—mountain biking, backpacking, bouldering, etc.—in our cover story, “Your (Local) Guide to the Great Outdoors” (page 43), with some top spots to try each adventure, “know before you go” tips, must-have apps, and more. After perusing the incredible pictures and reading his recommendations, I definitely feel inspired and more prepared to explore more.
- No tags were found...

You also want an ePaper? Increase the reach of your titles
YUMPU automatically turns print PDFs into web optimized ePapers that Google loves.
FIRST AID<br />
Blisters: Prevention is key. Place<br />
moleskin on any “hot spot” before<br />
the blister forms, and feel that ohso-sweet<br />
relief prior to feeling the<br />
pain! In a bind? Use athletic tape,<br />
Band-Aids, or even a piece of duct<br />
tape because, well…duct tape fixes<br />
everything.<br />
Rattlesnake Bites: We know they’reout<br />
there, and there are a lot of myths<br />
as to what to do. Sorry Billy Crystal,<br />
the old “cut and suck” method is<br />
a no go. According to the National<br />
Outdoor Leadership School (NOLS),<br />
this is what to do:<br />
1. Check the Scene. Don’t create<br />
more victims by getting all riled up.<br />
Look around and make sure it’s safe<br />
to stop to administer first-aid.<br />
2. Stay Calm. Sometimes a rattlesnake<br />
bite is “dry” and may not<br />
mean envenomation. At least remind<br />
yourself of that to help calm you<br />
down, because the calmer you are<br />
the lower your heart rate will be,<br />
meaning you will slow down the flow<br />
of the venom.<br />
3. Immobilize the limb. Avoid compressing<br />
or restricting blood flow.<br />
The old Boy Scout tourniquet is a big<br />
no! Remove any jewelry or restrictive<br />
clothing to allow maximum blood<br />
flow and keep the limb immobile, if<br />
possible.<br />
4. Get to a hospital. If you need to<br />
hike out, do so calmly. Remember:<br />
Keep that heart rate low. Don’t get<br />
hasty and add a twisted ankle to the<br />
dilemma.<br />
5. Document the progression of<br />
symptoms. The clearer you are about<br />
the succession of events, the better<br />
your physician will be able to provide<br />
health care.<br />
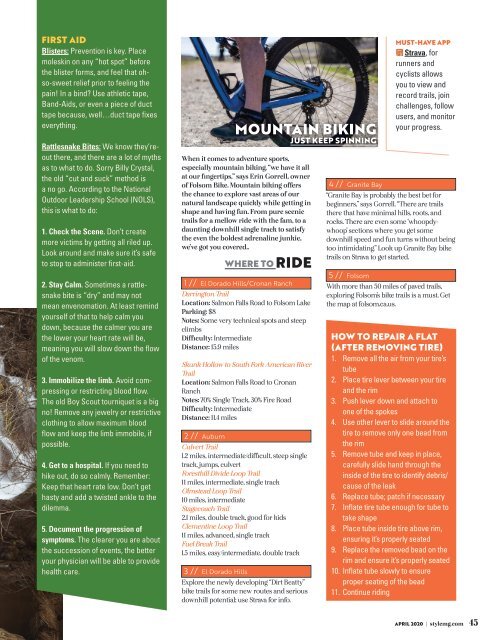
MOUNTAIN BIKING<br />
JUST KEEP SPINNING<br />
When it comes to adventure sports,<br />
especially mountain biking, “we have it all<br />
at our fingertips,” says Erin Gorrell, owner<br />
of Folsom Bike. Mountain biking offers<br />
the chance to explore vast areas of our<br />
natural landscape quickly while getting in<br />
shape and having fun. From pure scenic<br />
trails for a mellow ride with the fam, to a<br />
daunting downhill single track to satisfy<br />
the even the boldest adrenaline junkie,<br />
we’ve got you covered..<br />
WHERE TO RIDE<br />
1 // El Dorado Hills/Cronan Ranch<br />
Darrington Trail<br />
Location: Salmon Falls Road to Folsom Lake<br />
Parking: $8<br />
Notes: Some very technical spots and steep<br />
climbs<br />
Difficulty: Intermediate<br />
Distance: 15.9 miles<br />
Skunk Hollow to South Fork American River<br />
Trail<br />
Location: Salmon Falls Road to Cronan<br />
Ranch<br />
Notes: 70% Single Track, 30% Fire Road<br />
Difficulty: Intermediate<br />
Distance: 11.4 miles<br />
2 // Auburn<br />
Culvert Trail<br />
1.2 miles, intermediate/difficult, steep single<br />
track, jumps, culvert<br />
Foresthill Divide Loop Trail<br />
11 miles, intermediate, single track<br />
Olmstead Loop Trail<br />
10 miles, intermediate<br />
Stagecoach Trail<br />
2.1 miles, double track, good for kids<br />
Clementine Loop Trail<br />
11 miles, advanced, single track<br />
Fuel Break Trail<br />
1.5 miles, easy/intermediate, double track<br />
3 // El Dorado Hills<br />
Explore the newly developing “Dirt Beatty”<br />
bike trails for some new routes and serious<br />
downhill potential; use Strava for info.<br />
MUST-HAVE APP<br />
Strava, for<br />
runners and<br />
cyclists allows<br />
you to view and<br />
record trails, join<br />
challenges, follow<br />
users, and monitor<br />
your progress.<br />
4 // Granite Bay<br />
“Granite Bay is probably the best bet for<br />
beginners,” says Gorrell. “There are trails<br />
there that have minimal hills, roots, and<br />
rocks. There are even some ‘whoopdywhoop’<br />
sections where you get some<br />
downhill speed and fun turns without being<br />
too intimidating.” Look up Granite Bay bike<br />
trails on Strava to get started.<br />
5 // Folsom<br />
With more than 50 miles of paved trails,<br />
exploring Folsom’s bike trails is a must. Get<br />
the map at folsom.ca.us.<br />
HOW TO REPAIR A FLAT<br />
(AFTER REMOVING TIRE)<br />
1. Remove all the air from your tire’s<br />
tube<br />
2. Place tire lever between your tire<br />
and the rim<br />
3. Push lever down and attach to<br />
one of the spokes<br />
4. Use other lever to slide around the<br />
tire to remove only one bead from<br />
the rim<br />
5. Remove tube and keep in place,<br />
carefully slide hand through the<br />
inside of the tire to identify debris/<br />
cause of the leak<br />
6. Replace tube; patch if necessary<br />
7. Inflate tire tube enough for tube to<br />
take shape<br />
8. Place tube inside tire above rim,<br />
ensuring it’s properly seated<br />
9. Replace the removed bead on the<br />
rim and ensure it’s properly seated<br />
10. Inflate tube slowly to ensure<br />
proper seating of the bead<br />
11. Continue riding<br />
APRIL <strong>2020</strong> | stylemg.com 45