STEP U1 Handbook EN
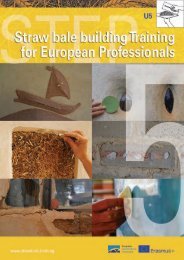
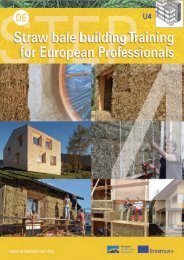
Straw Bale Building Training for European Professionals
Straw Bale Building Training for European Professionals
You also want an ePaper? Increase the reach of your titles
YUMPU automatically turns print PDFs into web optimized ePapers that Google loves.
1
2
U1 – INTRODUCTION
INDEX
U1
TIME
PAGE
U1 Learning Outcomes 5
U1 Session 1 : General Introduction 4 hr 6
Info-Presentation 1 : History of Straw Bale Buildings 7
Info-Presentation 2: Modern Straw Bale Buildings &Trends 8
U1 Session 2: StrawTalk 1 day 1 0
Info 1 : Straw and Bale Properties 11
Tips: Straw Bales – Quality 001 -1 2, Density 002-1 3, Measurements 003-1 4,
Expansion 004-1 5 1 2
Info 2: Storage 1 6
Info 3: Straw Bale Production 1 7
Info 4: Safety on the Building Site 1 8
Tips: Safety – Ladders & Scaffolding 005-20, Slipping 006-21 , 20
Fire Hazard 007-22, Carelessness 008-23, Protruding Tips (Pikes) 009-24,
Cables and Accus 01 0-25
U1 Session 3: Testing and Customizing Straw Bales 1 day 27
Info 1 : Handling and Adjustment of Straw Bales 28
Tip: Carry Straw Bales and save Energy 011 -29 29
Info 2: Cords and Knots 30
Tips: Tools – Belts 01 2-31 , Hammers 01 3-32, Cutting 01 4-33, Saws 01 5-34, 31
Knives 01 6-35, Hedge Saw 01 7-36, Motor Saw 01 8-37, Persuader 01 9-38,
Rakes and Bigbags 020-39, Bale Needles 021 -40, OtherTools 022-41 ,
Infill Aids (Boards) 023-42 and How to Handle them 024-43, DIY-Stuffer 025-44,
Preparing Straw Bale Walls for Plastering – Surface Shaving / Smoothing 026-45,
Stuffing Holes 027-46, Filling Gaps and Cavities 028-47
Credits and Impress 48
3
4
U1 – INTRODUCTION
LEARNING OUTCOME
U1
Level 3 (ECVET credit points: 1 5) / Level 4 (10)
Knowledge
Skills
Trainees know …
• various types of straw and their usability
• history of straw bale building
• the properties of a good construction bale
(moisture,
• direction and length of fibres, dimensions,
density, amount of weeds, type of twine)
• about the production techniques of straw
bales
• the health and safety regulations related to
straw (fire hazard, dust, slipping)
• recommendations for the farmer in the
production of good quality and good bales
• how to handle, divide, shape and store straw
bales
• appropriate tools for straw bale building
(measuring, shaping, compressing and
handling)
• the appropriate ways of shortening straw
bales
• reutilisation of remaining waste material
Trainees can …
• define the quality and properties of building
bales (dimensions, humidity, weight, density)
• define the amount of weed and the direction
of the fibres
• plan and supply of materials
• adjust the shape of the bale and cut them
accurately to size
• divide and compress the bales
• use the tools for handling and transforming
straw bales according to security rules
• keep the bales dry and well ventilated during
storage and transport
Competence
Trainees can …
• organise appropriate bales and skilfully work with bales (transport, storage, handling)
• estimate the risks connected to the use of straw and knows how to avoid these risks
• communicate with the other players on the straw bale building site about necessary safety measures
• work in teams
5
U1 – INTRODUCTION
SESSION PLAN S1
U1
Session Plan U1-S1 : General Introduction
Objectives:
Good start of training: It’s important that the trainees feel
comfortable. The trainer has to create a good atmosphere.
Introduction of participants.
The advantages of straw bales in sustainable building
Communicate with the other players
Work in team
Methods:
- Energizer to know each other better (game)
- Lecture/Talk
- Practice
- Power point
Trainer:
Place:
Classroom
Workshop
Duration:
Min. 2 hours
Equipment:
Projektor
Flip chart
50 Straw Bales
Anything else you need for
games
Theory
Practice
History of straw bale building
Examples of professional straw building
First contact with straw bales (free style)
Documents:
Trainer Sheet:
Tr1 Games
Tr2 Sheet Trainee
Tr3Training programme
Tr4 Free style
Tr5Why Straw?
Text sheet:
Tx1 Ecological Advantages
Powerpoint:
Ppt1 : History of Straw Bale
Buildings
Ppt2: New Buildings
Evaluation:
Multiple Choice
Organisation:
One month before order 50 bales
6
U1 – INTRODUCTION SESSION PLAN S1 – INFO-PRESENTATION 1
History of Straw Bale Building
U1
7
U1 – INTRODUCTION SESSION PLAN S1 – INFO-PRESENTATION 2
Modern Straw Bale Buildings & Trends
U1
8
9
U1 – INTRODUCTION
SESSION PLAN S2
U1
Session Plan U1-S2: Straw Talk
Objectives:
Know various types of straw and how it differs from hay
The properties of a good construction bale (moisture, direction of
fibres, dimensions, density, content of cereal, type of string,
shape)
About the production techniques of straw bales
The health and safety regulations (fire hazard, dust, slipping)
Recommendations for the farmer in the production of good quality
and good bales
Keep the bales dry and well ventilated during storage
Health / allergy
Methods:
Lecture / talk
Practice
Power point
Trainer:
Place:
Class
Duration:
Min. 2 hours
Equipment:
Projector
Flip chart
Straw bales in different
conditions
Different grains
Simulated working place
Theory
Practice
Quality control (e.g. impurity: other plants or stones inside?)
Handling the bales preserving the good shape
Properties in different directions
Insulation value / vapour resistance
Requirements for good building straw bales
Baling machines
Maintenance of machine / different kinds of harvesting and bailing
machines / good use of regulation of machine / different twines
Before the straw talk:
talks about different types of cereal (length, colour, strength, see
the wax protecting the straw, discover that the stalks are empty,
etc.)
Prepare two bales, one ideal construction bale, another in bad
condition (increasing the bad conditions). The trainees discuss and
discover the differences before the straw talk.
Documents:
Info sheet:
i1 straw (bale) properties
i2 storage
i3 straw bale production /
baling machines
i4 health & safety
Text sheet:
Tx1 manual baling machine
Tx2 the best bale (ASBN)
Tx3 list of humidity measure
Powerpoint:
Ppt1 : the best bale
Evaluation:
Multiple choice
Organisation:
Prepare classroom. Have different types grains talks. Two bales, prepare one in a bad condition (bad
shape, high humidity, bad colour, low density, strings removed, with cereal, with herbs, short straw,
etc.) and another ideal bale.
10
U1 – INTRODUCTION SESSION PLAN S2 – INFO 1
Properties of Straw and Bales
U1
11
U1 – INTRODUCTION
TIPS S2 STRAW BALE – QUALITY
U1
001
To check the Quality
of Straw Bales
If you want to use your own bales locally and you do not want to use certified bales
(specified as a building material, ETA), you have to check the quality of the bales and
therefore the suitability as building bales. The ideal bale is 1 ) yellow (and not gray,
brown or black), 2) form stable (similar to a cuboid rather than a ball), 3) dry (content
of moisture not over 1 4%, if a bale is yellow, it has never been in contact with moist
for long periods), 4) from hard cereal cultivars (winter or summer wheat, rye or
spelt), 5). free from green grains (less than 2% by weight), 6) sufficiently dense (85-
1 20 kg / m3, which gives a weight between 1 2 and 1 7 kg for a standard small bale
(80 x 47 x 36)). If the material is from organic cereals or conventional cultivation is
far less relevant in comparison with the residual content of pollutants (pesticides) in
the constructional bales, as e.g. from stalk shorteners (in rainy areas almost already
standard). Biologically cultivated grain often has the disadvantage that the amount
of greens is higher. And with moisture (imagine the moisture-content of the plaster
on the straw), the weed acts as a catalyst for mold grow.
1 2
U1 – INTRODUCTION
TIPS S2 STRAW BALE – DENSITY
U2
002
To check the Density
of Straw Bales
In order to determine the density of the bales, and thus their suitability as building
bales, the weight can of course be measured (hanging scale, put on bathroom scale
with and without bales...). We know from tests that the bale's best insulation values
are between 90 and 1 40 kg / m3. Below and above, it decreases slightly (too much air
in the bale means convection, too little air means less insulation, because the stationary
air between the stems provides the good insulation value). Now you can
calculate: approx. 7.5 bales fit in 1 m3, the measured weight x 7.5 = the specific
density (kg / m3). It is easier and quicker to try to press the two cords together. If this
is easy the bale is badly compressed, if it is hard, the bale has its ideal weight and if
it doesn't go at all ... usually it is not possible to bale higher densities with the small
standard baling machines.
Higher densities are not necessary, when we have to cover/plank (boards) the straw
bale wall on both sides. For this kind of construction, lighter bales (85-90 kg / m3) are
more suitable, as it is easier to work with it. But it is important to have an
appropriate density of min. 1 00 kg / m3 (with 36 x 47 x 80 cm bales, ie 1 3.5 kg / bale),
when the wall is directly plastered.
1 3
U1 – INTRODUCTION
TIPS S2 STRAW BALE – MEASURING
U2
003
Measuring Straw Bales
It sounds simple, but often leads to confusion or at least to communication
difficulties. How long is a bale really? Where do you measure exactly? Because of
rounded edges or bulged side surfaces, one person comes to 87 and the next to 80
cm. And why is it so important at all? Well, in the ideal case (if we have a wall
without windows and doors), we assemble the posts naturally in a distance according
to the length of the bales. Since the lengths vary slightly, we take the measurement
from the longer bales and fill too short bales with flakes (01 6). The easiest and
most reliable method of measurement is to flatten the sides of the bales. If the bales
are now semi-rectangular, we hold 2 boards or plates on the side of the bale and
measure the distance between them. If measuring this way, a 87 cm long bale will fit
between a 85 cm post spacing. The measure of the thickness is usually 36 cm (but
also worth checking). We have already had to extend roof rafters of 35 cm, because
the roof plate could not be mounted on the protruding bales. And the width is in
most cases 47 cm (and not 50, as often published). Again, it helps to measure
between two boards. We can at least be sure that the thickness and width once
measured in a charge is the same for all other bales (if it comes from the same baling
machine). And one more thing: the boards must of course be kept parallel for
exact dimensions.
1 4
U1 – INTRODUCTION
TIPS S2 STRAW BALE – EXPANSION
U2
004
Straw Bales expand only
in press-direction (of bale canal)
Straw bales always (and only) expand in the longitudinal direction, ie, in the
direction in which they have been compressed in the bale channel to so-called (8-1 4
cm thick) "flakes" (layers). These pressure-forces in the bale should be used: if you
cut the cords after filling them in post and beam constructions, good compressed
bales close the gaps to the construction (and you have less to stuff). That is why we
always cut the strings in wooden p&b constructions. However, the bales will not expand
more than 2-3 cm. For larger cavities, we fill flakes into the spaces (tip 01 6-01 7).
Only in the load bearing straw bale construction the cords remain in the
construction, otherwise the walls would fall apart after removal of the temporary
construction.
1 5
U1 – INTRODUCTION SESSION PLAN S2 – INFO 2
Storage of Straw Bales
U1
1 6
U1 – INTRODUCTION SESSION PLAN S2 – INFO 3
Production of Straw Bales (Baling)
U1
17
U1 – INTRODUCTION UNIT S2 – INFO 4
Health and Safety at the Straw Bale Building Site
U1
Objective:
To observe safe working practices at all times - and to have fun!
Good practices
In general, there are fewer accidents and errors on the site if everyone is happy and well motivated. It is
good practice for the entire team to get to know each other, and how each separate action is part of the final
realization. It is very useful for everybody to meet at the beginning and at the end of each day, to share
thoughts and reflections on the work to be done or the way to do this, and to discuss potential problems.
If we can recognize our interdependence with each other rather than be in competition, which will help to
generate a staff attentive and helpful, or each individual is responsible for his own person, but also takes
into account the well-being of others. This is particularly necessary at a site self-construction or the people
have different levels of knowledge or skill.
Encourage the questions concerning a task or a tool, until everyone feels comfortable and safe in their use.
The construction sites in bales of straw are renowned for their ethics to work together, share the knowledge
and skills, equality for women, the learning enjoyable and fun. And there is no reason that these qualities
cannot be encouraged on all construction sites.
Security on the site
These are the basic guidelines that will help to ensure that no person suffers an accident:
1 8
• Each construction site, even if it is your own home, should have a first aid kit available and everyone
must know where it is!
• Never use defective tools! !
• It is forbidden to smoke anywhere on the site or around the straw stored.
• Make sure that you know where is the nearest water point.
• Always keep the site clean. The scaffolding and working areas must be swept and tidied up each evening.
It is useful to store materials and waste etc in specific locations to maintain the order on the yard.
• Keep a central place for tools so that all those who are not used can be delivered, and can be found in
case of need.
• Never leave the tools lying around. Each person should be responsible for the tools he or she uses,
must know where they are and where to store them when they are not used.
• Unplug all electrical tools when they are not used!
• Don’t let electrical wires become trip hazards on the site!
• Fuel for the chainsaw or the brushcutter must be stored in a locked space far from the straw.
• All scaffoldings must be firmly attached.
• Step ladders and work platforms must always have a solid foundation.
•The helmets should always be worn. Especially so when somebody works above oneself.
• Extra precautions should be taken in the use of heat or open flame. Never use anything like that in the
vicinity of exposed straw.
U1 – INTRODUCTION UNIT S2 – INFO 4
Health and Safety at the Straw Bale Building Site
U1
Tools for the construction with straw bales
The construction in bales of straw requires almost no specialized tools.
As with most things, there are different grades of tools on the market. Generally speaking, it is better to
buy tools of good quality, even if they cost a little more, because the tools of poor quality may be inaccurate
and wear quickly. They will certainly frustrate you and make you feel incompetent. Remember, the
tools are the means by which you are able to do a good job. You will use them for a long period, therefore
take care of it, sharpen it, oil it, whatever is necessary to have it in good shape. They must resist the normal
wear on a building site, therefore need to be robust.
The right tools, if they are properly maintained, can last a lifetime, not only for the time you build your first
home. The right tools make the job easier, faster, and more secure.
Watch the security notice for each tool!
Clothing and safety equipment
When you work with straw, it is advisable to wear a long-sleeved shirt and long pants, because the stalks
of straw can be thorny.
Gloves are also a must, at least for some aspects of the work.
Eye protection, ear protection and dust masks may be necessary for some work.
The helmets must be worn if someone workes above yourself.
Safety shoes are necessary for protecting the feet from falling objects.
Identify the responders qualified on the site, and attach a list of emergency phone numbers.
1 9
U1 – INTRODUCTION
TIPS S2 SAFETY – FALLING
U1
005
Safety on Straw Building Sites:
Falling (from) Ladders
When filling from a stepladder, always place the steps parallel to the wall, otherwise
there is the danger that you will fall over from the ladder when filling with high
pressure. The distance of the ladder to the wall is also important for the pressure and
your power. The more the you use your own weight as pressure, the less efforts and
muscles are required for the filling process. So, try to place the ladder a little further
from the wall, and lean your body in an angle to the wall. Do the same with auxiliary
scaffoldings (scaffoldings with planks) and the façade scaffolding (you will nedd a
space between also for stuffing and plastering). Finally, leaned ladders should be fixed
with a cord or a wire at the upper end, if there is a risk of slipping (especially on
straw) as well as falling danger.
20
U1 – INTRODUCTION
TIPS S2 SAFETY – SLIPPING
U1
006
Safety on Straw Building Sites:
Slipping
Where work is done, chips fall. In our case, it is straw. Summerized - scaffoldings,
floors, ladders and stairways on our construction site are soon covered by a (thin)
layer of loose straw. As romantic as this may be: loose straw is quite slippery
(especially when wet, ie while plastered). Cables disappear under this straw blanket,
as well as tools and, of course, holes (e.g., between provisional planks or boards).
The most important danger, however, is represented by our hardboards for filling
(023). Loose straw in combination with (the slippery) filling aids laid flat on the
ground will let you slip even with the best shoes. The first requirement on a straw
site (also for reasons of fire protection) is therefore cleaning: collect the loose straw
in BigBags. Tools should never be placed on the ground (always collect them centered
on tables - easy available for all employees. Place the cut bales on the narrow
side and lean against a wall so that the layers do not fall apart. And before the shaving,
all the straw is collected again. Because the short straw which is falling from
the walls when shaving is ideal as a fiber reinforcement for our plaster.
21
U1 – INTRODUCTION
TIPS S2 SAFETY – FIRE
U1
007
Safety on Straw Building Sites:
Fire
The handling with open fire on a straw site is, of course, forbidden. This applies both
to smoking and especially to welding and hot-tacking (whether it is gluing roofing
paper or welding rainwater gutters). Here, great caution is necessary, because most
of the fires were caused by the flames or heat of roofing works or improper - non insulated
- chimneys through straw bale walls. Finally, waxed or oil-impregnated
cloths must be kept in sheet metal (danger of self-ignition).
Nevertheless: Well compressed straw bales form a coal layer in the event of fire,
which strongly hinders the propagation of the fire (see fire test below). The problem
is loose straw, which literally burns like tinder ("straw fire").
22
U1 – INTRODUCTION
TIPS S2 SAFETY – CARELESSNESS
U1
008
Safety on Straw Building Sites:
Carelessness
Everyone who works on a straw bale building site should be aware that one can
barely see the ground with one or two straw bales in their hands. The ground on
which we move, - whether it is the loamy excavation pit, a foamed glass fleece
covered with straw (which perhaps is folded), the unfinished floor, 2 laid boards for a
ramp (always the same thickness), a temporarily planked (interleaving) floor or terrace
(no holes, planks fixed with screws) or the scaffolding (well anchored), - should
be blindly accessible without being seriously injured. Often we work with large
weights (wheelbarrow full of clay). We should be at least able to rely on the safe
ground under our feet. Laying planks without temporarily fixing them (nailing,
screwing) is negligent. To remove a scaffolding plank somewhere without an
arrangement, because youI need it somewhere else, is actually a murder attempt. It
is also negligent not to anchor a scaffolding to the wall. And finally, anyone who
runs or jumps on a construction site should get the red card, no matter how fast he /
she wants to finish the work.
23
U1 – INTRODUCTION
TIPS S2 SAFETY – PROTRUDING TIPS
U1
009
Safety on Straw Building Sites:
protruding Tips
Especially when nailing or shooting brackets you will not always hit the wood-construction
behind. The tips of the brackets / nails / screws extending in the insulation
area are difficult to see when filling, so always check and remove or flatten them
before you strat the infill. They are a serious risk of injury. When naileg / screwed
planks are removed, remove the nails / screws immediately (if necessary with the
grinding machine). Even with steel caps on the shoes the kick on a screw tip is
dangerous (and hurts badly). Even building irons (rebars), which extend the
foundations, should always be made more visible with a cup or bottle. Summarized
it can be said that most of the subsequent accidents occur under time pressure /
during busy work. It should be self-evident that we can rely on the correct execution
of the work of our partners and those, who worked before us, that everybody corrects
his/her own mistakes.
24
U1 – INTRODUCTION
TIPS S2 SAFETY – CABLES & ACCUS
U1
010
Safety on Straw Building Sites:
Cables and Accus (Batteries)
The cable-free construction site will remain a dream, despite batteries (accus).
Compressors and many other tools have electric cables. Cable drums and their feeds
usually run crosswise through construction sites and where barriers are piling up
(wooden stacks, straw bales) also cross these piles on top. And even batteries are
charged via chargers with cables. Cables, hidden under the straw on the ground or
on scaffolding, can easily become a tripping trap. If you are in a hurry on a
construction site, you are more exposed to the risk of serious injury. In case of shaving
the bales with hedge saws or cutting with the alligator (electrical saw) you can -
if you are not careful and wear the cable for example over the shoulder - also
slightly cut the cable and cause a short circuit (or ruin the tool).
25
26
U1 – INTRODUCTION
SESSION PLAN S3
U1
Session Plan U1-S3: Customizing Straw Bales
Objectives:
How to handle, divide and shape straw bales
Appropriate tools
The advantages and disadvantages of different types of strings
The appropriate ways of tying straw bales (knots)
Check the quality and usability of straw bales
Methods:
Presentation
Testing and customizing straw bales
Trainer:
Place:
Workshop
Duration:
Min. 3.5 hours
Equipment:
Tools and straw bales
Theory
Practice
Overview about the tools on a typical straw bale building site
Methods of measuring and manipulating straw bales (tools,
machines)
Plan the supply of straw bales
Use the bale in the correct orientation
Measure the bales
Adjust the shape of the bale and square off the ends
Divide and restring the bale
Cut the bale
Calculate the density of bale
Check/measure moisture in the bale
Use tools for handling and transforming bales
Documents:
Trainer sheet:
Tr1 Health/ Safety game
Info sheet:
i1 Control sheet
i2 handle and shape bales
i3 twine and knots
i4 straw bale measuring
Evaluation:
Multiple choice
Organisation:
prepare the work shop (tools, bales, safety recommendations)
27
U1 – INTRODUCTION SESSION PLAN S3 – INFO 1
Shaping Straw Bales
U1
28
U1 – INTRODUCTION
TIPS S3 HANDLING STRAW BALES
U1
011
Carry Straw Bales
and save Energy
Small standard straw bales (36 x 47 x 80-1 00 cm) are usually tied with 2 strings in
the longitudinal direction (formerly sisal, now mostly polyethylene). In order to carry
the straw bales, these cords are of course very suitable. However, always put the
hand around both strings when carrying, so that a cord does not slip from the bale
(which - at least if the bale is not perfectly compressed - causes it to fall apart). Keep
the weight of the bales (approx. 1 2-1 4 kg) as close to the body as possible, it reduces
the force required. Another possibility is to embrace the bales and to carry them
close to the body. This can be a relieve for our fingers, because the cords cut with time
quite nicely into the hands. In addition, you should quickly learn to see the raw
material bales as a valuable material and not as a favorable waste material in grain
harvesting. Watch out for the mountains of loose straw, which can occur if you do
not care about this building material. It is quite elaborate to dispose, even if it can
finally be composted and it is always in the way on a construction site.
29
U1 – INTRODUCTION SESSION PLAN S3 – INFO 2
Cords and Knots
U1
30
U1 – INTRODUCTION
TIPS S3 TOOLS – BELT & BAGS
U1
01 2
Straw Bale-Tools:
The practical Belt
I personally have in my (carpenter-)belt bags (left and right) always my two stuffers
(like colts), for me the most important professional tool in straw bale building, next
to a knife to cut the strings. In the bags I have a few galvanized 6 cm nails, various
screws, a meter measure and a carpenter's pencil. Also gloves which are thin
enough not to prevent the feeling in your fingers, but protect you against the many
small chips from the construction wood. Actually, the bags should have top tabs, as
they are constantly filling with straw. Or I would have to turn the bags to the backside,
but I find that not practical looking for right screws or bits.
31
U1 – INTRODUCTION
TIPS S3 TOOLS – HAMMERING
U1
01 3
Straw Bale-Tools:
Hammering Nails
The Carpenter-Hammer must not be missing. With it, you simply (no, that is actually
a lie) pull out nails. There are two different models available on the market: those
with the flat tips, which are also ribbed so that they have better grip on the nail head.
And a model (claw hammer) that often meets me in other countries, which I personally
can not handle. It is so bent and has such a round head that it is almost
impossible to get a nail straight in. What I want to say is, that everyone is used to the
tool with which he has learned. That is why you should always take it with you to
your building sites. Even with hammers without grip on the cap, it can be hard to
strike a nail straight. No wonder, that nailing seems to be the biggest challenge for
many in straw bale building. Therefore, here are a few tips: 1 ) Holding the hand at
the bottom of the stem, helps to save energy. It is about the momentum, and the
less often a nail is hit, the less chance of bending it. Well, practice makes perfect. 2)
Look at the hammer head and align it before impact so that it does not strike
obliquely on the nail head, avoiding the distorted bending and pulling out again. The
same technique also leads to the goal (hole) with tennis or Minigolf.
32
U1 – INTRODUCTION
TIPS S3 TOOLS – CUTTING
U1
01 4
Straw Bale-Tools:
Cutting Straw Bales
II tried pretty much everything that has blades. But the only tool that really cuts
straw like butter is the electric saw (in German Elektro-Fuchsschwanz). I use the
Bosch ® Professional with 35 cm sword, which also cuts at the top. There are
alligators with comparatively long swords. But if the first 5 cm of the tip do not cut
(see drawing below), it becomes tedious. It is not always a question of dividing or
cutting a bale in the longitudinal direction, but sometimes also of forming a wedge
or an opening (niche) into the bale. The two blades are, by the way, easily
interchangeable and there are different ones for wood (and straw), metal and plastic.
33
U1 – INTRODUCTION
TIPS S3 TOOLS – SAWS
U1
01 5
Straw Bale-Tools:
other Saws
In addition to this all-purpose device, a simple (sharp) hand saw (without electrics),
e.g. for the cutting of our CUT-battens should of course be available. Also a jigsaw is
a nice addition to our tools, especially for all round cuts. But this is more for wood
construction, as it usually don't cut a straw bale. A crosscut saw is, of course, also
worth the gold on a construction site, for all exact cuts in the wood (joining). And
finally we need a table circular saw, if we e.g. cut the battens lengthwise from the
raw planks.
34
U1 – INTRODUCTION
TIPS S3 TOOLS – KNIFES
U1
01 6
Straw Bale-Tools:
Knives (Cutters)
The advantage of cut-off blades is that they are always sharp. As we soon get
muscles when working on building sites we start to cut with more pressure, so the
more sturdy 3 cm blades are more convenient to us. The 1 cm toy blades are good
enough for paper, but even do hard when cutting the polyethylene cords. By chance,
cutting straw bales on a construction site (actually more sawing) with a new, ribbed
bread knife works wonderful. The result was so positively convincing that I always
have one with me (or ask the cook for it). For all other knives applies: it's about the
sharpness, halms/stalks are quite brittle and it's boring to sharpen your knife
constantly.
35
U1 – INTRODUCTION
TIPS S3 TOOLS – HEDGE SAW
U1
017
Straw Bale-Tools: Shaving
Surfaces with Hedge Saws
We do not only want to squeeze a few protruding stalks with hedge saws, in most
cases we want a plane surface to save plaster and to avoid different drying times,
even if bales are slightly differently thick or bulged or not exactly installed plane.
Even if there are customers who prefer a more organic-hunched surface, in most
cases they mean slight bumps in the (hand-) plaster and not simply covering uneven
bales with the plaster. The cutting of the hunches of straw bales is a long-term work,
but it really becomes hard work with not really sharp hedge saws. Unfortunately
sharpening is often as expensive as a new one. A tip to save energy is to pick hedge
saws with a rather shorter sword (about 50-60 cm). The longer the sword, the more
pressure we need to push to the bale surface, and the harder it is to shave a round
wall or vault inside. In terms of strength: from 450 W, hedge trimmers are robust and
strong enough. The sharpness of the knives is much more important. Hedge saws
are among the very safe machines (since they cut only between the knives).
Nevertheless, you can tweak neatly with hedge saws (a small cut with painful
bruising is the result). It can happen when you sit on the scaffolding shaving the
walls. More often, if you don't take care, you will cut the cable and cause a short
circuit. Therefore, it is best to carry the cable over the shoulder. Or choose a model
with battery.
36
U1 – INTRODUCTION
TIPS S3 TOOLS – CHAIN SAW
U1
01 8
Straw Bale-Tools: Cutting Bales
with a Chain Saw
Some can do it, I have never managed to cut a straw bale with a chainsaw, it almost
always leads to smoking straw halms under the chain cover in short time. The
mixture with the chain saw oil is quite inflammable. The trick is to use a chain saw
with rather long sword and cut only (mainly) with the tip so that the stalks fly
tangentially away and do not get under the protective cover of the chain. Gasoline
powered chainsaws are also noisy and stinking, electrical usually not so strong. For
structural wood ideal, I cannot recommend it for straw bales from my point of view.
37
U1 – INTRODUCTION
TIPS S3 TOOLS – PERSUADER
U1
01 9
Straw Bale-Tools: the Straw Bale
Hammer or Persuader
This wooden hammer "persuades" each bale (at least as long as it is not fixed by
battens). It is a must on each straw building site and also easy to manufacture in the
DIY process from residues of construction wood. Only the handle should be sturdy
(typically hardwood). Do not screw the handle to the wooden plates too often (2
times should be enough), otherwise it will break more easily at this point. The
Persuader should be heavy, but it is used with a swing to move the bales back into
the row, or to connect the upper bale with the underlying ones well.
38
U1 – INTRODUCTION
TIPS S3 TOOLS – RAKE AND BIGBAGS
U1
020
Cleaning the Building Site:
Rakes and Bigbags
Keeping your construction site always clean is not only practical, it's also a matter of
safety. With a broom you will work mainly on floors, natural subsoils need flat rakes
for cleaning and removing straw, as we often cleaning grassy or gravel surfaces. The
elastic leaf rakes work best for this. And because of the quantities that are caused by
building bales due to destroyed bales and loose straw, the purchase of BigBags is
worthwhile (or you take your used clay or sand bags).
39
U1 – INTRODUCTION
TIPS S3 TOOLS – BALE NEEDLES
U1
021
Dividing Straw Bales with
Bale Needles
Bale Needles may be useful or even indispensable for load-bearing straw bale walls
(in this case each new row of bales needs half-bales). In the infill-technique, the bales
are compressed more easily with adding flakes between two plates (023). Bales
can also be compressed to a certain density by simply rebinding it with strings,
depending on the strength you tear, or with screw clamps. But as bale needles are
connected to straw bale building like the halms to the bale, let's look at these tools.
Actually a pointed wooden stick with two holes at the top is enough for their
function (since there are 2 new cords needed - one for the right, one for the left bale
part). There are also combined bale needles (which are connected to a bar / handle,
which pull all 4 cords through the bale at the same time (2 upper and 2 lower -
instead of the 2 existing cords). After you pulled your strings through the bale, the
cords are knotted to each half-bale. There are special knots, as they are known from
sailing. After you rebound your halfs, the original two cords are removed, thereby
maintaining the density of the bale. If you took the right strings on the right half bale
you can divide your bale (otherwise, if strings are crossed, you have two connected
half-bales). So you can definitely say that some straw balers make a science out of a
simple thing.
40
U1 – INTRODUCTION
TIPS S3 TOOLS – MORE TOOLS
U1
022
More Tools on
Straw Bale Building Sites
A cordless screwdriver (per worker) must not be missing on straw sites. We will not
screw straw bales to the wall, but often enough we need to do smaller woodwork
and fixtures, just for safety reasons. We also need a spirit level. But that's it for now.
With these tools you are already equipped as a straw bale builder. Except for the
crosscut saw (which is brought by the carpenter) and the table circular saw (let's
assume, it is anyway on a good construction site) our tools fit playfully into a small
car, even with 3 employees and luggage.
Especially in the case of workshops, it is a good idea to put the tools in different
labeled boxes so that they can be found by every participant. Paying attention to
your collection of tools saves a lot of searching-time.
41
U1 – INTRODUCTION
TIPS S3 TOOLS – INFILL AIDS
U1
023
Straw Bale-Tools:
The essential Infill-Aids (Boards)
For infilling flakes, we use thin (6 mm) plates (baords) of plywood, hard fiber, plastic
or metal, usually with a handle (hole) or with metal flaps with a bent folding handle,
so that they can be pulled out more easily. The smooth surface shows to the flake,
the rough to the existing bale or the construction. The boards should be available in
different sizes (approx. 47 x 47 cm for filling from the front, 36 x 57 cm for filling
from above, or half-sizes for smaller cavities).
42
U1 – INTRODUCTION
TIPS S3 TOOLS – INFILL AIDS
U1
024
Straw Bale-Tools:
How to handle Infill-Aids
When infilling bales or flakes (best with a helper), the boards are held like a funnel to
create the largest opening possible for the position (see picture). As soon as the bale
or flake is half filled into the wall, the helper pushes the plate to the bale (so that the
funnel becomes a tunnel with parallel sideboards and the straw is not squeezed on
the backside). Insert the flake only until the surface of the wall (same level as the
adjacent bales around). Another tip: usually more flakes fit into cavities than
assumed. If you fill too little, you must repeat the process. Therefore, use a little
more straw (several - still cohesive - layers at a time), then the surface becomes
even more even.
When removing the boards, lateral wobbling helps (much easier than just pulling). If
enough layers are infilled (high density) the boards are difficult to pull out: this is the
guarantee for a really good plaster surface.
43
U1 – INTRODUCTION
TIPS S3 TOOLS – STUFFER
U1
025
Straw Bale-Tools:
DIY-Stuffer in two Sizes
No one can fill straw bales between posts / rafters (or stack them over one another in
the load bearing straw bale building) without leaving any holes at all. This is due to
the fact that bales on the edges are often rounded (and not sharp-edged); on the
other hand, cavities can also develop when filling (densifying) with layers. And
finally it happens again and again that, for structural reasons, there is a (diagonal)
squared or round wood in the insulation area, such as the planks of an intermediate
vault. In order to fill these cavities with (loose) straw and prevent convection in the
thermal insulation layer or simply a cold bridge, we use homemade, simple (DIY)
stuffing tools. Of course, you can also stuff with the hands (fingers), but I wouldn't
recommend that for larger areas. After some days you cannot move your fingers any
more. Especially if the wall is to be plastered, it is important to stuff the straw in the
same density as the bales nearby, so that the weight of the plaster does not pull it
out again. For these purpose we need 2 tools, made of strips of 25 x 25 mm (1 x 1 ")
for the small and 25 x 50 mm for the large stuffer. So we are building a "T", which we
screw together 1 -2 times (6-8 cm screw, 5-6 mm hole pre-drill). The smaller handle
has a length of 1 5 cm, the larger handle has a length of 25-30 cm, which we slant at
the top like a screwdriver (with a jigsaw or crosscut saw). Finally, we put a small
notch in the middle of the "cutting edge" so we can later better collect the straw to
be stuffed. Finally we take sandpaper (or a rasp) and round off all edges easily.
44
U1 – INTRODUCTION
TIPS S3 TOOLS – SHAVING AND SMOOTHING
U1
026
Preparing Straw Bale Surfaces
for Plasters
Straw bales provide a pretty good plaster ground when the surface is prepared (and
will not be planked). To achieve the best possible and long lasting connection with
the plaster, the surface of the bales is cut with a (sharp) hedge trimmer. Since this
can be a lot of work (especially with well compressed bales), short hedge saws
(about 60 cm of sword) are usually better than long ones. This also makes it easier to
cut curved surfaces (as in the case of a round house or vault). It is not just about removing
protruding stalks, but of smoothing all the unevenness, ie shortening the
whole stalks one to two centimeters. On these many stalk ends, the plaster adheres
much better than on the untrimmed stalks covered with a wax layer. This method of
plaster preparation is much more useful than depositing the bales (so that the wax
layer disappears). Earth- and lime plasters have mainly mechanically based connections
to the plaster-ground through rough surfaces.
45
U1 – INTRODUCTION
TIPS S3 – STUFFING HOLES
U1
46
027
Customizing Straw Bales:
Stuffing Holes
Now go to the stuffing: by the rule of thumb, the loose straw is to be stuffed to the
middle of the bales (about 1 8 cm deep). For preparation the surface is shaved with a
hedge trimmer, then we see the holes much better. Take as many stalks as possible
from a straw bale (in the beginning always twice as much as you think that fits in the
hole), put this amount centrally over the hole and form a heart: with the small stuffer
you insert the stalks to the centre of the bale so they are deep in the hole and only
about 5 to 1 0 cm is exceeding. This should be done with power, and if it goes too easy,
you took too little straw. The protruding stalks are then bent and put back into the
cavity, this time with the larger stuffer. If we do this on both sides of the wall, a heart
shape is created. It is very important that in the end the triple bent stalks neither
protrude nor form a new cavity (because we have stuffed the straw too deep). The
visible crease should lie exactly on the surface. We can easily remove any protruding
stalks with a second hedge-trimmers (or push them by hand into the bale), but if we
cut the crease, the short stalks fall out again. Why the trick with the crease? Again,
we use the material's own power (the strong tendency of the stalks to expand after
buckling or compression) to fix the straw well in the bale. If you do not believe, try it
differently, but then you should also plaster at this place. I have often experienced
that suddenly plugs of plaster fall from the wall because the straw was not well fixed
in these places. This may sound a bit complicated, but it is really simple - and guarantees
a perfect straw surface, which is also a good plaster-ground.
U1 – INTRODUCTION
TIPS S3 – FILLING GAPS
U1
028
Customizing Straw Bales:
Filling Gaps
Larger holes and cavities can be stuffed in the same way, if necessary. In principle,
we fill the gaps as good as possible with bunches of loose straw and compress the
straw with the stuffer. This may seem hopeless in the beginning, but there is always
the moment when everything suddenly becomes stable (and dense). One of the
basic principles of straw construction is that compressed straw tends to expand and
at a certain density it begins to form a stable building body no matter what shape.
Straw figures or straw sculptures can also be built in this way, as hollow spaces can
be filled and compressed. The only exception are oblique or very shallow cavities
which have a larger opening to the exterior. Here you need to build a cage for the
straw: close the surface with plates, sturdy mats (for example, bamboo) or with
strips / boards, then you can stuff the straw in the cavity, without falling out again.
47
STEP – Straw Bale Training for European Professionals
UNIT 1 – Introduction/Einführung (201 7)
Editing/Tips: Herbert Gruber, Helmuth Santler (ASBN)
Cooperation: BuildStrawPro-Team (Erasmus+ Project)
Design & Fotos: Herbert Gruber (ASBN, StrohNatur),
More Fotos: RFCP, provided by Architects & companies.
Illustrations/Icons: Michael Howlett (SBUK)
This Handbook is based on
the Handbook from Leonardo-
Group STEP (201 5)
48


