Pro Photo West Spring 2020
A quarterly Magazine for Professional Photographers of California, by Professional Photographers!
A quarterly Magazine for Professional Photographers of California, by Professional Photographers!

You also want an ePaper? Increase the reach of your titles
YUMPU automatically turns print PDFs into web optimized ePapers that Google loves.
<strong>Photo</strong>shop - Zero to Sixty<br />
Michael Collins, M. <strong>Photo</strong>g., CR., CPP, M-PPC,<br />
S-PPC, BA-PPA, F-PPC<br />
In this first edition of “<strong>Photo</strong>shop – Zero to Sixty” we are going to work on the layout of our desktop/<br />
workspace. It may seem simple but there are a couple of things you can do to make your life in <strong>Photo</strong>shop<br />
easier.<br />
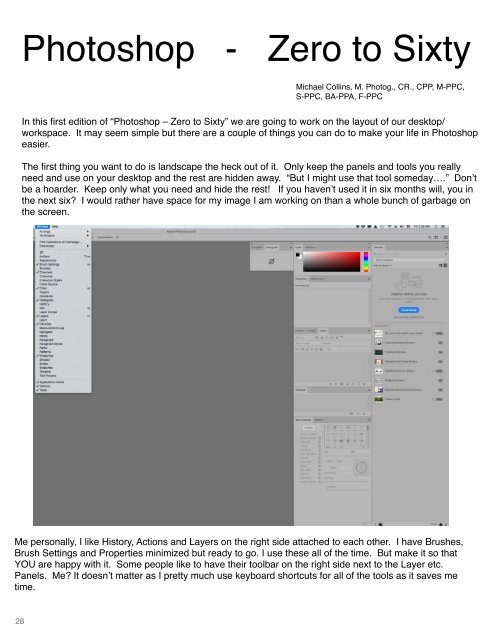
The first thing you want to do is landscape the heck out of it. Only keep the panels and tools you really<br />
need and use on your desktop and the rest are hidden away. “But I might use that tool someday….” Don’t<br />
be a hoarder. Keep only what you need and hide the rest! If you haven’t used it in six months will, you in<br />
the next six? I would rather have space for my image I am working on than a whole bunch of garbage on<br />
the screen.<br />
Me personally, I like History, Actions and Layers on the right side attached to each other. I have Brushes,<br />
Brush Settings and <strong>Pro</strong>perties minimized but ready to go. I use these all of the time. But make it so that<br />
YOU are happy with it. Some people like to have their toolbar on the right side next to the Layer etc.<br />
Panels. Me? It doesn’t matter as I pretty much use keyboard shortcuts for all of the tools as it saves me<br />
time.<br />
28