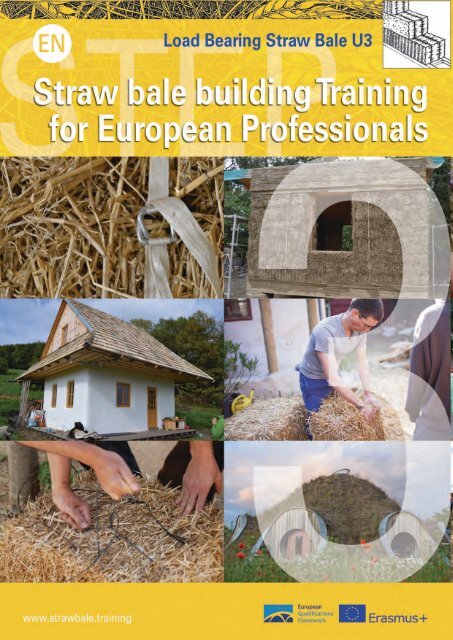
STEP U3 Handbuch ENGLISH
You also want an ePaper? Increase the reach of your titles
YUMPU automatically turns print PDFs into web optimized ePapers that Google loves.
1
2
<strong>U3</strong> – LOAD-BEARING STRAW BALE BUILDING<br />
CONTENTS<br />
<strong>U3</strong><br />
TIME<br />
PAGE<br />
<strong>U3</strong> Learning Outcome 5<br />
<strong>U3</strong> Session 1 : Design & Planning 5 hrs 7<br />
Info presentation 1 : Design Basics 8<br />
Info presentation 2: Drawing Basics 1 0<br />
Tips: Load-Bearing SBB Pros 001 -1 2 and Cons 002-1 3 1 2<br />
Weather Protection I 003-1 4, Weather Protection II 004-1 5<br />
Organization of the Building Site – Planning 005-1 6, Preparatory Works 006-1 7,<br />
Building Schedule 007-1 8/1 9, Cutting List 20, Estimating Costs 21<br />
<strong>U3</strong> Session 2: Construction & Statics 2 days 23<br />
Info 1 : Construction – Overview and Examples 24<br />
Tips: Bales and Walls Dressing Bales 008-26, Notching Bales 009-27, 26<br />
Compressing Walls with Trucker Straps 01 0-28, with Car Jacks 011 -29<br />
Info 2: Statics (Virko Kade) 38<br />
Info 3: Compression & Settlement 42<br />
Info 4: Legislation 44<br />
Info 5: Characteristics of the Planning Process 45<br />
Info 6: Remarks on Building Physics 46<br />
<strong>U3</strong> Session 3: Tools & Practice 1 day 32<br />
Tips: Tools Splitting Bales with Bale Needles 01 2-32, Hedge Saws 01 3-33,<br />
Persuader 01 4-34, Gap Filler 01 5-35<br />
Info 2: Strings and Knots 36<br />
Appendix: Statics House Fliri (Peter Braun) 49<br />
Credits and Impressum 52<br />
3
4
<strong>U3</strong> – LOAD-BEARING STRAW BALE BUILDING<br />
LEARNING OUTCOMES<br />
<strong>U3</strong><br />
Level 3 (ECVET credit points: 1 5) / Level 4 (12)<br />
Knowledge<br />
Skills<br />
Trainees know …<br />
• about the existing national building<br />
regulations related to straw bale building.<br />
• the specific problems organising a load<br />
bearing straw bale building site and their<br />
solutions (weather protection, safety, logistics).<br />
• the symbols to be able to understand plans<br />
and construction drawings.<br />
• the necessity and the techniques to avoid and<br />
to close gaps (between bales and between<br />
bales and construction).<br />
• the reasons and the techniques to fill in straw<br />
in the required density and the specific<br />
methods of compressing and their application.<br />
• the techniques to fix the bales in the<br />
construction (corner detail).<br />
• the techniques to adapt the straw bales layers<br />
to the requirements of load bearing straw bale<br />
building.<br />
• the pros and cons of the load bearing<br />
technique and its requirements related to<br />
schedule, planning, budget, and resources.<br />
• the details for adjacent building elements<br />
(floor and roof plates, ring-beam and openings)<br />
according to load-bearing straw bale building.<br />
• the details for openings (windows, doors) and<br />
for intersections (chimneys, pipes, wires).<br />
• the reasons and the techniques to prepare the<br />
substrate with a plane and gap free surface.<br />
Trainees can …<br />
• control the quality ofexisting constructions in<br />
relation to its suitability for load bearing straw<br />
bale building.<br />
• handle the tools and machines which are used<br />
generally on straw bale building sites and for<br />
simple wood constructions.<br />
• choose appropriate bales for the load bearing<br />
techniques, resize, reknot and fix the bales<br />
together.<br />
• adjust the bales to the length of the<br />
construction elements in a suitable assembly.<br />
• do basic carpentry to make additional<br />
wooden construction aids in order to erect<br />
straight walls.<br />
• compress the assembled bales in different<br />
techniques in an adequate way.<br />
• fill gaps and holes with straw in a required<br />
compression.<br />
• fabricate base and top ring beam and fill it<br />
with insulation material and fix it adequately.<br />
• calculate building costs related to the straw<br />
bale constructions.<br />
• prepare all surfaces for the successive crafts<br />
people (plaster, cladding, wind- and air<br />
tightness) or execute these tasks in mutual<br />
agreement.<br />
• assemble the supporting wooden structures<br />
and the frames for openings.<br />
Competence<br />
Trainees can …<br />
• organize and attend the building site at all stages and adapt the working process, the use oftools and<br />
adequate techniques related to straw bale building (planing, preparation, execution, additional crafts).<br />
• co-ordinate and communicate the special needs of load-bearing construction with other professionals.<br />
• explain different methods ofload-bearing construction with reference to advantages and disadvantages.<br />
• inspect and select good quality bales for load-bearing construction during the whole building process.<br />
• control the general quality of the bales during the whole building process.<br />
5
6
<strong>U3</strong> – LOAD-BEARING STRAW BALE BUILDING<br />
SESSION S1<br />
<strong>U3</strong><br />
<strong>U3</strong>-S1 : Design and Planning<br />
Objectives:<br />
Trainees …<br />
… have the ability to read and understand architectural plans and<br />
construction drawings<br />
… know different structural options<br />
… know the dis-/advantages of every solution<br />
Knowledge and Skills:<br />
- Making a building schedule<br />
- Organization and execution of the work within schedule<br />
- Making a cutting list<br />
- Calculation of the building costs<br />
Methods:<br />
- Lecture/Talk<br />
- Explanations<br />
- Practice<br />
Trainer:<br />
Location:<br />
Classroom<br />
Duration:<br />
8 hours<br />
Equipment:<br />
Projector, Flipchart<br />
Theory<br />
Practice<br />
Basics of architectural plans and construction drawings<br />
Different structural options, characteristics and bale<br />
requirements<br />
Advantages and disadvantages of different techniques<br />
How to prepare a building schedule<br />
How to make a cutting list<br />
Calculate the building costs (material, labour, etc)<br />
Study and develop a case-study comparing the results with<br />
other trainees<br />
Unterlagen:<br />
Info Sheets:<br />
I1 Drawing basics<br />
Text Sheets:<br />
X1 Straw bale and<br />
legislation<br />
X2 Advantages and<br />
disadvantages of loadbearing<br />
X3 Characteristics of<br />
different options<br />
X4 Organisation of building<br />
site and schedule<br />
X5 Design basics<br />
Evaluation:<br />
Practical Test<br />
Organisation:<br />
Prepare a case study for every group of trainees (2–3 persons), study it in<br />
order to be able to compare it with the results of the participants.<br />
Final:<br />
Multiple Choice<br />
Oral Test<br />
7
<strong>U3</strong> – LOAD-BEARING STRAW BALE BUILDING SESSION S1 – DESIGN – INFO 1<br />
<strong>U3</strong>-S1-I1 : Design Basics<br />
<strong>U3</strong><br />
8
<strong>U3</strong> – LOAD-BEARING STRAW BALE BUILDING SESSION S1 – DESIGN – INFO 1<br />
<strong>U3</strong>-S1-I1 : Design Basics<br />
<strong>U3</strong><br />
9
<strong>U3</strong> – LOAD-BEARING STRAW BALE BUILDING SESSION S1 – DESIGN – INFO 1<br />
<strong>U3</strong>-S1-I1 : Design Basics<br />
<strong>U3</strong><br />
Understanding Architectural Plans<br />
Architectural drawings are a way of<br />
representing three dimensional shapes in two<br />
dimensions. When drawn accurately and to<br />
scale they can be used for a variety of<br />
purposes; from calculating quantities of<br />
materials needed to helping workers to<br />
construct the building to the right size and<br />
shape with doors and windows in the correct<br />
positions.<br />
Plan View:<br />
The plan view is the most basic drawing and is a “top-down” view of all or part of the building. Various<br />
information is shown in plans. A floor plan is typically used to show layouts of rooms, stairs, doors and<br />
windows and can be visualized as what you’d see if you looked down after cutting through the building at<br />
about eye level (1 500 mm above finished floor level), with everything above the cut removed. Typically a<br />
separate floor plan is included for each floor in the building. Other plans may show specific parts of the<br />
building, e.g. sole plate plan, bale plans, wall plate plan.<br />
10
<strong>U3</strong> – LOAD-BEARING STRAW BALE BUILDING SESSION S1 – DESIGN – INFO 1<br />
<strong>U3</strong>-S1-I1 : Design Basics<br />
<strong>U3</strong><br />
Elevations:<br />
Elevations are views of the front, back and sides of the building. Elevations are used to convey an impression<br />
of how the building will look from outside but are also used to show positions and dimensions of doors and<br />
windows, roof pitch and sometimes detail such as external finishes etc.<br />
Sections:<br />
Sections are used to show additional information. A section is, a bit like a plan view, a slice through the<br />
building. Sections are generally a vertical slice through the building and are typically used to show detail on<br />
the roof construction, room heights, foundations etc. A “cross-section” is a section through the shorter axis of<br />
a building, whereas a “long section” is a section along the longer axis. Sometimes several sections will be<br />
needed, especially where different parts of the building are different heights, have different roof<br />
construction/pitch etc. Large scale sections are often used to provide construction detail on specific parts of<br />
the building.<br />
Conventions and Good Practice:<br />
It is good practice to include scale bars on scaled drawings so<br />
that any distortions in scale (when printing, photocopying,<br />
converting between digital file types, etc) can be easily<br />
identified. The scale bars should be checked before measuring<br />
off drawings.<br />
Where sections are included they are normally marked on the plans<br />
and elevations with a line and arrows. The line shows where the<br />
building is “sliced”, the arrows point in the direction of view. Each<br />
section is typically allocated a letter, and this letter appears by the<br />
arrows at each end of the section line.<br />
11
<strong>U3</strong> – LOAD-BEARING STRAW BALE BUILDING<br />
SESSION S1 – TIPPS<br />
<strong>U3</strong><br />
001<br />
Advantages of the<br />
Load-Bearing Technique<br />
• Load-bearing construction uses less timber than other straw bale building<br />
methods, with straw carrying the structural loads.<br />
• Less timber means fewer thermal bridges compared to framed constructions.<br />
• Load-bearing is a very simple form of construction and for the most part uses<br />
only three basic skills: notching bales (around fixing posts for doors and windows),<br />
splitting bales and dressing bales.<br />
• The structural loading of the bales helps keeping the straw in place.<br />
Load-bearing technique with big bales:<br />
• High insulation value (U-value) of the walls (esp. with bales on edge)<br />
• Fast montage of the walls (with crane)<br />
1 2
<strong>U3</strong> – LOAD-BEARING STRAW BALE BUILDING<br />
SESSION S1 – TIPPS<br />
<strong>U3</strong><br />
002<br />
Disadvantages of the<br />
Load-Bearing Technique<br />
• Unlike framed constructions (which can support a roof that works as weather<br />
protection), load-bearing is potentially more vulnerable to weather damage,<br />
unless some form of temporary roof or cover can be built.<br />
• Pre-fabrication off-site is not possible.<br />
• Because the straw is part of the buildings structure, repairs of any damage in it<br />
are more difficult compared with repairing damaged straw in timber frame constructions.<br />
•The lack of a frame means more care must be taken when building and compressing<br />
to ensure an even, level wall height.<br />
• Compressing the bales requires higher skill levels than placing them.<br />
• Load-bearing has no general building control approval in many countries.<br />
• Potential moisture issue with dew point between straw and external render.<br />
Load-bearing technique with big bales:<br />
• Relatively large floor areas necessary for walls<br />
• Montage only with crane<br />
1 3
<strong>U3</strong> – LOAD-BEARING STRAW BALE BUILDING<br />
SESSION S1 – TIPPS<br />
<strong>U3</strong><br />
003<br />
Weather Protection in<br />
Load-Bearing Building Technique<br />
In a wet climate like that of the U.K, protection against adverse weather needs to be<br />
factored into the build. On a small build it may simply be a case of covering over the<br />
works on a daily basis with temporary protection until the roof has been built and<br />
waterproofed. However, normally this approach is far from ideal and can lead to a<br />
stressful and vulnerable build process.<br />
Alternative solutions include:<br />
• Scaffolding with protective sheeting, (including a sheeted roof on “flyover”<br />
scaffold trusses).<br />
• The permanent roof structure can be built temporarily propped to provide protection.<br />
This can be done either by building the roof at height on a temporarily<br />
propped wall plate …<br />
• … or by building the roof on the floor below, craning it to height and propping<br />
in place.<br />
1 4
<strong>U3</strong> – LOAD-BEARING STRAW BALE BUILDING<br />
SESSION S1 – TIPPS<br />
<strong>U3</strong><br />
004<br />
Alternative Solutions<br />
for Weather Protection<br />
In either case, the propped roof should be approximately 1 50mm above its intended<br />
final position to allow the insertion of the uncompressed bales. Provision should be<br />
made for lowering the propped roof to allow for bale compression (e.g. by using<br />
Acrow props).<br />
Below: Temporary propping detail with prop screwed into side of wall plate. Note the<br />
chock screwed into the side of the prop to help support the wall plate.<br />
Whichever approach is taken, secondary bale protection should also be used (e.g.<br />
covering the tops of unroofed bale walls with secured tarpaulins, roofing felt etc).<br />
1 5
<strong>U3</strong> – LOAD-BEARING STRAW BALE BUILDING<br />
SESSION S1 – TIPPS<br />
<strong>U3</strong><br />
1 6<br />
005<br />
Organization of the Building Site:<br />
Planning Process<br />
Some processes may take unexpectedly long periods of time and some materials<br />
need to be ordered well in advance of when they’re actually required on site. By<br />
working out a schedule in advance and identifying any potential “bottlenecks”, work<br />
on site is much more likely to run smoothly, minimising unexpected delays. The<br />
schedule should include the following items:<br />
Design work: This is very open-ended – time will depend on the approach. Designs<br />
can be arrived at very quickly or can be the result of years of careful consideration<br />
and gradual evolution of ideas. It is worth spending time at the design stage to get<br />
the concepts right – it’s much easier to work out ideas on paper (or the digital equivalent)<br />
rather than doing and redoing work on site.<br />
Planning permission: In some countries it will take at least eight weeks for a decision<br />
to be made even in the most straight-forward planning applications. Controversial<br />
ones may take much, much longer. Bear in mind that there is no guarantee an application<br />
will be approved. Some types of work do not require planning permission<br />
(e.g. Permitted Development), although in some cases a notification procedure must<br />
still be followed. Check with the Local Planning Authority (LPA) for clarification. In<br />
some cases, additional approvals may also be required (Conservation Area or Listed<br />
Building consents, ...).<br />
Building Regulations Approval: is usually required in addition to planning permission.<br />
Approval may take from 5–8 weeks, although sometimes site work is permitted<br />
before formal approval is issued.
<strong>U3</strong> – LOAD-BEARING STRAW BALE BUILDING<br />
SESSION S1 – TIPPS<br />
<strong>U3</strong><br />
006<br />
Organization of the Building Site:<br />
Preparatory Works<br />
Time should be allowed for works that need to take place before straw work can<br />
begin. This could involve:<br />
• site clearance<br />
• excavation to level<br />
• excavation and construction of foundations<br />
• ground floor structure, including any services beneath (waste pipes, new gas,<br />
water and electricity connections)<br />
• sole plate and upright fixing posts<br />
• temporary weather protection (propped roof or similar)<br />
• security fencing<br />
• secure storage on site (tools & equipment, straw bales etc)<br />
• access, parking, delivery, covered working area etc.<br />
17
<strong>U3</strong> – LOAD-BEARING STRAW BALE BUILDING<br />
SESSION S1 – TIPPS<br />
<strong>U3</strong><br />
007<br />
Organization of the Building Site:<br />
Building Schedule<br />
Many natural materials are seasonal and sourcing may need to be done a long time<br />
in advance or at a particular time of year. Straw is baled in August so to have bales<br />
made a certain way and available in May, it may be necessary to talk to a local farmer<br />
the summer before. Coppicing of hazel for stubs and pins stops at the end of<br />
March, so sourcing them can be difficult if left until the summer.<br />
Even for more “mainstream” materials, there can often be a considerable delay between<br />
ordering and arrival on site. Whilst many components are often available “offthe-shelf”<br />
or at short notice (e.g. regular softwood timber sizes like 1 00x50mm for<br />
sole plates or OSB sheets), it is good practice to source more unusual components,<br />
especially those required to seal the building from the elements (to make it “wind<br />
and watertight”) and check how long they will take to arrive so they can be ordered<br />
in plenty of time. Such materials would include doors and windows, materials for<br />
the roof structure (trusses or cut roof materials), the roof covering and external<br />
render or cladding.<br />
If a lime render is to be used externally, the build should ideally be scheduled so the<br />
lime is applied early enough in the year that it has time to carbonate well before the<br />
first frosts.<br />
1 8
<strong>U3</strong> – LOAD-BEARING STRAW BALE BUILDING<br />
BULDING SCHEDULE<br />
<strong>U3</strong><br />
1 9
<strong>U3</strong> – LOAD-BEARING STRAW BALE BUILDING<br />
CUTTING LIST<br />
<strong>U3</strong><br />
20
<strong>U3</strong> – LOAD-BEARING STRAW BALE BUILDING<br />
ESTIMATING COSTS<br />
<strong>U3</strong><br />
21
22
<strong>U3</strong> – LOAD-BEARING STRAW BALE BUILDING<br />
SESSION S2<br />
<strong>U3</strong><br />
LOAD-BEARING CONSTRUCTION<br />
Objectives:<br />
Trainees know…<br />
… different structural options for load-bearing construction and<br />
their characteristics and bale requirements<br />
… how to fix the bales, to stabilize the system and all the different<br />
techniques<br />
… different options for compressing the bales<br />
… details for how to connect with other building elements;<br />
foundations, corners, windows, doors, roof, etc.<br />
… how to prepare different surfaces for plastering<br />
Competences and Skills:<br />
- Building with load-bearing straw bales<br />
- Using different compression and fixing techniques<br />
- Organization and execution of the work within the schedule<br />
- Executing good connection details<br />
- Maintaining integrity of the insulation<br />
- Preparing different surfaces for plastering<br />
Methods:<br />
Theory<br />
Practice<br />
- Theory and practice of load-bearing construction<br />
Different structural options for load-bearing, their<br />
characteristics and bale requirements.<br />
Fixing the bales, and different techniques<br />
Compressing bales within different systems<br />
Details of connections: foundation, corners, windows and<br />
doors, roof, etc.<br />
Preparing different surfaces for plastering<br />
Study and develop a case-study comparing the results with<br />
other trainees.<br />
Fixing the bales, and different techniques<br />
Compressing bales within different systems<br />
Preparing different surfaces for plastering<br />
Trainer:<br />
Location:<br />
Workshop or building-site<br />
and classroom<br />
Duration:<br />
1 8 hours<br />
Equipment:<br />
Projector<br />
Straw Bales<br />
Structure of model<br />
to work on<br />
Tools<br />
Documents:<br />
Info Sheets:<br />
I1 Dressing bales<br />
I2 Details<br />
Text sheets:<br />
X1 Load-bearing<br />
(Best building practice)<br />
Presentation:<br />
Examples Load-bearing<br />
Evaluation:<br />
Practical Test<br />
Final:<br />
Multiple Choice<br />
Oral Test<br />
Organisation:<br />
Prepare load-bearing build, prepare structure to demonstrate different construction details.<br />
Order bales, prepare tools for measuring, cutting, adjusting bales, fixing, compressing.<br />
Order all the material needed for preparing for plastering.<br />
23
<strong>U3</strong> – LOAD-BEARING STRAW BALE BUILDING SESSION S2 – INFO 1<br />
LOAD-BEARING CONSTRUCTION<br />
<strong>U3</strong><br />
24
<strong>U3</strong> – LOAD-BEARING STRAW BALE BUILDING SESSION S2 – INFO 1<br />
LOAD-BEARING CONSTRUCTION<br />
<strong>U3</strong><br />
25
<strong>U3</strong> – LOAD-BEARING STRAW BALE BUILDING<br />
TIPPS S2<br />
<strong>U3</strong><br />
008<br />
Preparing and<br />
Dressing Bales<br />
Left; bale to be dressed and joint between undressed bales<br />
Right; “dressed” bale and joint between dressed bales<br />
It is good practice to inspect and dress bales before use; checking the bale has been<br />
kept dry and is free from seed heads etc. Bales tend to bulge up in the middle of the<br />
end face and drop away towards the corners.<br />
“Dressing” the bale involves flattening off the ends to allow bales to meet more<br />
snugly. Straw can be slid under the strings, moving straw from the high points in the<br />
centre to the lower parts at the sides and corners.<br />
Dressing bales gives a much better junction between bales, improving thermal performance<br />
and minimizing work later (reduces need to stuff gaps etc). Dressing bales<br />
can be most easily done by a pair of people working together as shown below.<br />
The bale can be held in place by the two people pushing against it from opposite sides<br />
with one lower leg each.<br />
Both hands should be made like garden claws; palms held flat, fingers splayed<br />
slightly apart and angled down and back towards them.<br />
Both ends of the bale should be dressed before the bales are laid or worked further<br />
(e.g. split, notched etc).<br />
26
<strong>U3</strong> – LOAD-BEARING STRAW BALE BUILDING<br />
TIPPS S2<br />
<strong>U3</strong><br />
009<br />
Notching Bales<br />
Where a straw bale wall meets a post (for example at window and door openings, at<br />
junctions with other materials etc) bales will need to be notched. This improves airtightness<br />
and minimizes draughts and also helps make the wall rigid.<br />
There are two sizes of notch that may be required. Where two bales will meet at the<br />
post, one on each side, each bale should be “half-notched”: the depth of the notch in<br />
each bale should be equivalent to half the diameter of the post (for a 1 00mm / 4” post<br />
this would mean a 50mm deep notch). This typically occurs beneath a window.<br />
Beside windows and doors, the post will be entirely recessed into the straw with a<br />
“full notch” – 1 00mm deep notch for a 1 00mm / 4” post.<br />
The process is very simple. For a 50mm notch a piece of 1 00×50mm / 4×2” timber is<br />
laid across the centre of the bale where the notch is to go. An old saw is used to cut<br />
the straw using the timber as a guide. After the first few strokes to mark the cut, the<br />
timber should be removed and the saw angled slightly outwards as it will naturally<br />
tend angle inwards, resulting in a “V”-shaped cut if unchecked. Once one side of the<br />
cut is done, the wood should be replaced before removing the saw blade so the<br />
timber can again be used as a guide for a cut the other side. The depth and size of the<br />
cut should be checked using the guide timber. When the notch is the right depth and<br />
shape, the timber should sit snugly inside it with the top of the timber flush with the<br />
surface of the bale.<br />
For a full notch, the process is identical but using a 1 00×1 00m / 4×4” guide timber.<br />
Care should be taken to avoid the strings either being accidentally cut or slipping into<br />
the notch. Notching can be carried out much quicker and more accurately using<br />
machines such as alligator or shark saws.<br />
27
<strong>U3</strong> – LOAD-BEARING STRAW BALE BUILDING<br />
TIPPS S2<br />
<strong>U3</strong><br />
010<br />
Straw Bale Walls:<br />
Compressing with Trucker Straps<br />
Currently the most widely used method is to squeeze the straw using trucker straps<br />
with a ratchet fixing.<br />
These are typically passed under the sole plate, around the straw and over the wall<br />
plate, as shown in the picture. The straw can then be compressed between the two<br />
plates by tightening the straps. Straps are placed on each side of each door and<br />
window opening, at each corner and at regular intervals elsewhere. Straps are<br />
positioned so that alternate straps have their ratchets on opposite sides<br />
of the wall (the straps tend to compress more on the ratchet side of the wall so<br />
alternating helps to even out the compressive pressures).<br />
28
<strong>U3</strong> – LOAD-BEARING STRAW BALE BUILDING<br />
TIPPS S2<br />
<strong>U3</strong><br />
011<br />
Straw Bale Walls:<br />
Compressing with Car Jacks<br />
This method can only be used where there is a suitably braced, robust<br />
surface to set the jacks against. The most common use is to compress bales under or<br />
above a window. A temporary 1 00x1 00mm beam can be securely fixed between the<br />
upright fixing posts as a jacking point. A permanent 1 00x1 00mm beam can be<br />
rebated into the top of the highest bale below the window (or the soffit of the lowest<br />
bale above) and pushed using the jacks to compress the straw. When fully<br />
compressed the permanent beam is fixed into place and the temporary one<br />
removed.<br />
29
30
<strong>U3</strong> – LOAD-BEARING STRAW BALE BUILDING<br />
SESSION S3<br />
<strong>U3</strong><br />
TOOLS FOR LOAD-BEARING STRAW BALE BUILDING<br />
Objectives:<br />
Trainees know …<br />
… the tools and machines used on the straw bale building site<br />
… specific problems of straw bale building site organization<br />
… how to solve any technical problem conveniently<br />
Competences and Skills:<br />
- To handle tools and machines which are used in load bearing<br />
straw bale construction<br />
Methods:<br />
Demonstration<br />
explanation<br />
practice<br />
Trainer:<br />
Location:<br />
Workshop or building-site<br />
Duration:<br />
4 hours<br />
Equipment:<br />
Tools<br />
Theory<br />
Specific problems of straw bale building site organization<br />
Unterlagen:<br />
Info Sheet:<br />
I1 Tools<br />
Text Sheet:<br />
X1 Building Site<br />
Evaluation:<br />
Practical Test<br />
Practice<br />
Handling the tools, visiting building site<br />
Final:<br />
Multiple Choice<br />
Oral Test<br />
Organisation:<br />
Looking for an appropriate building-site in the surroundings or preparing different tools and material for<br />
the demonstration<br />
31
<strong>U3</strong> – LOAD-BEARING STRAW BALE BUILDING<br />
TIPPS S3<br />
<strong>U3</strong><br />
TOOLS FOR LOAD-BEARING STRAW BALE BUILDING<br />
01 2<br />
Splitting Straw Bales<br />
with Bale Needles<br />
Bale needles may be useful or even indispensable for load-bearing straw bale walls<br />
(in this case each new row of bales needs half-bales). In the infill-technique, the bales<br />
are compressed more easily with adding flakes between two plates. Bales can<br />
also be compressed to a certain density by simply rebinding it with strings,<br />
depending on the strength you tear, or with screw clamps. But as bale needles are<br />
connected to straw bale building like the halms to the bale, let's look at these tools.<br />
Actually a pointed wooden stick with two holes at the top is enough for their<br />
function (since there are two new cords needed –- one for the right, one for the left<br />
bale part). There are also combined bale needles (which are connected to a<br />
bar/handle, which pull all four cords through the bale at the same time (two upper<br />
and two lower – instead of the two existing cords). After you pulled your strings<br />
through the bale, the cords are knotted to each half-bale. There are special knots, as<br />
they are known from sailing. After you rebound your halfs, the original two cords are<br />
removed, thereby maintaining the density of the bale. If you took the right strings on<br />
the right half bale you can divide your bale (otherwise, if strings are crossed, you<br />
have two connected half-bales). So you can definitely say that some straw balers<br />
make a science out of a simple thing.<br />
32
<strong>U3</strong> – LOAD-BEARING STRAW BALE BUILDING<br />
TIPPS S3<br />
<strong>U3</strong><br />
TOOLS FOR LOAD-BEARING STRAW BALE BUILDING<br />
01 3<br />
Straw Bale Tools: Shaving<br />
Surfaces with Hedge Saws<br />
We do not only want to squeeze a few protruding stalks with hedge saws, in most<br />
cases we want a plane surface to save plaster and to avoid different drying times,<br />
even if bales are slightly differently thick or bulged or not exactly installed plane.<br />
Even if there are customers who prefer a more organic-hunched surface, in most<br />
cases they mean slight bumps in the (hand-)plaster and not simply covering uneven<br />
bales with the plaster. The cutting of the hunches of straw bales is a long-term work,<br />
but it really becomes hard work with not really sharp hedge saws. Unfortunately<br />
sharpening is often as expensive as a new one. A tip to save energy is to pick hedge<br />
saws with a rather shorter sword (about 50–60 cm). The longer the sword, the more<br />
pressure we need to push to the bale surface, and the harder it is to shave a round<br />
wall or vault inside. In terms of strength: from 450 W, hedge trimmers are robust and<br />
strong enough. The sharpness of the knives is much more important. Hedge saws<br />
are among the very safe machines (since they cut only between the knives).<br />
Nevertheless, you can tweak neatly with hedge saws (a small cut with painful<br />
bruising is the result). It can happen when you sit on the scaffolding shaving the<br />
walls. More often, if you don't take care, you will cut the cable and cause a short<br />
circuit. Therefore, it is best to carry the cable over the shoulder. Or choose a model<br />
with battery.<br />
33
<strong>U3</strong> – LOAD-BEARING STRAW BALE BUILDING<br />
TIPPS S3<br />
<strong>U3</strong><br />
TOOLS FOR LOAD-BEARING STRAW BALE BUILDING<br />
01 4<br />
Straw Bale Tools: the Straw Bale<br />
Hammer or Persuader<br />
This wooden hammer "persuades" each bale (at least as long as it is not fixed with<br />
battens). It is a must on each straw building site and also easy to manufacture with<br />
leftover construction wood. Only the handle should be sturdy (typically hardwood).<br />
Do not screw the handle to the wooden plates too often (twice should be enough),<br />
otherwise it will break more easily at this point. The persuader should be heavy, but<br />
it is used with a swing to move the bales back into the row, or to connect the upper<br />
bale with the underlying ones well.<br />
34
<strong>U3</strong> – LOAD-BEARING STRAW BALE BUILDING<br />
TIPPS S3<br />
<strong>U3</strong><br />
TOOLS FOR LOAD-BEARING STRAW BALE BUILDING<br />
01 5<br />
Straw Bale Tools:<br />
Gap Filler in Two Sizes<br />
No one can fill straw bales between posts/rafters (or stack them over one another in<br />
the load-bearing straw bale building) without leaving any holes at all. This is due to<br />
the fact that bales are often rounded at the edges rather than square; on the other<br />
hand, cavities can also develop when filling (densifying) with layers. And finally it<br />
happens again and again that, for structural reasons, there is a (diagonal) squared or<br />
round wood in the insulation area, such as the planks of an intermediate ceiling. In<br />
order to fill these cavities with (loose) straw and prevent convection in the<br />
insulation layer as well as thermal bridges, we use selfmade, simple stuffing tools.<br />
Of course, you can also stuff with your hands (fingers), but I wouldn’t recommend<br />
that for larger areas. After some days you cannot move your fingers any more.<br />
Especially if the wall is to be plastered, it is important to stuff the straw in the same<br />
density as the bales nearby, so that the weight of the plaster does not pull it out<br />
again.<br />
For these purpose we need two gap fillers or "stuff sticks", made of strips of 25×25<br />
mm (1 ×1 ") for the small and 25×50 mm for the large one. So we are building a "T",<br />
which we screw together once or twice (6–8 cm screw, 5–6 mm hole pre-drill). The<br />
smaller handle has a length of 1 5 cm, the larger handle has a length of 25–30 cm,<br />
which we bevel at the top like a screwdriver (with a jigsaw or crosscut saw). Finally,<br />
we put a small notch in the middle of the "cutting edge", so that the straw to be<br />
stuffed is bundled together more effectively. Finally we take sandpaper (or a rasp)<br />
and round off all edges a little bit.<br />
35
<strong>U3</strong> – LOAD-BEARING STRAW BALE BUILDING INFO 2<br />
Cords and Knots<br />
<strong>U3</strong><br />
36
37
<strong>U3</strong> – LOAD-BEARING STRAW BALE BUILDING INFO 3<br />
STRUCTURAL BEHAVIOUR<br />
<strong>U3</strong><br />
Virko Kade:<br />
Structural Behaviour<br />
Like any other building material, straw bales react in a very specific way to forces<br />
working in on single bales or on the whole building. Settlement is as much an issue<br />
as is known from traditional wood construction. The ductility of the straw bale<br />
results in (besides good thermal and acoustic insulation) an extremely good<br />
performance withstanding earth quakes. Tests conducted in the USA showed no<br />
failure even exposed to earth quakes of the highest level!<br />
Performing our own tests, we put a weight of 35 KN (3.5 metric tons) on a small<br />
bale, which did not destroy it. Only seconds after it was almost back to it’s original<br />
size, and after five minutes it was exactly like before the test.<br />
What loads can a straw bale wall bear without collapsing?<br />
The structural engineer Bruce King, who was part of the development of the straw<br />
bale building regulations in the USA, recommends not more than 500 kg per meter<br />
of straw bale wall as upper limit and calculation base. According to the building laws<br />
in the States however, the walls are supposed to bear the loads without being<br />
plastered. We put several tons per meter on a plastered sample straw bale wall<br />
without facing structural failure. Only the wall plate was forced between the two<br />
plastered surfaces. Massive snow loads on some of “my” buildings amounted to an<br />
actual load of 1.000 kg per meter wall and more without causing any cracks in the<br />
plaster. We can learn from this, that a heavy roof truss with roof tiles doesn’t work, at<br />
least with small bales. It makes sense to construct a roof as light as possible and<br />
reinforce it with a structural partition wall as “snow insurance”. Furthermore using<br />
small bales one-storey buildings are advisable, at least with the usual Alpine snow<br />
loads in mind. The Swiss architect Werner Schmidt proved that with big bales even<br />
3.5 storeys and substantially higher snow loads can work (see appendix Statics<br />
House Fliri p. 80).<br />
38<br />
What height of a straw bale wall is legally possible?<br />
In countries with specific straw bale building regulations the condition is being<br />
upheld, that the ratio of height and width of the wall should be < 6:1. This means a<br />
maximum of eight small bales on top of each other. The actual height of the room<br />
can be varied to some extent by adjusting the height of the wooden construction at<br />
the base and of the ring beam. This very regulations recommend for small bale<br />
constructions, to keep the length of a straight wall without bracing (e.g. with<br />
partitions) below six metres. A realistic limit according to my personal experiences!
<strong>U3</strong> – LOAD-BEARING STRAW BALE BUILDING INFO 3<br />
STRUCTURAL BEHAVIOUR<br />
<strong>U3</strong><br />
39
<strong>U3</strong> – LOAD-BEARING STRAW BALE BUILDING INFO 3<br />
STRUCTURAL BEHAVIOUR<br />
<strong>U3</strong><br />
40
<strong>U3</strong> – LOAD-BEARING STRAW BALE BUILDING INFO 3<br />
STRUCTURAL BEHAVIOUR<br />
<strong>U3</strong><br />
41
<strong>U3</strong> – LOAD-BEARING STRAW BALE BUILDING INFO 4<br />
COMPRESSING & SETTLEMENT<br />
<strong>U3</strong><br />
Virko Kade:<br />
Compressing and Settlement<br />
In load-bearing straw bale building, the bales are usually installed “lying flat”.<br />
Because the orientation of the straw is more or less uniform thanks to the pressing<br />
process, the stems are lying on the floor or parallel to it, respectively.<br />
In principle, thus the settlement can be bigger compared to an upright installment of<br />
the bales (which is common in certain timber frame constructions), but “standing”<br />
bales are running the risk of snapping under pressure, which would lead to the wall<br />
collapsing. If the bale/stem orientation is lying flat, the stalks are pressed into one<br />
another and wedged tight. The higher the pressure, the better the stability. Soon a<br />
single bale as part of a wall construction can no longer be moved or put into a better<br />
position. Corrections should therefore be done before the compression with straps.<br />
Generally speaking, straw bales should already be compressed as much as possible<br />
during the “brick”-laying; e.g. you could chose the heaviest person at site and let<br />
him walk on the wall crest every two or three layers.<br />
Nevertheless: Be careful when fitting bales in openings that are actually too small! A<br />
bale that is too long and is nonetheless forced into place with all strength moves<br />
other bales to the side, the corners are bulging outwards, the point load on window<br />
frames can get very high and so forth.<br />
When using small bales, the wall height is already below the theoretical measure of<br />
36 cm × 8 bales only by compressing it with a persons weight. Ideally the compression<br />
should be done mostly with straps and ratchets rather than by the weight of the<br />
roof truss. Therefore the strap-compressing should be exhausted before mounting<br />
the roof truss. The amount of settlement is the result of so many variables, that it<br />
can hardly be calculated.<br />
With small bales, the difference between the actual and the theoretical measurements<br />
can be between 5 and 7 %, with jumbo bales it’s 0 to 0.5 %. The compressing<br />
of big bales yields almost no measurable results, it’s importance lies in the enabling<br />
of an even settlement. Furthermore the resistance of the bales towards roof loads is<br />
increased. And: The straps which remain below the plaster are the only statically<br />
effective bracing against wind load.<br />
42
<strong>U3</strong> – LOAD-BEARING STRAW BALE BUILDING INFO 4<br />
COMPRESSING & SETTLEMENT<br />
<strong>U3</strong><br />
43
<strong>U3</strong> – LOAD-BEARING STRAW BALE BUILDING INFO 5<br />
BUILDING LAW (IN AUSTRIA)<br />
<strong>U3</strong><br />
Virko Kade:<br />
Building Law: Legislation<br />
in Austria<br />
44<br />
The straw bale building regulations differ very much from country to country. Many<br />
countries don’t have any specific regulation at all, others only recommendations.<br />
The most precise laws are to be found in the USA, which comes with advantages<br />
and disadvantages. E.g. the so-called chicken wire has to be used flat-spread, which<br />
can cause problems in wet climates, not to speak of electromagnetic radiation etc.<br />
On the plus side the regulations provide some sort of planning security, especially<br />
with regard to load-bearing constructions. Consequently the majority of straw bale<br />
buildings in the USA are load-bearing in the making, like in several other countries,<br />
btw.<br />
In Austria there is no general building control approval including a structural<br />
calculation. The certified bales are only approved with regard to insulation<br />
properties, fire resistance and humidity. When using them for insulation purposes<br />
only, it is usually no problem to get a building approval, even insurance companies<br />
nowadays have listed straw bales as building material.<br />
If you’d like to build with structurally loaded straw bales, however, an individual<br />
authorization is required. That means, that the building control can simply give its<br />
approval “one house at a time”, ideally without the need of any further proof. It helps<br />
the cause to refer to existing buildings as well as to the ecological advantages and<br />
the high level of innovation of this building technique. Written documentation<br />
(books, brochures), that shows how far the professionalization of straw bale building<br />
has come in Europe, can also help the authorities to rethink. But it is still possible<br />
that one has to provide a structural report. In this case it’s usually of little help to<br />
quote the building laws and structural surveys of other countries; you’ll have to<br />
deliver. Which can be quite time- and money-consuming, if you find a structural<br />
engineer at all.<br />
In the past it was often enough to convince the construction site management<br />
(master builder, carpenter) to incur liability for this construction method to satisfy<br />
the building control as well. Extensive structural tests aiming for a general building<br />
control approval according to the Austrian norms would unfortunately be very<br />
expensive and require a huge effort – too big a price considering the public and<br />
trade interest, which is not overwhelmingly high.
<strong>U3</strong> – LOAD-BEARING STRAW BALE BUILDING INFO 6<br />
<strong>U3</strong><br />
DESIGN<br />
Characteristics of Planning SBBs<br />
Each planning should take into account the specifics of the wall constructions (with<br />
regard to materials used and special features). This is particularly true in straw bale<br />
building, since the building material is not familiar to many planners and yet it<br />
requires a different way of thinking. First, of course, we should consider the bale<br />
dimensions – which are not precise and not following any industrial standard. A small<br />
bale has a fairly exact width (between 45 and 50 cm, according to the baler); the<br />
height may also vary according to the baler, but the most regular size is 36 cm.<br />
But: The bales become smaller by compression, so this height vanishes after the<br />
second or third layer. How much settlement you actually have in the end is not exactly<br />
calculable, so always calculate a bigger settlement to prevent the top beam from<br />
touching or resting on the window sill and endangering the entire statics. Stiff<br />
components such as intermediate walls or additional supports should be installed at a<br />
fixed height when the setting has been completed. Before that, work with scaffolding,<br />
e.g. threaded rods. Window sockets are designed ideally 20–30cm below the top beam<br />
and infilled later. For smaller windows that are walled in, calculate the total height of<br />
the window frame a few centimeters smaller than the theoretical bale dimension.<br />
The length has the greatest variance in straw bales. It can be set as desired in the<br />
baler, but still depends on the swath (width and stroke length of the tracks in the<br />
field) and the driving method. Even well-made small balls can have a variance on<br />
average of up to 1 0 cm or more. For a load-bearing building I calculate with a length<br />
of 1 00cm (which is regular for proper-density-bale dealers). That said: the length of<br />
small bales is not that big an issue, many of them have to be resized anyway, which<br />
can easily be done. In the case of big bales, however, it can take 20–30 min per piece<br />
(assuming crane/forklift is available).<br />
Theoretically, the length of most jumbo bales is 240cm. Although big bales are far<br />
more precise than small ones, some are still longer than others, gaps between bales<br />
occur … suddenly the wall is 20cm longer! Therefore I calculate in the planning with<br />
245cm length. Filling a gap later is definitely the least effort. Every second row,<br />
however, we still need half-bales to build properly bonded. At best you order the<br />
half-bales from the straw merchant before harvesting (some more than you need). I<br />
order with my desired length minus 5–1 0cm.<br />
In order to be able to work exactly and to facilitate window installation and plaster<br />
connections, all wooden components of the wall should be planned level with the<br />
straw surface, so both can be plastered in one layer.<br />
We should definitely focus on the following points regarding the statics:<br />
• no point loads on the top beam<br />
• avoid thrust forces on the wall crown (ring beam / top beam)<br />
• do not put loads on a blunt end wall, always arrange wooden posts here<br />
• use only the same bales for a building, preferably from the same harvest<br />
• enough additional bracing by intermediate walls (snow loads)<br />
• bearing walls (usually two): as few and as small windows as possible<br />
• max. wall length without bracing (for small bales with 50cm width): 6 metres<br />
• roof loads should be as small as possible (small bales)<br />
45
<strong>U3</strong> – LOAD-BEARING STRAW BALE BUILDING INFO 7<br />
BUILDING PHYSICS<br />
<strong>U3</strong><br />
Virko Kade:<br />
Remarks on Building Physics<br />
In central and northern Europe we should take into account a number of points that<br />
are less important in other parts of the world:<br />
• avoid metal parts in the straw, especially in the outer third (threaded rods, etc.)<br />
• avoid thermal bridges to ensure good insulation; furthermore, thermal bridges<br />
increase the effect of weak points<br />
• never place bales directly on concrete, always use a thermal separation<br />
• place the first row of bales always on wooden base plates (at least 5cm) in order<br />
to avoid water damage<br />
• do not use plasters which contain cement on the outside, only pure lime<br />
plasters; use clay plaster inside<br />
• interior constructive changeovers with straw walls such as partition walls,<br />
ceilings, etc. should always be sealed well, for example with plaster or clay fleece<br />
or similar<br />
• first bale layer should be above the splash water area (> 30cm)<br />
46
<strong>U3</strong> – LOAD-BEARING STRAW BALE BUILDING INFO 8<br />
QUESTIONS ABOUT DETAILS<br />
<strong>U3</strong><br />
Virko Kade:<br />
Questions about Details<br />
Wall bushings (pipes, cables, etc.)<br />
• Electricity and water (interior)<br />
• Chimney<br />
• Plaster preparations<br />
• Weather<br />
• Scheduling<br />
• Costs<br />
47
48
<strong>U3</strong> – LOAD-BEARING STRAW BALE BUILDING<br />
STRUCTURAL CALCULATION<br />
<strong>U3</strong><br />
Peter Braun / House by Arch. Werner Schmidt<br />
Load Bearing Straw Bale Building:<br />
About the Static Properties of Straw Bales<br />
Load Distribution<br />
The central bearer concentrates the load.<br />
49
<strong>U3</strong> – LOAD-BEARING STRAW BALE BUILDING<br />
STRUCTURAL CALCULATION<br />
<strong>U3</strong><br />
Peter Braun / House by Arch. Werner Schmidt<br />
Model: Office building of the city of Lausanne, architects collective carpe<br />
50
<strong>U3</strong> – LOAD-BEARING STRAW BALE BUILDING<br />
STRUCTURAL CALCULATION<br />
<strong>U3</strong><br />
Peter Braun / House by Arch. Werner Schmidt<br />
Deformation<br />
51
<strong>STEP</strong> – Straw Bale Training for European Professionals<br />
UNIT 3 – Load-bearing Straw Bale Construction (201 7)<br />
Editors/Tips: Herbert Gruber, Helmuth Santler (ASBN)<br />
Virko Kade, Michael Howlett; Coworks: BuildStrawPro-<br />
Team (Erasmus+ Projekt)<br />
Design & Photos: Herbert Gruber; Virko Kade, Werner<br />
Schmidt; more Photos: Werner Schmidt, provided by<br />
Architects. Illustrations/Icons: Michael Howlett (SBUK)<br />
This Handbook is based on<br />
the Handbook by Leonardo-<br />
Group <strong>STEP</strong> (201 5)<br />
52


