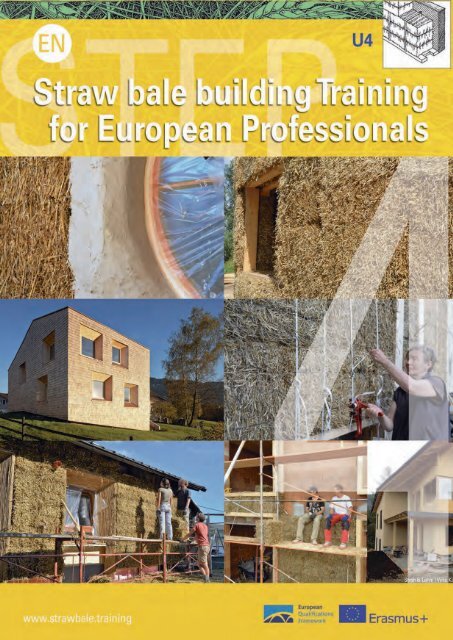
STEP U4 Handbook 2019 ENGLISH
You also want an ePaper? Increase the reach of your titles
YUMPU automatically turns print PDFs into web optimized ePapers that Google loves.
1
2
<strong>U4</strong> – WRAPPING (EXTERIOR THERMAL INSULATION)<br />
INDEX<br />
<strong>U4</strong><br />
TIME<br />
PAGE<br />
<strong>U4</strong> Learning Outcome 5<br />
<strong>U4</strong> Session 1 : Design and Planning ca. 6 hrs. 7<br />
Info: Thermal Insulation Composite Systems in Relation 8<br />
Info: Design and Planning: Details (Foundation/Windows) 1 2<br />
Tips: Planning-Checklist Wrapping 1 4<br />
001 -1 4 Hybrid Foundation, 002-1 5 Perimeter-Insulation, 003-1 6 Drainage,<br />
004-1 7 Roof Overhang, 005-1 8 Windows and Doors, 006-1 9 Scaffolding<br />
<strong>U4</strong> S2: Constructions 2 days 21<br />
Info: Wrapping-Konstruktionssysteme 22<br />
Tipps: Konstruktionssysteme 24<br />
007-24 CUT centered, 008-25 CUT outside, 009-26 Binding Bales to the Wall,<br />
01 0-27 Spanning Bales down, 011 -28 Spanning Bales to the Wall, 01 2-29 Pallette-<br />
Hybrid-Constructions, 01 3-30 Cage for Bale Layers, 01 4-31 Drop Nose, 01 5-32 Direct<br />
Plaster, 01 6-34 Cladding, 01 7-35 Glass Facade<br />
<strong>U4</strong> S3: Prefab-Constructions 1 day 37<br />
Info &Tipps: Wrapping-Prefab-Systems 38<br />
01 8-38 system/haus/bau / ASBN, 01 9-39 Jules Ferry Residence / Bet Gaujard,<br />
020-41 Complemedis / Werner Schmidt, 021 -42 Straw/Reed-Facade by Kengo Kuma<br />
Ass., 022-42 Waseda University Students: A-Recipe-To-Live-Straw-House,<br />
023-43 Enterprise Centre of University East Anglia: Prefab Straw-Reed-Facade,<br />
024-43 Schelfbauhütte: Montage System for Straw Bale-Wrapping,<br />
025-44 School Montreuil and Issy les Moulineux: Exterior Modular Straw Bale<br />
Facade, 027-45 Make your City Smart! / Paul Schulz, TU Vienna, 027-46 Calculation<br />
Building Costs<br />
<strong>U4</strong> S4: Alternatives to Straw Bales ca. 2 hrs. 49<br />
Info &Tipps: Natural NAWARO-Alternatives 49<br />
023-47 Inject Straw Fibres, 024-48 Straw Mats, 025-49 Reed Mats<br />
Credits and Impress 52<br />
3
4
<strong>U4</strong> – WRAPPING (EXTERIOR THERMAL INSULATION)<br />
LEARNING OUTCOMES<br />
<strong>U4</strong><br />
Level 3 (ECVET credit points: 1 5) / Level 4 (12)<br />
Knowledge<br />
Skills<br />
Trainees know …<br />
• about the existing national building<br />
regulations related to straw bale building.<br />
• the specific problems organizing a wrapping<br />
straw bale building site and their solutions<br />
(weather protection, safety, logistics).<br />
• the symbols to be able to understand plans<br />
and construction drawings.<br />
• new and historical wall-constructions and<br />
their impact on wrapping (horizontal moisture<br />
barrier, position ofwindows, consistence of<br />
plaster, roofoverhang).<br />
• the different methods and techniques of<br />
wrapping, their requirements, advantages and<br />
disadvantages.<br />
• the necessity and the techniques to avoid and<br />
to close gaps (between bales and between<br />
bales and construction).<br />
• other bio-sourced insulation materials, that<br />
can be used additionally in straw bale<br />
building.<br />
• different fixings and their characteristic and<br />
the suitable methods of compressing.<br />
• different wrapping techniques and their<br />
requirements related to schedule, planning,<br />
budget and resources.<br />
• about techniques and construction details for<br />
the adjacent building elements (ceiling, walls,<br />
floor- and roofplates) avoiding cold bridges.<br />
• techniques to manufacture the additive base<br />
plate for straw isolation avoiding cold bridges.<br />
• the reasons and the techniques to prepare the<br />
substrate with a plane and gap free surface.<br />
Trainees can …<br />
• control the quality ofexisting constructions in<br />
relation to its suitability for wrapping straw<br />
constructions.<br />
• handle the tools and machines which are used<br />
in wrapping construction.<br />
• apply different wrapping and retrofitting<br />
methods professionally.<br />
• resize and fix the bales and kompress them if<br />
needed.<br />
• fix the bales on an existing wall and fill gaps<br />
with straw or another suitable sustainable<br />
insulation material in order to produce a<br />
continuous layer of insulation avoiding cold<br />
bridges.<br />
• make a lasting connection between the<br />
wrapping and the existing construction.<br />
• read and understand the symbols of plans<br />
and construction drawings.<br />
• make supportive wooden structures and<br />
posts and lintels for the openings.<br />
• give advice to others, who make the plinth<br />
wall and other requested details.<br />
• prepare the substrate for following crafts<br />
(plaster, cladding, air- and wind tightness) or<br />
execute it in accordance with them (level and<br />
shave the straw surface, fix the plaster ground<br />
on wooden construction elements).<br />
Competence<br />
Trainees can …<br />
• organize and attend the building site at all stages and adapt the working process, the use oftools and<br />
adequate techniques related to straw bale wrapping (planning, preparation, execution, additional crafts).<br />
• coordinate and communicate the special needs of wrapping constructions with other professionals.<br />
• explain different methods ofwrapping with straw with reference to advantages and disadvantages.<br />
• select good quality bales for wrapping and supervise the whole wrapping process during the<br />
construction period.<br />
5
6
<strong>U4</strong> – WRAPPING (EXTERIOR THERMAL INSULATION)<br />
SESSION PLAN S1<br />
<strong>U4</strong><br />
Session Plan <strong>U4</strong>-S1 : Design and Planning<br />
Objectives:<br />
Trainer:<br />
Trainees ...<br />
… have the ability to read and understand architectural plans and<br />
construction drawings.<br />
… know different structural options.<br />
… know the advantages and disadvantages of every solution.<br />
Skills:<br />
Make a building schedule<br />
Organize and finish the work according to schedule<br />
Make a cutting list<br />
Calculate the building costs<br />
Methods:<br />
Theory<br />
Practice<br />
Lecture/talk<br />
Explanations<br />
Practice<br />
Organization:<br />
Basics of architectural plans and construction drawings<br />
Different structural options, characteristics and bale<br />
requirements<br />
Advantages and disadvantages of different techniques<br />
How to prepare a building schedule<br />
How to make a cutting list<br />
Calculation of building costs (material, labour etc.)<br />
Study and develop a case-study comparing the results with<br />
other trainees.<br />
Prepare a case study for every group of trainees (2–3 persons), study it<br />
in order to be able to compare it with the results of the participants.<br />
Place:<br />
Classroom<br />
Duration:<br />
3 days<br />
Equipment:<br />
Beamer<br />
Flip chart<br />
Documents:<br />
Info sheets:<br />
I1 Drawing basics<br />
I2 Characteristics of<br />
different options<br />
I3 Drawings of pros and<br />
cons<br />
Text sheets:<br />
X1 Drawing basics<br />
X2 Characteristics of the<br />
different options<br />
X3 Organization of building<br />
site and schedule<br />
Exercise sheets:<br />
E1 Make a building schedule<br />
E2 Cutting list<br />
E3 Calculating material and<br />
costs<br />
E4 Drawing construction<br />
details<br />
Evaluation:<br />
Multiple choice<br />
7
<strong>U4</strong> – WRAPPING (EXTERIOR THERMAL INSULATION) INFO 1<br />
<strong>U4</strong>-S1-I1 : Thermal Insulation Composite System<br />
<strong>U4</strong><br />
U-Wert: 0,1 32 W/m 2 K<br />
PEI n.e.: >1 9 kWh/m²<br />
U-Wert: 0,1 28 W/m 2 K<br />
PEI n.e.: >23 kWh/m²<br />
U-Wert: 0,1 78 W/m 2 K<br />
PEI n.e.: >1 3 kWh/m²<br />
U-Wert: 0,1 73 W/m 2 K<br />
PEI n.e.: >1 3 kWh/m²<br />
U-Wert: 0,1 74 W/m 2 K<br />
PEI n.e.: >1 33 kWh/m²<br />
Straw Bales with Direct Limeplaster<br />
Bale density ca. 1 00 kg, complete 38,5 cm thick<br />
Surface: shaving, stuffing, plastering<br />
Wrapping-System: Material Price/m2 (AT)<br />
Straw Bales: around € 1 0,00 - 1 7,40/m2 (cert.)<br />
Constr. with/out window box: € 1 3,05 - 36,50/m2<br />
Lime plaster 2,5 cm, mesh, Rabolin: € 1 0,00/m2<br />
Material-Price complete: € 33,05 - 63,90/m2<br />
Straw Bales with ventilated Cladding<br />
Bale density ca. 90 kg, complete 45 cm thick<br />
Wrapping-System: Material Price/m2 (AT)<br />
Straw Bales: around € 1 0,00 - 1 7,40/m2 (cert.)<br />
Constr. with/out window box: € 1 3,05 - 36,50/m2<br />
diffusion open facadeboard (DWD): € 8,46/m2<br />
Batten, Counterbatten, Cladding: € 40,00/m2<br />
Material-Price complete: € 71,51 - 102,36/m2<br />
Naporo Hempmat + Capatect Facade<br />
20 cm Hemp Board/Mat, complete 21 cm<br />
Wrapping-System: Material Price/m2 (AT)<br />
Hempmat (Naporo): 24,91 - 41 ,52/m2<br />
Screw dowel, filler, plaster base, fibre glass<br />
mesh, CarboPorPlaster: € 24,80/m2<br />
+/-Windowbox with Insulation: € 23,45/m2<br />
Material-Price complete: € 50,00 - 89,77/m2<br />
Mini-StrawBales, Woodfibreb., Lime-Directplaster<br />
26 cm Straw, 4 cm SteicoProtect, compl. 32,5 cm<br />
Wrapping-System: Material Price/m2 (AT)<br />
Straw Bales: around € 8,00 - 11 ,20/m2 (cert.)<br />
Constr. with/out window box: € 1 3,05 - 36,50/m2<br />
diffusion open facadeboard: € 1 3,1 8/m2<br />
Lime plaster 2,5 cm, mesh: € 8,70/m2<br />
Material-Price complete: € 43,00 - 69,58/m2<br />
to compare: Baumit WDVS EPS-F<br />
1 8 cm EPS-F, complete ca. 20 cm<br />
Wrapping-System: Material Price/m2 (AT)<br />
EPS-F (Polystyrol-Insulation): 22,60/m2<br />
Adhesive filler, fibre glass mesh, primer,<br />
Silikat Top: € 1 7,09/m2<br />
+/-Windowbox with Insulation: € 23,45/m2<br />
Material-Price complete: € 40,00 - 63,14/m2<br />
8<br />
Prices: baustrohballen.at/sonnenklee.at/frischeis.at/haeuser-in-wolle.com/bauschilf.at/hagebau.at
<strong>U4</strong> – WRAPPING (EXTERIOR THERMAL INSULATION) INFO 1<br />
<strong>U4</strong>-S1-I1 : Thermal Insulation Composite System<br />
<strong>U4</strong><br />
Source: u-wert.net, infos without warranty<br />
9
<strong>U4</strong> – WRAPPING (EXTERIOR THERMAL INSULATION) INFO 1<br />
<strong>U4</strong>-S1-I1 : Thermal Insulation Composite Systems in Relation<br />
<strong>U4</strong><br />
10
<strong>U4</strong> – WRAPPING (EXTERIOR THERMAL INSULATION) INFO 1<br />
<strong>U4</strong>-S1-I1 : Thermal Insulation Composite Systems in Relation<br />
<strong>U4</strong><br />
11
<strong>U4</strong> – WRAPPING (EXTERIOR THERMAL INSULATION)<br />
INFO 2<br />
<strong>U4</strong><br />
Session Plan <strong>U4</strong>-S1 : Design and Planning<br />
1 2
<strong>U4</strong> – WRAPPING (EXTERIOR THERMAL INSULATION)<br />
INFO 2<br />
<strong>U4</strong><br />
Session Plan <strong>U4</strong>-S1 : Design and Planning<br />
1 3
<strong>U4</strong> – WRAPPING (EXTERIOR THERMAL INSULATION)<br />
TIPS<br />
<strong>U4</strong><br />
Session Plan <strong>U4</strong>-S1 : Design and Planning-Checklist<br />
Task:<br />
Calculate PEI<br />
of this foundation<br />
per m<br />
1 4<br />
001<br />
Insulated Hybrid Foundation:<br />
Concrete or not Concrete?<br />
In order not to have to build with organic, moisture-sensitive materials in the splash<br />
area, we have to somehow overcome the 30 cm - with a base or auxiliary<br />
foundation. In general, this is made of concrete, although we don't have much loads<br />
except a plastered straw ball wall. What actually speaks against concrete? Concrete<br />
is an artificial mixture of cement, sand or gravel and water. Usually. further additives<br />
are used. The required energy expenditure for the production of concrete depends<br />
essentially on the composition of the concrete. The component with the highest<br />
energy content is the cement. Furthermore, a distinction is made between reinforced<br />
and unreinforced concrete. The reinforcement degree has a significant influence on<br />
the production energy PEC (transport concrete C20 / 25: PEI: 31 5 kWh / m3, λ = 2.0 W<br />
/ mK, concrete blocks: PEI: 379 kWh / m3, λ = 1 ,35W / mK).<br />
Advantages Concrete: High compressive strength, good sound insulation, good fire<br />
protection, good moisture protection, high thermal mass, any shape<br />
Disadvantages Concrete: poor thermal insulation, aging process, "composite<br />
building material".<br />
Thermoblock-Bricks have an even higher primary energy content (perlite filled)<br />
Brick S, Poroton: PEI: 484 kWh / m3, λ = 0.09-0.11 W / m.K)<br />
One possibility is to reduce the proportion of concrete as much as possible and to<br />
use mineralic, insulating building materials instead. However, their properties are<br />
also very different: perlite (PEI: 1 87 kWh / m3, λ = 0.06 W / mK), foam glass (PEI: 224<br />
kWh / m3, λ = 0.07 W / mK), Leca (PEI: 850 kWh / m3, λ = 0.035 W / mK) as well as<br />
XPS have a higher primary energy content than concrete (PEI: 548 kWh / m3, λ = 0.1 6<br />
W / mK) ) Solution: 1 5 cm concrete blocks with perlite or foam glass. Thus, the<br />
primary energy content remains justifiable.<br />
Source ofallValues for PEC und λ:TU Munich
<strong>U4</strong> – WRAPPING (EXTERIOR THERMAL INSULATION)<br />
TIPS<br />
<strong>U4</strong><br />
Session Plan <strong>U4</strong>-S1 : Design and Planning-Checklist<br />
002<br />
Foamglass-gravel and Cork<br />
Perim.insulation instead of XPS<br />
Are there any ways to prevent concrete and XPS in the wrapping foundation and<br />
perimeter insulation? The starting price for comparison is: € 9.74 / m.<br />
If we take a single-storey building (3 m high), we have a static load of straw bales<br />
(1 00 kg / m3 = 1 08 kg / and lime plaster (1 400 kg / m3 = 1 05 kg), thus total of 227 kg /<br />
m foundation. This is comparatively little load. Furthermore, these wrapping loads<br />
are not carried completely by the foundation, but partly by the wall and the roof<br />
rafter (suspended construction). And the 6 cm foot threshold distributes the unequal<br />
loads.<br />
Now we know that foam glass e.g. is suitable as a capillary, heat-insulating and loadbearing<br />
layer under ground level. 30-40 cm foam glass gravel around the house are<br />
enough (price at 50 cm depth € 11 ,70 - 1 5,70 / m). In order to overcome the 30 cm<br />
above ground level, Mirapor proposes so-called wall bags. Foam glass could also be<br />
filled into gabions (30 x 30 x 30 cm: € 8.95) or as in the case of the Earthbags<br />
(Calearth), filled into PP sandbags (€ 0,83, 4 rows of á 40 x 60 cm = € 6.46 / mm).<br />
Another alternative is cork as perimeter insulation. Cork should not be placed<br />
directly on the damp ground, but it can bridge the 30 cm on top of foam-glass gravel<br />
(price at 1 0 cm thickness and 30 cm height: 1 2,53 / m). A lime-cement plaster with<br />
glass fiber mesh ensures that this auxiliary foundation does not settle. But: without<br />
guarantee!<br />
1 5
<strong>U4</strong> – WRAPPING (EXTERIOR THERMAL INSULATION)<br />
TIPS<br />
<strong>U4</strong><br />
Session Plan <strong>U4</strong>-S1 : Design and Planning-Checklist<br />
1 6<br />
003<br />
Advantages and Disadvantages<br />
of Drains in Restoration<br />
In the restoration and clearing of old building cellars no drainages are generally<br />
found. This has its good reason in building the floors of these basements. In many of<br />
the cellars, for example, only a loose brick is laid in the Wilhelminian era, which does<br />
not have any kind of sealing against the ground. If foundations are built, they are<br />
usually water-permeable and in no way waterproof concrete. On the outside, the<br />
floor materials were again installed in a slightly compressed manner, so that at the<br />
base of the walls only capillary moisture - ie soil moisture, which could not be<br />
removed by drainage - is present. If the soil situation remains the same, the<br />
installation of a drainage tube would be completely ineffective, since a drainage pipe<br />
only drains water in liquid form.<br />
The installation of a drainage system with leachable granules, drainage plates and<br />
drainage pipes on the exterior walls and foundations would considerably impair<br />
these cellar constructions. Water would permanently flew into the open-pore and<br />
leachable drainage package next to the basement, which would lead to continuous<br />
water input and damage on walls and foundations. In particular, the soil moisture<br />
present to date under the basement floor would convert to a moisture saturation of<br />
the soil, which could not be relieved by a functional drainage at the exterior side of<br />
the walls.<br />
Respecting this, drains in old buildings are not purposeful and usually senseless,<br />
especially since a drainage in water-bearing soil layers would only bring about a<br />
reduction in the water amount. (Source: trockenlegung-hannover.de/drainagen)
<strong>U4</strong> – WRAPPING (EXTERIOR THERMAL INSULATION)<br />
TIPS<br />
<strong>U4</strong><br />
Session Plan <strong>U4</strong>-S1 : Design and Planning-Checklist<br />
004<br />
Is there enough Roof-Overhang<br />
lateral and on gable-side?<br />
Roof overhang lateral: the distance from the façade to the respective eaves (drip<br />
edge); Roof overhang at the gable-side (Ortgang) beyond the façade.<br />
While the extension of the lateral roof overhang is relatively simple, static<br />
calculations are mandatory when the roof overhang on the gable-side is extended.<br />
The administrative background has also to be added to the effort. When you renew<br />
the roof overhang at the gable side, you will have to obtain a building permit. In<br />
addition, building laws define a minimum distance to adjacent areas and also to the<br />
road. Finally, in many cases the neighbors will also have to confirm their agreement<br />
in writing.<br />
This also means that you need a structural engineer or architect who can design and<br />
sign the appropriate blueprints before submitting them to the building authorities<br />
for approval.<br />
Please check, before you cover an outer insulation, the roof overhang on all sides,<br />
for the wrapping with straw you need in the minimum case 36 to 40 cm on all sides.<br />
If this space is not available, it is advisable to think about thinner thermal insulation<br />
layers (for example with 26 cm minibales, flakes or other insulation) (see page 8 or<br />
tip 01 3). Or you extend the roof unconventionally: with a short extra roof under the<br />
main roof above the wrapped straw bale wall. This could be covered for example<br />
with a metal sheet (roofer / plumber, see picture on the upper right).<br />
17
<strong>U4</strong> – WRAPPING (EXTERIOR THERMAL INSULATION)<br />
TIPS<br />
<strong>U4</strong><br />
Session Plan <strong>U4</strong>-S1 : Design and Planning-Checklist<br />
005<br />
Solid Boxes carry the (new)<br />
Windows and Doors:<br />
If windows are left in the existing wall (e.g. because they still correspond to the<br />
thermal insulation standard), a thermal bridge is created because the straw bale<br />
wrapping insulation is completely open here. Windows are always the weak point in<br />
any house (8 - 1 2 cm wood or plastic frame has a significantly worse insulation<br />
value than 36 cm straw). In this case, the window frames must be massively<br />
insulated (outside), but this usually causes a problem (from the wall to the window<br />
wing it is usually not more than 5-6 cm).<br />
So windows are ideally removed and placed in the insulation area. Sturdy boxes (the<br />
larger the window or the (terrace) door, the more solid) are used for this purpose,<br />
which are pushed into the cavities after removal and are laterally fixed (and<br />
insulated). Concrete formwork panels meet these requirements better than OSB and<br />
are cheaper than natural three-layer panels. In addition, their impregnation provides<br />
a double rain protection (window sill). On the front, they are attached to our hybrid<br />
posts. The window sill is slightly sloped (2 °) and because the additional 40 cm<br />
insulation layer greatly reduces the amount of sunlight the box can also be beveled<br />
outwards (45 °). It is simpler, however, to extend the box only 1 8 cm to the center of<br />
the straw bale (where the windows are then installed at the front edge of the box)<br />
and the angle before is produced by cutting the bales (alligator / hedge trimmer).<br />
1 8
<strong>U4</strong> – WRAPPING (EXTERIOR THERMAL INSULATION)<br />
TIPS<br />
<strong>U4</strong><br />
Session Plan <strong>U4</strong>-S1 : Design and Planning-Checklist<br />
006<br />
Safety and Efficiency:<br />
Do we need a Scaffolding?<br />
Anyone who has lifted a 1 4 kg strawbale on a ladder standing in front of a wall and<br />
does not have the muscles of Arnold Schwarzenegger can sing a song of it: a<br />
scaffolding helps not only to save energy (and to not leave the motivation), it also<br />
helps to maintain the quality of the installation. Bales need to be compressed<br />
downwards with your weight (feet) or the persuader (wooden hammer) and with<br />
additional flakes to close the gaps to the adjacent bale, they must also be installed<br />
as flush as possible in a level with the neighboring bales ( so that we get a flat<br />
surface for the subsequent plaster). We are talking about quality work, which can<br />
only be done on a safe scaffolding. In single-storey houses, you may work perfectly<br />
with a few stable bucks and scaffolding boards. Or a smaller sliding aluminum<br />
scaffolding (which can be rented easily and cheaply, e.g. at geruestverleih.at: € 70, - /<br />
week). In two-storey buildings it is advisable to have a scaffolding erected by a<br />
scaffolding builder or master builder, as it can be used also by other craftsmen (e.g<br />
plasterers and roofers). Saving money here can ultimately become more expensive<br />
as not only the motivation of the straw bale builders or helpers is decreasing but<br />
also the workload during the post-processing of the wall increases massively. in a<br />
new building the bales can be infilled from inside, in wrapping also the plastering is<br />
carried out exclusively from the outside. So please do not save money on the wrong<br />
place. Additionally the construction site becomes much safer.<br />
1 9
20
<strong>U4</strong> – WRAPPING (EXTERIOR THERMAL INSULATION)<br />
SESSION PLAN S2<br />
<strong>U4</strong><br />
Session Plan <strong>U4</strong>-S2: Construction<br />
Objectives:<br />
Trainer:<br />
Trainees ...<br />
… know different structural options of wrapping and retrofitting<br />
and their characteristics and bale requirements.<br />
… know how to fix the bales, to stabilize the system and all the<br />
different techniques.<br />
… know the different options to compress the bales within the<br />
systems.<br />
… know the details of the connections: foundation, corners,<br />
windows, doors, roof etc.<br />
… know how to prepare the different surfaces for plastering.<br />
Skills:<br />
Execute wrapping and retrofitting construction methods<br />
Use of different compression and fixing techniques<br />
Organize and finish the work according to schedule<br />
Execute good connection details<br />
Knowledge of how to maintain integrity of the insulation<br />
Prepare different surfaces for plastering<br />
Methods:<br />
Theory<br />
Practice<br />
Practice on different wrapping and retroffiting systems<br />
Different structural options of wrapping and retrofitting and<br />
their characteristics and bale requirements<br />
Fixing the bales with different techniques<br />
Compressing bales within different systems<br />
Advantages and disadvantages of wrapping and retrofitting<br />
techniques<br />
Details of connections: foundation, corners, windows and<br />
doors, roof, etc.<br />
Preparing different surfaces for plastering<br />
Study and develop a case-study comparing the results with<br />
other trainees.<br />
Place:<br />
Workshop or building-site<br />
and classroom<br />
Duration:<br />
5 days<br />
Equipment:<br />
Beamer (projector)<br />
Bales<br />
Structure or model to work<br />
on with tools<br />
Documents:<br />
Info sheets:<br />
I1 Wrapping<br />
I2 Retroffiting<br />
I3 Details<br />
Text sheets:<br />
X1 Wrapping<br />
X2 Retroffiting (Best<br />
building practice)<br />
Power point:<br />
P1 Ex. Wrapping<br />
P2 Ex. Retrofitting<br />
Evaluation:<br />
Multiple choice<br />
Organization:<br />
Preparation of a structure to be wrapped or retrofitted, preparation of a structure to demonstrate<br />
different construction details.<br />
Order enough bales, prepare tools for measuring, cutting, adjusting bales, fixing, compressing.<br />
Order all the material needed for preparing the plastering.<br />
21
<strong>U4</strong> – WRAPPING (EXTERIOR THERMAL INSULATION)<br />
INFO S2<br />
<strong>U4</strong><br />
Session Plan <strong>U4</strong>-S2: Construction<br />
22
<strong>U4</strong> – WRAPPING (EXTERIOR THERMAL INSULATION)<br />
INFO S2<br />
<strong>U4</strong><br />
Session Plan <strong>U4</strong>-S2: Construction<br />
23
<strong>U4</strong> – WRAPPING (EXTERIOR THERMAL INSULATION)<br />
TIPS<br />
<strong>U4</strong><br />
Session Plan <strong>U4</strong>-S2: Construction<br />
007<br />
CUT-Hybrid-Construction:<br />
centered - for direct plastering<br />
If the surface of the straw bale wall is directly plastered, the posts (usually planks<br />
2.5 x 1 5 cm are enough to hold the bales) are placed in the center. The back of our<br />
construction thus forms the wall of the old stock. The bale is simply pushed against<br />
the existing wall (on edge). If the wall is directly plastered, care must be taken when<br />
filling the bales to form a flat surface on the outer side (ie connect to the adjacent<br />
bales without gaps). In order to prevent the bales from slipping or falling out in<br />
hybrid constructions (where they are not clamped between the boards and the wall)<br />
they are fixed (nailed or screwed) after each row by battens (2.5 x 2.5 cm). Predrilling<br />
especially helps when the battens are nailed. This (5 m long) batten is entered in the<br />
bale (laid halm side) by cutting the straw on the surface with a bread knife or a wide,<br />
stable cutter. This additional 36 cm insulation (approx. 39 cm thickness incl. plaster)<br />
brings your house to low-energy standard. Alternatively, 26 cm miniballs can also be<br />
used (28.5 cm total thickness).<br />
24
<strong>U4</strong> – WRAPPING (EXTERIOR THERMAL INSULATION)<br />
TIPS<br />
<strong>U4</strong><br />
Session Plan <strong>U4</strong>-S2: Construction<br />
008<br />
CUT-Hybrid-Construction:<br />
outside - for (Timber-)Cladding<br />
If the front of the bales is to be planked with diffusion-open boards (for example, for<br />
a ventilated wooden facade), we place the posts (2.5 x 1 5 cm or better 4 x 1 5 cm)<br />
flush with the front of the 6 cm thick wooden base. In this case, we do not need<br />
battens to fix the bales, since they are clamped between the wall and the boards<br />
(diffusion-open 1 6 mm DWD). If the wall is slightly sloped, our Wrapping wall should<br />
also be slightly sloped, just like in the assembly of a insulation composite system,<br />
which is usually not levelled. Otherwise, it must also be stuffed after each row, since<br />
crevices in the dewpoint area lead to convection and thus condensation. Please<br />
check the exact bale thickness before installing the hybrid posts, there are also bales<br />
which differ by the standard size 36 cm (about 34 cm thick). The bale density does<br />
not have to be as high (from 85 kg / m3) as with direct plasters (1 00 kg) and when<br />
stuffing, it is enough to fill the holes just in such a way that holes disappear, the<br />
straw doesn#t have to be well anchored. Contrary to the direct plaster, since the<br />
boards also hold loose straw. However, overhanging straw should be cut off,<br />
especially along the stands (hedge trimmer), so that the straw does not slide<br />
between the post and the board during assembly. Since here the individual rows are<br />
not fixed with battens (which also fix the distance of the stands), it is important to<br />
ensure that the posts / planks do not bend during the filling (especially at the<br />
corners). And it is advisable to fix the stands at least after each storey (2,5-3 m) on<br />
the wall.<br />
25
<strong>U4</strong> – WRAPPING (EXTERIOR THERMAL INSULATION)<br />
TIPS<br />
<strong>U4</strong><br />
Session Plan <strong>U4</strong>-S2: Construction<br />
009<br />
Binding<br />
Straw Bales on the Wall<br />
Before the CUT hybrid construction was invented and adapted for wrapping, bales<br />
were attached to the walls with cords. New connecting cords were knotted on the<br />
two bale cords and these were then fixed to the wall (dowels and eyelets). This does<br />
not just sound like a lot of work, it is. In addition, there are other disadvantages of<br />
this (outdated) technique: the cords intersect the bales and deform them, fixing<br />
dowels in old walls can be a real challenge, the strings remain as in the load bearing<br />
straw bale technique on the bale, which makes shaving much harder (or impossible).<br />
The first layer of bales is attached to the base plate with small spikes (also as in loadbearing<br />
straw bale construction). Pointed 2.5 x 2.5 cm battens with a length of<br />
approx. 20 cm fit into a 3 cm drill hole in base wood, to prevent bales from slipping.<br />
The advantage of this technique (some argue with the continuous insulation area) is<br />
not clear on closer inspection, since hybrid posts (1 " planks) affect the total<br />
insulation value of the wall far less than e.g. remaining cavities, which are then filled<br />
with clay or COB or lime plaster. Of course, no "planking" for a wooden facade can<br />
be attached to this "construction", it can only be "plastered" directly. The technique is<br />
a mixture with or, rather, a relic of load bearing straw bale building, where bales<br />
have still been laid flat (47 - 50 cm bale thickness). Since we know that flat bales<br />
have a way worse insulation value than bales on edge, this technique is actually<br />
superfluous (unless wood is not available).<br />
26
<strong>U4</strong> – WRAPPING (EXTERIOR THERMAL INSULATION)<br />
TIPS<br />
<strong>U4</strong><br />
Session Plan <strong>U4</strong>-S2: Construction<br />
010<br />
Down-spanning<br />
Straw Bales in the Wall<br />
The down-spanning of straw bales also comes from load-bearing construction<br />
technology. Admittedly, it compresses the bales quite good, thus closing up fairly<br />
reliably gaps between the bale rows. The packaging tapes, which are used for this<br />
purpose and are clamped with a packing tong, remain in the wall and - similar to the<br />
cords (tip 09) - are a hindrance when shaving the walls. Also the wood consumption<br />
does not really decrease compared to the CUT technique, because instead of the<br />
stands a massive, at least 6 cm thick and 36 cm wide, wooden top plate hinders the<br />
bales before constriction. As well the base plate has to be doubled so that the tape<br />
can be pulled through. And again, the wrapping tapes are guided through eyelets,<br />
which are fastened to the old stock wall every 50 - 1 00 cm. In the case of bad bales,<br />
this technique may have advantages due to the stronger compression with the<br />
packaging tong (and possibly precompression with truck straps). In case of good<br />
bales, the technique as well as the binding with cords to the wall (tip 009) is actually<br />
only one big disadvantage compared to hybrid CUT construction.<br />
27
<strong>U4</strong> – WRAPPING (EXTERIOR THERMAL INSULATION)<br />
TIPS<br />
<strong>U4</strong><br />
Session Plan <strong>U4</strong>-S2: Construction<br />
011<br />
Straw Bales<br />
spanned to the Wall<br />
Jakub Wihan, the Czech strawball builder, who has worked with amazonnails for a<br />
long time, is the inventor of this optimized fixing technique, which is still used today<br />
in Slovakia (Boris Hoechel demonstrates the technique). Bbales are installed here<br />
again on edge, after the second row, a wrapping tape is placed on the straw bales<br />
and guided through two eyelets attached to the wall. On the front, 2 strips or round<br />
wood are threaded through the cords and formed into an "H" with an approx. 50 cm<br />
wide spacing board. As soon as further rows of bales have been piled up, the<br />
wrapping tapes are now pulled over the "H" connected to the eyelets of the back<br />
wall. This H auxiliary construction presses the bales towards the wall, with sufficient<br />
tension (and not too hard bales) the wood pulls into the straw bales and forms a<br />
straight surface at the front. The advantage of this technique is that the bales are<br />
attached to the wall with pressure (tension), exactly what we mean by fixing the<br />
bales to the existing wall. And the technique is relatively fast, you only need 2<br />
eyelets per "H" and can simultaneously clamp 6-9 bales on the wall. But once again,<br />
the disadvantages of this technique are: the durable fixation depends on the 2<br />
eyelets, if they are not well anchored, the entire bale wall falls, as well as if the<br />
wrapping band tears. Also here the strings remain on the bale and hinder shaving.<br />
Finally, at least the board must be provided with a plaster ground.<br />
28
<strong>U4</strong> – WRAPPING (EXTERIOR THERMAL INSULATION)<br />
TIPS<br />
<strong>U4</strong><br />
Session Plan <strong>U4</strong>-S2: Construction<br />
01 2<br />
Straw Flakes for thinner Layers<br />
mounted with Pallettes<br />
Used pallets are a favorable construction material, usually cheaper than the wood in<br />
it. In addition, we do not need Euro pallets for this technology, but the more<br />
favorable pallets with a little more space between the boards at the top. These can<br />
be filled well with bale flakes while lying backwards on the ground. Afterwards, the<br />
filled and "insulated" pallets are simply screwed to the wall, thus compressing the<br />
protruding bales again compactly. From the front (visible) cavities can be re-stuffed<br />
(therefore also the slightly larger distance between the boards is ideal). In the spaces<br />
we fill clay with a lot of straw fibers (COB), which sucks the moisture from our<br />
dewpoint area, since clay is strongly hygroscopic (water-absorbing). As with a<br />
diagonal bracing, it must be covered with reed stucco or another plaster carrier. The<br />
advantage of this technique is that it can achieve lower insulation thicknesses up<br />
from 1 5 cm (pallet thickness). Depending on the distance between the wall and the<br />
pallet, the insulation thickness can be set individually. Pallets are solidly built, even if<br />
a nail is missing or riddled, it doen't fall apart. Who once tried to break a pallet,<br />
knows how stable they are. This technology is also extremely favorable at around €<br />
1 0, - / m2 of material requirements (wooden stands, pallet, straw). By the way, we do<br />
not fix the pallets directly on the wall, but on planks which are connected between<br />
base plate and the roof by a distance of the width of the pallets (for example 1 25<br />
cm), like our CUT posts.<br />
29
<strong>U4</strong> – WRAPPING (EXTERIOR THERMAL INSULATION)<br />
TIPS<br />
<strong>U4</strong><br />
Session Plan <strong>U4</strong>-S2: Construction<br />
01 3<br />
Straw Flakes for thinner Layers:<br />
building a Cage<br />
As already mentioned for the pallet wrapping technique (tip 01 2), we need a kind of<br />
cage for thinner insulation thicknesses below 26 cm (mini bales) or 36 cm (standard<br />
bales) in order to fix the bale flakes. The thickness can thus be individually adjusted<br />
from about 6 cm (for example, if the roof overhang is not sufficient for whole bales).<br />
In order to fill the bales as efficiently as possible, post distances of 36 cm, 47 - 50 cm<br />
or 72 cm are ideal.<br />
Materials which are suitable for a cage: 1 ) diffusion-open boards (DWD), see also tip<br />
025 form a wind-tight outer plane, and are especially useful when a wooden facade<br />
is to be mounted (price for DWD around € 8, - / m2). See picture above.<br />
2) 2.5 x 2.5 cm strips/battens at intervals of max. 1 0 cm have the advantage that they<br />
can be directly plastered with appropriate plaster thicknesses (2-3 cm) without<br />
plaster grounds (but with mesh). The advantage here is, as with the pallets, the<br />
filling of the interspaces with clay (when plastered with<br />
lime directly on top, we use 5-6 parts of clay and 1 part<br />
of lime) thus keeping our straw insulation layer dry as<br />
with Fachwerk-houses. See picture on the left.<br />
3) It is also possible to use bamboo, (reed) mats or<br />
similar solid materials, depending on the regional<br />
availability.<br />
30
<strong>U4</strong> – WRAPPING (EXTERIOR THERMAL INSULATION)<br />
TIPS<br />
<strong>U4</strong><br />
Session Plan <strong>U4</strong>-S2: Construction<br />
01 4<br />
Break between Perimeter- and Wall<br />
Plaster: Dripping Nose<br />
To prevent moisture transport from the cement plaster in the splash water area (30<br />
cm above ground level) up to the lime plaster facade, these two plasters must be<br />
separated by a horizontal barrier. This droplet is essentially an extension of the<br />
horizontal barrier between the strip foundation and the base plate of the<br />
construction to the outside, in such a way that water can drip off (picture above left).<br />
The dripping nose is at the same time the stiffening of this metal strip. Ideally, better<br />
use zinc, aluminum or stainless steel instead of galvanized sheet, which is a few euro<br />
cheaper but not permanently rustproof, if it is not painted. The drip can be fixed on<br />
the outside of the base plate (with roofing nails) or under the foot threshold. It then<br />
stands horizontally to the outside (plaster thickness + 5 mm overhang) and then<br />
bends obliquely downwards to the dripped nose. Each tinsmith will bend such a<br />
sheet in short time in the desired length. A 5 cm strip of Steico Underfloor can be<br />
clamped above the metal (picture on the upper right). A further possibility is to cover<br />
the entire base in the splash area with metal, the drip nose is then just above ground<br />
level (Center).<br />
31
<strong>U4</strong> – WRAPPING (EXTERIOR THERMAL INSULATION)<br />
TIPS<br />
<strong>U4</strong><br />
Session Plan <strong>U4</strong>-S2: Construction<br />
01 5<br />
Direct plaster on Straw Bales:<br />
rainproof and windproof<br />
Straw surfaces - properly prepared - are excellent plaster carriers. For this purpose,<br />
straw bales must be well baled (or compressed) to a minimum density of 1 00 kg /<br />
m3. The surfaces must be shaved ad levelled with the hedge trimmer and hollow<br />
spaces should be filled with as long straw as possible. It is not advisable to store the<br />
straw bales for month or years (so that the smooth but protective wax layer<br />
disappears). The surface - after shaving - is so rough that the clay and lime plasters<br />
hold on to this plaster carrier (the straw is shaved / cut off with the hedge trimmer<br />
with strong pressure). Excessed wood parts wider than 2 cm must be covered with<br />
plaster grounds (such as reed stucco, Steico Unerfloor, soft fiber board, Heraklith BM<br />
or cork) or heavily roughened (every 3 cm). Connections to window frames, doors,<br />
roundwood stands, etc. must be air- and wind-tight (tapes, apu strips, multiple<br />
plastering). Because earth- and lime plasters leadeasily to rust in metals, metals in<br />
touch with plasters must remain permanently rust-free (stainless steel, zinc,<br />
aluminum).<br />
32
<strong>U4</strong> – WRAPPING (EXTERIOR THERMAL INSULATION)<br />
TIPS<br />
<strong>U4</strong><br />
Session Plan <strong>U4</strong>-S2: Construction<br />
01 6<br />
Timber Cladding on Straw Bales:<br />
Boards and Ventilation Areas<br />
The safest method of protecting straw from rain and moisture is a wooden facade.<br />
Since wood with a μ-value of > 20 (spruce dry 50, damp 20) has a moisture-braking<br />
effect, a back-ventilation is to be provided, which allows the moisture from the room<br />
air diffuse outwards. In the case of vertical ventilation areas, 3-5 cm are sufficient,<br />
horizontal ventilation areas (flat roof) should be 8-1 0 cm. They are usually built with<br />
battens and counter battens, so that the air can sweep from all sides through the<br />
ventilation area. The first lattice is always installed in the direction of the boards /<br />
planks of the wooden facade, the second is then 90 ° to it. In order for air to circulate<br />
(which practically always works by the solar radiation on the façade when the air is<br />
heated), an air inlet of at least 3 cm in width at the lower end of the wooden façade<br />
and an equally wide air outlet at the upper end has to be installed. This openings are<br />
covered with a bird protection mesh (picture on the upper right), so that no animals<br />
(eg wasps) can enter here, this perforated mesh should be relatively fine (2-3 mm).<br />
The second layer of rain protection underneath the façade then usually forms a<br />
diffusion-free, but also water-repellent, wind-proof layer: this is usually achieved<br />
with diffusion-open panels (DWD) or with a two-layered clay plaster: the second (fine<br />
plaster) layer closes the cracks of the base plaster. In order to be windproof even<br />
under the battens, it is advisable to plaster the clay over the entire area and to install<br />
the battens afterwards.<br />
33
<strong>U4</strong> – WRAPPING (EXTERIOR THERMAL INSULATION)<br />
TIPS<br />
<strong>U4</strong><br />
Session Plan <strong>U4</strong>-S2: Construction<br />
017<br />
ventilated Glass Facades in front of<br />
Straw Bales: visible Straw<br />
Building physics says that a (not wind-tight) insulation layer, which is not enclosed<br />
(ie aerated), loses its thermal properties. The estimates range from half to 1 00%.<br />
Therefore an unplastered or unplanked straw bale house should not insulate at all<br />
(which is easy to check, anyone who has once built such a house knows how fast it<br />
can be warm, but it can cool down quickly when the insulation area is ventilated).<br />
But if the wind is hindered by a glass or Plexiglass layer (of course glass must also<br />
be ventilated, so cold air flows into the ventilation area), and according to<br />
calculations of the house of the future project "Biohof Achleitner" (20 m-long straw<br />
bale wall behind glass), the heat gain in this "glass house" is greater than the loss<br />
due to the lack of wind resistance: U-value: 0.11 4 W / m2K (plastered: 0.11 6 W / m2K).<br />
Maybe this is right for the south<br />
side ... Nevertheless, such<br />
techniques (similar to bottle<br />
walls) are at least to be<br />
questioned: for sure they serve<br />
more aesthetics than building<br />
physics.<br />
34
<strong>U4</strong> – WRAPPING (EXTERIOR THERMAL INSULATION)<br />
TIPS<br />
<strong>U4</strong><br />
Session Plan <strong>U4</strong>-S2: Construction<br />
Sarah Wigglesworth´architectural office in London / Guest House in Chile, AATA Arch.<br />
35
36
<strong>U4</strong> – WRAPPING (EXTERIOR THERMAL INSULATION)<br />
SESSION PLAN S3<br />
<strong>U4</strong><br />
Session Plan <strong>U4</strong>-S3: Prefab Wrapping Constructions<br />
Objectives:<br />
Trainer:<br />
Trainees ...<br />
… know the tools and machines used on the straw bale building<br />
site.<br />
… know specific problems of straw bale building site organization.<br />
… know how to solve any technical problem conveniently.<br />
… know accident prevention regulations, how to recognize<br />
dangers and save working practices.<br />
Skills:<br />
Handling tools and machines which are used in straw bale<br />
construction<br />
Methods:<br />
Demonstration<br />
Explanations<br />
Practice<br />
Place:<br />
Workshop or building site<br />
Duration:<br />
4 hours<br />
Equipment:<br />
Tools<br />
Theory<br />
Practice<br />
Specific problems of straw bale building site organization<br />
Trying the tools, visiting building site<br />
Documents:<br />
Info sheets:<br />
I1 Tools<br />
I2 Building site<br />
Text sheets:<br />
X1 Tools<br />
X2 Building site<br />
Power point:<br />
P1 Tools<br />
Evaluation:<br />
Multiple choice<br />
Organization:<br />
Looking for an appropiate building-site in the surroundings; prepare different tools and materials<br />
for the demonstration<br />
37
<strong>U4</strong> – WRAPPING (EXTERIOR THERMAL INSULATION)<br />
INFO & TIPS S3<br />
<strong>U4</strong><br />
Session Plan <strong>U4</strong>-S3: Prefab Wrapping Constructions<br />
01 8<br />
system/haus/bau-Module, entwickelt von C. Kastner, H. Gruber, W. Schmelz<br />
38
<strong>U4</strong> – WRAPPING (EXTERIOR THERMAL INSULATION)<br />
INFO & TIPS S3<br />
<strong>U4</strong><br />
Session Plan <strong>U4</strong>-S3: Prefab Wrapping Constructions<br />
01 9<br />
Jules Ferry Residence in St. Die des Vosges (FR) von Bet Gaujard Arch.: 7stöckiger Bau<br />
39
<strong>U4</strong> – WRAPPING (EXTERIOR THERMAL INSULATION)<br />
INFO & TIPS S3<br />
<strong>U4</strong><br />
Session Plan <strong>U4</strong>-S3: Prefab Wrapping Constructions<br />
Jules Ferry Residence in St. Die des Vosges (FR) by Bet Gaujard Arch.: 7storey-building<br />
40
<strong>U4</strong> – WRAPPING (EXTERIOR THERMAL INSULATION)<br />
INFO & TIPS S3<br />
<strong>U4</strong><br />
Session Plan <strong>U4</strong>-S3: Prefab Wrapping Constructions<br />
020<br />
Complemedis AG, CH: Wrapping with prefabricated modules by Werner Schmidt<br />
41
<strong>U4</strong> – WRAPPING (EXTERIOR THERMAL INSULATION)<br />
INFO & TIPS S3<br />
<strong>U4</strong><br />
Session Plan <strong>U4</strong>-S3: Prefab Wrapping Constructions<br />
021<br />
022<br />
Straw/Reed-Facade by Kengo Kuma, Japan; below: Waseda University Students have<br />
developed this prototype: Straw cools through evaporation in summer and heats<br />
through fermentation in winter<br />
42
<strong>U4</strong> – WRAPPING (EXTERIOR THERMAL INSULATION)<br />
INFO & TIPS S3<br />
<strong>U4</strong><br />
Session Plan <strong>U4</strong>-S3: Prefab Wrapping Constructions<br />
023<br />
024<br />
Enterprise Centre/University East Anglia, UK; Schelfbauhütte in the Alte Brauerei, DE<br />
43
<strong>U4</strong> – WRAPPING (EXTERIOR THERMAL INSULATION)<br />
INFO & TIPS S3<br />
<strong>U4</strong><br />
Session Plan <strong>U4</strong>-S3: Prefab Wrapping Constructions<br />
025<br />
School in Issy les Moulineux and Montreuil, FR: external mounted straw bale modules<br />
44
<strong>U4</strong> – WRAPPING (EXTERIOR THERMAL INSULATION)<br />
INFO & TIPS S3<br />
<strong>U4</strong><br />
Session Plan <strong>U4</strong>-S3: Prefab Wrapping Constructions<br />
026<br />
Make Your City Smart Project by Paul Adrian Schulz: conccrete slab building with DIYstraw<br />
bale walls: social living in Vienna (Partner: ASBN);<br />
ASBN-Project InsulateGreece with a similar idea against Fuel Poverty, GR<br />
45
<strong>U4</strong> – WRAPPING (EXTERIOR THERMAL INSULATION)<br />
INFO & TIPS S3<br />
<strong>U4</strong><br />
Session Plan <strong>U4</strong>-S3: Prefab Wrapping Constructions<br />
46
<strong>U4</strong> – WRAPPING (EXTERIOR THERMAL INSULATION)<br />
INFO & TIPS S3<br />
<strong>U4</strong><br />
Session Plan <strong>U4</strong>-S3: Prefab Wrapping Constructions<br />
Make Your City Smart Projekt-Calculation for the project by Paul Adrian<br />
Schulz: Materials and Work in Straw Bale Walls +/- Self-Building (DIY)<br />
47
48
<strong>U4</strong> – WRAPPING (EXTERIOR THERMAL INSULATION)<br />
INFO S4<br />
<strong>U4</strong><br />
Session Plan <strong>U4</strong>-S4: Alternatives: Straw Injection-Systems<br />
027<br />
49
<strong>U4</strong> – WRAPPING (EXTERIOR THERMAL INSULATION)<br />
INFO S4<br />
<strong>U4</strong><br />
Session Plan <strong>U4</strong>-S4: Alternatives: Straw Mats<br />
028<br />
50
<strong>U4</strong> – WRAPPING (EXTERIOR THERMAL INSULATION)<br />
INFO S4<br />
<strong>U4</strong><br />
Session Plan <strong>U4</strong>-S4: Alternatives: Reed-Mats<br />
029<br />
A) 25 cm Reed (5 Layers)<br />
U-Value: 0,208 W/m 2 K<br />
PEI n.r.: >1 7 kWh/m²<br />
€ 52,50 - 75,80/m2<br />
B) Straw, Reed-Insulation-Board, Lime-Direct Pl.<br />
26 cm Straw, 5 cm Reed Mat, complete 33,5 cm<br />
Wrapping-System: Material Price/m2 (AT)<br />
Straw Bales: around € 8,00 - 11 ,20/m2 (cert.)<br />
Constr. with/out window box: € 1 3,05 - 36,50/m2<br />
Reed insulation board (bauschilf.at): 8,47/m2<br />
Lime Plaster 2,5 cm, Mesh: € 8,70/m2<br />
Material - complete price: € 38,22 - 56,17/m2<br />
51
<strong>STEP</strong> – Straw Bale Training for European Professionals<br />
UNIT 4 – Wrapping (201 7)<br />
©/Editor/Texts/Tipps: Herbert Gruber (ASBN)<br />
Co-Workers: Helmuth Santler, BuildStrawPro-Team (Erasmus+<br />
Projekt)<br />
Design & Photos: Herbert Gruber; more Photos: Naporo (8)<br />
Hagebau (8), u-wert.net (9), Geocell (1 5, 1 6), Misapor,<br />
Kurkfabriek (1 5), Horst Danner, GrAT (22), Virko Kade (23),<br />
Kengo Kuma (36), Icons: Michael Howlett (SBUK)<br />
This <strong>Handbook</strong> bases on<br />
the <strong>Handbook</strong> by the Leonardo-<br />
Group <strong>STEP</strong> (201 5)<br />
52


