free-d Virtual Studio System Operators Guide - Vinten Radamec
free-d Virtual Studio System Operators Guide - Vinten Radamec
free-d Virtual Studio System Operators Guide - Vinten Radamec

Create successful ePaper yourself
Turn your PDF publications into a flip-book with our unique Google optimized e-Paper software.
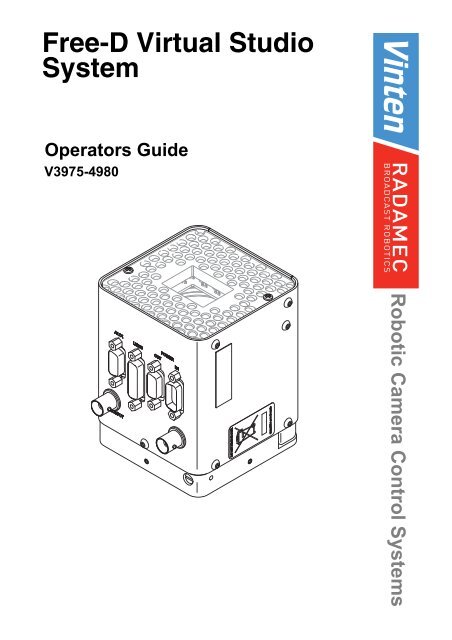
Free-D <strong>Virtual</strong> <strong>Studio</strong><br />
<strong>System</strong><br />
<strong>Operators</strong> <strong>Guide</strong><br />
V3975-4980<br />
Robotic Camera Control <strong>System</strong>s
<strong>free</strong>-d <strong>Virtual</strong> <strong>Studio</strong><br />
<strong>System</strong><br />
<strong>Operators</strong> <strong>Guide</strong><br />
Publication Part No. V3975-4980 Issue 1
Copyright © Vitec Group plc 2009<br />
All rights reserved throughout the world. No part of this<br />
document may be stored in a retrieval system.<br />
transmitted, copied or reproduced in any way including,<br />
but not limited to, photocopy, photograph, magnetic or<br />
other record without the prior agreement and permission<br />
in writing of Vitec Group plc.<br />
Trademarks<br />
<strong>Vinten</strong> <strong>Radamec</strong>® and <strong>Vinten</strong>® are registered<br />
trademarks of the Vitec Group plc.<br />
Free-d is a registered trademark of the BBC.<br />
Windows® is a registered trademark of the Microsoft<br />
Corporation.<br />
Important information about this document<br />
Information contained in this document is subject to<br />
change. Camera Dynamics Limited reserves the right,<br />
without notice, to make changes in equipment design or<br />
performance as progress in engineering, manufacturing<br />
or technology may warrant.<br />
Published by:<br />
Technical Publications Department<br />
William <strong>Vinten</strong> Building<br />
Western Way<br />
Bury St Edmunds<br />
Suffolk IP33 3TB<br />
UK<br />
Tel: +44 1284 752 121<br />
Fax: +44 1284 750 560<br />
Email: technical.publications@vitecgroup.com
Understanding these instructions<br />
Safety - Read This First<br />
Safety - Read This First<br />
English<br />
The original instructions presented in this operators guide were written in English, and subsequently<br />
translated into other languages. If you are unable to understand these instructions, contact <strong>Vinten</strong><br />
<strong>Radamec</strong> or your distributor to obtain a translation of the original instructions (EU Countries).<br />
БЪЛГАРСКИ<br />
Оригиналните инструкции, представени в настоящото ръководство на производителя, бяха<br />
написани на английски език, а след това - преведени на други езици. Ако не разбирате тези<br />
езици, свържете се с <strong>Vinten</strong> <strong>Radamec</strong> или с Вашия дистрибутор, за да получите оригиналните<br />
инструкции (за страните от Европейския съюз).<br />
Česky<br />
Pokyny uvedené v této operátorské příručce byly původně napsány anglicky a následně byly<br />
přelo_eny do ostatních jazyků. Nerozumíte-li těmto pokynům, kontaktujte společnost <strong>Vinten</strong> <strong>Radamec</strong><br />
nebo svého distributora, abyste získali překlad originálních pokynů (členské státy EU).<br />
Danish<br />
De originale instruktioner, der præsenteres i denne betjeningsvejledning, er skrevet på engelsk og<br />
derefter oversat til andre sprog. Hvis du ikke forstår disse instruktioner bedes du kontakte <strong>Vinten</strong><br />
<strong>Radamec</strong> eller vor forhandler for at få en oversættelse af de originale instruktioner (EU-lande).<br />
Deutsch<br />
Die Originalanleitung in diesem Bedienungshandbuch wurde auf Englisch verfasst und anschließend<br />
in andere Sprachen übersetzt. Bei Verständnisproblemen in einer der übersetzten Sprachen<br />
kontaktieren Sie bitte <strong>Vinten</strong> <strong>Radamec</strong> oder Ihren Fachhändler; dort erhalten Sie eine Übersetzung<br />
der ursprünglichen Anleitung (EU-Staaten).<br />
Eesti<br />
Käesoleva kasutajajuhendi algtekst on koostatud inglise keeles ning seejärel tõlgitud teistesse<br />
keeltesse. Kui juhend osutub teie jaoks arusaamatuks, võtke juhendi emakeelse tõlke hankimiseks<br />
ühendust <strong>Vinten</strong> <strong>Radamec</strong>i või kohaliku esindajaga (Euroopa Liidu riigid).<br />
Ελληνικά<br />
Οι αρχικές οδηγίες αυτού του οδηγού για το χειριστή συντάχθηκαν στα Αγγλικά και μεταφράστηκαν στη<br />
συνέχεια σε άλλες γλώσσες. Εάν δυσκολεύεστε να καταλάβετε αυτές τις οδηγίες, επικοινωνήστε με τη<br />
<strong>Vinten</strong> <strong>Radamec</strong> ή το διανομέα σας για να λάβετε μια μετάφραση των αρχικών οδηγιών (Χώρες ΕΕ).<br />
Español<br />
Las instrucciones originales que se indican en esta guía del operador se han redactado en inglés y<br />
posteriormente se han traducido a otros idiomas. Si no entiende estas instrucciones, póngase en<br />
contacto con <strong>Vinten</strong> <strong>Radamec</strong> o con su distribuidor para obtener una traducción de las instrucciones<br />
originales (para países de la UE).<br />
Français<br />
Les instructions originales présentées dans ce guide d'utilisation ont été écrites en anglais puis<br />
traduites dans d'autres langues. Si vous ne comprenez pas ces instructions, contactez <strong>Vinten</strong><br />
<strong>Radamec</strong> ou votre revendeur pour obtenir une traduction des instructions originales (pour les pays de<br />
l'UE).<br />
Gaeilge<br />
Scríobhadh na treoracha bunaidh don treoirleabhar oibritheora seo as Béarla, agus aistríodh iad go<br />
teangacha eile ina dhiaidh sin. Mura bhfuil tú in ann na treoracha seo a thuiscint, téigh i dteagmháil le<br />
<strong>Vinten</strong> <strong>Radamec</strong> nó le do dháileoir, chun aistriúchán de na treoracha bunaidh a fháil (Tíortha an AE).<br />
Italiano<br />
Le istruzioni originali presentate in questa guida per l'operatore sono in lingua inglese e<br />
successivamente tradotte nelle altre lingue. Qualora le istruzioni non fossero disponibili nella lingua<br />
desiderata, potete contattare <strong>Vinten</strong> <strong>Radamec</strong> o il vostro distributore per ricevere la traduzione delle<br />
istruzioni originali (Paesi UE).<br />
Publication Part No. V3975-4980 Issue 1 3
Latviešu<br />
Šajā operatora rokasgrāmatā iekļautie norādījumi sākotnēji tika sarakstīti angļu valodā un pēc tam<br />
pārtulkoti citās valodās. Ja nesaprotat šos norādījumus svešvalodā, sazinieties ar <strong>Vinten</strong> <strong>Radamec</strong> vai<br />
tirgotāju, lai saņemtu norādījumu tulkojumu (kādā no ES dalībvalstu valodām).<br />
Lietuvių<br />
Šiame operatoriaus vadove pristatomos pirminės instrukcijos parašytos anglų kalba ir vėliau išverstos<br />
į kitas kalbas. Jei šių instrukcijų nesuprantate, susisiekite su „<strong>Vinten</strong> <strong>Radamec</strong>“ arba savo platintoju ir<br />
gaukite pirminių instrukcijų vertimą (ES šalies kalba).<br />
Magyar<br />
A kezeloi útmutatóban található utasítások angol nyelven íródtak, és utólag fordították azokat más<br />
nyelvekre. Ha nem érti ezen utasításokat, kérjük, vegye fel a kapcsolatot a <strong>Vinten</strong> <strong>Radamec</strong>nel vagy<br />
a helyi képviselettel, és igényelje az eredeti utasítások fordítását (EU országok).<br />
Malti<br />
L-istruzzjonijiet originali ippreżentati f'din il-gwida ta' operaturi kienu miktuba bl-Ingliż, u sussegwentement<br />
maqluba fl-lingwi ohra. Jekk ma tistax tifhem dawn l-istruzzjonijiet, ikkuntattja lil <strong>Vinten</strong> <strong>Radamec</strong><br />
jew id-distributur tieghek biex tikseb traduzzjoni ta' l-istruzzjonijiet originali (Pajjiżi ta' UE).<br />
Nederlands<br />
De oorspronkelijke instructies in deze bedieningshandleiding zijn geschreven in het Engels en<br />
vervolgens in andere talen vertaald. Als het onmogelijk is deze instructies te begrijpen, neemt u<br />
contact op met <strong>Vinten</strong> <strong>Radamec</strong> of met uw distributeur om een vertaling te bemachtigen van de<br />
oorspronkelijke instructies (EG-landen).<br />
Polski<br />
Oryginalne instrukcje zamieszczone w niniejszym podręczniku operatora zostały napisane w języku<br />
angielskim, a następnie przetłumaczone na inne języki. Jeśli nie rozumieją Państwo tych instrukcji,<br />
prosimy skontaktować się z siedzibą lub dystrybutorem <strong>Vinten</strong> <strong>Radamec</strong>, aby uzyskać tłumaczenie<br />
oryginalnych instrukcji (kraje UE).<br />
Português<br />
As instruções originais apresentadas no guia do operador foram escritas em Inglês e traduzidas para<br />
outros idiomas. Se não conseguir compreender estas instruções contacte a <strong>Vinten</strong> <strong>Radamec</strong> ou o seu<br />
distribuidor para obter a tradução das instruções originais (Países da UE).<br />
Română<br />
Instrucţiunile originale prezentate în acest ghid pentru operatori au fost scrise în limba engleză, şi<br />
traduse ulterior în alte limbi. În cazul în care nu înţelegeţi aceste instrucţiuni, contactaţi <strong>Vinten</strong> <strong>Radamec</strong><br />
sau distribuitorul dumneavoastră pentru a obţine o traducere a instrucţiunilor originale (Ţările<br />
UE).<br />
Slovensky<br />
Pôvodné pokyny, uvedené v tomto návode na obsluhu, boli napísané v anglictine a následne<br />
preložené do iných jazykov. Ak nerozumiete týmto pokynom, obrátte sa na spolocnost <strong>Vinten</strong><br />
<strong>Radamec</strong> alebo vášho distribútora, aby vám zaslal preklad originálnych pokynov (krajiny EÚ).<br />
Slovenščina<br />
Originalno besedilo teh navodil za uporabo je bilo napisano v angleščini in prevedeno v ostale jezike.<br />
Če ne razumete teh navodil, se obrnite na podjetje <strong>Vinten</strong> <strong>Radamec</strong> ali lokalnega zastopnika, ki vam<br />
bo posredoval originalna navodila (velja za dr_ave EU).<br />
Suomi<br />
Tähän käyttäjän oppaaseen sisältyvät ohjeet on kirjoitettu alun perin englanniksi ja käännetty sitten<br />
muille kielille. Ellet ymmärrä näitä ohjeita, ota yhteyttä <strong>Vinten</strong> <strong>Radamec</strong>iin tai jälleenmyyjään ja pyydä<br />
alkuperäisten ohjeiden käännöstä (EU-maat).<br />
Svenska<br />
Instruktionerna i denna handbok skrevs ursprungligen på engelska och har sedan översatts till flera<br />
språk. Om du inte förstår dessa instruktioner, kontakta <strong>Vinten</strong> <strong>Radamec</strong> eller din återförsäljare för en<br />
ny översättning av originalinstruktionerna (EU-länder).<br />
4 <strong>free</strong>-d <strong>Virtual</strong> <strong>Studio</strong> <strong>System</strong>
Important safety instructions<br />
1. Take heed of warnings and instructions<br />
You should read all of the safety instructions<br />
before operating the equipment. Retain this<br />
operators guide for future reference and adhere to<br />
all warnings in the guide or on the equipment. Do<br />
not attempt to operate this equipment if you do<br />
not understand how to operate it.<br />
2. Usage Statement<br />
Do not use this product for any other purpose<br />
other than that specified in this usage statement.<br />
The <strong>free</strong>-d virtual studio system is designed<br />
specifically for use within television broadcasting<br />
studios where the precise positioning and<br />
orientation of each studio camera is required to<br />
obtain a virtual scene from the appropriate<br />
viewpoint. The <strong>free</strong>-d system allows unrestricted<br />
movement while panning and tilting through 360<br />
degrees and works with a variety of camera<br />
mountings including manual pedestals, cranes<br />
and hand-held cameras. The <strong>free</strong>-d system is<br />
intended to be used by television camera<br />
operators, trained to use <strong>Vinten</strong> <strong>Radamec</strong> robotic<br />
equipment.<br />
3. Water, moisture and dust<br />
Protect the product from water, moisture and<br />
dust. The presence of electricity near water can be<br />
dangerous. Do not use the product near water and<br />
take care that liquids are not spilled onto the<br />
equipment. For outdoor applications, only use<br />
products that are specifically designed for<br />
outdoor usage.<br />
4. Climate<br />
The equipment should not be used outside the<br />
operating limits. Refer to the Technical<br />
Specifications for the operating range of the<br />
equipment.<br />
5. Cleaning<br />
We encourage regular cleaning of the product.<br />
• Do not use oil or grease on any exposed part of<br />
the equipment. This is unnecessary and traps dirt<br />
which acts as an abrasive.<br />
Safety - Read This First<br />
• Do not use solvent or oil based cleaners,<br />
abrasives or wire brushes to remove<br />
accumulations of dirt as these damage the<br />
protective surfaces. To clean mechanical<br />
surfaces, use only detergent based cleaners.<br />
• External electrical connection ports should only<br />
be cleaned with a semi-stiff brush or a clean, dry<br />
air supply.<br />
6. Servicing<br />
You should not attempt to service the equipment.<br />
Contact Camera Dynamics Ltd or your local<br />
distributor to arrange servicing. Maintenance<br />
beyond that detailed in this guide must be<br />
performed by competent personnel in accordance<br />
with the procedures in the Technical or<br />
Maintenance Manual for the equipment.<br />
7. Notes about Robotic equipment<br />
Display prominent warning signs in studios,<br />
alerting personnel that robotic equipment is<br />
present and may move without warning.Ensure<br />
personnel remain a minimum of 1 m (40 inches)<br />
clear of robotic equipment in use.<br />
<strong>Operators</strong> must familiarise themselves with the<br />
resulting working envelope of robotic products<br />
including all ancillary equipment (lens, zoom and<br />
focus controls, viewfinder, prompter etc.), to<br />
prevent inadvertent collisions.<br />
Only operate robotic products remotely when you<br />
can see them to avoid harm to personnel and<br />
collisions with obstacles and other hazards.<br />
8. Power sources<br />
Only connect the equipment to a power supply of<br />
the type described in the Technical Specifications<br />
or as marked on the equipment.<br />
9. Cables<br />
Always ensure that all power and auxiliary<br />
communications cables are routed so that they do<br />
not present any danger to personnel. Take care<br />
when routing cables in areas where robotic<br />
equipment is in use.<br />
Publication Part No. V3975-4980 Issue 1 5
Certificates and compliances<br />
Manufactured under license on behalf of the BBC© in compliance with the following European<br />
Directives:<br />
Other Certification<br />
2006/95/EC Low Voltage Directive<br />
89/336/EEC EMC Directive<br />
By application of the following Harmonised Standards:<br />
BS EN 60065: 2002+A1 2006: Audio, video and similar electronic apparatus-Safety<br />
requirements<br />
BS EN 55103-1:1996 Electromagnetic Compatibility-Product Family standard for audio,<br />
video, audio-visual and entertainment lighting control apparatus for professional use - Part<br />
1: Emissions: Environments E4 and E5<br />
BS EN 55103-2: 1997 Electromagnetic compatibility - Product Family standard for audio,<br />
video, audio-visual and entertainment lighting control apparatus for professional use - Part<br />
2: Immunity. Environments E1, E2, E3, and E4<br />
CFR 47:2006 Code of Federal Regulations: Pt 15 Subpart B-Radio frequency devices - Class A -<br />
unintentional radiators.<br />
Caring for the environment by recycling<br />
Recycling old electrical and electronic equipment<br />
This symbol on the product or on its packaging indicates that this product must not be<br />
treated as household waste (applicable in the European Union and European countries<br />
with separate collection systems). It shall be handed over to the applicable collection<br />
point for the recycling of electrical and electronic equipment. Please visit<br />
www.vintenradamec.com/recycle for details.<br />
By ensuring this product is disposed of correctly, you will help prevent potentially<br />
negative consequences for the environment and human health, and help conserve<br />
natural resources.<br />
6 <strong>free</strong>-d <strong>Virtual</strong> <strong>Studio</strong> <strong>System</strong>
Lens Encoder<br />
Technical specification<br />
Technical specification<br />
Weight. . . . . . . . . . . . . . . . . . . . . . . . . . . . . . . . . . . . . . . . . . . . . . . . . . . . . . . . . . . . . . . . .1 k g (2.2 lbs)<br />
Length. . . . . . . . . . . . . . . . . . . . . . . . . . . . . . . . . . . . . . . . . . . . . . . . . . . . . . . . . . . . . . . 4.5 cm (1.7 in.)<br />
Width. . . . . . . . . . . . . . . . . . . . . . . . . . . . . . . . . . . . . . . . . . . . . . . . . . . . . . . . . . . . . . . . 7.0 cm (2.7 in.)<br />
Height . . . . . . . . . . . . . . . . . . . . . . . . . . . . . . . . . . . . . . . . . . . . . . . . . . . . . . . . . . . . . . 13.6 cm (5.4 in.)<br />
Output signals. . . . . . . . . . . . . . . . . . . . . . . . . . . . . . . . . . . . . . . . . . . . . . . 1024 pulses / rev of encoder<br />
Electrical Connection . . . . . . . . . . . . . . . . . . . . . . . . . . . . . . . . . . . . . 1m flying lead to 26 way HD type<br />
Target Seeking Camera<br />
Weight. . . . . . . . . . . . . . . . . . . . . . . . . . . . . . . . . . . . . . . . . . . . . . . . . . . . . . . . . . . . . . . 1.5 k g (3.3 lbs)<br />
Length. . . . . . . . . . . . . . . . . . . . . . . . . . . . . . . . . . . . . . . . . . . . . . . . . . . . . . . . . . . . . . . 8.2 cm (3.2 in.)<br />
Width. . . . . . . . . . . . . . . . . . . . . . . . . . . . . . . . . . . . . . . . . . . . . . . . . . . . . . . . . . . . . . . . 8.2 cm (3.2 in.)<br />
Height . . . . . . . . . . . . . . . . . . . . . . . . . . . . . . . . . . . . . . . . . . . . . . . . . . . . . . . . . . . . . . 10.0 cm (3.9 in.)<br />
Output signals. . . . . . . . . . . . . . . . . . . . . . . . . . . . . . . . . . . . . . . . . . . . . . . . Serial digital video (NTSC)<br />
Input power . . . . . . . . . . . . . . . . . . . . . . . . . . . . . . . . . . . . . . . . . . . . . . . . . . . . . . . . . . . . 24 V DC, 20W<br />
PSU input . . . . . . . . . . . . . . . . . . . . . . . . . . . . . . . . . . . . . . . . . . . . . . . . . 100-240 V AC, 1.5A, 50-60Hz<br />
Electrical Connection<br />
Free-d Processor Unit<br />
Video output . . . . . . . . . . . . . . . . . . . . . . . . . . . . . . . . . . . . . . . . . . . . . . . . . . . . . . . . . . . . . .BNC<br />
Genlock input . . . . . . . . . . . . . . . . . . . . . . . . . . . . . . . . . . . . . . . . . . . . . . . . . . . . . . . . . . . . .BNC<br />
Lens encoder input . . . . . . . . . . . . . . . . . . . . . . . . . . . . . . . . . . . . . . . . . . . . . . . . . . 26w HD-type<br />
Power input . . . . . . . . . . . . . . . . . . . . . . . . . . . . . . . . . . . . . . . . . . . . . . . . . . . . . . . 2 x 9w D-type<br />
RBU input . . . . . . . . . . . . . . . . . . . . . . . . . . . . . . . . . . . . . . . . . . . . . . . . . . . . . . . . . 15w HD-type<br />
Weight. . . . . . . . . . . . . . . . . . . . . . . . . . . . . . . . . . . . . . . . . . . . . . . . . . . . . . . . . . . . . . 8.5 k g (18.7 lbs)<br />
Length. . . . . . . . . . . . . . . . . . . . . . . . . . . . . . . . . . . . . . . . . . . . . . . . . . . . . . . . . . . . . 50.0 cm (19.7 in.)<br />
Width. . . . . . . . . . . . . . . . . . . . . . . . . . . . . . . . . . . . . . . . . . . . . . . . . . . . . . . . . . . . . . 48.3 cm (19.0 in.)<br />
Height . . . . . . . . . . . . . . . . . . . . . . . . . . . . . . . . . . . . . . . . . . . . . . . . . . . . . . . . . . . . . . . . 4.3cm (3.9 in.)<br />
Publication Part No. V3975-4980 Issue 1 7
Output signals:<br />
Analogue video<br />
Camera data . . . . . . . . . . . . . . . . . . . . . . . . . . . . . . . . . . . . . . . . . . . . . . . . . <strong>System</strong> normal relay<br />
Power input . . . . . . . . . . . . . . . . . . . . . . . . . . . . . . . . . . . . . . . . . . . . . . . . . 90 - 264 V AC, 47-63 Hz, 5A<br />
8 <strong>free</strong>-d <strong>Virtual</strong> <strong>Studio</strong> <strong>System</strong>
Contents<br />
Safety - Read This First . . . . . . . . . . . . . . . . . . . . . . . . . . . . . . . . . . . . . . . . . . . . . . . . . . . . . . . . . . . . . . . . 3<br />
Certificates and compliances . . . . . . . . . . . . . . . . . . . . . . . . . . . . . . . . . . . . . . . . . . . . . . . . . . . . . . . . . . . 6<br />
Technical specification. . . . . . . . . . . . . . . . . . . . . . . . . . . . . . . . . . . . . . . . . . . . . . . . . . . . . . . . . . . . . . . . . 7<br />
Introduction . . . . . . . . . . . . . . . . . . . . . . . . . . . . . . . . . . . . . . . . . . . . . . . . . . . . . . . . . . . . . . . . . . . . . . . . . 11<br />
FREEDWIN . . . . . . . . . . . . . . . . . . . . . . . . . . . . . . . . . . . . . . . . . . . . . . . . . . . . . . . . . . . . . . . . . . . . . . . . . . 14<br />
Getting started with FREEDWIN. . . . . . . . . . . . . . . . . . . . . . . . . . . . . . . . . . . . . . . . . . . . . . . . . . . . . 14<br />
LOMWIN . . . . . . . . . . . . . . . . . . . . . . . . . . . . . . . . . . . . . . . . . . . . . . . . . . . . . . . . . . . . . . . . . . . . . . . . . . . . 20<br />
How to use LOMWIN . . . . . . . . . . . . . . . . . . . . . . . . . . . . . . . . . . . . . . . . . . . . . . . . . . . . . . . . . . . . . 21<br />
Free-d communication protocols . . . . . . . . . . . . . . . . . . . . . . . . . . . . . . . . . . . . . . . . . . . . . . . . . . . . . . . 28<br />
General . . . . . . . . . . . . . . . . . . . . . . . . . . . . . . . . . . . . . . . . . . . . . . . . . . . . . . . . . . . . . . . . . . . . . . . . 28<br />
Protocols. . . . . . . . . . . . . . . . . . . . . . . . . . . . . . . . . . . . . . . . . . . . . . . . . . . . . . . . . . . . . . . . . . . . . . . 28<br />
Message structures . . . . . . . . . . . . . . . . . . . . . . . . . . . . . . . . . . . . . . . . . . . . . . . . . . . . . . . . . . . . . . 29<br />
Parameter definitions . . . . . . . . . . . . . . . . . . . . . . . . . . . . . . . . . . . . . . . . . . . . . . . . . . . . . . . . . . . . . . . . . 39<br />
Definition of axes . . . . . . . . . . . . . . . . . . . . . . . . . . . . . . . . . . . . . . . . . . . . . . . . . . . . . . . . . . . . . . . . 39<br />
Camera pan angle . . . . . . . . . . . . . . . . . . . . . . . . . . . . . . . . . . . . . . . . . . . . . . . . . . . . . . . . . . . . . . . 39<br />
Camera tilt angle. . . . . . . . . . . . . . . . . . . . . . . . . . . . . . . . . . . . . . . . . . . . . . . . . . . . . . . . . . . . . . . . . 39<br />
Camera roll angle . . . . . . . . . . . . . . . . . . . . . . . . . . . . . . . . . . . . . . . . . . . . . . . . . . . . . . . . . . . . . . . . 39<br />
Camera X-position . . . . . . . . . . . . . . . . . . . . . . . . . . . . . . . . . . . . . . . . . . . . . . . . . . . . . . . . . . . . . . . 40<br />
Camera Y-position. . . . . . . . . . . . . . . . . . . . . . . . . . . . . . . . . . . . . . . . . . . . . . . . . . . . . . . . . . . . . . . . 40<br />
Camera height (Z-Position) . . . . . . . . . . . . . . . . . . . . . . . . . . . . . . . . . . . . . . . . . . . . . . . . . . . . . . . . . 40<br />
Camera zoom . . . . . . . . . . . . . . . . . . . . . . . . . . . . . . . . . . . . . . . . . . . . . . . . . . . . . . . . . . . . . . . . . . . 40<br />
Camera focus . . . . . . . . . . . . . . . . . . . . . . . . . . . . . . . . . . . . . . . . . . . . . . . . . . . . . . . . . . . . . . . . . . . 41<br />
Data structures . . . . . . . . . . . . . . . . . . . . . . . . . . . . . . . . . . . . . . . . . . . . . . . . . . . . . . . . . . . . . . . . . . . . . . 42<br />
Data tables . . . . . . . . . . . . . . . . . . . . . . . . . . . . . . . . . . . . . . . . . . . . . . . . . . . . . . . . . . . . . . . . . . . . . 42<br />
Camera data pointers . . . . . . . . . . . . . . . . . . . . . . . . . . . . . . . . . . . . . . . . . . . . . . . . . . . . . . . . . . . . . 42<br />
Publication Part No. V3975-4980 Issue 1 9<br />
Page
Contents (continued) Page<br />
<strong>Studio</strong> data pointers . . . . . . . . . . . . . . . . . . . . . . . . . . . . . . . . . . . . . . . . . . . . . . . . . . . . . . . . . . . . . . 42<br />
Camera and lens data table . . . . . . . . . . . . . . . . . . . . . . . . . . . . . . . . . . . . . . . . . . . . . . . . . . . . . . . . 43<br />
<strong>Studio</strong> data table . . . . . . . . . . . . . . . . . . . . . . . . . . . . . . . . . . . . . . . . . . . . . . . . . . . . . . . . . . . . . . . . . 44<br />
Marker data table . . . . . . . . . . . . . . . . . . . . . . . . . . . . . . . . . . . . . . . . . . . . . . . . . . . . . . . . . . . . . . . . 44<br />
Miscellaneous . . . . . . . . . . . . . . . . . . . . . . . . . . . . . . . . . . . . . . . . . . . . . . . . . . . . . . . . . . . . . . . . . . . 45<br />
<strong>free</strong>-d processor unit . . . . . . . . . . . . . . . . . . . . . . . . . . . . . . . . . . . . . . . . . . . . . . . . . . . . . . . . . . . . . . . . . 46<br />
Processor card settings and warnings . . . . . . . . . . . . . . . . . . . . . . . . . . . . . . . . . . . . . . . . . . . . . . . . 46<br />
Illustrations<br />
Fig. 1 FREEDWIN. . . . . . . . . . . . . . . . . . . . . . . . . . . . . . . . . . . . . . . . . . . . . . . . . . . . . . . . . . . . . . . . . . . 15<br />
Fig. 2 Camera List . . . . . . . . . . . . . . . . . . . . . . . . . . . . . . . . . . . . . . . . . . . . . . . . . . . . . . . . . . . . . . . . . . 17<br />
Fig. 3 <strong>Studio</strong> List . . . . . . . . . . . . . . . . . . . . . . . . . . . . . . . . . . . . . . . . . . . . . . . . . . . . . . . . . . . . . . . . . . . . 18<br />
Fig. 4 Interface List . . . . . . . . . . . . . . . . . . . . . . . . . . . . . . . . . . . . . . . . . . . . . . . . . . . . . . . . . . . . . . . . . . 19<br />
Fig. 5 FREEDWIN Properties dialog box . . . . . . . . . . . . . . . . . . . . . . . . . . . . . . . . . . . . . . . . . . . . . . . . . 20<br />
Fig. 6 LOMWIN . . . . . . . . . . . . . . . . . . . . . . . . . . . . . . . . . . . . . . . . . . . . . . . . . . . . . . . . . . . . . . . . . . . . . 21<br />
Fig. 7 Free-d processor unit panel . . . . . . . . . . . . . . . . . . . . . . . . . . . . . . . . . . . . . . . . . . . . . . . . . . . . . . 46<br />
Tables<br />
Table 1 <strong>free</strong>-d processor unit toggle switch settings . . . . . . . . . . . . . . . . . . . . . . . . . . . . . . . . . . . . . . . . . . . 47<br />
Table 2 <strong>free</strong>-d processor unit rotary switch S5 settings. . . . . . . . . . . . . . . . . . . . . . . . . . . . . . . . . . . . . . . . . 47<br />
Table 3 <strong>free</strong>-d processor unit LED indications. . . . . . . . . . . . . . . . . . . . . . . . . . . . . . . . . . . . . . . . . . . . . . . . 49<br />
Publication Part No. V3975-4980 Issue 1 10
Introduction<br />
Introduction<br />
A key component of any virtual studio system is a means of measuring the precise position and orientation<br />
of each studio camera. This data is used to render the virtual scene from the appropriate viewpoint.<br />
Developed by the BBC R&D, the <strong>free</strong>-d virtual studio system allows unrestricted movement of studio<br />
cameras while panning and tilting through 360 degrees, accurately measuring the position and orientation<br />
of the camera to ensure the precise matching of the real and virtual worlds.<br />
The main features of the <strong>free</strong>-d system are:<br />
• 8 axes of motion tracking (x, y, z, pan, tilt, roll, zoom, focus).<br />
• Unlimited number of cameras.<br />
• Multiple studios.<br />
• No single point of failure for more than one camera.<br />
• Minimal daily set-up; returns absolute position and orientation at switch-on.<br />
• Passive target infrastructure.<br />
• Places no significant constraint on scene content or studio environment.<br />
• High speed operation.<br />
• Suitable for studio heights from 3 to at least 10 metres.<br />
• Supports studio sizes up to 3000 square metres.<br />
• Position resolution < 1 millimetre.<br />
• Orientation resolution < 0.01 degrees.<br />
• Delay one video frame.<br />
The <strong>free</strong>-d system uses a number of passive coded targets permanently installed out-of-shot in the studio<br />
lighting grid. The targets are mounted at one of two or more different heights (differing by 0.5-1 m) at an<br />
optimum distance between each target to suit the height of the studio, The targets are installed in an<br />
optimum pattern of high and low targets to ensure that the maximum number of targets are identified, with<br />
the minimum number of low targets obscuring high targets. Each target consists of concentric black and<br />
white retroreflective rings that form a circular bar code, providing each target with a unique identification<br />
and ensuring a sufficient number remain visible under normal studio lighting conditions. The diameter of<br />
the target depends on the height the target is from the floor, but is typically 20 cm.<br />
Each studio camera is fitted with zoom and focus sensors for the camera's lens and an auxiliary upwardlooking<br />
target-seeking camera mounted perpendicularly to the optical axis. The <strong>free</strong>-d target-seeking<br />
camera incorporates a cluster of bright LEDs which constantly illuminate the retroreflective targets;<br />
ensuring a uniform high-contrast image. For correct operation at least four targets, and preferably more,<br />
Publication Part No. V3975-4980 Issue 1 11
must be visible at all times. Allowing for about half being obscured by lights, hoists etc. a medium-sized<br />
studio may need around 300 targets installed. The image data and lens settings are encoded into a serialdigital-video<br />
signal for onward transmission to the <strong>free</strong>-d processing unit.<br />
The <strong>free</strong>-d processing unit, one of which is required for each camera, receives the serial-digital-video<br />
signal from the target-seeking camera and computes the studio camera's position and orientation in realtime.<br />
The processing unit identifies the targets in the image, measures their positions to sub-pixel accuracy<br />
and reads their barcodes. Knowing the exact positions of all the targets in the studio, which are stored in<br />
a non-volatile database, the position and orientation of the camera is computed. The <strong>free</strong>-d processing unit<br />
generates a serial data stream which conveys the position, orientation, zoom and focus data to the virtual<br />
set system. The complete data package is transmitted via a high speed serial data link to the 3D VR<br />
system. The protocol for this link is based on the <strong>Vinten</strong> <strong>Radamec</strong> Serial Position Interface protocol.<br />
Calibrating the <strong>free</strong>-d system<br />
To calculate the studio camera's position and orientation to the required precision the <strong>free</strong>-d system must<br />
know the exact position of every target to an accuracy of about one millimetre. To measure every target<br />
to this accuracy, whilst not impossible, would be difficult and time consuming. Therefore a calibration<br />
process is carried out which, assuming the approximate positions of the targets are known, is able to refine<br />
their positions to the necessary accuracy. To provide an absolute frame of reference the accurate positions<br />
of two targets, and the height of a third, must be known. So long as the targets are mounted rigidly and<br />
are not disturbed this process need only be performed once.<br />
The studio calibration process consists of moving the <strong>free</strong>-d target-seeking camera around the studio<br />
whilst the positions of the targets in the images it sees are automatically recorded. The requirement is that<br />
every target should be seen from a number of different directions, so that its true position can be accurately<br />
determined, and the calibration software displays a map showing the status of each target in this respect.<br />
As well as the target positions, the system needs to know some intrinsic parameters of the <strong>free</strong>-d targetseeking<br />
camera and how it is mounted on the studio camera. This information is also stored in the nonvolatile<br />
database in the <strong>free</strong>-d processing unit, and each camera encodes a unique ID number in its data<br />
output allowing the processing unit to select the appropriate parameters. Each <strong>free</strong>-d processing unit can<br />
store the parameters for multiple studio cameras, allowing cameras to be swapped (for example in the<br />
event of a failure) without any need to reconfigure the <strong>free</strong>-d system.<br />
Each <strong>free</strong>-d processing unit has the capacity to store the target position database for two or more studios<br />
(up to a limit of about 4000 targets in total), the particular studio in use being selected using switches<br />
provided on the <strong>free</strong>-d processing unit. In this way all <strong>free</strong>-d processing units within a studio centre can<br />
contain identical data, making it much easier to redeploy the <strong>free</strong>-d system from one studio to another and<br />
to provide a common spare unit suitable for use in any studio.<br />
Configuring the <strong>free</strong>-d system<br />
Once the studio has been calibrated and the database of studio and camera information has been<br />
programmed into each of the <strong>free</strong>-d processing units, the <strong>free</strong>-d system is entirely autonomous. It will<br />
generate absolute position and orientation data for each studio camera within a few seconds of being<br />
switched on (depending on the nature of the lens sensors it may be necessary to manually initialise the<br />
12 <strong>free</strong>-d <strong>Virtual</strong> <strong>Studio</strong> <strong>System</strong>
Introduction<br />
zoom and focus). All cameras are independent and there is no single point of failure which could affect<br />
more than one camera.<br />
On initial installation, and if it is necessary to reconfigure the <strong>free</strong>-d system (for example a recalibration<br />
is required, or a new camera is added), a general purpose (Windows) computer is used. This is<br />
connected to the <strong>free</strong>-d processing unit instead of the virtual set system and is used to download<br />
information from the <strong>free</strong>-d processing unit, for example during studio calibration, to store a 'master copy'<br />
of the camera and studio databases (e.g. on a network file server) and to upload the databases to the <strong>free</strong>d<br />
processing units. If multiple serial ports are fitted, it is possible for the computer to communicate with<br />
several <strong>free</strong>-d processing units. Alternatively, they may be connected and configured sequentially.<br />
Software<br />
Calibration and configuration operations are carried out using the FREEDWIN utility software running<br />
on a computer running Microsoft Windows (95, 98, Me, NT4, 2000 or XP). Note that FREEDWIN<br />
utility stores its configuration file FREED.CFG in the current directory. The software can be launched<br />
from the computer desktop or using the Start menu (Programs > BBC Free-D > Free-D for Windows).<br />
The LOMWIN utility software communicates with the <strong>free</strong>-d processor unit and can be called as a subprogram<br />
by FREEDWIN to download or upload data to the unit or it can be run as a stand-alone utility<br />
for diagnostic or demonstration purposes.<br />
An online help file is available from the BBC Free-D menu, by selecting the Free-D help option.<br />
Publication Part No. V3975-4980 Issue 1 13
FREEDWIN<br />
The FREEDWIN utility is used to configure the <strong>free</strong>-d system, allowing you to configure a number of<br />
cameras within the studio and nominate your computer outputs for interfaces. The FREEDWIN utility can<br />
display three lists; a camera list that displays automatically on startup that lists all the cameras and their<br />
calibration offsets, a studio list that displays the fixed targets within the studio and the interface list that<br />
displays a list of the different serial ports on your computer that may be used for communication with the<br />
<strong>free</strong>-d processing unit.<br />
FREEDWIN provides Wizards, available from the Utilities menu, to assist with the calibrating and<br />
configuration of the <strong>free</strong>-d system, and studio levelling where the target positions are adjusted to ensure<br />
that the camera’s height is reported accurately. Each wizard provides a step-by-step guide to the process.<br />
CAUTION! The FREEDWIN Utility is used primarily to configure and test the <strong>free</strong>-d<br />
system. The only function that should be used by <strong>Operators</strong> is the LOMWIN<br />
utility. This utility can be run to obtain information about the <strong>free</strong>-d system<br />
setup.<br />
Getting started with FREEDWIN<br />
To launch FREEDWIN, you can either:<br />
• double-click on the desktop shortcut icon; or<br />
• from the Start menu, choose Programs > BBC Free-D > Free-D for Windows.<br />
FREEDWIN (Fig. 1) is a Windows-based program that uses a conventional application window,<br />
consisting of a title bar, a set of menus, an editing pane and a status bar. The FREEDWIN window works<br />
similar to other application windows, allowing you to reposition the window on your computer desktop<br />
by dragging it with your mouse (left button), minimise it (so that it appears only as an item on your task<br />
bar) and close the application; but you cannot resize or maximise the window.<br />
Title bar: Displays the name of the application (FREEDWIN) and the current version number of the<br />
application software. The title bar also contains a Minimise button, a (disabled) Maximise button and a<br />
Close button. If you close the window using the Close button or using the keyboard shortcut Alt-F4, you<br />
will be prompted to save the current <strong>free</strong>-d configuration (if any changes have been made).<br />
Menu bar: Contains five menus, File, Edit, View, Utilities and Help. Each menu can be activated by<br />
clicking on the appropriate menu name or by using a keyboard shortcut (hold down Alt and press the key<br />
corresponding to the initial character). If any of the menu items are unavailable, they will appear dimmed.<br />
View: Can view three pages within FREEDWIN; Camera view, <strong>Studio</strong> view and Interfaces view. See<br />
About the View lists.<br />
14 <strong>free</strong>-d <strong>Virtual</strong> <strong>Studio</strong> <strong>System</strong>
FREEDWIN<br />
Status bar: When a menu item is selected, the status bar displays a brief description of the function of<br />
that command. If an item in the Utilities menu is dimmed (unavailable) the status bar contains a message<br />
explaining why that option is unavailable. This can be very useful in determining how to proceed.<br />
Otherwise, when the program is waiting for input from the user the status bar describes the required<br />
content of the current field (containing the cursor). If the program is busy, the status bar indicates what<br />
operation is taking place.<br />
About the View lists<br />
Fig. 1 FREEDWIN<br />
(1) Title bar (2) Menu bar (3) View (4) Status bar<br />
The View menu lets you select one of three possible pages of the current <strong>free</strong>-d system configuration: the<br />
Camera List, the <strong>Studio</strong> List or the Interfaces list.<br />
CAUTION! It is recommended that <strong>Operators</strong> do not edit the system configuration (Camera<br />
List, <strong>Studio</strong> List and Interface List) or run any of the configuration wizards<br />
using the FREEDWIN utility, as any changes to the data will affect the system<br />
setup.<br />
Publication Part No. V3975-4980 Issue 1 15<br />
(1)<br />
(2)<br />
(3)<br />
(4)
Camera list<br />
The Camera list (Fig. 2) displays a list of the different cameras (a maximum of 19) known about in the<br />
current <strong>free</strong>-d system configuration. For each camera the following information is listed:<br />
Camera: The <strong>free</strong>-d camera name. Only the first four characters of the camera name are transferred into<br />
the binary database, and therefore only those characters are displayed on the <strong>free</strong>-d processor unit's<br />
display when selected to show the current camera.<br />
ID No(s).: The hexadecimal ID number or numbers of the camera, optionally as a range (xx-yy) or a list<br />
(aa,bb...). Each <strong>free</strong>-d camera has a unique 8-bit ID which is encoded in its data output; this ID is<br />
determined partly by switches internal to the camera (affecting the most-significant four bits) and partly<br />
by inputs to the camera via its auxiliary connector (affecting the least-significant four bits). When the<br />
auxiliary connector is not in use it is safest to specify a range of 16 addresses (e.g. 30-3F) so that the same<br />
calibration file is selected irrespective of the four LSBs.<br />
X-offset: The X-offset, in metres, between the optical axis of the <strong>free</strong>-d camera and the reference point<br />
whose position you wish the system to return. This is measured in the direction of the X axis when the<br />
camera's pan and tilt are zero. If the reference point is to the right of the <strong>free</strong>-d camera, when viewed from<br />
behind the studio camera, then the offset should be positive. If the reference point is to the left of the <strong>free</strong>d<br />
camera, then the offset should be negative. Commonly the reference point corresponds to the<br />
intersection of the pan axis and the optical axis of the studio camera. With most mounting arrangements<br />
this offset is small or zero.<br />
Y-offset: The Y-offset, in metres, between the optical axis of the <strong>free</strong>-d camera and the reference point<br />
whose position you wish the system to return. This is measured in the direction of the Y axis when the<br />
camera's pan and tilt are zero, i.e. along the studio camera's optical axis. If the reference point is in front<br />
of the <strong>free</strong>-d camera, then the offset should be positive. If the reference point is behind the <strong>free</strong>-d camera,<br />
then the offset should be negative. Commonly the reference point corresponds to the intersection of the<br />
pan axis and the optical axis of the studio camera.<br />
Z-offset: The Z-offset, in metres, between the nodal plane of the <strong>free</strong>-d camera and the reference point<br />
whose position you wish the system to return. This is measured in the vertical direction when the camera's<br />
tilt is zero. If the reference point is above the <strong>free</strong>-d camera, then the offset should be positive. If the<br />
reference point is below the <strong>free</strong>-d camera, then the offset should be negative. Commonly the reference<br />
point is the intersection of the pan axis and the optical axis of the studio camera. The nodal plane of the<br />
<strong>free</strong>-d camera corresponds to the bottom edge of the B B C logo.<br />
Calibration Filename: The name of the calibration file for the particular <strong>free</strong>-d camera. It is important<br />
that the correct calibration file is specified for the given range of ID numbers, otherwise the system<br />
performance may be seriously degraded. Note that the filename cannot contain spaces.<br />
16 <strong>free</strong>-d <strong>Virtual</strong> <strong>Studio</strong> <strong>System</strong>
<strong>Studio</strong> list<br />
Fig. 2 Camera List<br />
FREEDWIN<br />
The <strong>Studio</strong> list (Fig. 3) displays a list of the different studios (a maximum of 19) known about in the<br />
current <strong>free</strong>-d configuration. For each studio the following information is listed:<br />
<strong>Studio</strong>: The studio name. Note that only the first four characters are actually transferred into the binary<br />
database, and therefore only those characters are displayed on the <strong>free</strong>-d processor's display when selected<br />
to show the current studio.<br />
ID No(s).: The hexadecimal ID number or numbers of the studio, optionally as a range (xx-yy) or a list<br />
(aa,bb...). The current studio is selected by means of switches on the <strong>free</strong>-d processor unit, from a<br />
theoretical maximum of 256 different 8-bit IDs. When the system is configured for use in only one studio,<br />
it is safest to specify the full range of addresses (i.e. 00-FF) so that the ID number is ‘don't care’.<br />
Fixed #1: The barcode number of the first ‘fixed’ target. When calibrating a studio the system needs to<br />
establish an absolute 3D frame of reference with respect to the fixed infrastructure (floor, walls etc.). This<br />
is achieved by specifying the X, Y and Z coordinates of two of the targets, thus defining a straight line<br />
passing through these two points, and constraining rotation about this line by specifying the Z coordinate<br />
(height) of a third target.<br />
Fixed #2: The barcode number of the second ‘fixed’ target. The first two fixed targets should be selected<br />
such that there is a reasonably large distance between them (therefore improving the accuracy of the<br />
straight line thus defined) without either target being so near to the edge, or being obstructed, that the<br />
calibration process cannot accurately establish its position relative to the others.<br />
Fixed #3: The barcode number of the third ‘fixed’ target. Only the Z coordinate (height) of this target<br />
needs to be measured accurately. This target should be selected as being a reasonable distance from the<br />
straight line joining the first two fixed targets (therefore accurately constraining rotation about this line)<br />
Publication Part No. V3975-4980 Issue 1 17
ut not so near to the edge, or obstructed, that the calibration process cannot accurately establish its<br />
position relative to the others.<br />
Target Data Filename: The name of the target data file for the particular studio. This file contains the X,<br />
Y and Z coordinates of all the targets, initially only approximately (except for the three fixed targets) but<br />
after calibration to an accuracy of about ±1 millimetre. Note that the filename cannot contain spaces.<br />
Interfaces list<br />
Fig. 3 <strong>Studio</strong> List<br />
The Interfaces list (Fig. 4) displays a list of the different serial ports (a maximum of 19) fitted to the PC,<br />
and which might be used for communication with a <strong>free</strong>-d processing unit. For each serial interface the<br />
following information is listed:<br />
Interface: The name by which the serial interface is known to Windows. Typically the serial ports are<br />
called COM1, COM2, COM3, COM4 and so on.<br />
I/O Port: Optionally the I/O port address at which this port may be accessed from MS-DOS. This is<br />
not used by FREEDWIN or LOMWIN, but may be entered if required for compatibility with the DOS<br />
utilities FREED and LOM.<br />
IRQ number: This is not used by FREEDWIN or LOMWIN, but may be entered if required for<br />
compatibility with the DOS utilities FREED and LOM.<br />
18 <strong>free</strong>-d <strong>Virtual</strong> <strong>Studio</strong> <strong>System</strong>
Fig. 4 Interface List<br />
FREEDWIN<br />
Publication Part No. V3975-4980 Issue 1 19
LOMWIN<br />
LOMWIN is a Windows based program that communicates with the <strong>free</strong>-d processor unit via a serial link<br />
and is called as a sub-program by FREEDWIN when it needs to download data from or upload data to the<br />
<strong>free</strong>-d processor unit. LOMWIN can also be run as a stand-alone utility for diagnostic or demonstration<br />
purposes.<br />
LOMWIN can be used in two modes:<br />
• with a bidirectional serial data connection to the <strong>free</strong>-d processor unit. In this mode LOMWIN<br />
both controls and monitors the processor, as is required for studio calibration and<br />
configuration operations.<br />
• with a receive-only serial data connection to the <strong>free</strong>-d processor unit. In this mode LOMWIN<br />
monitors and displays the data output from the processor, typically when it is driving a virtual<br />
set system in real time.<br />
LOMWIN can be run either from within FREEDWIN, using the Run LOMWIN utility command from the<br />
Utility menu or on its own from a desktop shortcut. It is usually more convenient to run it from<br />
FREEDWIN because the serial port used for communication with the <strong>free</strong>-d processor unit is<br />
automatically selected. When run from a desktop shortcut the default port COM1 is used. To change the<br />
default port, a command line option must be added to the Target field within the Properties dialog box<br />
(Fig. 5).<br />
Fig. 5 FREEDWIN Properties dialog box<br />
20 <strong>free</strong>-d <strong>Virtual</strong> <strong>Studio</strong> <strong>System</strong>
To change the port, you:<br />
1. Right-click on the <strong>free</strong>-d for Windows icon on your computer desktop.<br />
2. From the menu, choose Properties to launch the Properties dialog box (Fig. 5).<br />
LOMWIN<br />
3. On the Shortcut tab, enter the details of the communications port in the Target field, for example:<br />
C:\path\lomwin.exe -c COM2.<br />
How to use LOMWIN<br />
Like FREEDWIN, LOMWIN uses a conventional window consisting of a title bar, header and six data<br />
panels and a footer listing the available commands (Fig. 6). The window works similar to other application<br />
windows, allowing you to reposition the window on your computer Windows desktop by dragging with<br />
your mouse, minimise it (so that it appears only as an item on your task bar) and close the application, but<br />
you cannot resize or maximise the LOMWIN utility window.<br />
.<br />
NOTE: LOMWIN is controlled entirely from the keyboard.<br />
(1)<br />
Fig. 6 LOMWIN<br />
(5) title bar (6) header (7) data panels (8) footer<br />
The header contains the hexadecimal studio ID on the left-hand side and the hexadecimal camera ID on<br />
the right-hand side. Note that if communication with the <strong>free</strong>-d processor unit has not been established the<br />
camera and studio IDs will be blank. The corresponding studio and camera names can be discovered by<br />
comparing the IDs with the ranges given in the <strong>Studio</strong> List and Camera List respectively within<br />
FREEDWIN.<br />
Publication Part No. V3975-4980 Issue 1 21<br />
(5)<br />
(6)<br />
(7)<br />
(8)
Outputs panel<br />
Pan:<br />
Tilt:<br />
Roll:<br />
X-posn:<br />
Y-posn:<br />
Height<br />
Zoom:<br />
Focus:<br />
GPI:<br />
Outputs<br />
32.17 deg<br />
0.61 deg<br />
30.04 deg<br />
1089.1 mm<br />
1898.5 mm<br />
952.5 mm<br />
80000 hex<br />
80000 hex<br />
00F0 hex<br />
The Outputs panel displays the current studio camera orientation, position, zoom and focus as returned<br />
from the <strong>free</strong>-d processor unit. Note that when LOMWIN is running with a receive-only data connection<br />
to the Free-d processor unit, only the Outputs panel will display data.<br />
Pan: The angle in degrees between the Y-axis and the projection of the studio camera's optical axis onto<br />
the horizontal (XY) plane. A positive value indicates a pan to the right (i.e. the camera rotates clockwise<br />
when viewed from above).<br />
Tilt: The angle in degrees between the studio camera's optical axis and the horizontal (XY) plane. A<br />
positive value indicates an upwards tilt. If both pan and tilt are zero the camera is looking in the direction<br />
of the positive Y axis.<br />
Roll: The angle of rotation in degrees of the studio camera about its optical axis. A positive value indicates<br />
a clockwise roll, when viewed from behind the camera.<br />
X-position: The horizontal displacement in millimetres of the camera from its reference position in the<br />
direction of the X-axis.<br />
Y-position: The horizontal displacement in millimetres of the camera from its reference position in the<br />
direction of the Y-axis.<br />
Height: The vertical displacement in millimetres of the camera from its reference position. A positive<br />
value indicates an upwards displacement.<br />
Zoom: A hexadecimal value related to the rotation of the zoom ring. It is the responsibility of the virtual<br />
set system to convert this value to that required to control the rendering of the virtual background,<br />
knowing the type of lens in use.<br />
Focus: A hexadecimal value related to the rotation of the focus ring. It is the responsibility of the virtual<br />
set system to convert this value to that required to control the rendering of the virtual background,<br />
knowing the type of lens in use.<br />
GPI: 16-bit hexadecimal value sent from the <strong>free</strong>-d camera. The first two digits are a general purpose 8bit<br />
value corresponding to inputs fed to the camera's auxiliary connector; these are ignored by the <strong>free</strong>-d<br />
system and can be used to carry any (slowly changing) data from the camera to the virtual set system. The<br />
last two digits correspond to switch settings within the <strong>free</strong>-d camera (the fourth digit indicates the<br />
approximate shutter speed as follows: 0 = 1/10000 sec, 1 = 1/4000 sec, 2 = 1/2000 sec).<br />
22 <strong>free</strong>-d <strong>Virtual</strong> <strong>Studio</strong> <strong>System</strong>
Controls panel<br />
Controls<br />
Smoothing:<br />
Asymmetry:<br />
Outer box size:<br />
Black Thresh:<br />
White Thresh:<br />
Black clip:<br />
White clip:<br />
Maximum black:<br />
Minimum white:<br />
0.9<br />
0.5<br />
58<br />
32<br />
128<br />
32<br />
96<br />
1<br />
50<br />
LOMWIN<br />
The Controls panel displays the current configuration parameters for the <strong>free</strong>-d processor unit. These are<br />
changed using switches on the unit, but it will normally be satisfactory to leave them set to their default<br />
values.<br />
Smoothing: This determines the degree to which targets entering or leaving the field of view of the <strong>free</strong>d<br />
camera (or appearing and disappearing for any other reason) cause a disturbance to the measured<br />
position and orientation. The default value is 0.95.<br />
Asymmetry: This determines at what point to reject a target because it appears to be asymmetrical.<br />
Increasing the value can prevent the rejection of 'marginal' targets, but since their measured positions are<br />
suspect their inclusion may impair system accuracy. The default value is 0.5.<br />
Outer box size: This determines the maximum size of target which will be recognised. By default the box<br />
size is set to 'automatic', and the value displayed is that which the system is currently using. Only in<br />
exceptional circumstances, or for testing, should the box size need to be forced to a fixed value.<br />
Black threshold: This determines the maximum acceptable video level in the dark region around a target.<br />
It should be set so that flare and shiny objects in the vicinity of a target are ignored. The default value is 32.<br />
White threshold: This determines the minimum acceptable video level of the bright regions of a target.<br />
It should be set to allow for a reduction in video level as the distance from the targets increases. The<br />
default value is 128.<br />
Black clip: This determines the minimum level to which the incoming video is limited before the 'centre<br />
of gravity' of a target is measured. The default value is 32.
Camera Parameters panel<br />
Camera Parameters<br />
Image x-centre:<br />
Image y-centre:<br />
Pixel x-scaling:<br />
Pixel y-scaling:<br />
Lens distortion 1:<br />
Lens distortion 2:<br />
Camera x-offset:<br />
Camera y-offset:<br />
Camera z-offset:<br />
The Camera Parameters panel displays the calibration parameters of the <strong>free</strong>-d camera, derived from the<br />
contents of the appropriate calibration (.CAL) file, and the offsets between the <strong>free</strong>-d camera and the<br />
reference point whose position is returned.<br />
Camera x-offset: The displacement in millimetres between the optical axis of the <strong>free</strong>-d camera and the<br />
reference point, measured in the direction of the X axis when the camera's pan and tilt are zero. A positive<br />
value indicates that the reference point is to the right of the <strong>free</strong>-d camera, when viewed from behind the<br />
studio camera.<br />
Camera y-offset: The displacement in millimetres between the optical axis of the <strong>free</strong>-d camera and the<br />
reference point, measured in the direction of the Y axis when the camera's pan and tilt are zero. A positive<br />
value indicates that the reference point is in front of the <strong>free</strong>-d camera.<br />
Camera z-offset: The displacement in millimetres between the nodal plane of the <strong>free</strong>-d camera and the<br />
reference point, measured in the vertical direction when the camera's tilt is zero. A positive value indicates<br />
that the reference point is above the <strong>free</strong>-d camera. The nodal plane of the Free-d camera corresponds to<br />
the bottom edge of the BBC logo.<br />
Tracking Status panel<br />
Tracking Status<br />
Markers seen:<br />
Marker’s id’d:<br />
Markers used:<br />
DSP status:<br />
RMS error:<br />
19<br />
11<br />
9<br />
0<br />
0.06<br />
459.15 pixels<br />
256.84 pixels<br />
0.59497<br />
-0.58497<br />
0.20933<br />
-0.16784<br />
0.0 mm<br />
370.0 mm<br />
-40.0 mm<br />
The Tracking Status panel displays information related to the current performance of the Free-d camera<br />
tracking.<br />
Markers seen: The number of targets which are recognised based on the acceptance criteria in the<br />
Controls panel, i.e. Box size, Black threshold, White threshold, Maximum black and Minimum white.<br />
Markers identified: The number of targets whose bar-codes have been read (this may include other bright<br />
objects misinterpreted as targets with an ID of 4095).<br />
Markers used: The number of targets whose bar-codes exist in the target position database for the current<br />
studio, and which are therefore used in the position and orientation calculation.<br />
24 <strong>free</strong>-d <strong>Virtual</strong> <strong>Studio</strong> <strong>System</strong>
LOMWIN<br />
DSP status: The status of the most recent calculation. A zero or positive value indicates the number of<br />
iterations required to compute the camera's position and orientation. A negative value indicates a failure:<br />
• 255 = too few targets<br />
• 254 = failed to converge<br />
• 253 = DSP reset<br />
• 252 = internal error.<br />
RMS error: The residual error, in pixels. This is a measure of how close the target images are to their<br />
theoretical positions. A value in excess of 0.1 should lead to a suspicion that a studio calibration is<br />
required, or that the wrong camera calibration file is being used.<br />
<strong>System</strong> Status panel<br />
<strong>System</strong> Status<br />
Video input:<br />
Fault code:<br />
CPU version:<br />
DESP version:<br />
PLD version<br />
The <strong>System</strong> Status panel displays information on the overall status of the <strong>free</strong>-d system. The status<br />
indicators are defined as:<br />
Video input: The status of the video input from the <strong>free</strong>-d camera:<br />
• OK<br />
OK<br />
0<br />
2.5<br />
2.7<br />
2.1<br />
• FAIL (the video input is absent)<br />
• FAULT (the video input is present but unlocked or otherwise faulty)<br />
• FREEZE (the video image is 'frozen' e.g. during data acquisition.<br />
Fault code: Either zero, signifying no fault, or a value signifying a fault condition. See the Free-d<br />
communication protocols for more information.<br />
CPU version: The version number of the firmware running in the single-chip CPU controlling the <strong>free</strong>-d<br />
processor unit.<br />
DSP version: The version number of the software running on the Digital Signal Processor which performs<br />
the camera position and orientation calculation.<br />
PLD version: The version number of the programmable logic configuration.<br />
Publication Part No. V3975-4980 Issue 1 25
Target Data<br />
ID Image-X Image-Y X-err Y-err<br />
454 290.96 62.42 -0.01 0.13<br />
98 475.23 268.81 -0.01 0.04<br />
370 583.88 313.32 -0.05 -0.10<br />
351 536.03 418.01 0.04 0.06<br />
The Target Data panel displays one of two alternative views, either image data (shown above) or world<br />
data (shown below). You can toggle between these views by pressing the T key. In both views you can<br />
scroll the list up and down using the Page Up and Page Down keys.<br />
In the image data view the X and Y coordinates (in pixels) of each visible target are shown, along with<br />
the differences between the observed coordinates and where they should theoretically be seen from the<br />
calculated camera position and orientation. If any of the difference values are unusually large, it may<br />
suggest that the relevant target has moved since the studio was calibrated. However, because of the<br />
smoothing process these values are only meaningful when the camera is stationary and the target is<br />
steadily in view.<br />
ID World-X World-Y World-Z<br />
81 994.9 606.0 2454.4<br />
87 995.0 803.0 2455.3<br />
93 797.3 607.0 2454.9<br />
98 797.4 802.8 2454.9<br />
104 1201.3 198.5 2450.7<br />
In the world data view the X, Y and Z coordinates of all the targets are shown. This is simply a copy of<br />
the target position database stored in the <strong>free</strong>-d processing unit. It takes some time to upload the data via<br />
the serial link, so you may find that not all the targets are listed for the first few minutes.<br />
Commands<br />
The available keyboard commands are listed in the footer (8) and are activated with a single press of the<br />
appropriate key. The commands are:<br />
P:Program EEPROM: This command prompts you for the name of a data file, the contents of which are<br />
uploaded to the <strong>free</strong>-d processor and programmed into its non-volatile EEPROM memory. This should<br />
normally be accessed via the Upload database option of FREEDWIN.<br />
D:Diagnostic: This command cycles through the three diagnostic modes of the <strong>free</strong>-d processor and back<br />
to normal operation. The diagnostic modes set the monitoring video output to dark grey, light grey and a<br />
test pattern respectively.<br />
R:<strong>Radamec</strong>: This command alternates between normal polling and <strong>Radamec</strong>-style polling. In the latter<br />
mode the <strong>free</strong>-d processor is requested to send <strong>Vinten</strong> <strong>Radamec</strong>-compatible A2 messages. Since these<br />
messages have no provision for a roll value the camera must be mounted on a tripod or pedestal.<br />
PgUp:Scroll up: This command scrolls the contents of the Target Data panel down one line, so that earlier<br />
lines may be seen.<br />
26 <strong>free</strong>-d <strong>Virtual</strong> <strong>Studio</strong> <strong>System</strong>
LOMWIN<br />
PgDn:Scroll down: This command scrolls the contents of the Target Data panel up one line, so that later<br />
lines may be seen.<br />
Esc:Quit: This command exits LOMWIN. It is equivalent to clicking on the close button in the title bar.<br />
L:Log: This command toggles the logging mode on and off. When logging, the current position and<br />
orientation of the camera are written to the file LOM.LOG (in the current directory) once per second.<br />
G:Graph: This command displays a graphical representation of how the measured camera position<br />
changes with time. It can be used to assess the residual noise when the camera is stationary. Pressing any<br />
key returns to the normal display.<br />
C:Capture: This command prompts for the name of a file to which image data will be written.<br />
Subsequently each press of the spacebar causes the image coordinates of all the visible targets to be<br />
written to the file. This facility is primarily used in the <strong>free</strong>-d camera calibration process.<br />
S:Spool: This command initiates the image data acquisition process used for studio recalibration. This<br />
should normally be accessed via the Acquire image data option of the FREEDWIN utility.<br />
T:Toggle between world and image: This command alternates between the Image Data display and the<br />
World Data display in the Target Data panel<br />
F:Save to file: This command saves the world target data to a .MKR file. It is particularly useful if the<br />
original data has been lost and must be recovered from that stored in the processing unit.<br />
Publication Part No. V3975-4980 Issue 1 27
General<br />
Free-d communication protocols<br />
Communications with the <strong>free</strong>-d processing unit is by RS422/RS485 serial data:<br />
Baud rate 38.4 kbaud<br />
Data bits 8 (LSB first)<br />
Parity Odd<br />
Stop bits 1<br />
Total bits 11<br />
Data is transferred in messages. Each message consists of:<br />
Message type<br />
Camera ID number<br />
Data (depending on message type)<br />
Checksum<br />
Multi-byte data values are sent most-significant-byte first.<br />
The checksum is calculated by subtracting (modulo 256) each byte of the message, including the message<br />
type, from 40 (hex).<br />
The Camera ID number identifies the camera concerned. If the Camera ID of a message received by the<br />
<strong>free</strong>-d processor unit does not match that of the camera to which the unit is connected, the message is<br />
ignored. However, if the Camera ID is set to FF (hex) no comparison is made and the message is always<br />
recognised. Messages transmitted by the <strong>free</strong>-d processor unit carry the ID number of the camera to which<br />
it is connected.<br />
Protocols<br />
There are two modes of operation, stream mode and polled mode. In stream mode, the <strong>free</strong>-d processor<br />
unit will send position updates at the field rate of the reference video (genlock) input, or at approximately<br />
60 Hz if no genlock source is connected. In polled mode, the <strong>free</strong>-d processor unit will send a message<br />
only when specifically requested - a maximum rate of 100 polls per second is allowed. Switching between<br />
the two modes is possible using a command message. The <strong>free</strong>-d processor unit initialises itself to stream<br />
mode using message D1.<br />
The <strong>free</strong>-d processor unit can be configured to a '<strong>Radamec</strong>-compatible' mode, in which it transmits<br />
messages with the same format as would be returned by an RP2 robotic pedestal. Since <strong>Radamec</strong>-format<br />
messages have no provision for a camera 'roll' value, in this mode the camera must be mounted on a tripod<br />
or other suitable platform. Both stream and polled <strong>Radamec</strong>-compatible modes are available.<br />
28 <strong>free</strong>-d <strong>Virtual</strong> <strong>Studio</strong> <strong>System</strong>
Message structures<br />
Type D0 - poll / command<br />
Free-d communication protocols<br />
The D0 message is used to poll the <strong>free</strong>-d processor unit for data or to send a command to the unit.<br />
The message contains 4 bytes: :<br />
Message type<br />
Camera ID<br />
Command<br />
Checksum<br />
Commands presently defined are:<br />
00 Stop stream mode<br />
01 Start stream mode<br />
02 Stop <strong>free</strong>ze mode<br />
03 Start <strong>free</strong>ze mode<br />
D1 Poll for position update (and stop stream mode)<br />
D2 Request system status<br />
D3 Request system parameters<br />
D4 Request first marker data<br />
D5 Request next target data<br />
D6 Request first image point<br />
D7 Request next image point<br />
D8 Request next EEPROM data<br />
DA Request camera calibration values<br />
DB Request diagnostic mode<br />
Publication Part No. V3975-4980 Issue 1 29
Type D1 - camera position/orientation data<br />
The D1 message is used for transferring the camera position and orientation data from the <strong>free</strong>-d processor<br />
unit.<br />
The message contains 29 bytes:<br />
Message Type<br />
Camera IDs<br />
Camera Pan Angle<br />
Camera Tilt Angle<br />
Camera Roll Angle<br />
Camera X-Position<br />
Camera Y-Position<br />
Camera Height (Z-Position)<br />
Camera Zoom<br />
Camera Focus<br />
Spare / User Defined (16 bits)<br />
Checksum<br />
See Parameter definitions for details of the content of this message.<br />
Type D2 - system status<br />
The D2 message is used for transferring the system status from the <strong>free</strong>-d processing unit.<br />
The message contains 16 bytes:<br />
Message type<br />
Camera ID<br />
Switch settings<br />
LED indications<br />
<strong>System</strong> status<br />
CPU firmware version number<br />
PLD firmware version number<br />
DSP software version number<br />
DSP status<br />
Number of markers seen (i.e. detected by hardware)<br />
Number of markers identified (i.e. bar-codes read)<br />
Number of markers used (identified and in database)<br />
RMS error<br />
Checksum<br />
30 <strong>free</strong>-d <strong>Virtual</strong> <strong>Studio</strong> <strong>System</strong>
Bits in the 'switch settings' byte are:<br />
Bits 0-3 Setting of the hex switch S5 (inverted)<br />
Bit 4 0 = S2 left (decrease value / scroll left)<br />
Bit 5 0 = S2 right (increase value / scroll right)<br />
Bit 6 0 = S4 closed (save settings)<br />
Bit 7 0 = S3 left (results mode), 1 = S3 right (entry mode)<br />
Bits in the 'LED indications' byte are:<br />
Bit 0 1 = video input present<br />
Bit 1 1 = video input OK<br />
Bit 2 1 = serial data input present<br />
Bit 3 1 = data '<strong>free</strong>ze' mode<br />
0 = normal<br />
Bit 4 1 = too few markers<br />
Bit 5 1 = RMS error high<br />
Bit 6 1 = DSP alert (see DSP status)<br />
Bit 7 1 = fault (see system status)<br />
Free-d communication protocols<br />
Note that only one 'video input' LED (D3) is present in the hardware, which lights when both Bit 0 and<br />
Bit 1 of the 'LED indications' byte are set.<br />
The version numbers should be interpreted as BCD, with an implied decimal point between the two digits,<br />
e.g. 12 (hexadecimal) refers to version 1.2.<br />
The RMS error is expressed in pixels as a 24-bit positive number, where the most-significant bit (bit 23)<br />
is always zero, the next 8 bits (bits 22 to 15) are the integer part and the remaining bits (bits 14 to 0) are<br />
the fractional part; alternatively, this may be thought of as an unsigned integer value in units of 1/32768<br />
pixels. The range of values is from zero to nearly 256.0 pixels (7FFFFF hex).<br />
The 'DSP alert' bit is set whenever the DSP status is negative (bit 7 set).<br />
The 'fault' bit is set whenever the system status byte is non-zero.<br />
The system status is an 8-bit number which can take one of the following values:<br />
0 <strong>System</strong> normal (no detected errors).<br />
1 A processor reset occurred. This code is only present transitory.<br />
2 Serial communications error. This is most likely to be caused by a message being<br />
sent to the Free-d processing unit before the reply to the previous message has been<br />
received.<br />
3 Vertical blanking failure. This may indicate a hardware fault, or a problem with the<br />
digital video input.<br />
4 Xilinx failure. The programmable logic devices have not initialised correctly; if persistent,<br />
this indicates a hardware fault.<br />
5 I2C bus failure. Communication between the CPU and peripheral devices has failed,<br />
indicating a probable hardware fault.<br />
Publication Part No. V3975-4980 Issue 1 31
6 EEPROM failure. An attempt to save the parameters to non-volatile memory U3 has<br />
failed, indicating a probable hardware fault.<br />
7 DSP failure (1). The DSP failed to acknowledge a command; if persistent, this indicates<br />
a hardware fault.<br />
8 DSP failure (2). The DSP failed to accept data; if persistent, this indicates a hardware<br />
fault.<br />
9 DSP failure (3). The DSP failed to provide data; if persistent, this indicates a hardware<br />
fault.<br />
10 DSP failure (4). The DSP is flagging an exception error; if persistent, this indicates a<br />
hardware or software fault.<br />
91 I2C communication failure: No Reply.<br />
93 I2C communication failure: Bus Error.<br />
94 I2C communication failure: ACK Error.<br />
95 I2C communication failure: Undefined State.<br />
96 I2C communication failure: Overflow.<br />
The 'I2C communication failure' codes result from a problem with communication between the <strong>free</strong>-d<br />
processor unit and the I2C peripherals U3 and U17, most likely indicating a hardware fault.<br />
The DSP status is a signed 8-bit number which when negative indicates an error condition as follows:<br />
-1 = Too few valid markers visible to compute camera position<br />
-2 = Iteration failed to converge<br />
-3 = A DSP reset occurred<br />
-4 = Internal DSP error<br />
A zero or positive value of DSP status indicates the number of iterations which were required to compute<br />
the camera's position.<br />
Type D3 - control parameters<br />
The D3 message is used for transferring the control parameters. It may be sent to the <strong>free</strong>-d processing<br />
unit in order to set their values, or requested from the <strong>free</strong>-d processing unit in order to interrogate the<br />
current values. Operation of switch S4 saves the current values to EEPROM which become the default<br />
values following a subsequent processor reset.<br />
The message contains 13 bytes:<br />
Message type<br />
Camera ID<br />
<strong>Studio</strong> ID<br />
Smoothing value<br />
Maximum asymmetry<br />
Half box width<br />
Black video threshold<br />
32 <strong>free</strong>-d <strong>Virtual</strong> <strong>Studio</strong> <strong>System</strong>
White video threshold<br />
Black video clip level<br />
White video clip level<br />
Maximum number of >black pixels between boxes<br />
Minimum number of >white pixels in inner box<br />
Checksum<br />
Free-d communication protocols<br />
The 'studio ID' is in the range 0 to 255 and determines which database of marker positions (stored in the<br />
on-board EEPROM) is used.<br />
The 'smoothing value' is in the range 0 to 255, corresponding to settings of smoothing between 0.000 and<br />
0.996.<br />
The 'maximum asymmetry' is in the range 0 to 255, in units of 1/128 pixels. This sets a limit on the<br />
difference between the centre position of a marker as measured by the hardware and its position as<br />
estimated as the mid-point between opposite edges. If set to zero, a test mode is entered in which the<br />
returned pan value increments continuously at a rate of 30° per second (25° per second when genlocked<br />
at 50 Hz).<br />
The 'half box width' determines the size of the outer box used in marker detection. The maximum value<br />
is 41 pixels: if a larger value is set the unit will not operate correctly; the box height is calculated to ensure<br />
the box is square. A value of zero signifies 'automatic': the <strong>free</strong>-d processor unit sets the box size<br />
according to the apparent size of the markers in the image.<br />
The 'black video clip level' and 'white video clip level' determine the clipping which is applied before the<br />
marker's position is measured. Too little clipping can make the position measurement over-sensitive to<br />
level variation, such as might be caused by uneven illumination. Too much clipping, however, can cause<br />
excessive aliasing which can impair the measurement accuracy.<br />
The 'maximum number of black pixels' and 'minimum number of white pixels' values are used in<br />
conjunction with the 'black video threshold' and 'white video threshold' to control the marker detection<br />
process. A marker is recognised if there are at least the specified minimum number of pixels above the<br />
'white' threshold within the inner box, and at most the specified maximum number of pixels above the<br />
'black' threshold between the inner and outer boxes.<br />
The <strong>free</strong>-d processor unit acknowledges receipt of a D3 message by replying with a D3 message<br />
containing the new data (if the 'half box width' was set to zero, signifying automatic, the actual value in<br />
use is returned).<br />
Type D4 & D5 - marker data<br />
The D4 and D5 messages are used for transferring marker data from the <strong>free</strong>-d processing unit. Each<br />
message contains data about a single marker: requesting message D4 causes data for marker zero to be<br />
transmitted and requesting message D5 causes data for the next marker in sequence to be transmitted.<br />
After data for the last marker has been sent, the next message will contain data for the first marker, with<br />
a message type of D4 (whether the request was for D4 or D5).<br />
Publication Part No. V3975-4980 Issue 1 33
The messages contain 18 bytes:<br />
or Message type<br />
Camera ID<br />
<strong>Studio</strong> ID<br />
Marker Number<br />
Marker X-Position<br />
Marker Y-Position<br />
Marker Height (Z-Position)<br />
Marker Flags<br />
Checksum<br />
The X-Position, Y-Position and Height are sent in the same format as the camera position in message D1<br />
(see Parameter definitions).<br />
The MSB of Marker Flags (bit 7 of FH) is set for a valid marker and cleared for an invalid marker. If the<br />
marker is flagged as invalid its position data should be ignored.<br />
Type D6 & D7 - image data<br />
The D6 and D7 messages are used for transferring image data from the <strong>free</strong>-d processing unit. Each<br />
message contains data about a single marker: requesting message D6 causes data for the first marker in<br />
the image to be transmitted and requesting message D7 causes data for the next marker in the image to be<br />
transmitted. After data for the last marker has been sent, the next message will contain data for the first<br />
marker, with a message type of D6 (whether the request was for D6 or D7).<br />
The messages contain 18 bytes:<br />
or Message type<br />
Camera ID<br />
Marker Index (zero for message D6)<br />
Marker Number<br />
X-Position in image<br />
Y-Position in image<br />
Error in X-Position<br />
Error in Y-Position<br />
Checksum<br />
The X-Position and Y-Position are positive values in units of 1/256 pixels (i.e. XH,XM is the integer part<br />
of the X-Position in pixels and XL is the fractional part).<br />
The Error values are signed and in units which depend on the lens calibration. To obtain values in pixels<br />
the X-Error must be divided by X-Scale (see message DA) and multiplied by 512. Similarly the Y-Error<br />
must be divided by Y-Scale and multiplied by 512.<br />
34 <strong>free</strong>-d <strong>Virtual</strong> <strong>Studio</strong> <strong>System</strong>
Type D8 - EEPROM data<br />
Free-d communication protocols<br />
The D8 message is used for transferring EEPROM data from or to the <strong>free</strong>-d processing unit. If a D8<br />
message is sent to the <strong>free</strong>-d processing unit the EEPROM is programmed with the data supplied, and the<br />
<strong>free</strong>-d processing unit replies with a D8 message containing the new data.<br />
The message contains 21 bytes:<br />
Message type<br />
Camera ID<br />
EEPROM Address<br />
...... 16 bytes of EEPROM data<br />
Checksum<br />
The EEPROM can only be programmed or read 16-bytes at a time. The EEPROM address within the<br />
message corresponds to the address of the first byte of data transferred.<br />
See Data structures for details of the format of the EEPROM database.<br />
Type D9 - request EEPROM data<br />
The D9 message is used to request the transfer of EEPROM data from the <strong>free</strong>-d processing unit. The unit<br />
replies with a D8 message containing 16 bytes of EEPROM data.<br />
The message contains 5 bytes:<br />
Message type<br />
Camera ID<br />
EEPROM Address<br />
Checksum<br />
The EEPROM address determines the address of the first data byte to be transferred.<br />
Type DA - camera calibration data<br />
The DA message is used for transferring camera calibration data from the <strong>free</strong>-d processing unit. The data<br />
corresponds to the camera currently in use. If a valid camera is not connected to the <strong>free</strong>-d processing unit,<br />
or if the camera has only recently been connected, the data is invalid.<br />
The message contains 30 bytes:<br />
Message type<br />
Camera ID<br />
Lens X-Centre<br />
Lens Y-Centre<br />
Lens X-Scale<br />
Lens Y-Scale<br />
Lens Distortion A (radial, square term)<br />
Publication Part No. V3975-4980 Issue 1 35
Lens Distortion B (radial, fourth power)<br />
X-Offset from auxiliary camera to studio camera<br />
Y-Offset from auxiliary camera to studio camera<br />
Z-Offset from auxiliary camera to studio camera<br />
Checksum<br />
See Data structures for details.<br />
Type DB - diagnostic mode<br />
The DB message is used to switch the <strong>free</strong>-d processing unit into a diagnostic mode or to return the<br />
diagnostic mode currently set.<br />
The message contains 4 bytes:<br />
Message type<br />
Camera ID<br />
Diagnostic mode<br />
Checksum<br />
Only the two most-significant bits of diagnostic mode are defined. The possible modes are:<br />
00 Normal operation<br />
40 Set video data to 0x55<br />
80 Set video data to 0xAA<br />
C0 Set video data to test pattern<br />
The <strong>free</strong>-d processing unit acknowledges receipt of a DB message by replying with a DB message<br />
containing the new mode.<br />
Type A4 - poll / command (<strong>Radamec</strong> compatibility mode)<br />
The A4 message is used to poll the <strong>free</strong>-d processing unit for data or to send a command to the unit in a<br />
way compatible with <strong>Radamec</strong> robotic pedestals.<br />
The message contains 4 bytes:<br />
Message type<br />
Camera ID<br />
Command<br />
Checksum<br />
36 <strong>free</strong>-d <strong>Virtual</strong> <strong>Studio</strong> <strong>System</strong>
Commands presently defined are:<br />
00 Stop <strong>Radamec</strong>-compatible stream mode<br />
01 Start <strong>Radamec</strong>-compatible stream mode<br />
02 Request camera ID<br />
FF Poll for <strong>Radamec</strong>-compatible position update<br />
Free-d communication protocols<br />
In the case of commands 00 and 01 the <strong>free</strong>-d processing unit acts on the message but does not reply.<br />
In the case of command 02 (request camera ID) the byte in the message should be set to FF. The<br />
CD3/563A processing unit replies with an A4 message having the byte set to the current camera<br />
ID and the byte set to 02.<br />
In the case of command FF (poll) the <strong>free</strong>-d processing unit replies with an A2 message.<br />
Type A2 - camera position/orientation data (<strong>Radamec</strong> compatibility mode)<br />
The A2 message is used for transferring the camera position and orientation data from the <strong>free</strong>-d<br />
processing unit in a form compatible with <strong>Vinten</strong> <strong>Radamec</strong> robotic pedestals. Note that there is no<br />
provision to send a 'roll' value, so the camera must be mounted on a tripod or pedestal.<br />
The message contains 30 bytes:<br />
Message type<br />
Camera ID<br />
Camera Pan Angle<br />
Camera Tilt Angle<br />
Camera Zoom<br />
Camera Focus<br />
Camera Height (Z-Position)<br />
Camera X-Position (fraction)<br />
Camera X-Position (integer)<br />
Camera Y-Position (fraction)<br />
Camera Y-Position (integer)<br />
Pedestal Orientation (set to zero)<br />
Spare / User Defined (16 bits)<br />
Checksum<br />
The Pan Angle is expressed as a 24-bit integer in units of 1/900 degrees, where zero is represented by<br />
080000 hex. The range of values is from -180.0 degrees (058730 hex) to +180.0 degrees (0A78D0 hex).<br />
The Tilt Angle is expressed as a 24-bit integer in units of 1/900 degrees, where zero is represented by<br />
080000 hex. The range of values is from -90.0 degrees (06C398 hex) to +90.0 degrees (093C68 hex). The<br />
Camera Zoom is expressed as a 24-bit positive unsigned number in arbitrary units related to the rotation<br />
of the 'zoom ring' on the camera lens. It will be necessary for the host system to convert this to a true zoom<br />
value based on the type and particular sample of lens and camera in use.<br />
Publication Part No. V3975-4980 Issue 1 37
The Camera Focus is expressed as a 24-bit positive unsigned number in arbitrary units related to the<br />
rotation of the 'focus ring' on the camera lens. It will be necessary for the host system to convert this to a<br />
true focus value based on the type and particular sample of lens and camera in use.<br />
The Height is expressed as a 24-bit integer in units of 1/82.2 mm. The range of values is from -102,051.2<br />
mm (800000 hex) to +102,051.2 mm (7FFFFF hex).<br />
The X-Position and Y-Position are expressed in units of millimetres as a 16-bit integer part and a 16-bit<br />
fractional part. The range of values is from -32,768 mm (integer part 8000 hex, fractional part 0000 hex)<br />
to almost +32,768 mm (integer part 7FFF hex, fractional part FC00 hex).<br />
NOTE: Unlike a <strong>Radamec</strong> robotic pedestal and camera head, it is not possible to preload<br />
the encoder positions by transmitting an A2 message to the <strong>free</strong>-d<br />
processing unit.<br />
38 <strong>free</strong>-d <strong>Virtual</strong> <strong>Studio</strong> <strong>System</strong>
Parameter definitions<br />
Parameter definitions<br />
The following sections describe the parameters used to convey the position, orientation etc. of the studio<br />
camera.<br />
Definition of axes<br />
A set of orthogonal right-handed axes (X, Y and Z) is used, fixed with respect to the reference frame of<br />
the studio. The X and Y axes lie in the horizontal plane, and the Z axis is vertical. The positive direction<br />
of the Z-axis is upwards.<br />
Camera pan angle<br />
The camera pan angle is defined as the angle between the Y-axis and the projection of the optical axis of<br />
the camera onto the horizontal (XY) plane. A zero value corresponds to the camera looking in the positive<br />
Y direction and a positive value indicates a pan to the right (i.e. the camera rotates clockwise when viewed<br />
from above).<br />
The value is expressed in degrees as a 24-bit twos-complement signed number, where the most-significant<br />
bit (bit 23) is the sign bit, the next 8 bits (bits 22 to 15) are the integer part and the remaining bits (bits 14<br />
to 0) are the fractional part; alternatively, this may be thought of as a signed integer value in units of 1/<br />
32768 degree. The range of values is from -180.0 degrees (A60000 hex) to +180.0 degrees (5A0000 hex).<br />
Camera tilt angle<br />
The camera tilt angle is defined as the angle between the optical axis of the camera and the horizontal<br />
(XY) plane. A positive value indicates an upwards tilt. If the pan and tilt angles are both zero, the camera<br />
is looking in the direction of the positive Y axis.<br />
The value is expressed in degrees as a 24-bit twos-complement signed number, where the most-significant<br />
bit (bit 23) is the sign bit, the next 8 bits (bits 22 to 15) are the integer part and the remaining bits (bits 14<br />
to 0) are the fractional part; alternatively, this may be thought of as a signed integer value in units of 1/<br />
32768 degree. The range of values is from -90.0 degrees (D30000 hex) to +90.0 degrees (2D0000 hex).<br />
Camera roll angle<br />
The camera roll angle is defined as the angle of rotation of the camera about its optical axis. A roll angle<br />
of zero corresponds to a 'scan line' of the camera sensor (i.e. a horizontal in the image) being parallel to<br />
the horizontal (XY) plane. A positive value indicates a clockwise roll, when viewed from behind the<br />
camera.<br />
The value is expressed in degrees as a 24-bit twos-complement signed number, where the most-significant<br />
bit (bit 23) is the sign bit, the next 8 bits (bits 22 to 15) are the integer part and the remaining bits (bits 14<br />
to 0) are the fractional part; alternatively, this may be thought of as a signed integer value in units of 1/<br />
32768 degree. The range of values is from -180.0 degrees (A60000 hex) to +180.0 degrees (5A0000 hex).<br />
Publication Part No. V3975-4980 Issue 1 39
Camera X-position<br />
The Camera X-position is defined as the horizontal displacement of the camera from its reference position<br />
in the direction of the X-axis.<br />
The value is expressed in millimetres as a 24-bit twos-complement signed number, where the mostsignificant<br />
bit (bit 23) is the sign bit, the next 17 bits (bits 22 to 6) are the integer part and the remaining<br />
bits (bits 5 to 0) are the fractional part; alternatively, this may be thought of as a signed integer value in<br />
units of 1/64 mm. The range of values is from -131,072.0 mm (800000 hex) to nearly +131,072.0 mm<br />
(7FFFFF hex).<br />
Camera Y-position<br />
The Camera Y-position is defined as the horizontal displacement of the camera from its reference position<br />
in the direction of the Y-axis.<br />
The value is expressed in millimetres as a 24-bit twos-complement signed number, where the mostsignificant<br />
bit (bit 23) is the sign bit, the next 17 bits (bits 22 to 6) are the integer part and the remaining<br />
bits (bits 5 to 0) are the fractional part; alternatively, this may be thought of as a signed integer value in<br />
units of 1/64 mm. The range of values is from -131,072.0 mm (800000 hex) to nearly +131,072.0 mm<br />
(7FFFFF hex).<br />
Camera height (Z-Position)<br />
The camera height is defined as the vertical displacement of the camera from its reference position. A<br />
positive value indicates an upwards displacement.<br />
The value is expressed in millimetres as a 24-bit twos-complement signed number, where the mostsignificant<br />
bit (bit 23) is the sign bit, the next 17 bits (bits 22 to 6) are the integer part and the remaining<br />
bits (bits 5 to 0) are the fractional part; alternatively, this may be thought of as a signed integer value in<br />
units of 1/64 mm. The range of values is from -131,072.0 mm (800000 hex) to nearly +131,072.0 mm<br />
(7FFFFF hex).<br />
Camera zoom<br />
The camera zoom is defined as the vertical angle of view of the camera, i.e. the vertical angle subtended<br />
at the camera lens by the top and bottom edges of the active picture.<br />
The value is expressed as a 24-bit positive unsigned number in arbitrary units related to the rotation of the<br />
'zoom ring' on the camera lens. It will be necessary for the host system to convert this to a true zoom value<br />
based on the type and particular sample of lens and camera in use.<br />
40 <strong>free</strong>-d <strong>Virtual</strong> <strong>Studio</strong> <strong>System</strong>
Camera focus<br />
Parameter definitions<br />
The camera focus is defined as the distance between the camera lens and an object at which the object will<br />
be in sharp focus.<br />
The value is expressed as a 24-bit positive unsigned number in arbitrary units related to the rotation of the<br />
'focus ring' on the camera lens. It will be necessary for the host system to convert this to a true focus value<br />
based on the type and particular sample of lens and camera in use.<br />
Publication Part No. V3975-4980 Issue 1 41
Data structures<br />
The following sections describe the data structures within the non-volatile storage of the <strong>free</strong>-d processor<br />
unit. The storage consists of a Flash EEPROM holding up to 64 Kbytes of data, comprising a database of<br />
marker positions for one or more studios and a database of camera and lens calibration values for one or<br />
more cameras. Since the space available must be shared between these databases, the maximum size of<br />
each is dependent on the size of the other. The data capacity of the EEPROM is sufficient for<br />
approximately 4000 markers (corresponding to perhaps five medium-sized studios); the maximum<br />
number of cameras for which data may be stored is 256.<br />
Data tables<br />
There are five types of data table presently defined:<br />
• Camera data pointers<br />
• <strong>Studio</strong> data pointers<br />
• Camera and lens data<br />
• <strong>Studio</strong> data<br />
• Marker data<br />
Camera data pointers<br />
This table consists of 256 16-bit values (512 bytes) starting at EEPROM address 0x0000. Each 16-bit<br />
value represents a pointer to an area of EEPROM at which data for a particular camera is stored; the<br />
pointers are stored most-significant-byte first. The index into the table is the 8-bit 'Camera ID' which is<br />
received from the camera encoded in its serial digital video signal.<br />
If camera data is present for a particular Camera ID, then the appropriate entry in the table (at address<br />
0x0000 + 2 * Camera_ID) contains the address within the EEPROM at which the Camera and lens data<br />
table is stored. If no data is present for that camera then the table entry contains the value 0xFFFF. Two<br />
or more entries in the table may point to the same camera and lens data.<br />
<strong>Studio</strong> data pointers<br />
This table consists of 256 16-bit values (512 bytes) starting at EEPROM address 0x0200. Each 16-bit<br />
value represents a pointer to an area of EEPROM at which data for a particular studio is stored; the<br />
pointers are stored most-significant-byte first. The index into the table is the 8-bit '<strong>Studio</strong> ID' which is<br />
selected by the user either from the front-panel switches on the <strong>free</strong>-d processor unit or via the serial data<br />
interface.<br />
If studio data is present for a particular <strong>Studio</strong> ID, then the appropriate entry in the table (at address<br />
0x0200 + 2 * <strong>Studio</strong>_ID) contains the address within the EEPROM at which the <strong>Studio</strong> Data table is<br />
42 <strong>free</strong>-d <strong>Virtual</strong> <strong>Studio</strong> <strong>System</strong>
Data structures<br />
stored. If no data is present for that studio then the table entry contains the value 0xFFFF. Two or more<br />
entries in the table may point to the same <strong>Studio</strong> Data.<br />
Camera and lens data table<br />
This table consists of 32 bytes of data relevant to a particular studio camera. The contents of the table are:<br />
Camera Name (4 bytes)<br />
Lens X-Centre (3 bytes)<br />
Lens Y-Centre (3 bytes)<br />
Lens X-Scale (3 bytes)<br />
Lens Y-scale (3 bytes)<br />
Lens Distortion A (3 bytes)<br />
Lens Distortion B (3 bytes)<br />
X-Offset from auxiliary camera to studio camera (3 bytes)<br />
Y-Offset from auxiliary camera to studio camera (3 bytes)<br />
Z-Offset from auxiliary camera to studio camera (3 bytes)<br />
Unused (1 byte)<br />
The Camera Name should be left-justified and consist of 7-bit ASCII characters (MSB=0).<br />
The Centre, Scale and Distortion values characterise the lens in the upwards-looking auxiliary camera and<br />
are generated from images of a precision calibration object. They are stored most-significant-byte first.<br />
The Offset values represent the displacement between the 'centre' of the lens in the upwards-looking<br />
camera and the reference point on the studio camera whose position should be returned by the cameratracking<br />
system. The X, Y and Z-Offsets are defined such that they are aligned with the real-world X, Y<br />
and Z axes when the camera's pan, tilt and roll angles are all zero (see Parameter definitions). In other<br />
words, the Z-Offset is vertical (positive if the studio camera is above the auxiliary camera), the Y-Offset<br />
is in the direction of the optical axis (positive if the studio camera is in front of the auxiliary camera) and<br />
the X-Offset is from side to side (positive if the studio camera is to the right of the auxiliary camera).<br />
The Offset values are represented in the same units as the camera's position, i.e. as 24-bit twoscomplement<br />
signed integers in units of 1/64 mm (see Parameter definitions). They are stored in the table<br />
most-significant-byte first.<br />
Publication Part No. V3975-4980 Issue 1 43
<strong>Studio</strong> data table<br />
This table consists of 16 bytes of data relevant to a particular studio. The contents of the table are as<br />
follows:<br />
<strong>Studio</strong> Name (4 bytes)<br />
Number of Markers (2 bytes)<br />
Pointer to First Marker (2 bytes)<br />
Spare (8 bytes)<br />
The <strong>Studio</strong> Name should be left-justified and consist of 7-bit ASCII characters (MSB=0).<br />
The Number of Markers consists of a 16-bit integer, stored most-significant-byte first.<br />
The Pointer to First Marker is the EEPROM address of the Marker data table for the lowest-numbered<br />
marker. It is stored most-significant-byte first.<br />
Marker data table<br />
This table consists of 16 bytes of data relevant to a particular marker. The contents of the table are as<br />
follows:<br />
Marker Number (3 bytes)<br />
Marker X-Position (3 bytes)<br />
Marker Y-Position (3 bytes)<br />
Marker Height (Z-Position, 3 bytes)<br />
Pointer to Next Marker (2 bytes)<br />
Unused (2 bytes)<br />
The Marker Number is an unsigned integer representation of the marker's 'bar-code' value. It is stored<br />
most-significant-byte first (the first byte is always zero).<br />
The Marker X, Y and Z-Positions are the coordinates of the marker, with respect to the frame of reference<br />
of the studio as defined in Parameter definitions. The values are expressed in millimetres as 24-bit twoscomplement<br />
signed numbers, where the most-significant bit (bit 23) is the sign bit, the next 17 bits (bits<br />
22 to 6) are the integer part and the remaining bits (bits 5 to 0) are the fractional part; alternatively, this<br />
may be thought of as a signed integer value in units of 1/64 mm. The range of values is from -131,072.0<br />
mm (800000 hex) to +131,072.0 mm (7FFFFF hex). They are stored most-significant-byte first.<br />
44 <strong>free</strong>-d <strong>Virtual</strong> <strong>Studio</strong> <strong>System</strong>
Data structures<br />
The Pointer to Next Marker is the EEPROM address at which the Marker data table for the next marker<br />
(in ascending sequence of marker numbers) is stored. If this is the last (highest-numbered) marker, the<br />
value is set to 0xFFFF. It is stored most-significant-byte first.<br />
Miscellaneous<br />
Since the tables are all an exact multiple of 16 bytes in length, they will normally be stored in the<br />
EEPROM at addresses which are themselves exact multiples of 16.<br />
For correct operation it is essential that the Number of Markers contained in the <strong>Studio</strong> data table<br />
corresponds to the number of Marker data tables in the linked-list pointed to by the Pointer to First<br />
Marker. It is also essential that the Marker data tables be linked in ascending sequence of marker<br />
number.<br />
It is possible to insert or delete a marker, without having to re-write the entire studio data, by changing<br />
the relevant Pointer (link) values, and adjusting the Number of Markers value to suit.<br />
Two or more <strong>Studio</strong> data tables may point to the same Marker data table, should there be a requirement<br />
to have one or more aliases of the studio name.<br />
Publication Part No. V3975-4980 Issue 1 45
Processor card settings and warnings<br />
<strong>free</strong>-d processor unit<br />
D1 S1 S2 S3 S4 S5 Display ND1 D3 D4 D5 D6 D7 D8 D9<br />
D10D11<br />
The front panel of the <strong>free</strong>-d processor unit consists of 5 toggle switches, a number of LEDs and a<br />
alphanumeric display that are used to indicator errors and/or warnings.<br />
Toggle switch settings<br />
Fig. 7 Free-d processor unit panel<br />
The RESET switch (S1) resets the <strong>free</strong>-d processor unit and restarts the Xilinx devices and DSP.<br />
The change value or scroll display switch (S2) takes effect once per momentary operation or continuously<br />
(at an accelerating rate) if held closed. The range of adjustment depends on the parameter selected.<br />
The mode switch (S3) determines whether switch (S2) and the alphanumeric display (ND1) are used to<br />
display or change the control parameters such as the of smoothing or to display the outputs from the<br />
system including the calculated camera position.<br />
The STORE switch (S4) saves the current values of the control parameters in EEPROM. If the STORE<br />
switch (S4) is held while a RESET is performed, the default settings are loaded. To avoid storing the old<br />
settings the switches should be operated in the following sequence:<br />
• hold RESET, hold STORE, release RESET, wait until self-tests are complete, release<br />
STORE.<br />
The default settings may be saved by a subsequent operation of the STORE switch (S4)<br />
The settings of the toggle switches are detailed in table 1.<br />
46 <strong>free</strong>-d <strong>Virtual</strong> <strong>Studio</strong> <strong>System</strong>
Rotary switch (S5)<br />
Table 1 <strong>free</strong>-d processor unit toggle switch settings<br />
Switch number Function<br />
S1 Reset (biased)<br />
S2 Left position: reduce value or scroll display left<br />
Right position: increase value or scroll display right<br />
S3 Left position: display/change control parameters<br />
Right position: display calculated results<br />
S4 STORE settings<br />
<strong>free</strong>-d processor unit<br />
The rotary switch (S5) determines which control parameter is to be displayed/changed or which output<br />
value is to be displayed on the alphanumeric display (ND1) depending on the setting of the mode toggle<br />
switch (S3), detailed in Table 2.<br />
Switch S5<br />
setting<br />
Table 2 <strong>free</strong>-d processor unit rotary switch S5 settings<br />
S3 Left S3 Right<br />
0 studio name camera name<br />
1 smoothing value number of targets used. See note 1.<br />
2 maximum asymmetry overall RMS error<br />
3 box size camera x-position (mm)<br />
4 black threshold camera y-position (mm)<br />
5 white threshold camera height (mm)<br />
6 black clip value camera pan angle (degrees)<br />
7 white clip value camera tilt angle (degrees)<br />
8 maximum non-black camera roll angle (degrees)<br />
9 minimum white camera data (zoom etc.) See note 2.<br />
A marker to interrogate. See note 3. image x-centre<br />
B image x-position (pixels) Image y-centre<br />
C image y-position (pixels) pixel x-scaling<br />
D world x-position (mm) pixel y-scaling<br />
E world y-position (mm) lens distortion A<br />
F world height (mm) lens distortion B<br />
Publication Part No. V3975-4980 Issue 1 47
Notes:<br />
1. This normally shows the number of markers used in the camera position calculation, but<br />
by using toggle switch S2 the display can be switched, in sequence, to the number of<br />
markers identified (i.e. which target bar-codes have been read), the number of markers<br />
detected by the hardware and the DSP status value. If the DSP status is positive it<br />
indicates the number of iterations required in the camera position calculation; if<br />
negative it indicates an error code as follows:<br />
• -1 = too few valid markers<br />
• -2 = iteration failed to converge<br />
• -3 = A DSP reset occurred<br />
• -4 = Internal DSP error<br />
2. This can be scrolled to show the nine bytes of camera data (hexadecimal) as ZH ZM ZL<br />
FH FM FL AU ID GP, where:<br />
• ZH ZM ZL is the current zoom value (24 bits)<br />
• FH FM FL is the current focus value (24 bits)<br />
• AU is the auxiliary data (for example, diagnostic)<br />
• ID is the camera’s identification number<br />
• GP is 8-bits of general-purpose user input<br />
3. This selects and indicates which marker's information is displayed in positions B to F.<br />
48 <strong>free</strong>-d <strong>Virtual</strong> <strong>Studio</strong> <strong>System</strong>
LED indications<br />
The LED indications are detailed in table 3.<br />
LED<br />
Number<br />
Alphanumeric display ND1<br />
Table 3 <strong>free</strong>-d processor unit LED indications<br />
ON OFF Flashing<br />
<strong>free</strong>-d processor unit<br />
D1 CPU working No power CPU resttting (fault)<br />
D3 Video input present and locked<br />
D4 serial data input present<br />
D5 data <strong>free</strong>ze mode<br />
D6 too few targets<br />
D7 RMS error high<br />
D8 DSP alert<br />
D9 fault (code shown on alphanumeric<br />
display (ND1)<br />
D10 Xilinx booting error or failed<br />
D11 DSP booting error or failed<br />
In normal circumstances, the four-character alphanumeric display (ND1) shows the parameter or result<br />
value selected with the toggle switch S3 and rotary switch S5. However, in the event of an error condition<br />
the display shows "E n" and in the event of a self-test failure the display shows "Fnnnn" as detailed in<br />
table 4.<br />
Table 4 <strong>free</strong>-d processor unit alphanumeric display ND1 error/warnings<br />
ND1 code Error/warning<br />
E1 A processor reset has occurred. This code is only present transitory.<br />
E2 Serial communications error. This is most likely to be caused by a message being sent to<br />
the CD3/563A before the reply to the previous message has been received.<br />
E3 Vertical blanking failure. This maybe a hardware fault or a problem with the digital video<br />
input.<br />
E4 Xilinx failure. The programmable logic devices have not initialised correctly. If persistent<br />
this indicates a hardware fault.<br />
E5 I2C bus failure. Communication between the CPU and peripheral devices has failed, indicating<br />
a probable hardware fault.<br />
Publication Part No. V3975-4980 Issue 1 49
Table 4 <strong>free</strong>-d processor unit alphanumeric display ND1 error/warnings<br />
ND1 code Error/warning<br />
E6 EPROM failure. An attempt to save the parameters to non-volatile memory U3 has failed,<br />
indicating a probable hardware fault.<br />
E7 DSP failure (1). The DSP failed to acknowledge a command. If persistent this indicates a<br />
hardware fault.<br />
E8 DSP failure (2). The DSP failed to accept data. If persistent this indicates a hardware fault.<br />
E9 DSP failure (3). The DSP failed to provide data. If persistent this indicates a hardware<br />
fault.<br />
E10 DSP failure (4). The DSP is flagging an exception error. If persistent this indicates a hardware<br />
or software fault.<br />
E91 I2C communication failure. No reply.<br />
E93 I2C communication failure. Bus error.<br />
E94 I2C communication failure. ACK error.<br />
E95 I2C communication failure. Undefined state.<br />
E96 I2C communication failure. Overflow.<br />
F000 The Xilinx FPGAs have not configured correctly. Suspect a hardware fault or an incorrectly<br />
programmed U33.<br />
F1xx The DSP is not operating correctly. The value of xx may indicate the nature of the problem:<br />
F100: Failed to boot.<br />
F110: Memory self test failed.<br />
F118: Software error occurred.<br />
These codes and any value of xx other than those listed may also be caused by a failure of<br />
communication between the control processor and the DSP. The code F110 can result if<br />
no video input is present.<br />
F2xx Video bus VO failed. Data should be 55 (hex) or AA (hex), but was xx (hex).<br />
F3xx Video bus V4 failed. Data should be 55 (hex) or AA (hex), but was xx (hex).<br />
F4xx Filter bus RAF1 failed. Data should be 2C (hex) or 3C (hex), but was xx (hex).<br />
F5xx Filter bus RAF2 failed. Data should be 28 (hex) or 38 (hex), but was xx (hex).<br />
F6xx Filter bus RAF3 failed. Data should be 28(hex) or 38 (hex), but was xx (hex).<br />
F7xx Filter bus SYM1 failed. Data should be 35 (hex) or 94 (hex), but was xx (hex).<br />
F8xx Filter bus SYM2 failed. Data should be 00 but was xx (hex).<br />
F9xx An attempt to select page 2 of video RAM resulted in error code xx (hex).<br />
FAxx Even video RAM failed. Data should be D5 (hex) or 2A (hex), but was xx (hex).<br />
FBxx Odd video RAM failed. Data should be D5 (hex) or 2A (hex), but was xx (hex).<br />
FCxx Dual-port RAM (U10) failed. Data should be 42 (hex) but was xx (hex).<br />
50 <strong>free</strong>-d <strong>Virtual</strong> <strong>Studio</strong> <strong>System</strong>
Table 4 <strong>free</strong>-d processor unit alphanumeric display ND1 error/warnings<br />
ND1 code Error/warning<br />
FDxx Dual-port RAM (U4) failed. Data should be 07 (hex) but was xx (hex).<br />
<strong>free</strong>-d processor unit<br />
FExx Dual-port RAM (U10) failed. Data should be 25 (hex) or DA (hex), but was xx (hex).<br />
FFxx Dual-port RAM (U4) failed. Data should be F6 (hex) or 0A (hex), but was xx (hex).<br />
A transitory error code which does not reappear on a subsequent reset should not be considered to indicate<br />
a fault condition.<br />
Note that the possible cause of the fault is given as a guide only. It is quite probable that the true location<br />
is elsewhere; for example a fault listed as 'dual-port RAM failed' may be caused by many failures other<br />
than the dual-port RAMs themselves.<br />
Publication Part No. V3975-4980 Issue 1 51
Parts list<br />
The following list includes the main assemblies and optional accessories. For further information<br />
regarding repair or spare parts, please contact Camera Dynamics Limited or your local <strong>Vinten</strong> <strong>Radamec</strong><br />
distributor.<br />
For information on-line, visit our website at<br />
www.vintenradamec.com<br />
Item Part No.<br />
Main Assemblies:<br />
Free-D MKIII camera Unit . . . . . . . . . . . . . . . . . . . . . . . . . . . . . . . . . . . . . . . . . . . . . . . . . . . . . . . .V3975-0001<br />
Free-D Processing Unit. . . . . . . . . . . . . . . . . . . . . . . . . . . . . . . . . . . . . . . . . . . . . . . . . . . . . . . . 177-072-0001<br />
Free-D camera PSU . . . . . . . . . . . . . . . . . . . . . . . . . . . . . . . . . . . . . . . . . . . . . . . . . . . . . . . . . . . .V3975-1004<br />
Accessories:<br />
Ferrite EMC Filters (2 off) . . . . . . . . . . . . . . . . . . . . . . . . . . . . . . . . . . . . . . . . . . . . . . . . . . . . . . . . . .E710-018<br />
Cables:<br />
All cables must be shielded.<br />
52 <strong>free</strong>-d <strong>Virtual</strong> <strong>Studio</strong> <strong>System</strong>
CHINA<br />
The Vitec Group plc China<br />
Room 706, Tower B<br />
Derun Building<br />
YongAn Dongli A No. 8<br />
Jianwai Ave<br />
Chaoyang District<br />
Beijing, P.R.China 100022<br />
Tel: +86 10 8528 8748<br />
Fax: +86 10 8528 8749<br />
FRANCE<br />
Camera Dynamics sarl<br />
171, Avenue des Grésillons<br />
92635 GENNEVILLIERS Cedex<br />
France<br />
Tel: +33 820 821 336<br />
Fax: +33 825 826 181<br />
GERMANY<br />
Camera Dynamics GmbH<br />
Gebäude 16<br />
Planiger Straße 34<br />
55543 Bad Kreuznach<br />
Germany<br />
Tel: +49 671 / 483 43 30<br />
Fax: +49 671 / 483 43 50<br />
Camera Dynamics GmbH<br />
Erfurter Straße 16<br />
85386 Eching<br />
Germany<br />
Tel: +49 89 / 321 58 200<br />
Fax: +49 89 / 321 58 227<br />
info@vintenradamec.com<br />
www.vintenradamec.com<br />
JAPAN<br />
<strong>Vinten</strong> Japan KK<br />
P.A. Bldg. 5F<br />
3-12-6 Aobadai<br />
Meguro-ku Tokyo 153-0042<br />
Japan<br />
Tel: +81 3 5456 4155<br />
Fax: +81 3 5456 4156<br />
SINGAPORE<br />
Camera Dynamics Pte Ltd<br />
6 New Industrial Road<br />
#02-02 Hoe Huat Industrial Building<br />
Singapore 536199<br />
Tel: +65 6297 5776<br />
Fax: +65 6297 5778<br />
USA<br />
Camera Dynamics Inc.<br />
709 Executive Blvd<br />
Valley Cottage<br />
NY 10989<br />
USA<br />
Tel: +1 845 268 0100<br />
Fax: +1 845 268 0113<br />
Toll Free Sales: 1 888 2 <strong>Vinten</strong><br />
UK<br />
Camera Dynamics Limited<br />
William <strong>Vinten</strong> Building<br />
Western Way<br />
Bury St. Edmunds<br />
Suffolk IP33 3TB<br />
UK<br />
Tel: +44 1284 752121<br />
Fax: +44 1284 750560<br />
Sales Fax: +44 1284 757929<br />
Information contained in this document is subject to change.<br />
Camera Dynamics Limited reserves the right, without notice,<br />
to make changes in equipment design or performance as<br />
progress in engineering, manufacturing or technology may<br />
warrant.<br />
Publication Part No: V3975-4980