

Watercolor Studio - Missouri Watercolor Society
Watercolor Studio - Missouri Watercolor Society
Watercolor Studio - Missouri Watercolor Society

You also want an ePaper? Increase the reach of your titles
YUMPU automatically turns print PDFs into web optimized ePapers that Google loves.
How To… Painting Historic Cape<br />
by Yevgeny Sokolov<br />
There are many different approaches to painting a landscape in watercolor; each of them are great in their<br />
own way. I have seen many artists telling their story of how their painting came about and what road they<br />
took to make it happen, and all of those demonstrations were impressive. Some artists may have a better way<br />
of getting to where they are going; they all have their own unique qualities, yet here is my take on how to<br />
paint a landscape (cityscape) scene.<br />
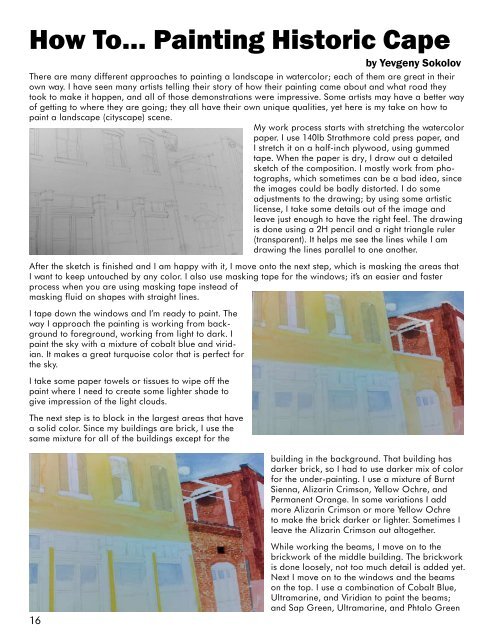
My work process starts with stretching the watercolor<br />
paper. I use 140lb Strathmore cold press paper, and<br />
I stretch it on a half-inch plywood, using gummed<br />
tape. When the paper is dry, I draw out a detailed<br />
sketch of the composition. I mostly work from photographs,<br />
which sometimes can be a bad idea, since<br />
the images could be badly distorted. I do some<br />
adjustments to the drawing; by using some artistic<br />
license, I take some details out of the image and<br />
leave just enough to have the right feel. The drawing<br />
is done using a 2H pencil and a right triangle ruler<br />
(transparent). It helps me see the lines while I am<br />
drawing the lines parallel to one another.<br />
After the sketch is finished and I am happy with it, I move onto the next step, which is masking the areas that<br />
I want to keep untouched by any color. I also use masking tape for the windows; it’s an easier and faster<br />
process when you are using masking tape instead of<br />
masking fluid on shapes with straight lines.<br />
I tape down the windows and I’m ready to paint. The<br />
way I approach the painting is working from background<br />
to foreground, working from light to dark. I<br />
paint the sky with a mixture of cobalt blue and viridian.<br />
It makes a great turquoise color that is perfect for<br />
the sky.<br />
I take some paper towels or tissues to wipe off the<br />
paint where I need to create some lighter shade to<br />
give impression of the light clouds.<br />
The next step is to block in the largest areas that have<br />
a solid color. Since my buildings are brick, I use the<br />
same mixture for all of the buildings except for the<br />
16<br />
building in the background. That building has<br />
darker brick, so I had to use darker mix of color<br />
for the under-painting. I use a mixture of Burnt<br />
Sienna, Alizarin Crimson, Yellow Ochre, and<br />
Permanent Orange. In some variations I add<br />
more Alizarin Crimson or more Yellow Ochre<br />
to make the brick darker or lighter. Sometimes I<br />
leave the Alizarin Crimson out altogether.<br />
While working the beams, I move on to the<br />
brickwork of the middle building. The brickwork<br />
is done loosely, not too much detail is added yet.<br />
Next I move on to the windows and the beams<br />
on the top. I use a combination of Cobalt Blue,<br />
Ultramarine, and Viridian to paint the beams;<br />
and Sap Green, Ultramarine, and Phtalo Green
