Manual for TV software „TT-Viewer version 2.0.0“
Manual for TV software „TT-Viewer version 2.0.0“
Manual for TV software „TT-Viewer version 2.0.0“
Create successful ePaper yourself
Turn your PDF publications into a flip-book with our unique Google optimized e-Paper software.
CityCom GmbH © 2012<br />
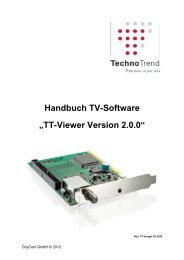
<strong>Manual</strong> <strong>for</strong> <strong>TV</strong> <strong>software</strong><br />
<strong>„TT</strong>-<strong>Viewer</strong> <strong>version</strong> <strong>2.0.0“</strong><br />
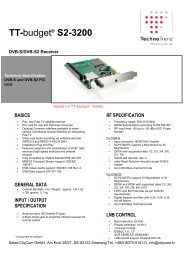
Figure: TT-budget S2-3200
Index<br />
<strong>Manual</strong> TT-<strong>Viewer</strong> 3<br />
1. Starting TT-<strong>Viewer</strong> <strong>software</strong> 3<br />
2. General settings 5<br />
3. Assignment of hardware 6<br />
3.1 Unicable 7<br />
4. Renderer 8<br />
5. Decoder 9<br />
6. Remote control 10<br />
6.1 Integrate the remote control 10<br />
6.2 Programming the remote control 13<br />
7. Main window TT-<strong>Viewer</strong> 14<br />
7.1 Control panel 15<br />
7.2 In<strong>for</strong>mation bar 16<br />
8. Channel scan 18<br />
9. Channel list 20<br />
9.1 Favorites list 25<br />
10. Records 28<br />
10.1 Direct recordings 28<br />
10.2 Time shift 29<br />
10.3 Programmed recordings 30<br />
11. EPG (Electronic Program Guide) 32<br />
11.1 The EPG timeline view 33<br />
11.2 The EPG window view 35<br />
12. CI extension 37<br />
13. Further functions 39<br />
Technical support 40<br />
CityCom GmbH © 2012 2<br />
www.technotrend.eu
In<strong>for</strong>mation<br />
Be<strong>for</strong>e you start the TT-<strong>Viewer</strong> <strong>software</strong>, please take a look at the Quick Start<br />
Guide. In the Quick Start Guide you will be able to find important in<strong>for</strong>mation<br />
on how to connect and install your TechnoTrend product. The Quick Start<br />
Guide can either be found on the supplied CD or on our homepage:<br />
www.technotrend.eu<br />
<strong>Manual</strong> TT-<strong>Viewer</strong><br />
1. Starting TT-<strong>Viewer</strong> <strong>software</strong><br />
To start TT-<strong>Viewer</strong> open the “start menu“ and select TT-<strong>Viewer</strong>, or click the TT-<strong>Viewer</strong> icon<br />
located on your desktop.<br />
CityCom GmbH © 2012 3<br />
www.technotrend.eu
To open the channel list please move the cursor to the right side of TT-<strong>Viewer</strong> and click on a<br />
desired channel. The channel will now load on the left side of TT-<strong>Viewer</strong>.<br />
CityCom GmbH © 2012 4<br />
www.technotrend.eu
2. General settings<br />
The general setting in TT-<strong>Viewer</strong> can be found in the context menu. To open the context,<br />
please right click in the window and select “Options” → “General”.<br />
In the general setting you will be able to adjust many setting. For example:<br />
� Language settings<br />
� Location settings<br />
� Save location <strong>for</strong> recordings<br />
� And much more<br />
CityCom GmbH © 2012 5<br />
www.technotrend.eu
3. Assignment of hardware<br />
Should you become the message “All capable DVB Adapters are busy. No free device has<br />
been found” you will need to enable your connected hardware to TT-<strong>Viewer</strong>.<br />
To enable your connected hardware you will need to open the context menu by right clicking<br />
on the window and selecting options → hardware. In this tab you will be able to search and<br />
choose the connected hardware.<br />
1. First click “Scan Devices“<br />
2. Select your purchased TechnoTrend device<br />
3. Set the available features and confirm with “OK“<br />
�The assignment of hardware is now finished.<br />
CityCom GmbH © 2012 6<br />
www.technotrend.eu
3.1 Unicable<br />
If you are using a Unicable system (SCR/CSS CENELEC EN50494), you will need<br />
to set the settings <strong>for</strong> the Unicable in TT-<strong>Viewer</strong> (please note: This needs to be<br />
done only once!). All of the following points of this manual can be done without any<br />
changes after these Unicable settings.<br />
� Open the context menu by right clicking the mouse and selecting Options →<br />
Hardware (page 6).<br />
� Click on “Sat CR“. Now the “Unicable settings“ window will open.<br />
� Please tick „Use Unicable Slot (1…8)“ and select the needed slot and frequency. Also<br />
if necessary, please enter a PIN.<br />
� Confirm with OK. Your setting <strong>for</strong> the Unicable system are now finished.<br />
CityCom GmbH © 2012 7<br />
www.technotrend.eu
4. Renderer<br />
If problems occur with the playback of sound and/or video, you will need to open the context<br />
menu by right clicking the mouse and selecting “Options“ followed by the “Renderer” tab. In<br />
this tab you will find a variety of different renderer options which, many solve the playback<br />
problems.<br />
� The default Audio Renderer is set as “Auto”. By click on the downward pointing arrow<br />
you may choose between different Audio Renderer settings.<br />
� The default Video Renderer is set as “Video Mixing Renderer 9”. By clicking on the<br />
downward pointing arrow you may choose between different Video Renderer settings.<br />
Be<strong>for</strong>e your setting will take change, you will need to either change the <strong>TV</strong> channel<br />
or restart TT-<strong>Viewer</strong>.<br />
Changing the renderer setting is only recommended while viewing Live <strong>TV</strong>.<br />
CityCom GmbH © 2012 8<br />
www.technotrend.eu
5. Decoder<br />
If problems persist with the playback of sound and/or video, you will need to open the context<br />
menu by right clicking the mouse and selecting “Options” followed by the “Decoder” tab. In<br />
this tab you will find a variety of different decoder settings which, may solve the playback<br />
problems.<br />
In the „Decoder Settings“ tab you can set your preferred Decoder <strong>for</strong> a specific audio or<br />
video <strong>for</strong>mat. Also, you can see <strong>for</strong> what <strong>for</strong>mat a decoder will be available (FAILED/OK).<br />
CityCom GmbH © 2012 9<br />
www.technotrend.eu
6. Remote control<br />
6.1 Integrate the remote control<br />
It is possible to use our standard TechnoTrend remote control<br />
with TT-<strong>Viewer</strong>. Using the “Remote Control Settings” in TT-<br />
<strong>Viewer</strong> you will be able to customize each button to an individual<br />
action in order to suit all your needs. Customizing the Remote<br />
Controller actions can be done simply, quickly, and without any<br />
hassles.<br />
To integrate the remote control with TT-<strong>Viewer</strong>, you will need to open the context menu by<br />
right clicking the mouse selecting “Options” followed by the “Remote” tab.<br />
� If you are using the product TT-budget S2-4100, you will need to tick on<br />
“TechnoTrend S2-4100” to activate the remote control. No further settings are<br />
needed. You can start programming the remote control, now (see point 6.2 below).<br />
CityCom GmbH © 2012 10<br />
www.technotrend.eu
� If you are using the product TT-connect S2-4600, you will need to tick on<br />
“TechnoTrend S2-4600” to activate the remote control. No further settings are<br />
needed. You can start programming the remote control, now (see point 6.2 below).<br />
CityCom GmbH © 2012 11<br />
www.technotrend.eu
� For all other TechnoTrend PC products you will need to tick on “Technotrend” to<br />
activate the remote settings.<br />
If you ticked “Technotrend”, please pay attention to the following. You will need to<br />
configure if the IR receiver is going to be used by a USB device from the TTconnect<br />
series or by a PCI/PCIe card from the TT-budget series. To do so, you will<br />
need to click on “settings” and in the next window on “settings again. Now please<br />
move the cursor to the window labeled “TT remote setting” followed by clicking on<br />
the downward pointing arrow in the “devices” box and select your connected<br />
TechnoTrend device.<br />
You will also be able to<br />
adjust the sensitivity of the<br />
remote control by adjusting<br />
the value in the “Antirepeat<br />
(ms)” box. Please confirm<br />
by clicking on “OK”.<br />
CityCom GmbH © 2012 12<br />
www.technotrend.eu
6.2 Programming the remote control<br />
To program the remote control, the IR receiver must be connected to the device. If<br />
you are using a TT-connect product, the IR receiver is already integrated in the<br />
device.<br />
In order to program the remote control open the context menu by right clicking the mouse<br />
and select “Options” followed by the tab “Remote”.<br />
� In the “Remote Control Settings” tab please tick “TechnoTrend” and then click on the<br />
“setting” button. A new window will open labeled as “Input Editor”, now you will be<br />
able to view different actions in which you can assign a different key of your remote<br />
control to suit your individual preferences.<br />
� Click “Learn“ in order to activate the programming mode.<br />
� Select the desired function with a left mouse click followed by the desired remote<br />
control key. After you have done this the assigned key will be listed in the “key”<br />
column.<br />
� To delete an assigned key, select the desired action and click “Delete”.<br />
� In order to stop the programming mode simply click on “Learn” again.<br />
CityCom GmbH © 2012 13<br />
www.technotrend.eu
7. Main window TT-<strong>Viewer</strong><br />
The following actions can be done on the window control panel.<br />
� Minimize the window<br />
� Full screen mode<br />
� Close the window<br />
If you move the cursor to these icons a context menu will open with a description of the<br />
icons.<br />
CityCom GmbH © 2012 14<br />
www.technotrend.eu
7.1 Control panel<br />
On the control panel you will find some different control elements (icons) with the following<br />
functions:<br />
Play/Pause<br />
Activate “Time shift“ or play back the time shift record.<br />
Stop<br />
Active recordings and time shift will be stopped.<br />
Record<br />
Direct recordings will be started.<br />
Video recorders<br />
The video recorder setting will open. In this window you can program recordings or<br />
change video recorder settings.<br />
Zapping<br />
If you click the zap button, the last watched <strong>TV</strong> channel will be toggled.<br />
Channel list<br />
The channel list will be opened/closed.<br />
Plus/Minus<br />
Clicking on these icons will cause the channel to change.<br />
In<strong>for</strong>mation<br />
Displays in<strong>for</strong>mation about the current <strong>TV</strong> program.<br />
EPG<br />
Clicking on this icon will open the EPG (Electronic Programing Guide).<br />
Teletext<br />
The teletext provides in<strong>for</strong>mation about the current program or future programs.<br />
Volume control<br />
Adjust the volume to either louder or softer. Clicking on the speaker icon<br />
will mute/unmute the audio.<br />
CityCom GmbH © 2012 15<br />
www.technotrend.eu
Progress bar<br />
The progress bar is located on top of the control panel. With the progress bar you can<br />
visually see the progress of the current <strong>TV</strong> program or the current playback. When a<br />
recorded video is being played you are able to use the progress bar to fast <strong>for</strong>ward or rewind<br />
to a preferred playback position.<br />
7.2 In<strong>for</strong>mation bar<br />
You can open the in<strong>for</strong>mation bar by moving the cursor to the lower area of the TT-<strong>Viewer</strong><br />
window.<br />
The in<strong>for</strong>mation bar will close after a few seconds, if you move the cursor to the center of the<br />
TT-<strong>Viewer</strong> window.<br />
On the in<strong>for</strong>mation bar you will find some different control and in<strong>for</strong>mation elements (icons)<br />
with the following functions:<br />
Now and Next in<strong>for</strong>mation<br />
In the middle of the in<strong>for</strong>mation bar you will find the “now and next” in<strong>for</strong>mation. You can see,<br />
what <strong>TV</strong> series is currently running and what will be playback next.<br />
Channel in<strong>for</strong>mation<br />
The channel in<strong>for</strong>mation you will find in the right area of the in<strong>for</strong>mation bar. There you can<br />
see the currently running channel.<br />
In<strong>for</strong>mation icons<br />
In the right area of the in<strong>for</strong>mation bar you will find the in<strong>for</strong>mation icons. These icons will<br />
show you, if there are different audio tracks, teletext, or subtitles available by the current<br />
playback.<br />
CityCom GmbH © 2012 16<br />
www.technotrend.eu
Directional pad<br />
With the buttons „+“ and „-“ of the directional pad you can control the audio intensity. The<br />
buttons „◄“ and „►“ can be used <strong>for</strong> switching the <strong>TV</strong> channels.<br />
Clicking on the speaker icon will mute/unmute the audio.<br />
Control buttons<br />
You can per<strong>for</strong>m some often needed functions like timeshift or record, with the control<br />
buttons of the in<strong>for</strong>mation bar.<br />
Clicking on the pause button will start timeshift function or playback the timeshift recording. A<br />
recording will start after clicking the „REC“ button.<br />
By clicking the button „MENU“ the following short menu will open:<br />
In this short menu you can choose between some different options:<br />
� Channellist<br />
� Programguide<br />
� Recordings<br />
� Teletext<br />
� Language<br />
CityCom GmbH © 2012 17<br />
www.technotrend.eu
8. Channel scan<br />
To per<strong>for</strong>m a channel scan you will need to open the context menu by right clicking the<br />
mouse and select “options” followed by the tab “scanner”.<br />
In the channel scan window you will be able to configure different type of settings such as<br />
reception type and preferred options.<br />
Target Root<br />
In the target root field you will be able to choose an already existing folder of the channel list,<br />
or you can create a new channel list. To create a new list, enter a new name in the Target<br />
Root field and the new folder will be insert to the channel list after the channel scan.<br />
Reception Type<br />
Select the correct reception type.<br />
Transponder List<br />
You will need to select the correct transponder list, be<strong>for</strong>e starting the channel scan.<br />
For example:<br />
� If you receive your <strong>TV</strong> signal via satellite, which is pointed to the satellite „Astra<br />
19.2°East“, you will need to choose the transponder list „Astra 19.2°E“.<br />
� If you receive your <strong>TV</strong> signal via cable (DVB-C), you will need to choose your cable<br />
provider at transponder list.<br />
CityCom GmbH © 2012 18<br />
www.technotrend.eu
DiSEqC<br />
If there is more than one LNB mounted to the satellite system, (receiving of more satellites at<br />
the same time), you will need to choose the appropriate position in this field.<br />
If there are any questions about your DiSEqC installation, please first contact the<br />
company which installed the satellite system.<br />
If you are using a Unicable system (SCR/CSS CENELEC EN50494), you will need<br />
to set the setting <strong>for</strong> the Unicable in TT-<strong>Viewer</strong> (please note: This process needs to<br />
be done only once!). Please refer to page 7 of this manual <strong>for</strong> more in<strong>for</strong>mation.<br />
Free to air only<br />
Tick „free to air only“, if you would only like to scan <strong>for</strong> free to air channels. Ticking this option<br />
will cause the channel scan to be done quickly.<br />
Update<br />
If a channel list already exists, in which some channels may be missing you can easy update<br />
the channel list by selecting the correct target root and ticking the option “update”. The<br />
existing folder will be updated. No new folder will be created.<br />
Scan Frequency<br />
If you would like to scan a specific frequency, you will need to enter the needed parameters<br />
into the according field. Click “Scan Frequency” and only the selected transponder will be<br />
scanned and not the whole range of frequency.<br />
Scan range<br />
With the button „scan range“ you can scan the whole range of frequency from the selected<br />
reception type.<br />
CityCom GmbH © 2012 19<br />
www.technotrend.eu
9. Channel list<br />
You can open the channel list by clicking on the channel list icon in the control panel (see<br />
page 15), or you can click to the button “MENU” of the in<strong>for</strong>mation bar and select “Channel<br />
list”. The channel list will open in a black field.<br />
The channel list is separated in four different categories:<br />
� Favorites<br />
� <strong>TV</strong><br />
� Radio<br />
� Network<br />
You can select one of these categories by left clicking the mouse or by pressing a colored<br />
button of your remote control.<br />
CityCom GmbH © 2012 20<br />
www.technotrend.eu
Choosing a channel<br />
Select a channel by double clicking on it. The TT-<strong>Viewer</strong> will switch to the chosen channel.<br />
Edit channel list<br />
You will find a channel overview to be able to edit the channel list. You can open the channel<br />
overview by moving the cursor to the right border area of the TT-<strong>Viewer</strong> window. The<br />
channel overview will open as a folder list in a white field<br />
The playback of a <strong>TV</strong> channel will start by double clicking a channel of the channel overview.<br />
CityCom GmbH © 2012 21<br />
www.technotrend.eu
Search function<br />
You will be able to search <strong>for</strong> a specific channel using the search function, simply type the<br />
name of the channel in the search bar and then select the wanted channel.<br />
Sorting the channel overview<br />
The channel overview can easily be classified into different groups.<br />
� To do so, open the context menu by right clicking the mouse in the channel overview<br />
and select one of the grouping options (An example image is provided below).<br />
CityCom GmbH © 2012 22<br />
www.technotrend.eu
Deleting a channel list<br />
You will be able to delete specific channels, single folder, or whole lists. To do so you will<br />
need to right mouse click in the white field of the channel list and then select “Editmode”.<br />
To delete a channel or folder you will need to right click on the unwanted channel or folder<br />
followed by the option “delete”. To delete a whole channel list you will need to right click on<br />
the satellite icon followed by the option “delete”.<br />
CityCom GmbH © 2012 23<br />
www.technotrend.eu
The whole channel list has now been deleted and you will see the channel list without any<br />
entries. A new channel list will be created after a new channel scan. (see page 18).<br />
CityCom GmbH © 2012 24<br />
www.technotrend.eu
9.1 Favorites list<br />
In TT-<strong>Viewer</strong> you can easily create a favorites list. In the favorites list you will be able to<br />
decide which channel will be inserted and in which order the channels will be placed.<br />
To open the favorites list simply:<br />
� Left click on the channel list icon of the control panel (see page 15)<br />
� Or refer to page 16 “In<strong>for</strong>mation bar“<br />
CityCom GmbH © 2012 25<br />
www.technotrend.eu
Creating a favorites list<br />
� Open the context menu by right clicking the mouse selecting “Options” followed by<br />
the “Favorites” tab<br />
� Left click on a channel of the channel overview and hold down the mouse button.<br />
� Move the cursor into the right area “Favourite” and release the button of the mouse.<br />
� The chosen channel has now been added to the favorites list and can be selected<br />
from there.<br />
CityCom GmbH © 2012 26<br />
www.technotrend.eu
Changing the order of favorites list<br />
The order of channels in the favorites list can be changed as follows:<br />
� Choose the channel you would like to replace by clicking on it with the left mouse<br />
button.<br />
� With the two icons “Up” and “Down” you can change the position of the chosen<br />
channel step by step.<br />
Delete channels from the favorites list<br />
You will also be able to delete.<br />
� Choose a channel you would like to delete with a left click of your mouse.<br />
� Click to the icon “Delete” one time to delete the channel.<br />
The channel is only deleted from the favorites list. The deleted channel still can be found in<br />
the channel overview.<br />
CityCom GmbH © 2012 27<br />
www.technotrend.eu
10. Records<br />
Using TT-<strong>Viewer</strong> you can directly record <strong>TV</strong>, Radio programs, or program recordings.<br />
The location of recordings can be individual specified in the options of TT-<strong>Viewer</strong><br />
(see page 5).<br />
10.1 Direct recordings<br />
Recording <strong>TV</strong> or Radio programs spontaneously can be done with ease using TT-<strong>Viewer</strong>´s<br />
control panel or in<strong>for</strong>mation bar. On the control panel and on the in<strong>for</strong>mation bar you will find<br />
a “record” icon (shown below). To start recording of the current <strong>TV</strong> or Radio program simply<br />
click on the “record” icon and the recording will start immediately.<br />
To stop the recordings simply click to one of the two “record” icons again.<br />
CityCom GmbH © 2012 28<br />
www.technotrend.eu
10.2 Time shift<br />
Time shift will be started by clicking on the play/pause icon (see page 15) on the control<br />
panel. The current program will be paused and recorded. You will be able to decide when the<br />
<strong>TV</strong> or Radio program should be started again by clicking on the play/pause icon again.<br />
Hint: With time shift you will have the possibility to skip commercial breaks, you will simply<br />
need to move the progress bar located on the control panel to a desired position.<br />
By clicking on the “stop” icon on your control you will resume playback of Live <strong>TV</strong>.<br />
Please note: Time shift recording will not be saved.<br />
CityCom GmbH © 2012 29<br />
www.technotrend.eu
10.3 Programmed recordings<br />
You can schedule recording by opening the “Recorder”, to open the “Recorder” you will need<br />
to per<strong>for</strong>m the following actions:<br />
� Click on the “VCR” icon on the control panel (see page 15).<br />
� By right clicking the mouse followed by the option “Recorder”.<br />
In the window labeled “Recorder” you will be able to select the desire channel on the left side<br />
of the window. After you have selected the desired channel you will need to enter the<br />
appropriate recording time of your desired program (please note: Please enter the recording<br />
time in a 24 hour <strong>for</strong>mat).<br />
CityCom GmbH © 2012 30<br />
www.technotrend.eu
� Click “Add“ to add the recording to the scheduled recording list.<br />
CityCom GmbH © 2012 31<br />
www.technotrend.eu
� If you would like to make adjustment to the recording list you will need to choose the<br />
recording you would like to adjust followed by the necessary adjustments. In order to<br />
update the adjustments in the recording list simply click on the option “update”.<br />
� If you would like to delete a scheduled recording, please select the entry followed by<br />
clicking the option “Remove”. The scheduled recording will now be removed.<br />
11. EPG (Electronic Program Guide)<br />
Using the EPG you will be able to get a program guide of the channel list. Using the EPG you<br />
will be able to find out more in<strong>for</strong>mation on the scheduled programs or schedule recordings.<br />
You can choose between two different views of the EPG.<br />
You can open the „timeline view“ by clicking the „EPG button“ of the control panel (see page<br />
15), or by clicking the „MENU button“ of the in<strong>for</strong>mation bar (see page 16).<br />
The classic „window view“ of the EPG can be opened by right clicking the mouse followed by<br />
the option “<strong>TV</strong> Guide”.<br />
CityCom GmbH © 2012 32<br />
www.technotrend.eu
11.1 The EPG „timeline view“<br />
The EPG timeline view can be divided into three areas:<br />
- Favorites<br />
- <strong>TV</strong><br />
- Radio<br />
You can select one of these categories by left clicking the mouse or by pressing a colored<br />
button of your remote control.<br />
In the right upper area of the timeline EPG you will find a directional pad. You can navigate<br />
through the timeline EPG with this.<br />
Program recordings from timeline EPG<br />
If you´ve opened the EPG in „timeline view“, you can program recordings as follows:<br />
� Choose a <strong>TV</strong> program you want to record by a left click.<br />
� A small window will open. Different options can be selected.<br />
� Click to „Record once“ to program a recording from the timeline EPG.<br />
� The window of „Recorder“ will open and the recording you´ve programmed will be still<br />
entered there.<br />
CityCom GmbH © 2012 33<br />
www.technotrend.eu
These programmed recording can be changed, too. There<strong>for</strong>e take a look at page 30 of this<br />
manual.<br />
CityCom GmbH © 2012 34<br />
www.technotrend.eu
11.2 The EPG „window view“<br />
The EPG window view can be divided into three areas:<br />
� Channel list (left side)<br />
� Program guide (right side)<br />
� In<strong>for</strong>mation about the program (below)<br />
To find out more in<strong>for</strong>mation on a specific program you will need to select the channel in the<br />
channel list followed by the appropriate program on the program guide. The in<strong>for</strong>mation will<br />
be displayed below in the in<strong>for</strong>mation area.<br />
To find a program easier, you will be able to search <strong>for</strong> a specific program using the search<br />
function. Simply type the name of the program in the search bar and then select the wanted<br />
program.<br />
Program recordings from window EPG<br />
To schedule recording using the EPG you will need to select a channel followed by a desired<br />
program then simply click on the button “Add”.<br />
The window of „Recorder“ will open and the recording you´ve programmed will be still<br />
entered there.<br />
CityCom GmbH © 2012 35<br />
www.technotrend.eu
These programmed recording can be changed, too. There<strong>for</strong>e take a look at page 30 of this<br />
manual.<br />
CityCom GmbH © 2012 36<br />
www.technotrend.eu
12. CI extension<br />
If you are using a CI extension, you can open the CI setting in TT-<strong>Viewer</strong> by:<br />
� You will need to open the context menu by right clicking the mouse followed by the<br />
option “Conditional Access Modul”.<br />
In the CI setting window you will be able to view the configuration of your CI extension and<br />
change the CI extension settings.<br />
1. Choose a menu item.<br />
2. Confirm with OK.<br />
3. The chosen menu item will be opened.<br />
4. You can return to the main menu by clicking on “Return“ or “Menu”.<br />
5. To close the CI setting simply click on the option “cancel”.<br />
CityCom GmbH © 2012 37<br />
www.technotrend.eu
CityCom GmbH © 2012 38<br />
www.technotrend.eu
13. Further Functions<br />
Volume control<br />
You can control the volume with your mouse wheel. Scroll up to increase the volume and<br />
scroll down to decrease the volume of TT-<strong>Viewer</strong>.<br />
TT-<strong>Viewer</strong> in<strong>for</strong>mation<br />
Open the TT-<strong>Viewer</strong> window and press the „F1 button“ of your keyboard. An in<strong>for</strong>mation<br />
window will open. You can see the <strong>version</strong> of the currently installed TT-<strong>Viewer</strong> there.<br />
CityCom GmbH © 2012 39<br />
www.technotrend.eu
Technical support<br />
For technical support please contact:<br />
support@technotrend.eu<br />
Telephone:<br />
0180 / 572 83 52* (Mo. – TH. 09.30am – 05.00pm; Fr. 09.30am – 04.00pm)<br />
*14 Euro-Cent/Min. with German Telekom, price with mobile phone at most 42 Euro-Cent/Min.<br />
CityCom GmbH © 2012 40<br />
www.technotrend.eu


