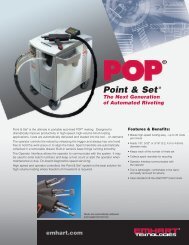
PSI-C/C2 Controller - Automated Fastening Equipment
PSI-C/C2 Controller - Automated Fastening Equipment
PSI-C/C2 Controller - Automated Fastening Equipment

Create successful ePaper yourself
Turn your PDF publications into a flip-book with our unique Google optimized e-Paper software.
<strong>PSI</strong>-C <strong>Controller</strong><br />
For both OK and NOK cycles, check the master transducer reading, or the residual torque reading<br />
from the torque wrench, versus the reading on the <strong>PSI</strong>-C controller. These numbers generally vary.<br />
Use CORRELATION under ADMIN to bring the two readings into correlation (see Correlation<br />
Procedure below). A few more fasteners may be run to check the reading consistency between the<br />
two.<br />
If the program completes this cycle but LOW TQ or TQ NOT REACHED is received, check for:<br />
• Target torque is above the capacity of the tool<br />
• The pulse mechanism is not adjusted to the maximum.<br />
• Insufficient supply air pressure. Check pressure when free-running tool; air pressure<br />
should not drop more than 10 psi from the static air pressure available.<br />
• Incorrect NOMINAL CAL VALUE was entered.<br />
2.4.2.1.1 Correlation Procedure<br />
1. From this RUN screen, without clearing the last reading, access the ADMIN functions via the<br />
ADMIN key. Quickly press the ADMIN key to display options.<br />
2. Use the UP or DOWN keys to scroll through and find the CORRELATION option. Press the<br />
ENTER button.<br />
3. MANUAL or AUTO CAL can be selected. Press the UP key or DOWN key accordingly.<br />
AUTO CAL allows the entry of the master torque reading to be entered by scrolling up or down<br />
until the master value is entered.<br />
NOTE:<br />
Adjust using AUTO CAL by setting the MASTER reading to about 60-70% of the actual measured<br />
torque. Repeat as needed until the two readings correlate.<br />
4. Press ENTER and note the new Correlation Value which is calculated automatically.<br />
5. Press the BACK button to return to run screen.<br />
6. Repeat this process until the readings from the master and the <strong>PSI</strong>-C match within 2% or as<br />
required by your ISO procedures.<br />
Installation and Use 9