BLOCKED_14_FINAL
- No tags were found...

Create successful ePaper yourself
Turn your PDF publications into a flip-book with our unique Google optimized e-Paper software.
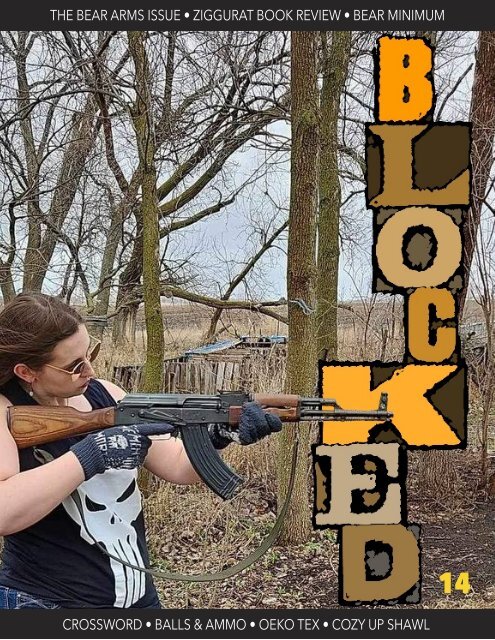
THE BEAR ARMS ISSUE • ZIGGURAT BOOK REVIEW • BEAR MINIMUM<br />
CROSSWORD • BALLS & AMMO • OEKO TEX • COZY UP SHAWL<br />
<strong>14</strong>
Unless otherwise indicated the information, articles, artwork,<br />
patterns and photography published in <strong>BLOCKED</strong> Magazine<br />
are subject to copyright ©2024 <strong>BLOCKED</strong> Magazine.<br />
All rights reserved.<br />
TEAM <strong>BLOCKED</strong><br />
Editor in Chief<br />
Neil James<br />
For all enquiries:<br />
blockedmagazine@gmx.com<br />
Layouts, Graphics, and Ads<br />
BS Designs<br />
Copy Editor, Tech Editor,<br />
Head of Games/Puzzles Content<br />
Cézanne Pellett<br />
Head of Review Content<br />
Katie Gerwien<br />
Joint Heads of Geographical<br />
and Historical Content<br />
Yelena of Scythia<br />
Amy D<br />
Cover Photography<br />
Anne Pinkava<br />
Content Writers<br />
Jo-Bob<br />
Katie Gerwein<br />
Tabitha of Murderknits<br />
Uknitted Kingdom<br />
Editorial Assistants<br />
Denise Pettus<br />
Karen Juliano<br />
Laura Neubauer<br />
Pattern Designers<br />
Anne Pinkava<br />
Liz Clothier<br />
Mockingbirdsrealm<br />
Tabitha of Murderknits<br />
Uknitted Kingdom
Dear Readers,<br />
Welcome to issue <strong>14</strong>!<br />
Many (but not all) of the articles and patterns in this issue are related to the theme of “Bear<br />
Arms.” Contributors were invited to interpret the theme in any way they chose. Some chose the<br />
2nd amendment right to “bear arms,” some chose bare arms, and some chose the arms of a bear.<br />
We even have a bare bear bearing arms in his bare bear arms! Try saying that ten times.<br />
In this issue, we have a brand-new knitting technique from Anne Pinkava of the Politically<br />
Incorrect Knitters https://www.youtube.com/@politicallyincorrectknitters. Anne has invented a<br />
unique, never-before-seen increase. She has named it “The Braided Increase.” You’ll find her<br />
pattern using this increase and a link to an instructional video on page 23.<br />
We also have some new features, including:<br />
Pattern Reviews<br />
The lovely Jo-Bob of the Knit Nite YouTube channel https://www.youtube.com/@knitnite will<br />
be regularly reviewing patterns she has bought, knitted, not knitted, tinked, frogged, worn, given<br />
away, thrown in time-out, and/or thrown in the trash. Jo-Bob isn’t afraid to speak her mind and<br />
her reviews will have the same no-nonsense approach. Although the flaws of a pattern might be<br />
highlighted, you can be sure the positives of a pattern will also be.<br />
If you’re a designer and Jo-Bob critiques one of your patterns, please do not take it as a<br />
personal attack. Trust me, if you listen to, and act upon, her feedback, your future designs will<br />
be better. Likewise, if she should praise your pattern, don’t let it go to your head but do keep<br />
up the good work!<br />
Cross Stitch<br />
You’ll notice in this issue that we have included several cross stitch charts. We intend<br />
to have at least one or two cross stitch patterns in every issue from <strong>14</strong> onwards.<br />
For my own cross stitch designs, I intend to have a theme each year of five or six charts.<br />
Each chart will make an individual piece or can be combined with the other four or five to<br />
create a set or a larger combined piece. Other cross stitch designers will be contributing<br />
individual or combined charts at different points in the year.<br />
I’m looking for ideas for a cross stitch theme for the 6 issues of 2025. If there’s a theme<br />
you wish was available, let me know, and I’ll see if it’s something I can create. No promises!<br />
Please let your stitching friends know and share the link. https://linktr.ee/blockedmagazine<br />
Enjoy this issue and, as always, Get Blocked!<br />
Yours faithfully,<br />
Neil<br />
Editor-in-Chief<br />
3
y Murder Knits<br />
Balls and Ammo<br />
I married the first guy I dated who didn’t make fun of me<br />
for my knitting hobby.<br />
I began knitting in sixth grade when my pastor’s wife<br />
taught me. I rode the bus to their house every Tuesday.<br />
Pastor offered me a snack when I got off the bus or<br />
grossed me out with what he was cooking for dinner. My<br />
first time trying goulash made me gag and my pastor<br />
rolled with laughter.<br />
Ann and I would move to the study to begin our lessons.<br />
I spent hours going through her pattern library, mostly<br />
made up of Family Circle knitting magazines. My first project<br />
was a scarf out of Red Heart Super Saver. It was light<br />
brown with red and orange speckles.<br />
I spent middle school knitting here and there but picked<br />
it up more in high school when my home life went south. I<br />
spent my nights after school knitting and listening to<br />
Coast-to-Coast AM with George Noory. I brought my knitting<br />
to school and knit during lunch break and lectures.<br />
My first two boyfriends teased me and called me<br />
“Grandma.” They asked me not to bring my knitting when<br />
we were going places.<br />
When I met Tom, I didn’t tell him right away that I was a<br />
knitter. I didn’t want my hobby to ruin this relationship. He<br />
saw my knitting in my room one day and asked about it. I<br />
showed him the project I was working on, a baby sweater<br />
for my pregnant English teacher. He said, “cool,” and that<br />
was it. No derogatory comments, no snide remarks.<br />
I eventually brought my projects along for truck rides<br />
and visits to his house. I was never asked to put my knitting<br />
away. His parents always asked about my projects.<br />
Our favorite dates involved truck rides up to the mountain.<br />
I brought my knitting and Tom packed a of couple<br />
guns. He would target practice and I would knit.<br />
We got pregnant with Chesney at the end of our senior<br />
year. His parents moved me into their house. I knit for<br />
Chesney and my in-laws while pregnant. My mother-in-law<br />
still has the blankets I made as a thank-you gift for taking<br />
me under her wing 16 years ago.<br />
Over the years, my hobby of knitting/yarn buying and<br />
Tom’s gun collection have both grown. The yarn/gun<br />
room shares the same space. Usually, a skein is hanging<br />
off of a deer antler that holds the gun. We often joke<br />
about opening a yarn/gun ammo shop together. “Balls &<br />
Ammo – Yarn in the front, Guns in the back.”<br />
Our date nights are now spent at home where Tom<br />
cooks steak on the BBQ and I knit while he cooks. He<br />
watches gun shows while I do the dishes, then it's back to<br />
our chairs. I knit while he continues his show. Target practice<br />
in the mountains now involves our kids. The girls and I<br />
knit in between shooting the target. We will celebrate 16<br />
years of marriage this July. Sixteen years of combining our<br />
hobbies. Sixteen years of respecting each other with our<br />
crafts. Sixteen years of Tom funding my yarn collection.<br />
Sixteen years, three kids, 30+ guns, and 1000+ balls of<br />
yarn.<br />
4<br />
Continued on next page...
SOUTH BY<br />
SOUTHWEST<br />
by Murder Knits<br />
YARN<br />
A 2 skein dk-weight shawl.<br />
Sample is knitted in Knitty McPurly Dresden DK.<br />
NOTIONS<br />
Darning needle<br />
Stitch marker<br />
Scissors<br />
GAUGE<br />
No gauge, No rules, No worries.<br />
Another Murder Knits,<br />
Murder She Wrote Shawl.<br />
PATTERN<br />
Cast on 3 sts.<br />
Knit 1 row.<br />
K1, m1, knit to end.<br />
Knit to end.<br />
Rep last 2 rows until you run out of yarn.<br />
Join new yarn.<br />
K1, ssk, knit to end (make sure the<br />
decreases and increases are on the<br />
same side to maintain the triangle shape)<br />
Knit 1 row.<br />
Rep last 2 rows until 3 sts rem.<br />
Cast off.<br />
Weave in all ends and block.<br />
Wear while solving a murder in the desert.<br />
5
y Tabitha of murderknits<br />
Bear Stew<br />
This recipe requires that you actually know how to cook. No<br />
measurements, use your brain and summon your inner Julia<br />
Child.<br />
Stuff you need:<br />
bear meat - cut into chunks<br />
salt and pepper<br />
whatever spices you feel like<br />
a beer<br />
bacon grease<br />
onion<br />
a whole head of garlic<br />
celery<br />
carrots<br />
(If you don't have celery or carrots don’t worry no one eats that<br />
shit when it's in the stew.)<br />
potatoes<br />
ketchup or tomato paste (Whichever you have)<br />
Worcestershire sauce<br />
broth<br />
Pre-heat oven to 275 degrees.<br />
1. Put the bacon grease in a pot, use a pot that comes with a lid; I use a Dutch oven. Turn the stove burner<br />
on medium.<br />
2. Pat your meat dry or it takes too long to brown. Sprinkle the meat with salt and pepper. Put the meat in<br />
the pot, don’t crowd the meat or it will turn gray. Once meat is browned on all sides (but not cooked all the<br />
way) put the meat on a plate or bowl. 3. Cut up the onion and whole-ass head of garlic. Add these to the pot<br />
that had the meat in it. Cook until caramelized. Pour a whole beer in the pot. Add the cut up carrots and<br />
celery. Include the celery leaves, they have more flavor. Add whatever spices you want - get creative here.<br />
Add your ketchup or tomato paste. Stop when it looks good. Stir.<br />
4. Put the meat and all the blood juices back in the pot. Add enough broth to cover all the meat. If you run<br />
out of broth use water or more beer. Stir.<br />
5. Once this comes to a boil, not a violent boil but like half way, cover and put in the oven. Cook until the<br />
meat falls apart, usually a couple hours. Serve with potatoes: mashed, baked, or fried.<br />
Bonus points if you make gravy from the stew juices.<br />
6
y Uknitted Kingdom<br />
Men’s PLUS Sizes<br />
(or Husky Bear Knits)<br />
In a recent conversation with a regular contributor and<br />
Blocked team member, I was reminded that the term<br />
“bear” is used in certain circles (mostly gay men) to describe<br />
big, hairy, bearded men. This isn’t used to describe<br />
the internal feelings of the individual, such as with the<br />
mentally ill “Therians” or “Otherkins” -<br />
https://en.wikipedia.org/wiki/Otherkin but rather a term<br />
to describe a physical category. The categories are used<br />
by gay men when describing both homosexual and heterosexual<br />
men.<br />
Within the “Bear” category there are several<br />
sub-categories, including:<br />
• Bear (big/fat, hairy, bearded men)<br />
• Muscle bear (muscled, hairy, bearded men).<br />
• Polar bear (big/fat, hairy, white-haired older men).<br />
• Cub (younger, less hairy men with stubble or no beard).<br />
• Otter (thin hairy men).<br />
• Fox (thin, hairy, white or silver-haired older men).<br />
• There is even a category to include fat, hairy women,<br />
“Ursula” or “Bruin.”<br />
https://en.wikipedia.org/wiki/Bear_(gay_culture)<br />
After studying the information, I have to admit to having<br />
more questions than answers. Some of the questions<br />
could perhaps be dismissed as irrelevant or not applicable<br />
to knitwear by a more experienced designer.<br />
So read on, not expecting to be told those answers but<br />
to consider and ponder whether the questions I ask<br />
should or shouldn’t be a factor in knitwear design.<br />
If we compare the ASTM image for a size-46 man with a<br />
size-64 man, one can see that grading the size up and<br />
down looks relatively simple.<br />
As a Santa lookalike, I would be categorized as a polar<br />
bear. Personally, I find it cute and harmless and have no<br />
objection to being objectified as a polar bear!
Husky Bear Knits Continued...<br />
by Uknitted Kingdom<br />
Here, the difference in the neck and arms (especially the<br />
upper arms) becomes more pronounced and the belly is an<br />
entirely different shape and volume.<br />
In terms of sweater construction, the first question I have<br />
is based on the center vertical axis running from the crown<br />
of the head down to the ankle. Theoretically, this is the line<br />
where the seam of a sweater would join the back piece to<br />
the front piece. With size-64 the back piece doesn’t appear<br />
to need to be as wide as the front piece. If an average of<br />
the front and back width was made, any subsequent seam<br />
(if not knitting in the round) likely is not going to sit correctly.<br />
Moving to the natural waistline (where the navel is found),<br />
this is just below the widest part of the belly. The belly appears<br />
to have a flatter, less rounded appearance at this<br />
point. Tailors and image consultants would recommend a<br />
large man wear his trouser waistband/belt at this point.<br />
Many large men prefer to wear their belts/waistbands much<br />
lower, below the belly. The belly then hangs over the front<br />
of the trousers. There are differing opinions on which version<br />
looks better, appears more slimming, is more fashionable,<br />
and is more comfortable. Both have a place in<br />
different scenarios (casual or formal, for example).<br />
Comparing the front of the garment to the back; for size-<br />
64 if the front piece was the same length as the back piece<br />
there might not be enough fabric to cover the lower belly.<br />
I have never seen a man’s knit or crochet sweater pattern<br />
which has made any allowances for the significant difference<br />
between the height and width of the front compared<br />
to the back. It seems an average is made of the overall circumference<br />
and then the knitter just hopes for the best.<br />
Any length adjustments are made to both front and back,<br />
creating a garment too long at the back or too short at the<br />
front.<br />
Should designers be grading up men’s sweaters to be<br />
longer and wider at the front and less so at the back? Are<br />
belly darts something to be considered? Or, more likely, am<br />
I overthinking this?<br />
It seems the knitters of old already had the answer for the<br />
portly gentleman. In Mary Thomas’s Knitting Book, first<br />
published in 1938, page 230, she says, “Spiral Ribbing was<br />
often used by the old-fashioned folk when knitting jerseys<br />
for corpulent figures, as the fabric can be adjusted over the<br />
figure with a slick line. The knitting would be round, and<br />
often done on eight needles.”<br />
- Cast on a multiple of 6. Rib for 6 rounds<br />
in 3 x 3 (k3, p3).<br />
- Move the ribbing one stitch to the right<br />
every 6 rounds.<br />
This stitch pattern is the same one used to knit spiral<br />
socks without a heel. By twisting the fabric around the heel<br />
(and in the case of a sweater, around the belly) the spiral rib<br />
opens out to accommodate the protuberance. I haven’t<br />
tried this method, nor have I seen a sweater using this<br />
method. As utilitarian as it sounds, there is little room for<br />
design elements or variety.<br />
However, for variance and creative elements can’t we just<br />
use the ASTM standards? Before thinking that the ASTM<br />
Standards are the panacea for the plus-sized, the standards<br />
are far from perfect.<br />
Eonyou Shin of Virginia Tech and Elahe Saeidi of Oregon<br />
State University conducted research into the ASTM standards<br />
and found them unfit for purpose. They concluded:<br />
“Three body shapes were categorized for the overweight<br />
and obese men in the United States: Rectangle-curvy<br />
shape, bottom hourglass-hip tilt shape, and top hourglassstraight<br />
shape. Result of this study support discrepancy between<br />
the body shapes and the current ASTM sizing<br />
standards. Overweight and obese men would experience<br />
more fit problems with bottoms than that with tops in both<br />
sizing standards (i.e., the men and the big men sizes). This<br />
study provides practical implications for apparel product<br />
developer in the United States that the sizing systems need<br />
to be updated to give better fit and accommodate different<br />
body shapes in the overweight and obese men.”<br />
8<br />
Continued on next page...
Husky Bear Knits Continued...<br />
Body Shapes and Fit Analysis of ASTM Size Standards<br />
for Overweight and Obese Men in the United States. (Shin<br />
& Saeidi, 2022)<br />
In 2011 Su-Jeong Hwang Shin, Cynthia L. Istook, and Jiinhee<br />
Lee concluded their research into USA menswear<br />
sizing as follows:<br />
Due to the complexity of the human body form, the<br />
methodology used in this study may not be sufficient to<br />
explain, or even uncover all the other possible variables.<br />
Further research needs to be conducted to evaluate these<br />
variables according to established and as yet developed<br />
fit models and 3D technologies.<br />
Various Men's Body Shapes and Drops for Developing<br />
Menswear Sizing Systems in the United States<br />
Article in Journal of the Korean Society of Clothing and<br />
Textiles · December 2011 DOI:<br />
10.5850/JKSCT.2011.35.12.<strong>14</strong>54<br />
Based on both research papers, we can conclude that<br />
men’s body shapes are far too varied for any single sizing<br />
system to work. Bearing this in mind, how can any independent<br />
designer be expected to size patterns to fit all<br />
men’s bodies?<br />
Now apply this approach to the variability of women’s<br />
bodies and the scale of the size-inclusivity problem becomes<br />
apparent.<br />
With the standard measurements currently available to<br />
designers, it is impossible for them to size a sweater for<br />
every body.<br />
It would be far easier for individual knitters to learn how<br />
to grade a pattern to suit their own body measurements.<br />
Rather than hounding and hassling designers to produce<br />
a pattern for every size conceivable, might it be<br />
more worthwhile to ask knitting tutors to provide tutorials<br />
demonstrating how to grade a pattern?<br />
The only way you bears and bruins are going to achieve<br />
the Goldilocks sweater, which isn’t too small, isn’t too big,<br />
and fits just right, is to learn to adapt patterns to your<br />
own, unique, one-of-a-kind, body.<br />
9
DISHIDENT #17<br />
by UKnitted Kingdom<br />
PATTERN DESCRIPTION<br />
Each issue of Blocked will contain a “secret”<br />
pattern. The design will only be revealed as you<br />
knit. The instructions might uncover an image, design,<br />
word, or message.<br />
When using cotton, these secret squares make<br />
excellent dishcloths. If you make 4 or 5 of each<br />
square in wool or acrylic, they can be seamed<br />
together at the end of the year to make a small<br />
Afghan or lap blanket.<br />
GAUGE & MATERIALS<br />
Each dishident uses approximately<br />
41 to 43g of worsted weight 100% cotton.<br />
Follow the yarn manufacturer’s<br />
recommended needle size.<br />
DIRECTIONS<br />
Cast on 45<br />
← Row 1 [RS]: k45<br />
→ Row 2 [WS]: k45<br />
← Row 3 [RS]: k45<br />
→ Row 4 [WS]: k45<br />
← Row 5 [RS]: k45<br />
→ Row 6 [WS]: k45<br />
← Row 7 [RS]: k45<br />
→ Row 8 [WS]: k31, p10, k4<br />
← Row 9 [RS]: k45<br />
→ Row 10 [WS]: k31, p10, k4<br />
← Row 11 [RS]: k45<br />
→ Row 12 [WS]: k30, p11, k4<br />
← Row 13 [RS]: k45<br />
→ Row <strong>14</strong> [WS]: k30, p11, k4<br />
← Row 15 [RS]: k45<br />
→ Row 16 [WS]: k29, p12, k4<br />
← Row 17 [RS]: k45<br />
→ Row 18 [WS]: k29, p12, k4<br />
← Row 19 [RS]: k45<br />
10<br />
Dishident Continued on next page...
Dishident Continued...<br />
→ Row 20 [WS]: k29, p12, k4<br />
← Row 21 [RS]: k45<br />
→ Row 22 [WS]: k29, p12, k4<br />
← Row 23 [RS]: k45<br />
→ Row 24 [WS]: k30, p11, k4<br />
← Row 25 [RS]: k45<br />
→ Row 26 [WS]: k31, p10, k4<br />
← Row 27 [RS]: k45<br />
→ Row 28 [WS]: k32, p9, k4<br />
← Row 29 [RS]: k45<br />
→ Row 30 [WS]: k33, p8, k4<br />
← Row 31 [RS]: k45<br />
→ Row 32 [WS]: k4, p1, k29, p7, k4<br />
← Row 33 [RS]: k45<br />
→ Row 34 [WS]: k4, p2, k28, p7, k4<br />
← Row 35 [RS]: k45<br />
→ Row 36 [WS]: k4, p2, k29, p6, k4<br />
← Row 37 [RS]: k45<br />
→ Row 38 [WS]: k4, p3, k17, p5, k6, p6, k4<br />
← Row 39 [RS]: k45<br />
→ Row 40 [WS]: k4, p4, k4, (k, p2) 2x, k5, p7, k5, p6, k4<br />
← Row 41 [RS]: k45<br />
→ Row 42 [WS]: k4, p5, k4, (p2, k) 2x, k3, p9, k4, p6, k4<br />
← Row 43 [RS]: k45<br />
→ Row 44 [WS]: k4, p5, k4, (p, k3) 2x, k, p7, k6, p6, k4<br />
← Row 45 [RS]: k45<br />
→ Row 46 [WS]: k4, p4, (p, k5, p2) 2x, p4, k, p, k5, p6, k4<br />
← Row 47 [RS]: k26, (mb, k5) 2x, k7<br />
→ Row 48 [WS]: k4, p5, k13, p8, k5, p6, k4<br />
← Row 49 [RS]: k45<br />
→ Row 50 [WS]: k4, p6, k11, p9, k5, p6, k4<br />
← Row 51 [RS]: k45<br />
→ Row 52 [WS]: k4, p4, k15, p6, (p1, k1) 3x, p6, k4<br />
← Row 53 [RS]: k45<br />
→ Row 54 [WS]: k4, p4, (k3, p9) 2x, p9, k4<br />
← Row 55 [RS]: k45<br />
→ Row 56 [WS]: k4, p37, k4<br />
← Row 57 [RS]: k45<br />
→ Row 58 [WS]: k45<br />
← Row 59 [RS]: k45<br />
→ Row 60 [WS]: k45<br />
← Row 61 [RS]: k45<br />
→ Row 62 [WS]: k45<br />
TIPS<br />
If preferred, slip the first OR the last stitch of every row to create a<br />
neater edge. When purling a stitch immediately after knitting a<br />
stitch, pull the excess yarn out of the purl stitch before knitting or<br />
purling on. This helps to reduce loose or baggy knit stitches.<br />
NOTES<br />
Occasionally, a dishident or secret square might not be<br />
suitable for children and “polite company”. This will be made<br />
clear when this is the case.<br />
If you would like to receive notifications of our next issue!<br />
Check out our Patreon!<br />
www.patreon.com/join/BlockedMagazine<br />
11
By Neil James<br />
OEKO-TEX® STANDARD 100,<br />
Echoes of Scheele’s Green.<br />
12<br />
On a recent Knit Nite YouTube episode, I was made<br />
aware of certification labels on some skeins of yarn,<br />
“OEKO-TEX® STANDARD 100.”<br />
Jo Bob showed us the label which none of us had noticed<br />
before.<br />
Quickly reading about the standards on the label, we<br />
learned that whilst using certain yarns, our lives might<br />
have been in mortal danger! Who knew so many toxic<br />
substances could be present in an acrylic blend? Had<br />
there been a hidden repeat of the “Scheele’s Green” arsenic<br />
poisonings of Victorian times?<br />
(https://www.color-name.com/scheelesgreen.color?utm_content=cmp-true),<br />
(https://en.wikipedia.org/wiki/Scheele%27s_Green)<br />
(https://www.theparisreview.org/blog/2018/05/02/scheeles<br />
-green-the-color-of-fake-foliage-and-death/)<br />
Ironically, it was noted that some of the toxic substances<br />
prohibited from the certified yarn are currently present in<br />
several ingredients contained in foods in the USA, and<br />
probably in other countries too.<br />
Having been subjected to decades of onerous, mostly<br />
pointless, and overly bureaucratic EU regulations, I was<br />
naturally suspicious. What is this? Why is it needed? Is it<br />
needed? Who is making money from it? Who is paying for<br />
it? Were we in danger before its implementation? Why is<br />
it a concern now but not before?<br />
I decided to go directly to the source and ask OEKO-<br />
TEX.<br />
The following are the unedited responses to my questions:<br />
1. “Why was the standard introduced for yarn specifically?<br />
Was there an incident or incidents which prompted<br />
it, or was this a pre-emptive measure 'just in case'?”<br />
OEKO-TEX® STANDARD 100 is a certification that was<br />
introduced for textiles, from raw materials such as yarns to<br />
finished textile products including their accessories.<br />
STANDARD 100 ensures that the products carrying the<br />
label, such as yarns, were tested for a very wide range of<br />
harmful substances.<br />
The label was developed in 1992 enabling consumers to<br />
make informed and safe purchasing decisions.<br />
2. “Is the OEK-TEX standard a legal requirement, or a<br />
voluntary option?”<br />
OEKO-TEX® STANDARD 100 is a voluntary standard.<br />
However, the requirements defined to obtain the certification<br />
(limit values, i.e., how much of a certain harmful<br />
substance is acceptable in a textile product) are indeed<br />
deduced from different regulations from within the EU<br />
and U.S. and based on the expertise of our own OEKO-<br />
TEX® toxicologists. OEKO-TEX® STANDARD 100 integrates<br />
worldwide regulations and newest scientific<br />
findings regarding chemicals and harmful substances.<br />
3. “How much does registration cost? Is the cost of registration<br />
typically passed onto the consumer?”<br />
The cost for the STANDARD 100 certification comprises<br />
most of the costs for the licence, the compulsory company<br />
audit and the laboratory and administrative tests.<br />
The precise costs for harmful-substance testing are based<br />
on the testing expenses for the respective textile product<br />
or material. Using already certified source materials, the financial<br />
costs for the laboratory tests can be reduced significantly.<br />
Due to the modular system used in STANDARD<br />
100 certification, the testing costs are distributed across<br />
the companies along the textile chain.<br />
4. “Is animal fibre tested and accredited too, or just cottons,<br />
acrylics, and acrylic blends? If not, why is that?”<br />
The OEKO-TEX® STANDARD 100 certification tests for<br />
all types of fibres commonly used in the textile industry,<br />
may they be plant-based, animal-based, synthetic or a<br />
mixture thereof. The limit values for harmful substances<br />
are the same, no matter the fibre type.<br />
5a. “Many knitters and crocheters use hand-dyed animal<br />
fibres from small independent dyers. Although it's impossible<br />
to know exactly which dyes they have used, is it possible<br />
that the acid dyes (such as Dharma) would cause the<br />
dyed yarn to fail the standard you apply?”<br />
Chemicals, colourants and auxiliaries that meet the<br />
OEKO-TEX® ECO PASSPORT standard have been tested<br />
and analysed against strict criteria, for a lower environmental<br />
impact.<br />
ECO PASSPORT is recognised as a pre-certification for<br />
OEKO-TEX®STANDARD 100.<br />
Continued on next page...
OEKO-TEX Continued...<br />
Especially for small business, our buying guide will be<br />
helpful to find suppliers for pre-certified yarns (STAND-<br />
ARD 100; or ORGANIC COTTON in case of cotton yarn)<br />
and dyes (ECO PASSPORT): See link below.<br />
5b. “Are independent small 'kitchen-sink' businesses<br />
(such as yarn dyers) able to be registered as compliant, or<br />
might the cost be prohibitive?”<br />
This would have to be evaluated by each business<br />
based on their products and business numbers individually,<br />
whether costs are prohibitive or not.<br />
6. “Do you have a list of the substances you test for in<br />
yarn (specifically)?”<br />
Our OEKO-TEX® RSL list (restricted substance list) is<br />
publicly available (see Annex 4 or 6 of the document for<br />
full chemical list and limit values): See Link Below.<br />
7. “Of the substances from question 6, of these, which<br />
are typically found in yarn?”<br />
This can differ depending on which fibre the yarn is<br />
made of, which (industrial) technology was employed for<br />
its production, which dyes were used etc. For all yarns<br />
certified according to OEKO-TEX® STANDARD 100, the<br />
restricted substance list and limit values are globally<br />
valid.<br />
8. “Of the substances from question 6, are you aware if<br />
any of these substances are routinely found in food (including<br />
additives/preservatives, etc) or medication? If so,<br />
which ones?”<br />
There are a lot of hazardous substances included in the<br />
OEKO-TEX® RSL that are relevant in different industries,<br />
including the food and pharmaceutical industry. They<br />
would not be used on purpose but be part of the products<br />
accidentally. For instance, PFAS are a very critical<br />
chemical group utilized as water and oil repellents used<br />
in cookware such as non-stick pans. PFAS also pose a<br />
great health and environmental risk as they contaminate<br />
the environment.<br />
A network of over 21,000 certified companies helps<br />
with easier sourcing. The OEKO-TEX® buying guide<br />
offers access by sorting for different types of products,<br />
such as yarns.<br />
10. “In terms of yarn, what can knitters and crocheters<br />
expect from OEK-TEX standards in the future?”<br />
We use globally standardised test criteria and update<br />
our limited values for harmful substances at least once a<br />
year. STANDARD 100 remains in compliance with international<br />
requirements and regulations and being even<br />
stricter, protecting consumers and people working in the<br />
industry. We always strive to empower the consumer to<br />
make informed purchasing decisions with our Label<br />
Check.<br />
I’m grateful for OEKO-TEX’s speedy response. However,<br />
as expected, the reply is in corporate-speak, designed<br />
to deliver some of the information and swerve<br />
anything incriminating, able to be misconstrued, or legally<br />
difficult for the company.<br />
I’m still skeptical about whether certification is actually<br />
needed. I hold my hands up though, I might well be like<br />
William Morris after learning his wallpaper was killing<br />
people. He was in denial. However, it was revealed he<br />
held shares in the copper mines which produced a crucial<br />
ingredient of the pigment!<br />
Let us know what you think. Does this certification<br />
make you feel safer?<br />
9. “How many yarn producers are currently registered<br />
at OEKO-TEX compliant?”<br />
5. https://www.oeko-tex.com/en/buying-guide<br />
6. https://www.oeko-tex.com/importedmedia/downloadfiles/OEKO-TEX_STANDARD_100_Standard_EN_DE.pdf<br />
9. https://www.oeko-tex.com/en/buying-guide<br />
10. https://www.oeko-tex.com/en/label-check<br />
13
AND MY<br />
HEART<br />
by Liz Clothier Designs and Anne Pinkava<br />
YARN<br />
• MC – Malabrigo Arroyo (100g/3.53oz, 335yd/306m)<br />
AR429 Cape Cod (You will need approx. 80g/2.8oz, 268y/245m)<br />
• CC – Malabrigo Arroyo (100g/3.53oz, 335yd/306m)<br />
AR870 Candombe (You will need approx. 32g/1.1oz, 108y/99m)<br />
NOTIONS<br />
• US Size 4 (3.5mm) 16-inch circular needle<br />
• 8 stitch markers, one being a unique color to signify the beginning of the round.<br />
• Tapestry needle<br />
• Scissors<br />
SIZE<br />
Size is approximately 9.75”/25cm x 12”/30.5cm<br />
PATTERN<br />
With MC cast on 136 stitches and join in the round. Work the first row of the chart, rep it<br />
4 times, placing markers as follows:<br />
Work 27 sts, pm, work 7 sts, pm, rep around. There will be four 27 st sections and four 7<br />
st sections.<br />
Continue following the chart, adding in the CC as indicated. Because there are large<br />
sections of MC that would create very large floats, I used the ladder-back jacquard<br />
technique on either side of the cable sections. There are several tutorials on YouTube,<br />
but the one I used is linked below.<br />
https://youtu.be/UcQns-ON1nw?si=wFjKclrhdFAY-dsy<br />
After completing the last round on the chart, bind off loosely in pattern.<br />
Block and weave in the ends.<br />
Continued on next page...<br />
<strong>14</strong>
And My Heart Continued...<br />
15
y Jo Bob<br />
COZY UP “JAMIE”<br />
SISTER SHAWL REVIEW<br />
Hailing from Grande Prairie, Alberta, Canada, Cozy Up<br />
with the Stitchin’ Sisters dropped its first Podcast episode<br />
in early 2017. The two elder sisters, Jamie and<br />
Sarah, launched their chatty forum, giving motivation<br />
credit to the Grocery Girls podcast, as sisters in knitting.<br />
Early in their weekly podcasting, younger twin sisters<br />
Katie and Krissy, mother Jody, and camera-shy Granny<br />
are introduced. My favorite guest is Aunt Jackie with her<br />
indifferent cameos, typically appearing in bathrobes or<br />
house coat attire, (complete with headband) and reverence<br />
for heating and reheating beverages in the microwave.<br />
The Stitchin’ Sisters began as production knitters at a<br />
local market and taught knitting classes. The sisters<br />
soon aligned their podcast branding with their other social<br />
media, renaming the Podcast as Cozy Up Knits.<br />
Although eldest sister Jamie taught her sisters to knit,<br />
second sister Sarah shines with her creative and technical<br />
prowess in designing beginner-friendly knitwear accessories.<br />
She is the brains behind most of the Cozy Up<br />
Knits’ designs, encouraging knitters to hack and modify<br />
any of her designs.<br />
During 2017 and 2018, Sarah designed a special shawl<br />
for each sister. Jamie's shawl was published in November<br />
2017 and is available for purchase as a digital<br />
download from LoveCrafts and Ravelry. This textured triangular<br />
shawl is designed to be knit with either double<br />
knit or worsted-weight yarn. There are separate directions<br />
for additional repetitions and stitch counts for the<br />
DK version.<br />
The shawl is built top down, with a center spine and<br />
edging increases, short bursts of differing textural stitch<br />
patterns to add interest, and a seed stitch border. The<br />
written pattern instructions are easy to read and follow.<br />
Continued on next page...<br />
16
Cozy Up Continued...<br />
By Jo Bob<br />
While the other three sister shawl designs lend themselves<br />
to semi-solid, variegated, speckled, or tonal<br />
yarns, the Jamie Shawl is more appealing in a solid or<br />
semi-solid, rustic, wooly yarn, producing an “Outlander”<br />
style aesthetic.<br />
All the textural sections are interchangeable with each<br />
other and may be repeated as many times as you<br />
choose. It is a beginner pattern design with knit and purl<br />
stitches, yarn overs, and a special texture stitch.<br />
Materials required:<br />
Worsted weight yarn<br />
Approx. 600 yards<br />
US size 10 (6 mm) needles<br />
4 stitch markers<br />
Or<br />
DK weight yarn<br />
Approx. 725 yards<br />
US Size 7 (4.5 mm) needles<br />
4 stitch markers<br />
I used a semi-worsted weight New Zealand Pure Wool.<br />
A modification I made was to knit into the back of the<br />
stitch on the last step of the bobble stitch instructions.<br />
There are currently 107 patterns published by Cozy Up<br />
Knits on Ravelry. My favorite is the Katie Shawl design<br />
with its endless opportunities to use any color, texture,<br />
and style of yarn for a contemporary knit accessory. Personally,<br />
I found the Jamie Shawl boring to knit. As the<br />
shawl grew in stitches my enthusiasm waned and I mustered<br />
“motivational mute” to complete the knit in Worsted<br />
weight and start a version in DK wool.<br />
On my bucket list is the worsted weight, double-lined,<br />
colorwork Alberta Frost mitten that appeared on their<br />
very first podcast episode.<br />
I'm curious to know; which sister shawl appeals to you<br />
the most? Jamie's Shawl, Sarah's Shawl, Katie's Shawl,<br />
or Krissy's Shawl?<br />
Let's chat about it!<br />
Jo Bob – Commentator<br />
Knit Nite Podcast<br />
17
-BONUS-<br />
BEAR ARMS<br />
Mystery Square<br />
by Goosemom<br />
PATTERN DESCRIPTION<br />
Each issue of Blocked will contain a “secret”<br />
pattern. The design will only be revealed as you<br />
knit. The instructions might uncover an image, design,<br />
word, or message.<br />
When using cotton, these secret squares make<br />
excellent dishcloths. If you make 4 or 5 of each<br />
square in wool or acrylic, they can be seamed<br />
together at the end of the year to make a small<br />
Afghan or lap blanket.<br />
GAUGE & MATERIALS<br />
Each dishident uses approximately<br />
41 to 43g of worsted weight 100% cotton.<br />
Follow the yarn manufacturer’s<br />
recommended needle size.<br />
DIRECTIONS<br />
Cast on 45<br />
Row 1(RS): P45.<br />
Row 2(WS): K3, p39, k3.<br />
Row 3: P3, k39, p3.<br />
Row 4: K3, p11, k5, p23, k3.<br />
Row 5: P3, k12, p7, k3, p6, k11, p3.<br />
Row 6: K3, p11, k7, p2, k7, p12, k3.<br />
Row 7: P3, k12, p7, k2, p6, k12, p3.<br />
Row 8: K3, p13, k5, p2, k7, p12, k3.<br />
Row 9: P3, k<strong>14</strong>, p5, k2, p5, k13, p3.<br />
Row 10: K3, p13, k5, p2, k5, p<strong>14</strong>, k3.<br />
Row 11: P3, k<strong>14</strong>, p5, k2, p5, k13, p3.<br />
Row 12: K3, p13, k5, p2, k5, p<strong>14</strong>, k3.<br />
Row 13: P3, k<strong>14</strong>, p5, k2, p5, k13, p3.<br />
Row <strong>14</strong>: K3, p13, k5, p2, k5, p<strong>14</strong>, k3.<br />
Row 15: P3, k<strong>14</strong>, p5, k2, p5, k13, p3.<br />
Row 16: K3, p13, k5, p2, k5, p<strong>14</strong>, k3.<br />
Row 17: P3, k<strong>14</strong>, p5, k2, p5, k13, p3.<br />
Row 18: K3, p13, k5, p2, k5, p<strong>14</strong>, k3.<br />
Row 19: P3, k<strong>14</strong>, p5, k2, p5, k13, p3.<br />
18
Row 20: K3, p7, k1, p5, k5, p2, k5, p<strong>14</strong>, k3.<br />
Row 21: P3, k<strong>14</strong>, p5, k2, p5, k4, p1, k1, p1, k6, p3.<br />
Row 22: K3, p5, k1, p3, k1, p3, k5, p2, k5, p<strong>14</strong>, k3.<br />
Row 23: P3, k<strong>14</strong>, p12, k3, p1, k3, p1, k5, p3.<br />
Row 24: K3, p4, k1, p5, k1, p2, k12, p<strong>14</strong>, k3.<br />
Row 25: P3, k<strong>14</strong>, p12, k2, p1, k5, p1, k4, p3.<br />
Row 26: K3, p4, k1, p6, k1, p1, k12, p<strong>14</strong>, k3.<br />
Row 27: P3, k<strong>14</strong>, p12, k1, p1, k5, p1, k5, p3.<br />
Row 28: K3, p6, k1, p4, k<strong>14</strong>, p<strong>14</strong>, k3.<br />
Row 29: P3, k<strong>14</strong>, p13, k4, p1, k7, p3.<br />
Row 30: K3, p8, k1, p4, k11, p15, k3.<br />
Row 31: P3, k9, p6, k1, p4, k8, p2, k9, p3.<br />
Row 32: K3, p11, k1, p2, k5, p4, k8, p8, k3.<br />
Row 33: P3, k7, p10, k2, p10, k10, p3.<br />
Row 34: K3, p9, k11, p1, k11, p7, k3.<br />
Row 35: P3, k7, p12, k1, p11, k8, p3.<br />
Row 36: K3, p8, k9, p3, k4, p4, k4, p7, k3.<br />
Row 37: P3, k7, p4, k1, p7, k1, p2, k4, p5, k8, p3.<br />
Row 38: K3, p8, k5, p1, k5, p1, k3, p2, k2, p1, k4, p7, k3.<br />
Row 39: P3, k7, p4, k1, p1, k7, p5, k1, p5, k8, p3.<br />
Row 40: K3, p8, k17, p2, k5, p7, k3.<br />
Row 41: P3, k7, p4, k2, p18, k8, p3.<br />
Row 42: K3, p9, k18, p2, k2, p8, k3.<br />
Row 43: P3, k8, p1, k2, p18, k10, p3.<br />
Row 44: K3, p11, k18, p2, k1, p7, k3.<br />
Row 45: P3, k6, p1, k2, p1, k1, p16, k12, p3.<br />
Row 46: K3, p<strong>14</strong>, k13, p3, k1, p2, k1, p5, k3.<br />
Row 47: P3, k4, p1, k2, p1, k5, p11, k15, p3.<br />
Row 48: K3, p16, k9, p7, k1, p2, k1, p3, k3.<br />
Row 49: P3, k2, p1, k2, p1, k7, p11, k15, p3.<br />
Row 50: K3, p15, k11, p8, k1, p1, k1, p2, k3.<br />
Row 51: P3, k2, p2, k9, p11, k15, p3.<br />
Row 52: K3, p15, k11, p13, k3.<br />
Row 53: P3, k13, p11, k15, p3.<br />
Row 54: K3, p<strong>14</strong>, k12, p13, k3.<br />
Row 55: P3, k12, p<strong>14</strong>, k13, p3.<br />
Row 56: K3, p13, k<strong>14</strong>, p12, k3.<br />
Row 57: P3, k12, p<strong>14</strong>, k13, p3.<br />
Row 58: K3, p13, k4, p6, k4, p12, k3.<br />
Row 59: P3, k39, p3.<br />
Row 60: K3, p39, k3.<br />
Row 61: P3, k39, p3.<br />
Row 62: K3, p39, k3.<br />
Bind off all sts.<br />
Weave in ends and<br />
block as necessary.<br />
TIPS<br />
If preferred, slip the first OR the last stitch of every row to create a<br />
neater edge. When purling a stitch immediately after knitting a<br />
stitch, pull the excess yarn out of the purl stitch before knitting or<br />
purling on. This helps to reduce loose or baggy knit stitches.<br />
NOTES<br />
Occasionally, a dishident or secret square might not be<br />
suitable for children and “polite company”. This will be made<br />
clear when this is the case.<br />
If you would like to receive notifications of our next issue!<br />
Check out our Patreon!<br />
www.patreon.com/join/BlockedMagazine<br />
19
y Uknitted Kingdom<br />
BEAR SIZED<br />
AT THE<br />
BARE MINIMUM<br />
“Size-inclusivity” is again taking up space in the knit/crochet world.<br />
With 54.5K YouTube subscribers (as of April 2024), the most vocal proponents of size inclusivity have been<br />
Traci and Jodi of the Grocery Girls Knit channel.<br />
Both Traci and Jodi state they are plus-sized knitters and as they’re at the top end of many patterns they<br />
believe every size and every body should be catered for within the pattern sizing.<br />
In October 2023, the pair spoke at length about how annoyed they were with designers.<br />
Excerpts from Grocery Girls Knit Ep 192, 12 Oct 2023, 1:21:34 – 1:29:20<br />
https://www.youtube.com/live/Hmqw80JVfZY?si=oTYTnE5VvOUkXSK2&t=4894<br />
Jodi: “It’s 2023 and you can’t grade it to a 70? Shame on you! That’s what I say.”<br />
Traci: “60 should be the bare minimum!”<br />
Traci: “Everybody should be able to knit a sweater without having to modify it, your size should be there.”<br />
Traci: “ I’m not here…<br />
Jodi: “We are… we are…”<br />
Traci: “… to trash anybody, it’s the whole mindset that bothers me…”<br />
Jodi, “I’m here to trash. Sorry. It’s f**king annoying!”.<br />
Their anger crossed into 2024, and, in January, they publicly called out the designer PetiteKnit for releasing<br />
her “Cloud Sweater.” The pattern is available in the following sizes, XXS (XS) S (M) L (XL) 2XL (3XL) 4XL (5XL)<br />
which fit busts from 29½”-59”. However, the Grocery Girls were not content with this.<br />
The smaller sizes had 9¾” of positive ease written into the pattern, whereas the larger sizes had positive ease<br />
which reduced as the size increased. Neither considered for a moment that there might be a reason for this.<br />
Instead, they, whilst admitting to having no sweater design knowledge, condemned Petiteknits for not being<br />
size-inclusive.<br />
Excerpts from Grocery Girls Knit, Ep 196, 10 Jan 2024, 1:10:45 to 1:21:51<br />
https://www.youtube.com/live/cfyoWagXuNY?si=ozj2cxlJJLymx4nE&t=4240<br />
Jodi: “I don’t want a designer to decide for me if I’m knitting the larger size, that my ease should be smaller.”<br />
Jodi: “You guys, in 2024 we need to be better… It is important to us that we don’t show patterns, moving<br />
forward, that don’t include every size and every body… It makes me angry.”<br />
Designing for every size and every body is impossible. Must designers include instructions for modifying a<br />
pattern for amputees or those with physical deformities? How about the person so obese she is confined to a<br />
bed, over 45st (286kg, 630lbs), and needs XXXXXXXXXXXXXXXL sized clothing? (A real example from 2010).<br />
https://www.mirror.co.uk/news/weird-news/worlds-biggest-pants-unveiled---266636<br />
Continued on next page...<br />
20
Bear Sized... Continued...<br />
Human bodies do not grow fatter in a uniform manner. No two obese bodies are the same. A mathematician<br />
might be able to calculate how many million design options there would need to be for a simple sweater to fit<br />
every conceivable body currently living in the world, but knitwear designers cannot reasonably be expected to<br />
do that.<br />
In February 2024, Traci and Jodi hosted an Instagram live and invited Kim McBrien Evans of Indigodragonfly<br />
to discuss the grading of Petiteknit’s patterns.<br />
Kim has devoted many years to researching size and grading for knitting patterns and created a sizing chart<br />
which claims to be more representative of modern bodies and plus sizes, available from the digits & threads<br />
website at:<br />
https://www.digitsandthreads.ca/new-representative-sizing-standards-for-garments-that-fit/<br />
It was satisfying to watch their faces drop as Kim explained that PetiteKnit used a grading system known as<br />
“proportionate grading.” To maintain the silhouette of the worn sweater the positive ease gets incrementally<br />
smaller the larger the sweater gets. This is a design choice that shows<br />
skill and consideration on PetiteKnit’s part. Many designers use the<br />
“fixed grading” system, whereby the size is scaled up or down with no<br />
consideration for how the garment drapes or looks when worn by all<br />
sizes. Both approaches have their purpose.<br />
After being proved wrong in such a public fashion neither of the<br />
Grocery Girls have subsequently offered a public apology to Petite-<br />
Knit. Instead, they have chosen to gloss over their original intentions.<br />
To add insult to injury, Jodi’s own hat patterns are not size-inclusive.<br />
The ASTM standards state the head girth of a man goes up to 27¼“<br />
(69.2cm). However, none of Jodi’s hats accommodate anyone with a<br />
head girth larger than a size Large. By Jodi’s standards, her own hats<br />
fall short.<br />
Jodi, if you want to criticize designers then start with yourself.<br />
It’s 2024, so do better!<br />
In closing, here are some options if you find your size isn’t<br />
included in a knitting pattern:<br />
● Ask the designer politely if your size is available.<br />
Accept the response.<br />
● Commission someone to modify the pattern to your size.<br />
● Lose weight.<br />
● Take the time to learn how to grade patterns to your specific size,<br />
then knit any pattern you choose.<br />
The ASTM body measurement standards can be purchased here:<br />
https://www.astm.org/catalogsearch/result/?q=body+measurements<br />
21
Podcasts!<br />
https://www.youtube.com/@TwoSistersAndSomeYarn<br />
https://www.youtube.com/@knitnite/featured<br />
https://www.youtube.com/@politicallyincorrectknitters<br />
SUBSCRIBE TO OUR<br />
CHANNEL!<br />
https://youtube.com/@blockedmagazine2859?si=-0u_JNUgDq7SHVcE<br />
22
KNITTING ABBREVIATIONS<br />
BIL: Braided Increase Left. If you need more help, watch<br />
Anne’s video at:<br />
https://youtu.be/axfS2vShbQY?si=6RDciJoLrDkiQUKa<br />
Step 1- Knit to previously crossed (increased) stitch.<br />
Step 2- Insert working needle into stitch 2 to the right<br />
and 1 row down from front to back.<br />
Step 3- Loop working yarn over needle behind work<br />
(a crochet hook may make this step easier).<br />
Step 4- Pull yarn through work and slip new stitch onto<br />
right needle. Do not pull the new stitch too tightly<br />
or your work will bunch up. Continue with pattern<br />
as instructed.<br />
BIR: Braided Increase Right. If you need more help, watch<br />
Anne’s video at:<br />
https://youtu.be/axfS2vShbQY?si=6RDciJoLrDkiQUKa<br />
Step 1- Knit to 1 st before previously crossed (increased)<br />
stitch.<br />
Step 2- Insert working needle into stitch 2 to the left and<br />
1 row down from front to back.<br />
Step 3- Loop working yarn over needle behind work<br />
(a crochet hook may make this step easier).<br />
Step 4- Pull yarn through work and cross new stitch over<br />
the 2 sts still on left needle, then slip onto right needle.<br />
Do not pull the new stitch too tightly or your work will<br />
bunch up. Continue with pattern as instructed, knitting<br />
the crossed stitches as the next 2 stitches of the pattern.<br />
CC: Contrasting Color.<br />
K: Knit.<br />
K2tog: Knit 2 sts together.<br />
Kitchener Stitch: Put half of stitches on each needle with<br />
RSs facing out and needle points to the right. Thread a<br />
tapestry needle with yarn tail.<br />
Setup 1- Insert tapestry needle purlwise into 1st st on<br />
front needle and draw yarn through.<br />
Setup 2. Insert tapestry needle knitwise into 1st st on<br />
back needle and draw yarn through.<br />
Step 1- Insert tapestry needle into 1st st on front needle<br />
knitwise and draw yarn through.<br />
Drop st from needle.<br />
Step 2- Insert tapestry needle into the next stitch on front<br />
needle purlwise and draw yarn through.<br />
Leave st on needle.<br />
Step 3- Insert tapestry needle into 1st st on back needle<br />
purlwise and draw yarn through. Drop st from needle.<br />
Step 4- Insert tapestry needle into next st on back needle<br />
knitwise and draw yarn through. Leave st on needle.<br />
Rep Steps 1-4 until all sts are worked.<br />
LH: Left Hand.<br />
M1: Make 1.<br />
MB: Make Bobble (Mini-Bobble).<br />
Step 1: KFBF (knit front, back, front) into the next stitch.<br />
Step 2: Individually pass second and first sts on right<br />
needle over third st.<br />
Step 3: Bring working yarn to front and slip st back to<br />
left needle.<br />
BRAIDED<br />
INCREASE<br />
LEFT<br />
BRAIDED<br />
INCREASE<br />
RIGHT<br />
Step 4: Bring working yarn under bobble and return to<br />
the back.<br />
Step 5: Return st to right needle and continue with pattern.<br />
MC: Main Color.<br />
M1R: Right-leaning make 1.<br />
P: Purl.<br />
PM: Place Marker.<br />
PU: Pick Up.<br />
Rep: Repeat.<br />
RH: Right Hand.<br />
RS: Right Side.<br />
Sl: Slip stitch, always slip sts purlwise unless otherwise<br />
indicated.<br />
Sk2p: Slip, knit, pass - Slip 1 st knitwise, k2 stitches and<br />
pass the first stitch over the other two stitches.<br />
Ssk: Slip, slip, knit – Slip 1st st knitwise, slip 2nd st knitwise,<br />
knit both together tbl.<br />
St(s): Stitch(es).<br />
Tbl: Through back loop.<br />
WS: Wrong Side.<br />
23
MEMENTO<br />
MORI<br />
SHOOTER’S<br />
MITTS<br />
by Anne Pinkava<br />
YARN<br />
• MC Skeinz Vintage DK 8ply (100% Wool 50gm/1.76oz,<br />
101m/110.45y) Charcoal (Example used approx. 170 y/81g)<br />
• CC Chicken Lady Fiber Arts DK Sock (75% Superwash<br />
Merino, 25% Nylon 100g/3.5oz, 245yd/224) Chickadee<br />
(Example used approx. 30y/12g)<br />
NOTIONS<br />
• US size 3 (3.25mm)<br />
• 2 stitch markers<br />
• Tapestry needle.<br />
GAUGE<br />
• Stockinette in the round 28 st x 36 rnds = 4” x 4”<br />
• Stranded knitting in the round 32 st x 36 rnds = 4” x4”<br />
SIZE<br />
• Women’s large: 8½” around at the palm, 8” from the top of mitt to cuff.<br />
Note: For help with the Braided Increase stitch, see the abbreviations page or watch Anne’s video at<br />
https://youtu.be/axfS2vShbQY?si=4QTa-Jzi1pikM5kZ<br />
PATTERN<br />
Cuff:<br />
With MC, CO 64 sts and join in the round.<br />
Work K1P1 ribbing for 20 rounds.<br />
Knit 2 rounds.<br />
Start Right Chart. On Round 8, PM at the end of the round and after the M1.<br />
This will mark the thumb stitches that will go onto a holder once they are all completed.<br />
On Round 29, put thumb stitches on holder, and cast on 1 st before joining again in the round.<br />
Cut CC, leaving a tail, and knit 3 rounds.<br />
Forefinger:<br />
Set up: K9 and put 48 sts on a st holder. M2 st and join in the round, then knit the remaining 9 sts on the back<br />
side. (20 sts total)<br />
Rounds 1-20: Knit.<br />
Round 21: K2, k2tog, k2, k2tog, k4, k2tog, k2, k2tog, k2. (16 sts rem)<br />
Rounds 22-23: Knit.<br />
Round 24: K1, k2tog 7X, k1. (9 sts rem)<br />
24
Memento Mori Mitts Continued...<br />
Round 25: Knit.<br />
Round 26: K2tog 4X, k1. (5 sts rem)<br />
Round 27: K2tog 2X, k1. (3 sts rem)<br />
Cut yarn and use tapestry needle to thread tail through<br />
remaining 3 sts. Pull tight.<br />
Hand:<br />
Set Up: Starting at marker for hand, PU 1 st, knit 48 sts,<br />
PU 1 st. (50 st total)<br />
Round 1: K22, k2tog, k2, k2tog, k22. (48 sts)<br />
Rounds 2-3: Knit<br />
Round 4: K1, k2tog, k18, k2tog, k2, k2tog, k18, k2tog, k1.<br />
(44 sts)<br />
Rounds 5-6: Knit<br />
Round 7: K19, k2tog, k2, k2tog, k19. (42 sts)<br />
Rounds 8-9: Knit<br />
Round 10: K1, k2tog, k15, k2tog, k2, k2tog, k15, k2tog,<br />
k1. (38 sts)<br />
Rounds 11-12: Knit<br />
Round 13: K16, k2tog, k2, k2tog, k16. (36 sts)<br />
Round <strong>14</strong>-15: Knit<br />
Round 16: K1, k2tog, k12, k2tog, k2, k2tog, k12, k2tog,<br />
k1. (32 sts)<br />
Round 17: Knit<br />
Round 18: K13, k2tog, k2, k2tog, k13 (30 sts)<br />
Round 19: Knit<br />
Round 20: K12, k2tog, k2, k2tog, k12. (28 sts)<br />
Round 21: Knit<br />
Round 22: K11, k2tog, k2, k2tog, k11. (26 sts)<br />
Round 23: Knit<br />
Round 24: K10, k2tog, k2, k2tog, k10. (24 sts)<br />
Round 25: Knit<br />
Round 26: K9, k2tog, k2, k2tog, k9. (22 sts)<br />
Round 27: Knit<br />
Round 28: K8, k2tog, k2, k2tog, k8. (20 sts)<br />
Cut yarn leaving approx. <strong>14</strong>” tail. Close opening using<br />
Kitchener stitch.<br />
Thumb:<br />
Round 1: PU 1 from edge, k20 from holder, PU 1. (22 sts)<br />
Rounds 2-3: Knit<br />
Round 4: K1, k2tog, k16, k2tog, k1. (20 sts)<br />
Rounds 5-6: Knit<br />
Round 7: K1, k2tog, k<strong>14</strong>, k2tog, k1. (18 sts)<br />
Rounds 8-9: Knit<br />
Round 10: K1, k2tog, k12, k2tog, k1. (16 sts)<br />
Rounds 11-12: Knit<br />
Round 13: K1, k2tog, k10, k2tog, k1. (<strong>14</strong> sts)<br />
Rounds <strong>14</strong>-15: Knit<br />
Round 16: K1, k2tog, k1, k2tog, k2, k2tog, k1, k2tog, k1.<br />
(10 sts)<br />
Rounds 17-18: Knit<br />
Round 19: K2tog, k1, k2tog, k2tog, k1, k2tog. (6 sts)<br />
Close opening using Kitchener stitch.<br />
Weave in all ends and block as needed.<br />
Repeat for left hand using Left Chart.<br />
Alternate instructions for individual fingers:<br />
Middle finger:<br />
PU 1 st from first finger, k9 off the front st holder, CO 2<br />
sts, k9 off back st holder, PU 1. (22 sts)<br />
Round 1: K2tog, k9, k2tog, k9. (20 sts)<br />
Rounds 2-24: Knit.<br />
Round 25: K2, k2tog, k2, k2tog, k4, k2tog, k2, k2tog, k2.<br />
(16 sts)<br />
Round 26: Knit.<br />
Round 27: K1, k2tog 7X, k1. (9 sts)<br />
Round 28: Knit.<br />
Round 29: K2tog 4X, k1. (5 sts)<br />
Round 30: K2tog 2X, k1. (3 sts)<br />
Cut yarn and use tapestry needle to thread tail through<br />
remaining 3 sts. Pull tight.<br />
Ring finger:<br />
PU 1 from middle finger, k8 from front holder, CO 2, k8<br />
from back holder, PU 1. (20 sts)<br />
Rounds 1-21: Knit.<br />
Round 22: K2, k2tog, k2, k2tog, k4, k2tog, k2, k2tog, k2.<br />
(16 sts)<br />
Round 23: Knit.<br />
Round 24: K1, k2tog 7X, K1. (9 sts)<br />
Round 25: Knit.<br />
Round 26: K2tog 4X, k1. (5 sts)<br />
Round 27: K2tog 2X, k1. (3 sts)<br />
Cut yarn and use tapestry needle to thread tail through<br />
remaining 3 sts. Pull tight.<br />
Pinky finger:<br />
PU 1 from fore finger, k<strong>14</strong> from holder, PU 1. (16 st)<br />
Rounds 1-15: Knit.<br />
Round 16: K1, k2tog 7X, k1. (9 sts)<br />
Rounds 17-18: Knit.<br />
Round 19: K2tog, k5, k2tog. (7 sts)<br />
Round 20: Knit.<br />
Round 21: K2tog 3X, k1. (4 sts)<br />
Cut yarn and use tapestry needle to thread tail through<br />
remaining 4 sts. Pull tight.<br />
Weave in all ends and block as desired.<br />
25
Momento Mori Left<br />
Momento Mori Right<br />
26
Book Review<br />
by Katie Gerwien, khgknits<br />
Sweater Knitting Method Review<br />
Ziggurats: 16 Elegantly Seamless Knits: Sweaters, Cardigans, Tutorials<br />
Neil suggested I review Ziggurats: 16 Elegantly<br />
Seamless Knits, written by Åsa Tricosa (whose real<br />
name is Åsa Söderman) for Blocked Magazine. I remember<br />
watching the Fruity Knitting podcast interview<br />
of the author and being impressed by the<br />
designs in the book. The sweater designs are classic<br />
and have beautiful finishing options. I was also looking<br />
for my next winter sweater to knit, thus here is the solution:<br />
knit a sweater from the book to assist in writing<br />
this review and add a winter sweater to my wardrobe<br />
at the same time.<br />
What is the Ziggurat Method? It is a method developed<br />
by Söderman with shaped necklines to curve<br />
with our backs, set in sleeves, and integrated buttons<br />
and pockets.<br />
The book was published in 2018 by Söderman,<br />
whose website (https://www.asatricosa.com/zigguratbook/)<br />
lists several locations for purchasing the book.<br />
When you purchase a physical copy of the book, an e-<br />
book version is included, or you can purchase the e-<br />
book separately. As of 11 March 2024, Söderman’s<br />
website says the book costs £35 British and the linked<br />
US seller lists it for $49.99, but it is currently out of<br />
stock. Several paperback copies were available as of<br />
11 March 2024 on Amazon, ranging from $150.00 to<br />
$2<strong>14</strong>.09, but all were gone by the publishing of this review.<br />
The book has a brief introduction to the concept,<br />
16 sweater patterns for women, tutorials, a resources<br />
guide, and an abbreviations list. The patterns include<br />
tunic, cardigan and pullover sweaters using lace<br />
weight, fingering, sport, dk and Aran yarn, with various<br />
neck finishes. Every pattern, along with beautiful photos,<br />
has a written description with suggestions for customization.<br />
The sizes range from 81cm/32” to<br />
127cm/50”, however, the size ranges are for the<br />
shoulder circumference and not the traditionally used<br />
bust circumference. I like the detailed schematics in<br />
each pattern as they provide extensive measurements<br />
to assist the knitter in making decisions regarding<br />
sleeve and body length and any other adjustments<br />
needed for a good fit. For more information regarding<br />
sizing, page 220 addresses sizing using the shoulder<br />
width measurement, gauge, and adjusting for bust<br />
sizes. Within each pattern, smaller boxes are included<br />
to give additional stitch instructions specific to certain<br />
sections of the sweater construction. Knitters are told<br />
when to use the tutorials for executing required steps<br />
and instructions for the tutorials include photos. At the<br />
end of each pattern, there is a colored chart depicting<br />
when sleeve, body and neck increases occur, as well<br />
as buttonhole placement and underarm cast on. The<br />
key to success with the Ziggurat method its completing<br />
Steps 1 - 5. The steps are explained, with photographs,<br />
on pages 212 -216. Whether you use a<br />
hardback copy or a digital copy, you will need bookmarks<br />
to reference the tutorials at the end of the book<br />
to complete a project. I have been zigging back and<br />
forth between the pattern instructions and the tutorials<br />
at the end of the book at every step of the sweater I<br />
am knitting.<br />
What are the pros of this process? All the pros of<br />
top-down sweater knitting apply:<br />
1. You can try the sweater on as you progress to<br />
make sure you have the right fit. For example, I made<br />
an adjustment to the back of my sweater as I needed<br />
to include 2 back darts.<br />
2. No seaming is required.<br />
3. Some of the finishing techniques are attractive.<br />
4. The tutorials for casting on, short rows, increasing,<br />
and decreasing are good. They explain the process<br />
and provide good photo illustrations of the<br />
processes.<br />
Neckline after blocking.<br />
27
Book Review Continued...<br />
5. The sweater designs are classic, and the book<br />
provides excellent suggestions for customizing the<br />
patterns.<br />
6. The advice on fitting is explained well. The schematics<br />
are thorough and helpful for achieving a wellfitting<br />
sweater.<br />
What are the cons of this process? All the cons of a<br />
top-down sweater knitting apply, and this is a bear of a<br />
process for knitting a sweater!<br />
1. Steps 1 – 5 for the neckline cast on through the<br />
sleeve cap set-up are a bear to knit. There was nothing<br />
intuitive about the sleeve cap steps for me. I had to<br />
knit the process twice as I did not understand it the<br />
first time. The tutorial was not clear to me. I searched<br />
for an online tutorial for the process and could not<br />
find one, except a pay for class with Knit Stars.<br />
2. I found the color-coded charts too complicated<br />
and did not realize how soon I needed to start using it.<br />
3. Top-down sweaters are heavy to knit once you<br />
are knitting the body and each row is a long process.<br />
The weight of the sweater when using this method increased<br />
the wrist pain I experience.<br />
4. The sleeves are frustrating to knit as you must<br />
turn the entire body of the sweater around for each<br />
row of each sleeve. You also cannot knit the sleeves<br />
two at a time as you can when knitting sleeves flat.<br />
5. While some of the finishing processes are attractive,<br />
they are no more attractive than the results I have<br />
achieved using traditional<br />
finishing<br />
processes for other<br />
sweaters.<br />
While I love the<br />
look of the patterns<br />
included in this<br />
book, which are<br />
classic in design, I<br />
believe this review is<br />
appropriate for the<br />
Bear Arms issue as it<br />
has been a bear to<br />
knit this sweater…<br />
and I still have not<br />
finished the sweater<br />
I started at least 2<br />
months ago! I have<br />
been knitting<br />
sweaters since I was 20 years old. I never struggled<br />
with the patterns. I followed the directions, occasionally<br />
making a sizing tweak or using a different, preferred-by-me<br />
method for casting on, increasing,<br />
decreasing and the like, and ended up with a wearable<br />
sweater at the end of the process. With the Ziggurat<br />
sweater, not only did I have to frog and reknit<br />
the sleeve caps, but I also had to reknit the underarm<br />
gussets. At this point, I am knitting the body and the<br />
sleeves of the sweater; thus, I know I will end up with a<br />
sweater at the end. I finished one sleeve, only to have<br />
to rip the finishing at the end of the sleeve and reknit<br />
as the sleeve is far too long. Also, the stitch design at<br />
the end of the sleeve is no longer attractive when I knit<br />
the lined hem for the sleeve. I wish the instructions<br />
were clearer and/or free tutorials were available for<br />
clarification of the initial steps. For example, when I<br />
was knitting the lined hem for the bottom of the<br />
sweater and the sleeve, the written directions said to<br />
pick up stitches going counterclockwise, yet the diagram<br />
for the process picked up the stitches going<br />
clockwise. Which way are we supposed to go, clockwise<br />
or counterclockwise?<br />
I selected the Chatoyant pattern, a DK-weight<br />
sweater with a stitch pattern on the sides and sleeves<br />
to create faux seams. The same stitch pattern starts<br />
about a third of the way from the bottom of the<br />
sweater on the front and back to give vertical lines.<br />
The sweater includes an underarm gusset, a decorative<br />
stitch pattern at the base of the sleeves, and<br />
lined hems for the body and sleeves of the pattern. I<br />
like the faux seams for the sides of the sweater and the<br />
Sleeve lined hem with decorative<br />
stitch pattern.<br />
28<br />
Underarm gusset.
Book Review Continued...<br />
bottom third of the sweater. They were easy to execute<br />
and give vertical lines where I need them. The<br />
underarm gusset was not fun to knit (had to redo it!),<br />
because it is under the arm, you don’t see it, and it<br />
does not aid the fit of the sweater. The decorative<br />
stitch for the bottom of the sleeve was not hard to execute<br />
until I knit the lined hem. Once I worked the<br />
lined hem for the sleeve bottom, the last few rows of<br />
the decorative stitch pattern were not easy to knit, and<br />
I am not happy with the appearance of the decorative<br />
stitch pattern for the lined hem portion of the sleeve. I<br />
have to rip out the sleeve hem again to shorten the<br />
sleeve as the sleeve is too long after knitting it a second<br />
time! When I reknit the bottom of the sleeve, I will<br />
not add the decorative stitch pattern as I do not think I<br />
will achieve a better result with the lined hem again.<br />
Once nice thing about the lined hems is they were<br />
super easy to block. Normally when I block a sweater,<br />
I spend a lot of time running the blocking wires<br />
through the ribbing at the base of the sweater body<br />
and sleeve bottoms. The blocking wires went right<br />
through the lined hem quickly and evenly, reducing<br />
the amount of time I spent setting the sweater for<br />
blocking. The neckline is attractive, but it is very similar<br />
to the results I have achieved using simpler processes.<br />
Several years ago, I knitted Sun Rose, a top down,<br />
seamless, set in sleeve pattern designed by Laura<br />
Aylor. I had no questions following the instructions<br />
and completing the project, other than my overall objections<br />
to sweaters knit in the round. I reviewed the<br />
pattern again and found Laura Aylor used a simplified<br />
variation of the seamless, set in sleeve process from<br />
Barbara Walker’s 2016 book, Knitting from the Top. I<br />
Inside view of lined hem/bottom of body of sweater.<br />
would knit Sun Rose again without question. I doubt I<br />
will knit another Ziggurat sweater. I did a quick search<br />
on Ravelry and found 392 top-down, seamless, set-in<br />
sleeve sweater patterns listed for adults. I did not review<br />
the patterns, yet this search and my experience<br />
knitting Aylor's Sun Rose tells me you can accomplish<br />
the same goal of knitting a top down, seamless<br />
sweater with set-in sleeves without using the Ziggurat<br />
process. I have not read Walker’s Knitting from the Top<br />
and did not have time to review it for this article. You<br />
may want to take a look at her book if you are interested<br />
in this method.<br />
If you like the Ziggurats patterns (and there are<br />
more designs on Söderman’s website) you can give<br />
this method a go… as long as you are not in a rush to<br />
finish the sweater. If you experience any problems understanding<br />
the processes, the only resource I found<br />
for assistance is to pay for the Knit Stars course. If you<br />
like knitting from the top down, as well as having a<br />
set-in sleeve, this book provides 16 options for you. If<br />
you don’t mind seaming sweaters, I don’t know that I<br />
would put you through this bear of a process to complete<br />
a sweater that will have the same attractive finishes<br />
you can achieve with seaming knitted pieces<br />
together. Regardless of what pattern you choose, I<br />
wish you happiness with your knitting!<br />
Bottom 1/3 of sweater with decorative<br />
stitch pattern columns and lined hem.<br />
29
Bear Arms<br />
CROSSWORD<br />
DOWN:<br />
1. To carry or possess firearms.<br />
2. A handgun or pistol with a multi-chambered<br />
cylinder (usually holding six to eight rounds) that<br />
rotates with each pull of the trigger.<br />
3. Term for helical grooves machined into the<br />
internal surface of a firearm’s barrel for imparting<br />
a spin to a projectile to improve its aerodynamic<br />
stability and accuracy.<br />
5. Often referred to as a gun’s “kick,” or the<br />
backward force the gun exerts when it’s fired.<br />
7. Upper limbs of the human body which<br />
are naked or unclothed.<br />
10. Designers of the .41 Magazine Pistol, the<br />
first repeating American firearm capable of<br />
successfully using a fully self-contained cartridge.<br />
<strong>14</strong>. The part of the US Constitution which reads<br />
"A well-regulated Militia, being necessary to the<br />
security of a free State, the right of the people to<br />
keep and bear Arms, shall not be infringed."<br />
17. LGBT slang term used by homosexual men<br />
to describe hyper masculine men who have hairy<br />
bodies and facial hair, or who are heavy set.<br />
19. What the AR in AR15 stands for.<br />
23. The smallest species of bear.<br />
24. NFL team based in Chicago, IL.<br />
25. The largest species of bear.<br />
ACROSS:<br />
4. The popular Australian “bear” that is not really a bear.<br />
6. The upper limb of the human body, especially the part<br />
extending from the shoulder to the wrist.<br />
8. Country most associated with the symbol of a bear.<br />
9. Arguably the most successful firearms designer of the<br />
19th and 20th centuries whose most successful design<br />
was the M1911.<br />
11. The large muscle that lies on the front of the upper<br />
arm between the shoulder and the elbow.<br />
12. The science and study of cartridge discharge, and the<br />
launch, flight, behavior, and effects of projectiles.<br />
13. The long bone in the arm that runs from the shoulder<br />
to the elbow that has a funny name.<br />
15. The state of bearing firearms or carrying weapons.<br />
16. A political rather than technical term, referring to<br />
firearms that changes depending on who is using it.<br />
18. Ammunition that contains medium or large-sized pellets<br />
that fire out of a shotgun shell all at once.<br />
19. A package of components that includes gunpowder, a<br />
primer, and a projectile encased in a casing.<br />
20. “Abe Lincoln may have freed all men, but ___ ____<br />
made them equal.”<br />
21. Ursus arctos horribilis<br />
22. U.S. President whose refusal to shoot a black bear cub<br />
on a hunting trip led to the popularization of the “Teddy<br />
bear<br />
26. A container that holds cartridges or rounds under<br />
spring pressure to be fed into a gun’s chamber.<br />
27. The third-largest constellation containing the Big<br />
Dipper,<br />
28. The diameter of a gun’s bore (the inner diameter of<br />
the barrel) measured as fractions of an inch or millimeters.<br />
It also determines the size of ammunition that can<br />
be fired by the gun.<br />
29. A slang term for a suppressor.<br />
30
31
By Neil James<br />
“BEARING<br />
GUNS” AND<br />
“PAWS UP!”<br />
CROSS STITCH<br />
DESIGN SIZE<br />
“Bearing Guns” 59 stitches wide x 34 stitches high (approx. 4.2” x 2.4”)<br />
“Paws Up!” 43 stitches wide x 36 stitches high (approx. 3.1” x 2.6”)<br />
MATERIALS<br />
<strong>14</strong> Count Cross Stitch Fabric / Aida 75 x 75 stitches (approx. 5.4” x 5.4”)<br />
Cross Stitch needle<br />
Embroidery Hoop (optional)<br />
Scissors<br />
NOTES<br />
The stitches used throughout both pieces are typical full cross stitches.<br />
EXCEPT for four x ¼ stitches on the “Bearing Guns” piece and eight x ¼<br />
stitches on the “Paws Up!” piece. These are used for the eye(s) of each bear.<br />
Fig. 1 - Shows a typical full stitch on the left and four ¼ stitches on the right<br />
(not actual colors in this pattern).<br />
“Bearing Guns” Notes<br />
Fig. 2 - Shows the ¼ stitches used to make the eye look to the right.<br />
Fig. 3 - Shows the ¼ stitches used to make the eye look to the left.<br />
For the eyebrow use 2 strands of black and back stich between the top left<br />
square across to the bottom right of the next square.<br />
Fig. 4 - For the mouth use 2 strands of black and back stitch in the square to<br />
the left of the lowest nose block and stitch top left to bottom right. Then back<br />
stitch bottom left to top right of the square to the right of the lowest nose<br />
block.<br />
“Paws Up!” Notes<br />
Fig. 5 - As per Fig. 2 Use the ¼ stitches to make the eyes look to the left or to<br />
the right.<br />
Fig. 6 - As above<br />
Fig. 7 - For the mouth use 2 strands of black and back stitch in the square to<br />
the bottom left of the lowest nose block and stitch bottom left to top right.<br />
Then back stitch top left to bottom right of the square to the bottom right of<br />
the lowest nose block.<br />
Fig. 1 Fig. 2<br />
Fig. 3 Fig. 4<br />
Fig. 5 Fig. 6<br />
Fig. 7<br />
32
Bearing Guns Continued...<br />
33
Bearing Guns Continued...<br />
Continued on next page...<br />
34
Bearing Guns Continued...<br />
35
36<br />
Bearing Guns Continued...
y mockingbirdsrealm<br />
BARE ARMS<br />
37
By Neil James<br />
<strong>BLOCKED</strong><br />
LOGO<br />
38
By Neil James<br />
39
“Colorwork Knitting Charts”<br />
Each issue we’ll have original colorwork chart repeats which can<br />
be used in your projects. Ensure your project has a stitch count<br />
divisible by the number of columns in the chart. Repeat the chart<br />
as many times as required. Or, Use these charts to create your<br />
own Cross Stitch Projects!
UPCOMING ISSUES<br />
Anne Pinkava<br />
Knitting Patterns<br />
www.lovecrafts.com/en-us/user/maker/fdba7e1e-93b6-4b6f-9f82-06ef18d0ec8c<br />
Knitting Patterns<br />
https://www.ravelry.com/designers/liz-clothier<br />
Knitting Patterns<br />
https://galilee-life.com/vendor/deplorable-knitter/<br />
AND CHECK OUT THESE PATTERN CONTRIBUTORS!
NEEDS YOU!<br />
© 2022 Conley Olson, @NantucketStudios<br />
WE’RE LOOKING FOR:<br />
• Test Knitters/Crocheters<br />
• Podcasters/Vloggers<br />
• Designers<br />
• Writers<br />
• Artists<br />
If you are interested in<br />
being a contributor<br />
email: blockedmagazine@gmx.com<br />
Patron Checkout | Patreon<br />
www.patreon.com/join/BlockedMagazine<br />
Although Blocked is free to read, it isn’t free to produce. Without the generosity of patrons,<br />
Blocked would not be possible. There are overheads that need to be met including subscriptions for software,<br />
the magazine online platform, a future website, and time.<br />
If you have enjoyed this issue, please consider becoming a patron.<br />
Patrons receive the magazine a week before general release, see exclusive content,<br />
get to vote on future content, and may receive exclusive offers.<br />
More details available on the Patreon site linked above.
Acknowledgments<br />
<strong>BLOCKED</strong> has been made<br />
possible by the generosity and<br />
goodwill of far too many people to<br />
name individually.<br />
Thank you to all the designers,<br />
writers, photographers, artists,<br />
patrons, advertisers and, of<br />
course you the reader.