FM 21-16 UXO Procedures
FM 21-16 UXO Procedures
FM 21-16 UXO Procedures

You also want an ePaper? Increase the reach of your titles
YUMPU automatically turns print PDFs into web optimized ePapers that Google loves.
PREFACE<br />
PURPOSE<br />
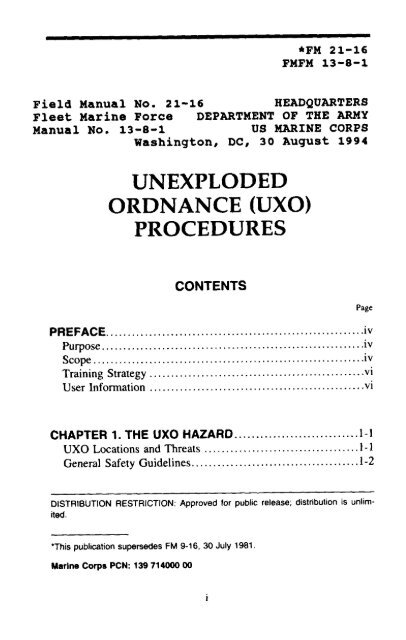
Field Manual (<strong>FM</strong>) <strong>21</strong>-<strong>16</strong>/Fleet Marine Force Manual (<strong>FM</strong><strong>FM</strong>)<br />
13-8-1 prescribes the doctrine for dealing with the unexploded ordnance<br />
(<strong>UXO</strong>) hazards on the battlefield. Use the information in this<br />
manual to teach military personnel, Department of Defense (DOD)<br />
civilians, and contractors about the <strong>UXO</strong> hazards they could meet<br />
and the procedures they can use to protect themselves. This manual<br />
also gives guidance on how to get help to take care of the<br />
hazards that affect mission capabilities.<br />
When personnel find <strong>UXO</strong>, they must follow these steps:<br />
Ž Recognize the <strong>UXO</strong> hazard.<br />
Ž Take immediate action (mark and evacuate).<br />
Ž Report the <strong>UXO</strong> hazard.<br />
Ž Use protective measures against the <strong>UXO</strong> hazard, if required.<br />
Based on these steps, <strong>FM</strong> <strong>21</strong>- <strong>16</strong>/<strong>FM</strong><strong>FM</strong> 13-8-1 serves as a general<br />
guideline for including <strong>UXO</strong> hazard procedures in unit<br />
standing operating procedures (SOPs). This manual provides information<br />
for transmitting and monitoring <strong>UXO</strong> reports throughout<br />
any battlefield functional area (BFA).<br />
SCOPE<br />
<strong>UXO</strong> on the battlefield affects the mobility and mission aspects<br />
of all units. Battlefields are littered with <strong>UXO</strong> hazards from two<br />
sources: ordnance that has either failed to function or ordnance<br />
designed to be used for area denial, such as conventional land<br />
mines and the family of scatterable mines (FASCAM). With the<br />
sophistication of modem weapons systems, battlefield commanders<br />
can target anything within their theater of operations. After these<br />
attacks are completed, <strong>UXO</strong> hazards will probably be left on the<br />
battlefield.<br />
iv
<strong>UXO</strong> hazards may not always pose an immediate threat to unit<br />
mission or mobility, but they are hazards that have in the past<br />
caused needless loss of life and materiel. Battlefield commanders<br />
need to know where <strong>UXO</strong> hazards are, as these hazards can affect<br />
the mobility of follow-on elements. This manual teaches personnel<br />
about the <strong>UXO</strong> hazard and how this hazard affects mission capabilities<br />
and what procedures are used to report and protect<br />
personnel and equipment. All units should be able to react to the<br />
<strong>UXO</strong> hazard effectively and to report and protect against it.<br />
During mission planning, leaders must coordinate with supporting<br />
artillery and supporting air liaison personnel to find out what<br />
areas are expected to contain large numbers of <strong>UXO</strong>. These areas<br />
should be avoided if possible. This type of planning makes a unit<br />
more mission capable.<br />
There are two types of <strong>UXO</strong> threats on the battlefield: passive<br />
(<strong>UXO</strong> that is found during unit movement) and active (<strong>UXO</strong> that<br />
results from an attack). All units must be able to react to both of<br />
these types of threats in order to survive on the modem battlefield.<br />
Chapter 5 of this manual covers procedures for reacting to these<br />
threats. Additional information may also be found in <strong>FM</strong> 20-32,<br />
Chapter 11.<br />
All military personnel and certain DOD civilians and contractors<br />
risk injury or death from <strong>UXO</strong>. Therefore, all of these personnel<br />
need to understand how to identify, report, mark and, if necessary,<br />
apply protective measures against <strong>UXO</strong>. This manual was designed<br />
to be used by all of these personnel. All users of this manual are<br />
referred to as personnel in the text.<br />
This manual implements the following international standardization<br />
agreements (STANAGs):<br />
Ž STANAG 2002 (Edition 7). Marking of Contaminated or Dangerous<br />
Land Areas, Complete Equipment, Supplies, and<br />
Stores. See Chapter 3.<br />
Ž STANAG <strong>21</strong>43 (Edition 4). Explosive Ordnance<br />
Reconnaissance/Explosive Ordnance Disposal (EOR/EOD).<br />
v
TRAINING STRATEGY<br />
For training to be effective, users of this manual must adopt the<br />
procedures outlined into their combat training and unit SOPs. <strong>UXO</strong><br />
training can be conducted concurrently with all common and collective<br />
training. It can be incorporated into training in the same<br />
way as nuclear, biological, chemical (NBC) training. Using the<br />
full-scale training aid package listed below, training can be conducted<br />
during land navigation, road marches, defensive/offensive<br />
operations, or force-on-force training. Preparation time is minimal;<br />
just place the training items where personnel will encounter them<br />
during normal training operations.<br />
Evaluation of the training will depend on current mission and<br />
unit SOPs. The three most important points for the trainee to<br />
remember are the following:<br />
Ž If possible, avoid the item and continue the mission.<br />
Ž If avoidance is not possible, take protective measures<br />
to reduce the hazard to personnel and equipment.<br />
Ž And, regardless of the action you take, report the hazard<br />
through command channels.<br />
USER INFORMATION<br />
The following training items are available at your local training<br />
aids support center (TASC) for you to use in your unit’s <strong>UXO</strong><br />
training program:<br />
Ž Graphic Training Aid (GTA) 9-12-1, Unexploded Ordnance<br />
(<strong>UXO</strong>) <strong>Procedures</strong>.<br />
Ž DVC-T 5-47, Full-scale <strong>UXO</strong> training-aid package.<br />
Ž Safety Video 709919, “Danger <strong>UXO</strong>."<br />
Ž Instructional Video 710288, “The <strong>UXO</strong> Hazard.”<br />
This manual is the reference for the following soldier training<br />
publication (STP) common tasks:<br />
Ž STP <strong>21</strong>-1 -SMCT (new edition to be published in FY 94),<br />
Identify <strong>UXO</strong> Hazards, task number 093-403-5000.<br />
vi
Ž STP <strong>21</strong>-24-SMCT:<br />
-Recognize Military Ordnance by Type, task number 093-403-<br />
5010.<br />
-Take Immediate Action Based on Confirmation of an Explosive<br />
Hazard, task number 093-403-5020.<br />
-Report Explosive Hazard, task number 093-403-5030.<br />
Any reference made in this manual to the former Soviet Union,<br />
or to Soviet-style ordnance, refers to the type of ordnance that was<br />
produced and distributed by the Soviet-block countries. This type<br />
of ordnance is still found stockpiled and is being sold throughout<br />
the world. United States (US) forces will find this type of ordnance<br />
on future battlefields.<br />
While personnel are not expected to determine ordnance fillers,<br />
the color codes on the ordnance (Soviet-style and US) help to identify<br />
the types of <strong>UXO</strong>s. See Appendix A.<br />
The proponent of this publication is Headquarters, United States<br />
Army Training and Doctrine Command (HQ TRADOC). Send<br />
comments and recommendations on DA Form 2028 to Commandant,<br />
United States Army Ordnance Missile and Munitions Center<br />
and School, Attention: ATSK-CCD, Redstone Arsenal, Alabama<br />
35897-6500.<br />
vii
C H A P T E R 1<br />
THE <strong>UXO</strong> HAZARD<br />
There were <strong>21</strong> US Army personnel killed and 53 injured during<br />
Operation Desert Storm as a direct result of handling <strong>UXO</strong>.<br />
Every person on the battlefield must be able to recognize and<br />
react to these hazards. Likewise, every leader must ensure that all<br />
personnel know how to recognize and react to these hazards.<br />
<strong>UXO</strong> LOCATIONS AND THREATS<br />
<strong>UXO</strong>s are hazards–whether on the battlefield or in designated<br />
impact areas. <strong>UXO</strong> includes ordnance items that have been fired,<br />
projected, dropped, or placed in such a way that they could become<br />
armed and go off. Whether in an area by design or accident, these<br />
items have not yet functioned. Whatever the reason, <strong>UXO</strong> poses<br />
the risk of injury or death to all personnel.<br />
The EOD mission is to eliminate or reduce the threat of <strong>UXO</strong><br />
hazards. The engineer mission is to clear minefield and wide areas<br />
of area-denial submunitions. However, these two groups individually<br />
or together will be unable to react immediately to an enemy<br />
submunitions or scatterable-mine attack on a position. Any unit<br />
that cannot extract itself from these attacks risks being fixed in<br />
place and destroyed by follow-on enemy fire.<br />
In wartime there are two types of <strong>UXO</strong> threats, passive and<br />
active. The passive threat refers to any ordnance found by personnel<br />
as they move across the battlefield. The active threat refers to<br />
any ordnance that remains in the area after a direct attack on a<br />
position. All units must be able to react to both types of <strong>UXO</strong><br />
threats in order to survive on the battlefield.<br />
In addition to the battlefield, <strong>UXO</strong>s are also found in designated<br />
impact areas. These areas are marked on all military maps, and they<br />
1-1
are also marked on the ground by warning signs and fences. Personnel<br />
are not allowed in these areas because of the <strong>UXO</strong> hazards.<br />
GENERAL SAFETY GUIDELINES<br />
Personnel can lessen the danger of <strong>UXO</strong> hazards by being able<br />
to recognize a <strong>UXO</strong> hazard and by strictly following the basic<br />
safety guidelines listed below.<br />
Ž Do not continue to move towards a suspected <strong>UXO</strong>. See Figure<br />
1-1. Some types of ordnance have magnetic or motionsensitive<br />
fuzing and will not detonate until they sense a target.<br />
Others may have self-destruct timers built in. Once you recognize<br />
a <strong>UXO</strong> hazard, do not move any closer. Make any further<br />
observations with binoculars if necessary. Refer to Chapter 2<br />
for additional information on the recognition of <strong>UXO</strong>.<br />
Figure 1-1. Never approach a suspected <strong>UXO</strong>.<br />
Ž Make all radio transmissions at least 100 meters away from a<br />
<strong>UXO</strong> hazard. See Figure 1-2. When transmitting, radios send<br />
out electricity from their antennas. This electricity can make a<br />
<strong>UXO</strong> blow up.<br />
1-2
Figure 1-2. Never transmit near a <strong>UXO</strong>.<br />
Do not try to remove anything that is on or near a <strong>UXO</strong>. See<br />
Figure 1-3. Your actions could make the <strong>UXO</strong> blow up.<br />
Figure 1-3. Never attempt to remove any part of a <strong>UXO</strong>.<br />
1-3
Ž Do not move or disturb a <strong>UXO</strong>. See Figure 1-4. It could blow<br />
up.<br />
Figure 1-4. Never attempt to move or disturb a <strong>UXO</strong>.<br />
Ž Stay away from <strong>UXO</strong>s. See Figure 1-5. This is the best way<br />
to prevent accidental injury or death.<br />
Figure 1-5. Avoid the area where a <strong>UXO</strong> is located..<br />
Ž Mark a <strong>UXO</strong> hazard area properly so that other personnel will<br />
stay away from it. See Figure 1-6. Proper marking also helps<br />
EOD technicians find the area when they respond to your<br />
report. Refer to Chapter 3 for additional information.<br />
1-4
Figure 1-6. The area must be clearly marked.<br />
Evacuate all nonessential personnel and equipment from a<br />
<strong>UXO</strong> hazard area. If personnel and equipment cannot be evacuated,<br />
you must take protective measures to reduce the risk to<br />
them. Refer to Chapter 3 for additional information.<br />
Report through your chain of command all <strong>UXO</strong> hazards that<br />
affect your operations. Reporting <strong>UXO</strong> hazards will get your<br />
unit the help it needs. Refer to Chapter 4 for additional information.<br />
If necessary, extract the unit from a hazardous area. Refer to<br />
Chapter 5 for additional information.<br />
1-5
C H A P T E R 2<br />
RECOGNIZE <strong>UXO</strong><br />
Being able to recognize a <strong>UXO</strong> is the first and most important<br />
step in reacting to a <strong>UXO</strong> hazard. There is a multitude of ordnance<br />
used throughout the world, and it comes in all shapes and<br />
sizes. This chapter explains and shows the general identifying<br />
features of the different types of ordnance, both foreign and US.<br />
In this chapter, ordnance is divided into four main types:<br />
dropped, projected, thrown, and placed.<br />
DROPPED ORDNANCE<br />
Regardless of its type or purpose, dropped ordnance is dispensed<br />
or dropped from an aircraft. Dropped ordnance is divided into three<br />
subgroups: bombs; dispensers, which contain submunitions; and<br />
submunitions. Photographs of dropped ordnances and their net<br />
explosive weights (NEWS) are in Appendix B.<br />
BOMBS<br />
As shown in Figure 2-1, page 2-2, general-purpose bombs come<br />
in many shapes and sizes depending on the country that made them<br />
and how they are to be used. Generally, all of these bombs are built<br />
the same and consist of a metal container, a fuze, and a stabilizing<br />
device. The metal container (called the bomb body) holds an explosive<br />
or chemical tiller. The body may be in one piece or in multiple<br />
pieces. The bombs shown in Figure 2-2. page 2-3, are Soviet-style,<br />
general-purpose bombs.<br />
Chemical-agent filled bombs are built the same as generalpurpose<br />
bombs. In Figure 2-3, page 2-4, the US chemical bombs<br />
are general-purpose bombs. They have a chemical filler in place of<br />
an explosive filler. The color codes and markings shown in<br />
2-1
Figure 2-1. General-purpose bombs.<br />
2-2
Figure 2-2. Soviet-style, general-purpose bombs.<br />
2-3
Figure 2-3. US chemical bombs.<br />
Appendix A may be used to identify chemical bombs. For example,<br />
the US and North Atlantic Treaty Organization (NATO) color<br />
code for chemical munitions is a gray background with a dark<br />
green band. The former Soviet Union used the same bombs as<br />
shown in Figure 2-2, page 2-3, and added a combination of green,<br />
red, and blue markings to the nose and tail sections to indicate<br />
chemical agents. Soviet bombs all have a gray background. See<br />
Appendix A.<br />
Fuzes<br />
Fuzes used to initiate bombs are either mechanical or electrical,<br />
They are generally placed in the nose or tail section, internally or<br />
externally. The fuzes may not always be visible, as they are often<br />
covered by the fin assembly. As shipped, fuzes are in a safe<br />
(unarmed) condition and cannot function until armed.<br />
Mechanical fuzing, whether in the nose or in the tail, is generally<br />
armed by some type of arming vane as shown in Figure 2-4.<br />
2-4
The arming vane assembly operates like a propeller to line up all<br />
of the fuze parts so the fuze will become armed.<br />
Figure 2-4. Arming vane assemblies.<br />
Electrical fuzes have an electric charging assembly in place of<br />
an arming vane. They are armed by using power from the aircraft.<br />
Just before the pilot releases the bomb, the aircraft supplies the<br />
required electrical charge to the bomb’s fuze.<br />
Action of the fuze may be impact, proximity, or delay. Impact<br />
fuzes function when they hit the target. Proximity fuzes function<br />
when bombs reach a predetermined height above the target. Delay<br />
fuzes contain an element that delays explosion for a fixed time after<br />
impact.<br />
To be safe, personnel should consider that all bombs have the<br />
most dangerous kind of fuzing, which is proximity or delay.<br />
Approaching a proximity- or delay -fuzed bomb causes unnecessary<br />
risk to personnel and equipment. Although it should function<br />
before it hits the target, proximity fuzing may not always do so.<br />
Once the bomb hits the ground, the proximity fuze can still function.<br />
It can sense a change in the area around the bomb and blow<br />
up. Delay fuzing can be mechanical, electrical, or chemical.<br />
Mechanical- and electrical-delay fuzes are nothing more than<br />
clockwork mechanisms. The chemical-delay fuze uses a chemical<br />
2-5
compound inside the fuze to cause a chemical reaction with the firing<br />
system. Delay fuzing times can range from minutes to days.<br />
Stabilizing Devices<br />
Bombs are stabilized in flight by either fin or parachute assemblies.<br />
These assemblies attach to the rear section of the bomb and<br />
keep the bomb nose-down during its descent. These assemblies can<br />
separate from the bomb after the bomb hits the ground. As shown<br />
in Figure 2-5, two common types of fin assemblies used by foreign<br />
countries are the conical- and box-fin assemblies. The retarding-fin<br />
assembly shown in Figure 2-6 is used by the US for most of its<br />
general-purpose bombs.<br />
Figure 2-5. Conical- and box-fin assemblies.<br />
Some bombs are stabilized by a parachute assembly as shown in<br />
Figure 2-7. The parachute assembly opens after the bomb is<br />
released from the aircraft. Even though the parachute may separate<br />
from the bomb after it hits the ground, you should never try to<br />
2-6
Figure 2-6. Retarding-fin assembly (opens after release).<br />
Figure 2-7. Parachute assembly.<br />
recover a parachute assembly found lying on the ground. The bomb<br />
may have become buried, and the parachute could still be attached<br />
to the bomb.<br />
As shown in Figure 2-8, page 2-8, former Soviet Union bombs<br />
have fins that are welded to the bomb body. Therefore, the fins<br />
cannot become separated from the bomb. However, the fins can<br />
wrap around the rear section of the bomb after it hits the ground<br />
and obscure the tail fuze from view.<br />
2-7
Figure 2-8. Soviet-style fin assemblies.<br />
DISPENSERS<br />
94032015<br />
Dispensers may be classified as another type of dropped ordnance.<br />
Like bombs, they are carried by aircraft. Their payload,<br />
however, is smaller ordnance called submunitions. Submunitions<br />
are discussed later in this chapter, In Figure 2-9, the cutaway<br />
2-8
shows the submunitions inside the dispenser body. Dispensers<br />
come in a variety of shapes and sizes depending on the payload<br />
inside. Some dispensers are reusable, and some are one-time-use<br />
items.<br />
Figure 2-9. Dispenser (cutaway section).<br />
Never approach a dispenser or any part of a dispenser you find<br />
on the battlefield. The payload of submunitions always scatters in<br />
the area where the dispenser hit the ground.<br />
Dropped Dispensers<br />
These dispensers (Figure 2-10, page 2-10) fall away from the<br />
aircraft and are stabilized in flight by fin assemblies. Dropped dispensers<br />
may be in one piece or in multiple pieces. All dropped<br />
dispensers use either mechanical time or proximity fuzing. These<br />
fuzes allow the payload to be dispersed at a predetermined height<br />
above the target. Multiple-piece dispensers open up and disperse<br />
their payload when the fuze functions. Single-piece dispensers eject<br />
their payload out of ports or holes in the body when the fuze functions.<br />
Attached Dispensers<br />
These dispensers stay attached to the aircraft and can be<br />
reloaded and used again. Their payload is dispersed out the rear or<br />
from the bottom of the dispenser. See Figure 2-11, page 2-11.<br />
2-9
Figure 2-10. Dropped dispensers.<br />
2-10<br />
94032017
Figure 2-11. Attached dispensers.<br />
2-11
SUBMUNITIONS<br />
Submunitions are classified as either bomblets. grenades, or<br />
mines. They are small explosive-filled or chemical-filled items<br />
designed for saturation coverage of a large area. They may be antipersonnel<br />
(APERS), antimateriel (AMAT), antitank (AT), dualpurpose<br />
(DP), incendiary, or chemical. Submunitions may be<br />
spread by dispensers, missiles, rockets, or projectiles. Each of these<br />
delivery systems disperses its payload of submunitions while still<br />
in flight, and the submunitions drop over the target. On the battlefield,<br />
submunitions are widely used in both offensive and defensive<br />
missions.<br />
Submunitions are used to destroy an enemy in place (impact) or<br />
to slow or prevent enemy movement away from or through an area<br />
(area denial). Impact submunitions go off when they hit the ground.<br />
Area-denial submunitions, including FASCAM, have a limited<br />
active life and self-destruct after their active life has expired.<br />
The major difference between scatterable mines and placed<br />
mines is that the scatterable mines land on the surface and can be<br />
seen. Placed mines, discussed in a later section, may be hidden or<br />
buried under the ground and usually cannot be seen.<br />
The ball-type submunitions shown in Figure 2-12 are APERS.<br />
They are very small and are delivered on known concentrations of<br />
enemy personnel. The submunition shown in Figure 2-13 is scattered<br />
across an area. Like a land mine, it will not blow up until<br />
pressure is put on it.<br />
Figure 2-12. APERS ball-type submunitions.<br />
2-12
Figure 2-13. APERS pressure-activated submunition.<br />
The APERS submunition shown in Figure 2-14 can be delivered<br />
by aircraft or by artillery. When it hits the ground, a small fragmentation<br />
ball shoots up and detonates about 6 feet above the ground.<br />
The submunitions shown in Figure 2-15, page 2-14, are area-denial<br />
APERS submunitions (FASCAM). These submunitions are delivered<br />
into areas for use as mines. When they hit the ground, trip<br />
wires kick out up to 20 feet from the mine. All area-denial submunitions<br />
use antidisturbance fuzing with self-destruct fuzing as a<br />
backup. The self-destruct time can vary from a couple of hours to<br />
as long as several days.<br />
Figure 2-14. APERS bounding-fragmentation submunition.<br />
2-13
Figure 2-15. APERS area-denial submunitions (FASCAM).<br />
The DP submunition shown in Figure 2-<strong>16</strong> has a shaped charge<br />
for penetrating hard targets but is also used against personnel.<br />
These submunitions are delivered by artillery or rockets. The arming<br />
ribbon serves two purposes: it not only arms the fuze as the<br />
submunition comes down. but it also stabilizes the submunition so<br />
that it hits the target straight on.<br />
Figure 2-<strong>16</strong>. DP submunition.<br />
2-14
The AMAT and/or AT submunitions shown in Figure 2-17 are<br />
designed to destroy hard targets such as vehicles and equipment.<br />
They are dispersed from an aircraft-dropped dispenser and function<br />
when they hit a target or the ground. Drogue parachutes stabilize<br />
these submunitions in flight so they hit their targets straight on. The<br />
submunitions shown in Figure 2-18 are also used to destroy hard<br />
targets such as vehicles and equipment. The only difference is that<br />
the fin assembly stabilizes the submunition instead of the drogue<br />
parachute.<br />
Figure 2-17. AMAT/AT parachute-stabilized submunitions.<br />
Figure 2-18. AMAT/AT fin-stabilized submunitions.<br />
AT area-denial submunitions (Figure 2-19, page 2- <strong>16</strong>) can be<br />
delivered by aircraft, artillery, and even some engineer vehicles.<br />
These FASCAMs all have magnetic fuzing. They will function<br />
2-15
when they receive a signal from metallic objects. These submunitions,<br />
similar to the APERS area-denial submunitions that are<br />
shown in Figure 2-15 on page 2-14, also have antidisturbance and<br />
self-destruct fuzing. AT and APERS area-denial mines are usually<br />
found deployed together.<br />
Figure 2-19. AT area-denial submunitions (FASCAM).<br />
2-<strong>16</strong>
PROJECTED ORDNANCE<br />
All projected ordnance is fired from some type of launcher or<br />
gun tube. Photographs and NEWS of projected ordnances are<br />
shown in Appendix C. Projected ordnance falls into the following<br />
five subgroups:<br />
Ž Projectiles.<br />
Ž Mortars.<br />
Ž Rockets.<br />
Ž Guided missiles.<br />
Ž Rifle grenades.<br />
PROJECTILES<br />
Projectiles range from 20 millimeters to <strong>16</strong> inches in diameter<br />
and from 2 inches to 4 feet in length. They can be filled with<br />
explosives, chemicals (to include riot-control agents such as CS),<br />
white phosphorus (WP), illumination flares, or submunitions. Projectile<br />
bodies can be one piece of metal or multiple sections<br />
fastened together.<br />
Projectiles, like bombs, can have impact or proximity fuzing.<br />
They can also be fuzed with time-delay fuzing that functions at a<br />
preset time after firing. For safety reasons, all projectiles should be<br />
considered as having proximity fuzing. Getting too close to proximity<br />
fuzing will cause the fuze to function, and the projectile will<br />
blow up. Depending on the type of filler and the design of the projectile,<br />
the fuze can be in the nose, as shown in Figure 2-20, page<br />
2-18, or in the base, as shown in Figure 2-<strong>21</strong>, page 2-18.<br />
There are two ways projectiles are stabilized, by spin or fin.<br />
Spin-stabilized projectiles use rotating bands near the rear section<br />
to stabilize the projectile. See Figure 2-22, page 2-19. Riding along<br />
the internal lands and grooves of the gun tube, these bands create<br />
a stabilizing spin as the projectile is fired. Fin-stabilized projectiles<br />
2-17
may have either fixed fins or folding fins. See Figure 2-23. Folding<br />
fins unfold after the projectile leaves the gun tube to stabilize the<br />
projectile.<br />
Figure 2-20. Nose-fuzed projectiles.<br />
Figure 2-<strong>21</strong>. Base-fuzed projectile.<br />
2-18
Figure 2-22. Spin-stabilized projectiles.<br />
Figure 2-23. Fin-stabilized projectiles.<br />
2-19
MORTARS<br />
Mortars range from 45 millimeters to 280 millimeters in diameter.<br />
Like projectiles, mortar shells can be filled with explosives,<br />
toxic chemicals, WP, or illumination flares. Mortars generally have<br />
thinner metal bodies than projectiles but use the same kind of fuzing.<br />
Like projectiles, mortars are stabilized in flight by fin or spin.<br />
Most mortars are fin stabilized, like the ones shown in Figure 2-24.<br />
Other mortars are spin stabilized as shown in Figure 2-25.<br />
Figure 2-24. Fin-stabilized mortars.<br />
Figure 2-25. Spin-stabilized mortars.<br />
ROCKETS<br />
A rocket may be defined as a self-propelled projectile. Unlike<br />
guided missiles, rockets cannot be controlled in flight. Rockets<br />
range in diameter from 37 millimeters to over 380 millimeters.<br />
2-20
They can range in length from 1 foot to over 9 feet. There is no<br />
standard shape or size to rockets, as you can see in Figure 2-26. All<br />
rockets consist of a warhead section, a motor section, and a fuze.<br />
See Figure 2-27, page 2-22. They are stabilized in flight by fins, or<br />
canted nozzles, that are attached to the motor.<br />
Figure 2-26. Rockets.<br />
2-<strong>21</strong>
Figure 2-27. Parts of a rocket.<br />
The warhead is the portion of the rocket that produces the<br />
desired effect. It can be filled with explosives, toxic chemicals,<br />
WP, submunitions, CS, or illumination flares. The motor propels<br />
the rocket to the target. The fuze is the component that initiates the<br />
desired effect at the desired time. Rockets use the same type of<br />
fuzing as projectiles and mortars. The fuze may be located in the<br />
nose or internally between the warhead and the motor.<br />
Rockets can be launched or fired from individual weapons (such<br />
as the light antitank weapon system), aircraft, mobile-launch vehicles,<br />
or stationary launch pads.<br />
Some rockets are spin stabilized. Unlike projectiles and mortars,<br />
these rockets do not have rotating bands. Instead, as shown in Figure<br />
2-28, their motor nozzles are slanted to produce the spin. The<br />
presence of motor nozzles, or venturies, in the rear of the rocket<br />
motor can be used for positive identification purposes for this type<br />
of ordnance. Generally, the rocket motor will not create an additional<br />
hazard, because the motor is usually burned out shortly after<br />
the rocket leaves the launcher.<br />
GUIDED MISSILES<br />
Guided missiles are like rockets in that they consist of the same<br />
parts. The difference is that the missiles are guided to their target<br />
by various guidance systems. Some of the smaller missiles, such as<br />
the tube-launched, optically tracked, wire-guided (TOW) and<br />
Dragon missiles are wire-guided by the gunner to their targets. See<br />
Figure 2-29.<br />
Larger missiles, such as the phased-array tracking radar intercept<br />
on target (PATRIOT) and the Sparrow are guided by radar to their<br />
2-22
Figure 2-28. Spin-stabilized rocket.<br />
Figure 2-29. AT guided missiles.<br />
target. See Figure 2-30, page 2-24. The radar may be internal to the<br />
missile, like the PATRIOT, or external, like the Sparrow, which<br />
uses the airplane’s radar system. Guided missiles are usually stabilized<br />
in flight by fins that are controlled by internal electronics.<br />
Guided missiles use internal, proximity fuzing. Therefore, do not<br />
approach any guided missile you find lying on the battlefield.<br />
2-23
Figure 2-30. PATRIOT and Sparrow guided missiles.<br />
RIFLE GRENADES<br />
Rifle grenades look like mortars and are fired from a rifle that is<br />
equipped with a grenade launcher or an adapter. Many countries<br />
use rifle grenades as an infantry direct-fire weapon. Some rifle grenades<br />
are propelled by specially designed blank cartridges, while<br />
others are propelled by standard ball cartridges. Rifle grenades may<br />
be filled with high explosives (HEs), WP, CS, illumination flares,<br />
or colored screening smoke. They range in size from the small<br />
APERS rifle grenade to the larger AT rifle grenade. APERS rifle<br />
grenades use impact fuzing. See Figure 2-31. Some rifle grenades,<br />
such as the AT, have internal fuzing behind the warhead (Figure<br />
2-32). This type of fuzing still functions on impact with the target.<br />
2-24
Figure 2-31. APERS rifle grenades.<br />
Figure 2-32. AT rifle grenades.<br />
THROWN ORDNANCE<br />
Thrown ordnance, commonly known as hand grenades, can be<br />
classified by use as follows:<br />
Ž Fragmentation (also called defensive).<br />
Ž Offensive.<br />
Ž Antitank.<br />
Ž Smoke.<br />
Ž Illumination.<br />
Hand grenades are small items that may be held in one hand and<br />
thrown. All grenades have three main parts: a body, a fuze with a<br />
pull ring and safety clip assembly, and a filler. See Figure 2-33,<br />
page 2-26. Never pick up a grenade you find on the battlefield,<br />
even if the spoon and safety pin are still attached. All grenades<br />
found lying on a battlefield should be considered booby-trapped.<br />
2-25
Figure 2-33. Parts of a grenade.<br />
FRAGMENTATION GRENADES<br />
Fragmentation grenades are the most common type of grenade<br />
and may be used as offensive or defensive weapons. See Figure<br />
2-34. They have metal or plastic bodies that hold an explosive<br />
filler. These grenades produce casualties by high-velocity projection<br />
of fragments when they blow up. The fragmentation comes<br />
from the metal body or a metal fragmentation sleeve that can be<br />
internal or attached to the outside of the grenade. These grenades<br />
use a burning delay fuze that functions 3 to 5 seconds after the<br />
safety lever is released.<br />
Figure 2-34. Fragmentation grenades.<br />
2-26
OFFENSIVE GRENADES<br />
Offensive grenades have a plastic or a cardboard body. See Figure<br />
2-35. They are not designed to have a lot of fragmentation.<br />
Their damage is caused from the over pressure of the explosive<br />
blast. These grenades use a burning-delay fuze that functions 3 to<br />
5 seconds after the safety lever is released.<br />
Figure 2-35. Offensive grenade.<br />
ANTITANK GRENADES<br />
AT grenades are designed to be thrown at tanks and other<br />
armored vehicles. They have a shaped-charge explosive warhead<br />
and are stabilized in flight by a spring-deployed parachute or a<br />
cloth streamer. See Figure 2-36, page 2-28. These grenades use<br />
impact fuzing.<br />
SMOKE GRENADES<br />
There are two types of smoke grenades: bursting and burning.<br />
See Figure 2-37, page 2-28. They may be made of rubber, metal,<br />
or plastic. Bursting-type smoke grenades are filled with WP and<br />
blow up when the fuze functions. These grenades use a burning<br />
delay fuze that functions 3 to 5 seconds after the safety lever is<br />
released. Burning-type smoke grenades produce colored smoke.<br />
This type of grenade uses an instant-action fuze. There is no delay<br />
once the spoon is released. This is the same type of grenade that is<br />
used to dispense not-control agents (such as CS).<br />
2-27
Figure 2-36. AT grenades.<br />
Figure 2-37. Smoke grenades.<br />
ILLUMINATION GRENADES<br />
Illumination grenades are used for illuminating, signaling, and as<br />
an incendiary agent. See Figure 2-38. The metal body breaks apart<br />
after the fuze functions and dispenses an illumination flare. This<br />
2-28
type of grenade uses a burning-delay fuze that functions 3 to 5 seconds<br />
after the safety lever is released.<br />
Figure 2-38. US illumination grenade.<br />
PLACED ORDNANCE<br />
Placed ordnance is commonly referred to as land mines. Land<br />
mines may be hidden or buried under the ground and may be classified<br />
as APERS or AT. Visual detection of land mines may be<br />
difficult at best. If you come to a suspected minefield, report it as<br />
a minefield to your commander. All combat arms personnel report<br />
a minefield on an obstacle report. For further information and procedures<br />
for reporting land mines, refer to <strong>FM</strong> 20-32. Photographs<br />
of placed ordnance and NEWS are in Appendix E.<br />
ANTIPERSONNEL MINES<br />
APERS mines are generally small and come in different shapes<br />
and sizes. See Figure 2-39, page 2-30. Some APERS mines are<br />
even made of wood, for example, the box mine shown in Figure<br />
2-39. Some APERS mines are designed to function when stepped<br />
on, such as those shown in Figure 2-39. Other APERS mines are<br />
designed for use as booby traps. See Figure 2-40, page 2-30. These<br />
mines are set up to function by using a trip wire laid out across a<br />
path or road. When the trip wire is pulled or cut, the fuze functions.<br />
Some APERS mines, such as the US claymore mine, may be set up<br />
to function by command detonation.<br />
2-29
Figure 2-39. APERS pressure-fuzed mines.<br />
Figure 2-40. APERS trip wire-fuzed mines.<br />
2-30
ANTITANK MINES<br />
AT mines are much larger than APERS mines and usually have<br />
pressure or tilt-rod fuzing. However, some AT mines also use<br />
magnetic-sensitive fuzing. Some of the more modem AT mines<br />
have plastic bodies, which make them hard to detect with a metallic<br />
mine detector. The variety of AT mines shown in Figure 2-41<br />
all function by direct pressure from a tank or vehicle. The mines<br />
shown in Figure 2-42, page 2-32, use a tilt-rod fuze that sticks out<br />
of the ground. When the rod is moved or pushed over, the mine<br />
blows up.<br />
Figure 2-41. AT pressure-fuzed mines.<br />
2-31
Figure 2-42. AT tilt-rod fuzed mines.<br />
2-32
C H A P T E R 3<br />
TAKE IMMEDIATE ACTION<br />
All <strong>UXO</strong>s found on the battlefield affect maneuver and mission<br />
capabilities. When you find a <strong>UXO</strong>, you must make some immediate<br />
decisions. These decisions will depend on your current<br />
mission, the size and location of the <strong>UXO</strong>, and your unit’s capabilities.<br />
Figure 3-1 shows a decision chart to help you decide.<br />
This information is also in GTA 9-12-1, which is available at<br />
your local TASC.<br />
Figure 3-1. Decision chart.<br />
If at all possible, avoiding/bypassing the <strong>UXO</strong> hazard is the safest<br />
option to take for personnel and equipment. lf the <strong>UXO</strong><br />
hazard is left from a recent enemy attack, you must consider<br />
protecting your personnel and equipment by extracting them<br />
from the area before another attack is targeted on you. See Chapter<br />
5 for extraction procedures.<br />
3-1
If the mission cannot be accomplish due to the presence of the<br />
<strong>UXO</strong> and the hazard cannot be avoided/bypassed, protective<br />
measures must be taken to reduce the hazard to personnel and<br />
equipment.<br />
Regardless of the option you choose, the location of the <strong>UXO</strong><br />
must be clearly marked with <strong>UXO</strong> markers and the hazard<br />
reported to your next higher headquarters. See Chapter 4 for<br />
procedures on reporting a <strong>UXO</strong> hazard.<br />
PROTECTIVE MEASURES<br />
There are three methods you can use<br />
equipment. You can evacuate, isolate, or<br />
EVACUATE<br />
to protect personnel and<br />
barricade them.<br />
Evacuation of all nonessential personnel and equipment is the<br />
best protective measure. The evacuation distances given in Figure<br />
3-2 provide a reasonable degree of safety for unprotected personnel<br />
and equipment. These distances are based on your estimate of<br />
the amount of explosive filler in the <strong>UXO</strong>. If protective barricades<br />
are used around the <strong>UXO</strong>, these distances can be reduced.<br />
The general rule for estimating the amount of explosive in an<br />
ordnance item is as follows: Assume that 50 percent of the total<br />
ordnance weight equals the NEW. For example, a 500-pound bomb<br />
would be calculated to have 250 pounds of explosive. According to<br />
Figure 3-2, the safe distance for unprotected personnel is 625<br />
meters. Refer to Appendixes B through E for the NEW of general<br />
ordnance items.<br />
After all personnel and equipment are evacuated, movement<br />
within the area should be kept to essential operations only. If<br />
equipment cannot be evacuated, only mission-essential personnel<br />
should be allowed in the area. The equipment should be protected<br />
by barricades and personnel should wear all protective equipment.<br />
3-2
Explosive Evacuation<br />
Weight (pounds) Distance (meters)<br />
27 and less 300<br />
30 310<br />
35 330<br />
40 350<br />
45 360<br />
50 375<br />
100 475<br />
150 550<br />
200 600<br />
250 625<br />
300 675<br />
400 725<br />
500 800<br />
Figure 3-2. Evacuation distances.<br />
ISOLATE<br />
Sometimes, for mission-related, operational, or other reasons,<br />
you cannot evacuate personnel and/or equipment or you cannot<br />
leave a particular area. When this happens, you must isolate either<br />
your assets (personnel, equipment, and operations) from the <strong>UXO</strong><br />
or isolate the <strong>UXO</strong> from your assets.<br />
BARRICADE<br />
If your unit is stationary, evacuate all nonessential personnel and<br />
equipment out of the hazard area. Equipment that cannot be moved<br />
must be protected with barricades. Personnel who cannot be evacuated<br />
from the area must also be protected from the hazard. You<br />
can do this by reinforcing the fighting positions on the side facing<br />
the hazard and by adding overhead cover.<br />
A barricade is an artificial barrier that provides limited protection<br />
by channeling the blast and fragmentation from the threatened<br />
area. Barricades may also be used to lessen the effect of the blast<br />
and to reduce the size of the evacuation area.When determining if<br />
3-3
arricades are needed, you must estimate the probable damage that<br />
would result if the <strong>UXO</strong> were to explode. Building artificial barricades<br />
is very time consuming and requires a large number of<br />
sandbags. Depending on the size of the <strong>UXO</strong>, barricades can be<br />
built around the <strong>UXO</strong> to protect the entire area, or they can be built<br />
next to the equipment or areas that cannot be evacuated.<br />
Use the following general guidelines when building barricades:<br />
Ž Clculate the total destructive power of the <strong>UXO</strong> hazard. Multiply<br />
the number of items by their NEW.<br />
Ž Detemine which assets cannot be moved or evacuated from<br />
the area safely. For those assets that cannot be moved or evacuated,<br />
decide on the type of barricade(s) you will need to<br />
protect your assets.<br />
Ž Determine how mny personnel are available to help build<br />
barricades. Use the absolute fewest personnel. Determine what<br />
equipment you can use. If earth-moving equipment is available,<br />
you can build earth barriers in place of sandbag<br />
barricades.<br />
Ž Caculate the number of sandbags you will need or that are<br />
already available to build barricades. Personnel evacuated<br />
from the <strong>UXO</strong> area can fill sandbags and transport them to the<br />
barricade site.<br />
Ž Make sure that all personnel actually building barricades are<br />
wearing all available safety equipment, This safety equipment<br />
includes a kevlar helmet, a flak vest, and hearing protection.<br />
Placement and Size of Barricades<br />
The barricade should be built no closer to the <strong>UXO</strong> than the<br />
height for the barricade plus 3 feet. Further guidance on the height<br />
for barricades is provided later in this section. For example, the<br />
barricade shown in Figure 3-3 is 5 feet tall. By adding an additional<br />
3 feet, the barricade is built no closer than 8 feet to the <strong>UXO</strong>.<br />
When possible, build the barricade between the building and/or<br />
the equipment to be protected and the <strong>UXO</strong>. By positioning the<br />
3-4
arricade in this location, personnel who are in or around the building<br />
or who are using the equipment will be afforded the greatest<br />
protection from the blast and flying fragments. See Figure 3-4.<br />
Figure 3-3. Placement distance for barricade.<br />
Figure 3-4. Placement of wall barricade.<br />
When building a barricade, the sandbags must be interlocked for<br />
stability. See Figure 3-5, page 3-6. Sandbags that are not interlocked<br />
will reduce protection and make the barricade unstable.<br />
3-5
Figure 3-5. Interlocking sandbags.<br />
Small <strong>UXO</strong>. For small <strong>UXO</strong>s such as missiles and rockets less<br />
than 70 millimeters in diameter, for projectiles less than 75 millimeters<br />
in diameter, and for submunitions and grenades, a doublewall<br />
thickness of sandbags should surround the area of the <strong>UXO</strong>.<br />
The sandbags must be stacked to a height of at least 3 feet and<br />
should be thick enough to protect personnel and equipment from<br />
the blast and fragmentation. This type of barricade may be semicircular<br />
or circular. Types of barricades are discussed later in this<br />
section.<br />
Medium <strong>UXO</strong>. For medium-sized <strong>UXO</strong>s such as missiles, rockets,<br />
and projectiles up to 200 millimeters in diameter, and for largesized<br />
placed munitions on the surface, a four- or five-wall thickness<br />
of sandbags should surround the area. The sandbags must be<br />
stacked to a height of at least 5 feet in order to protect assets. This<br />
type of barricade is usually semicircular.<br />
Large <strong>UXO</strong>. Large <strong>UXO</strong>s such as projectiles, missiles, and<br />
general-purpose bombs are too large for effective barricades to be<br />
built around them. In these cases, equipment and personnel activity<br />
areas would need to be barricaded. A wall barricade between the<br />
affected area and the <strong>UXO</strong> hazard provides the best and easiest<br />
protection.<br />
3-6
Barricade Types<br />
The three types of barricades are circular, semicircular, and wall.<br />
The type barricade that you use will depend on the <strong>UXO</strong> hazard<br />
and the area that requires protection.<br />
Circular. A circular barricade is the best choice for small <strong>UXO</strong><br />
hazards, because it provides complete protection for personnel and<br />
equipment. A circular barricade that is 8 feet in diameter, 3 feet<br />
tall, and 3 sandbags thick would require approximately 400 sandbags.<br />
The barricade shown in Figure 3-6 will force the blast and<br />
Figure 3-6. Complete circular placement of barricade.<br />
Semicircular. A semicircular barricade is used for small- and<br />
medium-sized <strong>UXO</strong> hazards. It will channel the blast and fragmentation<br />
through the open side and away from the protected area. See<br />
Figure 3-7, page 3-8.<br />
Wall. The wall barricade protects specific equipment or personnel<br />
areas. It is used when the <strong>UXO</strong> hazard is too large to contain<br />
by using a circular or semicircular barricade. The number of wall<br />
barricades you need will depend on how much equipment or how<br />
many personnel you must protect. A wall barricade that is 12 feet<br />
long, 6 feet high, and 3 sandbags thick would require 700 sandbags.<br />
As shown in Figure 3-8, page 3-8, the barricade should<br />
3-7
extend beyond and be at least as tall as the equipment or personnel<br />
areas to be protected. Equipment that is barricaded must still be<br />
usable. For example, the radar shown in Figure 3-8 must be left<br />
exposed in order to function.<br />
Figure 3-7. Semicircular placement of barricade.<br />
Figure 3-8. Wall barricade placement.<br />
3-8
This item implements STANAG 2002, Edition 7.<br />
MARK <strong>UXO</strong><br />
Marking a <strong>UXO</strong> hazard is just as important as marking other<br />
hazard areas such as NBC areas, minefield, and booby-trapped<br />
areas. All of these hazards are marked by using triangular signs, if<br />
readily available, that by their background color indicate the danger<br />
involved. The standard <strong>UXO</strong> marker is shown in Figure 3-9.<br />
The background is red with a white bomb inset. It has the same<br />
dimensions as the other markers.<br />
Figure 3-9. Standard <strong>UXO</strong> marker.<br />
The <strong>UXO</strong> marker is placed above ground at waist level (about 3<br />
feet) with the bomb pointing down as shown in Figure 3-10, page<br />
3-10. The marker should be placed no closer to the hazard than the<br />
point where you first recognized the <strong>UXO</strong> hazard. The marker<br />
should be attached to a stake (Figure 3-10), a tree, or other suitable<br />
holder. Just be sure that the marker is clearly visible.<br />
You should also mark all logical approach routes to the area. If<br />
the hazard is near a road, as a minimum, put a marker on each side<br />
of the road approaching the <strong>UXO</strong>. If there is a large concentration<br />
of <strong>UXO</strong> hazards such as submunitions, mark the area as you would<br />
3-9
Figure 3-10. Marking a <strong>UXO</strong> with standard marker.<br />
a scatterable minefield, with markers placed about every 15 meters<br />
around the area. Refer to <strong>FM</strong> 20-32 for additional information on<br />
marking minefield.<br />
As a general rule, the <strong>UXO</strong> hazard itself must be easily seen<br />
from any of the markers. This helps to keep others away from the<br />
hazard. It also helps the EOD team to find the hazard.<br />
If standard <strong>UXO</strong> markers are not available, you may use other<br />
suitable materials (such as engineer tape or colored ribbons).<br />
Ensure that the same color is used to avoid confusion. When using<br />
other materials, the same principles used for the standard markers<br />
apply for placement of the makeshift markers. That is, they should<br />
be placed about 3 feet off the ground and easily seen from all<br />
approach routes. See Figure 3-11.<br />
Figure 3-11. Marking <strong>UXO</strong> with alternate type of material.<br />
3-10
C H A P T E R 4<br />
REPORT THE <strong>UXO</strong> HAZARD<br />
As discussed in Chapter 1, <strong>UXO</strong> hazards on the battlefield have<br />
an enormous affect on command and control decisions for battle<br />
planning. The location of these hazards is vital to the command<br />
and control elements when projecting movement and support of<br />
combat units. <strong>UXO</strong> hazards also have a direct impact on the<br />
combat capabilities of any element that encounters them. To<br />
assist commanders, an effective <strong>UXO</strong> reporting system must be<br />
in place and maintained to allow commanders to concentrate<br />
EOD and engineer assets according to priorities and battle plans.<br />
<strong>UXO</strong> SPOT REPORT<br />
The <strong>UXO</strong> spot report is a detailed, swift, two-way reporting system<br />
that makes clear where the <strong>UXO</strong> hazard areas are, what their<br />
priorities are, and which units are affected by them. The report is<br />
used to request help in handling a <strong>UXO</strong> hazard that is beyond a<br />
unit’s ability to handle and that affects the unit’s mission. This<br />
report helps the commander set priorities based on the battlefield<br />
situation.<br />
The <strong>UXO</strong> spot report is the first-echelon report that is sent when<br />
a <strong>UXO</strong> is encountered. Information about this report is also found<br />
in GTA 9-12-1 and in the supplemental information section of the<br />
signal operating instructions (SOI), where it is just behind the<br />
request for medical evacuation (MEDEVAC). The report consists<br />
of nine lines. The information must be sent by the fastest means<br />
available and the required information provided in the following<br />
order:<br />
Line 1.<br />
Line 2.<br />
Date-Time Group: DTG item was discovered.<br />
Reporting Activity (unit identification code [UIC] ) and<br />
location (grid of <strong>UXO</strong>).<br />
4-1
Line 3. Contact Method: Radio frequency, call sign, point of<br />
contact (POC ), and telephone number.<br />
Line 4. Type of Ordnance: Dropped, projected, placed, or<br />
thrown. If available, supply the subgroup. Give the number<br />
of items, if more than one.<br />
Line 5. NBC Contamination: Be as specific as possible.<br />
Line 6. Resources Threatened: Report any equipment, facilities,<br />
or other assets that are threatened.<br />
Line 7. Impact on Mission: Provide a short description of your<br />
current tactical situation and how the presence of the<br />
<strong>UXO</strong> affects your status.<br />
Line 8. Protective Measures: Describe any measures you have<br />
taken to protect personnel and equipment.<br />
Line 9. Recommended Priority: Recommend a priority for<br />
response by EOD technicians or engineers.<br />
Priority Basis<br />
Immediate Stops the unit’s maneuver and mission capability<br />
or threatens critical assets vital to the<br />
mission.<br />
Indirect Slows the unit’s maneuver and mission capability<br />
or threatens critical assets important to<br />
the mission.<br />
Minor Reduces the unit’s maneuver and mission<br />
capability or threatens noncritical assets of<br />
value.<br />
No Threat Has little or no affect on the unit’s capabilities<br />
or assets.<br />
The priority you request must correspond with the tactical situation<br />
you described on Line 7 of the report (Impact on Mission).<br />
Remember, these priorities refer only to the <strong>UXO</strong> impact on your<br />
4-2
current mission. A priority of Minor or No Threat does not mean<br />
that the <strong>UXO</strong> is not dangerous.<br />
PRIORITIZING THE SPOT REPORT<br />
The <strong>UXO</strong> spot report is forwarded through your chain of command.<br />
Each commander in the chain who receives/reviews the<br />
report may change the priority to reflect the current tactical situation<br />
or projected battle plans. It is the responsibility of each<br />
commander in the chain to ensure that <strong>UXO</strong> spot reports are forwarded<br />
through command channels and that the proper priority is<br />
set for each report.<br />
If a higher-level commander in the chain changes a priority, all<br />
subordinate commanders, especially the commander of the reporting<br />
unit, must be told. Commanders must keep the following in<br />
mind: even though they may lower a priority, the reporting unit<br />
must be able to continue its mission until help comes. In addition<br />
to the priority status, all commanders need to be kept informed of<br />
the status of each <strong>UXO</strong> hazard in their area.<br />
The final priority is determined by the reporting unit’s higher<br />
headquarters that is supported by EOD or engineer units. Based on<br />
mission, enemy, terrain, troops, and time available (METT-T),<br />
EOD or engineer teams are dispatched to respond to the hazard.<br />
4-3
C H A P T E R 5<br />
SELF-EXTRACTION FROM<br />
<strong>UXO</strong> HAZARDS<br />
The use of submunitions and scatterable mines on the modern<br />
battlefield will have a direct impact on mobility, survivability,<br />
and logistical support requirements. All units must be able to<br />
maintain their mobility despite these hazards. Our forces must be<br />
able to self-extract from submunition and scatterable mine<br />
threats in order to survive.<br />
EOD units are responsible for the elimination of these threats<br />
from the battlefield, while engineer elements provide breaching<br />
and mine-clearing support for these threats. These elements will<br />
not be readily available to all units that receive submunition or<br />
scatterable mine at tacks from the enemy. Any unit that cannot<br />
self-extract will risk being destroyed in place by follow-on<br />
attacks.<br />
DETECTION<br />
Detection is the first step in extraction. Submunitions and scatterable<br />
mines are very small in size and are difficult to detect in<br />
optimum circumstances. In some terrain, such as dense foliage, tall<br />
grass, or uneven ground, many of them will go undetected. During<br />
periods of limited visibility or at night, detection is almost impossible.<br />
Combat vehicle personnel traveling cross-country in a<br />
buttoned-up vehicle will be at a great disadvantage, because they<br />
will not be able to see them or to avoid them.<br />
The unit detecting a submunitions area or scatterable minefield<br />
is required to mark it, report it, and, if so directed, breach through<br />
it. All areas will remain marked until they are cleared.<br />
5-1
IMMEDIATE ACTIONS<br />
When an operating area becomes contaminated with submunitions<br />
or scatterable mines, a certain amount of confusion is<br />
understandable. Therefore, a recognized and rehearsed system of<br />
alerting personnel to the danger and orders on how to evacuate the<br />
area are essential. Alerting systems may include loudspeakers,<br />
radios, or runners. A combination of these systems may be the<br />
most effective.<br />
The unit field SOP should include procedures for evacuating<br />
personnel from an area and reestablishing operations at another<br />
location. An established and trained evacuation plan will reduce<br />
personnel and vehicle losses. The plan must be flexible so it can be<br />
adapted to fit the different scenarios and environments that might<br />
be encountered.<br />
When setting up operational bases or work sites, the <strong>UXO</strong> threat<br />
must be considered. Roads are critical for evacuation. Hardsurfaced<br />
roads are the best evacuation routes and are also the<br />
easiest to clear. The evacuation plan should include procedures for<br />
unit elements to reconnoiter and mark clear paths or to link paths<br />
from other unit positions to their position and to the nearest hardsurfaced<br />
road.<br />
A unit that has been directly fired on must presume that more<br />
fires are coming. The unit must be able to self-extract from the area<br />
in order to resume operations or be able to protect assets in order<br />
to continue the assigned mission. The extraction procedure resembles<br />
an in-stride breach as outlined in <strong>FM</strong> 20-32 and <strong>FM</strong> 90-13-1,<br />
or in <strong>FM</strong><strong>FM</strong> 13-7 for the Marine Corps. Units that are conducting<br />
movement operations can use route clearance procedures to force a<br />
cleared lane through the area.<br />
Combat units that have the assets to conduct an in-stride breach<br />
can do so and reduce the hazard for follow-on forces and continue<br />
in the original direction of the march. Combat support (CS) and<br />
combat service support (CSS) units must rely on their operation<br />
order (OPORD) to designate alternate support areas. These units<br />
must employ their organic assets to reconnoiter and create cleared<br />
5-2
lanes in the direction of the alternate support location. Not all<br />
equipment may be retrievable. The emphasis should be placed on<br />
relocating personnel and operational equipment as quickly as possible.<br />
SITUATIONAL ASSESSMENT<br />
After taking immediate actions to alert personnel, locate the submunitions<br />
or scatterable mines, and provide protection for<br />
personnel and equipment, the following operational situation and<br />
tactical factors should be assessed:<br />
Ž Effect of the delay on the mission.<br />
Ž Threat from direct and indirect fire. The risk of casualties from<br />
direct or indirect fire may be greater than that from the submunitions<br />
or scatterable mines.<br />
Ž Type of terrain. The terrain determines the effectiveness of<br />
submunitions or scatterable mines, their visibility, and, consequently,<br />
their ability to be detected, avoided, or neutralized.<br />
Ž Alternate routes or positions available.<br />
Ž Degree of protection available.<br />
Ž Availability of specialized support, such as EOD or engineer<br />
teams and equipment.<br />
After assessing the situation, three main options are available, as<br />
follows:<br />
Ž Accept the risk of casualties and continue with the assigned<br />
mission.<br />
Ž Employ tactical breaching procedures and extract to alternate<br />
routes or positions.<br />
Ž Employ preplanned alternate tactical plans according to the<br />
current OPORD.<br />
BREACHING TECHNIQUES<br />
Hazardous areas must be bypassed if at all possible. When<br />
bypassing is not feasible, you must try to neutralize the submunitions<br />
and scatterable mines that prevent movement.<br />
5-3
There is no single device or technique that will neutralize every<br />
submunition or scatterable mine in every situation. The differences<br />
in fuzing, self-neutralization, terrain, and unit mission mean that<br />
multiple techniques must be considered.<br />
When employing breaching techniques, take all protective measures<br />
possible to protect personnel and equipment. Personnel who<br />
are not directly involved should be under cover, away from the<br />
area. Personnel who are directly involved must make use of all<br />
available cover.<br />
The following extraction techniques should be considered in the<br />
order listed:<br />
Ž<br />
Ž<br />
Ž<br />
Ž<br />
Ž<br />
Ž<br />
Perform area reconnaissance, and mark a cleared route.<br />
Use engineer equipment to remove or neutralize items.<br />
Destroy items using explosive charges.<br />
Destroy items using direct-fire weapons.<br />
Contain the item by building barricades.<br />
Move <strong>UXO</strong> out of the way remotely.<br />
DANGER<br />
Employing breaching techniques on ordnance other than submunitions<br />
or scatterable mines is not recommended. The<br />
amount of explosives involved would create more of a hazard<br />
to your operations than the <strong>UXO</strong> itself.<br />
WARNING<br />
Prior to employing breaching techniques, make sure that<br />
none of the items are filled with chemical or biological agents.<br />
ENGINEER EQUIPMENT (HEAVY-FORCE BREACHING)<br />
Using engineer equipment is the preferred method of breaching<br />
small submunitions and scatterable mines. This procedure allows<br />
5-4
for the quickest clearance of an evacuation route. Suitable equipment<br />
includes a bulldozer or grader, a combat engineer vehicle, and<br />
an armored combat engineer earthmover. If an unarmored vehicle<br />
is used (such as a bulldozer or a grader), the operator’s cab must<br />
be protected by sandbags.<br />
Three major disadvantages to heavy-force breaching are as follows:<br />
Ž Equipment may be damaged or operators injured. If either<br />
happens, extraction through the area will be hampered.<br />
Ž Equipment may only partially clear the area, requiring further<br />
clearance procedures.<br />
Ž Equipment may bury some submunitions or scatterable mines,<br />
which would keep them from being detected while using the<br />
evacuation route.<br />
EXPLOSIVE CHARGES<br />
Mine-Clearing Line Charge<br />
The mine-clearing line charger (MICLIC) is a rocket-propelled<br />
explosive line charge used to reduce minefield containing singleimpulse,<br />
pressure-activated AT mines and mechanically activated<br />
APERS mines. It has limited effectiveness against magnetically<br />
activated mines, including scatterable mines and those containing<br />
multiple-impulse or delay-time fuzes.<br />
The MICLIC will explosively clear a path through an area. Several<br />
MICLICS may be required in the same area to ensure that a<br />
wide enough path is cleared.<br />
Three major disadvantages to using MICLICs are as follows:<br />
Ž The explosive charges may not be close enough to the submunition<br />
or scatterable mine to cause destruction. This can result<br />
in “kick outs” where submunitions or scatterable mines can be<br />
thrown away from the detonation, possibly towards your position.<br />
5-5
Ž Further reconnaissance of the area is required prior to using<br />
the route for evacuation in order to detect those submunitions<br />
or scatterable mines that are still in place after using MICLIC.<br />
Ž MICLIC cannot be used if detonation of the submunitions or<br />
scatterable mines will cause unacceptable damage.<br />
Hand-Placed Explosive Charges<br />
This is the most effective way to clear an evacuation route. The<br />
explosive charges should be placed to the side of the <strong>UXO</strong> as close<br />
as possible without touching it. The explosive charge should be<br />
placed to the side of the <strong>UXO</strong> that is closest to the unit’s position.<br />
This will direct most of the fragmentation away from the unit.<br />
Enough time fuse should be used to allow personnel to return to a<br />
safe area prior to the detonation.<br />
Four major disadvantages to using hand-placed charges are as<br />
follows:<br />
Ž They are very labor intensive to use and expose personnel to a<br />
greater risk, especially if the submunitions use magnetic,<br />
delay, or trip-wire fuzing.<br />
Ž Their use is very slow and time consuming, because all items<br />
must be detected, marked, and destroyed individually.<br />
Ž They cannot be used if detonation of the submunitions or scatterable<br />
mines will cause unacceptable damage to the<br />
operational area and/or equipment.<br />
Ž They should not be used in heavy concentrations of submunitions<br />
or scatterable mines. The detonations will cause “kick<br />
outs.”<br />
DIRECT-FIRE WEAPONS<br />
Submunitions and scatterable mines can be destroyed or disabled<br />
by the use of direct-fire service weapons. The goal of this procedure<br />
is to produce a disabling reaction that rapidly reduces or<br />
eliminates the designed fuze functioning of the submunition or<br />
scatterable mine. Service weapons such as the 5.56 millimeter, the<br />
5-6
7.62 millimeter, the .50 caliber, and the 25 millimeter will most<br />
likely produce the desired effect. The person firing the service<br />
weapon should approach the <strong>UXO</strong> only close enough to be able to<br />
fire accurately. However, this person should never be closer than<br />
25 meters to the item. When performing the direct-fire procedure,<br />
the aiming point is center mass. Single shots should be fired until<br />
the item is hit. On some larger items, multiple hits may be required<br />
to be sure that the submunition or scatterable mine has been disabled.<br />
Frontal protection is required for mounted and dismounted<br />
personnel. Figure 5-1 shows the dismounted procedure, while Figure<br />
5-2, page 5-8, shows the light-vehicle mounted procedure with<br />
sandbags being used for frontal protection. If several persons are<br />
being used to clear a large area, ensure that each person is protected<br />
sufficiently from all areas. No one person should be closer<br />
than 25 meters to any item being engaged.<br />
Three major disadvantages to direct-fire destruction are as follows:<br />
Ž It is very slow and time consuming. Each item must be individually<br />
located, and each person can only engage one target<br />
at a time.<br />
Ž Some submunitions are too small to engage effectively with<br />
direct-fire weapons from a distance of 25 meters.<br />
Ž The terrain has a major affect on this procedure. Because submunitions<br />
and scatterable mines are so small. it does not take<br />
very much vegetation or loose dirt to hide them.<br />
Figure 5-1. Dismounted direct-fire procedure.<br />
5-7
Figure 5-2. Light-vehicle mounted direct-fire procedure.<br />
CONTAINMENT<br />
Each submunition or scatterable mine contains less than two<br />
pounds of explosives. Thus, by using engineer equipment, one or<br />
two items can be contained by building barricades or by placing<br />
loose fill dirt on top of them. This procedure is recommended for<br />
use only where equipment must be recovered and no other procedure<br />
is acceptable. Placing fill dirt on top of the <strong>UXO</strong> may cause<br />
a detonation that could damage the equipment or injure the operator.<br />
There is one major disadvantage to containment. Building barri<br />
cades is time consuming and thereby exposes a large number of<br />
personnel to the <strong>UXO</strong>.<br />
REMOTE MOVEMENT<br />
If the submunition or scatterable mine must be moved, it must<br />
be moved remotely using grapnel hooks, rope, or some other suitable<br />
material. To begin this procedure, there must be a distance of<br />
at least 50 meters between the person moving the <strong>UXO</strong> and the<br />
<strong>UXO</strong> itself.<br />
Three major disadvantages to remote movement are as follows:<br />
Ž Movement of the item can cause detonation.<br />
Ž Personnel must approach the item in order to attach necessary<br />
materials.<br />
Ž The <strong>UXO</strong> will he pulled toward the person moving it.<br />
5-8
A P P E N D I X A<br />
AMMUNITION<br />
COLOR CODES<br />
The color codes and markings in this appendix are for informational<br />
purposes only. They are provided to help you identify the<br />
different types of <strong>UXO</strong>. Keep in mind that each country that manufactures<br />
munitions has devised its own color codes. Remember,<br />
do not approach a <strong>UXO</strong> any closer than necessary to make an<br />
immediate identification. Remember also, that you are not responsible<br />
for determining <strong>UXO</strong> fillers.<br />
The ammunition color codes in Tables A-1 and A-2 are used by<br />
the former Soviet Union. The markings used on Soviet chemical<br />
munitions are in Table A-3.<br />
Table A-1. Former Soviet Union color codes for bombs.<br />
Nose Band Body Band Type<br />
Green Blue Fragmentation<br />
Green Blue and Green Fragmentation and<br />
Chemical<br />
Orange Semiarmor Piercing<br />
Blue Armor Piercing<br />
Red Blue Incendiary<br />
Red Incendiary Dispenser<br />
Red Green Persistent Chemical<br />
Green Green Nonpersistent Chemical<br />
White White Parachute Flare<br />
Blue Black Rocket Assisted<br />
Red White Practice<br />
A-1
Table A-2. Former Soviet Union color codes for projectiles.<br />
Color Codes (Bands)<br />
Red<br />
Blue<br />
Black<br />
White<br />
Yellow<br />
Khaki<br />
One Green Band<br />
Two Green Bands<br />
Type<br />
Incendiary<br />
Concrete Piercing<br />
Smoke<br />
Illumination<br />
Ball Shrapnel<br />
Bar Shrapnel<br />
Nonpersistent Agent<br />
Persistent Agent<br />
Table A-3. Former Soviet Union markings for chemical muni-<br />
tions.<br />
Marking Chemical Filler<br />
P-4 White Phosphorus<br />
P-5 Mustard Agent<br />
PC Lewisite Agent<br />
P-10 Phosgene Agent<br />
P-15 Adamsite (DM)<br />
TP Thermite<br />
The color codes shown in Figure A-1 are those used by the US<br />
and other NATO countries.<br />
A-2
A P P E N D I X B<br />
DROPPED ORDNANCE<br />
IDENTIFICATION AND NET<br />
EXPLOSIVE WEIGHTS<br />
BOMBS<br />
Figure B-1. Bomb, general-purpose, 2,000-pound.<br />
B-l
Figure B-2. Bomb, General-purpose, 500-kilogram.<br />
Figure B-3. Bomb, general-purpose, 250-pound.<br />
B-2
Figure B-4. Bomb, general-purpose, 100-kilogram.<br />
DISPENSER<br />
NOTE: This dispenser is loaded with BLU-97/B submunitions.<br />
However, it can be loaded with a variety of submunitions.<br />
Figure B-5. Submunition dispenser, CBU-87/B.<br />
B-3
SUBMUNITIONS<br />
Figure B-6. APERS/AMAT submunitions.<br />
NEW: Less than 0.5 pound per item.<br />
B-4
NEW: Less than 7 pound per item.<br />
Figure B-7. APERS/AMAT submunitions (conventional).<br />
B-5
Figure B-8. AMAT/AT submunitions (conventional).<br />
B-6
Figure B-9. Soviet-style AMAT/AT submunitions (conven-)<br />
tional).<br />
B-7
NEW: RAAMS, 2 pounds; ADAM and BLU-54/B less than 0.5 pound.<br />
Figure B-10. Area-denial submunitions: ADAM (left), RAAMS<br />
(middle), and BLU-54/B (right).<br />
B-8
Figure B-11. Area-denial submunitions: M74 (left), BLU-91/B<br />
"Gator" (right), and AT-2 (rear).<br />
B-9
A P P E N D I X D<br />
THROWN ORDNANCE<br />
IDENTIFICATION AND NET<br />
EXPLOSIVE WEIGHTS<br />
FRAGMENTATION GRENADES<br />
Figure D-1. Fragmentation grenades.<br />
NEW: Less than 2 pounds per item.<br />
D-1
ANTITANK GRENADES<br />
Figure D-2. HEAT grenades.<br />
NEW: Less than 2 pounds per item.<br />
D-2
SMOKE GRENADES<br />
NEW: Not applicable.<br />
NOTE: These grenades do not have a NEW concern, although<br />
bursting WP grenades have a 15-meter bursting radius.<br />
Figure D-3. Smoke grenades, burning-type (left) and burstingtype<br />
(middle and right).<br />
D-3
Figure D-4. Riot-control (CS) grenades.<br />
D-4<br />
NEW: Not applicable.
Figure D-5. Illumination grenade.<br />
ILLUMINATION GRENADE<br />
D-5<br />
NEW: Not applicable.
GLOSSARY<br />
ADAM area-denial artillery munition<br />
AMAT antimateriel<br />
AP armor piercing<br />
APERS antipersonnel<br />
AT<br />
BFA<br />
BLU<br />
CB<br />
CBU<br />
CS<br />
CSS<br />
DA<br />
DOD<br />
DP<br />
DTG<br />
EOD<br />
EOR<br />
antitank<br />
battlefield functional area<br />
bomb live unit<br />
chemical biological<br />
cluster bomb unit<br />
combat support; also o-chlorbenzolmalonitrile (riotcontrol<br />
agent)<br />
combat service support<br />
Department of the Army<br />
Department of Defense<br />
dual-purpose (antipersonnel/antimatetiel)<br />
date-time group<br />
explosive ordnance disposal<br />
explosive ordnance reconnaissance<br />
FASCAM family of scatterable mines<br />
<strong>FM</strong> field manual<br />
<strong>FM</strong><strong>FM</strong> Fleet Marine Force manual<br />
GTA<br />
HE<br />
HEAT<br />
graphic training aid<br />
high explosive<br />
high-explosive antitank<br />
Glossary - 1
HEP high-explosive plastic<br />
HQ headquarters<br />
MAGTF Marine air-ground task force<br />
MICLIC mine-clearing line charge<br />
MEDEVAC medical evacuation<br />
METT-T mission, enemy, terrain, troops, and time available;<br />
Marine Corps, mission, enemy, terrain and weather, troops<br />
and support available-time available<br />
NATO North Atlantic Treaty Organization<br />
NBC nuclear, biological, chemical<br />
NEW net explosive weight<br />
OPORD operation order<br />
POC point of contact<br />
PATRIOT phased-array tracking radar intercept on target<br />
RAAMS remote antiarmor mine system<br />
RPG rocket-propelled grenade<br />
SMCT soldier’s manual of common tasks<br />
SOI signal operating instructions<br />
SOP standing operating procedure<br />
STANAG standardization agreement<br />
STP soldier training publication<br />
TASC training aids support center<br />
TOW tube-launched, optically tracked, wire-guided<br />
TRADOC (United States Army) Training and Doctrine Command<br />
UIC unit identification code<br />
US United States (of America)<br />
Glossary - 2
<strong>UXO</strong> unexploded ordnance<br />
WP white phosphorus (screening smoke)<br />
Glossary - 3
ammunition color codes<br />
INDEX<br />
former Soviet Union, 2-4, A-1, A-2<br />
NATO, 2-4, A-3<br />
US, 2-4, A-3<br />
antipersonnel mines, 2-29, 2-30. See also placed ordnance and<br />
land mines.<br />
detonation of, 2-29<br />
NEWS for, E-1, E-2<br />
photographs of, E-1, E-2<br />
shapes and sizes of, 2-29<br />
antitank grenades, 2-27, 2-28. See also hand grenades.<br />
NEWs for, D-2<br />
photographs of, D-2<br />
antitank mines. See also placed ordnance and land mines.<br />
fuzing of, 2-31, 2-32<br />
NEWs for, E-3 through E-6<br />
photographs of, E-3 through E-6<br />
shapes and sizes of, 2-31<br />
area-denial submunitions. See submunitions.<br />
barricades, 3-3 through 3-8. See also protective measures.<br />
circular, 3-6, 3-7<br />
definition of, 3-3<br />
for large <strong>UXO</strong>, 3-6<br />
for medium <strong>UXO</strong>, 3-6<br />
for small <strong>UXO</strong>, 3-6<br />
guidelines for building, 3-4<br />
placement and size of, 3-4 through 3-8<br />
purpose of, 3-3<br />
semicircular, 3-6 through 3-8<br />
Index - 1
arricades (continued)<br />
using sandbags to build, 3-4 through 3-8<br />
wall, 3-6 through 3-8<br />
bombs<br />
chemical-agent filled, 2-1, 2-4<br />
color codes, 2-4, A-1, A-3<br />
components of, 2-1<br />
fuzes for, 2-4 through 2-6.<br />
general-purpose, 2-1 through 2-3<br />
NEWs for, B-1 through B-3<br />
photographs of, B-1 through B-3<br />
stabilizing devices, 2-6 through 2-8<br />
breaching techniques, 5-3 through 5-8<br />
containment, 5-8. See also barricades.<br />
direct-fire, 5-6 through 5-8. See also direct-fire weapons.<br />
explosive-charge, 5-5, 5-6. See also mine-clearing line charge<br />
(MICLIC) and hand-placed explosive charge.<br />
heavy-force, 5-4, 5-5. See also engineer equipment (heavy-force<br />
breaching).<br />
remote movement, 5-8<br />
direct-fire weapons<br />
disadvantages of using, 5-7<br />
dismounted procedure for using, 5-7<br />
mounted procedure for using, 5-7, 5-8<br />
protection required when using, 5-7<br />
used to clear submunitions and scatterable mines, 5-6<br />
dispensers, 2-8 through 2-11<br />
attached, 2-9, 2-11<br />
dropped, 2-9, 2-10<br />
payload of, 2-8<br />
photograph of, B-3<br />
Index - 2
dropped ordnance, 2-1 through 2-<strong>16</strong><br />
bombs, 2-1 through 2-7, B-1 through B-3. See also bombs.<br />
dispensers, 2-1, 2-8 through 2-11, B-3. See also dispensers.<br />
submunitions, 2-1, 2-12 through 2-<strong>16</strong>, B-4 through B-9. See also<br />
submunitions.<br />
engineer equipment (heavy-force breaching)<br />
advantages of using, 5-4, 5-5<br />
disadvantages of using, 5-5<br />
evacuation distances, 3-2, 3-3<br />
evacuation plan, 5-2<br />
family of scatterable mines (FASCAM), v, 2-12 through 2-<strong>16</strong>.<br />
See also submunitions.<br />
FASCAM. See family of scatterable mines (FASCAM).<br />
fragmentation grenades, 2-25, 2-26. See also hand grenades.<br />
NEW for, D-1<br />
photographs of, D-1<br />
guided missiles. See also projected ordnance.<br />
Dragon, 2-22, 2-23<br />
fuzing for, 2-23<br />
guidance systems for, 2-22, 2-23<br />
NEWs for, C-<strong>16</strong> through C-18<br />
PATRIOT, 2-22 through 2-24<br />
photographs of, C-<strong>16</strong> through C-18<br />
Sparrow, 2-22 through 2-24<br />
stabilization of, 2-23<br />
TOW, 2-22, 2-23<br />
hand grenades, 2-25 through 2-29.<br />
antitank, 2-27, 2-28, D-2. See also antitank grenades.<br />
fragmentation, 2-25, 2-26, D-1. See also fragmentation grenades.<br />
illumination, 2-28, 2-29, D-5. See also illumination grenades.<br />
offensive, 2-27<br />
Index - 3
hand grenades (continued)<br />
parts of, 2-25<br />
smoke, 2-27, 2-28, D-3, D-4. See also smoke grenades.<br />
hand-placed explosive charge<br />
disadvantages of using, 5-6<br />
used to clear evacuation route, 5-6<br />
hazards. See <strong>UXO</strong> hazards.<br />
illumination grenades, 2-28, 2-29, D-5. See also hand grenades.<br />
fuzing for, 2-29<br />
NEW for, D-5<br />
photograph of, D-5<br />
purpose of, 2-28<br />
impact submunitions. See submunitions.<br />
land mines, 2-29 through 2-32, E-1 through E-6<br />
antipersonnel, 2-29, 2-30, E-1, E-2. See also antipersonnel<br />
mines.<br />
antitank, 2-31, E-3 through E-6. See also antitank mines.<br />
markers. See <strong>UXO</strong> markers.<br />
MICLIC. See mine-clearing line charge (MICLIC).<br />
mine-clearing line charge (MICLIC)<br />
disadvantages of using, 5-5, 5-6<br />
used to clear minefield, 5-5<br />
mines<br />
placed, 2-12. See also land mines.<br />
scatterable, 2-12. See also submunitions<br />
mission<br />
engineer, 1-1<br />
EOD, 1-1<br />
mortars. See also projected ordnance.<br />
fin-stabilized. 2-20<br />
Index - 4
NEWs for, C-9 through C-11<br />
photographs of, C-9 through C-11<br />
size of, 2-20<br />
spin-stabilized, 2-20<br />
types of fillers used in, 2-20<br />
net explosive weight (NEW), 3-2, 3-4<br />
NEW. See net explosive weight (NEW).<br />
operation order (OPORD), 5-2, 5-3<br />
OPORD. See operation order (OPORD).<br />
placed ordnance, 2-1, 2-29 through 2-32, E-1 through E-6. See<br />
also land mines.<br />
projected ordnance, 2-1, 2-17 through 2-24<br />
guided missiles, 2-22 through 2-23, C-<strong>16</strong> through C-1 8. See also<br />
guided missiles.<br />
mortars, 2-20, C-9 through C-11. See also mortars.<br />
projectiles, 2-17 through 2-19, C-1 through C-8. See also projectiles.<br />
rifle grenades, 2-24, C-18 through C-20. See also rifle grenades.<br />
rockets, 2-20 through 2-22, C-12 through C-15. See also rockets,<br />
projectiles. See also projected ordnance.<br />
fin-stabilized, 2-17 through 2-19<br />
former Soviet Union color codes for, A-2<br />
fuzing for, 2-17, 2-18<br />
NEWS for, C-1 through C-8<br />
photographs of, C-1 through C-8<br />
size of, 2-17<br />
spin-stabilized, 2-17, 2-19<br />
types of fillers used in, 2-17<br />
protective measures, 3-2 through 3-8<br />
barricade, 3-3 through 3-8. See also barricades.<br />
Index - 5
evacuate, 3-2. See also evacuation distances.<br />
isolate, 3-3<br />
rifle grenades. See also projected ordnance.<br />
delivery systems for, 2-24<br />
fuzing for, 2-24<br />
NEWs for, C-18 through C-20<br />
photographs of, C-18 through C-20<br />
sizes of, 2-24<br />
types of fillers used in, 2-24<br />
rockets. See also projected ordnance.<br />
components of, 2-<strong>21</strong>, 2-22<br />
control of, 2-20<br />
delivery systems for, 2-22<br />
NEWs for, C-12 through C-15<br />
photographs of, C-12 through C-15<br />
size of, 2-20, 2-<strong>21</strong><br />
stabilization of, 2-<strong>21</strong>, 2-22<br />
safety guidelines, 1-2 through 1-5<br />
self-extraction<br />
situational assessment for, 5-3<br />
techniques, 5-4 through 5-8. See also breaching techniques.<br />
smoke grenades. See also hand grenades.<br />
burning-type, 2-27, 2-28<br />
bursting-type, 2-27, 2-28<br />
fuzing for, 2-27, 2-28<br />
NEWs for, D-3, D-4<br />
photographs of, D-3, D-4<br />
types of fillers used in, 2-27<br />
spot report. See <strong>UXO</strong> spot report.<br />
submunitions, 2-12 through 2-<strong>16</strong>, B-4 through B-9<br />
AMAT/AT fin-stabilized, 2-15<br />
Index - 6
AMAT/AT parachute-stabilized, 2-15<br />
APERS area-denial, 2-13, 2-14<br />
APERS ball-type, 2-12<br />
APERS bounding-fragmentation, 2-13<br />
APERS pressure-activated, 2-13<br />
AT area-denial, 2-15, 2-<strong>16</strong><br />
bomblets as, 2-12<br />
delivery systems for, 2-12<br />
dual-purpose, 2-14<br />
fuzing for area-denial, 2-12 through 2-<strong>16</strong><br />
grenades as, 2-12<br />
impact, 2-12.<br />
mines as, 2-12. See also mines.<br />
NEWs for, B-4 through B-9<br />
photographs of, B-4 through B-9<br />
threats. See <strong>UXO</strong> threats.<br />
thrown ordnance, 2-1, 2-25 through 2-29. See also hand grenades.<br />
training items, viii<br />
types of ordnance<br />
dropped, 2-1 through 2-<strong>16</strong>. See also dropped ordnance.<br />
placed, 2-1, 2-29 through 2-32. See also placed ordnance.<br />
projected, 2-17 through 2-24. See also projected ordnance.<br />
thrown, 2-25 through 2-29. See also thrown ordnance.<br />
<strong>UXO</strong> hazards<br />
alert personnel to, 5-2<br />
detection of, 1-2, 5-1<br />
<strong>UXO</strong> markers<br />
placement of, 3-9, 3-10<br />
standard, 3-9<br />
using makeshift, 3-10<br />
Index - 7
<strong>UXO</strong> spot report<br />
changing the priority of, 4-3<br />
definition of, 4-1<br />
information required for, 4-1, 4-2<br />
priorities defined for, 4-2<br />
transmitting the, 4-1<br />
<strong>UXO</strong> threats<br />
active, v, l-l<br />
passive. v, 1-1<br />
Index - 8
REFERENCES<br />
DOCUMENTS NEEDED<br />
These documents must be available to the intended users of this<br />
publication.<br />
DVC-T 5-47. Full-Scale <strong>UXO</strong> Training Aids.<br />
*<strong>FM</strong> 20-32. Mine/Countermine Operations. 30 September 1992.<br />
*<strong>FM</strong> 90-13-1. Combined Arms Breaching Techniques.<br />
28 February 1991.<br />
GTA 9-12-1. Unexploded Ordnance (<strong>UXO</strong>) <strong>Procedures</strong>.<br />
Safety Video No. 709919. “Danger <strong>UXO</strong>.”<br />
Instructional Video No. 710288. “The <strong>UXO</strong> Hazard.”<br />
READINGS RECOMMENDED<br />
These readings contain relevant supplemental information.<br />
AR 75-15. Responsibilities and <strong>Procedures</strong> for Explosive Ordnance<br />
Disposal. 1 November 1978.<br />
DA Form 2028. Recommended Changes to Publications and Blank<br />
Forms. February 1974.<br />
<strong>FM</strong> 3-4/<strong>FM</strong><strong>FM</strong> 11-9. NBC Projection. 29 May 1992.<br />
<strong>FM</strong> 5-34/<strong>FM</strong>FRP 13-5. Engineer Field Data. 14 September 1987.<br />
<strong>FM</strong> 9-15. Explosive Ordnance Disposal Service and Unit Operations.<br />
20 March 1989.<br />
*This source was also used to develop this publication.<br />
References - 1
<strong>FM</strong><strong>FM</strong> 13-7. MAGTF Breaching Operations. To be published in<br />
FY 94.<br />
<strong>FM</strong><strong>FM</strong> 13-8. MAGTF Explosive Ordnance Disposal. 20 December<br />
1993.<br />
STP <strong>21</strong>-1-SMCT. Soldier’s Manual of Common Tasks, Skill<br />
Level 1. 1 October 1990 (new edition to be published in<br />
FY94).<br />
STP <strong>21</strong>-24-SMCT. Soldier’s Manual of Common Tasks, Skill<br />
Levels 2/3/4. 1 October 1992.<br />
STP <strong>21</strong>-I-MQS. Military Qualification Standards I Manual of<br />
Common Tasks (Recommissioning Requirements).<br />
31 May 1990.<br />
STP <strong>21</strong>-II-MQS. Military Qualification Standards II Manual of<br />
Common Tasks (for Lieutenants and Captains).<br />
31 January 1991.<br />
References - 2